Machine Serial No. Technical Manual. International Door Dishwasher. February, 1998 Manual P/N Rev.A
|
|
|
- Amos Wilfrid Simpson
- 5 years ago
- Views:
Transcription

1 This manual supersedes PIN , April, Destroy previous edition. For machines beginning with serial no and above Technical Manual International Door Dishwasher Model I-DHM3 High Temperature with Built-in Booster Machine Serial No. February, 1998 Manual P/N Rev.A P. 0. Box N. Service Road Winston-Salem, North Carolina Jordan Station, Ontario, Canada LOR ISO 336/ Fax: 336/ / Fax: 905/ Champion Industries, Inc.
2 Revision History Revision Date Revised Pages Serial Number Effectivity Comments 1/30/98 All Issue of manual and replacement parts lists 1
3 CONTENTS INTRODUCTION 6 Model Number 7 Standard Equipment 7 Options 7 Electrical Power Requirements 7 INSTALLATION 8 Unpack the Dishwasher 8 To Change from Straight-through Operation to Comer Operation 9 Electrical Connections 10 Plumbing Connections 12 Water Connections 12 Drain Connections 13 Chemical Connections 14 INITIAL START-UP 16 OPERATION 21 MAINTENANCE 23 Maintenance Schedule 23 Deliming Schedule 23 Troubleshooting 24 REPLACEMENT PARTS LIST 29 ELECTRICAL SCHEMATICS 59 LIST OF FIGURES Figure 1 - Remove Front Panel 8 Figure 2 - Placement for Comer Operation 9 Figure 3 - Change the Track Assembly 9 Figure 4 - Electrical Connection Location 10 Figure 5 - Hinged Control Panel 11 Figure 6 - Main Terminal Block 11 Figure 7 - Hot Water Connection, 3/4" NPT 12 Figure 8 - Drain Connection, 1-1/2" OD 13 2
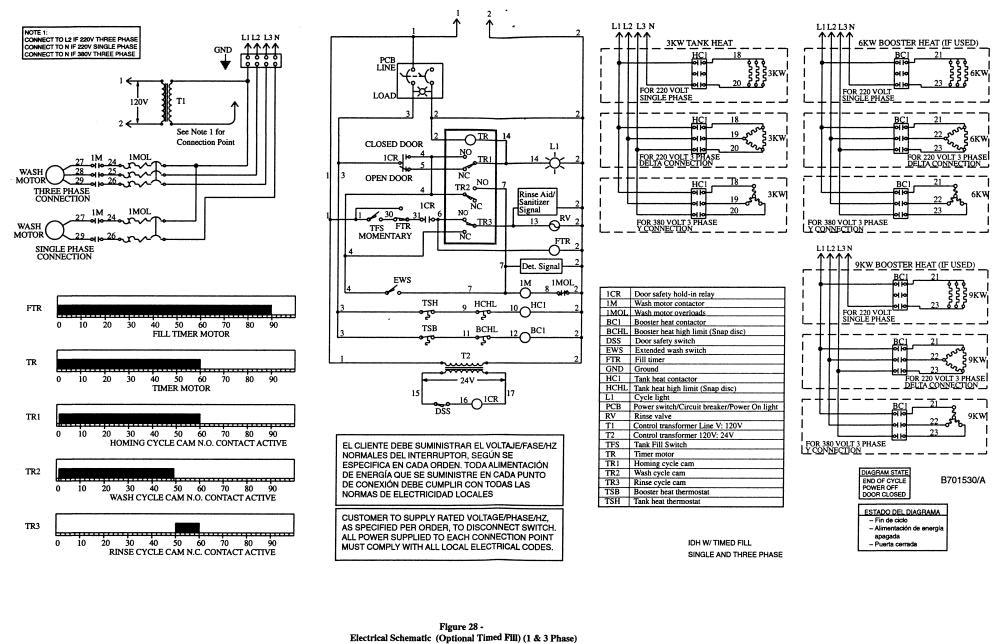
4 LIST OF FIGURES (Cont'd) Figure 9 - Detergent Signal Connection Point 14 Figure 10 - Detergent Probe Injection Point, 1/2" 15 Figure 11 - Rinse Aid Injection Point, 1/8" NPT 15 Figure 12 - Doors and Panels 30 Figure 13 - Door Guides, Stops, and Lift Bracket 32 Figure 14 - Door Handle, Spring Assembly and Safety Switch 34 Figure 15 - Track Assembly 36 Figure 16 - Wash/Rinse Spray Piping 38 Figure 17 - Wash/Rinse Spray Arm Assembly 40 Figure 18 - Drain Assembly and Scrap Screens 42 Figure 19 - Wash Tank Heat and Thermostats 44 Figure 20 - Electric Booster Assembly and Thermostats 46 Figure 21 - Fill Piping Assembly 48 Figure 22 - Pump Assembly 50 Figure 23 - Control Panel and Gauges 52 Figure 24 - Control Cabinet 54 Figure 25 - Dishracks and PRV 56 Figure 26 - Electrical Schematic (Electrical Heat 1 & 3 Phase) 59 Figure 27 - Electrical Schematic (Steam Heat 1 & 3 Phase) 60 Figure 28 - Electrical Schematic (Optional Timed Fill) (1 & 3 Phase) 61 3
5 INTRODUCTION Welcome to Champion... and thank you for allowing us to take care of your dishwashing needs. This manual covers the international door-type dishwasher. Model I-DH. Your machine was completely assembled, inspected, and thoroughly tested at our factory before it was shipped to your installation site. This manual contains: Installation Instructions Operation Instructions Maintenance Instructions Replacement Parts Lists Electrical Schematics All information, illustrations and specifications contained in this manual are based upon the latest product information available at the time of publication. Champion constantly improves its products and reserves the right to make changes at any time or to change specifications or design without notice and without incurring any obligation. For your protection, factory authorized parts should always be used for repairs. Replacement parts may be ordered directly from your Champion authorized parts distributor or authorized service agency. When ordering parts, please supply the model number, serial number, voltage, and phase of your machine, the part number, part descriptions and quantity. 6
6 Model Number The I-DH is a high temperature (180 F/82 C) sanitizing dishwasher with booster. Standard Equipment includes: Manual tank fill Built-in (40 F/23 C rise) electric or steam booster heater. Field convertible for comer operation Electric tank heat (3 KW) Balanced door lift system Automatic start on close of doors Low-water tank heat protection 1HP drip-proof pump motor Door safety switch Splash-proof control console Interchangeable upper & lower spray arms Stainless steel front and side panels Detergent/chemical connection provisions Fill solenoid valve 3/4" line strainer Common utility connections Two dish racks (peg and flat bottom) Options Electric booster with (70 F/39 C temperature rise) heater for (110 F/43 C) hot water supply. Pressure reducing valve, (PRV) 3/4" - P/N Water pressure gauge (0-60 PSI) - P/N Electrical Power Requirements Voltage Booster Rise Machine Full Load Amps Power Requirement (125% Service Factor) 220/60/1 40 F/23 C 56A 70A 220/50/1 40 F/23 C 56A 70A 220/60/3 40 F/23 C 32A 40A 220/50/3 40 F/23 C 32A 40A 380/60/3 40 F/23 C 19A 24A 380/50/3 40 F/23 C 19A 24A 220/60/1 N/A 220/50/1 N/A 220/60/3 70 F/39 C 41A 52A 220/50/3 70 F/39 C 41A 52A 380/60/3 70 F/39 C 24A 30A 380/50/3 70 F/39 C 24A 30A 7


7 INSTALLATION Unpack the dishwasher CAUTION: Care should be taken when lifting the machine to prevent damage. NOTE: The installation of your machine must meet all applicable health and safety codes. 1. Immediately after unpacking the machine, inspect for any shipping damage. If damage is found, save the packing material and contact the carrier immediately. 2. Remove the dishwasher from the skid. Move the machine to its permanent location. NOTE: Refer to: To change from Straight-through Operation to Corner Operation on the next page if your machine will be placed for comer operation. 3. Level the machine (if required) by placing a level on the top of the machine and adjusting the feet. Level the machine front-to-back and side-to-side. 4. Remove the dishracks from the interior of the machine. 5. Refer to Fig. 1. Remove (2) screws that hold the front panel. Remove the front panel in preparation for service connections. 8
8 To Change from Straight-through Operation to Corner Operation The I-DH dishwasher is shipped from the factory for straight-through operation. The following instructions explain how to change the dishwasher for comer operation. Refer to Fig Place the dishwasher so that operator controls are readily accessible. 2. Minimum clearance from any wall is 5-1/4" (133mm). Refer to Fig. 3a-3b and perform the steps below. 1. Remove the front rack guide (A). Discard the square spacers. 2. Move front rack guide (A) to the left side of the rack tracks. (See Fig. 3b) Use existing hardware. 3. Unbolt the track (B) and rack support rod (C). 4. Remove and save the two remaining fasteners from rear track. 5. Bolt (B) and (C) as shown in Fig. 3b. Placement for Corner Operation Figure3 Change the Track Assembly 9


9 INSTALLATION (Cont) Electrical Connections Warning: Electrical and grounding connections must comply with all applicable Electrical Codes. Warning: When working on the dishwasher, disconnect the electric service and place a tag at the disconnect switch to indicate work is being done on that circuit. 1. A qualified electrician must compare the electrical power supply with the machine electrical specifications before connecting to the incoming service through a fused disconnect switch. 2. A knock-out is provided at the lower right rear comer for the electrical service connection. A fused disconnect switch or circuit breaker (supplied by others) is required to protect the power supply circuit. 10
10 Electrical Connections (Cont.) 3. Remove (2) lower screws from the front panel of the machine to expose the electrical controls. Remove (2) screws on the control panel support. Swing the hinged control panel forward. 4. Three phase or single phase incoming power wiring connections are made at the bottom of the machine's main terminal block. The main terminal block is located on the side of the front right post of the dishwasher. 11
 (Min./Max.")
11 INSTALLATION (Cont.) Plumbing Connections NOTE: Plumbing connections must comply with all applicable sanitary and plumbing codes. Water Connections 1. The I-DH dishwasher requires a single, hot water supply. The following minimum water temperatures are recommended: I-DH with built-in 40 rise electric booster (Minimum 140 F/60 C) (Min./Max. flow pressure PSI/138 kpa) I-DH with built-in 70 rise electric booster (Minimum 110 F/43 C) (Min./Max. flow pressure PSI/138 kpa) 2. Install a pressure reducing valve, (PRV), in the water supply line if flow pressure exceeds 20-22PSI/ kPa. 3. The hot water connection to all I-DH dishwashers is 3/4" NPT. The connection is made from underneath the dishwasher up to the hot water solenoid valve located on the left side of the booster tank. 3/4" NPT 12
12 Water Connections (Cont.) 4. A manual shut-off valve (supplied by others) should be installed in the supply line in order to service the machine. 5. A pressure reducing valve, (PRV), (supplied by others) should be installed in the water supply line. 6. A pressure gauge (supplied by others) should be installed in the water supply line on the machine side of the PRV. Drain Connections 1. The model I-DH is a GRAVITY DRAIN machine equipped with a 1-1/2" O.D. hose connection point. 2. Drain height for model I-DH must not exceed 11" (280mm) above floor level. 3. The drain connection is made to the dishwasher from underneath the machine through an access hole in the machine base. Refer to Fig /2" O.D. 13
13 INSTALLATION (Cont.) Chemical Connections NOTE: Consult a qualified chemical supplier for your chemical needs. 1. An electrical detergent signal connection point for detergent dispensing equipment is provided on the control voltage terminal block located in the top left comer of the hinged control panel. 2. The detergent signal is limited to a maximum load of 2 Amps. Signal voltage is 120VAC. 14
14 Chemical Connections (Cont.) 3. A 1/2" detergent probe injection point is provided at the rear and left side of the dishwasher. 1/2" Plug 4. A 1/8" NPT rinse aid injection point is provided in the final rinse manifold of the booster piping. The manifold is located on the right side of the booster assembly. It can be accessed from the front of the dishwasher. 1/8" NPT 15

15 INITIAL START-UP Complete the installation After plumbing and electrical connections are made, follow the steps below to complete the installation of your dishwasher. 1. Remove the white protective covering from the exterior of the machine. 2. Remove any foreign material from inside the machine. 3. Make sure dishwasher power switch is off. 4. Turn main water supply on. 5. Turn main power on at the main power service disconnect switch. Fill the dishwasher with water Follow the steps below to fill your machine for the first time and each time the machine is completely drained. 1 Install scrap screens. Make sure rubber stopper is secure on the drain-overflow assembly. Make sure the drain-overflow seats securely in the tank bottom. 2 Make sure all doors are fully closed. Warning: During the fill operation, water will spray from the dishwasher if the doors are open. MAKE SURE DOORS ARE FULLY CLOSED. 16
16 Fill the dishwasher with water (Cont.) 3 The controls are located on the front of the dishwasher. A- On/Off power switch B- In cycle light C- Fill/Extended wash switch D-Wash water temperature gauge E- Final rinse water temperature gauge 4 THE POWER SWITCH IS OFF DURING INITIAL FILL. Push the On/Off power switch down to the OFF position. The red indicator light in the center of the power switch is not illuminated when the switch is off. 5 Push and hold the Fill/Extended wash switch UP to the FILL position to fill the dishwasher with water. NOTE: The initial fill primes the booster tank assembly. The booster tank is full when you hear water enter the wash tank of the dishwasher. Continue to hold the switch UP until water begins to drain out the overflow. Tank is full. Release the Fill/Extended wash switch. 17
17 INITIAL START-UP (Cont.) Check wash and final rinse water temperatures 6 Push the On/Off power switch "Up" to the on position. The red indicator light in the switch will come on. The wash tank and booster tank heaters will begin to heat the water in the dishwasher. 7 Wait approximately 10 minutes for the wash tank water to reach operating temperature. Check the wash water temperature gauge located on right side of the control cabinet to be sure it indicates the proper temperature. 8 Open and then fully close the dishwasher doors. The dishwasher will begin a wash cycle automatically. Note that the amber colored cycle lamp is lit during the automatic dishwasher cycle. Opening the doors anytime during the cycle will stop the dishwasher. Closing the doors will resume the automatic cycle where it left off. 18
18 Check the wash and final rinse water temperatures (Cont.) 9 The final rinse water temperature should be a minimum of 180 F/82 C during the final rinse cycle. The optimum final rinse temperature is F/82-91 C. Check the final rinse water temperature gauge located on left side of the control cabinet Check the Extended Wash operation The extended wash switch holds the dishwasher in a continuous wash mode for cleaning heavily soiled ware. 10 Open and then fully close the dishwasher doors. The dishwasher will begin a wash cycle automatically. Push the Fill/Extended wash switch "Down" to the extended wash position. The dishwasher will remain in a continuous wash mode until the switch is flipped back to the center position. NOTE: The extended wash switch may also be used during deliming operations. Consult a qualified chemical supplier for detailed instructions and procedures. 19
19 INITIAL START-UP (Cont.) Complete the initial start-up Check all the plumbing for leaks. Also, check the drain plumbing for leaks and be sure that the drain will handle the drain water flow from the dishwasher. After the drain and the plumbing connections are checked, turn off the power to the dishwasher. Drain the dishwasher 11 Turn off power at the dishwasher. Drain the dishwasher by pulling the handle of the drain-overflow assembly straight up. Be sure that the drain-overflow rubber stopper is secure on the drain-overflow assembly pipe. Check that the building drain handles the water flow exiting the dishwasher drain. 12 Remove the scrap screens and check the drain located in the bottom of the dishwasher wash tank. Clean the interior of the wash tank of any foreign material. Leave the doors open to air dry the interior of the dishwasher. The initial start-up is complete. 20
20 OPERATION Refer to the Initial Start-up section. Steps 1-5, on pages 16-20, to place your dishwasher into service. To operate your dishwasher, perform the action in the left hand column; check the result in right hand column. Action 1. Push the On/Off power switch "UP" to the ON position. Result 1. The indicator light in the center of the power switch illuminates. The wash tank heater and the booster tank heater begin to heat. 2. Wait approximately 10 minutes for the wash tank heater to heat the water. Then, check the reading on the wash water temperature gauge. 2. The wash water temperature gauge should indicate a minimum of 150 F/66 C. 3. Prescrap and load the ware into the dishrack. 3. Ware should be placed edgewise in the peg rack. Cups and bowls should be placed upside down in the flat rack. Silverware should be spread evenly in a single layer in the flat rack. 4. Open the doors. Insert a dishrack of soiled ware. Fully close the doors. Opening the doors anytime during the automatic cycle stops the dishwasher. Closing the doors will resume the cycle where it left off. 4. Amber cycle light illuminates as the dishwasher begins a 60 second automatic cycle. The cycle times are listed below: Wash = 48 seconds Dwell = 2 seconds Final rinse = 10 seconds 5. Check the final rinse temperature gauge reading during the 10 second final rinse cycle. 5. The final rinse temperature gauge should indicate a minimum of 180 F/82 C. The optimum final rinse temperature range is between F/82-90 C. 6. Check the incoming water pressure during the 10 second final rinse cycle. A water pressure gauge (supplied by others) should be installed on the incoming water supply. 6. The water pressure gauge should indicate a flowing pressure of PSI/ kpa. A pressure reducing valve (PRV) is required if flow pressure exceeds PSI/ kpa 7. The 60 second automatic cycle ends. 7. The amber cycle light goes out. 8. Open the doors. Remove the clean rack. Insert another rack of soiled ware. Fully close the doors. 8. The 60 second automatic cycle begins again. 9. Turn power OFF at the dishwasher. Remove the drain-overflow assembly. Clean the scrap screens. Clean the dishwasher after each meal period or every two hours of operation. 9. Dishwasher wash tank drains completely. Periodic cleaning reduces detergent consumption and improves washing results. 21

21 MAINTENANCE Cleaning your machine is the best maintenance that you can provide. Components that are not regularly flushed and cleaned do not perform well. The following schedules are the minimum requirements necessary for the proper performance of your machine. Intervals should be shortened whenever your machine is faced with abnormal working conditions, hard water, or multiple shift operations. CLEANING SCHEDULE Every 2 Hours or After Each Meal Period 1. Drain the dishwasher. 2. Flush interior with fresh water. 3. Clean scrap screens and pump intake screen. 4. Clean spray arm nozzles. Every 8 Hours or at the End of the Day 1. Drain the machine. 2. Flush interior with fresh water. 3. Clean scrap screens and pump intake screen. 4. Clean spray arms. 5. Thoroughly clean the exterior of machine. DO NOT HOSE DOWN WITH WATER. 6. Reassemble the machine. 7. Leave doors open to aid in drying. CAUTION: Do not leave water in wash tank overnight. DELIMING SCHEDULE Your dishwasher should be delimed regularly to prevent buildup of mineral deposits. NOTE: Consult your chemical supplier for an appropriate deliming solution and proper procedures. 23
22 TROUBLESHOOTING Perform the seven checks listed below in the event that your dishwasher does not operate as expected. 1. All switches are ON 2. Drain-overflow assembly is in place and seated 3. Wash and rinse nozzles are clean 4. Wash and rinse pipe assemblies are installed correctly 5. Scrap screens are properly positioned 6. Thermostat(s) are properly adjusted 7. Detergent and rinse additive dispensers are adequately filled. If a problem still exists, use the following table for troubleshooting. CONDITION CAUSE SOLUTION Machine will not start Machine washes constantly Low or no water Continuous water filling Wash motor not running Wash tank water temperature is low when in use Doors not closed Door safety switch faulty Start switch faulty Main switch off Overload protector tripped Fill/Extended wash switch in extended wash position Main water supply is turned off Drain-overflow assembly is not in place and seated Machine doors not fully closed Faulty fill valve Machine not filled initially Clogged strainer in fill valve Stuck or defective fill switch Fill valve will not close Drain-overflow not in place Overload protector tripped Defective motor Incoming water temperature at machine too low Defective thermometer Defective thermostat Defective heater element Defective solenoid valve Make sure doors are fully closed Contact your service agency Contact your service agency Check disconnect at main panel Reset overload in Control Box Push Fill/Extended wash switch to the center position Turn on house water supply Place and seat drain-overflow Close doors securely Contact your service agency Hold fill switch UP to fill Clean or replace Contact your service agency Clean or replace Install drain-overflow assembly Reset overload in Control Box Contact your service agency Raise temperature to: F/43-60 C Check or replace Check for proper setting or replace Check or replace Check or replace Heater elements have soil/lime buildup Clean and delime 24
23 TROUBLESHOOTING (Cont.) CONDITION CAUSE SOLUTION Insufficient pumped spray pressure Clogged pump intake screen Clogged spray pipe Scrap screen full Clean Clean Must be kept clean and in place Insufficient final rinse or no final rinse Low water level in tank Pump motor rotation incorrect Defective pump seal Faulty pressure reducing valve Improper setting on pressure reducing valve Clogged rinse nozzle and/or pipe Improper water line size Check drain-overflow assembly Reverse connection between L1 and L2 in Control Cabinet Contact Service Agent Clean or replace Set flow pressure at PSI/ kPa Clean Have installer change to proper size Low final rinse temperature Poor washing results Clogged strainer in fill valve Low incoming water temperature Defective thermometer Detergent dispenser not operating properly Insufficient detergents Wash water temperature too low Wash arm clogged Improperly scraped dishes Clean or replace Check the booster - be sure the thermostat is set to maintain 180 F/82 C temperature Check valve to be sure it is clean and operating Check for proper setting or replace Contact detergent supplier Contact detergent supplier See condition "Wash Tank Water Temperature" above Clean Check scraping procedures Ware being improperly placed in rack Improperly cleaned equipment Heater elements have soil/lime buildup Clean and delime Use proper racks Do not overload racks Unclog wash sprays and rinse nozzles to maintain proper pressure and flow conditions Overflows must be open Keep wash water as clean as possible 25
24 30 Figure 12 Doors and Panels
25 DOORS AND PANELS Fig 12 Item No Part No Part Description Qty DOOR, SIDE FRONT DOOR, DOOR MACH RH PANEL NO CUT OUT PANEL INSTRUMENT DECAL, CONTROL PANEL PANEL, FRONT LOWER LH PANEL W/CUTOUT PLUG PLASTIC WASHER 13/16 X 1 13/16 FIBER NUT, PLASTIC SCREW, 1/4-20 X 5/8 TRUSS HEAD SCREW, 8-32 X 1/2 PAN HEAD SCREW, X 1 ROUND HEAD FOOT, CAST GREY 4 31
26 32
27 DOOR GUIDES, STOPS, AND LIFT BRACKET Fig 13 Item No Part No Part Description Qty PLUG, CORNERPOST NUT, GRIP W/INSERT BRACKET, DOOR LIFT SCREW X 1/2" TRUSS HEAD GUIDE, DOOR GASKET, DOOR GUIDE (26") SCREW 8-32 X 1 FILISTER SCREW X 3/8 TRUSS HEAD STOP, DOOR 2 33
28 34
29 DOOR HANDLE, SPRING ASSEMBLY, AND SAFETY SWITCH Fig 14 Item No Part No Part Description Qty BOLT 5/16-18 X 11 HEX HEAD SPRING, EXTENSION BLOCK, SPRING HOOK DOOR HANDLE BOLT M6 X 45MM HEX HEAD BLOCK, UPPER PIVOT PIN, PIVOT HANDLE, GRIP BLOCK, LOWER PIVOT NUT, PLAIN M SCREW M6 X 16MM FILISTER SUPPORT, PIVOT BLOCK GASKET, BACKING PLATE, BACKING BOLT 5/16-18 X 1 HEX HEAD NUT, GRIP W/NYLON INSERT GUARD, SPLASH SCREW X 1/2 TRUSSHEAD BUSHING, SIDE DOOR NUT, ACORN 5/16-18 SST LIFT BAR, DOOR WASHER, FLAT BOLT 5/16-18 X 1-1/ NUT, PLAIN 5/ WASHER, LOCK 5/16 SPLIT WASHER 5/16 X 3/4 X 1/ SPRING ANCHOR BRACKET SWITCH, DOOR SAFETY BRACKET, SWITCH NUT, GRIP (1/4-20 with nylon insert) 2 35
30 36
31 TRACK ASSEMBLY Fig 15 Item No Part No Part Description Qty GUIDE, RIGHT HAND TRACK, REAR GUIDE, LEFT HAND SUPPORT, RACK TRACK, FRONT SCREW (10-32 X 5/8 FLAT HD) NUT, GRIP (10-32 W/NYLON INSERT) BOLT (1/4-20 X 5/8 TRUSS HD) WASHER, LOCK NUT (1/4-20 HEX HD) SPACER 2 37
32 38
33 WASH/RINSE SPRAY PIPING Fig 16 Item No Part No Part Description Qty RINSE TUBE FITTING, STRAIGHT COMPRESSION CONNECTOR, TOP RINSE FITTING, STRAIGHT COMPRESSION RINSE TUBE, TOP FITTING, BULKHEAD 1/2"NPT SPINDLE, WASH ARM SUPPORT, WASH ARM CONNECTOR, BOTTOM RINSE STANDPIPE, WASH BOLT 1/4-20 X 3/4 HEX HEAD NUT, GRIP 1/ WASHER, SPLIT LOCK SST WASHER 1 39
34 40
35 WASH/RINSE SPRAY ARM ASSEMBLY Fig 17 Item No Part No Part Description SPINDLE, RINSE ARM NOZZLE, RINSE ARM BEARING, RINSE ARM RINSE ARM ASSY (Includes 2 & 3) NUT, RINSE ARM SCREW (#8 X 1/2 PAN HD) S WASH ARM ASSY (Includes 6 & 8) BEARINGWASH ARM RINSE ARM (Does not include items 2, 3 or 9) WASH ARM (Does not include item 8) Qty 41
36 42
37 DRAIN ASSEMBLY AND SCRAP SCREENS Fig 18 Item No Part No Part Description Qty KNOB, DRAIN LIFT ROD ASSY, DRAIN LIFT GUIDE, DRAIN LIFT SCREW (10-32 X 1/2" TRUSS HD) RETAINER, OVERFLOW FILLER, DRAIN PLATE (retained by spring clip) FILLER, DRAIN PLATE (retained by stud and nut) (Not shown) NUT, GRIP (10-32 SST) NUT, GRIP (1/4-20 SST) TUBE, OVERFLOW SEAT RUBBER, OVERFLOW TUBE DRAIN BASKET, MODIFIED SLIP NUT WASHER/TAILPIECE TAILPIECE SCREEN, SCRAP 2 43
38 44
39 WASH TANK HEAT AND THERMOSTATS Fig 19 Item No Part No Part Description Qty THERMOMETER 4 FT THERMOSTAT W/CAP %F WASHER NUT, LOCK 1/2" DUAL THERMOSTAT BRACKET THERMOSTAT, FIXED HIGH LIMIT WASHER, LOCK 1/4 SPLIT SST NUT, PLAIN 1/4-20 SST BOLT 5/16-18 X 1 HEX HEAD GASKET 3X3X1/8 2" WASHER 5/16 X 3/4 X 1/ WASHER, LOCK 5/16 SPLIT NUT, PLAIN 5/16-18 SST HEATER 3KW V/ V 1/3PH SCREW X 3/8 TRUSS HEAD NUT, GRIP W/NYLON INSERT PUTTY, SEALING (USED TO SEAL ITEMS 3 & 4) A/R 45
40 46 Figure 20 Electric Booster Assembly and Thermostats
41 Fig 20 Item No ELECTRIC BOOSTER ASSEMBLY AND THERMOSTATS Part No Part Description Qty BOLT 5/16-18 X 1 HEX HEAD WASHER, FLAT 5/16 X 3/4 X 1/ NUT, GRIP 6-32 W/INSERT THERMOSTAT, HIGH LIMIT COMPOUND, HEAT SINK A/R THERMOSTAT, BOOSTER NUT, PLAIN 1/4-20 SST WASHER, LOCK 1/4 SPLIT HEATER 6KW V, (Wired delta) 40 Rise (1 & 3 phase) HEATER 6KW V (Wired wye) 40 Rise (3 phase only) HEATER 12KW V, (Wired delta) 70 Rise (3 phase) HEATER 12KW 380V-415V, (Wired wye) 70 Rise (3 phase) SEAL, ELECTRIC HEATER PLUG 1/8 SST TANK, BOOSTER 1 47
42 48
43 FILL PIPING ASSEMBLY Fig 21 Item No Part No Part Description Qty LINE STRAINER BRASS STREET ELL 3/4" NPT BRASS NIPPLE 3/4" x 2" BRASS VALVE 3/4" NPT HOT WATER NIPPLE 3/4" NPT TEE 3/4" X 1/2" X 3/4" BRASS UNION 3/4" NPT BRASS PLUG, 1/2" NPT BRASS NIPPLE, 3/4" NPT X 2-1/2" BRASS TEE, MODIFIED 3/4" X 1/2" X 3/4" X 1/8" BRASS BUSHING REDUCER 3/4" X 1/2" BRASS BARB, HOSE 1/2 NPTX 1/2 HOSE CLAMP, HOSE HOSE, 1/2" ID 9ft ELBOW, STREET 1/2" NPTX 90 BRASS PLUG, 1/8" NPT, BRASS COIL, SOLENOID VALVE (120V) KIT, REPAIR, 3/4" SOLENOID VALVE 1 49
44 50 Figure 22 Pump Assembly
45 PUMP ASSEMBLY Fig 22 Item No Part No Part Description Qty STRAINER NUT, GRIP W/NYLON INSERT CLAMP, HOSE CLAMP, HOSE CLAMP, HOSE HOSE PUMP DISCHARGE HOSE, SUCTION BOLT 1/4-20 X 1/2" HEX HEAD WASHER, LOCK 1/4" SPLIT NUT, HEX JAM 7/ WASHER, FLAT PLUG 1/4" BOLT X 7/8 HEX HEAD NUT, GRIP (10-32) VOLUTE IMPELLER GASKET, 0-RING PUMP SEAL BACK PUMP HOUSING NUT, JAM 3/ WASHER, LOCK 3/8" SPLIT BACKING PLATE, MACHINED PUMP SLINGER WASHER STUD 3/8-16 X 1 3/ MOTOR 14HP (220/ V/50-60/3) MOTOR 14HP (220/380V/50-60/1) BOLT 5/16-18 X 3/4 HEX HEAD WASHER, FLAT 5/ WASHER, LOCK 5/16-18 SST NUT, GRIP 5/ SCREW, FLAT X 1/2" WASHER, COUNTERSUNK SST KIT, PUMP (INCLUDES 15,17,19) 1 PUMP/MOTOR ASSEMBLY Complete 14HP(220V/ V/50-60/3ph) PUMP/MOTOR ASSEMBLY Complete 14HP(220V/380V/50-60/1ph)
46 52
47 CONTROL PANEL AND GAUGES Fig 23 Item No Part No Part Description Qty CIRCUIT BREAKER, SWITCH, ON-OFF (5A) LITE, AMBER (IN-CYCLE) SWITCH, ROCKER (FILL-EXTENDED WASH) SWITCH, MOMENTARY (OPTIONAL TIMED FILL ONLY) THERMOMETER, 4 FT OVERLAY, WASH 150 F OVERLAY, FINAL RINSE F DECAL, CONTROL PANEL 1 53
48 Figure 24 Control Cabinet 54
49 CONTROL CABINET Fig 24 Item No Part No Part Description Qty Switch, timer Motor, timer Assembly, timer (includes Items 1, 2, 4) Bearing, timer Transformer (120V : 24V) Contactor, booster heater (40A, 3 pole) Contactor, wash tank heater (40A, 3 pole) Contactor, 14 HP Wash motor (12A3 pole) (3 PH) Contactor, 14 HP Wash motor (25A3 pole) (1 PH) Overload, motor 14 HP Wash 220V/50-60/3PH Overload, motor 14 HP Wash /50-60/3PH Overload, motor 14 HP Wash 220V/50-60/1PH Board, terminal Relay (2PDT, 10A 24VAC coil) Fill timer assembly (Optional Timed Fill Only) Block, terminal (4 pole) (Main Power) Transformer ( /480V: 115VAC) Transformer ( V:115VAC) Wire lug, ground (Not shown) 1 55
50 56
51 DISHRACKS AND PRV Fig 25 Item No Part No Part Description Qty RACK, (FLAT BOTTOM) RACK, (PEG) PRESSURE REDUCING VALVE 1 57
52
53 60
54 61
CMA Dishmachines Knott Avenue Garden Grove, CA Undercounter High Temperature Dishwasher. Service Replacement Parts.
 CMA Dishmachines 1700 Knott Avenue Garden Grove, CA 981 Toll Free: 1- (800) 8-617 Fax: 1- (71) 89-11 Service Replacement Parts Undercounter High Temperature Dishwasher Model: UC6e M Machine Serial No.
Champion. Technical Manual. The Dishwashing Machine Specialists. Door-Type Dishwasher. Machine Serial No. June, 1998
 Champion The Dishwashing Machine Specialists Technical Manual For machines beginning with serial no. 90343 and above Door-Type Dishwasher Model D-HBM3 High Temperature with Built-in Booster D-H1M3 High
Champion. Technical Manual. The Dishwashing Machine Specialists. Door-Type Dishwasher. Machine Serial No. February, 2003
 Champion The Dishwashing Machine Specialists For machines beginning with serial no. D2099 thru D3693 Technical Manual Door-Type Dishwasher Model D-HBM4 High Temperature with Built-in Booster D-H1M4 High
Installation/Operation Manual with Service Replacement Parts
 Installation/Operation Manual with Service Replacement Parts For machines beginning with S/N D369 and above Door-type Dishwasher Models: D-HBM5 High Temperature with Built-in Booster Heater D-H1M5 High
Installation/Operation Manual with Service Replacement Parts
 Installation/Operation Manual with Service Replacement Parts For machines beginning with S/N D68 and above Door-type Extended Hood Dishwasher Models: D-HBTM5, DHBTCM5 High Temperature Extended Hood with
MODEL CMA-180UC PARTS MANUAL Rev 1.16
 MODEL CMA-180UC PARTS MANUAL Rev 1.16 CMA DISHMACHINES 12700 KNOTT STREET GARDEN GROVE, CALIFORNIA 92841 800-854-6417 FAX 714-895-2141 wwwcmadishmachines.com TABLE OF CONTENTS MODEL CMA-180UC 1. PARTS
Tall Hood-type Dishwashers
 Tall Hood-type Dishwashers SERVICE REPLACEMENT PARTS Pièces de Rechange - Partes de Reemplazo M. Series Models: DH000T, MDHHD Options: Ventless Heat Recovery LISTED Issue Date:.. Manual P/N rev. A For
Tall Hood-type Series Dishwasher
 Tall Hood-type Series Dishwasher Installation/Operation Manual with Service Replacement Parts Standard Model: Hot water sanitizing machine w/fresh water rinse and built-in stainless steel electric booster
Installation Manual with Service Replacement Parts
 Installation Manual with Service Replacement Parts Undercounter High Temperature Dishwasher Model: 301HT M2 High temperature dishwasher with built-in electric booster Dishwasher Serial No. www.moyerdiebel.com
Technical Manual. Undercounter Dishwasher. Machine Serial No. April, Model UH-150B UH-150 UL-150. Manual P/N REV. F
 Technical Manual Undercounter Dishwasher Model UH-150B UH-150 UL-150 Machine Serial No. April, 2003 P.O. Box 4149 Winston-Salem, North Carolina 27115-4149 Manual P/N 0510172 REV. F Champion Industries,
MODELS CMA-180 VL/180 VLTall PARTS MANUAL Rev 2.02A
 MODELS CMA-180 VL/180 VLTall PARTS MANUAL Rev 2.02A C M A D I S H M A C H I N E S 1 2 7 0 0 K N O T T A V E N U E GARDEN GROVE, CALIFORNIA 92841 800-8 5 4-6 4 1 7 FAX 714-895-2141 www.cmadishmachines.com
MODEL CMA-180UC PARTS MANUAL Rev 1.18
 MODEL CMA-180UC PARTS MANUAL Rev 1.18 CMA DISHMACHINES 12700 KNOTT AVENUE GARDEN GROVE, CALIFORNIA 92841 800-854-6417 FAX 714-895-2141 wwwcmadishmachines.com TABLE OF CONTENTS MODEL CMA-180UC 1. PARTS
MODELS CMA-180 VL/180 VLTall PARTS MANUAL Rev 2.02B
 MODELS CMA-180 VL/180 VLTall PARTS MANUAL Rev 2.02B C M A D I S H M A C H I N E S 1 2 7 0 0 K N O T T A V E N U E GARDEN GROVE, CALIFORNIA 92841 800-8 5 4-6 4 1 7 FAX 714-895-2141 www.cmadishmachines.com
2000 Series. Installation/Operation Manual with Service Replacement Parts For Champion Model DH2000 Moyer Diebel Model MD2000
 2000 Series Installation/Operation Manual with Service Replacement Parts For Champion Model DH2000 Moyer Diebel Model MD2000 Door-type High Temperature Dishwasher Model: 2000 Series Hot water sanitizing
Champion. Technical Manual. The Dishwashing Machine Specialists. Undercounter Dishwasher. Machine Serial No. August, Model TUW U-BW UTL
 Champion The Dishwashing Machine Specialists Technical Manual Undercounter Dishwasher Model TUW U-BW UTL Machine Serial No. August, 001 Manual P/N 050881 REV. H P.O. Box 19 Winston-Salem, North Carolina
MODEL CMA-180UC SERVICE & PARTS MANUAL Rev 1.10
 MODEL CMA-180UC SERVICE & PARTS MANUAL Rev 1.10 CMA DISHMACHINES 12700 KNOTT AVENUE GARDEN GROVE, CALIFORNIA 92841 800-854-6417 FAX 714-895-2141 www.cmadishmachines.com 0203 TABLE OF CONTENTS MODEL CMA-180UC
Installation/Operation Manual with Service Replacement Parts
 Installation/Operation Manual with Service Replacement Parts Taskmaster Model: PP-3 Power Wash Sink System Machine Serial No. LISTED Issue Date: 4.4.14 Manual P/N 115435 rev. - For machines beginning with
Technical Manual. June, Undercounter Dishwasher. Machine Serial No. Model UH-200B UH-200. For machines beginning with Serial no.
 For machines beginning with Serial no. U-2239 Technical Manual Champion Undercounter Dishwasher Model UH-200B High Temperature with Built-in Booster Fresh Water Final Rinse UH-200 High Temperature Fresh
Operation, Cleaning and Maintenance Manual
 Operation, Cleaning and Maintenance Manual PRO Series Rack Conveyor Dishwashers Models: 44 PRO 66 PRO 70FF PRO 80HD PRO 44 PRO LISTED www.championindustries.com Issue Date: 2.2.17 Manual P/N 116113 rev.
Technical Manual. Simply Engineered Better. Undercounter Dishwasher. Machine Serial No. February, Model 401-HT 401-HTN 401-LT
 Simply Engineered Better Technical Manual Undercounter Dishwasher Model 0-HT 0-HTN 0-LT Machine Serial No. February, 00 Manual P/N 050960 REV. G 67 N. Service Road Jordan Station, Ontario, Canada L0R S0
With (FFPR26) Basic With (PR22) With (PR36) 26" Front Feed Model 22" Prewash 36" Prewash Prewash
 Basic With (PR22) With (PR36) 26 Front Feed Model 22 Prewash 36 Prewash Prewash") For machines beginning with serial no. 8000 thru 99999 and serial no. R1000 and above Technical Manual Single Tank Rack Conveyor with/without Prewash With (FFPR) Basic With (PR) With (PR3) " Front Feed
For machines beginning with serial no. 8000 thru 99999 and serial no. R1000 and above Technical Manual Single Tank Rack Conveyor with/without Prewash With (FFPR) Basic With (PR) With (PR3) " Front Feed
PARTS MANUAL. American Dish Service ADS CONVEYOR DISHWASHER MODELS: ADC-44 L-R/R-L EFFECTIVE: SEPTEMBER 1, 2001
 EFFECTIVE: SEPTEMBER 1, 2001 ADS CONVEYOR DISHWASHER MODELS: ADC-44 L-R/R-L PARTS MANUAL 900 Blake Street Edwardsville, Kansas 66111 (913)422-3700 211-0044L-R / 212-0044R-L ADC-44 Conveyor Dishwasher 2
Technical Manual. June, Undercounter Dishwasher. Machine Serial No. Model UH-200B UH-200 UH-100B UH-100 UL-100
 For machines beginning with Serial no. U-1352 Technical Manual Champion Undercounter Dishwasher Model UH-200B High Temperature with Built-in Booster Fresh Water Final Rinse UH-200 UH-100B High Temperature
Installation Manual with Service Replacement Parts
 Installation Manual with Service Replacement Parts UH-200B Undercounter High Temperature Dishwasher Models: UH-200B UH-200 UH-170B UH-170 UH-100B UH-100 UL-100 UH-170B Dishwasher Serial No. UH-100B www.championindustries.com
ALTAIR II CONVECTION STEAM COOKER PARTS AND SERVICE MANUAL
 ALTAIR II CONVECTION STEAM COOKER PARTS AND SERVICE MANUAL EFFECTIVE MAY, 0 Superseding All Previous Parts Lists. The Company reserves the right to make substitution in the event that items specified are
STERO SD1. Low Temp Dishwasher MODEL: ML
 INSTRUCTION MANUAL STERO SD1 Low Temp Dishwasher MODEL: SD1 ML-130225 STERO, a division of Illinois Tool Works, Inc. 1758 Corporate Circle Petaluma, CA 94954 Phone: 800-762-7600 Fax: 707-762-5036 Website:
Model: FT110 Dishwasher
 PARTS MANUAL HOBART FOOD EQUIPMENT CO., LTD Model: FT110 Dishwasher HOBART FOOD EQUIPMENT CO., LTD 2003-07-10 Table of Contents Page Description 2 Panels, Upper chamber and Tank 4 Control Box 6 Control
Operation, Cleaning, and Maintenance Manual
 , Cleaning, and Maintenance Manual PRO Series Standard Rack Conveyor Dishwashers Models 44 PRO 70FF PRO HD 80HD PRO 66 PRO 44 PRO LISTED www.championindustries.com Issue Date: 8.1.17 Manual P/N 116113
Installation/Operation Manual with Service Replacement Parts
 CMA Dishmachines 12700 Knott Avenue Garden Grove, CA 92841 Toll Free: 1- (800) 854-6417 Fax: 1- (714) 895-2141 Installation/Operation Manual with Service Replacement Parts Undercounter High Temperature
Operation. Operation. Hood-type High Temperature Dishwasher LISTED. Model: DH5000 Series
 Hood-type High Temperature Dishwasher Model: DH5000 Series Standard Model: Hot water sanitizing machine w/fresh water rinse and built-in stainless steel electric booster Operation LISTED Issue Date: 6.10.15
Installation/Operation Manual with Service Replacement Parts
 Installation/Operation Manual with Service Replacement Parts Undercounter Dishwashers M4 Series 401HT High Temperature Wash Refresh with built-in booster and Pumped Final Rinse 401HT Issue Date: 2.22.17
CATALOG OF REPLACEMENT PARTS
 CATALOG OF REPLACEMENT PARTS CE SERIES ELECTRIC COMBI OVENS ML-138010 ML-138011 ML-138012 ML-138013 ML-138016 ML-138017 ML-138014 ML-138015 ML-138018 ML-138019 CE6HD (Left) CE6HD (Right) CE10HD (Left)
Global-Tek (Singapore) Pte Ltd
 Pte Ltd") Global-Tek (Singapore) Pte Ltd Door Type G-TEK G-TEK WWW.GLOBAL-TEK.COM.SG 1 P a g e Door Type, CONTENTS Wash and Rinse Arm Assembly....... 3-4 Booster Heater... 5-6 Wash Chamber.. 7-8 Door Lift Assembly...9-10
Global-Tek (Singapore) Pte Ltd Door Type G-TEK G-TEK WWW.GLOBAL-TEK.COM.SG 1 P a g e Door Type, CONTENTS Wash and Rinse Arm Assembly....... 3-4 Booster Heater... 5-6 Wash Chamber.. 7-8 Door Lift Assembly...9-10
Technical Manual. 301HT High Temperature with Built-in Booster
 Simply Engineered Better Technical Manual Undercounter Dishwasher Model 0HT High Temperature with Built-in Booster Machine Serial No. June, 00 Manual P/N Rev H P. O. Box Winston-Salem, North Carolina -9
GLC/GW-100 MANUAL INSTALLATION SERVICE PARTS REV.1.01
 Owner s Manual Keep with machine for reference GLC/GW-100 MANUAL INSTALLATION SERVICE PARTS REV.1.01 CMA DISHMACHINES 12700 KNOTT STREET GARDEN GROVE, CALIFORNIA 92841 800-854- 6417 FAX 714-895- 2141 www.cmadishmachines.com
Technical Manual. Simply Engineered Better. Undercounter Dishwasher. Machine Serial No. September, 2003
 Simply Engineered Better Technical Manual Undercounter Dishwasher Model 0-HTM PLUS 0-HTNM PLUS 0-LTM PLUS Machine Serial No. September, 00 Manual P/N 006 67 N. Service Road Jordan Station, Ontario, Canada
AM60E DISHWASHER INSTALLATION AND OPERATION INSTRUCTION
 AM60E DISHWASHER INSTALLATION AND OPERATION INSTRUCTION HOBART FOOD EQUIPMENT CO.,LTD FORM 7153069XE V1.1 2012.08 AM60E DISHWASHER OPERATION INSTRUCTION 1 AM60E DISHWASHER OPERATION INSTRUCTION CONTENT
Installation/Operation Manual with Service Replacement Parts. Undercounter Dishwashers M4 Series
 Installation/Operation Manual with Service Replacement Parts Undercounter Dishwashers M4 Series 201HT High Temperature Wash Refresh with built-in booster and Pumped Final Rinse 201HT 201LT Low Temperature
ECOJET EJ-10E & EJ-7E ELECTRIC CONVECTION STEAMER W/TWIN GENERATORS PARTS AND SERVICE MANUAL
 ECOJET EJ-10E & EJ-7E ELECTRIC CONVECTION STEAMER W/TWIN GENERATORS PARTS AND SERVICE MANUAL EFFECTIVE JULY 31, 2014 Superseding All Previous Parts Lists. The Company reserves the right to make substitution
CATALOG OF REPLACEMENT PARTS
 CATALOG OF REPLACEMENT PARTS LXGe SERIES GLASSWASHERS ML-130255 ML-130256 ML-130257 ML-130258 LXGePR (Cold) LXGeR (Hot) A product of HOBART 701 S. RIDGE AVENUE TROY, OHIO 45374-0001 FORM 43304 Rev. A (May
The Source (San Diego) 2101 Wilson Ave. National City, CA Tel: 1 (619) Fax: 1 (619)
 2101 Wilson Ave. National City, CA Tel: 1 (619) Fax: 1 (619)") I The Source 502 Rotary Street Hampton, VA 23661 Tel: 1 (757) 825-1400 1 (800) 497-2144 Fax: 1 (757) 825-1202 The Source (San Diego) 2101 Wilson Ave. National City, CA 91950 Tel: 1 (619) 474-4143 Fax:
I The Source 502 Rotary Street Hampton, VA 23661 Tel: 1 (757) 825-1400 1 (800) 497-2144 Fax: 1 (757) 825-1202 The Source (San Diego) 2101 Wilson Ave. National City, CA 91950 Tel: 1 (619) 474-4143 Fax:
Installation/Operation Manual with Service Replacement Parts. Undercounter Dishwashers M4 Series
 Installation/Operation Manual with Service Replacement Parts Undercounter Dishwashers M4 Series 201HT High Temperature Wash Refresh with built-in booster and Pumped Final Rinse 201HT 201LT Low Temperature
Owner s Manual. Keep with machine for reference PKC24 INSTALLATION & OPERATION REV Perlick Corporation 8300 W Good Hope Rd Milwaukee, WI 53223
 Owner s Manual Keep with machine for reference PKC24 INSTALLATION & OPERATION REV.11.09 Perlick Corporation 8300 W Good Hope Rd Milwaukee, WI 53223 800-558- 5592 FAX 414-353- 7069 perlick.com TABLE OF
Model 10AB/APRB Automatic Dishwasher
 Model 10AB/APRB Automatic Dishwasher Rinse and Wash Head Assemblies ITEM 1 0126800 End Plug 2 0125000 Rinse Arm Body (only) 3 0126000 Nylatron Washer (2 places) 4 0125500 Hex Nut 5 0126500 Snap Ring 6
Owner s Manual GLC MANUAL INSTALLATION SERVICE PARTS REV.1.00
 Owner s Manual GLC MANUAL INSTALLATION SERVICE PARTS REV.1.00 C M A D I S H M A C H I N E S 1 2 7 0 0 K N O T T S T R E E T GARDEN GROVE, CALIFORNIA 92841 800-8 5 4-6 4 1 7 F A X 7 1 4-8 9 5-2141 www.cmadishmachines.com
UNDERCOUNTER DISHWASHER
 OWNER S MANUAL BLAKESLEE Division of Blako Inc. UNDERCOUNTER DISHWASHER UC-21 I.R.S. INTEGRATED RECIRCULATING SYSTEM DESIGN 1844 South Laramie Avenue Chicago, IL 60804 Phone (708) 656-0660 Fax (708) 656-0017
Owner s Manual GW-100 MANUAL INSTALLATION SERVICE PARTS REV.1.00
 Owner s Manual GW-100 MANUAL INSTALLATION SERVICE PARTS REV.1.00 C M A D I S H M A C H I N E S 1 2 7 0 0 K N O T T S T R E E T GARDEN GROVE, CALIFORNIA 92841 800-8 5 4-6 4 1 7 F A X 7 1 4-8 9 5-2141 www.cmadishmachines.com
KLE-235D DOUBLE RACK IN-LINE CONFIGURATION KLE-175GTM SINGLE RACK THREE-DOOR CONFIGURATION KLE SERIES ULTRA WASH DISHMACHINE INSTRUCTION MANUAL
 KLE-235D DOUBLE RACK IN-LINE CONFIGURATION KLE-175GTM SINGLE RACK THREE-DOOR CONFIGURATION KLE SERIES ULTRA WASH DISHMACHINE INSTRUCTION MANUAL 9600475 Rev: C (06/12) Page 1 of 8 INTRODUCTION The KLE-235D
The Danger signal indicates an immediately hazardous situation which, if not avoided, will result in death or serious injury.
 The Danger signal indicates an immediately hazardous situation which, if not avoided, will result in death or serious injury. The Warning signal alerts you to potential hazards or unsafe practices which,
EFFECTIVE: MAY, American Dish Service ADS MODEL: ASQ GLASSWASHER PARTS MANUAL. 900 Blake Street Edwardsville, Kansas (913) /08
 /08") EFFECTIVE: MAY, 2014 American Dish Service ADS MODEL: ASQ GLASSWASHER PARTS MANUAL 900 Blake Street Edwardsville, Kansas 66111 (913)422-3700 05/08 The American Dish Service part numbers contained in this
EFFECTIVE: MAY, 2014 American Dish Service ADS MODEL: ASQ GLASSWASHER PARTS MANUAL 900 Blake Street Edwardsville, Kansas 66111 (913)422-3700 05/08 The American Dish Service part numbers contained in this
Repair Parts List DISHWASHER MODEL NUMBER DU471. When requesting service or ordering parts, always provide the following information:
 Repair Parts List DISHWASHER MODEL NUMBER DU471 When requesting service or ordering parts, always provide the following information: - Product Type - Part Number - Model Number - Part Description 2005
Table of Contents. FETCO, and Driven To Pioneer Innovation are trademarks or trade names of Food Equipment Technologies Company.
 www.fetco.com Hot Water Dispensers User s Guide Maritime Versions Rated IP44 Table of Contents Contact Information... 2 Specifications... 2 Dimensions... 3 Installation... 4 Operating Instructions...6
PS-3E AND PS-6E ELECTRIC CONVECTON STEAMERS PARTS AND SERVICE MANUAL
 PS-3E AND PS-6E ELECTRIC CONVECTON STEAMERS PARTS AND SERVICE MANUAL EFFECTIVE AUGUST 1, 2014 Superseding All Previous Parts Lists. The Company reserves the right to make substitution in the event that
High Temperature Undercounter Dishwasher
 Installation, Operation, Cleaning and Maintenance Manual High Temperature Undercounter Dishwasher Model: 383HT Hot water sanitizing with 4kW built-in stainless steel electric booster Option: 6kW built-in
STERO SD3. Door-Type Dishwasher MODEL: ML
 INSTRUCTION MANUAL STERO SD3 Door-Type Dishwasher MODEL: SD3 ML-130232 STERO, a division of Illinois Tool Works, Inc. 1758 Corporate Circle Petaluma, CA 94954 Phone: 800-762-7600 Fax: 707-762-5036 Website:
IMAGE V. Parts and Service Manual
 IMAGE 0V Section II Parts and Service Manual (88B) CLARKE TECHNOLOGY Image Operator's Manual Page AUTHORIZED PERSONNEL MAINTENANCE To Access Pump Motor. Remove brush housing from machine. See "Brush Motor
WU701 BLOWER/AIR INLET & WATER LEVEL FLOAT
 WU701 BLOWER/AIR INLET & WATER LEVEL FLOAT WU701 BLOWER/AIR INLET & WATER LEVEL FLOAT 2 310217 NO LONGER AVAILABLE (S/P) 3 900882 SWITCH, WATER LEVEL (S/P) 4 900911 FLOAT SWITCH & BRACKET ASSM (S/P) 5
Owner s Manual. Keep with machine for reference CMA DISHMACHINES KNOTT AVENUE GARDEN GROVE, CALIFORNIA FAX
 Owner s Manual Keep with machine for reference MODELS CMA-180/180 TALL Including 480V MACHINES Installation and Operation Rev 2.08 CMA DISHMACHINES 12700 KNOTT AVENUE GARDEN GROVE, CALIFORNIA 92841 800-854-
Installation Manual DH6000T-VHR. Ventless Heat Recovery. Manual P/N rev. A
 Installation Manual DH6000T-VHR Hot water sanitizing machine w/fresh water rinse and built-in stainless steel electric booster Ventless Heat Recovery LISTED Issue Date: 10.30.18 Manual P/N 116081 rev.
Installation Manual. PRO Series Ventless Heat Recovery Rack Conveyor Dishwashers LISTED.
 Manual PRO Series Ventless Heat Recovery Rack Conveyor Dishwashers Models 44 PRO-VHR 66 PRO-VHR 70FF PRO HD-VHR 80HD PRO-VHR 44 PRO-VHR LISTED www.championindustries.com Issue Date: 8.4.17 Manual P/N 116114
UNDERCOUNTER DISHWASHER
 OWNER S MANUAL BLAKESLEE Division of The Legacy Companies UNDERCOUNTER DISHWASHER UC20 Blakeslee Division of The Legacy Companies 1228 Capitol Drive Addison, IL 60101 Phone (630) 532-5021 Fax (630) 532-5020
MODEL L-1X & L-1X16 Installation & Operations
 Owner s Manual Keep with machine for reference MODEL L-1X & L-1X16 Installation & Operations Rev 1.15 CMA DISHMACHINES 12700 KNOTT AVENUE GARDEN GROVE, CALIFORNIA 92841 800-854-6417 FAX 714-8 95-2 141
3500 SERIES CONVECTION STEAM COOKER PARTS AND SERVICE MANUAL
 3500 SERIES CONVECTION STEAM COOKER PARTS AND SERVICE MANUAL EFFECTIVE JULY 30, 2014 Superseding All Previous Parts Lists. The Company reserves the right to make substitution in the event that items specified
TURBOWASH TM... Pot and Pan Sink
 TURBOWASH TM... Pot and Pan Sink MODEL TW ML-110644 701 S. RIDGE AVENUE TROY, OHIO 45374-0001 FORM 33800 Rev. A (4-98) Installation, Operation, and Care of TurboWash TM Pot and Pan Sink SAVE THESE INSTRUCTIS
EFFECTIVE: MAY, American Dish Service ADS MODEL: ASQ GLASSWASHER PARTS MANUAL. 900 Blake Street Edwardsville, Kansas (913) /08
 /08") EFFECTIVE: MAY, 2008 American Dish Service ADS MODEL: ASQ GLASSWASHER PARTS MANUAL 900 Blake Street Edwardsville, Kansas 66111 (913)422-3700 05/08 021-0061 Model: ASQ Glasswasher American Dish Service
EFFECTIVE: MAY, 2008 American Dish Service ADS MODEL: ASQ GLASSWASHER PARTS MANUAL 900 Blake Street Edwardsville, Kansas 66111 (913)422-3700 05/08 021-0061 Model: ASQ Glasswasher American Dish Service
Installation/Operation and Service Parts Manual
 Installation/Operation and Service Parts Manual Rotary-type Conveyor Glasswasher Model: DFM7.5 Clockwise Rotation Issue Date: 9.7.17 Manual P/N 0514427 rev. B For machines beginning with S/N G160520081
DOOR AND PANEL PARTS. For Models: KUDS25SHBL1, KUDS25SHWH1, KUDS25SHAL1, KUDS25SHBT1 (Black) (White) (Almond) (BISCUIT)
 (White) (Almond) (BISCUIT)") DOOR AND PANEL PARTS UNDERCOUNTER DISHWASHER 1 Literature Parts LIT9743822 Instructions Installation LIT9744391 Energy Guide LIT9744039 Guide, Use&Care Tech Sheet LIT9744033 English LIT9744034 French 2
DOOR AND PANEL PARTS UNDERCOUNTER DISHWASHER 1 Literature Parts LIT9743822 Instructions Installation LIT9744391 Energy Guide LIT9744039 Guide, Use&Care Tech Sheet LIT9744033 English LIT9744034 French 2
PARTS MANUAL. American Dish Service ADS HIGH TEMP SINGLE RACK DISHMACHINE MODEL: HT Blake Street Edwardsville, Kansas (913)
") EFFECTIVE: MAY, 2014 ADS HIGH TEMP SINGLE RACK DISHMACHINE MODEL: PARTS MANUAL 900 Blake Street Edwardsville, Kansas 66111 (913)-422-3700 05/08 The American Dish Service part numbers contained in this
EFFECTIVE: MAY, 2014 ADS HIGH TEMP SINGLE RACK DISHMACHINE MODEL: PARTS MANUAL 900 Blake Street Edwardsville, Kansas 66111 (913)-422-3700 05/08 The American Dish Service part numbers contained in this
SINGLE BUNN-O-MATIC CORPORATION POST OFFICE BOX 3227 SPRINGFIELD, ILLINOIS PHONE: (217) FAX: (217)
 FAX: (217)") ! SINGLE WARNING DISCONNECT FROM POWER SOURCE BEFORE REMOVAL OF ANY PANEL OR REPLACEMENT OF ANY COMPONENT! PRIOR TO S/N SNG000000 gal gal gal START ON / WARMER SELECTOR READY! BUNN MANUFACTURED BY BUNN-O-MATIC
! SINGLE WARNING DISCONNECT FROM POWER SOURCE BEFORE REMOVAL OF ANY PANEL OR REPLACEMENT OF ANY COMPONENT! PRIOR TO S/N SNG000000 gal gal gal START ON / WARMER SELECTOR READY! BUNN MANUFACTURED BY BUNN-O-MATIC
Fountain Classic. Installation and Owner s Manual. Page 16
 Fountain Classic Installation and Owner s Manual Page 16 4120 NW 44th St Lincoln, NE 68524 USA Tel: 402.467.9300 Toll Free in the USA: 800.875.5915 Fax: 402.467.9393 www.purewaterinc.com Page 2 Fountain
COS-101 NON SELF FLUSHING COMBI REPLACEMENT PARTS LIST
 COS-101 NON SELF FLUSHING COMBI REPLACEMENT PARTS LIST EFFECTIVE FEBRUARY 16, 2012 Superseding All Previous Parts Lists. The Company reserves the right to make substitution in the event that items specified
HHP-300 EXTRACTOR 120V
 CARPET HHP-300 EXTRACTOR 120V 1 2 CORD 1 3 VAC PUMP UPHOLSTERY MODE INFORMATION & OPERATING INSTRUCTIONS DO NOT OPERATE MACHINE UNTIL YOU HAVE READ ALL SECTIONS OF THIS INSTRUCTIONS IMPROPER USE OF THE
DISHSTAR HT/LT INSTALLATION, OPERATION, AND SERVICE MANUAL DISHSTAR SERIES UNDERCOUNTER DISHMACHINES. DishStar HT/LT Manual J
 INSTALLATION, OPERATION, AND SERVICE MANUAL DISHSTAR SERIES UNDERCOUNTER DISHMACHINES DishStar HT/LT Manual DISHSTAR HT/LT MANUFACTURER'S WARRANTY ONE YEAR LIMITED PARTS AND LABOR WARRANTY ALL NEW JACKSON
INSTALLATION, OPERATION & SERVICE MANUAL
 UPRIGHT DOOR DISHMACHINES INSTALLATION, OPERATION & SERVICE MANUAL FOR JACKSON MODEL(S): WAREFORCE HT-180 WAREFORCE HT-180 WITH VENTLESS AND ENERGY RECOVERY WAREFORCE HT-180/VENTLESS Technical Manual Rev
BUNN H5E H5M H5X BUNN-O-MATIC CORPORATION POST OFFICE BOX 3227 SPRINGFIELD, ILLINOIS PHONE: (217) FAX: (217)
 FAX: (217)") ! BUNN DISCONNECT FROM POWER SOURCE BEFORE REMOVAL OF ANY PANEL OR REPLACEMENT OF ANY COMPONENT! WARNING H5E H5M H5X WARNING Very Hot Water Use With Care!! ILLUSTRATED PARTS CATALOG Designs, materials,
! BUNN DISCONNECT FROM POWER SOURCE BEFORE REMOVAL OF ANY PANEL OR REPLACEMENT OF ANY COMPONENT! WARNING H5E H5M H5X WARNING Very Hot Water Use With Care!! ILLUSTRATED PARTS CATALOG Designs, materials,
PARTS MANUAL. American Dish Service. ADS HIGH TEMP SINGLE RACK DISHMACHINE MODELS: HT-25 5 WIRE 110 Volt Control System
 EFFECTIVE: MAY 1, 2018 ADS HIGH TEMP SINGLE RACK DISHMACHINE MODELS: 5 WIRE 110 Volt Control System PARTS MANUAL 900 Blake Street Edwardsville, Kansas 66111 (913)-422-3700 C 05/2018 The American Dish Service
COBRA -300H EXTRACTOR
 COBRA -300H EXTRACTOR 120V INFORMATION & OPERATING INSTRUCTIONS DO NOT OPERATE MACHINE UNTIL YOU HAVE READ ALL SECTIONS OF THIS INSTRUCTIONS IMPROPER USE OF THE MACHINE WILL VOID THE WARRANTY 1. Always
model NO. LSS GALLON SKID MOUNTED HIGH PRESSURE SPRAYER ASSEMBLY / OPERATION INSTRUCTIONS / PARTS
 000 model NO. LSS- 00 GALLON SKID MOUNTED HIGH PRESSURE SPRAYER ASSEMBLY / OPERATION INSTRUCTIONS / PARTS Part number and descriptions can be obtained from the illustrated parts list section of this manual.
DISCARD DECANTER IF: FAILURE TO COMPLY RISKS INJURY FUNNEL CONTENTS ARE HOT ILLUSTRATED PARTS CATALOG
 ! GMB-PS WARNING Disconnect from power source before removal of any panel or replacement of any component! FUNNEL CONTENTS ARE HOT CAUTION DISCARD DECANTER IF:. CRACKED. SCRATCHED. BOILED DRY. HEATED WHEN
UNDERCOUNTER DISHWASHER
 CORPORATION UNDERCOUNTER DISHWASHER MODEL DU8500XX3 Almond/Black 7 92 Litho In U.S.A. c 1992 WHIRLPOOL CORPORATION Part No. FRAME AND CONSOLE PARTS 1 3370310 Console (Includes Item 2) 2 3370309 Insert,
TECHNICAL MANUAL Installation, Operation and Maintenance Instructions
 TECHNICAL MANUAL Installation, Operation and Maintenance Instructions POT AND PAN WASHERS CA-3 DA-3 Insinger Machine Company 6245 State Road Philadelphia, PA 935-2996 800-344-4802 Fax 25-624-6966 www.insingermachine.com
GF Hood / Tank. Wash arm Wash/Rinse column. Thermostat/solenoid valve group Control box Rinse aid injector. Drain pump
 GF90-2004 1 Hood / Tank 2 Tank 3 Wash arm 4 Wash/Rinse column 5 Pump 6 Thermostat/solenoid valve group 7 Control box 8 Rinse aid injector 9 Rack 10 Drain pump 3/27/2017 4:39:35 PM Page 1 of 22 Hood / Tank
PARTS MANUAL. American Dish Service MODEL: 5-AG-S ADS LOW TEMPERATURE DISHWASHER EFFECTIVE: JULY, 2013 C 4/08
 EFFECTIVE: JULY, 2013 ADS LOW TEMPERATURE DISHWASHER MODEL: PARTS MANUAL 900 Blake Street Edwardsville, Kansas 66111 (913)422-3700 C 4/08 The American Dish Service part numbers contained in this publication
! ATTENTION INSTALLER! THIS DISHWASHER IS EQUIPPED WITH A CONDENSATE REMOVAL VENT SHROUD WHICH WAS SHIPPED SEPARATELY IN ITS OWN PACKAGING.
 Model DH5000 Hood-type Dishwasher with Condensate Removal Option CONDENSATE REMOVAL OPTION INSTALLATION INSTRUCTIONS P/N 114958 Rev. E Issued 12.18.13! ATTENTION INSTALLER! THIS DISHWASHER IS EQUIPPED
FRAME AND CONSOLE PARTS
 FRAME AND CONSOLE PARTS UNDERCOUNTER DISHWASHER 1 3375275 Console (Includes Item 2) 2 3376026 Insert, Console 3 3376029 Switch, 5 Pushbutton 4 3369529 Follower, Cam 5 3373626 Timer 6 3369415 Cam 7 304231
Liberty-Classic. Operator s Manual
 Liberty-Classic Operator s Manual Pure & Secure LLC 4120 NW 44th Lincoln, NE 68524 Phone: 402-467-9300 Fax: 402-467-9393 2006, Pure & Secure LLC. All Right Reserved Table of Contents Important Safety
PARTS MANUAL. American Dish Service ADS CONVEYOR DISHWASHER MODELS: ADC-66 L-R/R-L EFFECTIVE: MAY, 2014
 EFFECTIVE: MAY, 2014 ADS CONVEYOR DISHWASHER MODELS: ADC-66 L-R/R-L PARTS MANUAL 900 Blake Street Edwardsville, Kansas 66111 (913)422-3700 05/08 The American Dish Service part numbers contained in this
Installation Manual with Service Replacement Parts
 Installation Manual with Service Replacement Parts Rotary-type Conveyor Glasswasher Models: CGM7 Clockwise Rotation (access door front) CGM7 clockwise rotation (access door front) Glasswasher serial no.
DISCARD DECANTER IF: FUNNEL CONTENTS ARE HOT FAILURE TO COMPLY RISKS INJURY
 ! BUNN GMB-PS WARNING Disconnect from power source before removal of any panel or replacement of any component! FUNNEL CONTENTS ARE HOT CAUTION DISCARD DECANTER IF:. CRACKED. SCRATCHED. BOILED DRY. HEATED
MP GS/GD 10 GAS. Toll Free Phone, (US & Canada): (800) Toll Free Fax, (US & Canada): (800)
: (800) Toll Free Fax, (US & Canada): (800)") MP GS/GD 0 GAS Toll Free Phone, (US & Canada): (800) 427-6668 Toll Free Fax, (US & Canada): (800) 36-7745 http://www.garland-group.com FORM # Moisture Plus Gas GS/GD0 (Rev 5) Page 2 FORM # Moisture Plus
MP GS/GD 0 GAS Toll Free Phone, (US & Canada): (800) 427-6668 Toll Free Fax, (US & Canada): (800) 36-7745 http://www.garland-group.com FORM # Moisture Plus Gas GS/GD0 (Rev 5) Page 2 FORM # Moisture Plus
PERFORM Operating Document. Use and Maintenance of Undercounter High Temperature Dishwasher
 PERFORM Operating Document Use and Maintenance of Undercounter High Temperature Dishwasher PC-POD-NS-004-v02 Revision History Version Reason for Revision Date 02 Name change in Authorization manager Change
MODEL L-1X & L-1X16 Installation & Operations
 Owner s Manual Keep with machine for reference MODEL L-1X & L-1X16 Installation & Operations Rev 1.16A CMA DISHMACHINES 12700 KNOTT AVENUE GARDEN GROVE, CALIFORNIA 92841 800-854-6417 FAX 714-8 95-2 141
Repair Parts List DISHWASHER MODEL NUMBER DW871UQA. When requesting service or ordering parts, always provide the following information:
 Repair Parts List DISHWASHER MODEL NUMBER DW871UQA When requesting service or ordering parts, always provide the following information: - Product Type - Part Number - Model Number - Part Description 2005
DEMA 813 PROBELESS DEMAMaster TM INSTALLATION INSTRUCTIONS
 DEMA 813 PROBELESS DEMAMaster TM INSTALLATION INSTRUCTIONS Models: DM-813-PLLL-1T DM-813-PDLL-1T DM-813-PLLL-2T DM-813-PDLL-2T I-729 Pg 1 of 15 System Overview The DEMA DEMAMaster probeless series is designed
Owner s Manual. Keep with machine for reference PKD24A INSTALLATION & OPERATION. Rev
 Owner s Manual Keep with machine for reference PKD24A INSTALLATION & OPERATION Rev. 11.09 Perlick Corporation 8300 W Good Hope Rd Milwaukee, WI 53223 800-558- 5592 FAX 414-353- 7069 perlick.com TABLE OF
MODEL GL-X INSTALLATION & OPERATION
 Owner s Manual Keep with machine for reference MODEL GL-X INSTALLATION & OPERATION Rev. 1.01B CMA DISHMACHINES 12700 KNOTT AVENUE GARDEN GROVE, CALIFORNIA 92841 800-854-6417 FAX 714-8 95-2 141 www.cmadishmachines.com
MODEL L-1X & L-1X16 SERVICE & PARTS MANUAL. Rev 1.19B
 MODEL L-1X & L-1X16 SERVICE & PARTS MANUAL Rev 1.19B C M A D I S H M A C H I N E S 1 2 7 0 0 K N O T T S T R E E T GARDEN GROVE, CALIFORNIA 92841 800-854- 6417 F A X 7 1 4-8 9 5-2141 www.cmadishmachines.com
B-14G. for series number with jm or j
 B-G boilerless steamer REPLACEMENT PARTS LIST for series number with jm or j Effective june, 0 Superseding All Previous Parts Lists. The Company reserves the right to make substitution in the event that
MODEL CMA-130VL PARTS MANUAL Rev 1.00
 MODEL CMA-130VL PARTS MANUAL Rev 1.00 DISTRIBUTED EXCLUSIVELY BY CMA DISHMACHINES 12700 KNOTT AVENUE GARDEN GROVE, CALIFORNIA 92841 800-854-6417 FAX 714-895-2141 www.cmadishmachines.com TABLE OF CONTENTS
PARTS MANUAL. American Dish Service ADS LOW-WATER DISHWASHER MODELS: L3DW / L3DWC EFFECTIVE: MAY, 2008
 EFFECTIVE: MAY, 2008 ADS LOW-WATER DISHWASHER MODELS: L3DW / L3DWC PARTS MANUAL 900 Blake Street Edwardsville, Kansas 66111 (913)422-3700 05/08 The part numbers contained in this publication are replacement