CalMag Heating Pack Installation Instructions
|
|
|
- Barrie George
- 5 years ago
- Views:
Transcription


1 Calming troubled waters CalMag Heating Pack Installation Instructions Heating Filter Corrosion Inhibitor Scale Inhibitor (if applicable) Cleanser Acidic Neutraliser
2 CalMag HF2 Filter Installation Instructions CALMAG HF2 FILTER 22mm Why fit a CalMag filter? Radiator panels provide the largest surface area of a central heating system where they act as heat emitters. They are usually made of mild steel, which is highly reactive to corrosion. Even with a quality corrosion inhibitor installed, low levels of corrosion can occur. In the absence of air this is usually black magnetite, which is magnetic in nature and which can therefore be captured with a magnet. Although magnetite is seven times heavier than water and quite happy to sit in the bottom of the radiator from whence it came, some particles are dispersed around the system by the flow. If a magnetic filter does not collect these particles, they will surely end up trapped in the next device with electro-magnetic properties; the circulator pump where they will cause premature wear. The magnetic filter can also double as a sampling point to analyse the system water, or become the treatment point for liquid chemical additives. The table below shows some water conditions and suggested remedial action that can be determined from visual inspection of the contents of the filter canister:- Water Condition Clear water, no magnetite Clear water, magnetite build up Black water, magnetite build up Orange water, no magnetite Orange water, magnetite build up Suggested Remedial Action System appears to be corrosion free inspect annually. Top up inhibitor every one to three years System is corroding. Clean filter, add inhibitor, inspect every one to three months System is corroding badly. Clean the system consider Power Flushing, then add inhibitor on final fill System is corroding due to ingress of air investigate mechanical fault then clean the system then add inhibitor on final fill System is corroding due to ingress of air and likely absence of inhibitor. Investigate mechanical fault. Clean the system consider Power Flushing, then add inhibitor on final fill
3 Please retain these instructions for future use. Do s: Install the filter upright to enable it to be fully removed of air during commissioning. The inlet and outlet can also be swapped to suit. Where the filter is fitted to the metallic heating system, earth bonding continuity is required around it. All bonding connections must be accessible and labelled Safety Electrical Connection Do Not Remove. Service the filter annually (at boiler inspection) to remove any collected debris. Use the filter in conjunction with a scale and corrosion inhibitor ie. CM The inlet/outlet valves have PTFE valve seats, which can be initially stiff. Operate with the hex end of the service spanner. When using the key/cap to bleed air from the system make sure you have a bucket handy to catch the spill. Screw key/cap onto drain valve as a drip cover. Don ts: Magnets may affect or interfere with sensitive mechanical and electronic instruments such as heart pacemakers, computers / magnetic media and watches. Always keep magnets at least 300mm away from such equipment. NEVER close the INLET or OUTLET isolation valves, OR UNDO the lid when the pump is running! Don t get scalded! Allow the system to cool before operating the device. Don t fit the device too close to the boiler allow at least 300mm gap and sufficient space to service the unit. Don t tighten the lid with the service spanner over tightening could damage the unit.


4 CalMag HF2 Filter Installation Instructions Installation Instructions Only a competent person such as a qualified heating engineer should install the device. 1. Locate a suitable site for the filter to allow access and servicing. We recommend that you fit it on the return. Do not fit it between the boiler and the overflow on open vented systems. 2. Release heating system pressure and drain the pipe-run where the filter is to be located. It may be necessary to drain the whole system. 3. Vertical pipe runs: measure and mark a 152mm section and remove the marked section with a rotary tube cutter. ISOLATING VALVES SHOULD BE ACCESSIBLE IN ORDER TO ISOLATE THE UNIT
5 HEATING FILTER MANIFOLD Copper pipe cut out 152mm on return pipe to boiler 4. Fit the manifold into cut out, and tighten the compression fittings. 5. Loosely secure the canister to the manifold ensuring the canister is upright and square. Don t fit the washers at this point as you are pre-assembling the filter to assess it for fit. Providing everything lines up proceed to the next step, otherwise make any necessary adjustments. 6. Loosen off the valve flange nuts and insert the washers. Thoroughly tighten the flange nuts, taking care not to over tighten. Ensure washers are used. Tighten the lid only by hand, making sure the O ring is still in position. 7. Refill the heating system, ensuring the inlet and outlet valves are both in the OPEN position, with the drain valve in the CLOSED position and the bleed screw on top of the unit open, when water is seen coming from the bleed valve close the screw. 8. Start the heating system. Bleed the filter again after the system has reached the necessary temperature. Take care when doing so as the water expelled will be hot. Observe the unit, checking that there are no leaks. 9. The unit has now been successfully commissioned. If fitted correctly it will be silent in operation. We suggest its serviced annually to remove any particulate matter that has been collected. This should be carried out at the same time the boiler is serviced.
6 Chemicals Cleanser Installation Instructions How to add to systems Connect Powerflushing equipment to system. Leaving all radiators open, add 500ml of cleanser per 10 radiators. To test that the mix has reached all parts of the system, switch the boiler on and see if the radiators are heating up evenly. We recommend circulating the mixture around the system for 30 minutes to 1 hour for an average heating system. Allow more time for heavily sludged systems. Cleanser can be left in the system for up to 2 weeks without any detrimental effects. Cleanser should be used prior to the corrosion inhibitor. Other chemicals may need to be required to remove contaminants ie, sludge & flux remover, descaler etc. We strongly recommend that the boiler be serviced annually along with adding a further bottle of corrosion inhibitor to maintain long term protection of the central heating system. It is also strongly advised that as part of the boiler servicing the CalDensate cartridge be replaced and that the heating filter is thoroughly cleaned to maintain system efficiency.
7 Chemicals Inhibitor Installation Instructions How to add to systems There are different ways to add the inhibitor to a system with the easiest being through a header tank, or a non pressurised system. The second way is through a radiator, pressurised or non pressurised systems. This can usually be determined for a pressurised system if the boiler has a pressure gauge attached to it. If so, then this usually indicates that it is a pressurised system. Header Tank 1. Turn off boiler. 2. Locate drain tap at the bottom of a radiator. Attach a hose to the drain tap, ready to run to drain. Do not open the drain tap at this point. Please note a hose clip may be required to fasten to the hose tap to prevent spillage. 3. Locate the header tank and turn off the make up supply. The header tank is normally located in the roof space, or loft. If unsure as to which is the cold water tank and which is the header tank then it would be beneficial to run the hot and cold taps in a bathroom until the cold water tank s make up runs. 4. Open the drain at the bottom of the radiator and drain off water. When the header tank has fully drained, close the drain tap. 5. Turn the make up back on and add the chemical at the correct dosage rate into the system whilst refilling the header tank. Dosage rate should be at 10% of the total system make up on a system with radiators, 500ml should be sufficient. 6. Wait for the header tank to completely fill. 7. Disconnect the hose from the drain tap and check for any leaks. 8. Avoid spillage by taking precautionary measures when used. Pressurised System 1. Turn off the boiler and make a note of the operating pressure. 2. Locate a drain tap at the bottom of a radiator. Choose the lowest point within the heating system to ensure that all the system will be treated. 3. Attach a hose to the drain tap, ready to run to drain. Open the drain tap. Please note a hose clip may be required to fasten to the hose tap to prevent spillage. 4. Locate a radiator at the top of the heating system and open the air vent. Air should now rush in. Continue draining the system until the chosen radiator has drained approximately 30% (3-4ltr). Turn off the drain and remove the hose. 5. Unscrew the air vent plug at the top of the radiator. 6. The inhibitor can now be added into the system using an adaptor to fit the air vent plug or bleed valve and squirted directly into the system at the correct dosage - on a system with radiators, 1 litre should be sufficient. 7. Screw the air vent plug back into the radiator. Ensure that PTFE is used for the air vent plug thread. 8. Refill the system to the operating pressure noted at the outset and vent the radiators to remove any air from the system. 9. Venting may also be required in two to three days after the initial vent and avoid spillage by taking precautionary measures when used. Ensure that any excess fluid is wiped off all surfaces and fittings. Heating Filter See Annual Service Requirements section for the installation instructions.
8 CalDensate Installation Instructions Caldensate: A condensing boiler is a high efficiency modern boiler, incorporating an extra heat exchanger, so that hot exhaust gases lose much of their energy to pre-heat the water in the boiler system. When working at peak efficiency, the water vapour produced in the combustion process condenses back into liquid form, releasing the latent heat of vaporisation. The water, known as condensate, is produced as a side-effect and is usually acidic, containing dissolved oxides of sulphur and nitrogen, and has to be piped away to drain. There are a number of problems which occur when acidic water enters the water system, and simply installing the CalDensate will ensure that the ph is neutralised by means of the specially formulated media which is included in the product. This easy to fit in-line unit is a by-product of our own successful commercial products. The CalDensate is effective, economical and environmentally friendly due to the fact that the throw away cartridge is biodegradable and the housing never needs replacing and therefore does not harm the environment in terms of waste in landfill sites this is the only product on the market place with these unique features. Points to consider:- 1. Limited free play in rigid pipework. 2. Ensure that the unit is compact when the pipework has been cut. 3. The condensate is usually discharged periodically in slugs by siphonic action. 4. Is suitable for use with all types of condensate discharge overflow pipes. 5. Always consult the boiler manufacturer s installation instructions. 6. Fit in accordance with BS6798. Caldensate Installation: 1. Turn off the water supply if necessary. 2. Turn off the boiler. 3. The CalDensate should be installed either vertically or alternatively with a slight incline away from the boiler to ensure that the acidic waste falls away naturally with gravity. 4. Ensure that the installation takes into consideration the need to replace the internal cartridge on an annual basis. 5. The CalDensate does not have the need for directional flow and can be installed simply and easily in any direction. 6. Unscrew the cap fitting and slide the gasket and cap onto the boiler condensate discharge pipe. 7. Push the unit onto the boiler condensate discharge pipe until it hits the stop inside the unit. 8. Slide the cap and gasket to the unit and firmly screw the cap back onto the unit body. Ensure the angle of the gasket sits neatly into the angle of the body fitting. This only needs to be hand tight - do not use excessive force. 9. Unscrew the bottom cap fitting and gasket and slide both onto a suitable length of condensate discharge pipe. 10. Push the condensate discharge pipe to the unit until it hits the stop inside the unit. 11. Slide the cap and gasket to the unit and firmly screw the cap back onto the unit body. Ensure the angle of the gasket sits neatly into the angle of the body fitting. This only needs to be hand tight - do not use excessive force.
9 12. Continue and complete the installation of condensate pipe in accordance to BS6798 (typical installation shown below). 13. Turn on the water supply if necessary. 14. Turn on the boiler. Check for leaks. To maintain the performance of the CalDensate, it is strongly recommended to replace the cartridge in line with the annual service of the condensing boiler. If the unit is installed externally, adequate protection from frost, water and extreme weather conditions must be considered and dealt with accordingly. In situations where the external condensate drainage pipe is less than a nominal diameter of 32mm. the pipe must be protected from frost and also be insulated against potential water. Scale Inhibitor Installation Instructions For hard water areas (if applicable).
10 Annual Service Requirement Heating Filter: 1. Before commencing any service work, turn off the boiler and isolate the electrical supply. Wait for the temperature to cool before undertaking any work to avoid scalding. Turn both isolating valves to the OFF position. Have a bucket ready to collect spillage and OPEN the drain valve to release internal pressure. CLOSE the drain valve again to free your hand. 2. Open the lid by turning anticlockwise using the service spanner. Remove by lifting upwards to withdraw the magnet and plastic sleeve. 3. Withdraw the plastic magent sleeve. Some debris may stick to the non-magnetic sleeve but the remaining debris will fall to the bottom of the canister. 4. Have a bucket ready to collect spillage and reopen the drain valve to allow the debris to escape. Rinse out the canister with fresh water and clean the bowl, lid, O-ring and magnet before reassembling. 5. Tighten the lid retaining-ring only by hand. Ensure the inlet and outlet valves are both in the OPEN position, with the drain valve in the CLOSED position. Refill the system to recommended pressure and bleed the unit using the bleed screw on top. 6. Bleed the filter again after the system has reached the correct temperature. Take care when doing so as the water expelled will be hot. Observe the unit, checking that there are no leaks. Chemical Dosing: At step 4 in servicing, carefully pour a bottle of water treatment corrosion and scale inhibitor (sufficient capacity is available to hold 500ml) into the canister. Replace lid with plastic sleeve covering the magnet. Use CalProtector or CM100. Continue with step 5 in servicing. Allow the system to circulate for 5 minutes to disperse the chemical treatment. Continue with step 6 in servicing to complete the operation. Densate R: 1. Turn off the water supply if necessary. 2. Turn off the boiler. 3. Remove the CalDensate unit from the pipework. 4. Remove cap and replace cartridge. 5. Dispose of old cartridge. 6. Re-install CalDensate. 7. Turn on water supply if necessary. 8. Turn on the boiler. Check for leaks. To maintain the performance of the CalDensate, it is strongly recommended to replace the cartridge in line with the annual service of the condensing boiler. If the unit is installed externally, adequate protection from frost, water and extreme weather conditions must be considered and dealt with accordingly. In situations where the external condensate drainage pipe is less than a nominal diameter of 32mm. the pipe must be protected from frost and also be insulated against potential water.
11 Warranty: The limited warranty is subject to the following terms and conditions: I. That the products have been correctly installed and serviced in accordance with the instructions herein provided. The warranty does not cover damage or defects caused as a result of improper installation or servicing. II. That the products have not been tampered with or misused. III. That the products have not been modified in any way. IV. That the product labels have not been removed. V. That the products have been returned at the purchaser s own cost together with proof of purchase in the form of an original receipt or invoice (which will be returned). VI. The sole and exclusive remedy under this warranty is for the repair or replacement of the products and no other remedy including but not limited to incidental or consequential damage or loss, irrespective of nature shall be available. VII. This warranty will not cover any associated installation costs incurred as a result of the products being defective. VIII.Our decision on matters relating to warranty claims shall be final. This warranty does not affect your statutory rights. Full terms and conditions are available on request. Notes: Please refer to the current Building Regulations, British Standards and manufacturer s boiler instructions at all times.
12 Phone: Fax: Web: Calmag Ltd Riverview Buildings, Bradford Road, Riddlesden, Keighley, West Yorkshire, BD20 5JH
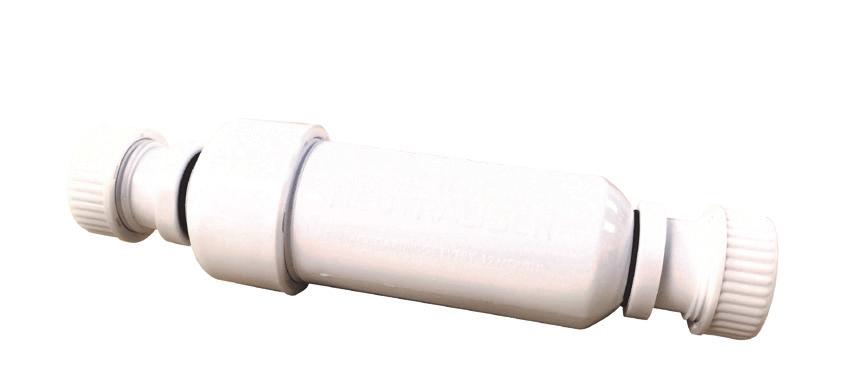
CalMag Filter Installation Instructions
 Calming troubled waters CalMag Filter Installation Instructions Please note: This filter is unique and does not have or need a messy top mounted air bleed valve. Air is channelled via a snorkel arrangement
DEFENDER DEFENDER. Models: MD22A OPERATION MANUAL. Full Flow Magnetic Filter
 OPERATION MANUAL Y NT Y YEA Full Flow Magnetic Filter YEA RW ARRA NT DEFENDER FullFlow Flow Magnetic Full Magnetic FilterFilter DEFENDER Models: MD22A 5 5 RW ARRA In the SALUS MD22A box: INTRODUCTION Today,
Installation and servicing instructions
 Installation and servicing instructions Installation MagnaClean Professional is suitable for all central heating systems and can be fitted anywhere on the main circuit. However, in order to achieve the
Greenstar System Filter
 Installation and Servicing Instructions Greenstar System Filter For sealed and open vented central heating systems with 22 or 28mm central heating pipes 672087500-00.Wo UK/IE 6 720 87 500 (205/07) Contents
PRODUCT GUIDE. High performance heating system filter Improves energy efficiency Captures magnetic and nonmagnetic.
 PRODUCT GUIDE High performance heating system filter Improves energy efficiency Captures magnetic and nonmagnetic debris No block design Fits in Minutes, Protects for Years Black ferrous oxide or sludge
M07. Wunda Premium Manifold. Before you start: Check the contents THE BRAND YOU CAN TRUST
 Before you start: Check the manifold box contents against the list below. Check the contents 1. 2 x Manifold end blanks 2. 2 x Manual air vent & drain cocks 3. 2x Adjustable mounting brackets 4. Manifold
USER MANUAL PLEASE READ THROUGH ALL INSTRUCTIONS BEFORE USE ANY FURTHER QUESTIONS PLEASE CALL OUR TECHNICAL HELP LINE:
 USER MANUAL PLEASE READ THROUGH ALL INSTRUCTIONS BEFORE USE ANY FURTHER QUESTIONS PLEASE CALL OUR TECHNICAL HELP LINE: 0870 428 0075 CONTENTS Page 2 - Unpacking Page 3 - Heating system preparation and
Eliminator TotalGuard Installation Manual
 Eliminator TotalGuard Installation Manual Central Heating Filter Version 2 January 2016 IMPORTANT Please retain these instructions for reference during servicing Page 1 Eliminator TotalGuard Instructions
PERFORMANCE SHOWER PRODUCTS
 INSTALLER PLEASE LEAVE INSTRUCTIONS WITH CUSTOMER PERFORMANCE SHOWER PRODUCTS INSTALLATION INSTRUCTIONS FOR REGENERATIVE MAINS SHOWER PUMP Model: PR35D Medium pressure twin PR50D Medium pressure twin PR50S
Where the tap has a removable aerator on the spout exit it can be removed and cleaned periodically to maintain optimum flow performance.
 TAP6000 3 in Hot Tap Guarantee (UK only): 04-7 Your tap has the benefit of a comprehensive manufacturer s guarantee, details of which are shown on your Proof of Purchase Document. Any claim during the
IntaKlean Installation & Servicing Instructions IKMF22 and IKMF28
 IntaKlean Installation & Servicing Instructions IKMF22 and IKMF28 In this procedure document we have endeavoured to make the information as accurate as possible. We cannot accept any responsibility should
HEAVY DUTY BRASS SHOWER PUMPS
 HEAVY DUTY BRASS SHOWER PUMPS YOUR GUARANTEE IS AT RISK IF PUMP NOT INSTALLED CORRECTLY. SEE SECTION 2 IMPORTANT INSTRUCTIONS Performance Shower Products SERVICE HELPLINE TEL: 01883 730339 1. GENERAL Your
Please take time to carefully read through these guidelines before using your Kamco pump.
 The Kamco CLEARFLOW CF30 CLASSIC pump is a purpose built unit for Power Flushing central heating systems, designed to cure circulation and boiler noise problems caused by the accumulation of sludge, corrosion
Installation Instructions Flute Tap Range
 Installation Instructions Flute Tap Range Models covered: FLT BAS C, FLT 1HBF C, FLT 2HBSM C, FLT TBAS C Please keep this booklet for future reference. Installer, when you have read these instructions
Please take time to carefully read through these guidelines before using your Kamco pump.
 The Kamco CLEARFLOW CF190 / CF230 DDV pumps are purpose built units for Power Flushing central heating systems, designed to cure circulation and boiler noise problems caused by the accumulation of sludge,
BASIN MIXERS INSTALLATION & AFTERCARE INSTRUCTIONS
 BASIN MIXERS INSTALLATION & AFTERCARE INSTRUCTIONS This guide covers the installation of all Tavistock basin mixer varients. Please select the installation diagram suited to the basin mixer you have purchased.
Winchester Heated Towel Rail. Fitting Instructions
 Winchester Heated Towel Rail Fitting Instructions Before starting any installation project please consider the following: Prior to drilling into walls, check there are no hidden electrical wires or cables
WC2 & WC3 Installation & Maintenance Instructions
 WC2 & WC3 Installation & Maintenance Instructions Please leave this instruction booklet with the home owner as it contains important guarantee, maintenance and safety information WC3 shown WC2 WC3 IMPORTANT
Distinction. D4000 & D4000/EURO Water Still. Assembly and Operating Instructions. 1 Issue 2
 Distinction D4000 & D4000/EURO Water Still Assembly and Operating Instructions 1 Issue 2 Fig. 1 Distinction D4000 & D4000/EURO Water Still 2 Issue 2 Before Use If the equipment is not used in the manner
BMW E36 Thermostat Removal And Coolant Flush
 BMW E36 Thermostat Removal And Coolant Flush Disclaimer: The cooling system is critical to the proper operation of your car. Failure to properly install all of the components of the cooling system could
BOILING UNIT REDITAP. Installation and User Guide. IMPORTANT: This booklet should be left with the user after installation and demonstration
 in tap Boiling water to in tap sink Drain Valve (as high as possible) REDITAP CONNECTION SUMMARY Amp mains supply cold mains water into in tap optional filter cold water in hot water BOILING UNIT Installation
For commercial & industrial systems. Large volume dirt collection capacity
 For commercial & industrial systems Large volume dirt collection capacity Heating & Cooling System Protection Maintaining system efficiency and reliability in larger properties is a major challenge for
Operating Instructions. Boilermag XL Filter. High Intensity Magnetic Separator
 Operating Instructions Boilermag XL Filter High Intensity Magnetic Separator Technical data is subject to change without notice due to technical innovation! Eclipse Magnetics Ltd Atlas Way, Atlas North,
The Professional s Choice
 CPF Series Models: CPF2100, CPF210, CPF310, CPF4100-3, CPF4100-6 & CPF6100 Auto-Fill Catering Water Boiler With Integrated Multi-Filter Installation And User Instructions The Professional s Choice INSTANTA
COMPRESSED AIR DRYER. SAFETY... Page 2 MAINTENANCE... Page 5. INSTALLATION... Page 3 PARTS AND KITS... Page 6
 OWNERS MANUAL BOSS COMPRESSED AIR DRYER Distributed by Air & Vacuum Process, Inc. Phone: 281-866-9700 Fax: 281-866-9717 Email: sales@airvacuumprocess.com SAFETY... Page 2 MAINTENANCE... Page 5 INSTALLATION...
Aqueous Thermostatic Surface Mounted Bar Shower Valve With Fast Fit Connections
 Aqueous Thermostatic Surface Mounted Bar Shower Valve With Fast Fit Connections Fitting Instructions & Contents List Before starting any installation project, consider Safety first. Look for the safety
Parenzo Range. Basin Mixer, Bath Filler & Bath Shower Mixer. Assembly instructions
 Parenzo Range Basin Mixer, Bath Filler & Bath Shower Mixer Assembly instructions We have designed these products with your enjoyment in mind. To ensure that they work to their full potential, they need
Please take time to carefully read through these guidelines before using your Kamco pump.
 The Kamco CLEARFLOW CF90 : QUANTUM pump is a purpose built unit for Power Flushing central heating systems, designed to cure circulation and boiler noise problems caused by the accumulation of sludge,
Utility and Utility System Floor Standing Condensing Oil Boiler Range ADDENDUM ATTENTION INSTALLERS - UPDATED INFORMATION!
 Grant Vortex Eco Utility and Utility System Floor Standing Condensing Oil Boiler Range ADDENDUM ATTENTION INSTALLERS - UPDATED INFORMATION! LOW Nox yellow flame (riello rdb 2.2 bx) burner fitted The Grant
ADVANCE ECB ELECTRIC COMBINATION BOILER
 ISSUE ISSUE 45 0115 0317 INSTALLATION AND USER GUIDE ADVANCE ECB ELECTRIC COMBINATION BOILER ADVANCE APPLIANCES LTD HOUSEHOLDER - PLEASE RETAIN AND ENSURE SERVICE RECORDS ARE KEPT UP TO DATE 1 SCHEMATIC
Installation, Operating and Maintenance Guide
 Installation, Operating and Maintenance Guide Part no. 780327-C Contents Exposed Exposed Shower Mixing Valve Wall Cover Plate (x2) Strainer (x2) Fixing Screw (x2) Hexagon Key wall Plug (x2) Green Limiter
Enzo Concealed Shower Mixing Valve
 Enzo Concealed Shower Mixing Valve EZ40010CP, EZ40013CP & EZ40014CP Installation and Maintenance Instructions In this procedure document we have endeavoured to make the information as accurate as possible.
SYSTEM MANUAL Description
 SYSTEM MANUAL Description PUCK is a revolutionary fire suppression system offering discrete protection coupled with industry leading pricing, efficient system design and easy install. PUCK s lightweight
Alkaline RO System INSTALLATION MANUAL
 Alkaline RO System INSTALLATION MANUAL 1-800-992-8876 Customer Support Disclaimer All rights reserved. All material published on this site by Express Water Inc., including all portions of the website,
Dove Eco thermostatic bar mixer shower
 Dove Eco thermostatic bar mixer shower Eco Statement This product has been fitted with a flow regulator to deliver a maximum flow rate of 6 litres per minute. Installation and operating instructions Installers
CPE RANGE PUMPS CPE RANGE PUMPS. MODEL Nos: CPE15A1 15A3 20A1 20A3 30A1 30A3 PART Nos:
 CPE RANGE PUMPS CPE RANGE PUMPS MODEL Nos: CPE15A1 15A3 20A1 20A3 30A1 30A3 PART Nos: 7120305 7120310 7120315 7120320 7120325 7120330 OPERATION & MAINTENANCE INSTRUCTIONS GC0514 Contents Specifications...
POWERFLOW Series. Unvented Electric Storage Water Heaters. Installation & Operating Instructions Manual
 POWERFLOW Series Unvented Electric Storage Water Heaters Installation & Operating Instructions Manual These Instructions must be left with the user after installation. Version 3.0 June 2009 Hyco POWERFLOW
Smile Tap Range. Installation Instructions & User Guide. Please keep these instructions for future reference and request of replacement parts
 Smile Tap Range Installation Instructions & User Guide Please keep these instructions for future reference and request of replacement parts Contents Thank you for choosing Bristan, the UK s leading taps
FULL RANGE of products for the protection of boilers and water heating loops SLUDGE FILTERS FDM-1P / FDM-2 / FDM-3
 FULL RANGE of products for the protection of boilers and water heating loops SLUDGE FILTERS FDM-1P / FDM-2 / FDM-3 ACID CONDENSATE NEUTRALISERS NEUTRAL COND / NEUTRAL MINI FDM SLUDGE FILTERS The FDM sludge
Single Lever Pull Out Kitchen Faucet
 INSTALLATION MANUAL Single Lever Pull Out Kitchen Faucet KPF-02 www.kraususa.com I toll free:.00..003 I 203-20 Kraus USA Inc. Congratulations on your new Kraus purchase! We would like to take this opportunity
ERGOMAX 7 INSTALLATION
 ERGOMAX 7 INSTALLATION INSTALLATION MUST CONFORM TO LOCAL CODES 1. WITH HYDRONIC BOILERS All ERGOMAX 7 units must be installed vertically. Adjustable feet for levelling are provided. PRESSURE RELIEF VALVE:
Pedestal Range. Installation and user manual. Kiosk. Trafalgar. Tube. Issue 001 September 2017 ENGLISH UK IRL SmithsEP.co.uk
 Pedestal Range Installation and user manual Kiosk Trafalgar Tube Issue 001 September 2017 ENGLISH UK IRL SmithsEP.co.uk Contents Introduction 2 Declaration of conformity 3 Symbols used in this guide 3
BARRINGTON PRESSURE LITE VITREOUS CHINA SIPHON JET TOILET K-4327
 BARRINGTON PRESSURE LITE VITREOUS CHINA SIPHON JET TOILET K-4327 BEFORE YOU BEGIN INSTALLER HAZARD NOTIFICATION WARNING: Risk of injury or water damage. Contents of vessel under pressure can cause severe
INSTALLATION MANUAL. Ecoline Geo RI HP PLEASE LEAVE THIS MANUAL WITH THE OSO UNIT AFTER INSTALLATION
 PLEASE LEAVE THIS MANUAL WITH THE OSO UNIT AFTER INSTALLATION Ecoline Geo RI HP INSTALLATION MANUAL The Ecoline GEO is an indirect unvented cylinder designed and approved for use with a heat pump. The
HOT WASHER MODEL NO: KING150
 WARNING: Do not use the hot washer without reading this manual HOT WASHER MODEL NO: KING150 PART NO: 7320175 OPERATION & MAINTENANCE INSTRUCTIONS LS1215 INTRODUCTION Thank you for purchasing this CLARKE
Installation, operating and servicing instructions
 English 57-115 - 144-1 - 259 Installation, operating and servicing instructions ITALIA EN 1 ITALIA English INDEX WARnINGS 3 Who should read these instructions 3 Symbols 3 Recommendations 3 Importants notes
Hodge Clemco Ltd. MJC Mini Cartridge Filters Owners Manual. TSOM 556 Date of issue 13/07/04. Hodge Clemco Ltd
 1 MJC Mini Cartridge Filters Owners Manual TSOM 556 Date of Issue: 13.07.04 Orgreave Drive, Sheffield South Yorkshire. S13 9NR Tel:0114 254 0600 Fax: 0114 2540250 Email:sales@hodgeclemco.co.uk www.hodgeclemco.co.uk
External Module Floor Standing Condensing Oil Boiler Range ADDENDUM ATTENTION INSTALLERS - UPDATED INFORMATION!
 Grant Vortex Pro External Module Floor Standing Condensing Oil Boiler Range ADDENDUM ATTENTION INSTALLERS - UPDATED INFORMATION! LOW Nox yellow flame (riello rdb 2.2 bx) burner fitted The Grant Vortex
ULTRASONIC HUMIDIFIER
 To Buy: Visit www.sylvane.com or call (800) 934-9194 For Product Support: Contact Sunpentown at 1-800-330-0388 ULTRASONIC HUMIDIFIER [ADORABLE MONKEY] To prolong the life of this humidifier, using distilled
METRO BASIN MONO MIXER CHR
 METRO BASIN MONO MIXER CHR 20004010020 This product should only be fitted by a qualified plumber to NVQ (National Vocational Qualification) or SNVQ (Scottish National Vocational Qualification) Level 3.
Avensys Avensys FIN EST SLO RUS UAE
 34 037 Avensys Avensys GB D...1...5 I...5 N...9 GR...13 TR...17 BG...21 RO...25 GB...2 NL...6 FIN...10 CZ...14 SK...18 EST...22 CN...26 F...3 S...7 PL...11 H...15 SLO...19 LV...23 RUS...27 E...4 DK...8
Installation & Operating Instructions
 PREMIUM Installation & Operating Instructions AQP-20SIL Signature Filtered Water Cooler Premium Selection Congratulations on your purchase of a Aquaport Signature Filtered Water Cooler This unit is easy
Parasitic Cysts - Cryptosporidium and Giardia, Chemicals, Heavy Metals, Dissolved Salts, Offensive Tastes and Odours, Sediment, Dirt,
 Aqua-Pure is a market leader in water filtration. In addition to our comprehensive range of Domestic Water Purifiers, we design and manufacture an extensive commercial and industrial range of purification
Installation and Operating Instructions for Microlene Underbench System
 Installation and Operating Instructions for Microlene Underbench System WARNING : Microlene underbench system installation must be in compliance with all local legislative requirements, and installed by
Intatherm Safe Touch Basin Tap IT1008CP
 Intatherm Safe Touch Basin Tap IT1008CP Installation and Maintenance Instructions In this procedure document we have endeavoured to make the information as accurate as possible. We cannot accept any responsibility
ASSEMBLY & OPERATING INSTRUCTIONS
 SD-BASIC SPRAY DRYER ASSEMBLY & OPERATING INSTRUCTIONS 1) Introduction 2) Safety / COSHH 3) General Safety Rules 4) Components Included 5) Packing List 6) Connection to Electrical Supply 7) Assembly and
PLEASE LEAVE THIS MANUAL WITH THE OSO UNIT AFTER INSTALLATION INSTALLATION MANUAL
 PLEASE LEAVE THIS MANUAL WITH THE OSO UNIT AFTER INSTALLATION 0 RD 0 RI 0000-06 IM/ IM/a INSTALLATION MANUAL This manual gives detailed advice for installation and should be read carefully prior to fitting
ONE PIECE TOILET LT3. Model: MPN: B0940 INSTALLATION INSTRUCTIONS. Version: 1.0
 Model: MPN: B0940 INSTALLATION INSTRUCTIONS Version: 1.0 READ ALL INSTRUCTIONS BEFORE UNPACKING THE PRODUCT INSTRUCTIONS THAT, IF IGNORED COULD RESULT IN DEATH OR SERIOUS INJURY CAUSED BY INCORRECT HANDLING
Technical Specifications: Your product has a high quality finish and should be treated with care to preserve the visible surfaces.
 3 Remove concealing plate KIRI Concealed Mixer Valve ABS Undo nuts (9) on both hot and cold inlets and remove filter washer KIRI VA (6) Installation Instructions & Maintenance Guide 5 Rinse filter washers
EDEN. Installation Instructions. Bath shower manual mixer tap INSTALLERS PLEASE NOTE THESE INSTRUCTIONS ARE TO BE LEFT WITH THE USER
 EDEN Bath shower manual mixer tap Installation Instructions INSTALLERS PLEASE NOTE THESE INSTRUCTIONS ARE TO BE LEFT WITH THE USER 2180389C October 2005 INTRODUCTION This guide contains all the neccessary
Wave. BATH SHOWER MIXER MONOBLOC With Kit Deck Mounted
 Wave BATH SHOWER MIXER MONOBLOC With Kit Deck Mounted WAVE MONO BATH SHOWER MIXER 20004011860 INSTRUCTIONS B For any further information please contact Bathstore on: 0845 873 8843 Or visit our web-site
Camping Toilet USER MANUAL PLEASE READ AND UNDERSTAND THIS MANUAL COMPLETELY BEFORE OPERATING & USING THE CAMPING TOILET
 Camping Toilet USER MANUAL PLEASE READ AND UNDERSTAND THIS MANUAL COMPLETELY BEFORE OPERATING & USING THE CAMPING TOILET Safety Information: Take care when moving and using the Camping Toilet Ensure that
INSTRUCTION MANUAL (English version) Water still
 Water still") INSTRUCTION MANUAL (English version) Water still Model : Brand : W4000 Merit Merit Water Still W4000 & W4000/EURO Cooling water inlet Condenser Constant level control Boiler Thermostat reset buttons To
INSTRUCTION MANUAL (English version) Water still Model : Brand : W4000 Merit Merit Water Still W4000 & W4000/EURO Cooling water inlet Condenser Constant level control Boiler Thermostat reset buttons To
CC Series VACUUM PUMPS
 CC Series VACUUM PUMPS OPERATING MANUAL Thank you for selecting a Javac select product! Please read this operation manual carefully before use. Only suitably qualified personnel should operate this equipment.
Aquila Single Lever Vessel Faucet
 INSTALLATION MANUAL Aquila Single Lever Vessel Faucet FVS-13900 www.kraususa.com I toll free: 1.800.775.0703 I 2014-2015 Kraus USA Inc. Thank you for purchasing Kraus We would like to take this opportunity
INSTALLATION & TECHNICAL MANUAL
 The COMET Range of Boilers the ultimate solution for central heating INSTALLATION & TECHNICAL MANUAL If you require any further assistance: Telephone: 01698 820533 Fax: 01698 825697 E-mail: info@electric-heatingcompany.co.uk
CROWN WATER HEATERS CPU10 - CPU15 CPOS10 - CPOS15
 CROWN WATER HEATERS CPU10 - CPU15 CPOS10 - CPOS15 COMPACT PLUS 10 and 15 Litre Unvented Under and Over Sink Water Heater INSTALLATION AND USER GUIDE 1 DIMENSIONS 10L - 250mm 15L - 310mm 100mm 80mm 410mm
Coda Single Lever Basin Faucet
 INSTALLATION MANUAL Coda Single Lever Basin aucet US-13801 www.kraususa.com I toll free: 1.800.775.0703 I 2014-2015 Kraus USA Inc. Thank you for purchasing Kraus We would like to take this opportunity
User and Installation Instructions. Wall Mounted Water Boiler WMB3F/B and WMB3F/W IS435 ECN3461
 User and Installation Instructions Wall Mounted Water Boiler WMB3F/B and WMB3F/W IS435 ECN3461 Dear Customer Thank you for purchasing this Lincat product. With correct use and careful maintenance as described
TRV & Lockshield Pack Angle Pattern Thermostatic Radiator Valve Vertical or horizontal mounting with (367 CPLS) matching lockshield
 matching lockshield") TRV & Lockshield Pack Angle Pattern Thermostatic Radiator Valve Vertical or horizontal mounting with (367 CPLS) matching lockshield GENERAL INFORMATION Size Pattern No. Pack 1 Qty Code Barcode Angle Pattern
TRV & Lockshield Pack Angle Pattern Thermostatic Radiator Valve Vertical or horizontal mounting with (367 CPLS) matching lockshield GENERAL INFORMATION Size Pattern No. Pack 1 Qty Code Barcode Angle Pattern
Thermostatic Concealed Shower Valve
 Thermostatic Concealed Shower Valve Product may differ from image. Please retain this booklet for future aftercare reference Component Breakdown - Three Handle Valve Component breakdown Two Handle Valve
MINIATURE THERMOSTATIC VALVE
 SS-TH500-1/2 Features: Ability to pre-select water temperature thus conserving water Compensates for water pressure fluctuations preventing scalding Safety button at 100 F prevents accidental scalding
SAN RAPHAEL PRESSURE LITE VITREOUS CHINA SIPHON JET TOILET
 SAN RAPHAEL PRESSURE LITE VITREOUS CHINA SIPHON JET TOILET BEFORE YOU BEGIN HOW TO USE THESE INSTRUCTIONS Please read these instructions carefully to familiarize yourself with the required tools, materials,
Basin Mixer. Installation & Aftercare Instructions. Please retain for future reference.
 Basin Mixer Installation & Aftercare Instructions Please retain for future reference. This guide covers the installation of all basin mixer varients. Please select the installation diagram suited to the
X62 Tap Range. Please keep these instructions for future reference
 X62 Tap Range This instruction booklet covers: X625205CP, X625215CP, X625255CP, X625265CP, X625122CP, X625126CP, X625135CP Please keep these instructions for future reference 02 For latest prices and delivery
The Professional s Choice
 SureFlow compact range: 1000-C & 1000-M Auto-Fill Catering Water Boiler Installation And User Instructions The Professional s Choice CONTENTS CONTENTS & INTRODUCTION 2 SAFETY & ENVIRONMENTAL INFORMATION
AIR OPERATED CLUTCH & BRAKE BLEEDING KIT. MODEL NO: CHT637 Part No: OPERATING & MAINTENANCE INSTRUCTIONS GC01/12
 AIR OPERATED CLUTCH & BRAKE BLEEDING KIT MODEL NO: CHT637 Part No: 1801637 OPERATING & MAINTENANCE INSTRUCTIONS GC01/12 INTRODUCTION Thank you for purchasing this CLARKE Clutch & Brake Bleeding Kit. Before
OPERATION AND INSTRUCTION MANUAL NORCLEAN POWERED EDDY CURRENT VACUUM RECOVERY SYSTEM WITH WATER TRAP OPTION
 OPERATION AND INSTRUCTION MANUAL NORCLEAN POWERED EDDY CURRENT VACUUM RECOVERY SYSTEM WITH WATER TRAP OPTION THIS SYSTEM IS TO BE USED FOR REMOVING CONTAMINATED DEBRIS FROM EDDY CURRENT PROBES DURING STEAM
Varsity Concealed Shower System
 VARSITY CONCEALED SHOWER SYSTEM Installation & aftercare instructions Please retain for future reference Varsity Dual Function Concealed Shower System Product code SVA1615 Varsity Single Function Concealed
Model pictured: ST6001
 ST6001 Issue: 1 Description: ROBINHOOD SUPERTUB SGL DRW Model Number: ST6001 All dimensions in mm Model may vary slightly from images pictured Model pictured: ST6001 1 Overview Contents of packaging: 1
METRO BATH FILLER MOUNTED CHR
 METRO BATH FILLER MOUNTED CHR 20004010050 For any further information please contact Bathstore on: 0845 873 8843 INSTRUCTIONS Or visit our web-site at www.bathstore.com P5-6P8P7-B-BS-E A/4 The manufacturer
DELUXE COLLECTION Executive Filtered Water Cooler AQP-WCM-FBOT4
 DELUXE COLLECTION Executive Filtered Water Cooler AQP-WCM-FBOT4 Congratulations on your purchase of an Aquaport Executive Filtered Water Cooler This unit is easy to install and provides great tasting chilled
Decade Tap Range. Installation Instructions & User Guide. Please keep these instructions for future reference and request of replacement parts
 Decade Tap Range Installation Instructions & User Guide Please keep these instructions for future reference and request of replacement parts Contents Thank you for choosing Bristan, the UK s leading taps
COOLING SYSTEM 1. Section V CONTENTS DATA AND SPECIFICATIONS. Page. Fluid Fan Drive (Silent Flite) 3. Water Pump 4. Radiator 5
 3. Water Pump 4. Radiator 5") Section V COOLING SYSTEM CONTENTS Fluid Fan Drive (Silent Flite) 3 Water Pump 4 Radiator 5 Water Temperature Gauge 6 Thermostat 7 Radiator Pressure Cap 7 Service Diagnosis 7 DATA AND SPECIFICATIONS COOLING
Section V COOLING SYSTEM CONTENTS Fluid Fan Drive (Silent Flite) 3 Water Pump 4 Radiator 5 Water Temperature Gauge 6 Thermostat 7 Radiator Pressure Cap 7 Service Diagnosis 7 DATA AND SPECIFICATIONS COOLING
BLADE BATH SHOWER MIXER DECK MOUNTED CHR WITH KIT INSTALLATION INSTRUCTIONS P BS-E A/2
 BLADE BATH MIXER DECK MOUNTED CHR WITH KIT 20007014600 INSTRUCTIONS P5-65511339-1-BS-E A/2 20007014600 INTRODUCTION DIMENSIONS Please read these instructions carefully and keep in a safe place for future
UB110DNC/L/U/B BASIN MONOBLOC WITH NO POP-UP WASTE BASIN MONOBLOC TALL WITH NO POP-UP WASTE UB112DNC/L/U/B INSTALLATION INSTRUCTIONS
 BASIN MONOBLOC WITH NO POP-UP WASTE BASIN MONOBLOC TALL WITH NO POP-UP WASTE UB110DNC/L/U/B UB112DNC/L/U/B INSTRUCTIONS INTRODUCTION DIMENSIONS Please read these instructions carefully and keep in a safe
Inta City Shower Mixing Valve CT20010CP
 Inta City Shower Mixing Valve CT20010CP Installation and Maintenance Instructions In this procedure document we have endeavoured to make the information as accurate as possible. We cannot accept any responsibility
Contents. Commissioning 6 Operation 6 Routine Preventative Maintenance 6 Fault Finding 7 Spares Parts 8 Technical Support 9
 Contents Product Description 2 Approvals 2 Warranty 2 Warnings 2 Technical Specification 3 Installation 4 Location 4 Plumbing Connection 4 Electrical connection 5 Commissioning 6 Operation 6 Routine Preventative
SHOT BLAST CABINET USER INSTRUCTIONS. Model No: CSB20B. Part No: GC05/13
 SHOT BLAST CABINET Model No: CSB20B Part No: 7640110 USER INSTRUCTIONS GC05/13 INTRODUCTION Thank you for purchasing this CLARKE Shot Blast Cabinet which is designed for professional workshop use. Please
ELECTRIC ASHCAN MODEL NO: ASHVAC1200 OPERATING & MAINTENANCE INSTRUCTIONS PART NO: ORIGINAL INSTRUCTIONS
 ELECTRIC ASHCAN MODEL NO: ASHVAC1200 PART NO: 6471133 OPERATING & MAINTENANCE INSTRUCTIONS ORIGINAL INSTRUCTIONS GC1216 INTRODUCTION Thank you for purchasing this CLARKE product which is designed for fast,
OWNER S GUIDE. Electric and Gas Storage Water Heaters. Safety Information Owner s Information Warranty. Models
 OWNER S GUIDE Electric and Gas Storage Water Heaters Safety Information Owner s Information Warranty Models Electric Storage Water Heaters: 25THMS124P 25THMS136 50THMS124P 50THMS136 80THM136 125THM118
PLEASE LEAVE THIS MANUAL WITH THE OSO UNIT AFTER INSTALLATION INSTALLATION MANUAL
 PLEASE LEAVE THIS MANUAL WITH THE OSO UNIT AFTER INSTALLATION SOLARCYL IM/SC INSTALLATION MANUAL This manual gives detailed advice for installation and should be read carefully prior to fitting any unvented
Installation guide Billi B-3000 Sparkling Dual levered slimline tap option
 Installation guide Billi B-3000 Sparkling Dual levered slimline tap option Installation requirements. IMPORTANT: This Billi appliance is to be installed by a licensed trades person in accordance with AS/NZS
PORTRAIT LITE VITREOUS CHINA REVERSE TRAP TOILET
 PORTRAIT LITE VITREOUS CHINA REVERSE TRAP TOILET BEFORE YOU BEGIN HOW TO USE THESE INSTRUCTIONS Please read these instructions carefully to familiarize yourself with the required tools, materials, and
Owner s Manual. Installation Details Owner s Information Warranty. 25L and 50L Electric Storage Water Heater
 Owner s Manual & Installation guide 25L and 50L Electric Storage Water Heater MODELS 25W124, 25W136, 25W124P, 50W124, 50W136, 50W124P Installation Details Owner s Information Warranty For advice, repairs
INSTALLATION, OPERATION AND MAINTENANCE MANUAL FOR COMMERCIAL INDIRECT POWERED WATER HEATER
 INSTALLATION, OPERATION AND MAINTENANCE MANUAL FOR COMMERCIAL INDIRECT POWERED WATER HEATER ELECTRIC HEATER COMPANY BASE MODEL T Edition 0 HUBBELL ELECTRIC HEATER COMPANY P.O. BOX 88 STRATFORD, CT 0665
Seda 8 Widespread 2-Handle Faucet
 INSTALLATION MANUAL Seda 8 Widespread 2-Handle Faucet FUS-1823 www.kraususa.com I toll free: 1.800.775.0703 I 2014-2015 Kraus USA Inc. I REV. August 6, 2015 Thank you for purchasing Kraus We would like
TREVI BLEND SINGLE LEVER SHOWER VALVES. INSTALLER After installation pass to user for future reference
 11 A4000, A4100 & A4110 TREVI BLEND PARTS LIST Ref. Description 1 Lever handle complete 1a/1b Nut and washer 2 Handle cover cap 3 Shield 4 Cover plate fixing screw 5.1 Cover plate for built in version
Vacmobile 20/2. Instruction manual OPERATION & SERVICE
 This instruction manual provides general instructions for the Vacmobile 20/2 vacuum system. This machine may use either the Becker U4.20 or the PVR EM 20/B vacuum pump. Service information specific to
INSTALLATION INSTRUCTIONS
 Model: MPN: AN5534 INSTALLATION INSTRUCTIONS Version: 1.0 READ ALL INSTRUCTIONS BEFORE UNPACKING THE PRODUCT INSTRUCTIONS THAT, IF IGNORED COULD RESULT IN DEATH OR SERIOUS INJURY CAUSED BY INCORRECT HANDLING