Contents. 1. Introduction... 5
|
|
|
- Aubrey Mills
- 5 years ago
- Views:
Transcription
1
2 2
3 Contents 1. Introduction Technical data Technical information Components and measured values Connection diagram Functional description of components Installation Settings Programme Time display Options Service menu Activation of service menu Programme flow description Troubleshooting Most common faults Fault indication Fault codes Tools Tools Special tools Register
4
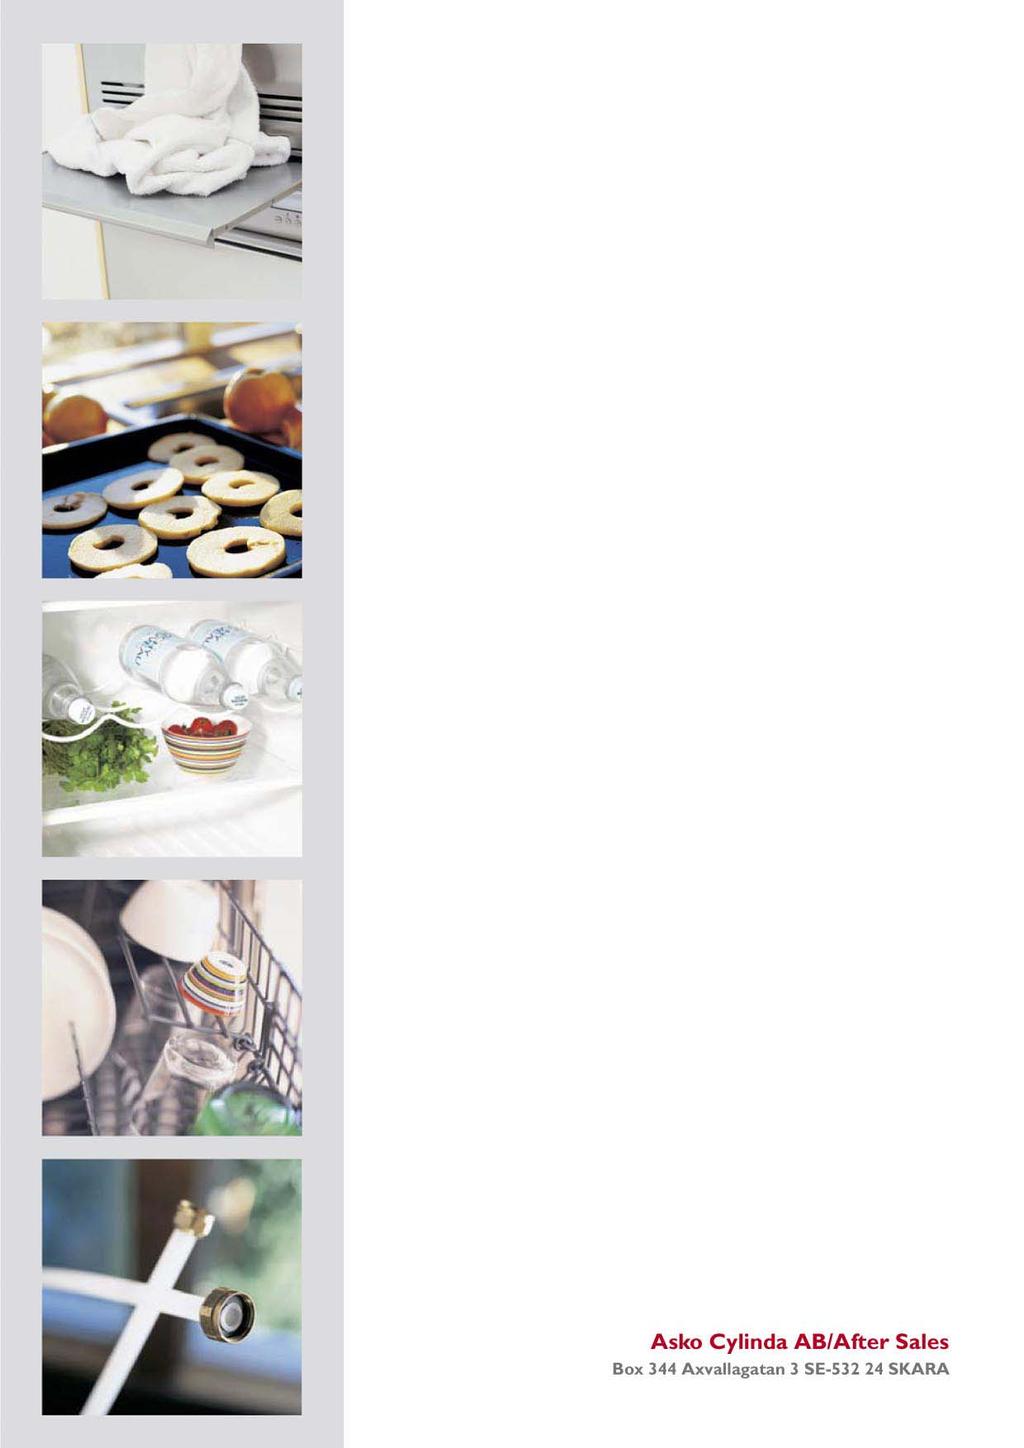
5 INTRODUCTION 1. Introduction In your hand you are holding ASKO s Service Manual for the new generation of dishwashers. The dishwashers in the DW20 range are available in four different basic models with the type designations DW20.1, DW20.2, DW20.3 and DW20.4. Presented on the following page are the different panels available for each type, which lets you readily identify the machine type. The different variants have different designations from market to market. The type designation is most important when you need to identify a particular type of machine. You can find this on the machine rating plate positioned on the right-hand side of the inner part of the door. Type designation Item number Year Week Serial number It must be easy to carry out servicing on dishwashers. It is important for you, as a service technician, to benefit from the conditions necessary to enable you to work in an effective and satisfactory fashion. We hope that this Service Manual will be a useful tool in your daily work. Asko Cylinda AB/After Sales Box 344 SE Skara Sweden 5

6 INTRODUCTION DW20.1 DW20.1 is available in three variants, either with none, one or with two options. All have four set programmes and operating controls on the front of the panel. DW20.2 DW20.2 is a control unit with a large display on the front of the panel. It has six set programmes and none or three or five options. DW20.3 The buttons are on the top side of the control unit in the DW20.3. The unit has six set programmes and is available in two models - with three or five options. DW20.4 DW20.4 is a control unit with ten set programmes, a number of different options and with a single display (LCD) on the top side of the panel. The DW20.3 and DW20.4 control units are used both for fully integrated and standard models. The other control units are used only on standard models. 6
7 TECHNICAL DATA 2. Technical data 2.1 Technical information Height: mm ( mm) Width: 596 mm Depth: 570 mm Weight: 42 kg/45 kg with water softener Capacity*: 12 place settings Water pressure: MPa ( kp/cm 2 ) Connection: 1-phase, 230 V, 50 Hz 10 A** Max connection power: W** *According to standard EN **See rating plate 7
8 TECHNICAL DATA 2.2 Components and measured values Indicated resistance values apply at room temperature (ca. 20 C/68 F) Values within ±10% are regarded as normal Item No. Component Measured value Position Radio interference suppression filter 680 kohm ,81 Radio interference suppression filter 1 Mohm Heating element 1800 W 230 V 30 ohm Heating element 1200 W 120 V 12 ohm Thermistor 25 kohm ,02 Combined dispenser 230 V 1.3 kohm ,04 Combined dispenser 120 V 0.3 kohm Circulation pump V 50 HZ 90 ohm Circulation pump V 60 HZ 56 ohm Circulation pump 120 V 60 HZ 22 ohm Drain pump V 50 HZ, 16 l/m 150 ohm Drain pump V 60 HZ, 16 l/m 85 ohm Drain pump 120V 60 HZ, 16 l/m 25 ohm Spray arm divider V 50/60 HZ 8,5 kohm Spray arm divider 120 V 60 HZ 2.6 kohm Inlet valve single incl. flow sensor V, 4 l/m 3.8 kohm coil Inlet valve single incl. flow sensor 120 V, 4 l/m 0.95 kohm Inlet valve safety incl. flow sensor V, 4 l/m 2 kohm Inlet valve safety incl. flow sensor 120 V, 4 l/m 0.5 kohm Inlet valve water soft incl. flow sensor V, 4 l/m 3.8 kohm Inlet valve water softener incl. flow sensor 120 V, 4 l/m 0.95 kohm Halogen lamp 5 W/12 V <10 kohm Wax motor 1.1 kohm Fan motor 230 V 0.75 kohm Fan motor 120 V 0.18 kohm 8
9 TECHNICAL DATA Item No. Component Item No , Control unit Compl., DW20.1 EU, Asia, etc. replaces by , Control unit Compl., DW20.1 AU , Control unit Compl., DW20.1 USA Control unit Compl., DW20.2 EU Control unit Compl., DW20.2 AU Control unit Compl., DW20.2 USA Control unit Compl., DW20.3 EU Control unit Compl., DW20.3 AU Control unit Compl., DW20.3 USA Control unit Compl., DW20.4 EU Control unit Compl., DW20.4 AU Control unit Compl., DW20.4 USA
10 TECHNICAL DATA 2.3 Connection diagram F E D C B A EL EL 10 TB AP: DRAIN PUMP TB 9 BB: ILLUM. SWITCH NET FG BE: HALOGEN LAMP CP: CIRCULATION PUMP FG DIV: WATER DIVERTER VALVE EL: HEATING ELEMENT F: FILTER AP VMG LB KD FL VAX CP IV SV SG DIV BE GS TS FM NTC FG: HUMIDITY SENSOR FL: FAN FM: FLOW METER GS: TURBIDITY SENSOR IV: INLET VALVE KD: COMBI DISPENSER LB: DOOR SWITCH LU: DOOR NTC: THERMISTOR CP SG: SALT SENSOR NTC SV: SALT VALVE TB: MAIN SWITCH TS: PRESSURE SENSOR VAX: VAX ACTUATOR VAX VMG: RINSE AID SENSOR NET: INTERFACE TO HOME NET COMMUNICATION UNIT FL DIV M ÖB: FLOAT SWITCH FM WIRES IN ALL MACHINES INTERNAL CONNECTION WIRES IN SOME MACHINES LU LB KD SV SG TS GS EL AP 2 VMG BB CP 1/C BE IV F N L Pos. Qty Part No. Name of item Material Material Dens.Kg /dm3 Dimensions, Type, et c. Scale Designed by Released by Rev ind Revision Appd Year Week Gen.tole rance Desc ription(eng) 1:1 CIRCUIT DIAGRAM DW20.1,.2,.3,.4,.C Gen.tol.A ngle Desc ription(se ) ML KOPPLINGSSCHEMA DW20.1,.2,.3,.4,.C Iss by Dept Year We ek Re v Ind Replace UD ASKOCYLINDA FORMAT A3 Project F E D C B A This document must not be copied without our written pemission, and the contents thereof must not be imparted to a third party nor be used for any unauthorized purpose. Contravention will be prosecuted. Asko Cylinda AB S:\U\Dw20\1_Tryckunderlag\Kopplingsschema\ Circuit diagram DW20.4_c.dft, mall, :34:08 1/C 3/4 2 1/C 3/4 ÖB 10
11 TECHNICAL DATA 2.4 Functional description of components A description of the function and specification of the different electrical components is given here. Certain components are only included in highly specified machines or on individual markets. Inlet valve/flow valve Available in single, safety and water softener valve models. A filter which traps particles is located in the valve. Situated after this is a flow restrictor, which maximizes the flow to 4 l/min. The valve opens at water pressures exceeding 0.3 bar and gives full flow at ca. 1 bar. The flow meter is situated on the valve outlet, where it is secured with a clip. Flow sensor The flow sensor is used to regulate the water intake so that the correct water volume is admitted regardless of the water pressure. There is also the possibility of switching the machine over to time-controlled water intake. The flow sensor consists of a rotor containing a magnet and a counterweight, which are caused to rotate by water flowing through. Situated externally on the flow sensor housing is a sensor, a so-called reed switch, of which the contact is closed every time the magnet passes. The number of pulses from the sensor is proportional to the volume of water flowing through. Output signal: 199 pulses/litre Safety valve The safety valve consists of two mutually independent valve seats, which are operated by two draw magnets. The valve seats are connected in series. This provides double reliability. The draw magnets are also electrically connected in series, which means that the magnet s rated voltage is half the mains voltage (e.g. 230V valve = 2 x 115V coils) Single valve The single valve consists of a draw magnet and a valve seat. Water softener valve The water softener valve consists of two parallelconnected valve seats, each with a draw magnet. One part is used for regeneration of the water softener (salt intake). An additional flow restrictor, which maximizes the flow to 0.5 l/minute, is located in the outlet from the water softener valve. The other part is used for the regular water intake, with the flow sensor connected after it. Circulation pump The circulation pump consists of an asynchronous motor, a pump part and a capacitor. Spray arm divider Certain machines are equipped with a spray arm divider. The spray arm divider consists of a synchronous motor that via a set of gears rotate a valve-disc. A damper distributes the water from the circulation pump to the upper and lower spray arms in a different quantity and at a different pressure. The motor/gearbox also causes a cam with four different step times to rotate. A contact detects the cam (step time) and provides the control unit with feedback about the current position when setting the desired spray arm status. Note that the spray arms never rotate simultaneously. The following spray arm statuses are encountered: Upper spray arm half or full pressure Lower spray arm half or full pressure Depending on the programme, items being washed and options, the spray arms will be regulated with a varying interval and spray pressure. Machines with no spray arm divider have a water distributor instead. This directs the water to both spray arms. The spray arms always rotate simultaneously. 11
12 TECHNICAL DATA Heating element The heating element is of the through-flow type and is situated between the sump and the suction sleeve of the circulation pump. It consists of a pipe with a heating coil. On one side of the heating element coil is an overheating safety device with a breaking temperature of 97 C and with automatic resetting. On the other side is a fusible cut-out rated at 206 C. Drain pump The drain pump consists of a synchronous motor with an output of ca. 30 W and a pump part. The direction of rotation is random, which makes it partially self-cleaning. Fan The fan evacuates the moist air from the machine during the programme s drying phase. The fan system consists of a fan motor which drives a double-sided impeller. Dry air is sucked in from the opening on one side of the impeller. Humid air flows in on the other side of the impeller, when a wax motor opens a valve. This takes place with a certain delay. Dry and moist air are mixed in a channel leading to the under part of the opening, where it is discharged. Detergent and surfactant dispenser The detergent and surfactant dispenser is equipped with a draw magnet which, on first actuation, dispenses detergent and, on second actuation, dispenses surfactant. The system is reset when the dishwasher door is opened. Inside the dispenser is an adjustable volume chamber for setting the desired quantity of surfactant. The surfactant level can be checked in an optical sight gauge located on the upper side of the dispenser. Certain models have a sensor for sensing the surfactant level, a so-called reed switch, mounted on the dispenser. This is indicated on the panel. Main switch The main switch is a 2-pole unit and switches off phase and neutral. The filter, overflow cut-out, drain pump and inlet valve are not disconnected, however, when the main switch shuts off the power supply. Radio interference suppressor The radio interference suppressor ensures that the machine does not interfere with its environment and protects the machine from external incoming interference. Door switch A microswitch senses when the door has been opened. There is a pause in the programme, and the power supply to certain components (motor, valves, etc.) is shut off. The programme continues from the point at which it was interrupted when the door is closed. Overflow cut-out The overflow cut-out consists of a float which actuates a microswitch. This closes the inlet valve electrically and starts the drain pump. The cut-out function operates regardless of whether the main switch is on or off. Lighting The lighting consists of a 5 W/12 V halogen lamp, which is powered from the control unit via a microswitch. It lights the lamp when the door has been opened to an angle of more than 5 degrees. The lamp is dimmed when it is lit in order to reduce the starting current and to extend the service life of the lamp. There are protective components on the control unit which limit the power supply to the lamp in the event of a shortcircuit, or if a replacement lamp of excessively high power is fitted. The lamp can be replaced from inside the washing compartment. 12
13 TECHNICAL DATA Wiring The machine is provided with coded contacts to prevent faulty connection. The wiring conforms to the standard for Rast 2.5 and 5. Water softener The ion exchanger mass is regenerated by opening the salt valve and admitting salt-saturated water into the ion exchanger during the main wash. The ion exchanger is flushed through at the end of the main wash. The quantity of salt, the interval (number of programmes) between the regenerations and the pre-wash volume are determined by the set water hardness and the programmes that are used. The higher the set water hardness and programme length, the greater the quantity of salt, the more frequent the regeneration and the higher the pre-wash volume. Certain models have a sensor, a so-called reed switch, which senses when the salt has run out. Other models have an optical indicator in the salt filler cover. Airbreak Located on the side of the machine is an antisiphonage device which prevents dirty water from being sucked back into the water mains, for example in the event of a vacuum in the water mains. Thermistor The thermistor is situated on the inner door and checks the water temperature so that the set temperature is reached. If the thermistor is shortcircuited or if it becomes detached from the circuit board, the element is switched off. Pressure sensor The pressure sensor is connected to the pressure chamber in the sump. It measures the pressure corresponding to the water level in the machine. In the event of an excessively high water level in the machine (continuously under 5 sec), the drain pump starts and other components are switched off. When right level is reached the programme will continue. Is the level not reached within one minute the programme stops and will show a faulty indication. Turbidity sensor Machines with an automatic programme (Auto wash,) have a turbidity sensor which senses the turbidity of the water. The sensor consists of an LED and a phototransistor. The wash process water is present between these. The smaller the quantity of light reaching the phototransistor, the more turbid the water. The sensor is calibrated in the automatic programme s final rinse. At different times during the automatic programme, the turbidity sensor s output signal provides the basis for how the wash programme will proceed (with/ without prewash, temperature, cycle time, number of rinses, etc.). In the event of a fault in the turbidity sensor, the machine assumes high turbidity, which gives a long cycle time with prewash and with extra rinses, etc. The turbidity sensor is situated on the front edge of the sump. Humidity sensor The humidity sensor is situated in the fan housing. It is of the capacitive type and measures the relative humidity. The humidity sensor measures the ambient humidity before the start of the drying process. The drying process then continues until the humidity sensor senses a level immediately above the ambient humidity. (Min. time 30 minutes, max. time 70 minutes). 13
14 INSTALLA ALLATION 3. Installation Recommended position for the dishwasher The dishwasher can be installed as a built-in, fully freestanding or half freestanding machine. Built-in installation WARNING! Connection to electricity, water and drains must be carried out by a person with competence within the respective area. A. Built-in The dishwasher can be built in under a worktop with a working height of mm. ( mm) = tall tank. The width dimension must be at least 600 mm (see Figure 1) ( ) Figure 1. Freestanding installation ( ) B. Freestanding A freestanding machine must be provided with tilt prevention means. This consists of two metal brackets, which are screwed in place according to the illustration (see Figure 2). An alternative to this type of tilt prevention is a counterweight installed directly on the rear of the machine. Slide in the machine so that the metal brackets engage with the rear feet. The machine now cannot tilt if a load is placed on the open door. If the machine is installed as a fully freestanding machine, both side panels and the worktop should be installed. These accessories can be purchased where you purchased the dishwasher. Figure WARNING! A fully stand-alone machine must be provided with tilt prevention/counterweight. C. Half freestanding If you position the machine so that one of the sides is visible, you can install one side panel. 14
15 INSTALLA ALLATION Connection to water There must always be a stopcock in the supply line. The stopcock must be positioned above the sink or on the front edge of the sink unit. The inlet pipe has a union with a 1/2 or 3/4 internal thread, depending on the country. When installation is complete, open the stopcock, leave the system under pressure for a time and check that all connections are tight. Connection to electricity A machine equipped with a flexible cord and a plug must be connected to an earthed electrical socket. Technical data See rating plate on the right-hand side of the door. WARNING! The flexible cord must be disconnected or the electrical socket must be dead when working on the machine! Connection to drainage When the drain hose is routed to a connection nipple at the sink s water trap (see illustration ), note that the hose must be fastened level with the underside of the sink unit otherwise the dishwater from the sink can run down into the dishwasher. The drain hose is threaded onto a cone-shaped connecting pipe at the sink unit s water trap. The cone-shaped pipe must be cut to an internal diameter of at least 16 mm. For other alternative connections, see illustrations 2 and 3. The drain hose may be lengthened by a maximum of 3 m (the total length of the drain hose may not exceed 4.5 m). Any connections and connecting pipes must have an internal diameter of at least 16 mm. However, the drain hose should ideally be replaced with a new hose without joins. No part of the drain hose may be more than 950 mm above the bottom of the machine. The hose must not be routed directly to the floor drain or similar. In such cases, the hose can act as a siphon and empty the dishwasher. The hose must always discharge at least 350 mm above the bottom of the machine. Holder hose Max 950 mm, (37 ) Min 350 mm, (14 ) Min 16 mm, (0.6 ) 15
16 INSTALLA ALLATION Adjustment of machine with six feet (stand-alone dishwasher) 1. Adjust the height of the machine with the four steel feet. (see Figure 4) NOTE! The machine must not be inclined by more than 5 mm. 2. Lock the feet with the nuts. 3. After adjusting the steel feet, screw the two rubber feet firmly to the floor. The rubber feet now act as a tilt prevention means. (see Figure 5) Figure 4. Stålfötter Steel feet Adjustment of machine with three or four feet 1. Begin by measuring the height from the floor to the lower edge of the worktop. 2. Fit the sliding feet to the machine (see Figure 6). 3. Measure the height from the floor to the top edge of the machine. 4. Adjust all the feet by screwing them clockwise to raise or anticlockwise to lower. 5. Check that the height of the machine corresponds to the height from the floor to the under side of the worktop. Tighten the locking nuts on the rear feet. 6. Slide the machine into place. 7. Adjust the front feet accurately (the machine must not be inclined by more than 5 mm) and tighten the locking nuts. Figure 5. Adjustment of machine with adjustable foot 1. Begin by measuring the height from the floor to the lower edge of the worktop. 2. Fit the sliding feet to the machine (see Figure 6). 3. Measure the height from the floor to the top edge of the machine. 4. Incline the machine forwards slightly and adjust the rear foot roughly by screwing the adjuster screw on the front clockwise to raise or anticlockwise to lower (see Figure 7). Use a broad-bladed screwdriver or a screwdriver with a hexagonal grip. 5. Adjust the front feet by rotating them clockwise to raise or anticlockwise to lower. 6. Check that the height of the machine corresponds to the height from the floor to the under side of the worktop. Figure 6. Figure 7. 16
17 INSTALLA ALLATION 7. Slide the machine into place. 8. Adjust the feet accurately (the machine must not be inclined by more than five mm) and tighten the locking nuts on the front feet. To prevent kinking, pull on the drain hose and connection pipe (see Figure 8). Adjustment of plinth (only for models with a kickplate as an accessory) The machine has two kick-plates. Use the higher plate if the machine will be mm high and the plinth depth can be varied between mm. Use the lower plate if the machine will be mm high.. Secure the insulating mat supplied to the kick-plate. Figure 8. Adjustment of right plinth depth 1. Move the grey hooks towards one another and pull out the holders as far as required. Push in the hooks so that they lock the holders securely (see Figure 9). 2. Hang the kick-plate on the holders by introducing it into the grooves. 1 2 Figure 9. Fitting fixed kick-plate The machine is delivered with: 1. A height adjustable kick-plate. 2. Two screws. (see Figure 10) Figure 10. Screw the machine in place If the machine is screwed on the sides, cover the screw holes with the plastic plugs supplied. Check after securing that the front feet are in contact with the floor (see Figure 11). Figure
18 INSTALLA ALLATION Settings 4.1 Programme Certain programmes are not included in all machines. Intensive wash Prewash (40 C), prewash (cold), main wash (basic temperature 60 C), pre-rinse, two rinses, final rinse (hot-temp. depending on drying selection, with/without fan, etc.), drying. Heavy wash Basic temperature 55 C in main wash, otherwise according to Intensive wash. Normal wash Main wash (incl. pre-soak, basic temperature 55 C), pre-rinse, rinse, final rinse (hot), drying. In certain markets a cold prewash is added. Auto wash The washing process is adapted automatically according to the actual load, i.e. with/without prewash, temperature and cycle time in main wash, number of rinses, etc. In machines with a humidity sensor, the drying process is also controlled to give an optimal result. Mixed wash Main wash (incl. pre-soak, basic temperature 55 C), pre-rinse, rinse, final rinse (hot), drying. Programme adapted for lightly soiled/fragile items to be washed in the upper basket and heavily soiled/coarse items to be washed in the lower basket. The spray arm divider directs a larger proportion of the water through the lower spray arm, with a high spray pressure in the lower spray arm, and a low pressure in the upper spray arm. Upper basket wash Main wash (including pre-soak, basic temperature 55 C), rinse (cold), final rinse (hot), drying. Items to be washed are placed only in the upper basket. Most of the process water is directed by the spray arm divider to the upper spray arm. Lower basket wash Main wash (incl. pre-soak, basic temperature 55 C), rinse (cold), final rinse (hot), drying. Items to be washed are placed only in the lower basket. Most of the process water is directed by the spray arm divider to the lower spray arm. Delicate wash Main wash (incl. pre-soak, basic temperature 50 C), rinse (cold), final rinse (hot), drying. The process water is directed by the spray arm divider with a high proportion of low spray pressure. Quick wash Main wash (basic temperature 30 C), rinse (cold), final rinse (cold for without drying). Rinse & Dry One final rinse (50 C), drying. Rinse & Hold One rinse (cold). 4.2 Time display DW20.2, DW20.4: For programme selection, the display shows the time taken by the programme on the previous occasion. After starting the programme, the time is counted down in stages of one minute (no conversion while the programme is running). A new time is not stored if a fault has occurred while the programme is running. DW20.2, DW20.3: The start lamp flash if the door is opened during the programme or is open when the programme is started. DW20.2, DW20.4: For programme selection, the display shows the time taken by the programme on the previous occasion. After starting the programme, the time is counted down in stages of one minute (no conversion while the programme is running). A new time is not stored if a fault has occurred while the programme is running. DW20.1: The start lamp flash if the door is opened during the programme or is open when the programme is started.
19 SETTINGS 4.3 Options The machine stores the selected settings when the start button is pressed, and these continue to apply until new settings are made. A delayed start and the upper/lower/mixed basket function are not stored. 19
20 SETTINGS DW20.1 Variant A Variant B Variant A L1 L2 L3 PROGRAM S1 L4 L12 L11 START STOP S2 L7 L1 L6 L2 PROGRAM S1 S4 L3 L5 L4 L11 L12 L10 START STOP S2 L7 L9 L8 L1 L6 L2 L3 PROGRAM S1 S3 S4 L5 L4 L11 L12 L10 START STOP S2 L7 L9 L8 Panel type DW20.1, L = LED, S =Push-button Temperature selection S3 L6 lights when High temperature is selected Drying selection S4 Long and Normal drying (Quick wash: Long and No drying). (L5 lights when long/extra drying is selected) Variant setting If the control unit is replaced, the machine will automatically be in the variant setting menu when the power supply is switched on for the first time. L1 flash: Variant A see above, with no and two options (temp, drying). L4 flash: Variant B see above, with one option (temp). 1. Press the programme button (S1) repeatedly until L1 or L4 is flashing. 2. Confirm your choice by pressing Start (S2). (The programme then reverts automatically the main menu.) If you wish to access the variant setting menu again: 1. Turn off the main switch (1/0) 2. Wait for at least five seconds 3. Keep the Programme and Start button depressed (S1&S2) 4. Turn on the main switch (1/0) 5. Release the Programme and Start button (S1&S2). Proceed with point 6 within 5 sec! 6. Press Start (S2) three times in a rapid succession. Select variant with programme button (S1). 7. Confirm with Start (S2) The programme then reverts automatically to main menu. 20 Water hardness setting Activation of setting menu 1. Turn off the main switch (1/0) 2. Wait for at least five seconds 3. Keep the Start button (S2) depressed 4. Turn on the main switch (1/0) 5. Release the Start button (S2) L7 starts to flash 6. Select desired water hardness with the Programme button (S1) Setting: Water hardness [ dh] (German degrees of hardness) All LEDs are 0-5 (incl. machines extinguished without water softener) L1 lit 6-8 L1-2 lit 9-14 L1-3 lit L L1-5 +L11 lit L1-6 +L-11 +L-12 lit Confirm your choice by pressing Start (S2). The programme returns to the main menu. Total reset To reset the machine to its basic settings. 1. Turn off the main switch (1/0) 2. Keep the Programme button (S1) depressed 3. Turn on the main switch (1/0) 4. Release the Programme button (S1). The machine now resets various settings, but not the water hardness and water intake setting. The machine then reverts automatically to the main menu.
21 SETTINGS DW20.2 S1 L1 L2 L3 L4 L5 L6 S3 S4 S5 S6 S7 Panel type DW20.2, L = LED, S =Push-button, S3a Washing in both baskets Both-basket washing (basic setting). The machine s upper and lower baskets are loaded with items to be washed. b Washing in the upper basket Most of the process water is directed by the spray arm divider to the upper spray arm. c Washing in the lower basket Most of the process water is directed by the spray arm divider to the lower spray arm. S4 Temperature S4 lights when High temperature is selected S5 Delayed start Programme start delayed by 1-12 hours S6 Drying selection Long and Normal drying (Quick wash: Long and No drying). LED lights when long drying is selected S2 Variant setting If the control unit is replaced, the machine will automatically be in the variant setting menu when the power supply is switched on for the first time. Fill the machine with appr. 1 litre of water! 1. Press the Programme button (S1), repeatedly until the desired variant is selected: Display shows 1: Variant Express (S7) also valid for 3 buttons. Display shows 2: Variant with Super rinse option (S7) 2. Confirm your choice by pressing Start (S2). The machine senses the presence of the turbidity and pressure sensors and the spray arm divider. The programme then reverts to the main menu. If you wish access to the variant setting again: 1. Turn off the main switch (1/0) 2. Wait for at least 5 seconds 3. Keep the Programme/Start buttons (S1&S2) depressed 4. Turn on the main switch (1/0) 5. Release the Programme/Start buttons (S1&S2) at once! Proceed with point 6 within 5 sec! 6. Press Start (S2) three times in a rapid succession. Indication 1 or 2 flashes in the display. 7. Select variant with S1 8. Confirm with S2 The programme then reverts automatically to main menu. S7 Express Variant 1 (certain markets) Reduces the main wash temperature by 10 C, lowers the rinse temperature and shortens the drying time. S7 Super rinsing Variant 2 (certain markets) Adds two rinses. 21
22 SETTINGS Water hardness setting Activation of setting menu: 1. Turn off the main switch (1/0) 2. Wait for at least 5 seconds 3. Keep the Start button (S2) depressed 4. Turn on the main switch (1/0) 5. Release the Start button (S2) 6. Select desired water hardness with the Programme button (S1) Setting: Display shows: 0 Display shows: Display shows: Display shows: Display shows: Display shows: Display shows: Display shows: Display shows: Display shows: Water hardness [ dh] 0-5 (incl. machines without water softener) 7. Confirm your choice by pressing Start (S2). The programme returns to the main menu. Super rinse (only machines with Express; S7) Adds two rinses at all programs, except Auto, Quick and Rinse & Hold Activation of setting menu: 1. Turn off the main switch (1/0) 2. Wait for at least 5 seconds 3. Keep the Express button depressed (S7) 4. Turn on the main switch (1/0) 4. Release the Express button (S7) 5. Select desired status with the Programme button (S1) Display shows 0: Super rinse deactivated Display shows 1: Super rinse activated 6. Confirm your choice by pressing Start (S2). The programme returns to the main menu. Child lock Activation/deactivation of setting menu: 1. Turn off the main switch (1/0) 2. Wait for at least 5 seconds 3. Keep the Temperature and Drying selection buttons depressed (S4 & S6) 4. Turn on the main switch (1/0) 5. Release the Temperature and Drying selection buttons (S4 & S6) 6. Select status with the Programme button (S1) Display shows 0, key extinguished: Child lock deactivated Display shows 1, key lit: Child lock activated 7. Confirm your choice by pressing Start (S2). The programme returns to the main menu. To unlock the child lock temporarily, the Temperature (S4) and Drying selection (S6) buttons must be pressed in simultaneously. The machine can now be operated normally for three minutes. Total reset To reset the machine to its basic settings. Fill the machine with appr. 1 litre of water! 1. Turn off the main switch (1/0) 2. Wait for at least 5 seconds 3. Keep the Programme button depressed (S1) 4. Turn on the main switch (1/0) 5. Release the Programme button (S1). The machine now resets various settings, although not the water hardness and intake volume, and senses the presence of the turbidity and pressure sensors and the spray arm divider. The machine then reverts automatically to the main menu. 22
23 SETTINGS DW20.3 S1 L1 L2 L3 L4 L5 L6 S3 S4 S5 S6 S7 S2 Panel type DW20.3, L = LED, S = Push-button S3a Washing in both baskets Both-basket washing (basic setting). The machine s upper and lower baskets are loaded with items to be washed. b Washing in the upper basket Most of the process water is directed by the spray arm divider to the upper spray arm. c Washing in the lower basket Most of the process water is directed by the spray arm divider to the lower spray arm. S4 Temperature selection LED lights when high temperature is selected. S5 Delayed start Programme start delayed by five hours. S6 Drying selection (LED lights when long drying is selected) Long and Normal drying (Quick wash: Long and no drying). S7 Express Variant 1 (certain markets) Reduces main wash and rinse temperature by 10 C, and shortens the drying time eight minutes. For certain markets the Express function is basically activated in Normal wash. Super rinsing Variant 2 (certain markets) Adds two rinses. Variant setting If the control unit is replaced, the machine will automatically be in the variant setting menu when the power supply is switched on for the first time. Fill the machine with appr. 1 litre of water! 1. Press the Programme button (S1, repeatedly until the desired variant is selected): L1 lit: Variant Express option (S7) Also valid for 3 buttons design. L2 lit: Variant Super rinse option (S7) 2. Confirm your choice by pressing Start (S2). The machine senses the presence of the turbidity and pressure sensors and the spray arm divider. The programme returns to the main menu. If you wish to access the variant settings menu again: Fill the machine with appr. 1 litre of water! 1. Turn off the main switch (1/0) 2. Wait for at least 5 seconds 3. Keep the Programme/Start buttons (S1&S2) depressed 4. Turn on the main switch (1/0) 5. Release the Programme/Start buttons (S1&S2) at once! Proceed with point 6 within 5 sec! 6. Press Start (S2) three times in a rapid succession. L1 or L2 is flashing 7. Select variant with S1 8. Confirm with S2 The programme then reverts automatically to main menu. Water hardness setting Activation of setting menu: 23
24 SETTINGS 1. Turn off the main switch (1/0) 2. Wait for at least 5 seconds 3. Keep the Start button depressed (S2) 4. Turn on the main switch (1/0) 5. Release the Start button (S2) 6. Select the desired water hardness with the Programme button (S1) Setting: Water hardness[ dh] All LEDs 0-5 (incl. machines extinguished without a water softener) L1 lit 6-8 L1-2 lit 9-14 L1-3 lit L1-4 lit L1-5 lit L1-6 lit Confirm your choice by pressing Start (S2). The programme returns to the main menu. Super rinse (only machines with Express; S7) Activation of setting menu: 1. Turn off the main switch (1/0) 2. Wait for at least 5 seconds 3. Keep the Express button depressed (S7) 4. Turn on the main switch (1/0) 5. Release the Express button (S7) 6. Select the desired status with the Programme button (S1) L1 extinguished: Super rinse deactivated L1 lit: Super rinse activated 7. Confirm your choice by pressing Start (S2). The programme returns to the main menu. Child lock Activation of setting menu: 1. Turn off the main switch (1/0) 2. Wait for at least 5 seconds 3. Keep the Temperature and Drying selection buttons depressed (S4 & S6) 4. Turn on the main switch (1/0) 5. Release the Temperature and Drying selection buttons (S4 & S6) 6. Select the status with the Programme button (S1) L1 extinguished, Child lock deactivated L1 lit, Child lock activated 7. Confirm your choice by pressing Start (S2). The programme returns to the main menu. To unlock the child lock temporarily, the Temperature (S4) and Drying selection (S6) buttons must be pressed simultaneously. The machine can now be operated normally for three minutes. Total reset To reset the machine to its basic settings. Fill the machine with appr. 1 litre of water! 1. Turn off the main switch (1/0) 2. Wait for at least 5 seconds 3. Keep the Programme button depressed (S1) 4. Turn on the main switch (1/0) 5. Release the Programme button (S1). The machine now resets various settings, although not the water hardness and intake volume, and senses the presence of the turbidity and pressure sensors and the spray arm divider. The machine then reverts automatically to the main menu. 24
25 SETTINGS DW20.4 S1 L8 L1 L2 L3 L4 L5 L6 L7 L9 S3 S4 S2 Panel type DW20.4, L = LED, S = Push-button Variant 1: S3 = Set, S4 = Menu Variant 2: S3 = Temperature S4 = Drying Express Variant 2 Temperature selection Heavy, Normal, Mixed, Upper basket, Lower basket wash: cold, 30, 40, 45,50, 55, 60, 65, 70, 75 C Delicate and Quick wash: Cold, 30, 40, 45, 50, 55, 60 C Drying selection Short, Normal and Long drying. Variant 1 Reduces main wash and rinse temperature 10 C, and shortens the main wash and drying time. Super rinsing Adds two rinses. Cooling 30 minutes fan time are added before the end of the programme to cool down washed items. Variant 1 Loaded baskets Both-basket washing (basic setting). The machine s upper and lower baskets are loaded with items to be washed. Upper basket loaded Most of the process water is directed by the spray arm divider to the upper spray arm. Lower basket loaded Most of the process water is directed by the spray arm divider to the lower spray arm. Baskets combined loaded The spray arm divider directs a larger proportion of water through the lower spray arm (high spray pressure lower spray arm). Variant 1 + Variant 2 Variant 1 Access to Special settings Menu 1. Turn off the main switch (1/0). 2. Wait for at least 5 seconds 3. Keep (S3) depressed. 4. Turn on the main switch (1/0). 5. Release (S3) 6. Select status with (S3). Proceed with (S4). a) Language: English, Swedish, Norwegian, etc. b) Child lock: on/off. c) Acoustic signal volume at end of programme: 0 (=off), 1, 2 9. Alt 2. Machines with Menu/Set buttons Turn on the Main Switch, step forward with the Menu (S4) until Special Settings menu appear. Follow point 6. above Delayed start Programme start delayed by hours 25
26 SETTINGS Setting: Water hardness [ dh] Display shows: (incl. machines without water softener) Display shows: Display shows: Display shows: Display shows: Display shows: Display shows: Display shows: Display shows: Display shows: d) Temperature display in C/ F. e) Machine information. Water consumption for most recent programmes run, number of programmes run. Toggle with S3. 7. Press (S4) or (S2). The programme stores the settings and returns to the main menu. Demo mode Enter by pressing S4 and then turn the power On or both at the same time Scrolling arguments will appear : Turbo Drying...Super Cleaning System...Auto Wash...Flexi Racks...Power Zone...8 Steel...Turbo Drying... Exit by turning main switch Off. Variant setting If the control unit is replaced, the machine will automatically be in the variant setting menu when the power supply is switched on for the first time. Fill the machine with appr. 1 litre of water! 1. Press the Programme button (S1, repeatedly until the desired variant is selected): the spray arm divider. The programme reverts to the main menu.) If you wish to access the variant setting menu again: 1. Turn off the main switch (1/0). 2. Wait for at least 5 seconds 3. Keep Programme and Start depressed. (S1 / S2) 4. Turn on the main switch (1/0). 5. Release Programme and Start buttons (S1 / S2) at once! Proceed with point 6 within 5 sec! 6. Press Start (S2) 3 times in a rapid succession 7. Press the Programme button (S1) repeatedly until desired variant is selected. 8. Press Start (S2) to confirm. The programme then reverts automatically to main menu. Total reset To reset the machine to its basic settings. Fill the machine with appr. 1 litre of water! 1. Turn off the main switch (1/0) 2. Wait for at least 5 seconds 3. Keep the Programme button depressed (S1) 4. Turn on the main switch (1/0) 5. Release the Programme button (S1). The machine now resets various settings, although not the water hardness and intake volume, and senses the presence of the turbidity, pressure and humidity sensors and the spray arm divider. The machine then reverts automatically to the main menu. Variant 1: Variant with Menu/Set Variant 2: Variant with Temperature / Drying selection. 2. Confirm your choice by pressing Start (S2), or Drying selection/menu S4). (The machine senses the presence of the turbidity, pressure and humidity sensors and 26
27 SERVICE MENU 5. Service menu 5.1 Activation of service menu DW20.1 (only water intake setting) 1. Turn off the main switch (1/0) 2. Wait for at least 5 seconds 3. Keep the Programme and Start buttons depressed (S1 & S2) 4. Turn on the main switch (1/0) 5. Release the Programme and Start buttons (S1 & S2) L7 flashes The water intake can now be adjusted by pressing S1 once again. L7 is flashing continuously during the operation. L1 extinguished: Volume-controlled water intake (regulated via the flow sensor) L1 lit: Time-controlled water intake Confirm your choice by pressing Start (S2). The programme returns to the main menu. DW Turn off the main switch (1/0) 2. Wait for at least 5 seconds 3. Keep the Programme and Start buttons depressed (S1 & S2) 4. Turn on the main switch (1/0) 5. Release the Programme and Start buttons (S1 & S2) at once! The display lights up after 5 seconds. Fault indication The most recent fault to occur is indicated as F1, F2 and so on on the display Component test Press the Programme button (S1) and index through the following components: 1. Inlet valve 2. Salt valve (only machines with water softener) 3. Detergent and surfactant dispenser 4. Circulation pump 5. Heating element and circulation pump (Max 75 C) 6. Fan 7. Drain pump Water intake adjusting The water intake can be adjusted by keeping the Programme button depressed until 1 in the display disappears. Machines manufactured before year 2005 week 16 Press the Programme button and index through the following: Display shows 0: Normal water intake volume Display shows 1: Water intake volume is reduced by 15 % Display shows 2: Water intake volume is reduced by 10 % Display shows 3: Water intake volume is reduced by 5 % Display shows 4: Time-controlled water intake Display shows 5: Water intake volume is increased by 5 % Display shows 6: Water intake volume is increased by 10 % Display shows 7: Water intake volume is increased by 15 % Machines manufactured year 2005 week 16 and later Press the Programme button and index through the following: Display shows 0: Normal water intake volume Display shows 1: Water intake volume is increased by 5% Display shows 2: Water intake volume is increased by 10 % Display shows 3: Water intake volume is increased by 15% Display shows 4: Time-controlled water intake Display shows 5: Water intake volume is increased by 5 % time-controlled Display shows 6: Water intake volume is increased by 10 % time-controlled Display shows 7: Water intake volume is increased by 15 % time-controlled Confirm your choice by pressing Start (S2). The programme returns to the main menu. 27
28 DW Turn off the main switch (1/0) 2. Wait for at least 5 seconds 3. Keep the Programme and Start buttons depressed (S1 & S2) 4. Turn on the main switch (1/0) 5. Release the Programme and Start buttons (S1 & S2) The most recent fault is indicated as L1-L6. Press the Programme button (S1) and index through the following components. 1. Inlet valve 2. Salt valve (only machines with water softener) 3. Detergent and surfactant dispenser 4. Circulation pump 5. Heating element and circulation pump (Max 75 C) 6. Fan 7. Drain pump Keep the Programme button depressed for three seconds to adjust the water intake. Machines manufactured before year 2005 week 16 Press the Programme button and index through the following: L1-L6 extinguished: Normal water intake volume L1 lit: Water intake volume is reduced by 10% L2 lit: Water intake volume is reduced by 5% L3 lit: Time-controlled water intake L4 lit: Water intake volume is increased by 5 % L5 lit: Water intake volume is increased by 10 % L6 lit: Water intake volume is increased by 15 % Machines manufactured year 2005 week 16 and later Press the Programme button and index through the following: L1-L6 extinguished: Normal water intake volume L1 lit: Water intake volume is increased by 5% L2 lit: Water intake volume is increased by 10% L3 lit: Time-controlled water intake L4 lit: Water intake volume is increased by 5 % time-controlled L5 lit: Water intake volume is increased by 10 % time-controlled L6 lit: Water intake volume is increased by 15 % time-controlled Confirm your choice by pressing Start (S2). The programme returns to the main menu. DW Turn off the main switch (1/0) 2. Wait for at least 5 seconds 3. Keep the Temperature/Set and Drying/ Menu buttons depressed (S3 & S4) 4. Turn on the main switch (1/0) 5. Release the Temperature/Set and Drying/ Menu buttons (S3 & S4) Press Temperature/Set (S3) for information about: - Date code (year/week) and serial number - Control unit date code - Software version - Most recent fault - Next most recent fault (if different from the most recent fault) - Third most recent fault (if different from the two most recent faults) C Display C Display The table shows the temperature and equivalent display code 28
29 SERVICE MENU Press Drying/Menu (S4) to access component diagnostics. Press Temperature/Set (S3) to activate the following components: 1. Inlet valve (display shows water intake volume) 2. Salt valve (only machines with water softener) 3. Detergent and surfactant dispenser 4. Circulation pump (display shows turbidity in Volts) 5. Heating element and circulation pump (Max 75 C) (Display shows temperature, see table) 6. Fan (display shows humidity sensor value) 7. Drain pump (display shows pressure sensor reading; VDC) Machines manufactured before year 2005 week 16 Press Drying/Menu (S4) to access water intake setting Press Temperature/Set (S3) to adjust the water intake. Display 0: Normal water intake volume Display 15 %: Water intake volume is reduced by 15 % Display 10 %: Water intake volume is reduced by 10 % Display 5 %: Water intake volume is reduced by 5 % Display Time: Time-controlled water intake Display +5 %: Water intake volume is increased by 5 % Display +10 %: Water intake volume is increased by 10 % Display +15 %: Water intake volume is increased by 15 % Machines manufactured year 2005 week 16 and later Press Drying/Menu (S4) to access water intake setting Press Temperature/Set (S3) to adjust the water intake. Display 0: Normal water intake volume Display +5%: Water intake volume is increased by 5% Display +10 %: Water intake volume is increased by 10 % Display +5%: Water intake volume is increased by 15 % Display time: Time-controlled water intake Display Time +5 %: Water intake volume is increased by 5 % Display Time +10 %: Water intake volume is increased by 10 % Display Time +15 %: Water intake volume is increased by 15 % Press Drying/Menu (S4) to access LCD contrast setting. Press Temperature/Set (S3 repeatedly) to adjust the contrast 0, +1, +2, +3, -1, -2, -3. Press Start (S2) to store the setting of the water intake volume and LCD contrast. The programme returns to the main menu. 29
30 SERVICE MENU Programme flow description.2 Programme flow description Illustrated below is a normal programme (for EU ) and the sequence in which the various components arc connected. Normal wash Component Commentary Main wash Drain pump Inlet valve 25 sec 605 pulse*, 47 sec, 3.1 lit*** 545 pulse* 43 sec, 2.8 lit** Circulation pump 30 sec Upper arm high pressure ** Pause 1 sec Circulation pump 60 sec Upper arm high pressure ** Pause 1 sec Circulation pump 120 sec Upper arm high pressure ** Pause 1 sec Circulation pump, Heater 32 C Temperature stop Circulation pump 5 min Pause 3 sec Filter cleaning Circulation pump 2 min Upper arm high pressure. ** Inlet valve, Circulation pump Circulation pump, Combined dispenser Circulation pump 75 pulse*, 6 sec, 0.4 lit 3 sec 3 min Circulation pump, Heater 40 C Temperature stop Circulation pump 3 min Circulation pump, Heater 55 C Circulation pump 39 min Circulation pump 1 min Upper arm high pressure ** Drain pump 2 sec SCS stage Circulation pump 20 sec SCS stage Upper arm high pressure** Drain pump 25 sec * pulse = number of pulses from the flow sensor to obtain the given quantity of water ** applicable to a machine with spray arm dividers. In stage (with an additional circulation pump) where no spray arm divider status is indicated, sequential 30 seconds lower arm low pressure, 30 seconds lower arm high pressure, 30 seconds upper arm low pressure, 30 seconds upper arm high pressure are intended. *** without Spray arm dividers. 30
31 Cooling down (not DW20.1) SERVICE MENU Machines with softener : Cool down step is NOT performed during regeneration. Drain pump Inlet valve Circulation pump Drain pump 5 sec 24 sec 60 sec 25 sec Pre-rinse Inlet valve 170 pulse*, 14 sec, 0.9 lit Circulation pump 20 sec Lower arm low pressure ** Drain pump 25 sec 1st. Rinse Inlet valve 605 pulse*, 47 sec, 3.1 lit*** 545 pulse* 43 sec, 2.8 lit** Circulation pump 9 min Circulation pump 60 sec Upper arm high pressure ** Drain pump 2 sec SCS stage Circulation pump 20 sec SCS stage Upper arm high pressure ** Drain pump 25 sec Final rinse Inlet valve 605 pulse*, 47 sec, 3.1 lit*** 545 pulse* 43 sec, 2.8 lit** Circulation pump 60 sec Circulation pump, Heater 60 C Temperature stop Circulation pump, Combined dispenser Circulation pump 60 sec 4 min Circulation pump 50 sec Upper arm high pressure ** Pause Drain pump 60 sec 25 sec Drying Fan 48 min * pulse = number of pulses from the flow sensor to obtain the given quantity of water ** applicable to a machine with spray arm dividers. In stage (with an additional circulation pump) where no spray arm divider status is indicated, sequential 30 seconds lower arm low pressure, 30 seconds ower arm high pressure, 30 seconds upper arm low pressure, 30 seconds upper arm high pressure are intended. *** without Spray arm dividers. l 31
Service manual Dishwasher
 Service manual Dishwasher Type: DW20.1, DW20.2, DW20.3, DW20.4 Asko Cylinda AB/After Sales Box 344 SE-532 24 Skara Sweden 2 Contents 1. Introduction... 5 2. Technical data... 7 2.1 Technical information...
SERVICEMANUAL DISHWASHERS DW20.1, DW20.2, DW20.3, DW20.4, DW20.5, DW20.C
 SERVICEMANUAL DISHWASHERS DW20.1, DW20.2, DW20.3, DW20.4, DW20.5, DW20.C 2 Contents 1. Introduction... 5 2. Technical data... 8 2.1 Technical information... 8 2.2 Components and measured values... 9 2.3
INDEX D1876 DISHWASHER (DW954)
") 2000-06 1 INDEX D1876 DISHWASHER (DW954) PROGRAMS 2 ELECTRICAL FUNCTIONS 5 PART NUMBER SUFFIX DEFINITIONS 7 SPARE PARTS LIST Casing and related parts 8 Container and related parts 10 Door 12 Control Panel
2000-06 1 INDEX D1876 DISHWASHER (DW954) PROGRAMS 2 ELECTRICAL FUNCTIONS 5 PART NUMBER SUFFIX DEFINITIONS 7 SPARE PARTS LIST Casing and related parts 8 Container and related parts 10 Door 12 Control Panel
INDEX D1976 DISHWASHER (DW955)
") 1 INDEX D1976 DISHWASHER (DW955) PROGRAMS 2 ELECTRICAL FUNCTIONS 6 PART NUMBER SUFFIX DEFINITIONS 8 SPARE PARTS LIST Casing and related parts 10 Container and related parts 12 Door 14 Control Panel 16
1 INDEX D1976 DISHWASHER (DW955) PROGRAMS 2 ELECTRICAL FUNCTIONS 6 PART NUMBER SUFFIX DEFINITIONS 8 SPARE PARTS LIST Casing and related parts 10 Container and related parts 12 Door 14 Control Panel 16
INDEX D1796FI DISHWASHER (DW 95FI)
") 2000-06 1 INDEX D1796FI DISHWASHER PROGRAMS 2 ELECTRICAL FUNCTIONS 5 PART NUMBER SUFFIX DEFINITIONS 7 SPARE PARTS LIST Casing and related parts 8 Container and related parts 10 Door 12 Control Panel 14
2000-06 1 INDEX D1796FI DISHWASHER PROGRAMS 2 ELECTRICAL FUNCTIONS 5 PART NUMBER SUFFIX DEFINITIONS 7 SPARE PARTS LIST Casing and related parts 8 Container and related parts 10 Door 12 Control Panel 14
D5424 ADA US. Base and related parts
 D5424 ADA US Base and related parts 135 101 142 102 141 164 137 140 130 125 134 166 165 116 105 133 ASKO, D5424 ADA US - Stainless (DW90.1) Pos Spare part No. Description Qty Comment 101 8801387 BOTTOM
EDW500 / EDW503. Electronic Controls for Dishwashers
 EDW500 / EDW503 Electronic Controls for Dishwashers ESSE-N / A.S. October 2004 EDW500 - EDW503 EDW500 and EDW503: new entry level electronic controls for dishwashers in the DIVA family Intended to replace
COMPONENTS AND FUNCTIONALITY
 COMPONENTS AND FUNCTIONALITY ESSE-N / A.S. 1 Common Circulation Pumps DIVA ZM+DGN 2 suppliers (FHP - Sole) fully interchangeable same performances versions: with / without tachymetric generator with /
D5954 OUTDOOR US. Base and related parts
 D5954 OUTDOOR US Base and related parts 115 114 135 101 142 171 173 141 164 119 102 137 140 166 116 134 165 116 107 125 133 126 174 161 105 ASKO, D5954 OUTDOOR US - Stainless (DW90.2) Pos Spare part No.
Service manual. Type: TD25. Contents
 Service manual Type: TD25 Contents Introduction...3 Type overview...4 Programme...5 Indication of programme sequence...5 Options and settings...6 Variant settings...8 Test programme...9 Troubleshooting...11
Merloni Elettrodomestici. Service Manual. Dishwashers Mark II. Language Issue/Edition GB /
 Dishwashers Mark II GB 2001-02-20/01 1-52 GB 2001-02-20/01 2-52 Contents 1 DIWA 126 TIMER SAFETY DEVICE MANAGEMENT 5 1.1 Alarms displayed and operations to be carried out 5 1.2 Types of alarms not displayed
aáëüï~ëüéê=ëéêáéë=bat=nrmp cìååíáçå~äáíáéë
 aáëüï~ëüéê=ëéêáéë=bat=nrmp cìååíáçå~äáíáéë Service Manual: H7-74-03D Product identification Code for the production numbers used for the various models (PNC) F.S. - Free-standing B. I. - Partially integrated
User manual. Dishwasher ZDT15010FA
 EN User manual Dishwasher ZDT15010FA Contents Safety instructions 2 Control panel 3 Programmes _ 4 Options _ 5 Before first use _ 6 Daily use _ 7 Hints and tips 9 Care and cleaning _ 10 Troubleshooting
FAVORIT 34502VI0. EN User manual
 FAVORIT 34502VI0 EN User manual 2 www.aeg.com CONTENTS 1. SAFETY INSTRUCTIONS...................................................... 3 2. PRODUCT DESCRIPTION.....................................................
REPAIR PART DIAGRAMS. Pages: 1-6
 REPAIR PART DIAGRAMS PRODUCT: MODEL: DISHWASHER LL S The information included in this Ariston Spare Parts List may change without notice please see our web site www.usservicenet.com for updates, corrections
User manual. Dishwasher ZDT15002
 EN User manual Dishwasher ZDT15002 Contents Safety information 2 Product description _ 3 Control panel 4 Programmes 4 Options _ 5 Before first use _ 5 Daily use 7 Care and cleaning 9 Troubleshooting 10
SERVICE MANUAL DISHWASHERS. Dishwasher with EDW 1503 electronic control system (Functionalities)
") SERVICE MANUAL DISHWASHERS ELECTROLUX HOME PRODUCTS ITALY S.p.A. Spares Operations Italy Publication no. Corso Lino Zanussi, 30 I - 33080 PORCIA /PN (ITALY) 599 35 64-85 Fax +39 0434 394096 EN Dishwasher
SERVICE MANUAL DISHWASHERS ELECTROLUX HOME PRODUCTS ITALY S.p.A. Spares Operations Italy Publication no. Corso Lino Zanussi, 30 I - 33080 PORCIA /PN (ITALY) 599 35 64-85 Fax +39 0434 394096 EN Dishwasher
FAVORIT DISHWASHER USER MANUAL
 FAVORIT 77000 DISHWASHER USER MANUAL 2 CONTENTS 4 SAFETY INFORMATION 6 PRODUCT DESCRIPTION 7 CONTROL PANEL 8 PROGRAMMES 10 OPTIONS 11 BEFORE FIRST USE 14 DAILY USE 17 CARE AND CLEANING 18 TROUBLESHOOTING
User manual. Dishwasher ZDI12001
 EN User manual Dishwasher ZDI12001 Contents Safety information 2 Product description _ 3 Control panel 3 Programmes 4 Before first use _ 4 Daily use 7 Care and cleaning 9 Troubleshooting 9 Technical information
FAVORIT VI DISHWASHER USER MANUAL
 FAVORIT 55002 VI DISHWASHER USER MANUAL 2 CONTENTS 4 SAFETY INFORMATION 6 PRODUCT DESCRIPTION 7 CONTROL PANEL 8 PROGRAMMES 9 OPTIONS 10 BEFORE FIRST USE 13 DAILY USE 16 CARE AND CLEANING 17 TROUBLESHOOTING
SERVICE MANUAL DISHWASHERS
 SERVICE MANUAL DISHWASHERS ELECTROLUX HOME PRODUCTS Customer Care - EMEA Training and Operations Support Technical Support Publication number Dishwashers with electronic control system DOROTEA 599 77 29
GETTING STARTED? EASY.
 User Manual GETTING STARTED? EASY. ZDF26001WA ZDF26001XA EN User Manual Dishwasher SAFETY INFORMATION Before the installation and use of the appliance, carefully read the supplied instructions. The manufacturer
Service Manual - Series 450/451 IG IGV IG IGV IG IG IG IGV IG
 Service Manual - Series 450/451 IG 448... IGV 449... IG 458... IGV 459... IG 459... IG 4408.0 IG 4406.0 IGV 4408.0 IG 4408.1 Service Manual: H7-71-04 Responsible: Dieter Rutz KÜPPERSBUSCH HAUSGERÄTE AG
User Manual. Dishwasher ZDM17301SA ZDM17301WA
 EN User Manual Dishwasher ZDM17301SA ZDM17301WA Contents Safety information 2 Safety instructions 3 Product description 4 Control panel 5 Programmes 6 Daily Use 7 Hints and tips 10 Care and cleaning 11
TECHNICAL INFORMATION G1000 / G2000 Dishwashers
 TECHNICAL INFORMATION G1000 / G2000 Dishwashers 1 G1000 / G2000 Dishwasher - Table of Contents WARNINGS AND SAFETY INFORMATION...10 1.0 CONSTRUCTION AND DESIGN...11 1.1 Appliance Overview...11 1.1.1 Appliance
FAVORIT W0P. EN User manual
 FAVORIT 88419 W0P EN User manual 2 www.aeg.com CONTENTS 1. SAFETY INSTRUCTIONS...................................................... 3 2. PRODUCT DESCRIPTION.....................................................
User manual. Dishwasher ZDT12041FA
 EN User manual Dishwasher ZDT12041FA Contents Safety instructions 2 Control panel 3 Programmes _ 4 Options _ 4 Before first use _ 5 Daily use _ 7 Hints and tips 9 Care and cleaning 9 Troubleshooting 10
INSTALLATION & OPERATION Rev 1.00A DISTRIBUTED EXCLUSIVELY BY CMA DISHMACHINES KNOTT AVENUE GARDEN GROVE, CALIFORNIA 92841
 MODEL UC 60e INSTALLATION & OPERATION Rev 1.00A DISTRIBUTED EXCLUSIVELY BY CMA DISHMACHINES 12700 KNOTT AVENUE GARDEN GROVE, CALIFORNIA 92841 800-854- 6417 FAX 714-895-2141 www.cmadishmachines.com TABLE
User manual. Dishwasher ZDI12010XA
 EN User manual Dishwasher ZDI12010XA Contents Safety instructions 2 Control panel 4 Programmes _ 4 Before first use _ 5 Daily use _ 7 Hints and tips 9 Care and cleaning 9 Troubleshooting 10 Technical information
user manual Dishwasher ESL 46510
 user manual Dishwasher ESL 46510 2 electrolux CONTENTS Electrolux. Thinking of you. Share more of our thinking at www.electrolux.com Safety information 2 Product description 5 Control panel 5 Use of the
FAVORIT W0P. EN User manual
 FAVORIT 77000 W0P EN User manual 2 www.aeg.com CONTENTS 1. SAFETY INSTRUCTIONS...................................................... 3 2. PRODUCT DESCRIPTION.....................................................
SERVICE MANUAL DISHWASHERS. Dishwasher with EDW 1500 electronic control system (Functionalities)
") SERVICE MANUAL DISHWASHERS ELECTROLUX HOME PRODUCTS Publication no. ITALY S.p.A. Spares Operations Italy Corso Lino Zanussi, 30 I - 33080 PORCIA /PN (ITALY) 599 37 82-86 Fax +39 0434 394096 Edition: 2006-04
SERVICE MANUAL DISHWASHERS ELECTROLUX HOME PRODUCTS Publication no. ITALY S.p.A. Spares Operations Italy Corso Lino Zanussi, 30 I - 33080 PORCIA /PN (ITALY) 599 37 82-86 Fax +39 0434 394096 Edition: 2006-04
TECHNICAL INFORMATION Touchtronic Clothes Dryers
 TECHNICAL INFORMATION Touchtronic Clothes Dryers Includes: T1302, T1303, T1322, T1329ci T1403 & T1405 2004 Miele This page intentionally left blank. Table of Contents GENERAL INFORMATION A. Warning and
FAVORIT34502VIO. EN User Manual
 FAVORIT34502VIO EN User Manual 2 www.aeg.com CONTENTS 1. SAFETY INFORMATION...3 2. SAFETY INSTRUCTIONS... 4 3. PRODUCT DESCRIPTION... 6 4. CONTROL PANEL...6 5. PROGRAMMES... 7 6. SETTINGS... 8 7. BEFORE
Side-by-side combined refrigerator-freezer
 REPAIR INSTTRUCTTI I IONS Side-by-side combined refrigerator-freezer 1 SAFETY... 2 4.1 Electronic controller... 8 1.1 Safety instructions... 2 1.2 Repair instructions... 2 2 INSTALLATION... 3 3 OPERATION...
User manual. Dishwasher ZDF14001WA ZDF14001KA ZDF14001SA
 EN User manual Dishwasher ZDF14001WA ZDF14001KA ZDF14001SA Contents Safety instructions 2 Control panel 4 Programmes _ 4 Options _ 5 Before first use _ 6 Daily use _ 7 Hints and tips 9 Care and cleaning
SERVICE MANUAL REFRIGERATION
 SERVICE MANUAL REFRIGERATION Electrolux Home Products S.p.A. Spares Operations Italy Corso lino Zanussi, 30 I - 33080 Porcia (PN) Fax +39 0434 394096 S.O.I. Edition: 10.2006 Publication no. 599 38 38-50
SERVICE MANUAL DISHWASHERS DIVA ACCESSIBILITY DISHWASHERS
 SERVICE MANUAL DISHWASHERS DIVA ELECTROLUX HOME PRODUCTS S.p.A. Publication no. Spares Operations Italy Corso Lino Zanussi,30 I - 33080 PORCIA /PN (ITALY) 599 38 70-09 Fax +39 0434 394096 EN DISHWASHERS
Technical Information. Touchtronic Clothes Washers
 Touchtronic Clothes Washers Includes: W1113, W1119, W1203, W1213, W1215 2004 Miele Touchtronic Clothes Washers Table of Contents A Warning and Safety Instructions...7 1 General Information...7 B Modification
Service Manual Professional Washing Machine Type: WM70.C
 Service Manual Professional Washing Machine Type: WM70.C 2 Service manual Type: WM70.C Contents Updates...4 Introduction...5 General product information...6 Troubleshooting strategy...6 Panel...7 Knob
User manual. Dishwasher ZDTS102. Downloaded from manuals search engine
 User manual Dishwasher ZDTS102 Contents Safety information _ 2 Control panel 3 Washing programmes _ 4 Use of the appliance 5 Set the water softener _ 6 Use of dishwasher salt _ 7 Use of rinse aid 7 Load
Engineers manual. Under counter machines
 Table of Contents 1. INTRODUCTION... 3 1.1 1.2 1.3 INSTALLATION AND COMMISSIONING... 3 SERVICE AND REPAIRS... 3 MODIFICATION... 3 2. EXPLANATION OF SYMBOLS USED... 3 3. WARNING AND SAFETY INFORMATION...
WC370 Integrated Intelligent dishwasher Manual for Installation, Use and Maintenance
 WC370 Integrated Intelligent dishwasher Manual for Installation, Use and Maintenance Customer Care Department The Group Ltd. Harby Road Langar Nottinghamshire NG13 9HY T : 01949 862 012 F : 01949 862 003
Engineers manual. Pass Through machines P500 P500 A P500 AS P500 A WS P500 AS WS. A- AirBreak WS Water Softener. AS Dual Rinse Element
 P500 P500 A P500 AS P500 A WS P500 AS WS A- AirBreak WS Water Softener AS Dual Rinse Element Table of Contents 1. INTRODUCTION... 3 1.1 1.2 1.3 INSTALLATION AND COMMISSIONING... 3 SERVICE AND REPAIRS...
User Manual Washing Machine L FL
 EN User Manual Washing Machine L 62270 FL 2 www.aeg.com CONTENTS 1. SAFETY INFORMATION...3 2. SAFETY INSTRUCTIONS... 4 3. PRODUCT DESCRIPTION... 6 4. CONTROL PANEL...7 5. PROGRAMMES... 8 6. CONSUMPTION
WASHING MACHINE SERVICE MANUAL CAUTION READ THIS MANUAL CAREFULLY TO DIAGNOSE PROBLEMS CORRECTLY BEFORE SERVICING THE UNIT.
 WASHING MACHINE SERVICE MANUAL CAUTION READ THIS MANUAL CAREFULLY TO DIAGSE PROBLEMS CORRECTLY BEFORE SERVICING THE UNIT. MODEL : WM2240C* Jul. 2010 PRINTED IN KOREA P/No. : MFL30599179 CONTENTS 1.SPECIFICATIONS...
User Manual Dishwasher FAVORIT 66602VI0P
 EN User Manual Dishwasher FAVORIT 66602VI0P 2 www.aeg.com CONTENTS 1. SAFETY INFORMATION...3 2. SAFETY INSTRUCTIONS... 4 3. PRODUCT DESCRIPTION... 5 4. CONTROL PANEL...6 5. PROGRAMMES... 7 6. SETTINGS...
OPERATING INSTRUCTIONS. Drying cabinet DC 7774 DC Read the instructions before using the machine.
 OPERATING INSTRUCTIONS Drying cabinet DC 7774 DC 7784 Read the instructions before using the machine. Dear ASKO customer, Congratulations on making an excellent choice, and welcome to the ASKO family,
wc431 Slimline Integrated Dishwasher Manual for Installation, Use and Maintenance
 wc431 Slimline Integrated Dishwasher Manual for Installation, Use and Maintenance Contents Contents... 2 Important... 3 Important Notes... 4 Recommendations... 5 Before First Use... 5 Control Panel...
SERVICE MANUAL DISHWASHER COMPACT EDW 503. Publ.-Nr.: EN. Dishwasher COMPACT
 SERVICE MANUAL DISHWASHER COMPACT EDW 503 AEG Hausgeräte GmbH Muggenhofer Straße 135 D-90429 Nürnberg Germany Publ.-Nr.: 599 528 133 EN Dishwasher COMPACT EDW 503 Fax +49 (0)911 323 1022 Spares Operation
SERVICE MANUAL REFRIGERATION
 SERVICE MANUAL REFRIGERATION ELECTROLUX HOME PRODUCTS S.p.A. Publication no. Spares Operations Italy 599 37 75-07 Corso Lino Zanussi, 30 060824 I - 33080 PORCIA / PN (ITALY) ITZ/SERVICE/AA Fax +39 0434
FAVORIT 55200VI EN DISHWASHER USER MANUAL
 FAVORIT 55200VI EN DISHWASHER USER MANUAL 2 FOR PERFECT RESULTS Thank you for choosing this AEG product. We have created it to give you impeccable performance for many years, with innovative technologies
Refrigerator KE T
 Refrigerator KE 680-1-3T Service Manual: H8-74-07 Responsible: U. Laarmann KÜPPERSBUSCH HAUSGERÄTE AG E-mail: uwe.laarmann@kueppersbusch.de Tel.: (0209) 401-732 Customer Service Fax: (0209) 401-743 Postfach
FAVORIT 66609M0P FAVORIT 66609W0P. EN User Manual
 FAVORIT 66609M0P FAVORIT 66609W0P EN User Manual 2 www.aeg.com CONTENTS 1. SAFETY INFORMATION...3 2. SAFETY INSTRUCTIONS... 4 3. PRODUCT DESCRIPTION... 5 4. CONTROL PANEL...6 5. PROGRAMMES... 7 6. SETTINGS...
INSTALLATION INSTRUCTIONS UNDERCOUNTER DISHWASHERS
 INSTALLATION INSTRUCTIONS UNDERCOUNTER DISHWASHERS VIKING 111 Front Street Greenwood, Mississippi 38930 USA (662) 455-1200 IMPORTANT - PLEASE READ AND FOLLOW Before beginning - please read these instructions
GETTING STARTED? EASY.
 User Manual GETTING STARTED? EASY. ZDT24001FA EN User Manual Dishwasher SAFETY INFORMATION Before the installation and use of the appliance, carefully read the supplied instructions. The manufacturer is
MW402 Integrated Dishwasher
 MW402 Integrated Dishwasher Manual for Installation, Use and Maintenance 1 Customer Care Department The Group Ltd. Harby Road Langar Nottinghamshire NG13 9HY T : 01949 862 012 F : 01949 862 003 E : customer.care@cda.eu
Dishwasher Cycle Chart Condensation Dry System
 Models: DMR57LFB/XAA DMR57LFS/XAA DMR57LFW/XAA DMR77LHB/XAA DMR77LHS/XAA DMR77LHW/XAA DMR78AHB/XAA DMR78AHS/XAA DMR78AHW/XAA Program Drain Pre-wash 1 Fast Track Troubleshooting IMPORTANT SAFETY NOTICE
Technical Description: / Rev, Seq: H, 1 / Date: Remarks. At Customer error case. Blinking LED's at end of Flash process
 Technical Description: 56000000157007 / Rev, Seq: H, 1 / Date: 29.06.2010 Material No. 9000 361 479 Function Actuation Display Remarks Error class (failure group) In Customer Service program At Customer
Get usage advice, brochures, trouble shooter, service information: Register your product for better service:
 FAVORIT 66603VI0P EN User Manual 2 www.aeg.com CONTENTS 1. SAFETY INFORMATION...3 2. SAFETY INSTRUCTIONS... 4 3. PRODUCT DESCRIPTION... 5 4. CONTROL PANEL...6 5. PROGRAMMES... 7 6. SETTINGS... 8 7. OPTIONS...
User Manual Dishwasher FAVORIT 56302MO FAVORIT 56302WO
 EN User Manual Dishwasher FAVORIT 56302MO FAVORIT 56302WO 2 www.aeg.com CONTENTS 1. SAFETY INFORMATION...3 2. SAFETY INSTRUCTIONS... 4 3. PRODUCT DESCRIPTION... 5 4. CONTROL PANEL...6 5. PROGRAMMES...
ESL 5201LO EN DISHWASHER USER MANUAL
 ESL 5201LO EN DISHWASHER USER MANUAL 2 www.electrolux.com CONTENTS 1. SAFETY INFORMATION... 2 2. SAFETY INSTRUCTIONS...4 3. PRODUCT DESCRIPTION... 5 4. CONTROL PANEL...6 5. PROGRAMMES...6 6. SETTINGS...
Glass and Dishwashers AMX / AUX Series
 Glass and Dishwashers AMX / AUX Series INSTALLATION OPERATION REV. 8.xx 04.07.2005 Installation and Operation Instructions for Models of AMX / AUX Series Content Page 1 Installation... 3 2 Connections...
DC200 Digital Dispenser Operating Manual
 DC200 Digital Dispenser Operating Manual 2015 Fisnar Phone: (973) 646-5044 E-mail: info@fisnar.com Table of Contents Product Safety Statements 4 Specifications 6 Accessories 6 External Controls 7 Machine
DISHWASHER INSTALLATION GUIDE SPECIFICATIONS, INSTALLATION, AND MORE
 DISHWASHER INSTALLATION GUIDE SPECIFICATIONS, INSTALLATION, AND MORE COVE DISHWASHER Contents 3 Cove Dishwasher 4 Specifications 7 Door Panel 9 Installation 15 Troubleshooting Features and specifications
1 SAFETY Aqua Stop valve INSTALLATION OPERATION FUNCTIONS REPAIR COMPONENTS
 REPAIR INSTTRUCTTI I ION Dishwasher 1 SAFETY... 3 4.3 Aqua Stop valve... 21 2 INSTALLATION... 4 2.1 Aligning the appliance... 4 2.2 Electrical connection... 4 2.3 Water connection... 4 3 OPERATION... 5
Service Manual Dishwasher integratable
 Whirlpool Europe Customer Services ADP 6940 WHM Service Manual Dishwasher integratable ADP 6940 WHM Model ADP 6940 WHM Version 8542 940 01900 Page Technical data 2-4 Spare part list 5-6 Exploded view 7-8
Technical Description: / Rev, Seq: F, 2 / Date: Remarks. At Customer error case. Blinking LED's at end of Flash process
 Technical Description: 56000000157007 / Rev, Seq: F, 2 / Date: 17.09.2009 Function Actuation Display Remarks Material No. 9000 361 479 Error class (failure group) In Customer Service program At Customer
º CP0398/01 Padholder assy Switch 2-cup
 Senseo Switch HD7892/60 HD7892/61 Philips Consumer Lifestyle Service Manual Product information This product meets the requirements regarding interference suppression on radio and TV. After the product
WC600 Integrated Dishwasher Installation, Use and Maintenance
 WC600 Integrated Dishwasher Installation, Use and Maintenance Customer Care Department The Group Ltd. Harby Road Langar Nottinghamshire NG13 9HY T : 01949 862 012 F : 01949 862 003 E : customer.care@cda.eu
Engineers manual. Pass Through machines P500 P500 A P500 AS P500 A WS P500 AS WS. A- AirBreak WS Water Softener. AS Dual Rinse Element
 P500 P500 A P500 AS P500 A WS P500 AS WS A- AirBreak WS Water Softener AS Dual Rinse Element Table of Contents 1. INTRODUCTION... 3 1.1 1.2 1.3 INSTALLATION AND COMMISSIONING... 3 SERVICE AND REPAIRS...
Glass and Dishwashers 402/452/502. (original instructions) (incl. Australian /502) Starting from Serial No.:
 (incl. Australian /502) Starting from Serial No.:") Glass and Dishwashers ECOMAX 402/452/502 (incl. Australian 452-90/502) INSTALLATION AND OPERATION INSTRUCTIONS (original instructions) Starting from Serial No.: 8663 4000 REV. 05.10.2015 EN IMPORTANT NOTES
Glass and Dishwashers ECOMAX 402/452/502 (incl. Australian 452-90/502) INSTALLATION AND OPERATION INSTRUCTIONS (original instructions) Starting from Serial No.: 8663 4000 REV. 05.10.2015 EN IMPORTANT NOTES
Model 1820 Dehumidifier
 Model 1820 Dehumidifier Installation Instructions SAFETY INSTRUCTIONS WARNING 1. 120 Volts may cause serious injury from electric shock. Disconnect electrical power before starting installation or servicing.
FOR SERVICE TECHNICIAN S USE ONLY
 F SERVICE TECHNICIAN S USE ONLY NOTE: This sheet contains important Technical Service Data. Tech Sheet Do Not Remove Or Destroy DANGER Electrical Shock Hazard Only authorized technicians should perform
GETTING STARTED? EASY.
 User Manual GETTING STARTED? EASY. ZDF21001WA ZDF21001XA ZDF21001NA EN User Manual Dishwasher SAFETY INFORMATION Before the installation and use of the appliance, carefully read the supplied instructions.
Operating, Installation and Service Manual W3400H, CLC 41 Clarus Control
 Operating, Installation and Service Manual W3400H, CLC 41 Clarus Control 438 9202-01 05.26 Washer extractor, drum volume 400 litres 3 Contents Machine operation... 7 General description... 7 Automatic
MW001 Integrated Dishwasher. Manual for Installation, Use and Maintenance
 MW001 Integrated Dishwasher Manual for Installation, Use and Maintenance Important The CDA Group Ltd cannot be held responsible for injuries or losses caused by incorrect use or installation of this product.
Installation manual Washer extractor
 Installation manual Washer extractor W555H Type W.55.H Original instructions 438 9054-30/EN 2017.11.06 Contents Contents 1 Safety Precautions...5 1.1 General safety information...6 1.2 Commercial use
Drying Cabinet Installation and Operating Manual
 Drying Cabinet Installation and Operating Manual Model:- ECO Dryer 2.0 HP Heat Pump Technology CONTENTS THIS USER MANUAL 3 DATA PLATE DETAILS 3 ADVICE ON SAFE OPERATION 3 DESCRIPTION OF THE CABINET 4 AIR
Operating Instructions. Dishwasher ASKO D5906
 Dear Customer, Thank you for choosing this quality product from ASKO. We hope it will meet your expectations and fulfil your needs for many years to come. Scandinavian design combines clean lines, everyday
Glass and Dishwashers AMX / AUX Series
 Glass and Dishwashers AMX / AUX Series INSTALLATION OPERATION VERSION 24.02.04 Important Notes Use in Accordance with Regulations This machine is exclusively to be used to wash ware such as plates, cups,
Owner's Manual. WS Series. Water Softener
 Owner's Manual WS-165-150 Series Water Softener Table of Contents WHAT'S INCLUDED 3 OPERATING CONDITIONS 4 ASSEMBLY INSTRUCTIONS 6 FLUSHING THE WATER LINES 13 MASTERPROGRAMMING 14 PROGRAMMING KEYAND GENERAL
MW401 Integrated Dishwasher
 MW401 Integrated Dishwasher Manual for Installation, Use and Maintenance Customer Care Department The Group Ltd. Harby Road Langar Nottinghamshire NG13 9HY T : 01949 862 012 F : 01949 862 003 E : service@cda.eu
DISHWASHER SERVICE MANUAL
 DISHWASHER SERVICE MANUAL INDEX page Tecnical features and security systems Electrical components Energy Label Name Plate Service mode Failure Codes Adjusting the water hardness Disassembly Repair Techniques
BEFORE USING THE DISHWASHER/CONNECTIONS
 INSTRUCTIONS FOR USE BEFORE USING THE DISHWASHER/CONNECTIONS ELECTRICAL CONNECTION PRECAUTIONS AND GENERAL RECOMMENDATIONS HOW TO FILL THE SALT CONTAINER HOW TO FILL THE RINSE AID DISPENSER HOW TO FILL
Service. Manual EOS DISHWASHER PLATFORM FREE STANDING KNOB-LED INTERFACE (LEVELS I AND II) 1 ISSUE - APRIL 2008
 1 ISSUE - APRIL 2008") 1 ISSUE - APRIL 2008 EOS DISHWASHER PLATFORM FREE STANDING KNOB-LED INTERFACE (LEVELS I AND II) MODELS COMM Covered Code LKF 72 50257 LKF 71 50256 LBF 51 50255 LBF 5 53185 Service GB Manual CONTENTS Chapter
1 ISSUE - APRIL 2008 EOS DISHWASHER PLATFORM FREE STANDING KNOB-LED INTERFACE (LEVELS I AND II) MODELS COMM Covered Code LKF 72 50257 LKF 71 50256 LBF 51 50255 LBF 5 53185 Service GB Manual CONTENTS Chapter
FOR SERVICE TECHNICIAN ONLY DO NOT REMOVE OR DESTROY WARNING
 WARNING Electrical Shock Hazard Disconnect power before servicing. Replace all parts and panels before operating. Failure to do so can result in injury or death. IMPORTANT Electric Discharge (ESD) Sensitive
INSTRUCTIONS FOR USE PORTABLE VACUUM SYSTEM LEI Part # s / , , , IMPORTANT INFORMATION
 INSTRUCTIONS FOR USE PORTABLE VACUUM SYSTEM LEI Part # s / 27-009, 27-010, 27-015, 27-020 IMPORTANT INFORMATION UNATHORIZED CHANGES OR ALTERATIONS TO ANY LINCOLN PORTABLE VACUUM SYSTEM WILL AUTOMATICALLY
Bottom Mount Refrigerator---Technical Information
 Bottom Mount Refrigerator---Technical Information WARNING Electrical Shock Hazard Disconnect power before servicing. Replace all parts and panels before operation. Failure to do so can result in death
EWM 1000 GENERAL SPECIFICATION
 EWM 1000 GENERAL SPECIFICATION TSE-N / A.S. 1 EWM 1000 General Features Fully electronic control Electrical supply: 220/240 V 50/60 Hz (configurable) Washing system: traditional or Eco ball Carboran tub
DAILY REFERENCE GUIDE PRODUCT DESCRIPTION APPLIANCE CONTROL PANEL. Before using the appliance carefully read Health and Safety guide.
 DAILY REFERENCE GUIDE EN THANK YOU FOR BUYING A HOTPOINT PRODUCT. In order to receive a more complete assistance, please register your appliance on: www.hotpoint.eu/register You can download the Safety
GETTING STARTED? EASY.
 User Manual GETTING STARTED? EASY. ZWF 71440W EN User Manual Washing Machine SAFETY INFORMATION Before the installation and use of the appliance, carefully read the supplied instructions. The manufacturer
ECOMAX 602/612/AM-10/AM-11
 Service Manual HOBART GmbH An ITW-Company EFFICIENT RELIABLE INNOVATIVE ECOMAX 402/452/502 Start Serial No.: 8663 000 8663 3999 EEPROM: 897547-6 Facelift as of Serial No.: 8663 4000 EEPROM: 897547-7 ECOMAX
WASHING MACHINE READ THIS MANUAL CAREFULLY TO DIAGNOSE TROUBLE CORRECTLY BEFORE OFFERING SERVICE.
 website : http://www.lgeservice.com e-mail : http://lgeservice.com/techsup.html WASHING MACHINE SERVICE MANUAL CAUTION READ THIS MANUAL CAREFULLY TO DIAGSE TROUBLE CORRECTLY BEFORE OFFERING SERVICE. MODEL
FOR SERVICE TECHNICIAN S USE ONLY
 FOR SERVICE TECHNICIAN S USE ONLY NOTE: This sheet contains important Technical Service Data. Tech Sheet Do Not Remove Or Destroy DANGER Electrical Shock Hazard Only authorized technicians should perform
3 In 1 AIR CONDITIONER with REMOTE CONTROL MODEL NO: CA9000 PART No: OPERATION & MAINTENANCE INSTRUCTIONS
 3 In 1 AIR CONDITIONER with REMOTE CONTROL MODEL NO: CA9000 PART No: 32305600 OPERATION & MAINTENANCE INSTRUCTIONS 0304 Parts List Item Part No Description Qty 1 FT900001 Top Cover 1 2 FT900002 Filter
DAILY REFERENCE GUIDE PRODUCT DESCRIPTION APPLIANCE CONTROL PANEL. Before using the appliance carefully read Health and Safety guide.
 DAILY REFERENCE GUIDE EN THANK YOU FOR BUYING A ARISTON PRODUCT. In order to receive a more complete assistance, please register your appliance on: www.aristonbrand.com You can download the Safety Instructions
User manual. Washing Machine ZWP 581 ZWQ 5102 ZWQ 5103 ZWQ 5122
 EN User manual Washing Machine ZWP 58 ZWQ 502 ZWQ 503 ZWQ 522 Contents Safety information 2 Product description _ 3 How to run a wash cycle? 4 Daily use _ 5 Washing programmes 6 Care and cleaning 8 Safety
WF140 Freestanding Dishwasher
 WF140 Freestanding Dishwasher Installation, Use and Maintenance Customer Care Department The Group Ltd. Harby Road Langar Nottinghamshire NG13 9HY T : 01949 862 012 F : 01949 862 003 E : customer.care@cda.eu
Operating Instructions Dishwasher GV64161
 EN Operating Instructions Dishwasher GV64161 1 2 3 4 5 6 7 8 9 10 11 12 13 14 1 Main power switch 8 SpeedWash 2 Programme selector 9 Auto open 3 Auto wash 10 Half load 4 Intensive wash 11 Delayed start