REV: 000. Lumitron/ Luminator
|
|
|
- Hilary Norton
- 5 years ago
- Views:
Transcription


1 REV: 000 Lumitron/ Luminator
2 Table Of Contents Introduction 3 Standard Operating Guide 3 Features & Specs 3 External Layout 4-8 Internal Layout 9-10 Wiring Diagrams 11 F.A.Q Ballast to Lamp Relationship 15 Timer Setting and Programming 16 Comprehensive Parts List 17 2
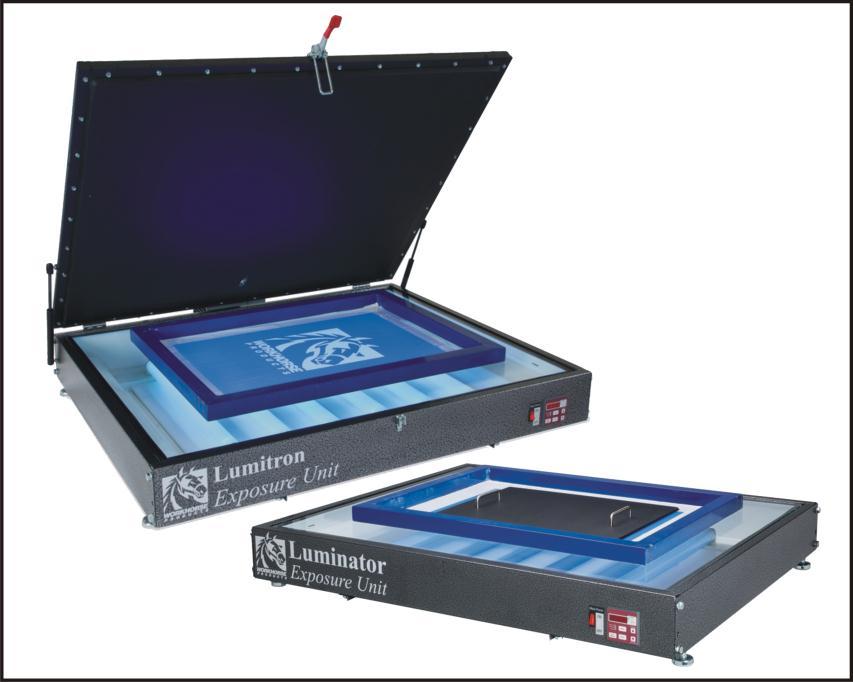
3 Introduction: The Lumitron is a high end exposure system in a small package. This unit has high output UV fluorescent bulbs that offer balanced light distribution throughout. Using the same powerful vacuum as our larger units, the Lumitron gives you perfect contact between your film positive and screen. The Luminator is an expandable exposure unit specially designed for the startup shop on a budget. This unit has high output UV fluorescent bulbs that offer balanced light distribution throughout. This system is compatible with direct emulsion or capillary films that allow versatility in your stencil systems. It comes standard with a 16 x 20" pressure pad to ensure even contact between your film positive and your screen. Standard Operating Guide: Plug in the unit, make sure it is plugged into a 3-wire grounded circuit (115 or 220 volt) depending on which machine you have. If you are unsure of the power requirements please call Workhorse Products DO NOT ALTER OR MODIFY THE PLUG IN ANY WAY! Turn on main power rocker switch until it lights up. Release the single latch and open the vacuum frame and place the coated, dry screen, print side down in the center of the glass with the film or vellum underneath, either taped to the glass or taped to the print side of the screen. (For optimum performance, place your screens in the center of the unit above the light source) Place one end of the rope next to the vacuum nipple located toward the rear and in the center of the vacuum frame, drape the other end of the rope across the inside (squeegee side) of the frame. This will allow all of the air to be evacuated out of the inside of the screen and provide necessary contact between your film or vellum and the emulsion. (Do not place the rope directly under the vacuum nipple as this will reduce the vacuum speed and could negatively affect your blanket to screen contact) Close the vacuum frame and lock it into position with the single latch, then turn on the unit, the vacuum will automatically come on. Wait until the blanket has drawn down around the screen completely before you start your exposure. The vacuum motor will change sound slightly as it goes into idle mode. Once the exposure timer has beeped indicating its finish, turn off the vacuum rocker switch and release the latches. Open the vacuum frame and remove your screen. NOTE: Open the frame slowly as screens can get stuck to the vacuum blanket due to tape, ink residue or wet emulsion( Keep your screens as clean as possible and inspect your frames periodically for sharp edges and splinters. This will aid in keeping your vacuum blanket and glass clean, and prevent wear on the vacuum blanket). Features/ Specs: Power Options: Construction: 115V, Single Phase, 60hz, 620 watts, 6 amps 230v (Euro), Single Phase, 50hz, 620 watts, 3 amps All steel construction. Features: UV Fluorescent Light system Dimensions: Digital time control, auto-shutoff and auto-repeat functions. Dimensions (LxWxD): 41" (104cm) x 43" (109cm) x 8" (20cm) 3

 Part C")
4 Front View Control Panel Main Power Switch Timer 115V Part A Part B Timer 220V (EURO Only) Part C 4


5 Lid Clamp Lid Clamp Part D Clamp Hook Hardware Included With Clamp Hardware Included With Clamp Hardware Included With Clamp 5


6 Gas Spring Gas Spring Part E Ball Stud Ball Stud Part F 6


 Part M Modified Stem")
7 Hinge Lock Washer Part G Pan Head Screw Part H Hinge Part I Pan Head Screw Part W Vacuum Assy. Mounted Blanket Part J Vacuum Pump 220V (EURO Only) Part K Vacuum Pump 115V Part L Vacuum Hose (2ft) Part M Modified Stem Part N Fender Washer Part O 7
 Part Q")
8 Rear Mounted Receptacle Receptacle 115V, 15A Part P Receptacle 250V, 15A (EURO Only) Part Q 8


9 WARNING! RISK OF ELECTRICAL SHOCK! Turn ALL power to unit OFF before service. All service should be done by or under the supervision of a trained technician Control Panel, Internal Timer 115V Part B Timer 220V (EURO Only) Part C Main Power Switch Lamp Bank Part A Black Light Part R Black Light Part R Lamp Socket Part S 9
10 Left Ballasts, Mounted Ballast 115V Ballast 115V Ballast 115V Part T Part T Part T Ballast 220V Ballast 220V Ballast 220V (EURO Only) Part U (EURO Only) Part U (EURO Only) Part U Right Ballasts, Mounted Ballast 115V Ballast 115V Ballast 115V Part T Part T Part T Ballast 220V Ballast 220V Ballast 220V (EURO Only) Part U (EURO Only) Part U (EURO Only) Part U 10
11 11

12 WARNING! RISK OF ELECTRICAL SHOCK! Turn ALL power to unit OFF before service. All service should be done by or under the supervision of a trained technician FAQ: 1. The vacuum is taking along time to remove all of the air. This can be caused by incorrect placement of the nylon cord. The nylon cord is used to create paths for the air to escape from the center of the screen. Place one end of the rope next to the vacuum nipple located toward the rear and in the center of the vacuum frame, drape the other end of the rope across the inside (squeegee side) of the frame. This will allow all of the air to escape out of the inside of the screen and provide necessary contact between your film or vellum and the emulsion. Do not place the rope directly under the vacuum nipple as this will reduce the vacuum speed and could negatively affect your blanket to screen contact If the nylon cord is properly placed, check the adjustment of the vacuum frame clamps, if out of adjustment tighten the nylon lock nuts an equal amount of turns on each one and try closing the frame. If it takes an excessive amount of force to lock them down back the nuts off and try again. They should be firm but no excessive to ensure a tight seal is formed. Also check the clear vacuum line running from the vacuum pump to the modified stem (Image 1) Check for kinks or disconnected lines, if necessary un-kink or replace vacuum lines. Image 1 2. The bulbs in my exposure unit are flickering (When I touch them they stop) This is caused by improper grounding. Make sure the receptacle that the unit is plugged into is properly grounded. Also have an electrician check the building ground. Another Symptom of a bad ground is when the timer is activated only some of the lights come on. 3. One of my bulbs is not coming on. This may be cause by a bad ballast. To test the bulb/ ballast with power to the unit off, remove the non-functioning bulb and swap it with a known working bulb. Turn the unit off, if the if the position of the non functioning bulb has not changed the ballast controlling that bulb is bad. If the position of the non functioning bulb does change, the bulb will need to be replaced. 12
13 3. (Continued) To replace the ballast, first remove the glass. Next, Identify which bulb is not working (See page 14, Ballast to Lamp Relationship) Image 2 Lamp #1 Lamp #2 Lamp #3 Lamp #4 Lamp #5 Lamp #6 Next locate the ballast covers located on the left and right sides. The position of the non functioning light will determine which cover to remove. If the non functioning lamps are 1, 2, or 3 the left cover will need to be removed. If the non functioning lamps are 4, 5, or 6 the right cover will need to be removed (Image 3 and 4) Image 3, Left Ballast Bank, Lamps 1-3 Image 4 Right Ballast Bank, Lamps 4-6 With the correct cover now removed, using the guide one page 15 to locate the faulty ballast. Once identified take notes of how the original ballast is wired, then, with the unit unplugged remove the ballast and place the new ballast in the same location. Connect the new ballast the same way the original was, if the correct plugs are not present on the new ballast use wire nuts to secure the wires together. Replace the covers and glass, then plug the unit back in. With the new ballast installed the unit is now ready for use. 13
 (Image 5) (Image 6) Locate the terminals marked #3 and #4, with power to the unit off,")

14 4. The timer starts to countdown but no lights come on. This may be caused by a faulty timer. To test the timer remove the glass, located at the front of the unit the timer will now be exposed (Image 5) (Image 5) (Image 6) Locate the terminals marked #3 and #4, with power to the unit off, using a blade style fuse (Image 6) most commonly found it automotive applications, jumper the two wires together. Now turn the unit on, if the lights come on the timer will need to be replaced. 5. The vacuum pump is not running. With power to the unit off, unplug the vacuum from the rear of the unit. Next plug the unit into a receptacle in the building. If the vacuum still will not run the vacuum will need to be replaced. If the vacuum begins to run, with power to the unit on, using a digital Volt/Ohm meter in the ACV ( ) setting, place one probe in one side of the receptacle and the other probe in the other (Image 7) the meter should read 115v-120v AC. If not turn the unit off and check the receptacles for loose connections. (Image 5) 14
15 Ballast to Lamp Relationship: Image 3 Lamp #6 Lamp #5 Lamp #4 Lamp #3 Lamp #2 Lamp #1 Ballast #4 Ballast #3 Ballast #5 Ballast #2 Ballast #6 Ballast #1 Note: The colors in this representation do not reflect the wire colors or harnesses in any way, simply to differentiate the ballast to lamp relationship. 15
 beeps. To enter one of the 3 countdown modes, press and hold the Mode button for 1 second.")
16 Timer settings and programming: Setting Interval Timer: In modes 1 3, the device functions as a simple countdown timer. When you set the value, press the Start/ Resume button. When the value reaches 0, the relay is turned OFF and the beeper beeps 6 sets of 2 (250ms) beeps. To enter one of the 3 countdown modes, press and hold the Mode button for 1 second. Holding down this button the mode will switch every 2 seconds. Each time the mode switches, the appropriate LED of mode LEDs will be turned ON and the value displayed will change to the modes default value. An audible ¼ beep will also be heard. Mode 1: 0 99 second: DEFAULT DISPLAY =.01 Mode 2: 0 99 minute: DEFAULT DISPLAY = Mode 3: 0 99 hour: DEFAULT DISPLAY = Once the countdown value has been set, you can now start the timer by pressing the Start/ Resume button, the relay is turned ON. While the timer is counting down the user can stop the event by pressing the Stop button. The current countdown value will remain on the display. If you want to resume the session you just need to press the start button again. Counting will proceed from the point where stopped. During this operation, the run LED blinks once a second. Once the timer has counted down to 0 and stopped, you can execute the same session (time value) by pressing the [START/RESUME] button again. This will recall the timer value and display it. At this point, you have two options. The first being the ability to change the value by using the Increase or Decrease buttons and the second being the ability to use the same value and starting the event again by pressing the Start/ Resume button. Repeat Feature: the timer will remember the last time set. To change the setting from the original setting, press start switch to recall previous setting then input new setting. Before using exposure unit for the first time obtain an exposure calculator from your supplier. 16
17 Comprehensive Parts List. Description P/N Description P/N A. "Main Power" Switch B. Timer, 115V R C. Timer, 220V (EURO Only) D. Lid Clamp E. Gas Spring F. Ball Stud G. Lock Washer 43-LOK H. Pan Head Screw 41-PHMS I. Hinge J. Blanket 20502R K. Vacuum Pump 220V (EURO Only) L. Vacuum Pump 115V M. Vacuum Hose (2 Feet) N. Modified Stem O. Fender Washer 43-FND P. Receptacle 115V 15A Q. Receptacle 250V 15A (EURO Only) R. Black Light S. Lamp Socket T. Ballast 115V U. Ballast 220V (EURO Only) V. Weight Plate (Luminator) W. Sems Pan Head Phillips Screw 41-SEMS
REV: 000. Mercury Compact Series
 REV: 000 Mercury Compact Series Table of Contents Introduction 2 Standard Operating Guide 2 Features & Specs 2 External Layout 3-8 Internal Layout 9-12 Wiring Diagram 13 F.A.Q. 14-22 Comprehensive Parts
REV: 000. Radiant Flash Service Manual
 REV: 000 Radiant Flash Service Manual Table Of Contents Introduction 3 Standard Operating Guide 3 Installation 4 External Layout 5-6 Internal Layout 7 Wiring Diagram 8 F.A.Q. 9-12 Comprehensive Parts List
SERVICE & TROUBLESHOOTING MANUAL FOR DISPLAY HOLD CABINETS DHC SERIES
 SERVICE & TROUBLESHOOTING MANUAL FOR DISPLAY HOLD CABINETS DHC SERIES REV: 1/28/09 ELECTRICAL SPECIFICATIONS Domestic Item # Description Voltage Hz. Watts Amps Cord/Plug Dimensions DHC 24H Domestic DHC
TT-180D. Fluorescent Table Top Exposure Units OWNER S MANUAL WARRANTY. For Customer Service, Call or Visit
 WARRANTY (Effective September 1, 2010) HIX will automatically register the equipment on the date it was shipped to you or your distributor. If the equipment was not purchased directly from HIX, but through
DOUBLE BURNER COUNTER INSET. User Guide
 DOUBLE BURNER COUNTER INSET User Guide Table of Contents I. Cooktop Installation 1-3 II. Important Safety Information 4 III. Product Specifications 5 IV. How to Use 5 Power Invariance Technology 5 Using
OPERATING & SERVICE PARTS MANUAL HDS-215 COMBINATION SHRINK SYSTEM
 OPERATING & SERVICE PARTS MANUAL HDS-215 COMBINATION SHRINK SYSTEM FOR HOT KNIFE AND IMPULSE MACHINES READ ALL INSTRUCTIONS CAREFULLY BEFORE OPERATING EQUIPMENT TABLE OF CONTENTS Electrical Requirements
Film-Tech. The information contained in this Adobe Acrobat pdf file is provided at your own risk and good judgment.
 Film-Tech The information contained in this Adobe Acrobat pdf file is provided at your own risk and good judgment. These manuals are designed to facilitate the exchange of information related to cinema
INSTALLATION, OPERATION and MAINTENANCE MANUAL for Cres Cor QUIKTHERM RETHERM ROLL-IN OVENS WITH RACK 18,000, 12,000 or 8,000 WATTS
 FL- Heisley Road Mentor, OH 00- Rev. 0 (/) Page of INSTALLATION, OPERATION and MAINTENANCE MANUAL for Cres Cor QUIKTHERM RETHERM ROLL-IN OVENS WITH RACK,000,,000 or,000 WATTS RRDE RRDX RRDEK RRDEK RRDXK
15 ELECTRIC SKILLET. Instruction Manual. Model: CES-1215R 120V/60Hz / 1400W
 15 ELECTRIC SKILLET Instruction Manual Model: CES-1215R 120V/60Hz / 1400W IMPORTANT SAFEGUARDS PLEASE READ CAREFULLY ALL INSTRUCTIONS BEFORE USING YOUR ELECTRIC SKILLET Do not use this appliance for any
Operation Manual SCT14B and SCT18B. Inspection. 3 General Description. 3 General Requirements. 3 Standard Features.
 Spot Cooling Systems, Inc. 120 Century Drive Suite 00 Carrollton, TX 7006 00-6-776 Operation Manual SCT1B and SCT1B Warning! Improper installation, adjustment, alteration, service, or maintenance can cause
MACHO POP Instruction Manual Model 2554EX, 2554BCX
 Instruction Manual Model 2554EX, 2554BCX Part No. 69915EX Issued 10/2004 Cincinnati, OH 45241-4807 USA www.gmpopcorn.com SAFETY PRECAUTIONS 2 MODEL 2554EX, BCX Inspection of Shipment: INSTALLATION INSTRUCTIONS
OWNER S MANUAL. FLAT PANEL FIREPLACE HEATER Model Number: Serena (EF202A) WARNING CAUTION
 WARNING CAUTION") FLAT PANEL FIREPLACE HEATER Model Number: Serena (EF202A) OWNER S MANUAL WARNING Read and understand this entire owner s manual, including all safety information, before plugging in or using this product.
FLAT PANEL FIREPLACE HEATER Model Number: Serena (EF202A) OWNER S MANUAL WARNING Read and understand this entire owner s manual, including all safety information, before plugging in or using this product.
INSTALLATION INSTRUCTIONS
 OVER THE RANGE CONVECTION MICROWAVE OVEN INSTALLATION INSTRUCTIONS Please read all instructions thoroughly before installing the Over the Range Microwave Oven/Hood System. Two people are recommended to
JOHN DEERE GATOR HPX/XUV 2 PASSENGER HEATER INSTALLATION INSTRUCTIONS (p/n: 9PH20S30)
") P. 1 of 12 JOHN DEERE GATOR HPX/XUV 2 PASSENGER HEATER INSTALLATION INSTRUCTIONS (p/n: 9PH20S30) Item: Qty: Description: 1 2 1 x 1 x 5/8 Tee Fitting 2 2 Plastic Snap-in Hose Grommet 3 4 1-1/2" Hose Clamps
P. 1 of 12 JOHN DEERE GATOR HPX/XUV 2 PASSENGER HEATER INSTALLATION INSTRUCTIONS (p/n: 9PH20S30) Item: Qty: Description: 1 2 1 x 1 x 5/8 Tee Fitting 2 2 Plastic Snap-in Hose Grommet 3 4 1-1/2" Hose Clamps
INSTALLATION, OPERATION and MAINTENANCE MANUAL for Cres Cor 2kW RETHERMALIZER
 Rev. 1 (1/16) Page 1 of 12 INSTALLATION, OPERATION and MAINTENANCE MANUAL for Cres Cor 2kW RETHERMALIZER REVOLUTION FOODS MODEL CO151027 Rev. 1 (1/16) Page 2 of 12 TABLE OF CONTENTS SUBJECT PAGE INSTALLATION
INSTALLATION, OPERATION and MAINTENANCE MANUAL for Cres Cor Undercounter AquaTemp HUMIDITY OVENS and CONVECTION OVENS 2000 WATTS
 Rev. (/) Page of INSTALLATION, OPERATION and MAINTENANCE MANUAL for Cres Cor Undercounter AquaTemp HUMIDITY OVENS and CONVECTION OVENS 000 WATTS COXUADE0 COXUADX0 COX8DE0 COX8DX0 COXWUADE0 COXWUADX0 Rev.
SAFETY OPERATION & MAINTENANCE MANUAL X-612 CARPET EXTRACTOR
 SAFETY OPERATION & MAINTENANCE MANUAL X-612 CARPET EXTRACTOR W/PARTS LIST This unit is intended for commercial use. READ AND FOLLOW ALL INSTRUCTIONS, WARNINGS AND CAUTIONS BEFORE USING THIS EXTRACTOR Address:
INSTALLATION, OPERATION and MAINTENANCE MANUAL for Cres Cor CONVECTION OVENS
 FL-28 2 Heisley Road Mentor, OH 0-8 Rev. (2/) Page of INSTALLATION, OPERATION and MAINTENANCE MANUAL for Cres Cor CONVECTION OVENS COFUA2DE COFUA2DX COF88DE COF88DX COF2DE COF2DX COFPUA2DE COFPUA2DX Call
PERFECT FIT IN-DASH HEAT/ COOL/ DEFROST FORD PICKUP
 specializing in AIR CONDITIONING, PARTS AND SYSTEMS for your classic vehicle PERFECT FIT IN-DASH HEAT/ COOL/ DEFROST 1960-66 FORD PICKUP CONTROL & OPERATING INSTRUCTIONS The controls on your new Perfect
CFS-2000 CHILLER TM. Operating Instructions P/N (110 VAC) P/N (230 VAC)
 P/N (230 VAC)") CFS-2000 CHILLER TM Operating Instructions P/N 100100 (110 VAC) P/N 100105 (230 VAC) Thank you for purchasing this CFS-2000 CHILLER TM! As you will notice from the table of contents, the manual for your
CFS-2000 CHILLER TM Operating Instructions P/N 100100 (110 VAC) P/N 100105 (230 VAC) Thank you for purchasing this CFS-2000 CHILLER TM! As you will notice from the table of contents, the manual for your
Henny Penny Island Warmer Model HMI-103 Model HMI-105 TECHNICAL MANUAL
 Henny Penny Island Warmer Model HMI-103 Model HMI-105 TECHNICAL MANUAL THIS PAGE INTENTIONALLY LEFT BLANK. Section TABLE OF CONTENTS Page Section 1. TROUBLESHOOTING... 1-1 1-1. Introduction... 1-1 1-2.
Microwave Oven. IMPORTANT SAFETY INSTRUCTION Never operate the oven when it is empty or without the glass turntable.
 Microwave Oven Introduction Installation Manual IMPORTANT SAFETY INSTRUCTION Never operate the oven when it is empty or without the glass turntable. Your Over-the-Range microwave oven comes complete with
TS0 Series Portable Bulb and Capillary
 TS0 Series Portable Bulb and Capillary Instruction Manual Read and understand this material before operating or servicing these heating tapes. Failure to understand how to safely operate these heaters
Fountain Classic. Installation and Owner s Manual. Page 16
 Fountain Classic Installation and Owner s Manual Page 16 4120 NW 44th St Lincoln, NE 68524 USA Tel: 402.467.9300 Toll Free in the USA: 800.875.5915 Fax: 402.467.9393 www.purewaterinc.com Page 2 Fountain
TRUE INDUCTION DOUBLE BURNER MINI DUO COOKTOP MANUAL
 TRUE INDUCTION DOUBLE BURNER MINI DUO COOKTOP MANUAL DOUBLE BURNER MINI DUO INDUCTION COOKTOP MANUAL 1 TABLE OF CONTENTS I. II. III. IV. V. VI. VII. VIII. Control Panel Overview Cooktop Installation Important
DISHWASHER INSTALLATION INSTRUCTIONS
 DISHWASHER INSTALLATION INSTRUCTIONS IMPORTANT! Read all of these instructions before installing the dishwasher. AUTOMATIC HIGH LOOP The drain hose is fastened to the back of the machine at the best height.
NO VENTING REQUIRED 120V AC;
 ELECTRIC FIREPLACE Model Number: Alice (EF172B-EF176B) OWNER S MANUAL WARNING Read and understand this entire owner s manual, including all safety information, before plugging in or using this product.
MODELS SSB-3E/5E/10EF, (2)SSB-3E/5E/10EF, SSB-3G/5G/10GF, (2)SSB-3G/5G/10GF
SSB-3E/5E/10EF, SSB-3G/5G/10GF, (2)SSB-3G/5G/10GF") SERVICE MANUAL IMPORTANT INFORMATION, KEEP FOR OPERATOR This manual provides information for: MODELS SSB-3E/5E/0EF, (2)SSB-3E/5E/0EF, SSB-3G/5G/0GF, (2)SSB-3G/5G/0GF Self Contained Electric or Gas Heated
SERVICE MANUAL IMPORTANT INFORMATION, KEEP FOR OPERATOR This manual provides information for: MODELS SSB-3E/5E/0EF, (2)SSB-3E/5E/0EF, SSB-3G/5G/0GF, (2)SSB-3G/5G/0GF Self Contained Electric or Gas Heated
BUILT-IN DISHWASHER INSTALLATION INSTRUCTIONS
 BUILT-IN DISHWASHER INSTALLATION INSTRUCTIONS PLEASE READ COMPLETE INSTRUCTIONS BEFORE YOU BEGIN LEAVE INSTALLATION INSTRUCTIONS AND USER'S GUIDE WITH OWNER ALL ELECTRIC WIRING AND PLUMBING MUST BE DONE
NOTICE . SAFE SERVICING PRACTICES. Electric Wall Oven with Electronic Oven Control
 SERVICE DATA SHEET 318047418 (0504) Rev. A Electric Wall Oven with Electronic Oven Control NOTICE This service data sheet is intended for use by persons having electrical and mechanical training and a
Full Size Canister Service Manual Riccar Models 1700 / 1800 Power Nozzles RPB-100 / RPB-220 / RPB-224 / RPB-250
 Full Size Canister Service Manual Riccar Models 1700 / 1800 Power Nozzles RPB-100 / RPB-220 / RPB-224 / RPB-250 Table of Contents I. General Full Size Canister Issues...2 A. Full Bag Indicator...2 1. General
SERVICE MANUAL VC3ED FULL SIZE ELECTRIC CONVECTION OVEN - NOTICE -
 SERVICE MANUAL VC3ED FULL SIZE ELECTRIC CONVECTION OVEN VC3ED ML-137013 - NOTICE - This Manual is prepared for the use of trained Vulcan Service Technicians and should not be used by those not properly
BARRACUDA DUAL MOTOR VACUUM OWNERS MANUAL. IMPORTANT: READ OWNERS MANUAL CAREFULLY Please fill out & return your warranty card! CUDA26 MODEL# SERIAL#
 www.usviper.com BARRACUDA DUAL MOTOR VACUUM OWNERS MANUAL IMPORTANT: READ OWNERS MANUAL CAREFULLY Please fill out & return your warranty card! MODEL# SERIAL# CUDA26 VIPER NORTH AMERICA P.O. BOX 104 HAMILTON,
LIMITED LIFETIME WARRANTY
 Congratulations on your purchase of a Minka-Aire TM ceiling fan! Your new fan will be a beautiful addition to you home, and will keep you comfortable throughout the year. Minka-Aire TM offers a variety
Rev B, 9/2/2009. Kodiak Chiller Overview
 930-0001 Rev B, 9/2/2009 Kodiak Chiller Overview Presentation Outline Phone: 781-933-7300 Lytron Technical Support Contact Information 3 Introduction 4 Part I: Unpacking 5 Part II: Installation 7 Part
INSTALLATION INSTRUCTIONS
 INSTALLATION INSTRUCTIONS BUILT-IN BOTTOM MOUNT REFRIGERATOR/FREEZER DBRTGK72SS-GRILLE KIT (FOR designer SERIES ONLY) VIKING RANGE CORPORATION 111 Front Street Greenwood, Mississippi (MS) 38930 USA (662)
REF5-BB Undercounter Blood Bank Refrigerator
 REF5-BB Undercounter Blood Bank Refrigerator Order parts online www.follettice.com Installation, Operation and Service Manual Following installation, please forward this manual to the appropriate operations
Built-In Dishwasher. Installation Instructions. BEFORE YOU BEGIN Read these instructions completely and carefully. IMPORTANT The dishwasher MUST be
 Installation Instructions Built-In Dishwasher If you have questions, call 800.GE.CARES (800.432.2737) or visit our website at: www.ge.com BEFORE YOU BEGIN Read these instructions completely and carefully.
TRADITIONAL CONCEPT INSTRUCTION MANUAL WARRANTY CERTIFICATE
 TM TRADITIONAL CONCEPT BY INSTRUCTION MANUAL WARRANTY CERTIFICATE Manual design and all elements of manual design are protected by U.S. Federal and/or State Law, including Patent, Trademark and/or Copyright
WIDE AREA VACUUM MODEL PF2030 WARNING: OPERATOR MUST READ AND UNDERSTAND THIS MANUAL COMPLETELY BEFORE OPERATING THIS EQUIPMENT.
 OPERATOR S MANUAL & PARTS LIST WIDE AREA VACUUM MODEL PF2030 WARNING: OPERATOR MUST READ AND UNDERSTAND THIS MANUAL COMPLETELY BEFORE OPERATING THIS EQUIPMENT. Tacony, Inc., All rights reserved Save These
Citation Models #2001, 2001ST, 2001BN Instruction Manual
 Models #2001, 2001ST, 2001BN Instruction Manual Part No. 67861 Revised: February 2009 Cincinnati, OH 45241-4807 USA SAFETY PRECAUTIONS 2 Forward This manual covers the 16oz. Popcorn Machine, model number
OCH-SS series Direct Wired Units Indoor * and Outdoor Comfort Heaters
 1200 North Main Street Fostoria, OH 44830 Phone: 800-495-4525 Fax: 419-435-0842 A DIVISION OF www.fostoriaindustries.com OCH-SS series Direct Wired Units Indoor * and Outdoor Comfort Heaters *EXCLUDING
Gallery Electric Fireplaces
 Gallery Electric Fireplaces Homeowner s Installation Instructions & Operating Manual Model: GBI-34, GBI-41 Only use this heater as described in this manual. Any other use is not recommended by the manufacturer,
INSTALLATION INSTRUCTIONS
 INSTALLATION INSTRUCTIONS BUILT-IN BOTTOM MOUNT REFRIGERATOR/FREEZER BRTGK72SS-GRILLE KIT (FOR PROFESSIONAL SERIES ONLY) VIKING RANGE CORPORATION 111 Front Street Greenwood, Mississippi (MS) 38930 USA
1020 Industrial Drive, Orlinda, TN fax
 Operation Manual Ultraviolet Disinfection System 615-654-4441 sales@specialtyh2o.com 615-654-4449 fax TABLE OF CONTENTS Section 1 GENERAL 1.1 Warnings and Cautions... 1 1.2 Theory of Operation... 2 1.3
TRUE INDUCTION DOUBLE BURNER TI-2B COUNTER INSET INDUCTION COOKTOP MANUAL
 TRUE INDUCTION DOUBLE BURNER TI-2B COUNTER INSET INDUCTION COOKTOP MANUAL DOUBLE BURNER TI-2B INDUCTION COOKTOP MANUAL 1 *Previous model# S2F3 TABLE OF CONTENTS I. II. III. IV. V. VI. VII. Cooktop Installation
DOUBLE BURNER TI-2BN INDUCTION COOKTOP MANUAL
 DOUBLE BURNER TI-2BN INDUCTION COOKTOP MANUAL 1 TABLE OF CONTENTS I. II. III. IV. V. VI. VII. Cooktop Installation Important safety Information Product Specifications How to Use > Power Invariance Technology
SimplyClear Pressurized Filter Product Manual
 SimplyClear Pressurized Filter Product Manual For Model: SimplyClear 1250 (Item #130040) Table of Contents: Important Information... 2 Package Contents... 3 Technical Specs... 3 How it Works.................................
INSTALLATION, OPERATION and MAINTENANCE MANUAL for Cres Cor AQUATEMP TM HUMIDITY 12kW QUIKTHERM RETHERM OVEN
 FL-5 55 Heisley Road Mentor, OH 00-8 Rev. 8 (/5) Page of INSTALLATION, OPERATION and MAINTENANCE MANUAL for Cres Cor AQUATEMP TM HUMIDITY kw QUIKTHERM RETHERM OVEN RO5FWUA8DE RO5FWUA8DX RO5FPWUA8DE RO5FPWUA8DX
Auto Opening with Pressure Readout 15 x15 & 16 x20 Heat Transfer Machines
 S-450P & S-650P Auto Opening with Pressure Readout 15 x15 & 16 x20 Heat Transfer Machines OWNER S MANUAL S-650P shown For Customer Service, Call 1-800-835-0606 or Visit www.hixcorp.com CONTENTS Receiving
MW401 Integrated Dishwasher
 MW401 Integrated Dishwasher Manual for Installation, Use and Maintenance Customer Care Department The Group Ltd. Harby Road Langar Nottinghamshire NG13 9HY T : 01949 862 012 F : 01949 862 003 E : service@cda.eu
IMPORTANT INFORMATION. Revised Dishwasher Installation Instructions
 IMPORTANT INFORMATION Revised Dishwasher Installation Instructions To obtain a revised copy of the entire Dishwasher User s Manual, go to www.eurotechappliances.com. SPECIAL EDITION 11-20-02 SAVE THESE
OWNERS MANUAL. To Order Parts Call SPEED AIR MOVER
 3 SPEED AIR MOVER OWNERS MANUAL IMPORTANT: READ OWNERS MANUAL CAREFULLY Please fill out and return your warranty card! MODEL # STR3SPD. REV 01 (6 12) TABLE OF CONTENTS Safety Precautions 3 Machine Operation
Installation Instructions
 Installation Instructions SELECTRONIC Hard-Wired AC Powered ICU Lavatory Proximity Faucet PRODUCT NUMBER 0. Certified to comply with ASME A..M 0 American Standard M 0. ICU Faucet shown Installed on American
Manual update 2016 MC37/MFC3600
 Manual update 2016 MC37/MFC3600 SETUP INSTRUCTIONS Evaporative cooling works on the principle of heat absorption by moisture evaporation. Simply put, heat is removed from the air as water evaporates. You
GALAXY FLOOR MACHINE
 OPERATION MANUAL GALAXY FLOOR MACHINE IMPORTANT SAFETY INSTRUCTIONS WARNING: Failure to observe these instructions can cause personal injury to machine operator or bystanders. WARNING: Shock or electrocution
Manual for MC37/MFC3600
 Manual for MC37/MFC3600 SETUP INSTRUCTIONS Evaporative cooling works on the principle of heat absorption by moisture evaporation. Simply put, heat is removed from the air as water evaporates. You feel
GAS RACK OVENS WITH ELECTRONIC OVEN CONTROL
 GAS RACK OVENS WITH ELECTRONIC OVEN CONTROL MODELS DRO2G DRO2GH GAS GAS 701 S. RIDGE AVENUE TROY, OHIO 45374-0001 937-332-3000 www.hobartcorp.com FORM 19202 Rev. D (Dec. 2003) IMPORTANT FOR YOUR SAFETY
MW001 Integrated Dishwasher. Manual for Installation, Use and Maintenance
 MW001 Integrated Dishwasher Manual for Installation, Use and Maintenance Important The CDA Group Ltd cannot be held responsible for injuries or losses caused by incorrect use or installation of this product.
ELECTRIC FLAT PANEL FIREPLACE HEATER. Model# : BG-36B BG-45B BG-50B BG-60B BG-72B BG-100B OWNER S MANUAL
 ELECTRIC FLAT PANEL FIREPLACE HEATER Model# : BG-36B BG-45B BG-50B BG-60B BG-72B BG-100B OWNER S MANUAL 36"/45"/50"/60"/72"/100" LED Wall Mounted Or Built-in Electric Fireplace AC 110-120V 60Hz 1500W WARNING
INFORMATION ONLY READ AND SAVE THESE INSTRUCTIONS SAFETY FIRST
 This information guide will help you with converting the electronics on the Comfort- Touch to Advan-Touch technology. Within this guide you will find step by step instruction on how to convert the fan,
Installation Instructions
 GE Consumer & Industrial Appliances Installation Instructions Junction Box Cover Within this user bag, you will find a junction box cover and a #10 hex head screw used to attach the junction box cover
GLC/GW-100 MANUAL INSTALLATION SERVICE PARTS REV.1.01
 Owner s Manual Keep with machine for reference GLC/GW-100 MANUAL INSTALLATION SERVICE PARTS REV.1.01 CMA DISHMACHINES 12700 KNOTT STREET GARDEN GROVE, CALIFORNIA 92841 800-854- 6417 FAX 714-895- 2141 www.cmadishmachines.com
MODELS CMA-180 VL/180 VLTall PARTS MANUAL Rev 2.02A
 MODELS CMA-180 VL/180 VLTall PARTS MANUAL Rev 2.02A C M A D I S H M A C H I N E S 1 2 7 0 0 K N O T T A V E N U E GARDEN GROVE, CALIFORNIA 92841 800-8 5 4-6 4 1 7 FAX 714-895-2141 www.cmadishmachines.com
Owner s Manual. Keep with machine for reference PKC24 INSTALLATION & OPERATION REV Perlick Corporation 8300 W Good Hope Rd Milwaukee, WI 53223
 Owner s Manual Keep with machine for reference PKC24 INSTALLATION & OPERATION REV.11.09 Perlick Corporation 8300 W Good Hope Rd Milwaukee, WI 53223 800-558- 5592 FAX 414-353- 7069 perlick.com TABLE OF
UNDERCOUNTER LABORATORY REFRIGERATORS and FREEZERS Installation, Operation and Maintenance Instructions
 UNDERCOUNTER LABORATORY REFRIGERATORS and FREEZERS Installation, Operation and Maintenance Instructions INSPECTION When the equipment is received, all items should be carefully checked against the bill
Installation Instructions Built-In Dishwasher
 GE Consumer & Industrial Appliances Installation Instructions Built-In Dishwasher If you have questions, call 800.GE.CARES (800.432.2737) or visit our website at: www.ge.com BEFORE YOU BEGIN Read these
Alice. In Wall Recessed Electric Fireplace Model Number: (EF172B, EF173B, EF174B, EF175B, EF176B) OWNER S MANUAL
 OWNER S MANUAL") Alice In Wall Recessed Electric Fireplace Model Number: (EF172B, EF173B, EF174B, EF175B, EF176B) OWNER S MANUAL WARNING Read and understand this entire owner s manual, including all safety information,
Alice In Wall Recessed Electric Fireplace Model Number: (EF172B, EF173B, EF174B, EF175B, EF176B) OWNER S MANUAL WARNING Read and understand this entire owner s manual, including all safety information,
SAFETY OPERATION & MAINTENANCE MANUAL X-405 CARPET EXTRACTOR This unit is intended for commercial use.
 SAFETY OPERATION & MAINTENANCE MANUAL X-405 CARPET EXTRACTOR This unit is intended for commercial use. READ AND FOLLOW ALL INSTRUCTIONS, WARNINGS AND CAUTIONS BEFORE USING THIS EXTRACTOR Address: 777 South
30" ELECTRIC EYE LEVEL RANGE WITH MICROWAVE OVEN SELF CLEAN LOWER OVEN
 CORPORATION 30" ELECTRIC EYE LEVEL RANGE WITH MICROWAVE OVEN SELF CLEAN LOWER OVEN MODEL RM980PXYW0 W White, N Almond 10 92 Litho in U.S.A. c 1992 WHIRLPOOL CORPORATION Part No. COOKTOP PARTS 1 4371918
INSTALLATION, OPERATION and MAINTENANCE MANUAL for Cres Cor 12kW QUIKTHERM RETHERM OVENS
 Rev. 2 (7/13) Page 1 of 11 INSTALLATION, OPERATION and MAINTENANCE MANUAL for Cres Cor 12kW QUIKTHERM RETHERM OVENS RO151029 Rev. 2 (7/13) Page 2 of 11 TABLE OF CONTENTS SUBJECT PAGE INSTALLATION INSTRUCTIONS...
SINGLE DISHDRAWER TM DISHWASHER
 SINGLE DISHDRAWER TM DISHWASHER DD4SA & DD4SCT models INSTALLATION GUIDE US CA 595B 08.7 SAFETY AND WARNINGS! WARNING! Electrical Shock Hazard Before installing the dishwasher, remove the house fuse or
TRUE INDUCTION DOUBLE BURNER TI-2C PORTABLE INDUCTION COOKTOP MANUAL
 TRUE INDUCTION DOUBLE BURNER TI-2C PORTABLE INDUCTION COOKTOP MANUAL DOUBLE BURNER TI-2C INDUCTION COOKTOP MANUAL 1 *Previous model# S2F2 TABLE OF CONTENTS I. II. III. IV. V. VI. Important safety Information
72 ONYX XL FLAT PANEL ELECTRIC FIREPLACE
 72 ONYX XL FLAT PANEL ELECTRIC FIREPLACE Model Numbers: 80005 OWNER S MANUAL WARNING Read and understand this entire owner s manual, including all safety information, before plugging in or using this product.
Reproduction or other use of this Manual, without the express written consent of Vulcan, is prohibited.
 SERVICE MANUAL ELECTRIC RESTAURANT RANGES E36LC SERIES ML-136624 E36SLC MODEL SHOWN - NOTICE - This Manual is prepared for the use of trained Vulcan Service Technicians and should not be used by those
Specifications 3. Bladder 5. Chimney 12. Air Supply 12. Anti-Rollout Device and Ash Auger Tube 14. Timer 15
 TABLE OF CONTENTS Page No. Specifications 3 Bladder 5 Fire Door 7 Chimney 12 Air Supply 12 Anti-Rollout Device and Ash Auger Tube 14 Timer 15 Supply Line and Return Line Threaded Connectors 15 Low Water
A HEATER KIT With Diesel Engine Connection Fittings
 A-12142 HEATER KIT With Diesel Engine Connection Fittings Figure 1 (General Layout and Parts I.D.) Page 1 of 6 Read these instructions and identify all components. Please retain these instructions for
347002K/177002K/34900
 Service Manual Models: 347002K/177002K 34900/347012K Manifold Block Style Recovery/Recycling/Recharging Unit For R-12 or R-134a Only TABLE OF CONTENTS: Theory of Operation and Safety Precautions... 2 Depressurizing
INSTALLATION INSTRUCTIONS John Deere One Series; 1023E, 1025R and 1026R Models A HEATER KIT. Figure 1 (General Layout and Parts I.D.
 A-11978 HEATER KIT Figure 1 (General Layout and Parts I.D.) Read these instructions and identify all components. Please retain these instructions for future reference and parts ordering information. Refer
PO Box 827 Hawley, MN (218) Fax (218)
 Fax (218)") Introduction Before proceeding with the installation or operation of the Oil Alert System, read all instructions thoroughly, as well as complying with all Federal, State and Local codes, Regulations and
Introduction Before proceeding with the installation or operation of the Oil Alert System, read all instructions thoroughly, as well as complying with all Federal, State and Local codes, Regulations and
3 In 1 AIR CONDITIONER with REMOTE CONTROL MODEL NO: CA9000 PART No: OPERATION & MAINTENANCE INSTRUCTIONS
 3 In 1 AIR CONDITIONER with REMOTE CONTROL MODEL NO: CA9000 PART No: 32305600 OPERATION & MAINTENANCE INSTRUCTIONS 0304 Parts List Item Part No Description Qty 1 FT900001 Top Cover 1 2 FT900002 Filter
INSTALLATION, OPERATION and MAINTENANCE MANUAL for Cres Cor 2kW RETHERMALIZER
 Rev. 0 (4/14) Page 1 of 11 INSTALLATION, OPERATION and MAINTENANCE MANUAL for Cres Cor 2kW RETHERMALIZER REVOLUTION FOODS MODEL CO15102 Rev. 0 (4/14) Page 2 of 11 TABLE OF CONTENTS SUBJECT PAGE INSTALLATION
Over-the-Range Microwave Oven Installation Instructions MVH130* MVH230* MVH330*
 Over-the-Range Microwave Oven Installation Instructions MVH130* MVH230* MVH330* * Additional alphanumeric characters representing other models in the series may follow each model number. Keep these instructions
ELECTRIC FLAT PANEL FIREPLACE HEATER
 ELECTRIC FLAT PANEL FIREPLACE HEATER Model Numbers: 80-2000A-42 OWNER S MANUAL AC 120V 60Hz 1500W WARNING Read and understand this entire owner s manual, including all safety information, before plugging
CEILING FAN OWNER'S MANUAL
 CEILING FAN OWNER'S MANUAL READ AND SAVE THESE INSTRUCTIONS MODEL: 52-135-5WA-13 FAN RATING AC 120V. 60Hz CUL LISTED MODEL : AC-552OD 1. TOOLS AND MATERIALS REQUIRED Philips screw driver Blade screw driver
User Manual AIR HOG. Vacuum Booster REV. 3/20/ Stowe Dr. Poway, CA P: (858) F: (858)
 F: (858)") User Manual AIR HOG Model: 7303L Vacuum Booster REV. 3/20/18 13655 Stowe Dr. Poway, CA 92064 P: (858) 679-1191 F: (858) 726-6005 INTRODUCTION Dear Customer: Congratulations on the purchase of your new
User Manual AIR HOG Model: 7303L Vacuum Booster REV. 3/20/18 13655 Stowe Dr. Poway, CA 92064 P: (858) 679-1191 F: (858) 726-6005 INTRODUCTION Dear Customer: Congratulations on the purchase of your new
Avery Dennison Troubleshooting Guide Instructional Bulletin #8.34 Revised: May 2011
 Introduction Screen printing is one of the most complex means of image reproduction due to the many variables in substrate, ink chemistries, and application techniques. Continual adjustments are frequently
TCW 2000 Ice liner refrigerator and freezer PIJ
 TCW 2000 Ice liner refrigerator and freezer OVER VIEW The unique rotomoulded Chest Freezer and inclined Refrigerator with two separate compartments and compressors worldwide Hold over time @ 32 C Hold
Glass Chimney Hood. Installation & User Instructions Please keep for future reference
 Glass Chimney Hood Installation & User Instructions Please keep for future reference 4897549 4897556 Important Please read these instructions fully before installing or using These instructions contain
MW402 Integrated Dishwasher
 MW402 Integrated Dishwasher Manual for Installation, Use and Maintenance 1 Customer Care Department The Group Ltd. Harby Road Langar Nottinghamshire NG13 9HY T : 01949 862 012 F : 01949 862 003 E : customer.care@cda.eu
MODELS CMA-180 VL/180 VLTall PARTS MANUAL Rev 2.02B
 MODELS CMA-180 VL/180 VLTall PARTS MANUAL Rev 2.02B C M A D I S H M A C H I N E S 1 2 7 0 0 K N O T T A V E N U E GARDEN GROVE, CALIFORNIA 92841 800-8 5 4-6 4 1 7 FAX 714-895-2141 www.cmadishmachines.com
Wall Mount Electric Fireplace
 Wall Mount Electric Fireplace User Guide Thank you for purchasing the Ivation Wall Mount Electric Fireplace. This User Guide is intended to provide you with guidelines to ensure that operation of this
Factory Direct Walk-In Tubs WALK-IN TUB. Installation Manual. For Model Numbers VT2848, VT2853, VT3153 and VT3255
 Factory Direct Walk-In Tubs WALK-IN TUB Installation Manual For Model Numbers VT2848, VT2853, VT3153 and VT3255 FACTORY DIRECT WALK-IN TUBS Thank you for choosing an Vitality Tubs Walk-In Tub. Vitality
Technical Data. Name: ERIKA Automat fully automatic machine to divide and to round dough pieces of the same size
 AUTOMAT MANUAL 1 Technical Data Name: ERIKA Automat fully automatic machine to divide and to round dough pieces of the same size Type Divisions Dough Portions (in ounces) Plate Nos. 3 30 1.0 3.5 #35 4/40A
Smart-Wall TV Kit - Installation & Operation Instructions -
 If any parts are missing or damaged, contact your Dealer before starting installation. DO NOT install a damaged kit. Be sure to also reference the appliance Installers Guide. Approvals The flexible duct
Manual for MC91 SETUP INSTRUCTIONS
 Manual for MC91 SETUP INSTRUCTIONS Evaporative cooling works on the principle of heat absorption by moisture evaporation. Simply put, heat is removed from the air as water evaporates. You feel this principle
ELECTRIC FLAT PANEL FIREPLACE HEATER
 ELECTRIC FLAT PANEL FIREPLACE HEATER Model Numbers: WM50; WM-50-W; WS-G-01;WS-G-02 OWNER S MANUAL WARNING Read and understand this entire owner s manual, including all safety information, before plugging
Instruction Manual. Cheddar Easy All-In-One Cheese Corn Shop
 Instruction Manual Cheddar Easy All-In-One Cheese Corn Shop Model No. 2703-00-000 10700 Medallion Drive, Cincinnati, Ohio 45241-4807 USA 2017 Gold Medal Products Co. Part No. 110028 SAFETY PRECAUTIONS
Instruction Manual. Portion Cup Cheese Warmer
 Instruction Manual Portion Cup Cheese Warmer Model No. 5581-00-100, 5581-01-100, and 5581-00-101 10700 Medallion Drive, Cincinnati, Ohio 45241-4807 USA 2017 Gold Medal Products Co. Part No. 74797 SAFETY
READ AND FOLLOW ALL INSTRUCTIONS SAVE THESE INSTRUCTIONS
 READ AND FOLLOW ALL INSTRUCTIONS SAVE THESE INSTRUCTIONS International Patent #9,938,166 Patented Micro-Ozone cell ozone technology: Patent #8367007 1 IMPORTANT SAFETY INSTRUCTIONS Read the maintenance