Pro-Line Wine Dual-Temperature Wine Keg Storage & Dispensing
|
|
|
- Thomasine Flowers
- 6 years ago
- Views:
Transcription


1 MDD23W Series MDD58W Series Pro-Line Wine Dual-Temperature Wine Keg Storage & Dispensing PLEASE READ BEFORE USE Before getting started please read this user manual and at all times follow the important safety instructions. Installation, Use & Maintenance Guide
 and one for reds (55 F). Keg wine is a great value with minimal waste and stays fresh until poured.")
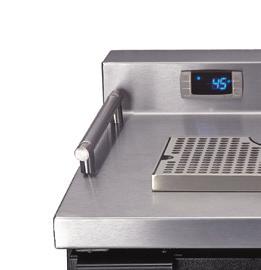
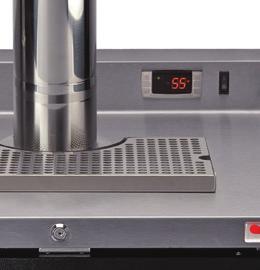
2 Wine On Tap Keg wine is the smart choice. Fine varietal wines are now in kegs. Serve wine at the optimal temperature the vintner intended it to be enjoyed. Pro-Line Wine units feature dedicated dual-temperature zones: one for whites (45 F) and one for reds (55 F). Keg wine is a great value with minimal waste and stays fresh until poured. Increase Sales Dispense Wine Any Place, Any Time Capture incremental sales Open up new opportunities for profitability Dispense Quality Wine Pour consistency from the first to the last glass Once tapped, keg wine stays fresh for up to 6 weeks Eliminate open bottle degradation and oxidation Operating Efficiencyiency No corks to pull, no bottles to stock or recycle Realize maximum product yield Low maintenance cost Small footprint = 26 bottles tles per keg (866) Installation, Use & Maintenance
3 Table Of Contents Receiving & Inspecting...Page 3 Location...Page 4 Installation...Page 4 Install Wine Font Install Keg Tapping Kit Specifications & Dimensions...Page 5 Keg Temperature Storage & Serving...Page 7 Thermostat Adjustment...Page 9 Data Plate...Page 13 Electrical Connections...Page 13 Troubleshooting...Page 14 Maintenance...Page 15 Cleaning the Cabinet Defrosting Cleaning Condensor Coil Door Gasket Maintenance Wiring Diagrams...Page 17 Parts Listing...Page 19 Warranty...Page (866) Installation, Use & Maintenance 2


4 Receiving & Inspecting Upon receiving your new Micro Matic Pro-Line Wine dispenser, check the package and the unit for any damages that may have occurred during transportation. Visually inspect the exterior of the package. If damaged, open and inspect the contents with the carrier. Any damage should be noted and reported on the delivering carrier s receipt. In the event that the packaging is not damaged, yet upon opening, there is concealed damage to the equipment notify the carrier immediately. Notification should be made verbally as well as in written form. Request an inspection by the shipping company of the damaged equipment. Retain all crating material until inspection has been made. Finally, contact Micro Matic. Uncrating 1. Cut and remove the outer packaging. 2. Lift the unit off the skid. 3. If the unit has been laid down during this operation leave upright for 24 hours before plugging into power source. MDD58W Series MDD23W Series (866) Installation, Use & Maintenance

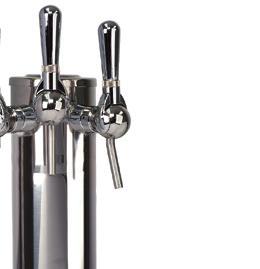
 Place rubber washer over draft tower mounting holes in cabinet top. Place wine line down through holes. Secure font with four bolts provided.")
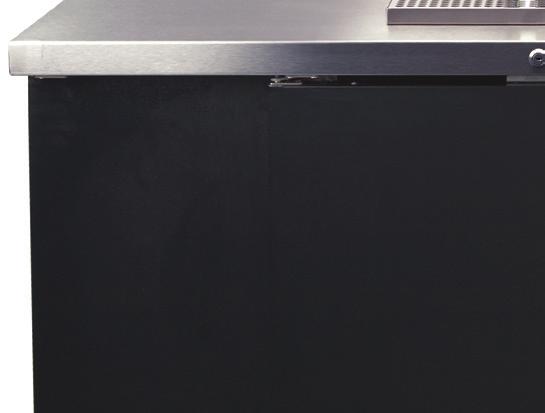
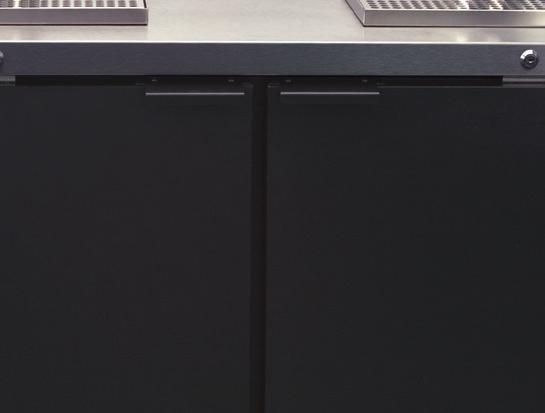
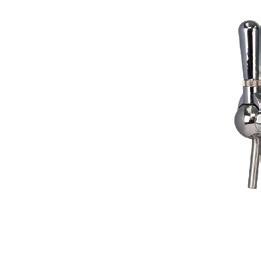
5 Location Be sure the location chosen has a floor strong enough to support the total weight of the unit and contents. Recommended to use a professional installation company. For the most efficient operation, be sure to provide good air circulation around the unit. MDD23W cannot be used for built-in applications. Avoid hot corners and locations near stoves and ovens. It is recommended the unit be installed no closer than 2" from any wall. The place for the dispenser must be open and free of dust and debris. Installation Install Wine Font (Sold Separately) Place rubber washer over draft tower mounting holes in cabinet top. Place wine line down through holes. Secure font with four bolts provided. Attach keg connectors to wine lines (provided with wine font). Install Keg Tapping Kit(s) (Sold Separately) Use only Wine Certified components for wine dispensing. This includes grade 304 stainless steel or better and Barriermaster Flavourlock tubing. Use of these components assures vintners quality. Use John Guest swivel elbows to minimize line kinking. Use zip ties to secure to gas line (blue hose) to John Guest fitting. 1 (866) Installation, Use & Maintenance 4
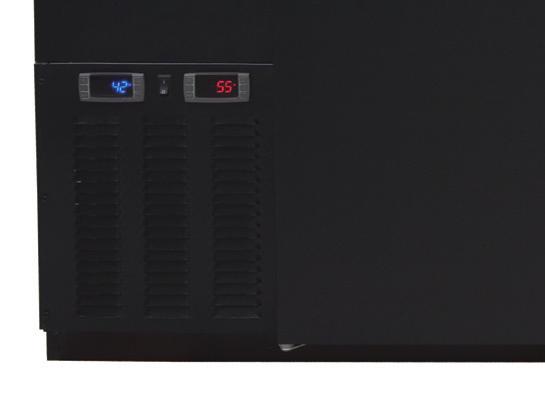
6 Specifications & Dimensions MDD58W Series Capacity of 20 Liter Kegs 8 (4 per zone) Running Amps 6.5 Cubic Feet Per Side TBD Hole for Wine Font 2 Hole Diameter 3" Color-coded Digital Thermostats 2 (Blue LED-Whites & Red LED-Reds) Temperature Range Whites F ( C) Temperature Range Reds F ( C) Approval ETL Listed Condenser HP 1/3 Voltage 115/60/1 Plug Type NEMA-5-15P Cord Length 8' Refrigerant R-134a Charge oz (Grs) 10.5 (300) Exterior Interior Ventilation Plumbing Insulation Accessories 18 gauge stainless steel top, 22 gauge solid self-closing doors, black vinyl over 24 gauge steel front, sides and back. 20 gauge stainless steel floor, rugged false floor, reinforced frame, 24 gauge galvanized walls. Front and side ventilated Automatic condensate evaporator, no drain connection required. Evaporator condensate has been plumbed to a condensate pan located in the compressor housing. Foamed-in-place using high density, CFC-free polyurethane; 1-1/2" top, walls and floor. Castors or 6" Fixed legs TOP FRONT SIDE 1511mm 59 1/2" 305mm 597mm 23 1/2" 604mm 23 3/4" 12" 1302mm 51 1/4" 813mm 32" 527mm 20 3/4" 946mm 37 1/4" 590mm 23 1/4" 584mm 23" 51mm 2" 717mm 28 1/4" (866) Installation, Use & Maintenance
7 Specifications & Dimensions MDD23W Series Capacity of 20 Liter Kegs 4 (2 per zone) Cubic Feet Per Side TBD Hole for Wine Font 1 Hole Diameter 3" Color-coded Digital Thermostats 2 (Blue LED-Whites & Red LED-Reds) Temperature Range Whites F ( C) Temperature Range Reds F ( C) Approval ETL Listed Running Amps 2.7 Condenser HP 1/6 Voltage 115/60/1 Plug Type NEMA-5-15R Cord Length 8' Refrigerant R-134a Charge oz (Grs) 10.5 (300) Exterior Interior Ventilation Plumbing Insulation Mobility 18 gauge stainless steel top, 22 gauge solid doors, black vinyl over 24 gauge steel front, sides and back. 20 gauge stainless steel floor, rugged false floor, reinforced frame, 24 gauge galvanized walls. Rear ventilated Automatic condensate evaporator, no drain connection required. Evaporator condensate has been plumbed to a condensate pan located in the compressor housing. Foamed-in-place using high density, CFC-free polyurethane; 1-1/2" top, walls and floor. Castors are standard and not removable. 1 (866) Installation, Use & Maintenance 6
8 Keg Temperature: Storage & Serving Storage It is important to understand that when the keg of wine is delivered it must be properly stored. White wine must be stored inside the cooler as soon as possible, as it may take as many as 24 hours for the temperature to be reduced to the desirable range. It is recommended to store both reds and whites at room temperature (approximately 72 F.) Wine kegs stored in a walk-in cooler (approximately 38 F) may dramatically effect the time it takes to reach the desired serving temperatures. Allow 24 hours for kegs to reach the desired serving temperature (45 F for whites and 55 F for reds). Just like a bottle of wine, the best temperature to store white or red wines is between F: neither too cold, nor too warm. Remember, wines are both cold- and heatstabilized. Most white wines are cold-stabilized to approximately 36 F. If the wine gets any colder for any length of time, the risk arises that the naturally occurring tartrates may drop out of solution and appear as sediment in the bottom of a wine glass. Serving Pro-Line Wine units are designed to maintain your wine keg temperature within the vintners recommended temperature serving range: White wines: 45 F (range: F) Red wines: 55 F (range: F) IMPORTANT NOTICE: The thermostats on the Pro-Line Wine units have been factory preset at approximately 45 F for white wine dispensing and approximately 55 F for red wine dispensing. Any change to the factory settings will affect performance of unit and void the warranty. Factory testing has produced results that show consistent wine (liquid) temperatures are being maintained by the unit. The Pro-Line Wine unit operates like any refrigeration unit; the compressor is engaged when the interior air temperature reaches the pre-determined maximum level, cooling the unit until it reaches the pre-determined minimum level. The goal is consistent wine (liquid) temperature inside the keg. Thermostat displays are reading the air temperature setting and may be dramatically different than the keg (liquid) temperatures. To verify, measure the temperature of the wine dispensed in the glass (866) Installation, Use & Maintenance

9 MDD23W Air & Wine Temperatures This chart shows that air temperature cycles, but keg (liquid) temperature remains consistent. 1 (866) Installation, Use & Maintenance 8

10 Adjusting the Thermostat The Pro-Line Wine dispenser is designed to maintain your wine keg temperature within the most desirable range of 45 to 55 F (depending on the varietal). You can expect the Pro-Line unit to maintain temperature with the proper temperature control setting and in a normal environment. If a different setting is desired, follow these instructions to adjust the thermostat. To display target set point, in programming mode it selects a parameter or confirms an operation To start a manual defrost (only XR02CX). Key Combination Operation To lock or unlock the keyboard In programming mode it browses the parameter codes or increases the displayed value. In programming mode it browses the parameter codes or decreases the displayed value. To enter into programming mode To return to room temperature display Symbol Mode Operation On Flashing On Flashing On Flashing On Flashing Compressor enabled Anti short cycle delay enabled (AC parameter) Defrost in progress Dripping in progress Measurement unit Programming mode Measurement unit Programming mode (866) Installation, Use & Maintenance
11 How To See The Set Point 1. Push and immediately release the key, the set point will be displayed. 2. Push and immediately release the key or wait about five (5) seconds to return to normal display. How To Change The Set Point 1. To change the set point number, push the key for more than two (2) seconds. 2. The number of the set point will be displayed and the or LED will blink. 3. To change the set number push the arrow up or down keys within ten (10) seconds. 4. To hold the new set point number push the key again or wait ten (10) seconds. How To Change A Parameter Number 1. Enter the Programming mode by pressing the keys for three (3) seconds, the or LED will blink. 2. Select the required parameter. Press the key to display the number. 3. Use the up or down arrow keys to change the number. 4. Press to store the new number and move to the following parameter. To exit: Press or wait fifteen (15) seconds without pressing a key. NOTE: The set number is stored even when the procedure is exited by waiting for the time-out to expire. How To Enter The Hidden Menu 1. Enter the programming mode by pressing the keys for three (3) seconds, the or LED will blink. 2. Release the keys, then again push the keys for more than seven (7) seconds. The L2 label will be displayed immediately followed by the Hy parameter. NOW YOU ARE IN THE HIDDEN MENU 3. Select the required parameter. 4. Press the key to display its number. 5. Use the up or down arrows to change its number. 6. Press the key store the new number and move to the following parameter. To Exit: Press the or wait 15 seconds without pressing a key. NOTE 1: If no parameter is present in L1, after three (3) seconds the np message is displayed. Keep the keys pushed until the L2 message is displayed. NOTE 2: The set number is stored even when the procedure is exited by waiting for the time-out to expire. NOTE: Any change in these parameters will effect unit performance and void warranty. 1 (866) Installation, Use & Maintenance 10
12 Parameters for MDD23W Thermostat Parameter Description For Blue Display For Red Display SEt Set point Hy Differential 10 3 LS Minimum set point US Maximum set point ot Thermostat probe calibration 8 0 P2 Evaporator probe presence n n oe Evaporator probe calibration 0 0 od Outputs activation delay at start up 3 3 AC Anti-short cycle delay 1 1 Cy Compressor ON time with faulty probe 8 6 Cn Compressor OFF time with faulty probe CF Temperature measurement units F F re Resolution (only for C) in in Ld Default display P1 P1 dy Display delay 5 2 de Defrost termination temperature id Interval between defrost cycles 8 0 Md Maximum length for defrost 15 1 df Display during defrost sp sp AU Maximum temperature alarm AL Minimum temperature alarm Ad Temperature alarm delay da Exclusion of temperature alarm at startup d2 Second probe display (866) Installation, Use & Maintenance
13 Parameters for MDD58W Thermostat Parameter Description For Blue Display For Red Display SEt Set point Hy Differential 10 5 LS Minimum set point US Maximum set point ot Thermostat probe calibration 8 5 P2 Evaporator probe presence n n oe Evaporator probe calibration 0 0 od Outputs activation delay at start up 3 3 AC Anti-short cycle delay 1 1 Cy Compressor ON time with faulty probe 6 6 Cn Compressor OFF time with faulty probe CF Temperature measurement units F F re Resolution (only for C) in in Ld Default display P1 P1 dy Display delay 2 2 de Defrost termination temperature 0 0 id Interval between defrost cycles 0 0 Md Maximum length for defrost 1 1 df Display during defrost rt rt AU Maximum temperature alarm AL Minimum temperature alarm Ad Temperature alarm delay da Exclusion of temperature alarm at startup d2 Second probe display 0 0 Pt Parameter table code (readable only) 5 5 rl Firmware release (readable only) (866) Installation, Use & Maintenance 12
14 Data Plate The data plate is located inside the unit, near the top front left corner. Under no circumstances should the data plate be removed from the unit. The data plate is essential to identify the particular features of the unit and is of great benefit to installers, operators and maintenance personnel. It is recommended that, in the event the data plate is removed, you copy down the essential information in this manual for reference before installation. If service is required call Service agent will require the data plate information. Electrical Connections Refer to the amperage data in this manual or on data plate and your local code or the National Electrical Code to be sure unit is connected to the proper power source. Verify correct incoming voltage according to the Data Plate information. A protected circuit of the correct voltage and amperage must be run for connection of the supply cord. Unit must be grounded and connected in accordance with NEC Article 422 Appliances. DANGER: Power must be turned off and disconnected from the power source whenever performing maintenance, repair or cleaning the condensing unit. If unit is still running when power is off, disconnect power at the circuit breaker before unplugging the unit. WARNING: Unit and compressor warranties are void if failure is due to improper electrical installation (866) Installation, Use & Maintenance
15 Troubleshooting Sometimes, working failures are due to simple causes which can be solved by the user. Before asking for the help of a qualified technician, you have to do some verifications. These failures are not covered by the warranty: 1. Refrigeration is not cooling? a. Check the unit is still connected to power supply. 2. The thermostats on the Pro-Line Wine units have been factory preset at approximately 45 F for white wine dispensing and 55 F for red wine dispensing. Any change to the factory settings will affect performance of unit and void the warranty. 3. After 24 hours, refrigerated compartments do not reach temperature? a. Check temperature of dispensed wine. b. Check that the door gasket is clean and in good condition; door is sealed. c. Check that the fan is operating. 1 (866) Installation, Use & Maintenance 14
16 Maintenance Cleaning the Cabinet Proper cleaning of stainless steel requires a soft cloth, never use steel pads, wire brushes or scrapers. Cleaning solutions need to be alkaline or non-chloride cleaners. Any cleaner containing chlorides will damage the protective film of the stainless steel. Chlorides are also commonly found in hard water, salts, household and industrial cleaners. Routine cleaning of stainless steel can be done with soap and water. Extreme stains or grease should be cleaned with a non-abrasive cleaner and plastic scrub pad. Stainless steel cleaners available which can restore and preserve the finish of the steel s protective layer. Never use an acid based cleaning solution. Many food products have an acidic content which can deteriorate the finish these items include peppers, tomatoes and other vegetables. Be sure to clean ALL food products from any stainless steel surface. The interior of the cabinet should be cleaned only with lukewarm water, taking care not to scratch the galvanized metal surface. Mild detergents are recommended. Defrosting The unit will not require defrosting if the door is only opened for a minimum time. Should ice form on evaporator turn unit off and allow to defrost. Make sure the door closes properly and gasket seals completely as warm air entering the unit will cause evaporator to freeze and malfunction. Do not use a pick, knife, etc., to pry ice from evaporator as this could puncture evaporator or damage the coils (866) Installation, Use & Maintenance
17 Cleaning Condenser Coil Clean the condenser coil every three months. A dirty condenser will reduce the performance of the cooling system. Do not block airflow to the perforated panel and do not operate the Pro-Line Wine unit in environments above 100 F. DANGER: Power must be turned off and disconnected from the power source whenever performing maintenance, repair, or cleaning the condensing unit. Disconnect unit from power supply. Remove compressor cover panel and carefully blow out any dust or debris on or around the condensing unit. Use a vacuum or compressed air to blow though the condenser coil. THE CONDENSER MUST BE CLEANED AT REGULAR INTERVALS (30-60 DAYS). FAILURE TO DO SO CAN CAUSE COMPRESSOR MALFUNCTION AND WILL VOID WARRANTY. If you keep the condenser clean you will minimize your service expense and lower your electrical costs. Failure to maintain a clean condenser coil will cause high temperatures and excessive run times. Continuous operation with dirty or clogged condenser coils can result in compressor failures. Gasket Maintenance Gaskets require regular cleaning to prevent mold and mildew build up and also to keep the elasticity of the gasket. Gasket cleaning can be done with the use of warm soapy water. Avoid full strength cleaning products on the gasket as this can cause it to become brittle and prevent a proper seal. Never use sharp tools or knives to scrape or clean the gasket which could possibly tear the gasket and rip the bellows. Gaskets can easily be replaced and do not require the use of tools or authorized service persons. 1 (866) Installation, Use & Maintenance 16
18 Wiring Diagram MDD23W Series Standard Color Green Dark Blue Brown Light Blue Brown Dark Blue Yellow Red Black White White Black Black Striped Black White (866) Installation, Use & Maintenance
19 Wiring Diagram MDD58W Series Standard Color Green Dark Blue Brown Light Blue Brown Dark Blue Yellow Red Black White White Black Black Striped Black White 1 (866) Installation, Use & Maintenance 18


20 Parts Listing Item Part # Description MDD23W MDD58W Castors & Legs M0013 Castor w/o B D M0014 Castor with B D Compressors M0073 Compressor EM55HNX M0082 Start Kit Compressor EM55HNX M0002 Filter 25gr M0020 Compressor NE6187Z M0035 Start Kit Compressor NE6187Z M0001 Filter 40gr. 1 2 Condensers & Others Condenser Coil M0009 Condenser Coil Fan Condenser Condensing Units M17301M0034 Condensing Unit 1 M17301M0036 Condensing Unit 1 4 Doors & Others 6 M16901M0153 Black Left Door Kit 1 M16901M0154 Black Right Door Kit 1 M16901M0133 Black Door Kit M0133 Door Spacer M0007 Door Gasket M0019 Door Central Gasket M0056 Lock (Master Key) M16909M0019 Left Self-Closing Hinge Kit 1 M16909M0020 Right Self-Closing Hinge Kit 1 M16909M0023 Right Hinge Kit Evaporators & Others Fan Evaporator 115V M0003 Fan Evaporator 120V M0009 Evaporator Coil M0017 Evaporator Coil M0002 Grid Fan Evaporator (866) Installation, Use & Maintenance


21 Parts Listing Pro-Line Wine Item Part # Description MDD23W MDD58W Controllers M032 Thermometer Digital M0033 Thermometer Digital M0034 Inner Side Panel Heater M026 Probe 2 2 Panels M10917M0549 Bottom Panel 1 M10917M0621 Inner Side Panel M10917M0567 Side Panel 1 20 M10917M0133 Back Panel 1 M10917M0164 Back Panel M10913M0500 Top Panel M0022 Handrail M0005 Separator Handrail 4 Racks M0032 Plastic Bottom Protector 2 3 M10305M0011 Plastic Bottom Protector 1 M18101M0261 Top MDD23W 1 M18101M0264 Top MDD58W 1 CO2 Distributor M0002 Air Distributor 4 Ways 2 Handles M10917M0503 Black Handle, Door Hardware M0018 Bolt Hex, M.4 DOMO M0028 Bolt M6x M0106 Support Hinges M0107 Support Hinges M0118 Support Hinges M0119 Support Hinges M0008 Power Cord w/ Connections M0011 Bumper 2 38 A10905M0221 Probe Protector M0132 Rubber Membrane 2 Capillary Tubes Capillary tube 0.42 x 9.5 FT Capillary tube 0.54 x 5.9 FT (866) Installation, Use & Maintenance 20
22 Notes: (866) Installation, Use & Maintenance
23 Warranty For warranty service call: Please have the model number and serial number. Warranty Claims Procedure: If there is a defect in material or factory workmanship covered by this Warranty reported to Micro Matic during the period the applicable Warranty is in force and effect, Micro Matic will repair or replace, at Micro Matic s option, that part of the Equipment that has become defective. Micro Matic will cover labor cost within one year from the Warranty Commencement date or 15 months from shipment date, whichever occurs first. Micro Matic shall bear all labor costs in connection with the installation of these replacement parts, provided that, the installation is conducted by Micro Matic or its authorized representative. Charges for warranty travel time to round trip total of (2) two hours or up to 100 miles total. Any charges exceeding those stated herein or overtime rates must have prior authorization by Micro Matic. by the User to Micro Matic within thirty (30) days after the date the User discovered, or should have discovered, the claim. In connection with all claims under this Warranty, Micro Matic will have the right, at its own expense, to have its representatives inspect the Equipment at the User s premises and to request all of User s records pertaining to the Equipment to determine whether a defect exists, whether the conditions set forth in this Warranty have been satisfied, and whether or not the applicable Warranty is in effect. Exclusions from and Conditions to Warranty Coverage: This Warranty does not cover parts or accessories, which (a) carry the warranty of a supplier or (b) are, abused. Application of this Warranty is further conditioned upon the following: Additional Four Year Compressor Part Warranty: In addition to the warranty set above. Micro Matic warrants the compressor (part only) for an additional four (4) years based on the installation date. This warranty is for defects both in workmanship and material under the normal and proper use and maintenance service. The four (4) year extended warranty only applies to hermetically sealed parts of the compressor and does not apply to any other part or component, including, but not limited to cabinet, temperature control, refrigerant, motor starting equipment, fan assembly, or any other electrical or mechanical component. The original purchaser shall be responsible for returning the defective compressor to Micro Matic prepaid. This warranty shall be void if the compressor, in Micro Matic s sole judgment, has been subjected to misuse, neglect, alteration or accident, operated contrary to the recommendations specified by the Unit manufacturer, repaired or altered by anyone other than Micro Matic in any way so as, in Micro Matic s sole judgment, to affect its quality or efficiency or if the serial number has been altered, defaced or removed. This warranty does not apply to a compressor in any unit that has been moved fro the location where it was originally installed. Parts Warranty Coverage: Micro Matic warrants all new machine parts produced or authorized by Micro Matic to be free from defects in material and workmanship for a period of 90 days from the Warranty Commencement Date. If any defect in material and workmanship is found to exist within the warranty period, Micro Matic will replace the defective part without charge. Defective parts become the property of Micro Matic. Micro Matic will have no responsibility to honor claims received after the date the applicable Warranty expires. Notwithstanding the foregoing, any claim with reference to the Equipment or any parts therefore for any cause shall be deemed waived unless submitted Installation: The Equipment must be properly installed in accordance with Micro Matic s installation procedures. No Alteration: The Equipment must not have been modified or altered from its condition at the date of original installation. Any alteration from factory settings on thermostats will void warranty. Use. Micro Matic equipment in not designed for personal, family or household purposes, and its sale for such purposes is not intended. in the event the equipment is so used, this warranty shall be null and void, and the equipment shall be deemed to have been sold as is-where is without any warranty of any kind, including without limitation any warranty of title, non-infringement, merchant-ability or fitness for a particular purpose. Proper Maintenance and Operation. The Equipment must be properly maintained and operated in accordance with Micro Matic s maintenance and operating procedures. All service, labor and parts must be acquired from Micro Matic or its authorized service representative for the User s area. This warranty is void if failure is a direct result of handling and/or transportation, fire, water, accident, misuse, acts of god, attempted repair by unauthorized persons, improper installation, if serial number has been removed or altered, or if unit is used for purpose other than it was originally intended. Failure to comply with any of these conditions will void this Warranty. In addition, this Warranty does not cover defects due to apparent abuse, misuse or accident. 1 (866) Installation, Use & Maintenance 22
24 1 (866) D Micro Matic USA, Inc.
Bottle Coolers. Manual for installation, use and Maintenance
 Bottle Coolers. Manual for installation, use and Maintenance 1 RECEIVING AND INSPECTING Upon receiving your new Fagor Equip, check the package and the machine for any damages that may have occurred during
Solid Door Top Mount Reach-In Freezer
 Solid Door Top Mount Reach-In Freezer Service, Installation and Care Manual Please read this manual completely before attempting to install or operate this equipment. Notify carrier of damage! Inspect
Sandwich/Salad Table Under-counter Refrigerator Worktop Refrigerator
 Sandwich/Salad Table Under-counter Refrigerator Worktop Refrigerator Service, Installation and Care Manual Please read this manual completely before attempting to install or operate this equipment. Notify
Glass Door Merchandiser Refrigerator and Freezer
 Glass Door Merchandiser Refrigerator and Freezer (Swing and Sliding Door ) Service, Installation and Care Manual Please read this manual completely before attempting to install or operate this equipment.
Chef Base Refrigerators
 Chef Base Refrigerators Service, Installation and Care Manual Please read this manual completely before attempting to install or operate this equipment. Notify carrier of damage! Inspect all components
COUNTER TOP REFRIGERATION MODEL SERIES HUBM-2RB/HUBM-2FB/HUBM-3.5RB/HUBM-3.5FB HUBM-2R/HUBM-2F/HUBM-3.5R/HUBM-3.5F
 HUBM-2R HUBM-2F HUBM-3.5R HUBM-3.5F HUBM-2RB HUBM-2FB HUBM-3.5RB HUBM-3.5FB Please read this manual completely before attempting to install or operate this equipment. Notify carrier of damage! Inspect
Upright Chiller & Freezer Service, Installation and Care Manual
 Upright Chiller & Freezer Service, Installation and Care Manual Please read this manual completely before attempting to install or operate this equipment. Notify carrier of damage! Inspect all components
FAGOR BAR EQUIPMENT. Manual for installation, use and maintenance.
 FAGOR BAR EQUIPMENT Manual for installation, use and maintenance. TABLE OF CONTENTS 1 RECEIVING AND INSPECTING THE EQUIPMENT 3 2 SPECIFICATIONS 4 3 INSTALLATION 5 3.1 UNCRATING 5 3.2 SEALING 5 3.3 CLEANING
REFRIGERATORS AND FREEZERS Manual for installation, use, and maintenance
 REFRIGERATORS AND FREEZERS Manual for installation, use, and maintenance Contents RECEIVING AND INSPECTING THE EQUIPMENT... 3 SPECS... 4 INSTALLATION... 6 OPERATION... 10 MAINTENANCE... 21 TROUBLE SHOOTING...
Instruction Manual. Bottle Cooler. Models HBC-50 (-S) HBC-65 (-S) HBC-80 (-S) HBC-95 (-S) hoshizakiamerica.com. Issued: Revised:
 HBC-65 (-S) HBC-80 (-S) HBC-95 (-S) hoshizakiamerica.com. Issued: Revised:") Instruction Manual Bottle Cooler Models HBC-50 (-S) HBC-65 (-S) HBC-80 (-S) HBC-95 (-S) hoshizakiamerica.com Issued: 06-11-2018 Revised: WARNING Only qualified service technicians should install and service
Instruction Manual Bottle Cooler Models HBC-50 (-S) HBC-65 (-S) HBC-80 (-S) HBC-95 (-S) hoshizakiamerica.com Issued: 06-11-2018 Revised: WARNING Only qualified service technicians should install and service
Direct Draw Equipment
 Instruction Manual Direct Draw Equipment Models HDD-1-24 (-S) HDD-2-59 (-S) HDD-3-69 (-S) HDD-3-80 (-S) HDD-4-95 (-S) hoshizakiamerica.com Issued: 08-04-2018 Revised: WARNING Only qualified service technicians
Turbo Air Speed up the Pace of Innovation TBB-4SB CAUTION! PLEASE KEEP POWER SWITCH ON BEFORE OPERATING THIS EQUIPMENT
 Turbo Air Speed up the Pace of Innovation CAUTION! PLEASE KEEP POWER SWITCH ON BEFORE OPERATING THIS EQUIPMENT Underbar Equipment Back Bars Installation and Operation Manual Please read this manual completely
Horizontal Bottle Cooler Installation and Operation Manual
 Speeds Up the Pace of Innovation Horizontal Bottle Cooler Installation and Operation Manual Please read this manual completely before attempting to install or operate this equipment! TBC-50SD, 50SB/ TBC-95SD,
ASBER BAR EQUIPMENT Manual for installation, use and maintenance
 ASBER BAR EQUIPMENT Manual for installation, use and maintenance CONTENTS 1 RECEIVING AND INSPECTING THE EQUIPMENT 3 2 SPECIFICATIONS 4 3 DIMENSION 5 4 INSTALLATION 7 4.1 UNCRATING 7 4.2 SEALING 7 4.3
Power Pack Service Manual
 Power Pack Service Manual MMPP4301-EP MMPP4301 MMPP4301-PKG MMPP4302 MMPP4302-PKG MMPP4305-PKG MMPP4301-WC MMPP4302-WC MMPP4305-PKG-WC www.micromatic.com 1 TABLE OF CONTENTS Equipment Specifications...
ref. com Owner s Manual for models: A Step Above the Standard Thank you for choosing EVEREST
 www.everest ref. com Owner s Manual for models: Back Bar Coolers " Deep Back Bar Coolers Glass Door Back Bar Coolers " Deep Galss Door Back Bar Coolers " Deep Galss Sliding Door Back Bar Coolers EBB3,
Power Pack Service Manual
 Power Pack Service Manual MMPP4301-EP MMPP4301 MMPP4301-WC MMPP4301-PKG MMPP4301-PKG-WC MMPP4302 MMPP4302-WC MMPP4302-PKG MMPP4302-PKG-WC MMPP4303-PKG MMPP4303-PKG-WC MMPP4303-PKG-3 MMPP4305-PKG MMPP4305-PKG-WC
Power Pack Service Manual
 Power Pack Service Manual MMPP4301-EP MMPP4301 MMPP4301-WC MMPP4301-PKG MMPP4301-PKG-WC MMPP4302 MMPP4302-WC MMPP4302-PKG MMPP4302-PKG-WC MMPP4303-PKG MMPP4303-PKG-WC MMPP4303-PKG-3 MMPP4305-PKG MMPP4305-PKG-WC
E-Chef Hot Food Table Installation and Operation Manual
 E-Chef Hot Food Table Installation and Operation Manual Please read this manual completely before attempting to install or operate this equipment! Notify carrier of damage! Inspect all components immediately.
OWNER S MANUAL STAINLESS STEEL REACH-IN SERIES. Model: ATF1 ATF2 ATF3 ATR1 ATR2 ATR3 ATF2 ATR2
 OWNER S MANUAL STAINLESS STEEL REACH-IN SERIES Model: ATF1 ATF2 ATF3 ATR1 ATR2 ATR3 ABF1 ABF2 ABF3 ABR1 ABR2 ABR3 ABF1 ABR1 ATF2 ATR2 ABF3 ABR3 Please read the manual carefully and follow all instructions.
GLASS DOOR MERCHANDISER REFRIGERATOR & FREEZER. Installation, Operation and Maintenance Instructions
 GLASS DOOR MERCHANDISER REFRIGERATOR & FREEZER Installation, Operation and Maintenance Instructions TABLE OF CONTENTS COMMERCIAL REFRIGERATOR SAFETY... 3 SERIAL NUMBER INFORMATION... 4 RECEIVING AND INSPECTING
Milk Coolers Installation and Operation Manual Please read this manual completely before attempting to install or operate this equipment!
 Turbo Air Speed up the Pace of Innovation CAUTION! PLEASE KEEP POWER SWITCH ON BEFORE OPERATING THIS EQUIPMENT Milk Coolers Installation and Operation Manual Please read this manual completely before attempting
OPERATING INSTRUCTIONS
 OPERATING INSTRUCTIONS SPECIALTY REFRIGERATED TRANSPORT CABINETS FOR SATELLITE LOCATIONS RBQ-96 Caution: Read the instructions before using the machine. CONGRATULATIONS......and thank you for purchasing
INSTALLATION AND OPERATING MANUAL
 INSTALLATION AND OPERATING MANUAL Refrigerated Island Merchandiser FOR PARTS & SERVICE Contact: Piper Products, Inc. Phone: (800) 544-3057 Ask for Service Department IMPORTANT! This manual contains important
DIRECT DRAW BEER COOLERS Installation, Operation and Maintenance Instructions
 DIRECT DRAW BEER COOLERS Installation, Operation and Maintenance Instructions INSPECTION When the equipment is received, all items should be carefully checked against the Bill of Lading to ensure all crates
Blue Air. Commercial Refrigeration Inc. Installation & Operation Manual Ice Cream Freezers
 Blue Air Commercial Refrigeration Inc. Installation & Operation Manual Ice Cream Freezers Please read this manual completely before installing or operating this unit! BACF11 BACF15 BACRF14 Blue Air reserves
INSTALLATION AND OPERATING MANUAL
 INSTALLATION AND OPERATING MANUAL Salad Bars Olive Bars Food Prep Cases Refrigerated Cases with Air-Over Displays Refrigerated Cases with Coppered Cold Well Displays Cases with Under-Counter Refrigerators
Refrigerator Freezer Installation and Operation Manual
 Speeds Up the Pace of Innovation CAUTION! PLEASE KEEP POWER SWITCH ON BEFORE OPERATING FREEZER Refrigerator Freezer Installation and Operation Manual Please read this manual completely before attempting
GCG-10. Instruction Manual. G-Series Cooler. Manual is for the following models: GCG-10-N33EB G-10-N33EB UPRIGHT COOLER
 G-Series Cooler GCG-10 UPRIGHT COOLER Manual is for the following models: GCG-10-N33EB G-10-N33EB Instruction Manual Manual is for the following models: GCG-10-N33EB G-10-N33EB Instruction Manual GCG-10
REFRIGERATORS AND FREEZERS Manual for installation, use, and maintenance
 REFRIGERATORS AND FREEZERS Manual for installation, use, and maintenance Contents 1 RECEIVING AND INSPECTING THE EQUIPMENT... 3 2 SPECIFICATIONS... 4 3 DIMENSIONS... 6 4 INSTALLATION... 10 4.1 UNCRATING...
INSTALLATION AND OPERATING MANUAL
 INSTALLATION AND OPERATING MANUAL Refrigerated Merchandisers with Air-Over Displays Refrigerated Low-Profile Mobile Merchandiser Refrigerated High-Profile Mobile Merchandiser Refrigerated Grab-N-Go Merchandiser
Refrigerator Freezer Installation and Operation Manual
 Speeds Up the Pace of Innovation CAUTION! Refrigerator Freezer Installation and Operation Manual PLEASE KEEP POWER SWITCH ON BEFORE OPERATING THIS EQUIPMENT Please read this manual completely before attempting
POWER PACK SERVICE MANUAL
 POWER PACK SERVICE MANUAL MMPP4301-EP MMPP4301 MMPP4301-WC MMPP4301-PKG MMPP4301-PKG-WC MMPP4302 MMPP4302-WC MMPP4302-PKG MMPP4302-PKG-WC MMPP4303-PKG MMPP4303-PKG-WC MMPP4303-PKG-3 MMPP4305-PKG MMPP4305-PKG-WC
Operation Manual and Parts Directory
 Operation Manual and Parts Directory ST24, ST36, ST48, ST60, ST72 and ST96 Slide Top Coolers ST36-B ST48-SF Glastender, Inc. 5400 North Michigan Road Saginaw, MI 48604-9780 800.748.0423 989.752.4275 Fax
POWER PACK SERVICE MANUAL
 POWER PACK SERVICE MANUAL MMPP4301-EP MMPP4301 MMPP4301-WC MMPP4301-PKG MMPP4301-PKG-WC MMPP4302 MMPP4302-WC MMPP4302-PKG MMPP4302-PKG-WC MMPP4303-PKG MMPP4303-PKG-WC MMPP4303-PKG-3 MMPP4305-PKG MMPP4305-PKG-WC
BOTTOM MOUNT REFRIGERATORS AND FREEZERS Installation, Operation and Maintenance Instructions
 BOTTOM MOUNT REFRIGERATORS AND FREEZERS Installation, Operation and Maintenance Instructions INSPECTION When the equipment is received, all items should be carefully checked against the Bill of Lading
InstructIon Manual KrEs EQuIPMEnt stands
 Instruction Manual Instruction Manual SELF-CONTAINED AND REMOTE Kairak KRES model refrigerated equipment stand units are available in many lengths from 36 to 120 inches long. These units are available
REFRIGERATED DROP-INS (2-6)FT-DI Installation and Operating Manual
FT-DI Installation and Operating Manual") REFRIGERATED DROP-INS (2-6)FT-DI Installation and Operating Manual For service information call 800-544-3057 Please have the following information available before calling. Information can be found on
REFRIGERATED DROP-INS (2-6)FT-DI Installation and Operating Manual For service information call 800-544-3057 Please have the following information available before calling. Information can be found on
UNDERCOUNTER LABORATORY REFRIGERATORS and FREEZERS Installation, Operation and Maintenance Instructions
 UNDERCOUNTER LABORATORY REFRIGERATORS and FREEZERS Installation, Operation and Maintenance Instructions INSPECTION When the equipment is received, all items should be carefully checked against the bill
INSTALLATION AND OPERATING MANUAL
 INSTALLATION AND OPERATING MANUAL Refrigerated Cases with Air-Over Displays Refrigerated High Profile Grab-N-Go FOR PARTS & SERVICE Contact: Piper Products, Inc. Phone: (800) 544-3057 Ask for Service Department
Installation & Operation Manual Ice Cream Freezers
 Installation & Operation Manual Ice Cream Freezers Please read this manual completely before installing or operating this unit! BACF11 BACF15 Blue Air reserves the right to make product modification at
BOTTOM MOUNT REFRIGERATORS & FREEZERS Installation, Operation and Maintenance Instructions
 BOTTOM MOUNT REFRIGERATORS & FREEZERS Installation, Operation and Maintenance Instructions INSPECTION When the equipment is received, all items should be carefully checked against the Bill of Lading to
G-7s. Instruction Manual. G-Series Cooler COUNTERTOP COOLER. Part No.11IPA
 G-Series Cooler COUNTERTOP COOLER Part No.11IPA-061000 Instruction Manual FOR YOUR FUTURE REFERENCE This easy-to-use manual will guide you in getting the best use of your cooler. Remember to record the
OPERATING INSTRUCTIONS
 OPERATING INSTRUCTIONS HLC WITH DIXELL CONTROLS Quick Start On Page 7 Detailed Operating Manual for Controller Included Separately HLC SERIES WITH RADIANT HEAT SYSTEM FWE HLC WITH DIXELL CONTROLS HLC-SL1826-5L
G-10s. Instruction Manual. G-Series Cooler UPRIGHT COOLER. Part No.11IPA
 G-Series Cooler UPRIGHT COOLER Part No.11IPA-062800 Instruction Manual FOR YOUR FUTURE REFERENCE Thank you for using our product. This manual will guide you in getting the best use of your cooler. Remember
Glass Door Refrigerators
 To better help you obtain assistance or service should you ever need it, write down the following information about the product. This information is on the identification label located on the left hand
BOTTLE COOLERS SLIDE TOP INSTALLATION AND OPERATION INSTRUCTION MANUAL MODEL SERIES BC24- BC36- BC48- BC72- BC96-
 BOTTLE COOLERS SLIDE TOP INSTALLATION AND OPERATION INSTRUCTION MANUAL MODEL SERIES BC24- BC36- BC48- BC72- BC96- Printed in the USA Rev. 11/2012 No. BC-1.02 WE RAISE THE BAR TABLE OF CONTENTS WARRANTY
WCPT-3 and WCPT-4. Effective Date: 2017 IMPORTANT INFORMATION READ BEFORE USE. Drop-in Display Cases
 WCPT-3 and WCPT-4 Service and Installation Manual Please read this manual completely before attempting to install or operate this equipment! Notify carrier of damage! Inspect all components immediately.
Service Manual Models CPH2 & CPH3
 Plate Heater Service Manual Models CPH2 & CPH3 888-892-2213 alluserv.com Plate Heater Service Manual Models CPH2 & CPH3 Table of Contents Introduction...................................................2
User Manual. Commercial School Milk Cooler User s Manual. Commercial School Milk Coolers: MC34, MC49, MC58
 Commercial School Milk Cooler User s Manual Commercial School Milk Coolers: MC34, MC49, MC58 12/2015 Please read the manual thoroughly prior to equipment set-up, operation and maintenance. - 1 - Exploded
CWR265SZ 26 Bottle Built-in Wine Cooler Owner s Manual
 CWR265SZ 26 Bottle Built-in Wine Cooler Owner s Manual This owner s manual provides instructions on safe installation use, and troubleshooting assistance. Please read it carefully and save it for reference
Quality Refrigeration OWNER S MANUAL. Instructions for the installation, operation and maintenance of Traulsen: Heated Banquet & Transport Carts
 Quality Refrigeration OWNER S MANUAL Instructions for the installation, operation and maintenance of Traulsen: Heated Banquet & Transport Carts This Traulsen unit is built to our highest quality standards.
POLAR TEMP FARM MORTALITY UNIT OPERATION MANUAL
 POLAR TEMP FARM MORTALITY UNIT OPERATION MANUAL www.polartemp.com TABLE OF CONTENT Disclaimer.......................................... Page 3 Inspection, unpacking and FMU setup.................. Page
Operation Manual and Parts Directory
 Operation Manual and Parts Directory Lettuce Crisper LC Glastender, Inc. 5400 North Michigan Road Saginaw, MI 48604-9780 800.748.0423 989.752.4275 Fax 800.838.0888 / 989.752.4444 www.glastender.com Rev.
240 ASSEMBLY & OPERATION MANUAL
 WineKoolRTM 240 Read the "USE and CARE" guide before you start! LOCATING YOUR WINE CELLAR Provide 2 1/2 Never locate your wine cellar outdoors or in an area with extremes of temperature and humidity. These
OPERATING INSTRUCTIONS
 OPERATING INSTRUCTIONS ORIGINAL INSTRUCTIONS MOBILE HUMI-TEMP CABINETS "ETC-1826-HD" SERIES: Non-Insulated 18"x26" Tray Server "ETC-UA-HD" SERIES: Non-Insulated Universal Server P SERIES: Banquet Servers
INSTRUCTIONN MANUAL. for Angle Curved MMF9106 MMF9109 MMF9112
 INSTRUCTIONN MANUAL for Angle Curved Top Chest Freezer MMF9106 MMF9109 MMF9112 Please read this user s manual thoroughly before using. Keep this manual handy for further reference. Email: Service@atosausa.com
User Manual. Commercial Chest Freezer User s Manual 360CF5, 360CF8, 360CF14, 360CF18
 Commercial Chest Freezer User s Manual 360CF5, 360CF8, 360CF14, 360CF18 11/2017 Please read the manual thoroughly prior to equipment set-up, operation and maintenance. - 1 - Installation Important!!! Please
BEFORE USE, PLEASE READ AND FOLLOW ALL SAFETY RULES AND OPERATING INSTRUCTIONS
 WINE CELLAR Model SWC1840 Owner s Manual BEFORE USE, PLEASE READ AND FOLLOW ALL SAFETY RULES AND OPERATING INSTRUCTIONS Write the Serial Number here Felix Storch, Inc. Summit Appliance Division An ISO
User Manual / Installation Instructions
 User Manual / Installation Instructions Outdoor Refrigerator MODEL: L24REF Lynx Professional Grills 5895 Rickenbacker Rd., Commerce, CA 90040 Service: (888) 289-5969 Tel: (323) 838-1770 Fax: (323) 838-1778
Operator s Manual. IP-100 Immersion Probe Cooler
 Operator s Manual IP-100 Immersion Probe Cooler 110-810 04.27.11 Table of Contents Introduction... 3 General Information... 3 General Safety Information... 3 Safety Recommendations... 4 Unpacking Your
PLEASE READ THIS MANUAL BEFORE USING YOUR APPLIANCE. KEEP THIS MANUAL IN A SAFE PLACE FOR FUTURE REFERENCE.
 File name: ARFG-42FB Care & Use Manual.pub Last revised: June 3rd 2008 PLEASE READ THIS MANUAL BEFORE USING YOUR APPLIANCE. KEEP THIS MANUAL IN A SAFE PLACE FOR FUTURE REFERENCE. ASSEMBLER / INSTALLER
COMMERCIAL REFRIGERATOR INSTRUCTION MANUAL
 COMMERCIAL REFRIGERATOR INSTRUCTION MANUAL Model No.: TGM-69R FEATURE CHART ADVERTISING PANEL FLOURESCENT SWITCH COOLING FAN FLOURESCENT LAMP EVAPORATOR INNER DRAIN PAN SHELF DOOR HANDLE GLASS DOOR CONDENSER
A PROUD HERITAGE OF EXPERIENCE & QUALITY. Beverage Cooler VT-SC-1
 A PROUD HERITAGE OF EXPERIENCE & QUALITY Beverage Cooler VT-SC-1 O W N E R S M A N U A L W W W. V I N O T E M P. C O M Your Beverage Cooler This unit can be used for Storage and/or Service. The cooler
Quick-Start Operating Guide Document No Acrylic Vacuum Chambers Copyright 2010 Terra Universal Inc. All rights reserved. Revised October 2010
 Document No. 1800-60 Acrylic Vacuum Chambers Copyright 2010 Terra Universal Inc. All rights reserved. Revised October 2010 Terra Universal, Inc. TerraUniversal.com 800 S. Raymond Ave. Fullerton, CA 92831
INSTRUCTION MANUAL COMMERCIAL GRADE KEGERATOR MODEL:XCK-1
 INSTRUCTION MANUAL COMMERCIAL GRADE KEGERATOR MODEL:XCK-1 BEFORE USE, PLEASE READ AND FOLLOW ALL SAFETY RULES AND OPERATING INSTRUCTIONS. Kegco has a policy of continuous improvement on its products and
Manual is for the following models: G-26 GCG-26 GCG-26-C31N* G-26-C31N* GCG-26-C231N* GCG-26-CA31N* *G,I,M,7,J plug. Instruction Manual.
 G-Series Cooler G-26c/GCG-26c UPRIGHT COOLER Manual is for the following models: G-26 GCG-26 GCG-26-C31N* G-26-C31N* GCG-26-C231N* GCG-26-CA31N* *G,I,M,7,J plug Instruction Manual Manual is for the following
RPI Industries, Inc.
 IMPORTANT: THE FOLLOWING INFORMATION SHOULD BE RETAINED FOR FUTURE REFERENCE RPI Industries, Inc. building a better case for sales BAKERY and DELI USE AND SERVICE MANUAL WARRANTY INFORMATION SPECIFICATIONS
GCG-9. Instruction Manual. G-Series Cooler. Manual is for the following models: GCG-9-N13EB G-9-N13EB GCG-9-B13EB UPRIGHT COOLER
 G-Series Cooler UPRIGHT COOLER Manual is for the following models: -N13EB G-9-N13EB -B13EB Instruction Manual FOR YOUR FUTURE REFERENCE This easy-to-use manual will guide you in getting the best use of
Owner / Operator Use and Care Guide I SERIES 224 ICE CUBE MACHINE
 Owner / Operator Use and Care Guide I SERIES 224 ICE CUBE MACHINE THE HOTTEST MACHINES ON ICE CORNELIUS INC www.cornelius.com IMPORTANT: TO THE INSTALLER. It is the responsibility of the Installer to ensure
MANUAL FOOD HOLDING & TRANSPORT CABINETS WITTCO MODEL NUMBERS
 O P E R A T I O N S M A I N T E N A N C E MANUAL FOOD HOLDING & TRANSPORT CABINETS WITTCO MODEL NUMBERS 1826-4 1826-7-BC-IS 1826-7 1826-13-BC-IS 1826-7-BC 1826-15-BC-IS 1826-13-BC 1826-15-BC 1826-40-BC
ASSEMBLY & OPERATION MANUAL
 WineKoolRTM 250 500 READ THE "USE AND CARE GUIDE" BEFORE YOU START LOCATING YOUR WINE CELLAR Provide 2 1/2 Never locate your wine cellar outdoors or in an area with extremes of temperature and humidity.
MODEL 620 ELECTRICAL DATA: FEATURES: DIMENSIONS: SHIPPING INFORMATION: AVAILABLE ACCESSORIES: CONVECTION OVEN 1/4 SIZE PAN
 CONVECTION OVEN 1/4 SIZE PAN MODEL 620 Convection is the ideal way to cook convenience foods and this compact oven can bake it all. Heated, circulating air throughout the oven penetrates food quickly.
CHEST FREEZER INSTRUCTION MANUAL. Model No.: EWCF5WBX EWCF7WBX
 CHEST FREEZER INSTRUCTION MANUAL Model No.: EWCF5WBX EWCF7WBX To ensure proper use of this appliance and your safety, please read the following instructions completely before operating this appliance.
DH07, DH07A /DH08, DH08A CONVECTED AIR DISH HEATERS
 DH07, DH07A /DH08, DH08A CONVECTED AIR DISH HEATERS DH07 shown INSTALLATION, OPERATION & MAINTENANCE MANUAL Manual P/N 92448 Rev. G 04/02/2009 Copyright 1998 Aladdin Temp-Rite Changes may be made to the
INSTRUCTION MANUAL. UNDERCOUNTER WINE & BEVERAGE COOLER (32 bottles capacity) MODEL:WC-30U
 MODEL:WC-30U") INSTRUCTION MANUAL UNDERCOUNTER WINE & BEVERAGE COOLER (32 bottles capacity) MODEL:WC-30U To ensure proper use of this appliance and your safety, please read the following instructions completely before
INSTRUCTION MANUAL UNDERCOUNTER WINE & BEVERAGE COOLER (32 bottles capacity) MODEL:WC-30U To ensure proper use of this appliance and your safety, please read the following instructions completely before
PLEASE READ THIS MANUAL BEFORE USING YOUR APPLIANCE. KEEP THIS MANUAL IN A SAFE PLACE FOR FUTURE REFERENCE.
 File name: ARDI Care & Use Manual.pub Last revised: Oct 10th 2008 PLEASE READ THIS MANUAL BEFORE USING YOUR APPLIANCE. KEEP THIS MANUAL IN A SAFE PLACE FOR FUTURE REFERENCE. ASSEMBLER / INSTALLER Leave
A910.8A Remote Water Chiller, 8 GPH A A / A A-220V TECHNICAL ASSISTANCE TOLL FREE TELEPHONE NUMBER:
 Remote Water Chiller, 8 GPH A9100080-A / A9100080-A-220V TECHNICAL ASSISTANCE TOLL FREE TELEPHONE NUMBER: 1.800.591.9360 Technical Assistance Fax: 1.626.855.4894 NOTES TO INSTALLER: 1. Please leave this
GENERAL PURPOSE REFRIGERATORS ABT-9R, ABT-14R, ABT-17R, ABT-20R, ABT-30R
 GENERAL PURPOSE REFRIGERATORS ABT-9R, ABT-14R, ABT-17R, ABT-20R, ABT-30R OWNER S INSTRUCTIONS This manual describes how to operate and care for your appliance to get the best, most efficient, performance.
Air Cleaning Equipment, Inc. 303 N. Main St. Broadway, NC iers.com
 Read and Save These Instructions Horizon Galaxy - Installation and Operations Manual Air Cleaning Equipment, Inc. 303 N. Main St. Broadway, NC 27505 www.horizondehumidif iers.com 1 Safety Notes: The Horizon
INSTALLATION, OPERATION, AND SERVICE MANUAL
 Leer, Inc. 206 Leer Street, P.O. Box 206 New Lisbon, WI 53950 1-800- 766-5337 www.leerinc.com INSTALLATION, OPERATION, AND SERVICE MANUAL Form # 1070011 04/16 TABLE OF CONTENTS I. STORAGE and UNPACKING.
OWNER S MANUAL. Installation Operation Maintenance. Saturn Equipment
 OWNER S MANUAL Saturn Stainless Steel Sandwich/Salad Table & Mega Top Refrigerators Undercounter Refrigerators & Undercounter Freezers Installation Operation Maintenance Saturn Equipment www.saturnequipment.com
Installation and Operation Guide For
 Installation and Operation Guide For S23R, S49R, S23F, S49F S23RG, S49RG Refrigerator S23R S49R Freezer S23F S49F Refrigerator S23RG S49RG CONTENTS 1. SPECIFICATIONS 2. SERIAL
RCM-77. Instruction Manual. G-Series Cooler. U.S. Patent No. 8,215,125 RECHARGE COLD MERCHANDISER
 G-Series Cooler RECHARGE COLD MERCHANDISER U.S. Patent No. 8,215,125 Instruction Manual FOR YOUR FUTURE REFERENCE This easy-to-use manual will guide you in getting the best use of your cooler. Remember
GCG-26c. Instruction Manual. G-Series Cooler
 G-Series Cooler UPRIGHT COOLER Manual is for the following models: GCG-26-C14N7 GCG-26-C14NG GCG-26-C14NI GCG-26-C14NM GCG-26-C14NJ GCG-26 G-26-C14N7 G-26-C14NG G-26-C14NI G-26-C14NM G-26-C14NJ G-26 Instruction
OPERATIONS FOOD HOLDING & TRANSPORT CABINETS. wîttco foodservice. equipment
 OPERATIONS MAINTENANCE MANUAL FOOD HOLDING & TRANSPORT CABINETS WITTCO MODEL NUMBERS 1220-105-2-BC 1220-105-3-BC 1220-105-4-BC A A wîttco foodservice equipment F-41009 LIMITED WARRANTY Wittco warrants
G-10f/GCG-10f UPRIGHT COOLER
 G-Series Cooler G-10f/GCG-10f UPRIGHT COOLER Manual is for the following models: G-10F, G-10-F33EB GCG-10F, GCG-10-F33EB GCG-10F2, GCG-10-F233EB G-10-F33EB-HC, GCG-10-F33EB-HC GCG-10-F233EB-HC Instruction
TWO-ZONE WINE COOLERS
 TWO-ZONE WINE COOLERS Models SWC902D SWC1380D Owner s Manual BEFORE USE, PLEASE READ AND FOLLOW ALL SAFETY RULES AND OPERATING INSTRUCTIONS Write Model and Serial Numbers here: Felix Storch, Inc. Summit
READ MANUAL BEFORE OPERATING SYSTEM Read the owner s manual thoroughly before operating to ensure the most efficient use of the system.
 READ MANUAL BEFORE OPERATING SYSTEM Read the owner s manual thoroughly before operating to ensure the most efficient use of the system. Attention Installer: Please be sure this manual and warranty information
AB Can Beverage Cooler
 AB-1200 126-Can Beverage Cooler OWNERS MANUAL Read and save these instructions. A Name You Can Trust Trust has to be earned and we will earn yours. Customer happiness is the focus of our business. 2 From
This manual describes how to operate and care for your appliance to get the best, most efficient, performance. READ THIS BOOK!
 GENERAL PURPOSE DUAL TEMP REFRIGERATOR / FREEZER MODEL NUMBERS: ABT-RFC-3M, ABT-RFC-12M, ABT-RFC-16M, ABT-RFC-17A, ABT-RFC-20A, ABT-RFC-30M OWNER S INSTRUCTIONS This manual describes how to operate and
Table of Contents Welcome and Thank You Note:
 TWR210EBL/TWR215ESS TWR320EBL/TWR325ESS Thermoelectric Wine Cooler Owner s Manual This owner s manual provides instructions on safe installation, use, and maintenance. Please read it carefully and save
AQUA LOGIC S MULTI-TEMP Water-Cooled Marine Duty Series chiller
 AQUA LOGIC S MULTI-TEMP Water-Cooled Marine Duty Series chiller INSTALLATION & OPERATING INSTRUCTIONS Effective 8-19-15 Thank you for purchasing an Aqua logic chiller. It has been designed and built to
TCW 2000 Ice liner refrigerator and freezer PIJ
 TCW 2000 Ice liner refrigerator and freezer OVER VIEW The unique rotomoulded Chest Freezer and inclined Refrigerator with two separate compartments and compressors worldwide Hold over time @ 32 C Hold
FPO OWNER S MANUAL. Climate Comfort Anyplace Imaginable
 Climate Comfort Anyplace Imaginable FPO OWNER S MANUAL Safety Instructions Overview and Specifications Operating Instructions Troubleshooting Warranty Registration 2-3 4-7 8 9 10 SAFETY INSTRUCTIONS 2
XC Portable Air Conditioning
 PORTABLE AIR CONDITIONERS XC Portable Air Conditioning XC-14A, XC-22A, XC-30A Models USER & INSTALLATION MANUAL www.xpcc.com 2013 Xtreme Power Conversion Corporation. All rights reserved. Table of Contents
MODEL 891 FEATURES: ELECTRICAL DATA: DIMENSIONS: SHIPPING INFORMATION: SHIPPING DIMENSIONS: - 19"W 19"D 28"H SHIPPING WEIGHT: - 46 LBS.
 FOOD WARMING/ MERCHANDISING CABINET MODEL 891 With illuminating LED lights and simple Digital Temperature Controller, keeping your products on the shelf will no longer be a challenge. Circulating, heated
Instructional & Operating Manual
 Instructional & Operating Manual For CoolFreeze Series Portable Refrigerators/Freezers CF-18, CF-25, CF-35, CF-40, CF-50, CF-80, CF-110 WAECO USA Clinton, CT www.waecousa.com Safety indications in the
Before Putting Into Use. Important. Tips for Energy Savings
 Before Putting Into Use Before connecting the appliance to the power supply, let it stand for about 2 hours, which will reduce a possibility of malfunctions in the cooling system due to transport handling.
Refridgerated Topping Rail Model: RTR-8 Intended for other than household use. Unit must be kept clear of combustibles at all times.
 DESIGNED SMART. BUILT SOLID. INSTALLATION AND OPERATING INSTRUCTIONS Refridgerated Topping Rail Model: RTR-8 Intended for other than household use. Unit must be kept clear of combustibles at all times.