Installation and Operating Instructions. Fully Electronic Automatic Washing Machine. (Model shown for indicative purposes only)
|
|
|
- Randolf Oliver Carson
- 6 years ago
- Views:
Transcription
 Please")

1 Installation and Operating Instructions Model: MON-MW7012P Fully Electronic Automatic Washing Machine (Model shown for indicative purposes only) Please read these instructions carefully before attempting to install or use this appliance. It is advisable to keep these instructions in a safe place for future reference.
2 Introduction Thank you for choosing this montpellier appliance. It has been designed to give years of trouble-free use provided it is installed and maintained correctly. Please read these instructions carefully before installing or using your appliance. It is advisable to keep your purchase and installation receipts with these instructions in a safe place for future reference. Included is some important safety information in addition to guidelines and recommendations that will enable you to take full advantage of all the functions available. This quality appliance has been tested and certified to meet all applicable UK electrical and safety standards. This appliance must be installed and connected in accordance with current regulations by a qualified electrician. After unpacking the appliance ensure that there is no visible damage. If the appliance has been damaged during transit, do not use it, contact your retailer immediately.
3 Your 2 year Manufacturer's guarantee THIS DOES NOT AFFECT YOUR STATUTORY RIGHTS Your new montpellier appliance carries a free guarantee which protects you against the cost of repairs during the first 24 months from date of purchase provided that: Any claim is accompanied by evidence of the model reference, model serial number and proof of purchase, such as a Sales Receipt, showing that the appliance was purchased within the 24 months prior to the date of claim. What is not covered under the Guaran:t ee Any appliance not correctly installed and operated in accordance with the manufacturer's instructions. Any appliance that is used for anything other than domestic purposes. Any defect caused by accident, misuse, unauthorized modification or inexpert repair. Cost of Call-out where a fault cannot be found with the appliance. Cost of Call-out for work covering routine maintenance, such as, but not exclusively, cleaning of filters or defrosting. Cost of Call-out for work required to correct the alignment of doors following door reversal procedures carried out by you. Use of the appliance by anyone other than the Householder. Use in any commercial environment. Consumable items, such as, but not exclusively, fuses in plugs, bulbs and breakable items which require routine replacement. Repair costs incurred that have not been authorised by Repairtech. Repairs carried out by a non-approved Repairtech engineer. YOUR GUARANTEE IS VALID ONLY IN THE UK. To Register your Appliance simply complete the card in your appliance pack and return it with a stamp affixed or Alternatively you can Register online at SERVICE HELPLINE Should your appliance develop a fault, please call the Repairtech Service Helpline on: Please remember to have all your product details available, including the serial number, before registering a fault. Your service call cannot progress without this information.
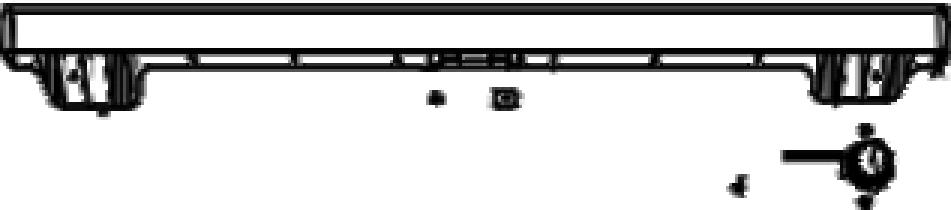
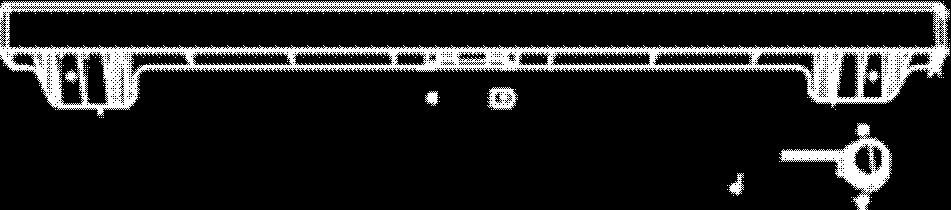
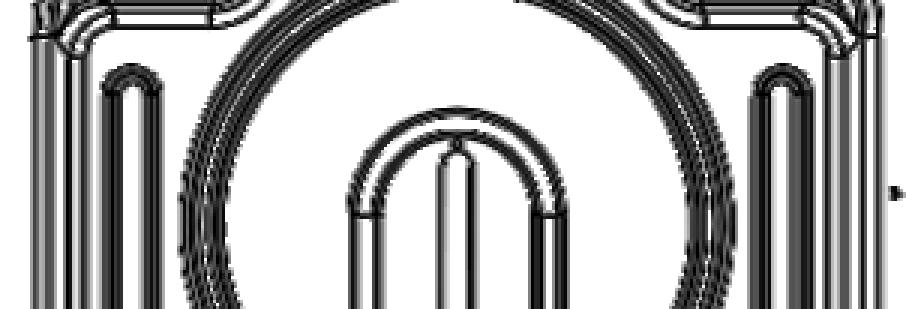


4 Description of the Appliance Control Panel Top Lid Detergent Drawer Door Pump Filter Cover Transit Bolt Water Inlet Valve Discharging Hose Power Cable Transit Bolt Transit Bolt Transit Bolt BEFORE OPERATING YOUR WASHING MACHINE YOU MUST REMOVE THE TRANSIT BOLTS. FAILURE TO DO SO WILL INVALIDATE YOUR GUARANTEE.
5 CONTENTS: Section 1: Safety Instructions -Correct Usage -General Warnings -Safety Warnings Section 2: Installation -Removing Transit Bolts -Adjusting the Feet -Electrical Connection -Water Inlet Hose Connection -Water Discharge Connection 1 2 3/ Section 3: Technical Specifications 10 Section 4: Control Panel -Control Panel -Detergent Drawer -Program Knob Section 5: Washing your Laundry -Preliminary Preparation of Laundry -Putting Laundry in the Machine -Adding Detergent to the Machine -Operating your Machine -Auxiliary Functions -Child Lock -Cancelling a Program -Finishing a Program Section 6: Maintenance and Cleaning -Water Inlet Filters -Pump Filters -Detergent Draw 11 11/ / / Section 7: Troubleshooting 23/24/25 Section 8: Fault Codes 26/27 Section 9: Program Table 28/29/30
6 Section 1. Safety Advice 1.1 Correct Usage Read the user instruction manual. Your machine is designed to be used domestically. Commercial use will cause your warranty to be invalid. Keep pets away from your machine. Please check the packaging of your machine is in good order before installation, and the outer surface of the machine after the package is opened. Do not operate damaged machines. Have your machine installed only by a qualified person. Any interference to your machine by anyone other than a qualified person will invalidate your warranty. The appliance in not intended for use by people (including children) with reduced physical, sensory or mental capabilities, or lack of experience and knowledge unless they have been given supervision or instruction concerning use of the appliance by a person responsible for their safety. Children should be supervised to ensure that they do not play with the appliance. Use your machine only for laundry that has been specified as suitable for washing by the manufacturer. Before operating the washing machine, remove the 4 transit bolts and rubber spacers from the back of the machine. If the bolts are not removed, it will cause heavy vibration, noise and product malfunction (invalidating the guarantee). - Your machine is not covered under warranty for faults caused by any kind of external factors (pesticides, fire, etc.). - Please do not throw away this user manual: keep it for future reference as it contains full operating instructions as well as the serial number of your machine. You will need this should you wish to book a service call. Note: Specifications may vary depending on the product purchased. 1


7 1.2 General Warnings - The ambient temperature for your machine s ideal operation is 15-25ºC. - Frozen hoses can tear and explode. In regions where temperature is below zero, ambient temperature might endanger the safe operation of the electronic circuit board. - Please ensure that the clothes put into your machine do not contain any foreign objects (nails, needles, coins, lighters, matches, clips, etc.) in pockets. These objects can damage your machine. It is recommended that the first washing operation is carried out on a 90º Cotton program but without laundry and using ½ the dose of detergent in the 2nd compartment of the detergent drawer. - If a detergent or softener is exposed to air for any time, residue may be caused, be sure only to put your detergent or softener in the detergent drawer at the beginning of every wash. - It is advised that you unplug your machine and close the water inlet tap if you do not intend to use the machine for a prolonged period of time. Also, leaving the door of your appliance open will prevent the formation of bad odours due to humidity. - Some water might be left in your machine after factory trials and tests conducted due to Quality Control procedures. This is normal and will not damage your machine. - Remember the packaging materials of your machine may be dangerous for children. Keep the packaging materials in a place where children cannot reach them and dispose of them appropriately. - Keep any small parts away from the reach of children and babies. - Use Pre-wash programs only for very dirty laundry. - Never open the detergent compartment when the appliance is running. - In case of any breakdown, unplug the appliance first and then turn the water inlet off. Do not attempt repair by yourself, always contact the authorised service agent help line. - The amount of laundry you put in your washing machine should not exceed the maximum amount indicated. - Never force the door to open when the machine is running. - Do not wash clothes covered in flour or other powders in your machine as it will cause damage. - Please adhere to detergent/fabric conditioner manufacturer s advice regarding the use of fabric conditioner or similar products. - Set up your machine in a place where its door can be completely opened. - Set up your machine in a position where it can be fully ventilated and has constant air circulation. 2
8 1.3 Safety Warnings You must take note of these warnings, as this can protect you and your family. DANGER OF GETTING BURNT! Do not touch the discharge hose or water during the discharge process as the appliance can reach high temperatures during operation. RISK DUE TO ELECTRICAL CURRENT! Do not use multi-sockets on an extension lead. Do not plug in damaged plugs. Never pull the cable when unplugging - always grip the plug itself. Do not plug-in or remove the plug with wet hands. Never touch the machine with wet hands or feet. If the mains cable becomes damaged it must be replaced by an authorised electrician or service agent. DANGER OF FIRE! Do not keep flammable liquids near your machine. The sulphur content of paint removers might cause corrosion. For this reason, never use paint-removing materials in your machine. Never use products that contain solvent material in your machine. Remove all objects from the pockets of your laundry (needles, paperclips, lighters, matches, etc.) before placing it in your machine. 3
9 1.3 Safety Warnings (continued) FALL AND INJURY HAZARD! Do not climb on your machine. The top lid of your machine may break and you might get injured. Tidy the hose, cable and packaging of your machine during installation, to avoid tripping or falling over. Do not turn your machine upside down or on its side. Do not lift your machine by holding it from extruding parts (detergent drawer, door). These parts might break and cause you to get injured. There s the risk of tripping and injury if the materials like hoses and cables are not properly stored after your machine is installed. Machine must be carried by 2 people. CHILD SAFETY! Do not leave children unattended near the machine. Children might lock themselves inside. Door glass and surface may get hot while your machine operates. And as a result of this, touching the machine might damage the skin, especially that of children. Keep packaging material away from children. Danger may occur if detergent or cleaning materials are consumed, and eyes or the skin might be irritated if contact is made. Keep the cleaning materials away from the reach of children. 4


 into the holes")


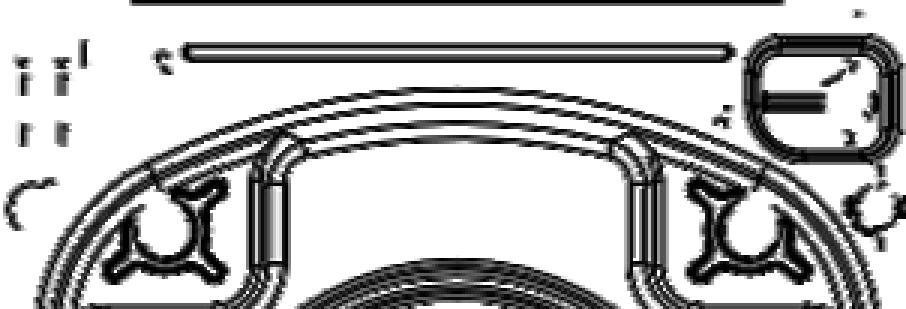
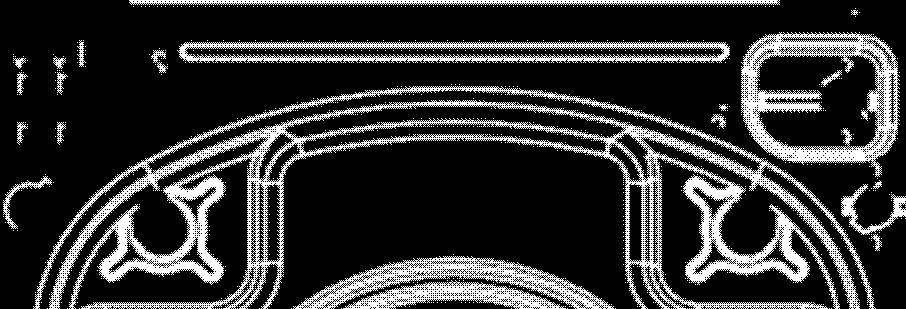
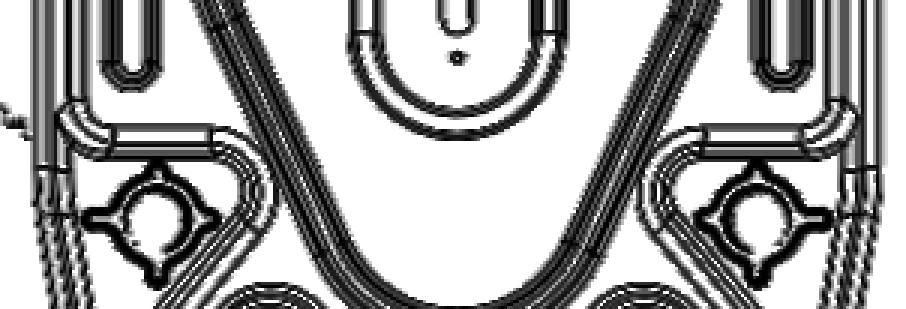
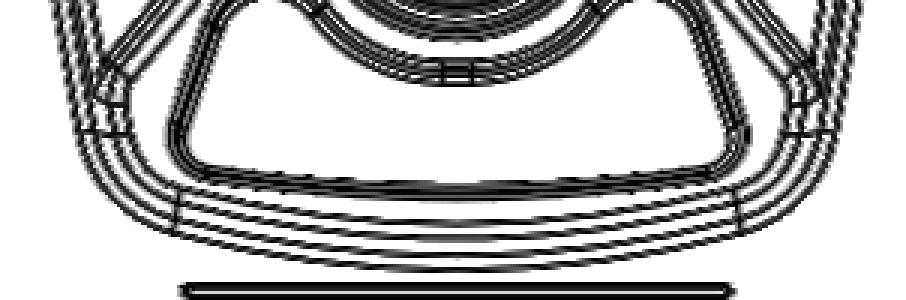
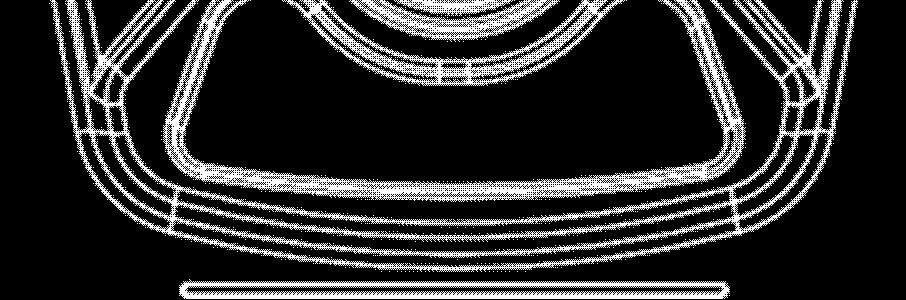
10 Section 2. Installation 2.1 Removing transit bolts Before operating the washing machine, remove the 4 transit bolts and rubber spacers from the back of the machine. If the bolts are not removed, it will cause heavy vibration, noise and product malfunction, (invalidating the guarantee). X4 4 For this reason, the transit bolts should be loosened by being rotated counterclockwise using an appropriate wrench. X4 The transit bolts are removed by pulling out. X4 Fit the plastic transit bolt caps (in the accessories bag) into the holes left by the removal of the transit bolts. The transit bolts should be stored to be used in case of future transportation. NOTE: You must remove the transit bolts of your machine before first use. Faults occurring to the machine if operated with transit bolts fitted will be out of scope of warranty. 5


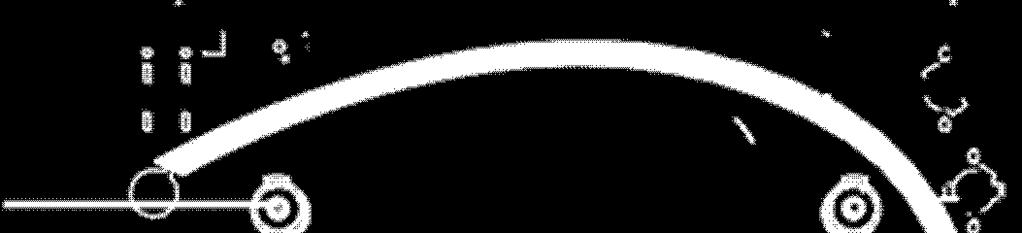
11 2.2 Adjusting the feet Do not install your machine on a carpet or anything that will prevent ventilation under the base. To ensure silent and vibration-free operating of your machine, it should be sited on a non-slippy firm floor. You can adjust the level of your machine by the adjustable feet. Loosen the plastic adjustment nut. Adjust the feet upwards or downward by rotating them. After maintaining the level, compress the plastic adjustment nut upwards again. X4 Note: The machine must be level. Never put cardboard, wood or other materials under your machine if you are trying to level any distortion in the floor. When cleaning the floor, on which your machine stands, be careful not to disturb the balance of the machine. 6


12 2.3 Installation (Electrical Connection) Your washing machine is set to V and 50Hz. The mains cord of your washing machine is equipped with a specific earthed plug. This plug should always be inserted to an earthed socket of 13 amps. The rating of the fuse should be 13 amps. NOTE: Operating your machine below the recommended voltage will cause the life cycle of your appliance to be reduced and its performance to be restricted. 7
 based on its specifications.")
.")


.")
13 2.4 Installation (Water Inlet Hose Connection) Your machine may have either a single inlet (cold) or double water inlets (cold/hot) based on its specifications. A white-capped hose should be connected to the cold water inlet and a red-capped hose to a hot water inlet (applicable for machines with double water inlets). To eliminate water leakages in the connection points, 1 or 2 nuts are provided in the hose package (applicable for machines with double water inlets). Fit these nuts to the ends of new water inlet hoses on the tap end of the hose. Connect the new water inlet hoses to a 3/4, threaded inlet pipe. 3/4 10 mm Connect the white-elbow end of the water inlet hoses to the white filtered water inlet valve on the rear side of the machine and the red-elbow end to the red-filtered one (applicable for machines with double water inlets). Tighten plastic parts of the junctions using your hand. If you are unsure of this process get the work done by a qualified plumber. Flow of water with pressure of Mpa will allow your machine to operate more efficiently. (0,1 Mpa pressure means that more than 8 litres of water will flow per minute). Ensure that the new water inlet hoses are not bent, broken, crushed or the wrong size. If your machine has a hot water connection, the temperature of the water inlet should be maximum 70 Degrees Centigrade. NOTE: Use only the new water inlet hose supplied with your machine while making water inlet hose connections. Never use old, used or damaged water inlet hoses. 8


14 2.5 Installation (Water Discharge Connection) The end of the water discharge hose can be fitted to a specific outlet pipe. Never attempt to extend the water discharge hose by joining two pieces of hose. Do not put the discharge hose of your machine into a bucket or sink. Make sure that the water discharge hose does not bend, buckle, become squashed or stretched. Please note: The water drain hose should be mounted at a height of minimum 60cm, and maximum of 100cm from the ground. ~95cm ~145cm ~140cm ~95cm 95 cm? 150 cm? 0 max.100cm 9
15 Section 3. Technical Specification Operating voltage / frequency (V/Hz) ( )V~/50Hz Total current (A) 13 Water pressure Maximum:1 Mpa Minimum:0.1 Mpa Total power(w) 2200 Maximum dry laundry capacity (kg) 7 Spinning revolution (rev/min) 1200 Program number 23 Dimensions (HeightxWidthxDepth)(mm) 845x597x527 10


16 Section 4. The Control Panel Function Indicator Lights Program Knob Start/Pause Light Program Ready Light Detergent Drawer Start/Pause Button Function Buttons Program End Light (DIAGRAM-1) (DIAGRAM-2) Detergents may form a sediment in your detergent drawer or in the housing of the detergent drawer over time. To clean, pull out the detergent drawer from time to time as shown and wash thoroughly. Pull the detergent drawer out as far as possible. (Diagram 1) Lift the front of the drawer, continue to pull until the drawer is pulled out. (Diagram 2) Wash with an old toothbrush and water. After drying the detergent drawer put it back in the housing in the reverse manner used to remove it. Liquid Detergent Apparatus Main wash detergent compartment Softener Compartment Pre-wash detergent compartment (*) Specifications may vary depending on the product purchased. 11

.")


17 4.1 Control Panel continued. Main wash detergent compartment: In this compartment, use only detergent (liquid or powder). Limescale remover can be used. Fabric conditioner, starch, detergent compartment: You may use fabric softener for your laundry (recommended amount and type by the manufacturer). Sometimes the fabric conditioners you use for your laundry may remain in this compartment. The reason for this is that the conditioner is not viscous. To prevent this situation, more viscous liquid softeners are recommended to be used or the softener could be thinned and then used. Pre-wash detergent compartment: This compartment must only be used when the pre-wash feature is selected. The Pre-wash feature is recommended for very dirty laundry. Select the program you wish to use with the program knob. Set the program selection operation by rotating the program knob in either direction. Ensure that the program knob is exactly on the program you want to use. (*) Specifications may vary depending on the product. 12


, their temperatures (cold, 30º, 40º, 60º, 90º) and degree of")


18 Section 5. Washing your Laundry 5.1 Preliminary Preparation of Laundry Laundry has product labels on them that state their specifications. Wash or dry your laundry according to the specifications on the product label. Separate your laundry according to their types (cotton, synthetic, sensitive, wool etc), their temperatures (cold, 30º, 40º, 60º, 90º) and degree of contamination (slightly stained, stained, highly stained). Never wash your coloured and white laundry together. Wash your coloured laundry separately in the first washing as colours may run. Ensure that there are no metallic materials in your laundry or in pockets. CAUTION: Faults that emerge due to foreign objects in the machine will not be included in the scope of warranty. Zip up and button up clothes. Remove the metallic or plastic hooks from curtains. Turn items such as pants, knitwear, t-shirt and sweat shirts inside out. Place socks, handkerchiefs and suchlike small laundry in a washing net. 13
19 5.1 Preliminary Preparation of Laundry continued. Whitening No whitening Normal wash Ironing temperature Ironing temperature maximum 150 C maximum 200 C No ironing Dry cleaning No dry cleaning Leave flat Hang when wet Dry by hanging Do not tumble dry F Dry cleaning in gas oil, pure alcohol and R113 is allowed P Perchloroethylene R11, R13, Petroleum A Perchlorinethylene 14


20 5.2 Putting Laundry in the Machine Open the door of your machine. Spread your laundry in your machine. NOTE: Maximum loading capacity may vary based on the laundry type you will wash, degree of contamination and the program you have chosen. Do not exceed maximum dry loading capacity indicated in the program table for washing programs. Put each item of laundry in separately. Ensure that no laundry is stuck between the cabinet and click rubber seal when closing the door of your machine. Push the door of your machine until you hear the locking sound. Close the door of your machine properly, otherwise the machine will not start. 15

 will need to be thinned before being put into the drawer. High-density (thick) softeners can clog the compartment and prevent the flow of the softener.")
 into the 2nd compartment of the detergent drawer and set the amount of liquid")
21 5.3 Adding detergent to the machine The amount of detergent put into the machine will depend on the following criteria: Only use detergents produced specifically for automatic washing machines. The amount of detergent to be used for your laundry is printed on the detergent packet. The higher the degree of hardness of the water the more detergent you need to use. Put the fabric softener into the softener compartment of the detergent drawer. Do not exceed the MAX level. Softeners with high density (thick) will need to be thinned before being put into the drawer. High-density (thick) softeners can clog the compartment and prevent the flow of the softener. You can use liquid detergents in all programs. For this, fit the liquid detergent level plate found in the accessories bag or the liquid detergent apparatus (*) into the 2nd compartment of the detergent drawer and set the amount of liquid detergent according to the levels on this plate. Remember to remove the liquid detergent plate. 5.4 Operating your machine Plug your machine in. Open the water tap. Open the machine door. Spread your laundry evenly in the machine. To close, push the door until you hear the locking sound. Selecting a program Select the appropriate program for your laundry from the program table. (*) Specifications may vary depending on the product purchased. 16

22 5.5 Auxiliary Functions Before starting the program, you can optionally select an auxiliary function. Press the button of the auxiliary ufunction you would like to select. If the auxiliary function symbol is displayed on the electronic display, the auxiliary function you have selected will be activated. If the auxiliary function symbol on the electronic display blinks, the auxiliary function you have selected will not be activated. Reason for non-activation: The auxiliary function you want to use in the washing program you have selected is not applicable. Your machine is too far into its current wash program to activate the auxiliary function you would like to select. It is not compatible with an auxiliary function you have selected previously. Half-load detection system Your machine features a half-load detection system. This should be used when the amount of laundry to be washed is approximately half or less than the maximum capacity of the machine. This function will save time, water consumption and energy. 17

23 5.5 Auxiliary Functions continued. Function Buttons 1- No Spin This program is recommended for use with your sensitive clothes for which no spinning is needed. 2- Extra Rinse This function adds an extra rinse to your washing machine program. 3- Easy Ironing By using this function, you can ensure your clothes come our less wrinkled after the wash. If you forget to use an additional function and your machine starts to wash, you can still activate the additional function button. If the indicator light is on, the additional function will be activated. If the indicator light is not on, the additional function will not be activated. Start / Pause Button Used to start a selected program or pause WARNING! You will need to turn the program knob to O(off) position before selecting the program or changing a continuing program. 18
24 5.6 Child Lock Child Lock The child lock is used in order to protect the washing cycle from the effects of unwanted button activations during the cycle. The child lock is activated by pressing the first and third button on the control panel at the same time for more than 2 seconds. When the child lock is activated, LEDs on the function buttons will blink. In order to deactivate the child lock, the same buttons (1st and 3rd) should be pressed again for more than 3 seconds. The deactivation of the child lock is shown by the blinking of LED on the start/pause button. 5.7 Cancelling a program If you wish to cancel any program running: 1. Switch the program knob to O(off) position. 2. Your machine will stop the washing operation and the program will be cancelled. 3. To drain the water accumulated in the machine switch the program knob to any program. 4. Your machine will perform the necessary discharge operation and cancel the program. 5. You can then run your machine by selecting a new program. 5.8 Finishing a program Your machine will automatically stop when the program selected ends. The program end light will come on. Turn the program knob to O(off) position. The door will unlock in approximately two minutes from the program end. You can open the door by pulling the handle of the door. After you unload your clothes leave the door open to dry the interior of the drum. Switch off your machine. Please Note: If the power goes off and on again after a while at any stage of the washing program, your machine will continue the program from the point where it was interrupted. This is not harmful for your machine. 19


25 Section 6. Maintenance and Cleaning Unplug your machine before starting the maintenance and cleaning of your machine. Turn the water off before starting the maintenance and cleaning of your machine. CAUTION: Your machine s parts might be damaged if cleaners with solvents are used. Do not use cleaning materials containing solvents. Water Inlet Filters On the tap side of your machine s water inlet hose and at the ends of water inlet valves, there are filters to prevent the entry of dirt and foreign materials in the water to the machine. If the machine is unable to receive sufficient water although the water tap is opened, these filters should be cleaned. Remove the water inlet hose. Remove the filters found on the water inlet valves by using pincers and wash thoroughly using a brush. Clean the filters of the water inlet hoses located on the tap side by washing thoroughly using a brush. After you clean the filters, re-fit them in the reverse manner to which they were removed. CAUTION: Filters of water inlet valves may be clogged due to a contaminated tap or lack of maintenance. Broken seals will cause water to leak into your machine continuously. Any breakdown that arises due to these reasons are out of the scope of warranty. 20


26 6.1 Maintenance and Cleaning continued. Pump Filters The pump filter system prolongs the life of your pump, which is used to drain the dirty water. It prevents lint entering the pump. Cleaning the pump filter every 2-3 months is recommended. To clean your pump filter: Open the kickplate cover, by pulling the handle. Before opening the filter cover, place a suitable container in front of the filter cover to prevent spillage of water that remains in the pump. Loosen the filter cover by rotating it counter clockwise and drain the water. Remove any foreign materials from the filter. Check the rotation of the pump manually. After you have cleaned the pump, re-fit the filter cover by rotating clockwise. Put the kickplate cover back in place. Do not forget that if you do not fit the filter cover correctly, it will leak water. WARNING! As water in the pump may be hot, wait until it cools down. (*) Specifications may vary depending on the product purchased. 21


27 6.1 Maintenance and Cleaning continued. Detergent Drawer Your detergents may deposit residue in the detergent drawer and housing of the detergent drawer over time. To clean the residue formed, disassemble the detergent drawer periodically. It is recommended that you clean your detergent drawer every 2 months. To remove the detergent drawer: Pull out the detergent drawer until it is fully withdrawn. Keep pulling whilst depressing the section shown below in the detergent drawer and then remove the detergent drawer. Flush it using water and a brush. Collect any residue in the housing of the detergent drawer without dropping them inside the machine. Re-assemble the detergent drawer after drying it using a towel or dry cloth. DO NOT WASH YOUR DETERGENT DRAWER IN A DISHWASHER Flush Stopper Disassemble the detergent drawer. Disassemble the flush stopper and clean out any softener residues completely. Refit the flush stopper after cleaning it. Check that it is fitted properly. Body Clean the outer body of your machine with warm water and a nonflammable cleaning agent that will not abrade the body of your machine. After rinsing with some water, dry it using a soft and dry cloth. Drum Do not leave metallic objects such as needles, paper clips, coins etc. in your machine. These objects lead to formation of rust stains in the drum. To clean any rust stains, use a non-chlorine cleaning agent and follow the instructions of manufacturers of the cleaning agent. Never use wire wool or similar hard objects for cleaning rust stains. 22

28 Section 7. Troubleshooting Any repairs required to your machine should be carried out by our authorised service agents. If your machine requires a repair or if you cannot remove the fault by the help of the information provided as follows: Unplug your machine. Turn the water tap off. FAULT POSSIBLE CAUSE TROUBLE-SHOOTING It is not plugged in. Fuse Blown Plug it in. Replace the fuses. Electricity cut-off. Check mains power. Start/Pause button not Your machine does Press the Start/Pause not start. pressed. button. Program dial at stop Switch the program to the position. desired position. The machine door is not Close the machine door. completely closed. Water tap is turned off. Turn your tap on. Water inlet hose may be Check water inlet hose twisted. and untwist. Your machine does Water inlet hose clogged. Clean water inlet hose not take in water. filters. (*) Valve inlet filter clogged. Clean the valve inlet filters. (*) The machine door not Close the machine door. completely closed. Outlet hose clogged or Check the outlet hose, twisted. then either clean or untwist. Your machine does not discharge water. Pump filter clogged. Clean the pump filter. (*) Laundry settled in the Spread your laundry in the machine unevenly. machine evenly. (*) See the chapter regarding maintenance and cleaning of your machine 23
 Transit bolts fitted for Remove the transit bolts on transportation have not been your machine. (**) disassembled.")
29 7.1 Troubleshooting continued. FAULT POSSIBLE CAUSE TROUBLE-SHOOTING Your machine vibrates. The feet of your machine Adjust the feet on your have not been adjusted correctly. machine and make sure it is level. (**) Transit bolts fitted for Remove the transit bolts on transportation have not been your machine. (**) disassembled. Smaller amount of laundry in This will not stop operation of the appliance. the machine. Your machine is overloaded Do not put in more laundry with laundry or laundry is settled than the recommended amount unevenly. and settle it evenly. Excessive foam is formed in the detergent drawer. Excessive amount of Press on the start/pause detergent used. button to eliminate foam formation, mix a spoon of softener with half a litre of water and pour the mixture into the detergent drawer. After 5-10 minutes, press on start/pause button again. In your next wash, adjust the detergent dose accordingly. Wrong detergent used. Use detergents produced only for automatic washing machines in your machine. The soiling of your laundry does not match the program chosen. Amount of detergent used was insufficient. Unsatisfactory washing result The maximum laundry capacity of your machine has been exceeded. Select the program appropriate for the soiling of your laundry. (See program table) Adjust the amount of detergent based on the amount and contamination degree of your laundry. Load your machine with an amount of laundry which will not exceed the maximum laundry capacity. (**) See the chapter regarding installation of your machine. 24


30 7.1 Troubleshooting continued. FAULT POSSIBLE CAUSE TROUBLE-SHOOTING Unsatisfactory washing result. Water being hard. (contaminated, lime water etc.) Laundry is distributed in your machine unevenly. Adjust the amount of detergent based on the instruction of the detergent manufacturer. Spread your laundry in the machine properly. As soon as the machine is loaded with water, water discharges. No water appears the drum during washing. Laundry has detergent residues on them. Grey spots appear on laundry. i The end of the water outlet hose is too low for the machine. No fault. Water is in the unseen part of the drum. Non-dissolving particles of some detergents may stick to your laundry as white spots. The reason for such spots may be oil, cream or ointment. Set the water outlet hose at appropriate height. (**) Perform an extra rinsing by setting your machine to Rinsing program, or clean the spots with a brush once dry. Apply the maximum amount of detergent instructed by the detergent manufacturer in the next washing operation. Spinning operation is not performed or runs late. No fault. Out of balance load control system has been activated. Out of balance load control system will try to spread your laundry correctly. Spinning operation will begin after your laundry is spread. Place the laundry in the machine in a balanced fashion next time. IMPORTANT! If you are unable to correct a fault after checking the relevant section above, or if you are still in doubt, please call the Repairtech Service Helpline on Please note if you call out an engineer when one of the above faults arises, or to repair a fault that has arisen due to incorrect use, you may have to bear the cost of the call out and repair, even if the product is still within the guarantee period. (**) See the chapter regarding installation of your machine. 25
31 Section 8. Automatic Fault Warnings Your machine is equipped with systems that are capable of both taking necessary precautions and warning you in case of any breakdown by means of continuous self-checking during washing operations. Failure Code Failure Indicator Probable Failure Process to be followed E01 The start/pause light blinks. The door is not shut properly. Shut the door properly so that you hear the click. If the problem persists, turn off the machine, unplug, and contact the Repairtech Helpline. Err 02 The program ready light blinks The water level in your machine is below the heater. The pressure of your water supply may be low or the water may be switched off. Turn the tap on fully. Water may be off, check it. If the problem still continues, your machine will automatically stop after a while. Unplug your machine, turn off the tap and contact the Repairtech Helpline. Err 03 The start/pause light and program read light blinks. The pump has failed or the pump filter is obstructed. Clean the pump filter. If the problem persists, contact the Repairtech Helpline. (*) Err 04 The program end light blinks. Communication error. Shut down your machine and unplug. Turn off your tap and contact the Repairtech Helpline. (*) See the chapter regarding maintenance and cleaning of your machine. 26
32 Section 8. Automatic Fault Warnings continued. Failure Code Failure Indicator Probable Failure Process to be followed Err 05 The start/pause light and program end light blink. The machine heater or heat sensor has failed. Turn off and unplug your machine. Turn off the tap and contact the Repairtech helpline. Err 06 The program ready light and program end light blink. The motor has failed. Turn off and unplug your machine. Turn off the tap and contact the Repairtech helpline. Err 07 The program start/pause light, ready light and program end light stay on permanently. Configuration error. Turn off and unplug your machine. Turn off the tap and contact the Repairtech helpline. Err 08 The start/pause light, program ready light and program end light blink. The motor has failed. Turn off and unplug your machine. Turn off the tap and contact the Repairtech helpline. Err 09 The program ready light and program end light stays on permanently. The network voltage is too high or too low. If the network voltage is lower than 150V or higher than 260V, your machine will automatically stop. When the voltage is recovered, your machine will continue its operation. 27
 Maximum dry laundry amount(kg) COTTON 60C Washing temperature( C) 90 60 5 Maximum dry laundry amount (kg) 5 Detergent compartment 2 Detergent")
 Laundry type / Descriptions Dirty, cotton, coloured and linen textile Underwear, sheet, tablecloth, t-shirt, shirt, towel (max.")
 140 Laundry type/ Descriptions 5 Very dirty, cotton, coloured and linen textile. Underwear, sheet, tablecloth, t-shirt, shirt, towel(max.")
 180 Laundry type / Descriptions Dirty, cotton, coloured and linen tex tile Underwear, sheet,tablecloth, t-shirt, shirt, towel (max.")
 2,5 Maximum dry laundry amount (kg) 3 Detergent compartment 2 Detergent compartment 2 Program duration(min.")
33 Section 9. Washing Program COTTON 90 Washing temperature( C) Maximum dry laundry amount(kg) COTTON 60C Washing temperature( C) Maximum dry laundry amount (kg) 5 Detergent compartment 2 Detergent compartment 2 Program duration (Min.) Laundry type / Descriptions 155 Program duration (Min.) 190 Dirty,boil,cotton and linen textile. Underwear, sheet, tablecloth,t-shirt, shirt, towel(max.2,5kg) Laundry type / Descriptions Dirty, cotton, coloured and linen textile Underwear, sheet, tablecloth, t-shirt, shirt, towel (max.2,5kg) PRE-WASH COTTON Washing temperature( C) 60 M aximum dry laundry a mount(kg) Detergent compartment 1&2 Program duration (Min.) 140 Laundry type/ Descriptions 5 Very dirty, cotton, coloured and linen textile. Underwear, sheet, tablecloth, t-shirt, shirt, towel(max.2,5kg) COTTON 40C Washing temperature( C) 40 Maximum dry laundry amount(kg) 5 Detergent compartment 2 Program duration (Min.) 180 Laundry type / Descriptions Dirty, cotton, coloured and linen tex tile Underwear, sheet,tablecloth, t-shirt, shirt, towel (max.2,5kg) ECO WASH ECO 20 Washing temperature( C) 40 Washing temperature( C) 20 Maximum dry laundry amount(kg) QUICK WASH SYNTHETIC 60 Washing temperature( C) 30 Washing temperature( C) 60 Maximum dry laundry amount(kg) 2,5 Maximum dry laundry amount (kg) 3 Detergent compartment 2 Detergent compartment 2 Program duration(min.) 30 Laundry type / Descriptions 5 Maximum dry laundry amount (kg) 2,5 Detergent compartment 2 Detergent compartment 2 Program duration (Min.) 80 Laundry type / Descriptions Program duration (Min.) 102 Dirty, cotton, coloured and linen textile Laundry type / Descriptions Underwear, sheet, tablecloth, t-shirt, shirt, towel (max.2,5kg) Program duration (Min.) 84 Slightly dirty, cotton, coloured and linen textile Laundrytype / Descriptions Less dirty, cotton and linen textiles. (Underwear, bedsheet, tablecloth, tow el (max.2kg) bedcloth, etc. Dirty, synthetic or synthetic mixture textile. Nylon socks, blouse NOTE: Program duration might change according to the amount of laundry, tap water, ambient temperature and selected additional functions. 28
 40 Maximum dry laundry amount (kg) Detergent compartment 2 Program duration 65 3 Slightly dirty, synthetic or synthetic L aundry type")
 Laundry type / Descriptions 2 70 Slightly dirty, cotton, coloured, synthetic or synthetic mixture sensitive laundry.")
 30 Maximum dry laundry amount (kg) L aundry type / Descriptions Slightly dirty, synthetic or synthetic")
 73 2 Dirty, hand and machine to wash wool laundry.")

34 9.1 Washing Program continued. SYNTHETIC 40 Washing temperature( C) 40 Maximum dry laundry amount (kg) Detergent compartment 2 Program duration 65 3 Slightly dirty, synthetic or synthetic L aundry type / Descriptions mixture textile. Nylon socks, blouse DELICATE 30 Washing temperature( C) 30 Maximum dry laundry amount (kg) Detergent compartment 2 Program duration (Min.) Laundry type / Descriptions 2 70 Slightly dirty, cotton, coloured, synthetic or synthetic mixture sensitive laundry. Silk mixture, shirt, blouse, polyester, poliamid, mixture textile All wool laundry SYNTHETIC COLD Washing temperature( C) - Maximum dry laundry amount (kg) Detergent compartment 2 Program duration 72 3 WOOL 30 Washing temperature( C) 30 Maximum dry laundry amount (kg) L aundry type / Descriptions Slightly dirty, synthetic or synthetic mi x- ture sensitive laundry. Washed withou t Laundry type / heating the tap water. Descriptions Nylon socks, blouse Detergent compartment 2 Program duration (Min.) 73 2 Dirty, hand and machine to wash wool laundry. All wool laundry RINSING L aundry type / Descriptions When you need additional rinsing after the washing process, you can use this program for all kinds of clothes. SPINNING L aundry type / Descriptions When you need additional spinning after the washing process, you can use this program for all kinds of clothes. DRAINING L aundry type / Descriptions This program is used to drain the dirty water from the machine. If you want the water inside your machine to be drained before the program ends, you can use this program. NOTE: Program duration might change according to the amount of laundry, tap water, ambient temperature and selected additional functions. 29


35 9.1 Washing Program continued. NOTE: Program duration might change according to the amount of laundry, tap water, ambient temperature and selected additional functions. 30
36 If after the previous checks there is still a fault, please contact the Repairtech Service Help-line below. Please ensure that you have the model number, serial number, date of purchase and retailers information available before you make the call. SERVICE HELP-LINE Should your appliance develop a fault, please call the Repairtech Service Helpline on:

37 Important Note: This appliance is marked according to the European directive 2002/96/EC on Waste Electrical and Electronic Equipment (WEEE). By ensuring this product is disposed of correctly, you will help prevent potential negative consequences for the environment and human health, which could otherwise be caused by inappropriate waste handling of this product. The symbol on the product, or on the documents accompanying the product, the Crossed Out Wheelie Bin, indicates that this appliance may not be treated as household waste. Instead it shall be handed over to the applicable collection point for the recycling of electrical and electronic equipment. Disposal must be carried out in accordance with local environmental regulations for waste disposal. For more detailed information about treatment, recovery and recycling of this product, please contact your local authority, your household waste disposal service or the retailer where you purchased the product. We continuously try to improve our products for the benefit of our customers. For this reason we reserve the right to make changes to any product at any time, without notice Issue: 01/
Installation and Operating Instructions
 THE PERFECT BALANCE OF FUNCTION AND STYLE LAUNDRY - DISHWASHING - COOKING - COOLING Installation and Operating Instructions Freestanding ing Machine MW6201P -6kg - 1200rpm White Please read these instructions
WASHING MACHINE L510W
 WASHING MACHINE L510W CONTENTS 4 CHAPTER-1: BEFORE USING THE APPLIANCE Correct Usage 6-7 General warnings 8-9-10-11 Safety warnings 12-13-14-15-16-17 Packaging and Environment 18 Savings Information
Installation and Operating Instructions MODEL: MSE46W
 Installation and Operating Instructions MODEL: MSE46W MSE50W MODEL: Free Standing Electric ElectricOven Oven Free Standing Please read these instructions carefully before attempting to install or use this
WASHING MACHINE. User Manual W1249CF2S - W1249CF2B - W1249CF2W. Service Helpline:
 EN User Manual WASHING MACHINE User Manual W1249CF2S - W1249CF2B - W1249CF2W Service Helpline: 0333 577 7238 CONTENTS 2 CHAPTER-1: BEFORE USING THE APPLIANCE Correct Usage 4-5 General warnings 6-7-8-9
User Manual WASHING MACHINE HWS60-12F2S
 EN User Manual WASHING MACHINE User Manual HWS60-12F2S 2 3 CONTENTS 4 CHAPTER-1: BEFORE USING THE APPLIANCE Correct Usage 6-7 General warnings 8-9-10-11 Safety warnings 12-13-14-15-16-17 Packaging and
WASHING MACHINE INSTRUCTION MANUAL
 WM105V WM105VB WM105VS WASHING MACHINE INSTRUCTION MANUAL Please read this instruction manual carefully before you use this product CONTENTS SECTION 1: BEFORE USE Safety warnings Recommendations SECTION
User Manual WASHING MACHINE EWF 1075 VT
 EN User Manual WASHING MACHINE User Manual EWF 1075 VT 2 3 CONTENTS 4 CHAPTER-1: BEFORE USING THE APPLIANCE Correct Usage 6-7 General warnings 8-9-10-11 Safety warnings 12-13-14-15-16-17 Packaging and
Washing Machine Instruction Manual
 Washing Machine Instruction Manual INSTRUCTION MANUAL DWDMV1011 CONTENTS Page BEFORE USING THE APPLIANCE...3 OVERVIEW OF YOUR DEVICE...17 INSTALLATION OF THE MACHINE...20 INTRODUCTION OF CONTROL PANEL...29
WASHING MACHINE. User Manual W1044CF1W. Service Helpline:
 EN User Manual WASHING MACHINE User Manual W1044CF1W Service Helpline: 0333 577 7238 CONTENTS 4 CHAPTER-1: BEFORE USING THE APPLIANCE Correct Usage 6-7 General warnings 8-9-10-11 Safety warnings 12-13-14-15-16-17
Washing Machine Instruction Manual
 Washing Machine Instruction Manual INSTRUCTION MANUAL DWDMV10B1 - DWDMV12B1 DAEWOO UK Customer Helpline Number : 03330 144477 For more information, Visit DAEWOO ELECTRONICS Website www.daewooelectronics.co.uk
Service Helpline:
 Service Helpline: 0333 577 7238 CONTENTS IMPORTANT SAFETY WARNINGS 4 BEFORE USING YOUR MACHINE 7 PACKAGING and the ENVIRONMENT 17 SAVINGS INFORMATION 18 OVERVIEW OF THE APPLIANCE 19 SETTING UP THE MACHINE
montpellier Installation and Operating Instructions MODELS: MR90GOK, MR90GOX, RMC90GOK & RMC90GOC 90cm Range Cooker Gas
 montpellier Installation and Operating Instructions MODELS: MR90GOK, MR90GOX, RMC90GOK & RMC90GOC 90cm Range Cooker Gas (Picture indicative of model supplied) Please read these instructions carefully before
User Manual WASHING MACHINE HW50-10F1
 EN User Manual WASHING MACHINE User Manual HW50-10F1 CONTENTS 4 CHAPTER-1: BEFORE USING THE APPLIANCE Correct Usage 6-7 General warnings 8-9-10-11 Safety warnings 12-13-14-15-16-17 Packaging and Environment
User Manual WASHING MACHINE AWM05801
 EN User Manual WASHING MACHINE User Manual AWM05801 CONTENTS 4 CHAPTER-1: BEFORE USING THE APPLIANCE Correct Usage 6-7 General warnings 8-9-10-11 Safety warnings 12-13-14-15-16-17 Packaging and Environment
WASHING MACHINE. User Manual CLA1016W
 WASHING MACHINE User Manual CLA1016W CONTENTS 4 CHAPTER-1: BEFORE USING THE APPLIANCE Correct Usage 6-7 General warnings 8-9-10-11 Safety warnings 12-13-14-15-16-17 Packaging and Environment 18 Savings
WASHING MACHINE INSTRUCTION MANUAL
 WM126V WM126VS WM 126VB WASHING MACHINE INSTRUCTION MANUAL Please read this instruction manual carefully before you use this product CONTENTS SECTION 1: BEFORE USE Safety warnings Recommendations SECTION
User manual. Washing Machine ZWP 581 ZWQ 5102 ZWQ 5103 ZWQ 5122
 EN User manual Washing Machine ZWP 58 ZWQ 502 ZWQ 503 ZWQ 522 Contents Safety information 2 Product description _ 3 How to run a wash cycle? 4 Daily use _ 5 Washing programmes 6 Care and cleaning 8 Safety
User Manual WASHING MACHINE AWM06801
 EN User Manual WASHING MACHINE User Manual AWM06801 CONTENTS 4 CHAPTER-1: BEFORE USING THE APPLIANCE Correct Usage 6-7 General warnings 8-9-10-11 Safety warnings 12-13-14-15-16-17 Packaging and Environment
User Manual WASHING MACHINE PLCE06GGPWT - PLCD06GGPWT
 EN User Manual WASHING MACHINE User Manual PLCE06GGPWT - PLCD06GGPWT CONTENTS 4 CHAPTER-1: BEFORE USING THE APPLIANCE Correct Usage 6-7 General warnings 8-9-10-11 Safety warnings 12-13-14-15-16-17 Packaging
Double Door - Dual Zone Wine Cooler
 THE PERFECT BALANCE OF FUNCTION, STYLE AND RELIABILITY LAUNDRY - DISHWASHING - COOKING - COOLING Installation and Operating Manual Double Door - Dual Zone Wine Cooler WS38SDDX Stainless Steel Please read
User Manual WASHING MACHINE WA5290E
 EN User Manual WASHING MACHINE User Manual WA5290E 2 3 CONTENTS 4 CHAPTER-1: BEFORE USING THE APPLIANCE Correct Usage 6-7 General warnings 8-9-10-11 Safety warnings 12-13-14-15-16-17 Packaging and Environment
User manual. Washing machine ZWQ 590 SO ZWQ 585 SO ZWQ 580 SO ZWQ 575 SO ZWQ 570 SO
 EN User manual Washing machine ZWQ 590 SO ZWQ 585 SO ZWQ 580 SO ZWQ 575 SO ZWQ 570 SO Product description 1 The control panel 2 Lid handle 3 Filter access cover 4 Adjustable levelling feet Control panel
GB User manual. Washing machine ZWQ 5130
 GB User manual 2 Washing machine ZWQ 5100 ZWQ 5101 ZWQ 5130 Product description 1 1. The control panel 2. Lid handle 3. Adjustable levelling feet 2 3 The control panel 1 2 3 4 5 6 1. Programme selector
User manual. Washing machine ZWQ 6120 ZWQ 6100
 EN User manual Washing machine ZWQ 6120 ZWQ 6100 Product description 1 1. The control panel 2. Lid handle 3. Adjustable levelling feet 2 3 The control panel 1 2 3 4 5 6 1. Programme selector 2. Pushbuttons
Instruction manual. Washing Machine WMDF612W
 Instruction manual Washing Machine WMDF612W You ll soon be enjoying your new washing machine. It all begins here, with your instructions. Don t worry, there s nothing too technical coming up. Just simple,
WASHING MACHINE USER MANUAL WM1291WH
 WASHING MACHINE USER MANUAL WM1291WH BEFORE USING THE WASHING MACHINE, YOU SHOULD CERTAINLY READ THE INFORMATION IN USER S MANUAL. CONTENTS CHAPTER-1: TECHNICAL SPECIFICATIONS 3 CHAPTER-2: BEFORE USING
Installation and Operating Instructions
 THE PERFECT BALANCE OF FUNCTION AND STYLE LAUNDRY - DISHWASHING - COOKING - COOLING Installation and Operating Instructions Built In Ceramic Hob - 15min Timer CER30T15/CER60T15-30cm/60cm Please read these
TKX2 650 T BLANCA - TKX T BLANCA
 MANUAL DE INSTRUCCIONES BEDIENUNGSANLEITUNG INSTRUCTION MANUAL NOTICE D UTILIZATION MANUAL DE INSTRUÇÕES MANUALE D USO ENTOIXIZOMENO ΠΛYNTHPIO ΠIATΩN KULLANIM KLAVUZU РУКОВОДСТВО ПО ЭКСПЛУАТАЦИИ OBSŁUGA
6KG 1200 Spin Speed Washing Machine. Instruction Manual
 6KG 1200 Spin Speed Washing Machine Instruction Manual Model number: RHWM61200B Opening times: Monday - Friday 8am 6pm & Saturday 9am 1pm or visit us at www.productcareuk.com Contents Safety Instructions
INSTRUCTION MANUAL 6KG WASHING MACHINE C610WM16. C610WM16_IB.indd 1 29/01/ :27
 INSTRUCTION MANUAL 6KG WASHING MACHINE C610WM16 C610WM16_IB.indd 1 29/01/2016 12:27 Contents Unpacking... 5 Installing Your Washing Machine... 6 Choosing the Right Location for Your Washing Machine...
GETTING STARTED? EASY.
 User Manual GETTING STARTED? EASY. ZWF 71440W EN User Manual Washing Machine SAFETY INFORMATION Before the installation and use of the appliance, carefully read the supplied instructions. The manufacturer
Instruction Manual. 6kg Washing Machine L612WM15/L612WMS15. L612WM15/S15_IB.indd 1 10/08/ :00
 Instruction Manual 6kg Washing Machine L612WM15/L612WMS15 L612WM15/S15_IB.indd 1 10/08/2015 13:00 Contents Safety Warnings... 3 Unpacking... 5 Moving and Installing... 6 Removing the Transit Bolts... 6
User Manual WASHER - DRYER WD 7512 VT
 EN User Manual WASHER - DRYER User Manual WD 7512 VT CONTENTS IMPORTANT SAFETY WARNINGS 4 BEFORE USING YOUR MACHINE 7 General warnings 8 Safety warnings 9 -Danger of scalding/burning 12 - Risk of death
User manual. Washing Machine ZWG 6148K
 EN User manual Washing Machine ZWG 6148K Contents Safety information 2 Safety instructions 3 Environment concerns 4 Product description _ 5 Control panel _ 6 Washing programmes 6 Consumption values _ 7
User manual. Washing Machine ZWG K
 EN User manual Washing Machine ZWG 71202 K Contents Safety information 2 Safety instructions 3 Environment concerns 4 Product description _ 5 Control panel _ 6 Washing programmes 7 Consumption values _
10kg Washing Machine
 Instruction Manual 10kg Washing Machine L1014WM17 L1014WM17_IB.indd 1 26/07/2017 11:31 L1014WM17_IB.indd 2 26/07/2017 11:31 Contents Safety Warnings... 4 Unpacking... 6 Removing the Transit Bolts... 7
GETTING STARTED? EASY.
 User Manual GETTING STARTED? EASY. ZWF 81240W ZWF 81440W EN User Manual Washing Machine SAFETY INFORMATION Before the installation and use of the appliance, carefully read the supplied instructions. The
Dear Customer, We wish that this product, manufactured at modern facilities with total quality notions, will deliver you the best performance.
 Dear Customer, We wish that this product, manufactured at modern facilities with total quality notions, will deliver you the best performance. In order to guarantee this, please read this instruction manual
G6FLWW17 6KG WASHING MACHINE
 G6FLWW17 6KG WASHING MACHINE G6FLWW17_IB_170919_grace.indd 1 Contents Guide to the Appliance 2 Caring for the Environment 3 Safety Information and Warnings 4 Items in the Box 6 Getting Started 7 Basic
EWF EW EWF EW... EN WASHING MACHINE USER MANUAL
 EWF 31276 EW EWF 31076 EW...... EN WASHING MACHINE USER MANUAL 2 www.electrolux.com CONTENTS 1. SAFETY INFORMATION................................................... 3 2. SAFETY INSTRUCTIONS..................................................
User Manual. Washing Machine ZWF 91483WH ZWF 91483WR
 EN User Manual Washing Machine ZWF 91483WH ZWF 91483WR Contents Safety information 2 Safety instructions 3 Product description 4 Control panel 5 Programme Chart 6 Consumption values 7 Options 8 Settings
1 Installation. 2 Use. Instruction manual
 1 1EURO click Instruction manual e n g l i s h Very important: Please, read the whole of this manual before installation and using the washing machine. This manual is designed with the corresponding illustration
CDC266 Reverse Action
 40000194.qxd 11/3/04 5:30 pm Page 1 GB User Instructions CDC266 Reverse Action 40000194.qxd 11/3/04 5:30 pm Page 2 WARNING Check that the product has no visible signs of damage before use. If damaged do
WASHING MACHINE USER MANUAL WM1201WH WM1201SL
 WASHING MACHINE USER MANUAL WM1201WH WM1201SL THE CONTENTS SECTION 1:BEFORE USE Safety warnings Recommendations SECTION 2:INSTALLATION Removal of transportation screws Foot adjustment Electrical connection
Black 8KG 1400 Spin Speed Inverter Direct Drive Washing Machine Instruction Manual
 Black 8KG 1400 Spin Speed Inverter Direct Drive Washing Machine Instruction Manual Model number: RHWM81400DIDB Opening times: Monday - Friday 8am 6pm & Saturday 9am 1pm or visit us at Contents Safety Instructions
User Manual Washing Machine L FL
 EN User Manual Washing Machine L 62270 FL 2 www.aeg.com CONTENTS 1. SAFETY INFORMATION...3 2. SAFETY INSTRUCTIONS... 4 3. PRODUCT DESCRIPTION... 6 4. CONTROL PANEL...7 5. PROGRAMMES... 8 6. CONSUMPTION
Washing Machine. User manual WW9*K5*****/WW8*K5*****/WW7*K5***** Untitled :17:40
 Washing Machine User manual WW9*K5*****/WW8*K5*****/WW7*K5***** Untitled-6 1 2017-12-12 3:17:40 Contents Contents 4 What you need to know about the safety instructions 4 Important safety symbols 4 Important
5kg Front Load Washing Machine
 5kg Front Load Washing Machine G5FLWW15 Instruction Manual Contents Guide to the Appliance 2 Caring for the Environment 3 Safety Information and Warnings 4 Items in the Box 6 Getting Started 7 Basic Set
Introductión. Table of contents. Safety measures
 Introductión Read this manual carefully as it offers practical advice to help you get the most from your washing machine. This «Instruction and Installation Manual» contains everything you need to know
WASHING MACHINE INSTRUCTION MANUAL
 WASHING MACHINE INSTRUCTION MANUAL Model num ber: HWM51000/HWM51000SW Please read these instructions carefully and keep them for future reference For Customer Services, Spare parts & Warranty Information
9.5KG WASHING MACHINE
 G9TLWW17 9.5KG WASHING MACHINE G9TLWW17_IB_Final170920V2.indd 1 G9TLWW17_IB_Final170920V2.indd 2 Contents Guide to the Appliance 2 Caring for the Environment 3 Safety Information and Warnings 4 Items in
ELECTRONIC WASHING MACHINE GODDESS WFD 1025 M8
 ELECTRONIC WASHING MACHINE GODDESS WFD 1025 M8 INSTRUCTION MANUAL BEFORE USING THE WASHING MACHINE, YOU SHOULD CERTAINLY READ THE INFORMATION IN USER S MANUAL THE CONTENTS SECTION 1: BEFORE USING... 3
2400W steam generator with one touch temperature control. Instruction Manual MODEL: SI9020TTN
 2400W steam generator with one touch temperature control Instruction Manual MODEL: SI9020TTN WWW.SWAN-BRAND.CO.UK Contents Important Safeguards 04 UK Wiring Instructions 05 Parts and Features 06 Fabric
Steam Station User Manual
 Steam Station User Manual SGA7126P SGA7124B EN 01M-8834973200-4116-01 01M-8834593200-4116-01 Please read this manual first! Dear Customer, Thank you for selecting a Beko product. We hope that you get the
It is essential to read this manual carefully before it is installed and used for the first time. EFL6KWH
 It is essential to read this manual carefully before it is installed and used for the first time. EFL6KWH This washing machine conforms to current safety requirements. Inappropriate use can, however, lead
WE 170 P. EN User Manual Washing Machine. CAUTION: Read the instructions before using the appliance. Original Instructions.
 WE 170 P EN User Manual Washing Machine CAUTION: Read the instructions before using the appliance. Original Instructions. 2 www.electrolux.com CONTENTS 1. SAFETY INFORMATION... 2 2. PRODUCT DESCRIPTION...
Contents Contents... 2 Safety Warning... 3 Unpacking... 6 Installation... 7 Installing Your Washing Machine... 7 Moving and Installing...
 Contents Contents...2 Safety Warning...3 Unpacking...6 Installation...7 Installing Your Washing Machine...7 Choosing the Right Location for Your Washing Machine... 7 Moving and Installing...8 Removing
CONTENTS QUICK REFERENCE GUIDE INSTRUCTIONS FOR USE PROGRAMME CHART BOOKLET
 CONTENTS QUICK REFERENCE GUIDE PROGRAMME CHART PREPARING THE LAUNDRY SELECTING A PROGRAMME AND OPTIONS STARTING AND COMPLETING A PROGRAMME CHANGING A PROGRAMME INTERRUPTING A PROGRAMME DAILY MAINTENANCE
W Steam Iron User Instructions SHIR01
 2000-2400W Steam Iron User Instructions SHIR01 CONTENTS Introduction... 2 Product Safety... 3 Electrical Safety... 4 Features... 5 Instructions for Use... 5-7 Cleaning... 7 Troubleshooting... 7 Guarantee...
CONTENTS 4 BEFORE USING THE APPLIANCE. Correct Usage OVERVIEW OF YOUR DEVICE CHAPTER-4: INTRODUCTION OF CONTROL PANEL
 UWM-5061 UWM-5009 CONTENTS 4 CHAPTER-1: BEFORE USING THE APPLIANCE Correct Usage 6-7 8-9-10-11 CHAPTER-2: OVERVIEW OF YOUR DEVICE CHAPTER-3: INSTALLATION CHAPTER-4: INTRODUCTION OF CONTROL PANEL CHAPTER-5
MW001 Integrated Dishwasher. Manual for Installation, Use and Maintenance
 MW001 Integrated Dishwasher Manual for Installation, Use and Maintenance Important The CDA Group Ltd cannot be held responsible for injuries or losses caused by incorrect use or installation of this product.
XR510W 5KG 1000RPM WASHING MACHINE XR612W 6KG 1200RPM WASHING MACHINE. Instruction Manual
 XR510W 5KG 1000RPM WASHING MACHINE XR612W 6KG 1200RPM WASHING MACHINE Instruction Manual Serial number: Please read these instructions carefully before use and retain for future reference. Before switching
WASHING MACHINE INSTRUCTION MANUAL
 WASHING MACHINE INSTRUCTION MANUAL Model num ber: RH1248RTG Please read these instructions carefully and keep them for future reference For Customer Services, Spare Parts & Warranty Information please
MACHINE OPERATION. Additional information (including troubleshooting and service) can be found in the individual chapters of the Instructions for Use.
 can be found in the individual chapters of the Instructions for Use.") MACHINE OPERATION Additional information (including troubleshooting and service) can be found in the individual chapters of the Instructions for Use. Sort laundry according to care symbols Do not tumble
MACHINE OPERATION Additional information (including troubleshooting and service) can be found in the individual chapters of the Instructions for Use. Sort laundry according to care symbols Do not tumble
WASHER EXTRACTOR M XQG60-A508K
 WASHER EXTRACTOR 4160980M XQG60-A508K It is essential to read this manual carefully before it is installed and used for the first time. 9 12 14 15 Correct use Read and understand thoroughly these safety
Operating & Installation Instructions Fully Automatic Washing Machine (Domestic use)
") Operating & Installation Instructions Fully Automatic Washing Machine (Domestic use) Model No. NA-F00A NA-F90A NA-F85A Contents Safety Precautions Part Names 3 Operation Panel 4 Variety of Programs 5 Detergent
Operating & Installation Instructions Fully Automatic Washing Machine (Domestic use) Model No. NA-F00A NA-F90A NA-F85A Contents Safety Precautions Part Names 3 Operation Panel 4 Variety of Programs 5 Detergent
AUTOMATIC WASHING MACHINE WITH DRYER
 AUTOMATIC WASHING MACHINE WITH DRYER USER'S MANUAL PLD 14961 WD Dear customer, Thank you for buying a PHILCO brand product. So that your appliance serves you well, please read all the instructions in this
Installation and Operating Instructions
 THE PERFECT BALANCE OF FUNCTION AND STYLE LAUNDRY - DISHWASHING - COOKING - COOLING Installation and Operating Instructions Fully Integrated Dishwasher MDI600 Please read these instructions carefully before
MACHINE OPERATION. Additional information (including troubleshooting and service) can be found in the individual chapters of the Instructions for Use.
 can be found in the individual chapters of the Instructions for Use.") MACHINE OPERATION Additional information (including troubleshooting and service) can be found in the individual chapters of the Instructions for Use. Sort laundry according to care symbols Do not tumble
MACHINE OPERATION Additional information (including troubleshooting and service) can be found in the individual chapters of the Instructions for Use. Sort laundry according to care symbols Do not tumble
FULL ELECTRONIC WASHING MACHINE USER MANUAL
 FULL ELECTRONIC WASHING MACHINE USER MANUAL THE CONTENTS SECTION 1:BEFORE USING Safety warnings Recommendations SECTION 2:INSTALLATION Removal of transportation screws Adjustment of feet Electrical connection
MACHINE OPERATION. Additional information (including troubleshooting and service) can be found in the individual chapters of the Instructions for use.
 can be found in the individual chapters of the Instructions for use.") MACHINE OPERATION Additional information (including troubleshooting and service) can be found in the individual chapters of the Instructions for use. Sort laundry according to care symbols Do not tumble
MACHINE OPERATION Additional information (including troubleshooting and service) can be found in the individual chapters of the Instructions for use. Sort laundry according to care symbols Do not tumble
washing machine contents
 washing machine contents WARNINGS SPECIFICATIONS INSTALLATION AND ASSEMBLY USING THE APPLIANCE. PRACTICAL TIPS MAINTENANCE AND CLEANING SAFETY AND TROUBLESHOOTING ENVIRONMENTAL WARNINGS 4 5 6 10 20 22
MACHINE OPERATION. Additional information (including troubleshooting and service) can be found in the individual chapters of the Instructions for use.
 can be found in the individual chapters of the Instructions for use.") MACHINE OPERATION Additional information (including troubleshooting and service) can be found in the individual chapters of the Instructions for use. Sort laundry according to care symbols Do not tumble
MACHINE OPERATION Additional information (including troubleshooting and service) can be found in the individual chapters of the Instructions for use. Sort laundry according to care symbols Do not tumble
INSTRUCTION MANUAL. Washing machine BT608LA
 INSTRUCTION MANUAL Washing machine BT608LA This appliance has been designed exclusively for domestic use for washing linen. Very important : Read this user guide before installing and using this appliance.
STEAM GENERATOR. Model: G-1030ST. Instruction Manual
 STEAM GENERATOR Model: G-1030ST Instruction Manual IMPORTANT SAFEGUARDS 1. Make sure to read all the safety precautions below and look at the illustrations before you start using the appliance. 2. Use
How to get the most from your Integrated Tumble Dryer HJA 8800
 How to get the most from your Integrated Tumble Dryer HJA 8800 IMPORTANT: Read instructions befpre use. IMPORTANT USER INFORMATION These notes are provided in the interest of safety. You must read them
CONTENTS QUICK REFERENCE GUIDE PROGRAMME CHART
 1 CONTENTS Please read instruction for use QUICK REFERENCE GUIDE PREPARING THE LAUNDRY SELECTING A PROGRAMME AND OPTIONS STARTING AND COMPLETING A PROGRAMME CHANGING A PROGRAMME PROGRAMME CHART INTERRUPTING
laundry collection Front-load Washing Machine Instructions for use and warranty details Model No.: LW8014
 laundry collection Instructions for use and warranty details Front-load Washing Machine Model No.: LW8014 Dear Customer, Thank you and congratulations for choosing Kleenmaid. Your new appliance has been
Machine operation. Additional information (including troubleshooting and service) can be found in the individual sections of the Instructions For Use.
 can be found in the individual sections of the Instructions For Use.") Machine operation Additional information (including troubleshooting and service) can be found in the individual sections of the Instructions For Use. Sort laundry according to care symbols Do not tumble
Machine operation Additional information (including troubleshooting and service) can be found in the individual sections of the Instructions For Use. Sort laundry according to care symbols Do not tumble
User Manual Washing Machine L FL
 EN User Manual Washing Machine L 76475 FL 2 www.aeg.com CONTENTS 1. SAFETY INFORMATION...3 2. SAFETY INSTRUCTIONS... 4 3. PRODUCT DESCRIPTION... 5 4. CONTROL PANEL...6 5. PROGRAMMES... 8 6. CONSUMPTION
MACHINE OPERATION. Additional information (including troubleshooting and service) can be found in the individual chapters of the Instructions for use.
 can be found in the individual chapters of the Instructions for use.") MACHINE OPERATION Additional information (including troubleshooting and service) can be found in the individual chapters of the Instructions for use. Sort laundry according to care symbols Do not tumble
MACHINE OPERATION Additional information (including troubleshooting and service) can be found in the individual chapters of the Instructions for use. Sort laundry according to care symbols Do not tumble
4 Selecting a Program and Operating Your Machine
 4 Selecting a Program and Operating Your Machine Control panel Figure 1 1 2 3 4 5 6 7 8 1 - Spin Speed Adjustment button 2 - Display 3 - Temperature Adjustment button 4 - Programme Selection knob 5 - On
Semi-Auto Washing Machine
 MWM-B1270SA(IM)070915_Layout 1 10/15/15 9:55 AM Page 1 USER MANUAL Market Expansion Services by www.dksh.com.my E-mail: electrical.appliance@dksh.com www.morgan.my facebook.com/morganappliances Semi-Auto
User manual. Dishwasher ZDI12001
 EN User manual Dishwasher ZDI12001 Contents Safety information 2 Product description _ 3 Control panel 3 Programmes 4 Before first use _ 4 Daily use 7 Care and cleaning 9 Troubleshooting 9 Technical information
WASHING MACHINE USER MANUAL
 WASHING MACHINE USER MANUAL THE CONTENTS SECTION 1:BEFORE USING Safety warnings Recommendations SECTION 2:INSTALLATION Removal of transportation screws Adjustment of feet Electrical connection Water supply
WASHING MACHINE USER MANUAL WM1002WH
 WASHING MACHINE USER MANUAL WM1002WH THE CONTENTS SECTION 1:BEFORE USING Safety warnings Recommendations SECTION 2:INSTALLATION Removal of transportation screws Adjustment of feet Electrical connection
Installation and Operating Instructions
 THE PERFECT BALANCE OF FUNCTION AND STYLE LAUNDRY DISHWASHING COOKING COOLING Installation and Operating Instructions 60cm Single Cavity Electric Cooker MSE60W White Please read these instructions carefully
WASHING MACHINE. User Manual. Model Number: ES-GFC8144I3-EN ES-GFC8144W3-EN. Customer Support Helpline
 WASHING MACHINE User Manual Model Number: ES-GFC8144I3-EN ES-GFC8144W3-EN Customer Support Helpline 0333 577 7230 T: 0333 577 7230 www.sharphomeappliances.com Contents 01 Welcome 02 Safety Instructions
Front Load Washer 5kg USER MANUAL MFWS512
 Front Load Washer 5kg USER MANUAL MFWS512 CONTENTS Safety information... 2-3 Identifying parts of the Washer... 4 Installation... 5-7 Control Features and Functions... 8 Wash Programs... 9 Wash Guide...
GETTING STARTED? EASY.
 User Manual GETTING STARTED? EASY. ZWD 71460 W ZWD 71463 W EN User Manual Washer Dryer SAFETY INFORMATION Before the installation and use of the appliance, carefully read the supplied instructions. The
AWI510LP INSTRUCTION MANUAL WASHING MACHINE. Please read this User Manual carefully before using the appliance! IO 01229/1 (05.
 AWI510LP INSTRUCTION MANUAL WASHING MACHINE Please read this User Manual carefully before using the appliance! IO 01229/1 (05.2016) CONTENTS Basic Information...3 Notes on Safety...4 Installing the Washing
MW402 Integrated Dishwasher
 MW402 Integrated Dishwasher Manual for Installation, Use and Maintenance 1 Customer Care Department The Group Ltd. Harby Road Langar Nottinghamshire NG13 9HY T : 01949 862 012 F : 01949 862 003 E : customer.care@cda.eu
6KG 1200 Spin Speed Washing Machine Instruction Manual
 6KG 1200 Spin Speed Washing Machine Instruction Manual Model number: RHWM612B-M/RHWM612-M Before using your appliance, please read this manual carefully and keep it for future reference. Contents Safety
User Manual. Tumble Dryer ZDC8202P
 EN User Manual Tumble Dryer ZDC80P Contents Safety information Safety instructions 3 Product Description 4 Control Panel 5 Programme table 5 Options 6 Settings 7 Before First Use 8 Daily Use 8 Hints and
EWP 1062 TDW EWP 1462 TDW... EN WASHING MACHINE USER MANUAL
 EWP 1062 TDW EWP 1462 TDW...... EN WASHING MACHINE USER MANUAL 2 www.electrolux.com CONTENTS 1. SAFETY INFORMATION................................................... 3 2. SAFETY INSTRUCTIONS..................................................
Bar Fridge USER MANUAL MB46W
 Bar Fridge USER MANUAL MB46W CONTENTS Safety information... 2-3 Identifying parts of the fridge... 4 Transporting... 5 Installation... 5 Reversing the door... 6 Operating instructions... 7 Cleaning &
4KG Tumble Dryer / GVA4KG. Instruction Manual
 4KG Tumble Dryer / GVA4KG Instruction Manual Important Safety Instructions 1 When using electrical appliances, in order to reduce the risk of fire, electric shock, and/or injury to persons, basic safety
Installation and Operating Instructions
 THE PERFECT BALANCE OF FUNCTION AND STYLE LAUNDRY - DISHWASHING - COOKING - COOLING Installation and Operating Instructions 60cm Ceramic Double Oven Cooker MDC600FW/S/K - White/Silver/Black Please read
GETTING STARTED? EASY.
 User Manual GETTING STARTED? EASY. ZWD 91683 NW EN User Manual Washer Dryer SAFETY INFORMATION Before the installation and use of the appliance, carefully read the supplied instructions. The manufacturer