SERVICE MODEL LVG-202 LVG-203 LVG-204. OPEN FRYER (Gas) REDUCED OIL CAPACITY REGISTER WARRANTY ONLINE AT
|
|
|
- Leonard Long
- 6 years ago
- Views:
Transcription


1 SERVICE M A N U A L OPEN FRYER (Gas) REDUCED OIL CAPACITY MODEL LVG-202 LVG-203 LVG-204 REGISTER WARRANTY ONLINE AT
2 Compliance Information These are the original version controlled Henny Penny instructions for Low oil Volume Gas (LVG) model 20 number of vats 2 (LVG-202/203/204). Read these instructions completely prior to installation and operation of this appliance to ensure compliance to all required installation, operation and safety standards. Read and obey all safety messages to avoid damage to the appliance and personal injury. This appliance is intended for commercial use in kitchens of restraunts, bakeries, hospitals, etc. but not for the continuous mass production of food such as in a factory setting. This fryer must be installed and used in a way that water does not contact the oil which can cause splashing and boiling over of oil and steam leading to personal injury; excludes normal product moisture. Proper daily, weekly, monthly, quarterly and yearly maintenance must be performed on this appliance to ensure safe and continuous operation. Proper maintenance also increases the usable life of the appliance and oil, which reduces lifetime operating costs. Additionally, old oil increases the possibility of surge boiling and fire due to the reduced flash point of the oil. This appliance must never be cleaned with a water jet or steam cleaning tool. Cleaning brushes are shipped with the appliance and proper cleaning instructions are included in this manual.
3 TABLE OF CONTENTS Section Page Section 1. TROUBLESHOOTING Introduction Safety Troubleshooting Error Code Table Section 2. INFO, FILTER & TEMP BUTTON STATS INFO Button Stats FILTER Button Stats TEMP Button Stats HP Info Mode Section 3. LEVEL 1 PROGRAMMING Modifying Product Settings AIF Clock Deep Clean Mode Fryer Setup Section 4. LEVEL 2 PROGRAMMING Advanced Product Settings E-Log (error code log) Passwords Alert Tone (and volume) Filter After Filter Time Section 5. LEVEL 3 PROGRAMMING Additional Advanced Product Settings Special Programming Clock Set Data Comm & Heat Control Tech Mode Stats Mode Section 6. INFORMATION MODE Info Mode Section 7. MAINTENANCE SECTION Preventive Maintenance Maintenance Hints Complete Control Replacement Power Switch Replacement Burner Tube Removal Pilot Replacement
4 Section 7. MAINTENANCE SECTION (Continued) 7-7 High Limit Thermocouple High Limit Control Probe Replacement Back Shroud Removal Blower Replacement Vacuum Switch Replacement JIB Pump Replacement Selector Valve Drive Motor Replacement Gas Valve Replacement Section 8. PARTS SECTION 8-1 Introduction Genuine Parts When Ordering Parts Prices Delivery Warranty Recommended Spare Parts for Distributors Apenndix A A-1 Wiring Diagrams & Scematics... A-1 Solid State High Limit Chart... A-10 Encoder Alignment... A-11 Selector Valve... A-13
5 Technical Data for CE Marked Products Nominal Heat Input: (Net) Nominal Heat Input: (Gross) Supply Pressure: Test Point Pressure: Injector Size: Natural (I2H) = 19,8, kw (67,560 Btu/h) Natural (I2E) = 19.8 kw (67,560 Btu/h) Natural (I2E+) = 19.8 kw (67,560 Btu/h) Natural (I2L) = 19.8 kw (67,560 Btu/h) Natural (I2HS) = 19.8 kw (67,560 Btu/h) Liquid Propane (I3P) = 19,8, kw (67,560 Btu/h) Liquid Propane/Butane (I3B/P) = 19,8, kw (67,560 Btu/h) Natural (I2H) = 21,98 kw (75,000 Btu/h) (79.13 MJ/h) Natural (I2E) = 21,98 kw (75,000 Btu/h) Natural (I2E+) = 21,98 kw (75,000 Btu/h) Natural (I2L) = 21,98 kw (75,000 Btu/h) Natural (I2HS) = 21,98 kw (75,000 Btu/h) Liquid Propane (I3P) = 21,98 kw (75,000 Btu/h) (79.13 MJ/h) Liquid Propane/Butane (I3B/P) = 21,98 kw (75,000 Btu/h) (79.13 MJ/h) Natural (I2H) = 20 mbar (2.0 kpa) Natural (I2E) = 20 mbar Natural (I2E+) = 20/25 mbar Natural (I2L) = 25 mbar Natural (I2HS) = 25 mbar Liquid Propane (I3P) = 30/37/50 mbar (3.0/3.7/5.0 kpa) Liquid Propane/Butane (I3B/P) = 30/50 mbar Natural (I2H) = 8.7 mbar (.87 kpa) Natural (I2E) = 8,7 mbar Natural (I2E+) = N/A Natural (I2L) = 8.7 mbar Natural (I2HS) = 8.7 mbar Liquid Propane (I3P) = 25 mbar (2.5 kpa) Liquid Propane/Butane (I3B/P) = 30/50 mbar (3.0/5.0 kpa) Natural (I2H) = 2.08 mm Natural (I2E) = 2.08 mm Natural (I2E+) = 1.70 mm Natural (I2L) = 2.30 mm Natural (I2HS) = 2.30 mm Liquid Propane/Butane (I3B/P) = 1.30 mm Liquid Propane (I3P) *30 mbar = 1.18 mm Liquid Propane (I3P) *50 mbar = 1.04 mm This appliance must be installed in accordance with the manufacturer s instructions and the regulations in force and only used in a suitable ventilated location. Read the instructions fully before installing or using the appliance. Noise generated from this equipment is less than 70 db(a)


6 SECTION 1. TROUBLESHOOTING 1-1. INTRODUCTION This section provides troubleshooting information in the form of an easy to read table. If a problem occurs during the first operation of a new fryer, recheck the Installation Section of the Operator s Manual. Before troubleshooting, always recheck the Operation Section of the Operator s Manual SAFETY Where information is of particular importance or is safety related, the words DANGER, WARNING, CAUTION, or NOTE are used. Their usage is described on the next page: SAFETY ALERT SYMBOL is used with DANGER, WARNING or CAUTION which indicates a personal injury type hazard. NOTICE is used to highlight especially important information. CAUTION used without the safety alert symbol indicates a potentially hazardous situation which, if not avoided, may result in property damage. CAUTION used wih the safety alert symbol indicates a potentially hazardous situation which, if not avoided, could result in minor or moderate injury. WARNING indicates a potentially hazardous situation which, if not avoided, could result in death or serious injury. DANGER INDICATES AN IMMINENTLY HAZ- ARDOUS SITUATION WHICH, IF NOT AVOID- ED, WILL RESULT IN DEATH OR SERIOUS INJURY. Aug
7 1-3. TROUBLESHOOTING To isolate a malfunction, proceed as follows: 1. Clearly define the problem (or symptom) and when it occurs. 2. Locate the problem in the Troubleshooting table. 3. Review all possible causes. Then, one-at-a-time work through the list of corrections until the problem is solved. 4. Refer to the maintenance procedures in the Maintenance Section to safely and properly make the checkout and repair needed. If maintenance procedures are not followed correctly, injuries and/or property damage could result. Aug
8 Problem Cause Correction POWER SECTION With power switch in ON position, Open circuit Check to see that unit is plugged in the fryer is completely inoperative Check the breaker or fuse at supply (NO POWER) box Check voltage at wall receptacle Check MAIN POWERswitch; replace if defective Check cord and plug Reset transformer circuit breaker Oil will not heat but lights are on No Heat error E-22 HEATING OF SHORTENING SECTION Blown fuse or tripped Faulty power switch. Faulty cord and plug Faulty drain switch Faulty PC Board High limit control switch tripped E-10 Reset breaker or replace fuse circuit breaker at supply box or control panel Check power switch Check cord and plug Check power at receptacle Check drain switch Check control panel per maintenance section and replace as needed Allow fryer to cool for minutes; reset high limit by pressing down & releasing raised side of the switch for the vat that is not operating; a single reset switch is found behind the door of each well; if high limit does not reset, high limit must be replaced Aug
9 Problem Cause Correction HEATING OF SHORTENING SECTION (Continued) Oil will not heat (continued) Faulty temperature probe Replace temerature probe Drain valve open Close drain valve Faulty gas valve Check gas valve Oil heating too slow Low gas pressure Wire(s) loose Burnt or charred wire connection Oil overheating Programming wrong Faulty PC board Faulty temperature probe Faulty gas valve Oil foaming or boiling over vat Have gas pressure checked Tighten Replace wire and clean connections Check Temperature setting in the program mode Replacecontrol board if heat indicator stays on past ready temperature Check probe calibration and replace if temperature is off ± 5 degrees Check gas calve OIL LEVEL SECTION Water in oil At end of a Cook Cycle, drain and Improper or bad oil clean vat; add fresh oil Improper filtering Use recommended oil Cold zone (bottom of vats) full Refer to the procedure on filtering of crumbs the oil. Improper rinsing after cleaning the fryer Oil will not drain from vat Drain valve clogged with crumbs Faulty actuator Oil channel clogged Oil leaking through drain valve Obstruction in drain Faulty drain valve Open valve. using cleaning brush, force crumbs through drain valve Replace actuator Access the clean-out plug on the sides of the unit (see Oil Channel Clean-out Section) Remove obstruction Replace drain valve Aug


10 Problem Cause Correction OIL LEVEL SECTION (Continued) Vat is under-filled Locations with RTI, the 3-way valve is stuck open Filter pan needs cleaned JIB is low or empty JIB oil line is clogged or collapsed Quick Disconnect O-ring may be worn or missing Bubbles in oil during entire filtering process Filter pan needs cleaned Filter pan not completely engaged Filter pan clogged Damaged o-ring on filter line tube on fryer The RTI system can be disconnected until RTI repairs the valve Clean filter pan and change pad Fill the JIB Check JIB line Check JIB Disconnect O-ring for wear or cracking. Replace if missing or torn Clean filter pan and change pad Make sure filter pan return line is pushed completely into the receiver on the fryer Clean pan and change pad Change o-ring Filter motor runs but pumps oil slowly FILTER MOTOR SECTION Filter line connections loose Tighten all filter line connections Drain pan o-rings damaged or missing Filter paper or pad clogged Install new o-rings Filter motor will not run Thermal reset button on the rear of the pump motor is tripped To prevent burns caused by splashing shortening, turn the unit s POWER switch to the OFF position before resetting the filter pump motor s manual reset protection device. Change filter paper or pad Allow time for the motor to cool. Open front door and using at least a 12 in. (305 mm) Phillip s head screwdriver, press on the thermal reset button by prying hard between the button and the door frame until button clicks July
11 IS POT FILLED filter error prompt DISPLAYED PROMPT SECTION All oil did not completely return after a filter cycle Filter pad clogged Have manager follow prompts Is JIB full? If not, fill JIB Replace filter pad/clean pan. CHECK PAN prompt Filter drain pan missing Filter drain pan not completely engaged Filter drain interlock switch not engaged Find pan and install Adjust filter drain pan position Check drain microswitch CHANGE FILTER PAD prompt appears Filter pad has not been changed within a 24hr time period; Main power switch was turned off during filter pad change Drain pan microswitch stuck Replace old filter pad with NEW filter pad with main power switch turned on. *NOTE* 24/7 store replace filter twice a day. Check drain microswitch Aug

12 1-4. ERROR CODES In the event of a control system failure, the digital display shows an error message. The message codes are shown in the DISPLAY column below. A constant tone is heard when an error code is displayed, and to silence this tone, press any button. DISPLAY CAUSE CORRECTION E-4 Control board overheating Turn switch to OFF position, then turn switch back to ON; if display shows E-4, the control board is getting too hot; check the louvers on each side of the unit for obstructions E-5 Oil overheating Turn switch to OFF position, then turn switch back to ON; if display shows E-5, the heating circuits and temperature probe should be checked E-6A Temperature probe open Turn switch to OFF position, then turn switch back to ON; if display shows E-6A, the temperature probe should be checked E-6B Temperature probe shorted checked Turn switch to OFF position, then turn switch back to ON; if display shows E-6B, temperature probe should be E-10 E-10A- tripped above 300F E-10B- tripped below 300F E-10C- tripped while cooking E-10D- tripped <5min. of Auto Filter E-10F- tripped during filter cycle E-10M- tripped during melt mode E-10Y- tripped <5min of YES to IS THE POT FULL? prompt Allow fryer to cool for minutes; reset high limit by pressing down & releasing raisedside of the switch for the vat that is not operating; a single reset switch is found behind the door of each well; if high limit does not reset, high limit must be replaced E-15 E-18-A E-18-B E-18-C E-20-A FAN SENSOR STUCK CLOSED Drain valve open Left level sensor open Right level sensor open Both level sensors open Pressure switch failure/ Wiring problem Clean and/or close fish vat drain valve; if clean and closed, have drain switch continuity checked Turn switch to OFF position, then turn switch back to ON; If display still indicates a failed sensor, check the connectors at the control board; check sensor & replace, if necessory If fan is not running, have pressure switch checked; should be open circuit, if no air pressure If fan is running, wiring error Feb

13 1-4. ERROR CODES (CONTINUED) E-20-B NO DRAFT CHECK FAN E-20-D Pressure Switch failure/ hose loose Draft Fan failure/ low voltage/ Flue or hood obstruction Failure to ignite/ no flame sense Plugged atmospheric equalization hole in regulator cap resulting in pilot flame slowly fading Press power button to vat off and back on again, if E-20-B persists, have pressure switch checked; should be open circuit if no air pressure; make sure hose is connected to fan and pressure switch Have draft fan checked; low voltage going to fan Check the fryer flue and hood system for obstructions Press power button to vat off and back on again, if E-20-D persists, check gas line connections; check gas shutoff valve; check ignition module; check gas valve; check flame sensor gap; check gas valve, and check ignition module wiring Clear obstruction from hole E-21 E-22 NO HEAT E-41, E-46 E-47 E-48 E-54-C Slow heat recovery Burner not igniting Have a certified service technician check the fryer for correct gas supply and pressure to the unit; have the gas valves checked; have unit checked for loose or burnt wires Have gas valve and heat circuit checked Programming failure Turn switch to OFF, then back to ON; if display shows any of these error codes, re-initialize the controls; if error code persists, check control board and replace as needed Analog converter chip or 12 volt Turn switch to OFF, then back to ON; if E-47 supply failure persists, replace the PC board Input system error Turn switch to OFF, then back to ON; have control PC board replaced if E-48 persists Temperature input error Turn switch to OFF, then back to ON; have control PC board replaced if E-54C persists July
14 1-4. ERROR CODES (CONTINUED) E-60 E-62A E-62B E-70-C E-82A E-82B E-82C E-82-D E-83 PRES- SURE TOO HIGH AIF PC board not communicating with control PC board Communication Error Wrong Calibration Error Drain valve jumper wire missing or disconnected Selector Valve not detected Selector Valve failed Selector Valve failed Selector Valve failed Pressure Trasducer senses too high pressure in AIF system Model LVG-202, 203, 204 Turn switch to OFF, then back to ON; if E-60 persists, check 1.5 amp fuse on AIF PC board on International units only; check connector between the PC boards; replace AIF PC board or control PC board if necessary Loose connection. Refer to Service Manual. Replace control board. Replace sensor. Enable OQM on control board 1. Replace OQM Sensor. Refer to Service Manual. Have the jumper wire checked on the PC board at drain switch interlock position Have wiring checked between Selector Valve and AIF board Have the Home switch on Selector Valve checked Have wiring checked between the Home & Position encoder and the Selector Valve; Have Selector Valve Motor checked; Have drive chain checked Have the Home switch and the Position switch on Selector Valve checked Check AIF system or the RTI quick-disconnect; See details below; E-83-A Pressure too high Check AIF system in Vat #1 E-83-B Pressure too high Check AIF system in Vat #2 E-83-C Pressure too high Check AIF system in Vat #3 E-83-D Pressure too high Check AIF system in Vat #4 E-83-E Pressure too high Check AIF system in Vat #5 E-83-J RTI JIB FILL switch ON when Check JIB fill valves pressure too high E-83-R RTI DISPOSE switch ON when Check RTI quick-disconnect behind fryer; RTI pressure too high phone no. if needed: E-83-Z Unknown source Check RTI system & JIB fill valve E-93-A 24VDC tripped Have drain actuator checked May
15 1-10 Model LVG-202, 203, 204
16 SECTION 2. INFO, FILTER & TEMP BUTTON STATS 2-1. INFO BUTTON STATS Recovery Information for each Vat/OQM Information 1. Press and release and REC shows in left display and the recovery time that oil temperature went from 250 F (121 C) to 300 F (149 C) shows in the right display. For example, REC 5:30 means it took 5 minutes and 30 seconds for the oil temperature to recover to 300 F (149 C) from 250 F (121 C). 1a. Press and release, the display will show the last TPM reading, date of the last TPM reading, and time stamp of last TPM reading (only if OQM sensor is installed and enabled) FILTER BUTTON STATS Selected Languages 2. Press twice and the primary language shows in the left display and the secondary language shows in right display. Press ü button under either language to switch unit operation to that language. If no buttons are pressed within 5 seconds in any of stats modes, the controls revert back to normal operation. Cook Cycles Remaining before Filtering 1. Press and release either or and left display shows COOKS REMAIN and right display shows the number of cook cycles before the next auto filter. For example, REMA IN 3 6 means after 3 more cook cycles on the left vat, the controls ask operator if they are ready to filter or not. But, 6 more cook cycles remain on the right vat TEMP BUTTON STATS May 2016 Time and Date 2. Press either or twice and time-of-day and date shows in the displays. Filter Pad Usage 3. Press either or three times and number of hours the present filter has been used is shown in the displays. Actual Oil Temperature 1. Press and the actual oil temperature shows in the display, for each vat. 2-1
17 Set-point Temperature 2. Press twice and SP shows in the display, along with the set-point (preset) temperature of each vat HP INFO MODE Cook Cycles Remaining before Filtering Press and release both and at the same time to enter HP Info Mode. You can view the following option in HP Info Mode: 1. E-Log 2. Last Load 3. Daily Stats 4. Review Usage 5. Inputs HDE (to check: high limit, drain switch jumper, and tilt switch) 6. Outputs S_H (saftey contactor / heat contactor) 7. Oil Temperature 8. CPU Temp 9. Communication OQM Sensor 10. Analog 11. Activity Log 12. Oil Levels (see if low level sensing temperature difference between probes). 13. Pumps and Valves 14. AIF Info (check for drain pan recognition: Left F button 1X and down arrow 2X. 15. Print Report to USB 16. Remove USB 17. Oil Quality Support a. Software Version (SVN); hardware (HVN) b. Serial Number c. RTC Date d. RTC Time e. Vat-1 f. Vat-2 g. Vat-3 h. Vat-4 i. Vat-5 j. Vat-6 k. Vat-7 l. Vat oil quality (OQ) history May
18 SECTION 3. LEVEL 1 PROGRAMMING Level 1 contains the following: Modify product settings Set the AIF clock for products Perform the Deep Clean procedure Fryer Setup Mode 3-1. MODIFYING PRODUCT SETTINGS 1. Press and hold and buttons until LEVEL - 1 shows in the display, followed by ENTER CODE. 2. Enter code 1, 2, 3, 4 (first 4 product buttons). PRODUCT and SELECTN show in the displays. 3. Press right button and SELECT PRODUCT and -P 1- (ex: NUGGETS) show in the displays. Change Product Names 4. Use the and buttons to scroll through 40 products, or press desired product button 5. Press right button and the product (ex: NUGGETS) shows in left display and MODIFY, and YES NO shows in right display. Press button to change this product, or press the X button to choose another product. 6. If button was pressed, press and release a product button and the flashing letter changes to the first letter under the product button that was pressed. For example, if pressed, the flashing letter changes to an A. Press same button again and the flashing letter changes to a B. Press it again and the flashing letter changes to a C. Once desired letter shows in the display, press button to continue to the next letter and repeat the procedure. Press and hold the right X button to exit Program Mode, or press button to continue on to 1. COOK TIME. To Change Times and Temperatures 7. Press button until COOK TIME shows in display, and then use product buttons to change the time in minutes and seconds, to a maximum of 59:59. Aug
19 3-1. MODIFYING PRODUCT SETTINGS (CONTINUED) 8. Press and release button and TEMP shows in the display, along with the preset temperature on the right side of the display. Press the product buttons to change the temperature. The temperature range is 190 F (88 C) to 380 F (193 C). Cook ID Change 9. Press button until COOK ID shows in the display along with the product ID. For example, NUG would be the ID for nuggets. Use the product buttons to change the ID, following the same procedure as Step 6 above. Alarms (Duty 1 & 2) 10. Press button until DUTY 1 shows in left display, and an alarm time in the right display. Press the product buttons to set an alarm. Ex., If a Cook Cycle was set at 3 minutes, and an alarm was to go off after 30 seconds into the Cook Cycle, 0:30 would be set in the display at this time. When the timer counts down to 2:30 the alarm sounds. After alarm time is set, press button and DUTY 2 shows in display, and a second alarm can be programmed. Quality Timer 11. Press button until QUAL TMR shows in display along with preset holding time. Press product buttons to adjust hold time (2 hrs., 59 min. max.). AIF Disable 12. Press button until AIF DISABLE shows in display along with YES or NO. Using and buttons change the display to YES if that product is to not be included in the automatic intermittent filtration operation, or NO if it is to be included. Assign Button 13. Press button until ASSIGN BTN shows in the display, along with the product (ex: NUGGETS). If this product already has a product button assigned to it, that LED will be lit. To assign other product buttons to that product, press and hold the product button for 3 seconds and that LED stays lit. To remove a product from a button, press and hold the product button with a lit LED and the LED goes out. Aug
20 3-2. AIF CLOCK This feature allows controls to be set for periods of the day that block the automatic Filter Now prompts. For example, the controls could be set not interrupt with Filter Now prompts during the lunch rush, and during the supper rush. But, if filtering is desired during this time, press and hold a button to access the filter menu. Each AIF Blocking period is defined by a start time (a time of day, XX:XX A, etc) and a duration in minutes. Weekdays M-F are all grouped together. Up to four different AIF blocking periods may be programmed throughout the day for Monday - Friday. (All days share the same settings.) A separate set of four blocking periods may be programmed for Saturdays, and a final set of four blocking periods may be programmed for Sundays. 1. Press and hold and buttons until LEVEL - 1 shows in the display, followed by ENTER CODE. 2. Enter code 1, 2, 3, 4 (first 4 product buttons). PRODUCT and SELECTN show in the displays. 3. Press button once and AIF CLOCK show in displays. 4. Press button and use and buttons to scroll through ENABLE and DISABLE and then press button again to select one. 5. If ENABLE is chosen, then and buttons can be used to scroll through following list of blocking periods: Left Display Right Display M-F 1 XX:XX A XX M-F 2 XX:XX A XX M-F 3 XX:XX A XX M-F 4 XX:XX A XX SAT 1 XX:XX A XX SAT 2 XX:XX A XX SAT 3 XX:XX A XX SAT 4 XX:XX A XX SUN 1 XX:XX A XX SUN 2 XX:XX A XX SUN 3 XX:XX A XX SUN 4 XX:XX A XX Aug
21 3-2. AIF CLOCK (CONTINUED) In 12-hour clock mode, there are three items on each line: the start time XX:XX, the A or P (am/pm) setting, and the XX duration. Use the and buttons to set these items, which flashes when the item is selected. To set a new start time setting, use the product buttons, to enter the new value. Press the button to step over to the AM/PM setting. The A or P can be toggled by pressing the 0 product button. Press the button again to step over to the duration value (in minutes). Enter a new value using the product buttons, In 24-hour clock mode, there are only two items on each line: the time (XX:XX) and the duration (XX). Again, the and buttons step you between these items. Press the right-side X button to exit out of AIF Clock programming mode DEEP CLEAN MODE This procedure allows a thorough cleaning of the vat by removing caramelized oil from vat. See Section 4-3 in the Operator s Manual for complete set of instructions. Aug
22 3-4. FRYER SETUP This mode has the same settings as seen upon initial start-up of the fryer. 1. Press and hold and buttons until LEVEL - 1 shows in the display, followed by ENTER CODE. 2. Enter code 1, 2, 3, 4 (first 4 product buttons). PRODUCT and SELECTN show in the displays. 3. Press button 3 times and FRYER SETUP show in the displays. 4. Press button and *SETUP* *MODE* shows in displays, followed by, LANGUAGE on the left display, ENGLISH on the right display. Use or buttons to change the operation display to, FRAN- CAIS, CAN FREN, ESPANOL, PORTUG, DEUTSCHE, SVENSKA, РУССКИИ. Press to continue with other set-up items which include: ZONE - USA or NON-USA TEMP FORMAT - o F or o C TIME FORMAT - 12-HR OR 24-HR ENTER TIME - Time of day (use product buttons to change) ENTER TIME - AM OR PM DATE FORMAT - US OR INTERNATIONAL ENTER DATE - Today s date (use product buttons to change) FRYER TYPE - GAS or ELEC VAT TYPE - FULL OR SPLIT DISPOSE BULK OIL - YES/NO (BULK has RTI system) SUPPLY BULK OIL - YES/NO (BULK has RTI system) DAYLIGHT SAVING TIME - 1.OFF; 2.US (2007 & after); 3.EURO; 4.FSA (US before 2007) DISPOSE BULK OIL: - 1. NO or VAC: Select for vats drained with an oil drain caddy RTI: Select for vats drained with an RTI switch REAR: Select for vats without a secondary switch FRONT: Currently not used (01/18). OIL QUALITY ENABLED (yes or no) TPM WARN (value can be set to 0% - 40%) TPM MAX (value can be set to 0% - 40%) Unless otherwise indicated, use or to change settings. May
23
24 SECTION 4. LEVEL 2 PROGRAMMING Used to access the following: Advanced changes to product settings Error code log Password programming Alert Tone/Volume No. of cook cycles before filter is suggested Automatic filter time 4-1. ADVANCED PRODUCT SETTINGS 1. Press and hold and buttons until LEVEL - 2 shows in the display, followed by ENTER CODE. 2. Enter code 1, 2, 3, 4 (first 4 product buttons). PROD and COMP show in the displays. 3. Press right button and SELECT PRODUCT and -P 1- show in the displays. 4. Use the and buttons to scroll through 40 products, or press the desired product button. 5. Press right button and product (ex: NUGGETS) shows in the left display and MODIFY YES NO shows in the right display. Press the button to change this product, or press the X button to choose another product. >Load Compensation, Load Compensation Reference, Full Heat, PC Factor< 6. If button was pressed, LD COMP shows in the display along with the load compensation value. This automatically adjusts the time to account for the size and temperature of the cooking load. Press the product buttons to change this value of 0 to Press button until LCMP REF shows in the display along with the load compensation average temperature. (if load compensation is set to OFF, then _ shows in display and setting cannot be programmed) This is the average cooking temperature for each product. The timer speeds up at temperatures above this setting and slows down at temperatures below this setting. Press the product buttons to change this value. Aug
25 4-1. ADVANCED PRODUCT SETTINGS (CONTINUED) 8. Press button until FULL HT shows in display along with full heat value in seconds, which means heat is on as soon as a timer button is pressed, for a programmed length of time. Press product buttons to change this value of 0 to 90 seconds. 9. Press button until PC FACTOR shows in display along with the proportional temperature, which helps keep the oil from over-shooting the setpoint temperature. Press product buttons to change this value of 0 to 50 degrees. Use button to go back to previous menu items. Press X button when finished with the current product, to return to the PRODUCT SELECTN step. Press X button a second time to exit PROD COMP mode E-LOG (ERROR CODE LOG) 1. Press and hold and buttons until LEVEL - 2 shows in the display, followed by ENTER CODE. 2. Enter code 1, 2, 3, 4 (first 4 product buttons). PROD and COMP show in the displays. 3. Press button and E-LOG shows in the display. 4. Press right button and A plus the present date & time flashes on the display, along with *NOW*. 5. Press and if an error was recorded, B and date, time, and error code information shows in display. This is the latest error code that the controls recorded. 6. Press and the next latest error code information can be seen. Up to 10 error codes (B to K) can be stored in the E-Log Section. Press and hold the right button to view a brief description of the error. Aug
26 4-3. PASSWORDS The 4-digit passwords can be changed for access to Set-Up, Usage, Level 1, Level 2, & Get Mgr.) 1. Press and hold and buttons until LEVEL - 2 shows in the display, followed by ENTER CODE. 2. Enter code 1, 2, 3, 4 (first 4 product buttons). PROD and COMP show in the displays. 3. Press button twice and PASSWORD shows in the display. 4. Press right button and SET UP shows in display. The Set up password can be changed at this time, or press once to change the USAGE password, twice for LEVEL 1 password, 3 times for LEVEL 2 password, or 4 times for GET MGR password. And then, follow instructions below. 5. If the password for Set Up Mode (for example) is to be changed, press right button and MODIFY? YES NO shows in the display. Press right button to change the 4-digit password for the Set Up Mode, using the product buttons 4-4. ALERT TONE (AND VOLUME) 6. Once new password is entered, CONFIRM PASSWORD shows in the display. Press button to confirm, or press X to choose another password. 1. Press and hold and buttons until LEVEL - 2 shows in the display, followed by ENTER CODE. 2. Enter code 1, 2, 3, 4 (first 4 product buttons). PROD and COMP show in the displays. 3. Press button 3 times and ALERT TONE shows in the display. 4. Press right button and VOLUME shows in display, along with volume value. Use the product buttons to set volume from 1 (softest) to 10 (loudest). 5. Once volume is set, press button and TONE shows in display, along with the tone value. Use the product buttons to set tone from 50 to 2000 Hz. 6. Press X to exit Alert Tone Mode. Aug
27 4-5. FILTER AFTER The number of cook cycles between filtering the oil can easily be programmed for all products. 1. Press and hold and buttons until LEVEL - 2 shows in the display, followed by ENTER CODE. 2. Enter code 1, 2, 3, 4 (first 4 product buttons). PROD and COMP show in the displays. 3. Press button 4 times and FILR AFTR shows in the left display. 4. Use the product buttons to set the number to cook cycles between filtering procedures from 0 to Once set, press übutton to confirm FILTER TIME The length of time the fryer remains idle between cook cycles before the controls suggest filtering. 1. Press and hold and buttons until LEVEL - 2 shows in the display, followed by ENTER CODE. 2. Enter code 1, 2, 3, 4 (first 4 product buttons). PROD and COMP show in the displays. 3. Press button 5 times and FILR TIME shows in the left display (hours:minutes). 4. Use the product buttons to set a time between cook cycles from 0 to 18:00 hours. For example, if 5:00 is programmed in the right display, if the vat was not used for 5 hours after a cook cycle, the controls would display FILR NOW? YES NO. 5. Once set, press übutton to confirm. Aug
28 SECTION 5. LEVEL 3 PROGRAMMING 5-1. ADDITIONAL ADVANCED PRODUCT SETTINGS Used to access the following: TECH RESETS-Reset Recovery Faults/Passwords to defaults SPCL PROG-Program filter control parameters and other items CLOCK SET-Set the time-of-day clock / calendar DATA COMM-Data Communications, LonWorks, MMC, etc. HEAT CTRL-Program heat algorithm control parameters TECH MODE-Control of outputs, display & button tests, etc. STATS MODE-Review, reset operating stats, diagnostic logs, etc 1. Press and hold and buttons until LEVEL - 3 shows in the display, followed by ENTER CODE. 2. Enter code 1, 1, 2, 2, 1, 1, 2, 2 (first 2 product buttons), and A. TECH & RESETS show in the displays. >Tech Resets< 3. Press right button and RECOVERY FAULTS shows in left display. Right display shows CLR and the number of recovery error recorded. Press button to reset the number to Press button and ALL PASSWORDS RESET shows in left display. Press button to reset all passwords set in the controls. Use button to go back to previous menu items. Press X button when finished with the current item, to return to the main menu. Press X button a second time to exit Level 3 programming. Aug
29 5-2. SPECIAL PROGRAMMING The Special Program Mode is used to set more detailed programming, such as: SP-1 ZONE - USA or Non-USA (default setpoints) SP-2 System Initialization SP-3 2nd Language: English, French, Candian- French, German, Spanish, Portuguese, Swedish, Russian, & NONE SP-4 2nd Volume SP-5 Quick Configuration - CHKN+FISH; FF/HBR; CHKN; EMPTY SP-6 Polish Duration - X:XX M:SS SP-7 Drain Valve - NORMAL or MANUAL SP-8 Edit S/N (Serial Number) SP-9 Decal Layout - UP/DOWN or DOWN/UP SP-10 Recovery Test Limit - XXX SEC SP-11 Melt Cycle Select - 1.LIQUID; 2.SOLID SP-12 Change Pad Reminder Time - XX HRS SP-13 Pan Out = Pad Changed Time - XXX SEC SP-14 Auto-Fill Enabled? - YES; NO SP-15 Auto-Fill Cycle Time? - XXX SEC SP-16 Auto-Fill Check JIB - XXX CNT SP-17 Oil Full If Delta Above... - XX o F or C SP-18 Oil Low If Delta Below... - XX o F or C SP-19 Heat Allowed During Fill? - HEAT OK; NO HEAT SP-20 Always Ask IS POT FILLED? - YES; NO SP-21 Oil Drain Time - XXX SEC SP-22 Oil WashTime - XXX SEC SP-23 Oil Rinse Time - XXX SEC SP-24 Oil Type Fill Time - XXX SEC SP-25 Repeat Fill Time - XXX SEC SP-26 RTD Air Cooling - X.XX o /SC SP-27 RTD Cold Oil Surround - X.XX o /SC SP-28 RTD Hot Oil Surround - X.XX o /SC SP-29 Temp. Probe x Above Min. - XXX o F or C SP-30 x Above Min. Hit Limit - XXX CNT SP-31 Level RTD Air Cooling - X.XX o /SC SP-32 Level RTD Oil Surround - X.XX o /SC SP-33 New Pad-Max. Fill Time - XXX SEC SP-34 Old Pad-Max. Fill Time - XXX SEC SP-35 Fill To Top Time - XXX SEC SP-36 Reach Top Plus x Seconds - XXX SEC SP-37 Fill Until Pan Empty - XXX SEC SP-38 Valve Auto - Cycle Period - X:XX H:MM SP-39 Refill Detect By... - LVL PRBS or PRESSURE SP-40 Min. Wash PSI - XX.XX PSI Aug
30 5-2. SPECIAL PROGRAMMING (CONTINUED) SP-41 Max. Bubble PSI - XX.XX PSI SP-42 Max. Wash Time - XXXX SEC SP-43 Old Pad Max. Wash Time - XXXX SEC SP-44 Min. Fill Time - XXX SEC SP-45 New Pad Max. Fill Time - XXXX SEC SP-46 Old Pad Max. Fill Time - XXXX SEC SP-47 Required Bubble PSI Hits - XXX CNT SP-48 Pressure Trip Limit - XXX PSI SP-49 Pilot During Filter-PILOT OK or NO PILOT (GAS FRYERS ONLY) SP-50 Filling - Low Heat On - XXX SEC SP-51 Filling - Low Heat Off - XXX SEC SP-52 Heat Error Enabled? - YES or NO SP-53 Warm Return Line Enabled?/Interval - H:MM (Hours/Minutes - OFF to 4 hours) SP-54 Warm Return Line Time - M:SS (Minutes/Seconds - 0:00 to 4 Minutes) SP-55 SP-56 Enable R & D Displays? - YES or NO Not all Special Program Mode functions are discussed in this section. To ensure proper operation of fryer, please consult Henny Penny Corp. before changing any of these settings. For more information on these functions, contact the Service Department at , or To Enter Special Programming: 1. Press and hold and buttons until LEVEL - 3 shows in the display, followed by ENTER CODE. 2. Enter code 1, 1, 2, 2, 1, 1, 2, 2 (first 2 product buttons). 3. A. TECH & RESETS show in displays. Press and B. SPCL & PROG show in the displays. Zone - USA/Non-USA (SP-1) 4. Press button and SP-1 ZONE shows in the left display. Use and buttons to set the default set-points to USA specifications or non-usa specifications. Initialize System (SP-2) 5. Press button and SP-1 DO SYSTEM INIT scrolls in left display. To reset the controls to factory default settings, press and hold button and controls count down IN 3, IN 2, IN 1. Once display shows -INIT- & *DONE* the controls are reset to factory defaults. Aug
31 5-2. SPECIAL PROGRAMMING (CONTINUED) 2nd Language (SP-3) 6. Press button and SP-3 2ND LANGUAGE scrolls in left display. Use and buttons to set to: ENGLISH; FRANCAIS; CAN FREN; ESPANOL; PORTUG; DEUTSHE; SVENSKA; РУССКИИ or -NONE-. By setting a second language in the controls, 2 languages can now be easily chosen by pressing button twice during normal operation. One language shows in left display and a second language shows in the right display. Pressing the button selects the language in the displays. 2nd Volume (SP-4) 7. Press button and SP-5 2nd VOLUME shows in display. If NONE is displayed, this option is off. Push and to turn option on and to set volume from Quick Configuration (SP-5) 8. Press button and SP-5 QUICK CONFIG shows in display. Use the and buttons to change the menu selection in the controls to: CHKN+FISH; FF/HBR; CHKN or EMPTY. Polish Duration (SP-6) 9. Press button and SP-6 POLISH shows in left display. Use product buttons to change polish time, from 5 minutes to a maximum of 10 minutes. Drain Valve (SP-7) 10. Press button and SP-7 DRAIN VALVE scrolls in the left display. Use the and buttons to change the right display to show NORMAL or MANUAL. NORMAL means drain valves are controlled electronically and MANUAL means drain valves must be opened by hand. Aug
32 Edit Unit Serial Number (SP-8) 11. Press button and SP-8 S/N EDIT shows in the left display. Press the right button to enter the unit s serial number in the controls, using the product buttons. STD and CUST show in the right displays. Press the button under STD and the first 2 letters of the serial number is the standard equipment code, press X button and a custom equipment code can be entered. THIS SERIAL NUMBER SHOULD MATCH THE SERIAL NUMBER ON THE DATA PLATE, ON THE DOOR. Dispose Requires Code (SP-55) 12. Press button and SP-55 DISPOSE REUIRES CODE shows in the display. Using and to select YES/NO and confirm by pressing or cancel by pressing X. Aug
33 5-2. SPECIAL PROGRAMMING (CONTINUED) Decal Layout (SP-9) 11. Press button and SP-9 DECAL LAYOUT? scrolls in the left display. The words in the right displays should match the arrow type above the and buttons. EX: If the control decal shows should show DOWN-UP the right displays If the displays show UP-DOWN, use the and buttons to change the displays to DOWN-UP. Liquid or Solid Cooking Oil Used (SP-11) 12. Press button and SP-11 MELT CYCLE SELECT scrolls in the left display. Unless solid oil is being used in the vats the right display should show 1.LIQUID. If solid oil is used, the unit MUST BE equipped to handle solid oil. Use the and buttons to change the right display to 2.SOLID Change Pad Reminder Time (SP-12) 13. Press button and SP-12 CHANGE PAD REMINDER shows on the display. Use the product buttons to change the time between changing the filter pad reminders. For example, if 25 HRS is programmed in the right display, every 25 hours the display shows CHANGE PAD as a reminder to the operator that the filter pad needs changed. Pan Out of Fryer = Pad Changed (SP-13) 14. Press button and SP-13 PAN OUT = CHANGED PAD scrolls in the left display. Use the product buttons to program amount of time the drain pan is pulled-out from under fryer before the controls reset the change pad reminder. This is the amount of time it should take to change filter pad. The range is 15 to 255 seconds. For example, if 120 SEC is programmed in the right display, when the drain pan is out from under the fryer for at least 120 seconds, the controls restarts counting for the change pad reminder. Auto-Fill Enabled (SP-14)(automatically keeps oil at proper level) 15. Press button and SP-14 AUTO-FILL ENABLED? scrolls in the left display. Use the and buttons to set the right display to YES or NO. This should always be set to YES, unless a hardware failure causes a problem, such as a JIB pump or Add Oil valve failure. Aug
34 5-3. CLOCK SET 1. Press and hold and buttons until LEVEL - 3 shows in the display, followed by ENTER CODE. 2. Enter code 1, 1, 2, 2, 1, 1, 2, 2 (first 2 product buttons). 3. A. TECH & RESETS show in displays. Press button twice and C. CLOCK and SET show in the displays. 4. Press button and CS-1 ENTER DATE MM-DD-YY shows in the left display. Use the product buttons to set the date in right display. 5. Press button and CS-2 ENTER TIME shows in left display and time flashes in right display. Use product buttons to change the time. 6. Press button and CS-2 ENTER TIME shows in left display and AM or PM flashes in right display. Use the buttons to change from AM to PM or vice-versa. 7. Press button and CS-3 TIME FORMAT shows in left display and 12-HR or 24-HR shows in right display. Use the buttons to change from a 12 hour time format to a 24 hour time format or vice-versa. 8. Press button and CS-4 DAYLIGHT SAVING TIME shows in the left display. Use the to change daylight saving time for your area: 1.OFF; 2.US (2007 & after); 3.EURO; or 4.FSA (US before 2007) 5-4. DATA COMM & HEAT CONTROL Data communications and heat controls settings are shown in Level 3 Program Mode. But, to ensure proper operation of fryer, please consult Henny Penny Corp. before changing any of these settings. For more information on these functions, contact the Service Department at , or Aug
35 5-5. TECH MODE The TECH Mode has self-diagnostic information, which can be used by certified technicians for troubleshooting purposes, such as: T-1 Software T-2 Fryer Type (Gas or Elec.) T-3 Push Button Test T-4 All On Display Test T-5 Display Segments Test T-6 Display Digits Test T-7 Display Decimal Points Test T-8 LED s Test T-9 Left Temp. Probe Calibration & Offset T-10 Left Level 1 Probe Calibration & Offset T-11 Left Level 2 Probe Calibration & Offset T-12 Right Temp. Probe Calibration & Offset T-13 Right Level 1 Probe Calibration & Offset T-14 Right Level 2 Probe Calibration & Offset T-15 CPU Control Temp. Calibration/Offset/Highest T-16 View A - D Channel T-17 Digital Inputs T-18 AIF Info T-19 Outputs Test T-20 Pumps & Valves Test T-21 Change Tech Code? T-22 Total Initialization Not all Tech Mode functions are discussed in this section. To ensure proper operation of fryer, please consult Henny Penny Corp. before changing any of these settings. For more information on these functions, contact the Service Department at , or Aug
36 5-5. TECH MODE (CONTINUED) 1. To enter the TECH Mode, press and hold and buttons for 5 seconds, until display shows LEVEL 3, followed by ENTER CODE. 2. Enter code 1, 1, 2, 2, 1, 1, 2, 2 (first 2 product buttons). A. TECH & RESETS show in the displays. 3. Press 5 times, and when display shows F. TECH, press the right button and T-1 SOFTWARE shows in the display, the first step of the TECH Mode. Use and buttons to toggle through the steps. Press the right X button twice, at anytime to return to normal operation. T-1 - SOFTWARE Press to view HP Part No. of eprom Press to view software ID Press to view software version T-2 - FRYER TYPE - GAS or ELEC T-3 - PUSH-BUTTON TEST Press any of the control buttons to test operation. You should hear a beep, and the LED should light and/or a display. T-4 - ALL-ON DISPLAY TEST Press any of the product buttons and all the LEDs and display segments should light. T-5 - SEGMENTS TEST Press any of the product buttons to view a different segment of the display characters. T-6 - DIGITS TEST Press any of the product buttons numerous times to view all segments of each digit across the displays. T-7 - DECIMAL PTS TEST Press any of the product buttons numerous times to view all decimal points across the displays. Aug
37 5-5. TECH MODE (CONTINUED) T-8 - DECIMAL PTS TEST Press any of the product buttons numerous times to view each LED across the control panel. T-17 - DIGITAL INPUTS - HDF H = HIGH LIMIT - If H is present, the high limit is good. If - shows then the high limit is tripped out (overheated) or disconnected. D = DRAIN SWITCH - If D is present, the drain handle (when applicable) is closed. If - shows then the drain is open or the switch is faulty. F = FAN (PRESSURE SWITCH) - If F is present, the pressure switch is good. If - shows in the display, the switch is faulty. Press button and an underscore ( _ ) indicates the input is not presently detected. A Checkmark ( ) indicates the signal is detecting a normal input. A blinking ( X ) indicates the signal is presently detected, but is detected as a half-wave (partially failed) input. The H, D, F signals above are wired in series. The first signal missing out of this sequence l generally causes all signals to the right of it to be missing as well. T-18 - AIF INFO (AIF PCB communicating with control PCB?) An AIF means normal communications between the AIF PCB and the control PCB. AIF X means a problem with the communications between the PCBs. Press button and FILR IN and USE BY 1(ex) shows in the displays. These displays shows which controls are using the filtering system. USE BY 0 = not in use USE BY 7 = used by AIF USE BY 1 to 5 = used by control PCB Press button and CPU POSN and 1 OF 3(ex) shows in the displays. These displays shows which controls are plugged into which port on the AIF board. For example, the left control should be plugged into port 1, and on a 3 control fryer, shows 1 OF 3 on the display. If the right control is unplugged, then the left control would show 1 OF 2 instead of 1 OF 3. Aug
38 5-5. TECH MODE (CONTINUED) Press button and INP E_P_ and JL_R_DF_ shows in the displays. AIF Board Inputs: E = Stop button P = Drain Pan JL = JIB R = RTI DF = RTI Discard Tank E* = E-Stop pressed. M* = drain pan is missing. J* = JIB oil level is low. R* = RTI System Detected DF* = tank full Press button and OUT F_J_ and N_DI_JFo shows in the displays. AIF Board Outputs: Current outputs status from AIF board. F = Filter Pump. (F* = Filter pump is on) J = JIB Pump. (J* = JIB pump is on) N = New Oil Pump. (N* = RTI new oil pump on) DI = Discard Valve. (DIo = RTI disc. valve open/dic=closed) JF = JIB Fill Valve. (JFo = RTI JIB fill valve open/ JFc=closed) Press button and REQ F_J_ and N_DI_JFo_ shows in the displays. AIF Board Outputs Requested by the Control Board: Current outputs status from AIF board. F = Filter Pump. (F* = Filter pump is on) J = JIB Pump. (J* = JIB pump is on) N = New Oil Pump. (N* = RTI new oil pump on) DI = Discard Valve. (DIo = RTI disc. valve open/ DIc=closed)) JF = JIB Fill Valve. (JFo = RTI JIB fill valve open/ JFc=closed) T-19 - OUTPUTS F = FAN (PRESSURE SWITCH)- Press or to open and close the pressure switches S = SAFETY GAS VALVE (if available) - Press to open and close the gas safety valves or I = IGNITION MODULE - Press or to open and close the outputs on the ignition modules H = HEAT OUTPUTS - Press or to turn on and off the heating outputs (ex: gas valve) Aug
39 5-5. TECH MODE (CONTINUED) T-20 - PUMPS & VALVES Press button and VALVES DcRcAc shows in displays. Press Press Press to open and close the drain valves. to open and close the return valves. to open and close the add valves. DcRcAc means valves are closed, DoRoAo means valves are open. (Driven by the control board) Press button and DISCARDc and JIBFILLc shows in the displays. (Driven by the AIF board) Press to open and close the RTI discard valve (display shows DISCARDo when open) Press to open and close the RTI JIB fill valve (display shows JIBFILLo when open) Press button and PUMP FP_ and JP_ NP_ shows in the displays. (Driven by the AIF board) Press to turn off and on the filter pump (display shows FP* when on) Press when on) to turn off and on the JIB pump (display shows JP* Press to turn off and on the RTI new oil pump (display shows NP* when on) Press button and LIGHTS and FLT_ JLO_ shows in the displays. (Driven by the AIF board) Press to turn off and on the FILTER light (display shows FLT* when on) Press to turn off and on the JIB LOW light (display shows JLO* when on) Aug
40 5-6. STATS MODE This mode allows a technician to view advanced information on the operation of the fryer and controls. 1. To enter the TECH Mode, press and hold and buttons for 5 seconds, until display shows LEVEL 3, followed by ENTER CODE. 2. Enter code 1, 1, 2, 2, 1, 1, 2, 2 (first 2 product buttons). A. TECH & RESETS show in the displays. 3. Press 6 times, and when display shows G. STATS, press the right button and ST-1 LAST RESET ON... shows in display, the first step of the TECH Mode. Use and buttons to toggle through the steps. ST-1 Stats Last Reset Date ST-2 Fryer Total Running Hours ST-3 Left Vat Melt Cycle Hours ST-4 Left Vat Cook Cycle Hours ST-5 Left Vat Filter Lockout Hours ST-6 Right Vat Melt Cycle Hours ST-7 Right Vat Cook Cycle Hours ST-8 Right Vat Filter Lockout Hours ST-9 Power-Ups Count ST-10 Error Counts ST-11 Left Vat Heat On Hours ST-12 Right Vat Heat On Hours ST-13 Highest Left Vat Oil Temperature ST-14 Highest Right Vat Oil Temperature ST-15 Highest CPU Temperature ST-16 System RAM Fade Count ST-17 Cook RAM Fade Count ST-18 Product RAM Fade Count ST-19 Stat RAM Fade Count ST-20 RAM Data Error Count ST-21 Data Total Loss Count ST-22 User Intialization Count ST-23 Automatic Initialization Count ST-24 Cooks Count per Product ST-25 Cook Cycle Stop Counts - A = number of stops in the first 30 seconds - B = 0 - C = 0 - D = complete cook cycles counted ST-26 Reset All Stats Aug
41 SECTION 6. INFORMATION MODE 6-1. INFO MODE This mode gathers and stores historic information on the fryer and operator s performance. Press and hold for 3 seconds, until *INFO* *MODE* shows on the displays. Press or buttons to access the steps and press button to view the statistics within each step. This mode includes the following information: 1. FILTER STATS - filtering information for the last 7 days 2. REVIEW USAGE- information accumulated since the last time this data was manually reset 3. LAST LOAD - information about the most recent Cook Cycle, or the cycle presently in progress Press X button to exit from the Information Mode. 1. FILTER STATS Press button to select Filter Stats and then press and to select the day for which you want to view the stats. Then press or buttons to view the following stats: FILTERED = No. of times filtered FLT BPSD = No. of times filtering was skipped FLT AVG = Average no. of cook cycles between filters 2. REVIEW USAGE Press button to select Review Usage and press or buttons to view the following: FUNCTION DISPLAY EX: Day usage data was previously reset SINCE 9:32P Total number of cook cycles TOTAL COOKS 462 Cook Cycles stopped before PULL QUIT COOK 4 Number of hours fryer was on (left) L ON HRS 165 Number of hours fryer was on (right) R ON HRS 160 Aug
42 6-1. INFO MODE (CONTINUED) 3. LAST LOAD Press button to select Last Load (ex: -P1- = Product 1; L1 = left, 1st product) and press or buttons to view the following: FUNCTION DISPLAY EX: Product (Last product cooked) PRODUCT -P1- L1 Time of day last Cook Cycle was started STARTED 10.25A SEP-08 Actual Elapsed cook Time (Real seconds) ACTUAL TIME 7:38 Programmed cook Time PROG TIME 3:00 Max Temp during Cook Cycle MAX TEMP 327 F Min Temp during Cook Cycle MIN TEMP 313 F Avg Temp during Cook Cycle AVG TEMP 322 F Heat On (percentage) during Cook Cycle HEAT ON 73% Ready? (Was fryer Ready before start?) READY? YES Aug
43 SECTION 7. MAINTENANCE 7-1. PREVENTIVE MAINTENANCE To ensure a long life of fryers and their components, regular maintenance should be performed. Refer to the chart below. Frequency Action Daily Maintenance Filter (See Maintenance Filtering Instructions Section in Operator s Manual or PM Guide) Daily Weekly Quarterly Quarterly Change Filter Pad (See Changing Filter Pad Section in Operator s Manual or PM Guide) Clean Behind Fryer (See PM Guide) Change Filter Pan O-Rings (See PM Guide) Vat Deep Clean (See Deep Clean Mode Section in Operator s Manual or PM Guide) 7-2. MAINTENANCE HINTS Semi-Annually Clean Blower Motors (See PM Guide) 1. You may need to use a multimeter to check the electric components. 2. When the manual refers to the circuit being closed, the multimeter should read zero unless otherwise noted. 3. When the manual refers to the circuit being open, the multimeter will read infinity. 4. The fry pots, also referred to as vats, are sealed into place with a divider that is intregral to the vats and cannot be removed for cleaning. May


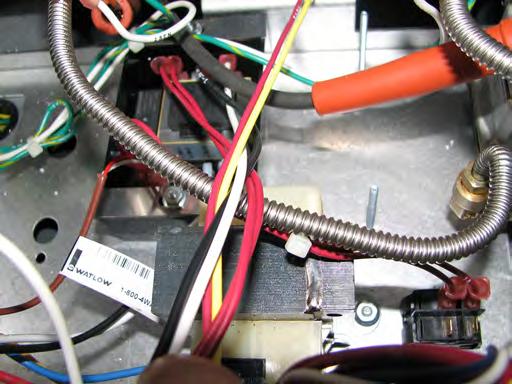
44 7-3. COMPLETE CONTROL REPLACEMENT 1. Remove electrical power supplied to the unit. To avoid electrical shock or property damage, move the POWER switch to OFF and disconnect main circuit breaker, or unplug cord at wall receptacle. 2. Using a phillips head screw driver, loosen (do not remove) the screw located at the top of the control board. 3. Slide the control board down until the notch is clear of the screw. 4. Tilt the entire control board down allowing it to rest. 5. Disconnect all connectors from control board. Make note of the locations of the connectors for the reinstall. 6. Remove the old control board and replace with the new board. When plugging connectors onto new control panel, be sure the connectors are inserted onto all of the pins, and that the connectors are not forced onto the pins backwards. If not connected properly, damage to the board could result. 7. Reconnect all connectors POWER SWITCH REPLACEMENT 8. Tilt control board back to factory location and secure with the screw. 1. Lower the control board (see Control Board Replacement). 2. Press on the switch from the inside of the fryer to release from the metal shroud. 3. Mark and disconnect the wires from the switch. 4. Connect the wires onto the new switch on the correct terminals. 5. Press back into factory location. May


. 3.")
45 7-5. BURNER TUBE REMOVAL 1. Remove electrical power supplied to the unit. To avoid electrical shock or property damage, move the POWER switch to OFF and disconnect main circuit breaker, or unplug cord at wall receptacle. 2. Lower the control board (refer to the Control Board section). 3. Using a 5/16 socket, remove the 2 screws that secure the burner support bar to the burner assembly. 4. Remove the support bar. 5. Pull down on the burner tubes to release them from the orifices. Once the burner tube is cleared from the orifice, pull the tube out of the assembly. 6. To reassembly the burners, slide each burner tube onto the orifice. 7. Line the notches on the support bar to each tube PILOT REPLACEMENT 8. Tighten the screws to the assembly. 1. Remove electrical power supplied to the unit. 2. Lower the control board (refer to the Control Board section). 3. Remove burner tubes (refer to the Burner Tube Removal section). 4. Remove the flame sensor wire. 5. Remove the two screws securing the pilot to the burner assembly. The right hand screw will have the ground wire. May


. 3.")
46 7-6. PILOT REPLACEMENT (CONTINUED) 6. Disconnect the pilot wire located in the orange rubber sleeve. 7. Using a 7/16 wrench, loosen the pilot tube from the pilot. 8. Using a 7/16 wrench loosen and remove flame sensor. 9. Replace pilot in reverse order. 10. When screwing the pilot back to the burner assembly, be sure to connect the ground wire to the right hand screw. To replace the flame sensor, leave pilot assembly attached to the burner assembly and remove only the flame sensor with a 7/16 wrench HIGH LIMIT THERMOCOUPLE 1. Remove electrical power supplied to the unit. To avoid electrical shock or property damage, move the POWER switch to OFF and disconnect main circuit breaker, or unplug cord at wall receptacle. 2. Lower the control board (refer to the Control Board section). 3. Remove burner tubes (refer to the Burner Tube Removal section). 4. Disconnect the wires from the high limit control located behind the control board mounted to the frame. 5. Using a 1/2 wrench, loosen the compression fitting on the probe. 6. Slide the fitting nut and the ferrule back to loosen the probe.. May


47 7-7. HIGH LIMIT THERMOCOUPLE (CONTINUED) 7. Remove the pot bushing from the vat. Replace with the new bushing included with new part. Apply thread sealant and tighten into vat. 8. Apply thread sealant to the compression fitting. Thread into the pot bushing. 9. Insert the probe into the compression nut and the ferrule. 10. Insert the new probe into the compression fitting. Be sure to insert the probe end into the sleeve welded to the burner tube inside of the vat. 11. Tighten the compression fitting nut HIGH LIMIT CONTROL 1. Remove electrical power supplied to the unit. To avoid electrical shock or property damage, move the POWER switch to OFF and disconnect main circuit breaker, or unplug cord at wall receptacle. 2. Lower the control board (refer to the Control Board section). 3. Mark and disconnect the wires located on the high limit control. 4. Using a 3/8 wrench, remove the nuts. 5. Remove the clamp bars. 6. Slide the high limit control off of mounting studs. 7. Install the new control in reverse order. May

. 3.")


48 7-9. PROBE REPLACEMENT 1. Remove electrical power supplied to the unit. To avoid electrical shock or property damage, move the POWER switch to OFF and disconnect main circuit breaker, or unplug cord at wall receptacle. 2. Lower the control board (refer to the Control Board section). 3. Remove burner tubes (refer to the Burner Tube Removal section). 4. Using a 1/2 wrench, loosen the compression nut. 5. Using pliers, remove the ferrule. 6. Pull the probe from the vat. 7. Trace the probe wire to the connected located on the back of the control board. 8. Disconnected the connector. Using a flat blade screw driver or pin pusher, press in on the clip and remove wire from connector. 9. Insert the new probes wire into the connector. 10. Replace probe in reverse order. 11. Use the gage to adjust the probe BACK SHROUD REMOVAL 1. Using a phillips head bit or screw driver, loosen the four screws on the lower shroud. 2. Remove shroud and set aside to access all back components. May


. 3.")
49 7-11. BLOWER REPLACEMENT 1. Remove electrical power supplied to the unit. To avoid electrical shock or property damage, move the POWER switch to OFF and disconnect main circuit breaker, or unplug cord at wall receptacle. 2. Remove the lower back shroud (See back shroud removal). 3. Using a phillips head screw, remove the two screws that secures the blower to the flue. One screw is located on the back side of the flue. 4. Cut zip ties that are holding the wires to the blower. Remove the wire nuts from the wires. 5. Remove blower. 6. Reconnect new blower wires to the existing wires with wire nuts. 7. Tighten the new blower onto the flue with the two screws. 8. Zip tie wires back to the blower VACUUM SWITCH REPLACEMENT 1. Remove electrical power supplied to the unit. 2. Remove the lower back shroud (See back shroud removal). 3. Remove the vacuum hose from switch. 4. Using a phillips bit or screwdriver, remove the two screws securing switch to the frame. 5. Disconnect the wires on the switch. 6. Replace switch in reverse order. May


50 7-13. JIB PUMP REPLACEMENT 1. Remove electrical power supplied to the unit. To avoid electrical shock or property damage, move the POWER switch to OFF and disconnect main circuit breaker, or unplug cord at wall receptacle. 2. Remove the lower back shroud (See back shroud removal). 3. Remove blower (see blower removal sections). 4. Using an adjustable wrench, remove the flex line from the elbow. 5. Loosen the hose clamp with a flat blade screw driver and disconnect the hose. 6. Use a 3/8 socket or wrench and remove the four nuts and washers from the pumps feet. 7. Pull the pump off of the studs. 8. Remove the wire nuts. 9. Wire the new pump into the existing wires. 10. Place the pump onto the studs. Be sure to have the shield box in place on the studs before placing the pump onto studs. 11. Tighten the pump nuts and washers onto the feet of the pump. 12. Reconnect fittings. 13. Replace blower. May

. 4.")


51 7-14. SELECTOR VALVE DRIVE MOTOR REPLACEMENT 1. Remove electrical power supplied to the unit. To avoid electrical shock or property damage, move the POWER switch to OFF and disconnect main circuit breaker, or unplug cord at wall receptacle. 2. Remove the lower back shroud (See back shroud removal). 3. Remove blower (see blower removal sections). 4. Disconnect the selector valve motor wires located in the back of the fryer. 5. Move to the front of the fryer. Remove the AIF housing cover. 6. Locate and disconnect the encoder wires from the AIF board. Move to the back of the fryer. 7. Remove the phillips head screw on the selector valve and remove the shield. 8. Using a 5/32 allan wrench (recommended T-Handle), remove the two diagonal bolts circled to the right. 9. Remove the shield. Wires 10. Remove the remaining two bolts. May
, loosen the")


52 7-14. SELECTOR VALVE DRIVE MOTOR REPLACEMENT (CONTINUED) 11. Using a 5/32 allan wrench (recommended T-Handle), loosen the 4 screws on the coupler that is clamped onto the drive tube. 12. Lift motor off of selector valve body. 13. Move to the front of the fryer and locate Port 10 on the selector valve body. This will be the port located in the JIB area. 14. Using an adjustable wrench, remove the flex line from port Next remove the fitting and set aside. This will allow the inside valve to be visible. 16. Rotate the valve by hand until the hole is lined up with the threaded hole on the valve body. 17. Place the new motor onto the selector valve mounting plate. 18. Plug the encoder wire back into the AIF board where it was previously removed. Place AIF board box cover back into position. 19. Reconnect the new motor wires May

53 7-14. SELECTOR VALVE DRIVE MOTOR REPLACEMENT (CONTINUED) 20. Tighten the bolts with the 5/32 allan wrench. DO NOT tighten the coupler at this time DO NOT install the shield at this time 21. Reconnect the power cord to the unit. The selector valve will run a quick calibration to find the home position. 22. Once calibration is complete, tighten the coupler to the motors drive tube. When tightening the coupler, use the torque specs are as follows: Top 2= 50 in-lbs Bottom 2= 10 in-lbs 23. With the coupler tightened to the correct specs, ran a calibration to confirm all ports are properly aligned. Calibrate Selector Valve 1. Press and release both buttons. 2. Press or until you reach 13. PUMPS & VALVES. 3. Press the INFO button 3 times SELECTOR VALVE AT HOME. 4. Press the then to confirm. 5. Once calibration has completed check Port 10 to confirm the inner hole is lined with valve body hole. 6. Continue with the reassembly. Reinstall Continued 24. Install fitting back to selector valve and tighten. Then tighten the flex line. 25. Install the shield and plate to the selector valve assembly. May


. 7. Lift the gas valve from the bottom of the shroud.")

54 7-15. GAS VALVE REPLACEMENT 1. Remove electrical power supplied to the unit. To avoid electrical shock or property damage, move the POWER switch to OFF and disconnect main circuit breaker, or unplug cord at wall receptacle. 2. Use a phillips head bit or screwdriver to lower the control board. 3. Use a 3/8 in. wrench to remove the two (2) flex tubes from the burner pilot to the gas valve. 4. Use an adjustable to remove the flex line from the back of the gas valve that is leading to the gas manifold. 5. Mark the locations of the wires on the gas valve and then remove the wires. 6. Use a 3/8 in. wrench or socket to remove the three (3) nuts located on the bottom-side of the shroud (behind the door). 7. Lift the gas valve from the bottom of the shroud. Use an adjustable to remove the flex line from the front of the gas valve leading to the burner. 8. Remove the brass fitting or fittings from either side of the gas valve and save for reuse. 9. Remove the fittings from the front and back of the gas valve. 10. Use a phillips head screwdriver to remove the four (4) screws that secure the mounting bracket onto the valve. 11. Install the new gas valve in reverse order. June
55 SECTION 8. PARTS INFORMATION 8-1. INTRODUCTION This section lists the replaceable parts of the Henny Penny Model LVG fryer GENUINE PARTS Use only genuine Henny Penny parts in your fryer. Using a part of lesser quality or substitute design may result in damage to the unit or personal injury WHEN ORDERING PARTS Once the parts that you want to order have been found in the parts list, write down the following information: Item Number 2 Part Number Example: Description High Limit From the data plate, list the following information: Product Number Serial Number 0001 Example: Voltage PRICES Your distributor has a price parts list and will be glad to inform you of the cost of your parts order DELIVERY Commonly replaced items are stocked by your distributor and will be sent out when your order is received. Other parts will be ordered, by your distributor, from Henny Penny Corp. Normally, these will be sent to your distributor within three working days WARRANTY All replacement parts (except lamps and fuses) are warranted for 90 days against manufacturing defects and workmanship. If damage occurs during shipping, notify the carrier at once so that a claim may be properly filed. Refer to warranty in the front of this manual for other rights and limitations RECOMMENDED SPARE PARTS FOR DISTRIBUTORS Aug Recommended replacement parts are indicated with A or B in the parts lists: A = parts to be stocked on service vans or trucks B = parts to be stocked at the distributor/kes location. Inventory on all other parts not identified, should be based upon usage in the territory. Please use care when ordering recommended parts, because all voltages and variations are marked. Distributors should order parts based upon common voltages and equipment sold in their territory. 8-1


56 Recommend Parts: A=Truck Stock/B=Dist. Stock /*not shown Aug
57 Item No. Part No. Description Quantity B 1 TS TRANSFORMER - AIF... 1 A FLAME SENSOR... 2/vat A ASSY - SPARK IGNITOR (PILOT)... 2/vat A HIGH LIMIT CONTROL - 120V... 1/vat A HIGH LIMIT CONTROL - 230V... 1/vat A ASSY-75VA TRANSFORMER (120V-Pri/24v-Sec)... 1/vat A ASSY-75VA TRANSFORMER (240V-Pri/24v-Sec)... 1/vat A THERMOCOUPLE - HIGH LIMIT... 1/vat A SWITCH - MOMENTARY SPLASH PROOF... 1/vat A 8* ORIFICES (See chart below)... 4/vat 9* KIT- NAT TO LP S UP TO 5000 FT... 1/vat 10* KIT- NAT TO LP F UP TO 5000 FT... 1/vat 11* KIT- LP TO NAT S UP TO 5000 FT... 1/vat 12* KIT- LP TO NAT F UP TO 5000 FT... 1/vat 13* KIT- NAT TO LP S FT... 1/vat 14* KIT- NAT TO LP F FT... 1/vat 15* KIT- LP TO NAT S FT... 1/vat 16* KIT- LP TO NAT F FT... 1/vat 17* KIT- NAT TO NAT SEAT LVL TO HA... 1/vat 18* KIT- LP TO LP SEA LVE TO HA... 1/vat 19* KIT- NAT TO NAT HA TO SEA LVL... 1/vat 20* KIT- LP TO LP HA TO SEA LVL... 1/vat 21* PACK-SVCE OFG32X CE PILOT TUBE... A/R B B PART NO. BURNER ORIFICE DRILL SIZE (DIA. GAS TYPE ALTITUDE #45 (0.082) #45 (0.082) 1.30mm (0.0512) 1.30mm (0.0512) #44 (0.086) #43 (0.089) #42 (0.0935) #51 (0.067) 2.30mm (0.0906) 1.25mm (0.0492) 1.90mm (0.0768) 1.04mm (0.0409) 1.18mm (0.0465) #54 (0.055) NATURAL 12H, 12E PROPANE 13P NATURAL NATURAL 12S 12E+ 12L 13B/P 13A 13B/P 13B/P PROPANE ALL ALL Recommend Parts: A=Truck Stock/B=Dist. Stock / *not shown June
58 NON-CE GAS VALVE ASSEMBLY CE GAS VALVE ASSEMBLY Item No. Part No. Description Quantity (per assy) 1 FP FITTING - 1/2 NPT M to 45 FLARE M... 1 A VALVE - GAS CONTROL - NAT - FULL... 1/vat A VALVE - GAS CONTROL - NAT - SPLIT... 1/vat A VALVE - GAS CONTROL - LP - FULL... 1/vat A VALVE - GAS CONTROL - LP - SPLIT... 1/vat 3 FP ELBOW - 1/2 IN NPT MALE 45 FLARE FP ELBOW - 1/4 TUBE TO 1/8 PIPE Z...2-full/1-split 5 FP NIPPLE - 1/2 X SS... 1 A VALVE - SOLENOID GAS - 24V - 50/60 HZ... 2 Recommend Parts: A=Truck Stock/B=Dist. Stock / *not shown Aug


.")
59 Item No. Part No. Description Quantity A SWITCH - POWER... 1 B LIGHT - INDICATOR - BLUE... 1 B LIGHT - INDICATOR - YELLOW ASSY-DOOR... See chart on next page CASTER- 4 W/BRAKE CASTER- 4 W/O BRAKE SUPPORT-CASTER MTG B SUPPORT- CASTER MTG ASSY- CONTROL BOARD... see page 8-7 9* COVER - SPLIT VAT... 1/vat DECAL-FLTR/CK JIB/MAIN POWER * COVER - FULL VAT... 1/vat 12* HANGER-BASKET - LVG * HANGER-BASKET - LVG * HANGER-BASKET - LVG A 13* RELAY - 24VAC COIL (Full Vat Fryers Only)... 1/vat 14* TETHER KIT-GAS FRYER... 1 Recommend Parts: A=Truck Stock/B=Dist. Stock / *not shown Aug
60 83774 LH Door Assy without Holder RH Door Assy with Holder Model LVG LH Door Assy without Holder LH Door Assy without Holder RH Door Assy with Holder Model LVG LH Door Assy without Holder LH Door Assy without Holder RH Door Assywithout Holder RH Door Assy with Holder 1 2 Model LVG-204 Item Part No. Description Quantity No. 1 SC SCREW - #6-32 X 3/8 PH TYPE F C STUD ASSY - DOOR HINGE-RH STUD ASSY - DOOR HINGE-LH SC SCREW - #8-32 X 3/8 PH HPD S HANDLE - DOOR Recommend Parts: A=Truck Stock/B=Dist. Stock / *not shown Oct
61 Control Panel Assembly Item No. Part No. Description Quantity B ASSY - CONTROL - LOV...1/well** DECAL - LOV MCD...1/control 3 NS NUT - HEX KEPS #6-32 C...23/control B ASSY - SPEAKER...1/control STUD ASSY - CONTROL PANEL COVER...1/control MENU CARD - BLANK - LOV...1/control MENU CARD - FVA - LOV...1/control MENU CARD - SPA - LOV...1/control A 7* MS TOOL - TERMINAL EXTRACTOR (not shown) KIT-LVE/LVG-MMC COMM... 1 Recommend Parts: A=Truck Stock/B=Dist. Stock *not shown **LVE-202=2; LVE-203=3; LVE-204=4 April
... 1 B 6* 82914 ASSY-EMC FILTER BOARD - CE... 1 B 7* BLOCK -TERMINAL POWER - CE... 1 Part No.")

62 Item No. Part No. Description Quantity B 1 ME RELAY - PUMP MOTOR - 12 VDC - 30 AMP... 1 B RB PC BOARD - AIF... 1 B TRANSDUCER-PRESSURE 30 PSI XXXX GATEWAY PC BOARD (See chart below)... 1 B 6* ASSY-EMC FILTER BOARD - CE... 1 B 7* BLOCK -TERMINAL POWER - CE... 1 Part No. Voltage Coupling Transceiver Type Model LN LN LN LN LN LN LN LN LN NON-CENELEC NON-CENELEC NON-CENELEC NON-CENELEC NON-CENELEC NON-CENELEC CENELEC CENELEC CENELEC LVG-102 LVG-103 LVG-104 LVG-102 LVG-103 LVG-104 LVG-102 LVG-103 LVG-104 Recommend Parts: A=Truck Stock/B=Dist. Stock / *not shown Aug

... 1 12* 151686-001 HOSE-OIL DISPOSAL... 1 13* 140272 KIT-LVG200 PUMP PRIME... 1 Recommend Parts: A=Truck Stock/B=Dist.")
63 Located behind motor Item No. Part No. Description Quantity B PUMP - OIL TOP OFF - 120V... 1 B PUMP - OIL TOP OFF - 230V... 1 A MOTOR, 1/2 HP- 50/60 Hz... 1 see next page for parts break down ADAPTER- TUBE END... 1 A SWITCH- DRAIN PAN KIT... 1 B KIT- DRAIN VALVE W/O MODULE... AR B MOTOR-ACTUATOR... AR ROD-FILTER PUMP BRACKET * PN COTTER-PIN HAIR PIN... 2 B 9* VALVE- CHECK SAE PSI... 1 B 10* O-RING ( located in drain tube in trough)... 1/vat B 11* FILTER- EMI (230V units only) * HOSE-OIL DISPOSAL * KIT-LVG200 PUMP PRIME... 1 Recommend Parts: A=Truck Stock/B=Dist. Stock / *not shown May
64 Filter Motor and Pump Item No. Part No. Description Quantity ASSY-FILTER PMP & 1/2 HP MOTOR ASSY-FILTER PMP & 1/2 HP MOTOR... 1 A MOTOR, 1/2 HP - 50/60 Hz... 1 A SEAL KIT... 1 B PUMP ASSEMBLY SC SCREW, Pump Cover COVER, Pump... 1 B ROTOR, Pump... 1 A ROLLER, Pump... 5 A O-RING BODY, Pump SHIELD, Pump SC SCREW, Pump Shield... 1 Recommend Parts: A=Truck Stock/B=Dist. Stock / *not shown Feb


65 1 See Next page for parts Item No. Part No. Description Quantity A MODULE- IGNITION NON CE... 2/ WELL A MODULE- IGNITION CE... 2/ WELL Recommend Parts: A=Truck Stock/B=Dist. Stock / *not shown Dec
66 Well & 4 Well Aug
67 2 WELL Item No. Part No. Description Quantity 1 FP NIPPLE- 1/2 X 4 1/2 LONG FP ELBOW-1/2 X 90 FEMALE FP NIPPLE- 1/2 INCH CLOSE FP UNION- 1/2 THREADED FP /2 STR PIPE COUPLING FP FITTING- 1/2 BARB-F 1/2 NPT BRASS FP /2 NPT FEMAL PIPE TEE FP REDUCER 3/4 MALE TO 1/2 FEMALE FP ELBOW-STREET 3/4 NPT FP ELBOW- 3/4 NPT X 90 FEMALE ELBOW STREET 90 DEGREE NIPPLE 3/4 X CLOSE FP /8 PIPE PLUG FP REDUCING BUSHING- 1/2-1/ & 4 WELLS Item No. Part No. Description Quantity 1 FP ELBOW- 3/4 NPT FP NIPPLE- 3/4 X 2 LG FP UNION- 3/4 3000LB FP ELBOW- 3/4 NPT X 90 FEMALE FP NIPPLE- 3/4 NPT X 17 IN LONG FP REDUCER 1 MALE TO 3/4 FEMALE FP /8 PIPE PLUG FP REDUCING BUSHING- 1 INCH 1/ FP TEE-1IN NPT FEMALE PIPE FP NIPPLE- 1IN NPT CLOSE BLACK... 1 Recommend Parts: A=Truck Stock/B=Dist. Stock / *not shown Aug
68 1 2 Item No. Part No. Description Quantity FLEXIBLE GAS LINE W/SHUT-OFF VALVE - 2 -WELL-36 IN FLEXIBLE GAS LINE W/SHUT-OFF VALVE - 3 -WELL-72 IN 1 Recommend Parts: A=Truck Stock/B=Dist. Stock / *not shown Aug


69 Jan
70 Item No. Part No. Description Quantity A SWITCH - PRESSURE (behind covers)... 1/vat B MOTOR - BLOWER - 115V... 1/ control board B MOTOR - BLOWER - 230V... 1/ control board X TUBE - PRESSURE SWITCH (see chart below)... AR SELECTOR VALVE ASSY-SEL VAL MOTOR ENCODER... 1 (Flex hose chart on next page) COVER-REAR SHROUD LVG COVER-REAR SHROUD LVG COVER-REAR SHROUD LVG COVER- LOWER REAR LVG COVER- LOWER REAR LVG COVER- LOWER REAR LVG ASSY-CE CONT CORD & PLUG 230V ASSY- 120V POWER CORD * BAR-REAR SPACER-LVG * BAR-REAR SPACER-LVG * BAR-REAR SPACER-LVG HOSE-OIL DISPOSAL... 1 PART NO. A Recommend Parts: A=Truck Stock/B=Dist. Stock / *not shown July
71 SELECTOR VALVE FLEX HOSES LENGTH/ PART NUMBER LVG-202 Selector Valve Port FF SD SR SS FD FR FS SF 1 Plug 24 Plug Plug Plug Plug Plug Plug Plug 6 Plug Plug Plug Plug 7 Plug Plug Plug Plug 8 Plug Plug Plug Plug 9 (JIB) 10 (RTI-Discard oil) New Oil (RTI) New Oil (From JIB) From JIB pump on line From JIB pump on line Selector Valve Port LVG-203 FFF SSD SSR SSS FSD FSR FSS FFD FFR FFS SSF SFF 1 Plug 36 Plug Plug Plug Plug 24 Plug Plug Plug Plug Plug Plug Plug Plug Plug Plug 8 Plug Plug Plug Plug Plug Plug 9 From JIB pump on line 10 (RTI-Discard oil) New Oil (RTI) New Oil (From JIB) LVG flex hose lengths and part numbers listed on next page From JIB pump on line Aug
72 SELECTOR VALVE FLEX HOSES LENGTH/ PART NUMBER (CONTINUED) LVG-204 Selector Valve SSSD SSSR FSSD FSSR FFSD FFSR FFFD FFFR FFFF Port SSSS FSSS FFSS FFFS SSSF SSFF SFFF 1 Plug 54 Plug Plug Plug Plug Plug Plug Plug Plug Plug 24 Plug Plug Plug Plug Plug Plug (JIB) From JIB pump on line 10 (RTI- Discard Oil) New Oil (RTI) New Oil (From JIB) From JIB pump on line LVG Flex Hose Lengths/ Part Number Aug


73 1 See previous pages for lengths and part numbers Item No. Part No. Description Quantity 1 FP FTG-SAE ELBOW 45 DEG FLARE... A/R 2 FP ELBOW- 1/2 IN NPT MALE 45 FLARE... A/R 3 FP CONNECTOR-6 SAE M 6 SAE F... A/R B VALVE- CHECK SAE 12 3 PSI... A/R B ASSY-CHK VALVE PLUMBING (SN: BU & After) ASSY- OIL MANF CHK VALVE... A/R 5 FP FTG-SAE STR 45 DEG FLARE... A/R 6 FP FTG- SAE PLUG... A/R 7* HARN-SELECTOR VLV ENCODER * HARN-SELECTOR VALVE-LVG20X... 1 Recommend Parts: A=Truck Stock/B=Dist. Stock / *not shown Feb

74 3 1 2 Item No. Part No. Description Quantity B RACK - SPLIT VAT... 1/vat B RACK - FULL VAT... 1/vat A THERMOCOUPLE - HIGH LIMIT... 1/vat B KIT- ASSY 2.5 INCH PROBE/ CAUGE... A/R 4* KIT-REPLACEMENT FULL POT ASSY... A/R 4* KIT-REPLACEMENT SPLIT POT ASSY... A/R Recommend Parts: A=Truck Stock/B=Dist. Stock / *not shown Aug
... 1 B 2 85737 ASSY-INT L. JIB TUBE & QUICK DISC (includes items 3 & 4).")
... 1 8* FP05-016 QUICK DISCONNECT-1/2 (Female)... 1 Recommend Parts: A=Truck Stock/B=Dist.")
75 Item No. Part No. Description Quantity ACCESSORY-JUG-AUTO TOP OFF (EMPTY)... 1 B ASSY-JIB TUBE & QUICK DISC (includes items 3 & 4)... 1 B ASSY-INT L. JIB TUBE & QUICK DISC (includes items 3 & 4)... 1 B 3 FP QUICK DISCONNECT - 3/ A 4* MS O-RING - JIB TUBE... 1 B ASSY - HOSE SHELF-JIB FP QUICK DISCONNECT-3/8 (Male) * FP QUICK DISCONNECT-1/2 (Female)... 1 Recommend Parts: A=Truck Stock/B=Dist. Stock *not shown Recommend Parts: A=Truck Stock/B=Dist. Stock / *not shown July
... 1 2 162050 ASSY-DRAIN PAN COVER (After 04/16)... 1 3 163322 WELD ASSY-CRUMB CATCHER... 1 4 85503 WELD ASSY-FILTER WEIGHT.")
... 1 7 164057 ASSY-DRAIN PAN & CASTERS-20X (After 01/17)... 1 8 19004 CASTER - DRAIN PAN... 4 9* SC01-009 SCREW (1/4-20 x 1/2).")
76 Item No. Part No. Description Quantity ASSY - DRAIN PAN - LVG (Before 01/17) ASSY - DRAIN PAN - LVG (After 01/17) ASSY-DRAIN PAN COVER (Before 04/16) ASSY-DRAIN PAN COVER (After 04/16) WELD ASSY-CRUMB CATCHER WELD ASSY-FILTER WEIGHT McD s FILTER KIT (not supplied by Henny Penny)... 1 (includes fryer cleaner, 30 filter pads, & green cleaner pads) FILTER-SECTION ASSY-DRAIN PAN & CASTERS-20X (Before 01/17) ASSY-DRAIN PAN & CASTERS-20X (After 01/17) CASTER - DRAIN PAN * SC SCREW (1/4-20 x 1/2) * NS NUT, KEPS (1/4-20) A O-RING-PICKUP TUBE... 3 B BRUSH - BLACK L... 1 B BRUSH - STRAIGHT WHITE... 1 Recommend Parts: A=Truck Stock/B=Dist. Stock / *not shown Nov
77 Fry Cap Item No. Part No. Description Quantity ACCESSORY-FRY CAP - LVG ACCESSORY-FRY CAP - LVG ACCESSORY-FRY CAP - LVG Recommend Parts: A=Truck Stock/B=Dist. Stock / *not shown Aug
78 Oil Quality Monitoring (OQM) Sensor Item No. Part No. Description Quantity CLAMP, SENSOR OQM ASSY, OQM SENSOR & TUBE SEAL, SENSOR OQM WELD ASSY, OQM SENSOR BODY FP ELBOW-45 DEG 8 SAE ORB X 8 SAE HOSE, OIL DISPOSAL 20in. (50.8cm), LVG HOSE, OIL DISPOSAL 34in. (86.36cm), LVG203, FP FTG-1/2 NPT M TO 45 FLARE M FP ELBOW-8 SAE MORB TO 8 45 FLARE... 1 Aug

79 APPENDIX A. WIRING DIAGRAMS AND SCHEMATICS The legend below helps in identifying the components of the wiring diagrams on the following wiring diagrams. May 2016 A-1
SERVICE MODEL EEG-241 EEG-242 EEG-243 EEG-244. Evolution Elite Gas Open Fryer REGISTER WARRANTY ONLINE AT
 SERVICE M A N U A L Evolution Elite Gas Open Fryer MODEL EEG-241 EEG-242 EEG-243 EEG-244 REGISTER WARRANTY ONLINE AT WWW.HENNYPENNY.COM Safety and Compliance Henny Penny fryers have many safety features
OPERATION MODEL LVE-202 LVE-203 LVE-204. SPLIT/FULL VAT OPEN FRYER (Electric) REGISTER WARRANTY ONLINE AT
 REGISTER WARRANTY ONLINE AT") OPERATION M A N U A L SPLIT/FULL VAT OPEN FRYER (Electric) MODEL LVE-202 LVE-203 LVE-204 REGISTER WARRANTY ONLINE AT WWW.HENNYPENNY.COM Compliance Information These are the original version controlled
OPERATION M A N U A L SPLIT/FULL VAT OPEN FRYER (Electric) MODEL LVE-202 LVE-203 LVE-204 REGISTER WARRANTY ONLINE AT WWW.HENNYPENNY.COM Compliance Information These are the original version controlled
AHC-990 TECHNICAL MANUAL
 Henny Penny Humidified Holding Cabinets With Automatic Water Fill Model AHC-993 Model AHC-990 TECHNICAL MANUAL TABLE OF CONTENTS Section Page Section 1. TROUBLESHOOTING 1-1. Introduction... 1-1 1-1.
Henny Penny Humidified Holding Cabinets Model HHC-980 Model HHC-983 TECHNICAL MANUAL
 Henny Penny Humidified Holding Cabinets Model HHC-980 Model HHC-983 TECHNICAL MANUAL LIMITED WARRANTY FOR HENNY PENNY EQUIPMENT Subject to the following conditions, Henny Penny Corporation makes the following
FilterQuick Controller Version 2 (For push button FilterQuick fryers)
") FilterQuick Controller Version 2 (For push button FilterQuick fryers) Operation Manual This manual is updated as new information and models are released. Visit our website for the latest manual. *8197206*
FilterQuick Controller Version 2 (For push button FilterQuick fryers) Operation Manual This manual is updated as new information and models are released. Visit our website for the latest manual. *8197206*
OPERATOR S MODEL HHC-901 HHC-904 HEATED HOLDING CABINET REGISTER WARRANTY ONLINE AT
 OPERATOR S M A N U A L HEATED HOLDING CABINET MODEL HHC-901 HHC-904 REGISTER WARRANTY ONLINE AT WWW.HENNYPENNY.COM TABLE OF CONTENTS Section Page Section 1. INTRODUCTION... 1-1 1-1. Heated Holding Cabinet...
FQ30-T FRYER COMMISSION AND DEMONSTRATION FORM 8700 LINE AVENUE SHREVEPORT, LA (800) Date
 Date") FQ30-T FRYER COMMISSION AND DEMONSTRATION FORM 8700 LINE AVENUE SHREVEPORT, LA 71106 (800) 551-8633 Date Store Technician Store # (if applicable) Service Agency Address Address City/State City/State Store
FQ30-T FRYER COMMISSION AND DEMONSTRATION FORM 8700 LINE AVENUE SHREVEPORT, LA 71106 (800) 551-8633 Date Store Technician Store # (if applicable) Service Agency Address Address City/State City/State Store
FRYMASTER MANUAL LOV M3000 CONTROLLER OPERATION MANUAL
 FRYMASTER MANUAL LOV M3000 CONTROLLER OPERATION MANUAL This equipment chapter is to be installed in the Fryer Section of the Equipment Manual. MANUFACTURED BY 8700 Line Ave. SHREVEPORT, LOUISIANA 71106
OPERATION MODEL LVE-102 LVE-103 LVE-104. SPLIT/FULL VAT OPEN FRYER (Electric) REGISTER WARRANTY ONLINE AT
 REGISTER WARRANTY ONLINE AT") OPERATION M A N U A L SPLIT/FULL VAT OPEN FRYER (Electric) MODEL LVE-102 LVE-103 LVE-104 REGISTER WARRANTY ONLINE AT WWW.HENNYPENNY.COM Compliance Information These are the original version controlled
OPERATION M A N U A L SPLIT/FULL VAT OPEN FRYER (Electric) MODEL LVE-102 LVE-103 LVE-104 REGISTER WARRANTY ONLINE AT WWW.HENNYPENNY.COM Compliance Information These are the original version controlled
OPERATOR S MODEL OFE-321 OFE-322 OPEN FRYER REGISTER WARRANTY ONLINE AT
 OPERATOR S M A N U A L OPEN FRYER MODEL OFE-321 OFE-322 REGISTER WARRANTY ONLINE AT WWW.HENNYPENNY.COM TABLE OF CONTENTS Section Page Section 1. INTRODUCTION...1-1 1-1. Introduction...1-1 1-2. Proper
YUM K3000 CONTROLLER. Operation Manual. 24-Hour Service Hotline
 YUM K3000 CONTROLLER Operation Manual Frymaster, a member of the Commercial Food Equipment Service Association, recommends using CFESA Certified Technicians. 24-Hour Service Hotline 1-800-551-8633 FEBRUARY
OPERATOR S MODEL EEG-241 EEG-242 EEG-243 EEG-244. EVOLUTION ELITE (Gas) REDUCED OIL CAPACITY OPEN FRYER
 REDUCED OIL CAPACITY OPEN FRYER") OPERATOR S M A N U A L EVOLUTION ELITE (Gas) REDUCED OIL CAPACITY OPEN FRYER MODEL EEG-241 EEG-242 EEG-243 EEG-244 REGISTER WARRANTY ONLINE AT WWW.HENNYPENNY.COM Read instructions before operating the
OPERATOR S M A N U A L EVOLUTION ELITE (Gas) REDUCED OIL CAPACITY OPEN FRYER MODEL EEG-241 EEG-242 EEG-243 EEG-244 REGISTER WARRANTY ONLINE AT WWW.HENNYPENNY.COM Read instructions before operating the
OPERATION MODEL LVG-102 LVG-103 LVG-104. SPLIT/FULL VAT OPEN FRYER (Gas) REGISTER WARRANTY ONLINE AT
 REGISTER WARRANTY ONLINE AT") OPERATION M A N U A L SPLIT/FULL VAT OPEN FRYER (Gas) MODEL LVG-102 LVG-103 LVG-104 REGISTER WARRANTY ONLINE AT WWW.HENNYPENNY.COM These are the original version controlled Henny Penny instructions for
OPERATION M A N U A L SPLIT/FULL VAT OPEN FRYER (Gas) MODEL LVG-102 LVG-103 LVG-104 REGISTER WARRANTY ONLINE AT WWW.HENNYPENNY.COM These are the original version controlled Henny Penny instructions for
OPERATOR S MODEL EEE-141 EEE-142 EEE-143 EEE-144. EVOLUTION ELITE (Electric) REDUCED OIL CAPACITY OPEN FRYER
 REDUCED OIL CAPACITY OPEN FRYER") OPERATOR S M A N U A L EVOLUTION ELITE (Electric) REDUCED OIL CAPACITY OPEN FRYER MODEL EEE-141 EEE-142 EEE-143 EEE-144 REGISTER WARRANTY ONLINE AT WWW.HENNYPENNY.COM TABLE OF CONTENTS Section Page Section
OPERATOR S M A N U A L EVOLUTION ELITE (Electric) REDUCED OIL CAPACITY OPEN FRYER MODEL EEE-141 EEE-142 EEE-143 EEE-144 REGISTER WARRANTY ONLINE AT WWW.HENNYPENNY.COM TABLE OF CONTENTS Section Page Section
OPERATOR S MODEL EEE-153 EEE-154. WENDY S EVOLUTION ELITE (Electric) REDUCED OIL CAPACITY OPEN FRYER REGISTER WARRANTY ONLINE AT
 REDUCED OIL CAPACITY OPEN FRYER REGISTER WARRANTY ONLINE AT") OPERATOR S M A N U A L WENDY S EVOLUTION ELITE (Electric) REDUCED OIL CAPACITY OPEN FRYER MODEL EEE-153 EEE-154 REGISTER WARRANTY ONLINE AT WWW.HENNYPENNY.COM TABLE OF CONTENTS Section Page Section 1.
OPERATOR S M A N U A L WENDY S EVOLUTION ELITE (Electric) REDUCED OIL CAPACITY OPEN FRYER MODEL EEE-153 EEE-154 REGISTER WARRANTY ONLINE AT WWW.HENNYPENNY.COM TABLE OF CONTENTS Section Page Section 1.
Installation Instructions / User s Manual TSTAT0406 and TSTAT0408
 997-060180-5 Installation Instructions / User s Manual TSTAT0406 and TSTAT0408 4 HEAT 2 COOL DUAL FUEL TSTAT0406 & TSTAT0408-4 WIRE CAPABLE THERMOSTAT (NAXA00201DB Daughter Board sold separately) LEFT
FilterQuick FQ4000 easytouch
 Your Growth Is Our Goal FilterQuick FQ4000 easytouch Controller Operation Manual This manual is updated as new information and models are released. Visit our website for the latest manual. CAUTION READ
OPERATOR S MODEL EEG-141 EEG-142 EEG-143 EEG-144. EVOLUTION ELITE (Gas) REDUCED OIL CAPACITY OPEN FRYER REGISTER WARRANTY ONLINE AT
 REDUCED OIL CAPACITY OPEN FRYER REGISTER WARRANTY ONLINE AT") OPERATOR S M A N U A L EVOLUTION ELITE (Gas) REDUCED OIL CAPACITY OPEN FRYER MODEL EEG-141 EEG-142 EEG-143 EEG-144 REGISTER WARRANTY ONLINE AT WWW.HENNYPENNY.COM This manual should be retained in a convenient
OPERATOR S M A N U A L EVOLUTION ELITE (Gas) REDUCED OIL CAPACITY OPEN FRYER MODEL EEG-141 EEG-142 EEG-143 EEG-144 REGISTER WARRANTY ONLINE AT WWW.HENNYPENNY.COM This manual should be retained in a convenient
OPERATOR S MODEL EEE-141 EEE-142 EEE-143 EEE-144. EVOLUTION ELITE (Electric) REDUCED OIL CAPACITY OPEN FRYER
 REDUCED OIL CAPACITY OPEN FRYER") OPERATOR S M A N U A L EVOLUTION ELITE (Electric) REDUCED OIL CAPACITY OPEN FRYER MODEL EEE-141 EEE-142 EEE-143 EEE-144 REGISTER WARRANTY ONLINE AT WWW.HENNYPENNY.COM TABLE OF CONTENTS Section Page Section
OPERATOR S M A N U A L EVOLUTION ELITE (Electric) REDUCED OIL CAPACITY OPEN FRYER MODEL EEE-141 EEE-142 EEE-143 EEE-144 REGISTER WARRANTY ONLINE AT WWW.HENNYPENNY.COM TABLE OF CONTENTS Section Page Section
Spa Touch Control Panel with BP2100, BP6013 spa controllers. (Spa Owner s Manual insert)
") Spa Touch Control Panel with BP2100, BP6013 spa controllers. (Spa Owner s Manual insert) P.N. 7876C (export) February 12, 2015 For Spas equipped with BP2100, BP6013 controllers and Spa Touch panel. Spa
Spa Touch Control Panel with BP2100, BP6013 spa controllers. (Spa Owner s Manual insert) P.N. 7876C (export) February 12, 2015 For Spas equipped with BP2100, BP6013 controllers and Spa Touch panel. Spa
OPERATOR S MODEL CFE-410 CFE-420. OPEN FRYER (Electric) REGISTER WARRANTY ONLINE AT
 REGISTER WARRANTY ONLINE AT") OPERATOR S M A N U A L OPEN FRYER (Electric) MODEL CFE-410 CFE-420 REGISTER WARRANTY ONLINE AT WWW.HENNYPENNY.COM TABLE OF CONTENTS Section Page Section 1. INTRODUCTION... 1-1 1-1 Introduction... 1-1
OPERATOR S M A N U A L OPEN FRYER (Electric) MODEL CFE-410 CFE-420 REGISTER WARRANTY ONLINE AT WWW.HENNYPENNY.COM TABLE OF CONTENTS Section Page Section 1. INTRODUCTION... 1-1 1-1 Introduction... 1-1
User Manual. Dryer Controller M720
 User Manual Dryer Controller M720 Hardware version 1.00 Software version 1.00 Preliminary version Manual M720 Dryer controller Page 1 of 42 Document history Preliminary version: - Created in April, 2009
Spa Touch Control Panel with 2000, 2100 controllers. (Spa Owner s Manual insert)
") Spa Touch Control Panel with 2000, 2100 controllers (Spa Owner s Manual insert) P.N. 7876B February 11, 2015 For Spas equipped with BP2000, BP2100 controllers and Spa Touch panel. Spa Touch Control Panel
Spa Touch Control Panel with 2000, 2100 controllers (Spa Owner s Manual insert) P.N. 7876B February 11, 2015 For Spas equipped with BP2000, BP2100 controllers and Spa Touch panel. Spa Touch Control Panel
GAS RACK OVENS WITH ELECTRONIC OVEN CONTROL
 GAS RACK OVENS WITH ELECTRONIC OVEN CONTROL MODELS DRO2G DRO2GH GAS GAS 701 S. RIDGE AVENUE TROY, OHIO 45374-0001 937-332-3000 www.hobartcorp.com FORM 19202 Rev. D (Dec. 2003) IMPORTANT FOR YOUR SAFETY
! WARNING To avoid risk of electrical shock, personal injury or death; disconnect power to range before servicing, unless testing requires power.
 Technical Information Electric Slide-In Range JES9750BA* JES9860BA* Due to possibility of personal injury or property damage, always contact an authorized technician for servicing or repair of this unit.
! WARNING To avoid risk of electrical shock, personal injury or death; disconnect power to range before servicing, unless testing requires power.
 Technical Information Electric Slide-In Range JES8850BC* JES9900BC* JES9860BC* Due to possibility of personal injury or property damage, always contact an authorized technician for servicing or repair
OPERATOR S MODEL PRESSURE FRYER REGISTER WARRANTY ONLINE AT
 OPERATOR S M A N U A L PRESSURE FRYER MODEL 500 600 REGISTER WARRANTY ONLINE AT WWW.HENNYPENNY.COM This manual should be retained in a convenient location for future reference. A wiring diagram for this
Dryer Controller M720
 User Manual Dryer Controller M720 Hardware version 2.00 Software version 2.00 Manual M720 Dryer controller Page 1 of 60 Document history Preliminary version: - Created in April, 2009 Hardware Version 2.00,
! WARNING To avoid risk of electrical shock, personal injury or death; disconnect power to range before servicing, unless testing requires power.
 Technical Information Electric Downdraft Slide-In Range JES9800BA* JES9900BA* Due to possibility of personal injury or property damage, always contact an authorized technician for servicing or repair of
! WARNING To avoid risk of electrical shock, personal injury or death; disconnect power to oven before servicing, unless testing requires power.
 Electric Wall Oven Technical Information JJW8527DDB/W/Q/S JJW9527DDB/W/S JJW8530DDB/W/Q/S JJW9530DDB/W/S Refer to Service Manual 16022506 for detailed installation, operating, testing, troubleshooting,
CONTROLLER Operation Manual
 3000 CONTROLLER Operation Manual Frymaster, a member of the Commercial Food Equipment Service Association, recommends using CFESA Certified Technicians. 24-Hour Service Hotline 1-800-551-8633 MAR 2013
! WARNING To avoid risk of electrical shock, personal injury or death; disconnect power to oven before servicing, unless testing requires it.
 Electric Wall Oven Technical Information JJW8627DD*, JJW8630DD*, JJW9627DD*, JJW9630DD*, JJW9827DD*, JJW9830DD* Refer to Service Manual 16022506 for detailed installation, operating, testing, troubleshooting,
User s Manual
 997-060180-4e User s Manual 8403-060 Menu Driven Display 1120-445 I. CONTROLLER OPERATION ADJUSTING TEMPERATURE (Temporary Override when in Programmable mode) 1. Before you can adjust the temperature,
OPERATOR S MODEL HC-5 HC-15 HHC-900 HHC-902 HHC-903 HHC-906 HHC-908 HEATED HOLDING CABINET REGISTER WARRANTY ONLINE AT
 OPERATOR S M A N U A L HEATED HOLDING CABINET MODEL HC-5 HC-15 HHC-900 HHC-902 HHC-903 HHC-906 HHC-908 REGISTER WARRANTY ONLINE AT WWW.HENNYPENNY.COM TABLE OF CONTENTS Section Page Section 1. INTRODUCTION...
Henny Penny Electronic Bun Warmer Model BW-1 Model BW-4 Model BW-4 Model BW-4/3 Model BW-6 Model BW-8
 Henny Penny Electronic Bun Warmer Model BW-1 Model BW-4 Model BW-4 Model BW-4/3 Model BW-6 Model BW-8 SERVICE MANUAL LIMITED WARRANTY FOR HENNY PENNY EQUIPMENT Subject to the following conditions, Henny
OPERATOR S MODEL HCN-5 HHC-136 HEATED HOLDING CABINET REGISTER WARRANTY ONLINE AT
 OPERATOR S M A N U A L HEATED HOLDING CABINET MODEL HCN-5 HHC-136 REGISTER WARRANTY ONLINE AT WWW.HENNYPENNY.COM TABLE OF CONTENTS Section Page Section 1. INTRODUCTION... 1-1 1-1. Heated Holding Cabinet...
Oakton TEMP 9500 Advanced Multiparameter Controller
 Oakton TEMP 9500 Advanced Multiparameter Controller Models: 89800-03 & 89800-04 Oakton Instruments 625 E Bunker Ct. Vernon Hills, IL 60061, USA 1-888-4OAKTON (1-888-462-5866) info@4oakton.com Contents
CONTROL PANEL INTERFACE ACTIVATE THE GENERATOR DISPLAY INTERFACE MENUS. Control Panel USING THE AUTO/OFF/MANUAL SWITCH
 CONTROL PANEL INTERFACE USING THE AUTO/OFF/MANUAL SWITCH With the switch set to AUTO, the engine may crank and start at any time without warning. Such automatic starting occurs when utility power source
HIGH EFFICIENCY FIRETUBE CONDENSING GAS BOILER
 This manual must be left with owner and should be hung on or adjacent to the boiler for reference. US HIGH EFFICIENCY FIRETUBE CONDENSING GAS BOILER MODELS CHS-85 through CHS-399 APPENDIX A CONTROLLER
OPERATOR S MODEL MPC-21L MPC-222 MULTIPURPOSE PASS-THRU HOLDING CABINET. Read instructions before operating the appliance
 OPERATOR S M A N U A L MULTIPURPOSE PASS-THRU HOLDING CABINET MODEL MPC-21L MPC-222 REGISTER WARRANTY ONLINE AT WWW.HENNYPENNY.COM Read instructions before operating the appliance TABLE OF CONTENTS Section
Henny Penny Open Fryer Electric Model OE-100
 Henny Penny Open Fryer Electric Model OE-100 OPERATOR MANUAL Henny Penny Model OE-100 LIMITED WARRANTY FOR HENNY PENNY APPLIANCES Subject to the following conditions, Henny Penny Corporation makes the
Emerson Inspire 1HDEZ Installation Instructions. Thermostat/Interface Equipment Control TROUBLESHOOTING
 Emerson Inspire 1HDEZ-1521 Installation Instructions Thermostat/Interface Equipment Control TROUBLESHOOTING FAILURE TO READ AND FOLLOW ALL INSTRUCTIONS CAREFULLY BEFORE INSTALLING OR OPERATING THIS CONTROL
The Information Contained in this Document is Proprietary and should only be used for Service or Training of Authorized Blodgett Servicers who will
 The formation Contained in this Document is Proprietary and should only be used for Service or Training of Authorized Blodgett Servicers who will be working on the Blodgett XR8 Oven. All other uses are
COMMERCIAL WASHERS MODELS T-300/350/400/450/600/650/750/900/950/1200/1450 VENDED C-SERIES CONTROL
 COMMERCIAL WASHERS MODELS T-300/350/400/450/600/650/750/900/950/1200/1450 VENDED C-SERIES CONTROL OPERATOR S MANUAL INSTALLATION & OPERATION INSTRUCTIONS Please read this information and retain for reference.
Parts Diagram. Up button. Down button. Right (fan) button. Left (system) button. RC/RH Jumper. Field programming pins
 button. Left (system) button. RC/RH Jumper. Field programming pins") Table of Contents Parts Diagram........................................................... 1 Icon Descriptions......................................................... 2 Specifications...........................................................
Table of Contents Parts Diagram........................................................... 1 Icon Descriptions......................................................... 2 Specifications...........................................................
Rooftop Thermostat Controller Specification and Installation Instructions. Model TRT2422
 ºF / º C Rooftop Thermostat Controller Model TRT2422 Description The TRT2422 is a combination controller and thermostat with a built-in scheduler, which is designed for simple and accurate control of single
Product Manual SZ1009
 Product Manual SZ1009 Conventional Heating & Cooling Thermostats with Heat Pump Mode Communicating Thermostats Description The SZ1009 is a microprocessor-based mable thermostats designed for conventional
RC-112 Two Speed Heat Pump 3 Stage Heat / 2 Stage Cool With Energy Efficient Control
 O M N I S T A T ELECTRONIC COMMUNICATING THERMOSTAT Installation Manual RC-112 Two Speed Heat Pump 3 Stage Heat / 2 Stage Cool With Energy Efficient Control Document Number 13I00-5 November, 1997 CONTENTS
Digital Thermostat Models: VS30W and VS30B
 it600 VS30W - VS30B Installer - User Manual 015_Layout 1 28.07.2014 10:28 Digital Thermostat Models: VS30W and VS30B INSTALLER / USER MANUAL it600 VS30W - VS30B Installer - User Manual 015_Layout 1 28.07.2014
Refrigeration Controller Operator s Manual (HRC) PO Box 6183 Kennewick, WA
 PO Box 6183 Kennewick, WA") Refrigeration Controller Operator s Manual (HRC) PO Box 6183 Kennewick, WA 99336 www.jmcvr.com 1-509-586-9893 Table of Contents TABLE OF FIGURES...1 OVERVIEW OF THE HRC CAPABILITIES...2 INSTALLATION AND
Refrigeration Controller Operator s Manual (HRC) PO Box 6183 Kennewick, WA 99336 www.jmcvr.com 1-509-586-9893 Table of Contents TABLE OF FIGURES...1 OVERVIEW OF THE HRC CAPABILITIES...2 INSTALLATION AND
SC Installation, Operation & Application Guide
 SC 5211 2-Stage Heat Pump Auto Changeover Hardwire Programmable Electronic Thermostat 7-Day, 5-2-Day or 5-1-1-Day Programmable Configurable 2-Stage Heat Pump Systems Large Display With Backlight Selectable
PHASE NON-COIN USER S MANUAL (S.A.F.E.)
") PHASE 7.2.2 NON-COIN USER S MANUAL (S.A.F.E.) American Dryer Corporation 88 Currant Road Fall River, MA 02720-4781 Telephone: (508) 678-9000 / Fax: (508) 678-9447 E-mail: techsupport@amdry.com www.amdry.com
PHASE 7.2.2 NON-COIN USER S MANUAL (S.A.F.E.) American Dryer Corporation 88 Currant Road Fall River, MA 02720-4781 Telephone: (508) 678-9000 / Fax: (508) 678-9447 E-mail: techsupport@amdry.com www.amdry.com
Programmable Thermostat
 Set & $ave Programmable Thermostat Installation and Operation Manual English Model 44360 Form# 42710-01 20091204 2009 Hunter Fan Co. 2 Table of Contents Important Information... 5 Tools... 6 Uninstalling
Type UCG/UDG. English...1 Français...7 Español Up button. OK button. Down button
 USER MANUAL Type UCG/UDG 57116D 06/12 (MBC) 1.10 2012 OJ Electronics A/S...1 Français...7 Español... 14 Type UCG/UDG Contents Introduction...1 First Time Settings...1 Ground Fault Circuit Interrupter (GFCI)...1
Instruction Guide: Thermostat Operation
 Instruction Guide: Elite Communicating Thermostats TPCM32U03*/TPCM32U04* (*GSR, GSM, TRN, AST) INSTRUCTION GUIDE: ELITE COMMUNICATING THERMOSTAT Thermostat Operation NOTE: These communicating thermostats
Safety & Installation Instructions
 Model 8800 Universal Communicating Thermostat Safety & Installation Instructions READ AND SAVE THESE INSTRUCTIONS Table of contents Installation Installation location recommendations... 2 Thermostat mounting...
4 in 1 Digital Thermostat Control
 4 in 1 Digital Thermostat Control Models: VS10W and VS10B INSTALLER / USER MANUAL Contents Contents Box contents Introduction Product Compliance System options overview Installation Parameter Settings
Operating & Maintenance Manual. Alert-4 Ethernet LCD Master Alarm
 Operating & Maintenance Manual Alert-4 Ethernet LCD Master Alarm w w w. a m i c o. c o m Contents User Responsibility 4 Introduction 4 Features 5 Description of the Alarm 5 Shipment Details 5 The Alarm
P200 Programmable Thermostat Installation Instructions & User Guide. For Installation Help. White-Rodgers.com
 P200 Programmable Thermostat Installation Instructions & User Guide For Installation Help 1-877-654-9394 White-Rodgers.com 2011 Printed in China White-Rodgers 8100 West Florissant Avenue St. Louis, MO
Tempco PCT-3000 Series Temperature Control Console with Relay Output for Heating or Cooling Applications
 Instruction Manual Tempco PCT-3000 Series Temperature Control Console with Relay Output for Heating or Cooling Applications Manual PCT-3000 Revision 9/2014 The PCT-3000 series control console incorporates
CAUTION. Installation Manual
 System Controller SC-301-6M CAUTION Installation Manual In order to use this product safely, read this installation manual carefully and follow the installation instructions. Potential dangers from accidents
Follett Performance Plus
 Follett Performance Plus touchscreen user guide The next level of control in undercounter refrigeration Controller Operation - Performance Plus touchscreen Use and care of the LCD Performance Plus touchscreen
EBC20. Instructions for fitting, installation and operation. Read and save these instructions!
 EBC20 UK Instructions for fitting, installation and operation Read and save these instructions! 2 3002878 EBC20 UK 290415 1. Product information............................................... 4 1.1 Delivery.............................................................
User Guide. Color Touchscreen Programmable Residential Thermostat. ComfortSense Model: 13H /2015 Supersedes 7/2015
 User Guide Color Touchscreen Programmable Residential Thermostat ComfortSense 7500 Model: 13H14 507503-01 10/2015 Supersedes 7/2015 TABLE OF CONTENTS Features... 2 Temperature Dial Indicator... 3 Home
OPERATOR S MODEL HMI-103 HMI-105 ISLAND WARMER REGISTER WARRANTY ONLINE AT
 OPERATOR S M A N U A L ISLAND WARMER MODEL HMI-103 HMI-105 REGISTER WARRANTY ONLINE AT WWW.HENNYPENNY.COM TABLE OF CONTENTS Section Page Section 1. INTRODUCTION... 1-1 1-1. Island Warmers... 1-1 1-2.
! WARNING To avoid risk of electrical shock, personal injury or death; disconnect power to oven before servicing, unless testing requires power.
 Technical Information Electric Slide-In Range JES8850ACB/S/W JES9750ACB/W JES9800ACB/S/W JES9860ACB/S/W Due to possibility of personal injury or property damage, always contact an authorized technician
OPERATOR S MANUAL REGISTER WARRANTY ONLINE AT
 Henny Penny Evolution Elite Reduced Oil Capacity Open Fryers (Full Vat Electric) Wendy s Model EEE-153 Model EEE-154 OPERATOR S MANUAL REGISTER WARRANTY ONLINE AT WWW.HENNYPENNY.COM LIMITED WARRANTY FOR
INSTALLATION INSTRUCTIONS FOR SERIES 9 INTERMITTENT PILOT IGNITION CONTROL
 INSTALLATION INSTRUCTIONS FOR SERIES 9 INTERMITTENT PILOT IGNITION CONTROL Figure 1 Series 9 Intermittent Pilot Ignition Control Application The Series 9 Intermittent Pilot Ignition Control is a microprocessor
This Manual is prepared for the use of trained Vulcan Service Technicians and should not be used by those not properly qualified.
 SERVICE MANUAL ERA & EBD SERIES ELECTRIC FRYERS WITH KLEENSCREEN PLUS FILTRATION SYSTEMS 2ER50AF KLEENSCREEN FRYER BATTERY MODEL ML MODEL ML 1ER50A 136730 2XER50AF 136747 1E50BD 136730 2XE50BDF 136747
FRYMASTER TCF. Chicken Fryer
 Hardee s Food Systems, Inc. FRYMASTER TCF Chicken Fryer EQUIP 501 Chicken Fryer October 1, 1994 CALIBRATION EQUIPMENT and TOOLS Digital Thermometer Flat Blade or Phillips w/immersion Probe Screwdriver
OPERATOR S MODEL PFE-590 PFE-592. PRESSURE FRYER (Electric) Read instructions before operating the appliance
 Read instructions before operating the appliance") OPERATOR S M A N U A L PRESSURE FRYER (Electric) MODEL PFE-590 PFE-592 REGISTER WARRANTY ONLINE AT WWW.HENNYPENNY.COM Original Instructions Read instructions before operating the appliance HENNY PENNY
OPERATOR S M A N U A L PRESSURE FRYER (Electric) MODEL PFE-590 PFE-592 REGISTER WARRANTY ONLINE AT WWW.HENNYPENNY.COM Original Instructions Read instructions before operating the appliance HENNY PENNY
RCS Residential Control Systems Inc.
 RCS Residential Control Systems Inc. Model TZ16 Z-Wave Communicating Thermostat with Rev P HVAC Control Unit INSTALLATION AND OPERATION MANUAL DCN: 141-00882 Rev 02 5/18/06 This manual applies to the following
Oakton TEMP 9000 Advanced Thermocouple Controller
 Oakton TEMP 9000 Advanced Thermocouple Controller Models: 89800-01 & 89800-02 Oakton Instruments 625 E Bunker Ct. Vernon Hills, IL 60061, USA 1-888-4OAKTON (1-888-462-5866) info@4oakton.com Contents Safety...
Henny Penny Island Warmer Model HMI-103 Model HMI-105 TECHNICAL MANUAL
 Henny Penny Island Warmer Model HMI-103 Model HMI-105 TECHNICAL MANUAL THIS PAGE INTENTIONALLY LEFT BLANK. Section TABLE OF CONTENTS Page Section 1. TROUBLESHOOTING... 1-1 1-1. Introduction... 1-1 1-2.
Technicians Manual Single Compressor
 Technicians Manual Single Compressor HAC-FF-D WALL PAD Operating Manual Version PCB Version V2.3.5 Version wall pad Version Manual Page 1 Contents 1. Main features 2. Main technical data 3. Wall pad 4.
347002K/177002K/34900
 Service Manual Models: 347002K/177002K 34900/347012K Manifold Block Style Recovery/Recycling/Recharging Unit For R-12 or R-134a Only TABLE OF CONTENTS: Theory of Operation and Safety Precautions... 2 Depressurizing
Henny Penny Island Warmer Model HMI-103 Model HMI-105 TECHNICAL MANUAL
 Henny Penny Island Warmer Model HMI-103 Model HMI-105 TECHNICAL MANUAL Section TABLE OF CONTENTS Page Section 1. TROUBLESHOOTING... 1-1 1-1. Introduction... 1-1 1-2. Safety... 1-1 1-3. Troubleshooting...
ProCon 16, 31, 47, 75, 77 & HT. RVA 46. Zone Controller Commissioning Data.
 ProCon 16, 31, 47, 75, 77 & HT. RVA 46. Zone Controller Commissioning Data. The RVA 46 Zone Controller can only be used in conjunction with a RVA47 controlled boiler installation. The RVA46 controller
Contents. Box contents: JGSTAT2B (Black) Fixing screws (White) Icons used in this manual:
 Fixing screws (White) Icons used in this manual:") Contents Box contents: Instruction Manual Instruction manual: Box contents Introduction Product compliance System options overview Installation Parameter settings Error codes User guide Installers notes
Contents Box contents: Instruction Manual Instruction manual: Box contents Introduction Product compliance System options overview Installation Parameter settings Error codes User guide Installers notes
User s Manual. TIGER S EYE E-Series Mark V Jockey. TIGERFLOW Systems, Inc Mint Way Dallas, Texas
 User s Manual TIGER S EYE E-Series Mark V Jockey TIGERFLOW Systems, Inc. 4034 Mint Way Dallas, Texas 75237 214-337-8780 www.tigerflow.com TABLE OF CONTENTS Introduction... 4 Sequence of Operation... 5
1 and 2 Fan Vision Series Portable Dryers
 1 and 2 Fan Vision Series Portable Dryers Operator s Manual PNEG-1456 Date: 09-29-09 PNEG-1456 2 PNEG-1456 1 and 2 Fan Vision Series Portable Dryers Table of Contents Contents Chapter 1 Safety... 5 Safety
PF1000 CONTROLLER. for the. Heateflex Corporation 405 E. Santa Clara St. Arcadia, CA TEL: (626) ; FAX: (626)
 ; FAX: (626)") PF1000 CONTROLLER for the AQUARIUS I/II DEIONIZED WATER HEATING SYSTEM Heateflex Corporation 405 E. Santa Clara St. TEL: (626)599-8566; FAX: (626)599-9567 Rev. 07 10/19/10, (PF1000) 1 2 TABLE OF CONTENTS
PF1000 CONTROLLER for the AQUARIUS I/II DEIONIZED WATER HEATING SYSTEM Heateflex Corporation 405 E. Santa Clara St. TEL: (626)599-8566; FAX: (626)599-9567 Rev. 07 10/19/10, (PF1000) 1 2 TABLE OF CONTENTS
Tempco Part Number PCT30006 Temperature Control Enclosure with Relay Output for Tote Tank Heating Applications
 Instruction Manual Tempco Part Number PCT30006 Temperature Control Enclosure with Relay Output for Tote Tank Heating Applications Manual PCT30006, Revision 9/20/2016 The PCT30006 control enclosure incorporates
IT801 Thermostat. User s Manual. The complete guide to the set up and operation of your new smart Wi-Fi thermostat.
 IT801 Thermostat User s Manual The complete guide to the set up and operation of your new smart Wi-Fi thermostat. The smart Wi-Fi thermostat system learns your comfort preferences, then finds opportunities
M4.9. NO LONGER IN PRODUCTION Some service parts may not be available for this product- Service and Parts Manual M4.9-0
 M4.9-001 thru -002 Service and Parts Manual Self-Contained Steam Sterilizer Serial Number Prefixes: (LT, LV) M4.9-0 th -0 NO LONGER IN PRODUCTION Some service parts may not be available for this product-
ELECTRONIC COMMUNICATING THERMOSTAT
 O M N I S T A T ELECTRONIC COMMUNICATING THERMOSTAT Installation Manual RC-81 Single Stage Heat/Cool Real Time Pricing System Document Number 13I00-2 January, 1997 Copyright 1997 Home Automation, Inc.
HT-2 / 9600 Series Control Contents
 HT-2 / 9600 Series Control Contents Tools & Parts Tools Required Parts Required Error Messages 3 Flashing Dots Pressure or Flow Switch Not Activated Pressure or Flow Switch Activated Temperature Sensor
INTRODUCTION Thank you for purchasing your new Comfort-Set 90 Series thermostat. Your new White-Rodgers Thermostat uses solid state microcomputer
 INTRODUCTI Thank you for purchasing your new Comfort-Set 90 Series thermostat. Your new White-Rodgers Thermostat uses solid state microcomputer technology to provide precise time/temperature control. This
TEMPERATURE CONTROLLER (STANDARD MODEL)
") OPERATING MANUAL TEMPERATURE CONTROLLER (STANDARD MODEL) 689-0000 689-0005 Barnant Company 28W092 Commercial Avenue Barrington, Illinois U.S.A. 60010-2392 (847) 381-7050 (847) 381-7053 (Fax) 800-637-3739
OPERATING MANUAL TEMPERATURE CONTROLLER (STANDARD MODEL) 689-0000 689-0005 Barnant Company 28W092 Commercial Avenue Barrington, Illinois U.S.A. 60010-2392 (847) 381-7050 (847) 381-7053 (Fax) 800-637-3739
Installation Instructions
 TP --- PRH --- A, TP --- NRH --- A PerformancetSeries Edger Thermidistatt Control Installation Instructions Programmable Control A07049 A07048 Non---Programmable Control NOTE: Read the entire instruction
User Manual. Digi-Sense TC9500 Advanced Multiparameter Temperature Controller with Thermocouple, Thermistor, and RTD Inputs
 User Manual Digi-Sense TC9500 Advanced Multiparameter Temperature Controller with Thermocouple, Thermistor, and RTD Inputs Models 89800-03 and 89800-04 THE STANDARD IN PRECISION MEASUREMENT Table of Contents
Beacon 200 Gas Monitor Operator s Manual. Part Number: RK Released: 6/6/08
 Beacon 200 Gas Monitor Operator s Manual Part Number: 71-2102RK Released: 6/6/08 Table of Contents Chapter 1: Introduction.................................................3 Overview.............................................................3
O PE R AT I ON HO851G REVOLVING TRAY OVEN. MODEL HO851G GAS ML Pan ML Pan ML Pan ML Pan
 O PE R AT I ON HO851G REVOLVING TRAY OVEN MODEL HO851G GAS ML-132160 24 Pan ML-132161 18 Pan ML-132258 36 Pan ML-132259 30 Pan 701 S. RIDGE AVENUE TROY, OHIO 45374-0001 937-332-3000 www.hobartcorp.com
On initial power up the thermostat will guide you through set up procedure for the following:
 Operating Guide: for the Warmup 3iE Programmable Thermostat INTRODUCTION Your thermostat s default screen is the Home Screen. This screen displays important information such as the time, current floor
Henny Penny Blast Chiller/Freezer Models BCC/BCR-140 Models BCC/BCR-175 Models BFR/BCR-350
 Henny Penny Blast Chiller/Freezer Models BCC/BCR-140 Models BCC/BCR-175 Models BFR/BCR-350 TECHNICAL MANUAL Section TABLE OF CONTENTS Page Section 1. TROUBLESHOOTING... 1-1 1-1. Introduction... 1-1 1-2.
Programmable Interactive User Manual
 67504B 02/16 (ALA) DH E RT 102/BW Programmable Interactive User Manual www.schluter.com 1. Contents 2. Menu Overview..............3 3. Introduction................ 4 4. General Operation............5 4.1.Navigation
OPERATOR S MODEL OFE/OFG-341 OFE/OFG-342 OEA/OGA-341 OEA/OGA-342 HIGH VOLUME OPEN FRYER REGISTER WARRANTY ONLINE AT
 OPERATOR S M A N U A L HIGH VOLUME OPEN FRYER MODEL OFE/OFG-341 OFE/OFG-342 OEA/OGA-341 OEA/OGA-342 REGISTER WARRANTY ONLINE AT WWW.HENNYPENNY.COM This manual should be retained in a convenient location
RC-101 Heat Pump Real Time Pricing System 2 Stage Heat / 1 Stage Cool
 O M N I S T A T ELECTRONIC COMMUNICATING THERMOSTAT Installation Manual RC-101 Heat Pump Real Time Pricing System 2 Stage Heat / 1 Stage Cool Document Number 13I00-4 January, 1997 Copyright 1997 Home Automation,
24 VAC Intermittent Pilot Gas Ignition Control
 C610U Universal 24 VAC Intermittent Pilot Gas Ignition Control Issue Date: 08/24/2016 Quick Reference Guide The C610U Universal Intermittent Pilot Gas Ignition Control module replaces many popular flame
RC-90 / RC-90B Single Stage Heat/Cool Thermostat for Zone Control Systems Installation Instructions
 RC-90 / RC-90B Single Stage Heat/Cool Thermostat for Zone Control Systems Installation Instructions DESCRIPTION The RC-90 is a precision digital thermostat designed for 24 VAC single stage heating and