INSTALLATION MANUAL. Touchless Paper Towel Dispenser Questions/Accessories/Parts (USA/Canada)
|
|
|
- Homer McLaughlin
- 6 years ago
- Views:
Transcription


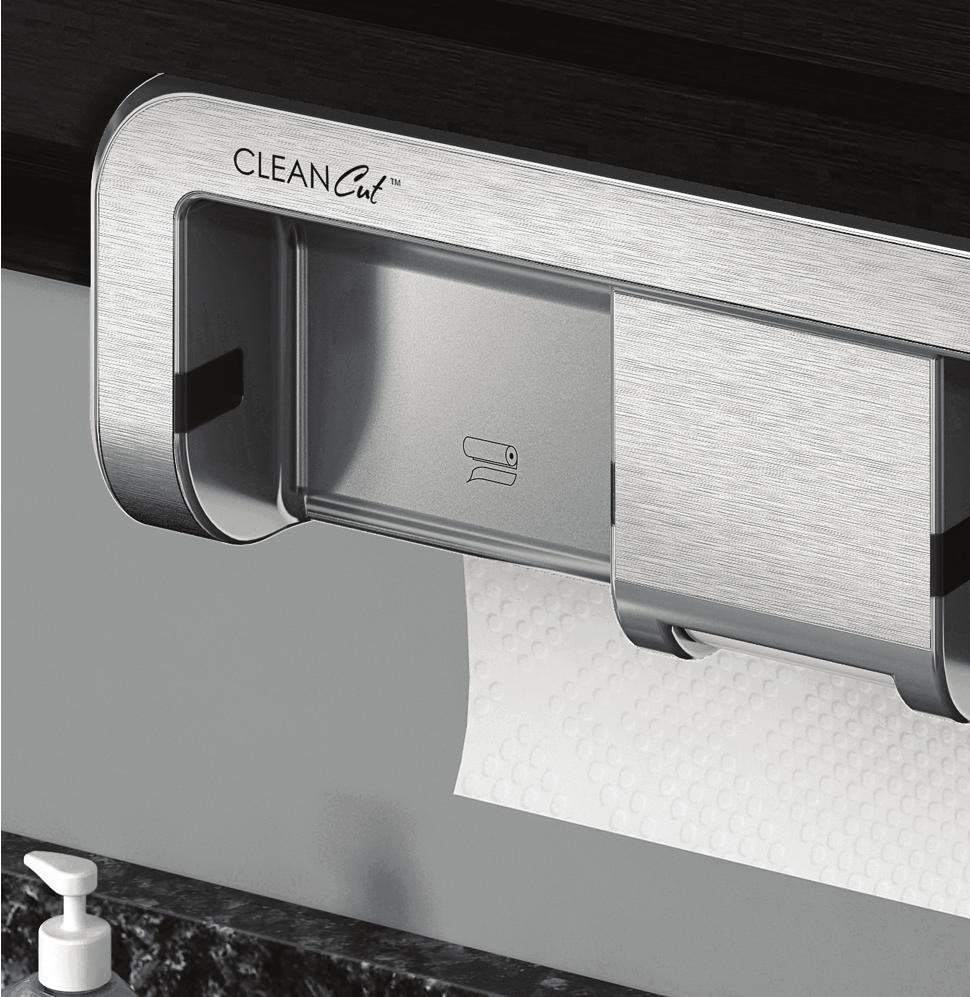

1 Touchless Paper Towel Dispenser INSTALLATION MANUAL Questions/Accessories/Parts (USA/Canada) REGISTER ONLINE AT

2 IMPORTANT SAFEGUARDS SAVE THESE INSTRUCTIONS When using electrical appliances, basic safety precautions should always be followed, including the following: Read all instructions before using. DANGER: To reduce the risk of electric shock: Always unplug this appliance from the electrical outlet before cleaning. WARNING: To reduce the risk of burns, fire, electric shock, or injury to persons: Make sure the appliance is unplugged before installing or uninstalling. Use this appliance only for its intended use as described in these instructions. Do not use attachments not recommended by the manufacturer. Never operate this appliance if it has a damaged cord or plug, if it is not working properly, if it has been dropped or damaged, or dropped into water. Return the appliance to an authorized service facility for examination, repair or adjustment. Or, call the appropriate toll-free number on the cover of this manual. Do not place on or near a hot gas or electric burner. Keep cord away from heated surfaces. To reduce the risk of fire, do not place any heating or cooking appliance beneath the appliance. To reduce the risk of fire, do not mount unit over or near any portion of a heating or cooking appliance. Do not use outdoors. To disconnect, remove plug from outlet. ELECTRICAL CORD A short power-supply cord (or detachable power-supply cord) is to be provided to reduce the risk resulting from becoming entangled in or tripping over a longer cord. NOTE: If the power supply cord is damaged, it should be replaced by qualifi ed personnel. CAUTION: Make sure power cord does not fall into the roll. Use cord management hooks behind the appliance to hang extra cord. TAMPER-RESISTANT STICKERS WARNING: This appliance is equipped with tamper-resistant stickers to prevent removal of the outer cover. To reduce the risk of fi re or electric shock, do not attempt to remove the outer cover. There are no user-serviceable parts inside. Repair should be done only by authorized service personnel. 2 3
3 B 4 10 D UNIT PARTS: 1. Mounting Holes 2. Mounting Bracket 3. LED Sensor Windows 4. Cut Zone 5. Dispense Zone 6. Opening Latch 7. Viewing Window 8. Main Body 9. Dowel Rod 10. Dowel Rod Guide 11. Power Cord Connector 12. Power Adapter (exact model varies by country) 13. Paper Roller MOUNTING PARTS: A. 4 Wood Screws (Sharp Point) 2 ½ 2 1 ¼ B. 12 Standard Screws ½ 4 2 ¼ C. 4 Washers D. 18 Spacers 4 ½ 4 ¼ 4 3/16 4 1/ /16 E. Mounting Template (in box) A 14. Insertion Slot (space between paper roller and pinch rollers) 15. Pinch Rollers (Inside) C 16. Power Jack TOP DOWN Mounting Bracket Opened and Hidden from Illustration BACK Cord Management Hooks YOU WILL ALSO NEED: Tape Ruler (or you may cut out the ruler provided on the template) Electric drill with a ⅜ or 1/16 drill bit Phillips-head screwdriver 4 5
4 GETTING STARTED WATCH ONLINE: 1. Remove all packing material. 2. Remove and save literature. 3. Unpack mounting washers, screws and spacers for mounting and set them aside in a safe place where they will not roll away or get lost. IMPORTANT: Do not attempt to operate appliance until it is properly installed. This appliance will be damaged if operated while sitting on a surface or on its side. 2. Use your ruler or the paper ruler provided [D] to measure the overhang height, placing your ruler vertically against the underside of the cabinet behind the overhang [D]. If this measurement is less than 1¾, you may follow the RECOMMENDED INSTALLATION or THROUGH CABINET INSTALLATION method. If this measurement is greater than 1¾, you must follow the THROUGH CABINET INSTALLATION method. CHOOSE A LOCATION When choosing your location, consider the following: DO make sure to mount within reach of an electrical outlet. DO consider your normal work patterns in the kitchen when choosing location. As this will become your most used kitchen appliance, it is recommended to mount the CLEANCut close to your sink or food prep area. DO NOT mount over any heating or cooking appliance such as your range or oven. DO NOT mount under, in front of or behind any under-cabinet light fixtures. CAUTION: When selecting a location for your CLEANCut, make sure you have adequate room to reach the power jack. Be sure to unlatch the main body to ensure that nothing hits the power jack. CAUTION: There needs to be a minimum of 13¼ of space between the surface that the CLEANCut is mounted to and the counter top. DETERMINE INSTALLATION TYPE WATCH ONLINE: 1. Prior to taping the mounting template and beginning to drill your holes, determine if your cabinet has a flat bottom [B] or an overhanging lip [C]. If your cabinet is flat, you may follow the RECOMMENDED INSTALLATION or THROUGH CABINET INSTALLATION method. [B] [C] RECOMMENDED INSTALLATION WATCH ONLINE: IMPORTANT: This method can only be used if the bottom of your cabinet is ⅜ thick or more. If the cabinet bottom is too thin the sharp ends of the screws will protrude through. IMPORTANT: Always wear protective glasses or goggles to prevent injury. 1. Clear counter top under insta mounting easier. 2. Fully open the main body and position the CLEANCut under the cabinet where you want it installed. IMPORTANT: Do not align screw holes with the break between cabinets, as this will prevent you from installing the appliance properly. Pay close attention to where the drill holes will be set so as not to damage your cabinets during mounting. Drilling through the breaks between your cabinet may cause damage to cabinets and prevent proper installation. 3. Using a thin pencil, mark the 4 mounting holes [SEE ILLUSTRATION G & H1]. 4. Pre drill a small 1/16 pilot starter hole ¼ [E] deep in the center of your 4 marks. Be careful not to drill through the cabinet. NOTE: Put some tape on the drill as a guide to prevent drilling through the bottom [E]. IMPORTANT: Always ensure you are drilling straight up through the marks you made on the bottom of the cabinet. Drilling at an angle may prevent proper installation and may damage cabinets if the drill bit goes into the break or partition of the cabinet. 5. Once holes are drilled, wipe dust and debris off under side of cabinet. 6. Hold the unit in place secure the back with the two small screws [SEE ILLUSTRATION G]. 1/4 NOTE: Always tighten screws to ensure the appliance does not move or shake during operation. Be careful not to over-tighten the screws to avoid damaging the mounting bracket. 6 7
5 7. Insert the plastic spacers then screw the large wood screws into the two front holes [H]. 8. Plug power cord connector into the power jack in the back of the appliance. Plug the power adapter into a standard electrical outlet. Extra cord should be hung over cord management hooks behind unit [F]. [G] [F] CAUTION: Make sure power cord does not fall into the roll. NOTE: If you wish to conceal the power cord, drill a ⅜ hole through the bottom of the cabinet fl oor at the rear and to the side of the cabinet. Now the power cord connector can be run down through the ⅜ hole and connected to the power jack. The power adapter can be plugged into a standard electrical outlet available inside the cabinet. If this outlet is not available then one can be installed by a qualified electrician. 9. Your CLEANCut appliance is now ready for use! For operating instructions, see the HOW TO USE section of this manual. [H1] [H2] 2. Fold mounting template along Overhang Lip Fold Line. Place template under cabinet with fold line flush against inside overhang, and tape securely in place [J]. NOTE: Use center line to align unit with center of cabinet if desired. [J] IMPORTANT: Do not align screw holes on template with the partition between cabinets, as this will prevent you from installing the appliance properly. Pay close attention to where the drill holes will be set so as not to damage your cabinets during mounting. Drilling through your cabinet s partition may cause damage to cabinets and prevent proper installation. 3. Drill from under the cabinet up. Drill holes through the 4 places marked on the template using a ⅜ drill bit. IMPORTANT: Always ensure you are drilling straight up through the marked mounting hole on the template. Drilling at an angle may prevent proper installation and may damage cabinets if the drill bit pierces the partition. 4. Once holes are drilled, remove tape and mounting template and save template with your instructions in case you move or wish to remount at a later time. 5. Wipe dust and debris off inside cabinet surface. Also, make sure under side of cabinet is clean. 6. Place a washer inside the cabinet over each of the 4 holes you drilled. 7. Now, use your ruler or the paper ruler provided to measure the overhang height, plac- [K] ing your ruler vertically against the underside of the cabinet behind the overhang [K]. If this measurement is less than 1¾, you may skip step 9. If it is greater than 1¾, this number determines the number of spacers you need, using the SPACER MOUNTING GUIDE found below. WATCH ONLINE: SPACER MOUNTING GUIDE THROUGH CABINET INSTALLATION WATCH ONLINE: IMPORTANT: Always wear protective glasses or goggles to prevent injury when drilling. 1. Clear counter top under installation area to avoid getting dust or debris on other appliances or items. Open cabinets and remove contents to make mounting easier. MEASUREMENT SPACER 1 ¾ or less None 1 13/16 1/ /16 13/16 MEASUREMENT SPACER 2 ¼ 2 1/16 ¼ + 3/16 1 3/16 ¼ + 3/16 8 9
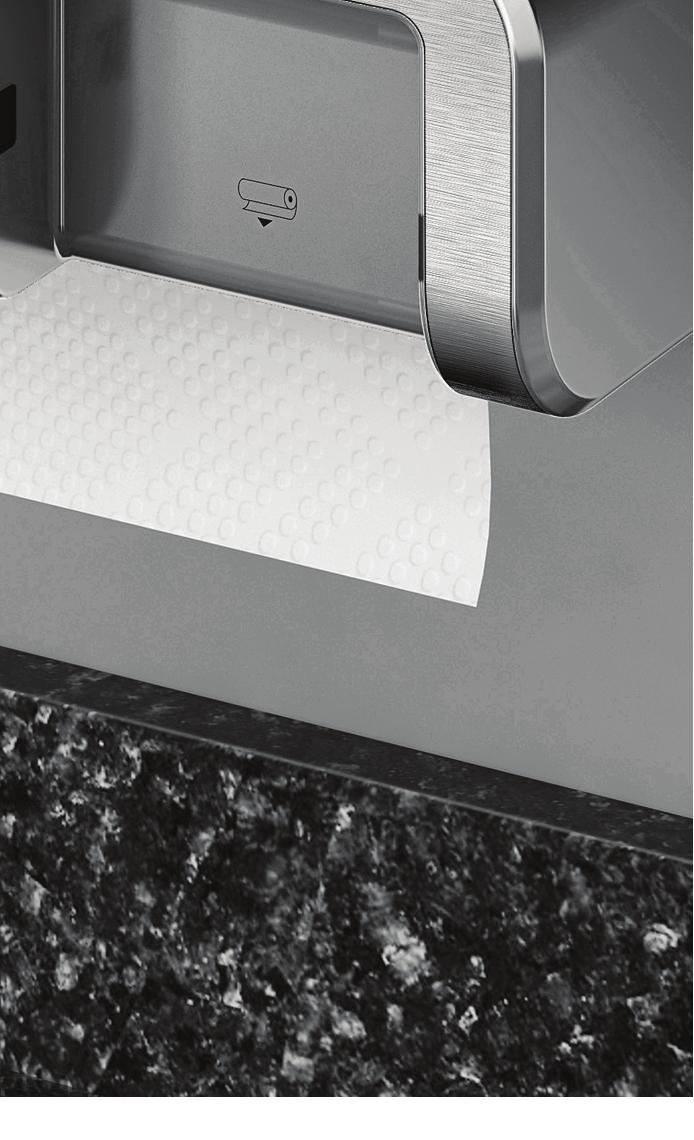
6 8. Drop one of your 1 screws through each of the washers covering the holes in the cabinet, from inside the cabinet down. [L] NOTE: For spacer installation, you ll need to use longer screws. 3. Lift dowel rod to remove from device and dispose of empty cardboard tube from previous use (if any). 4. Insert the dowel rod through the center of a new paper towel roll. [M] 9. Place the appropriate number of spacers determined in step 7 on each screw so the appliance will be even with the front overhang [L]. NOTE: For spacer installation, you may require assistance (in mounting) in order to hold spacers in place while securing the appliance at the same time. If assistance is not available, use pieces of tape to hold the spacers in place while you position the appliance. 10. Once spacers are set (if necessary), hold CLEANCut and mounting bracket up and tighten screws into mounting holes to secure. NOTE: Always tighten screws to ensure the appliance does not move or shake during operation. Be careful not to over-tighten the screws to avoid damaging the mounting bracket. NOTE: If you wish to conceal the power cord, drill a ⅜ hole through the bottom of the cabinet fl oor at the rear and to the side of the cabinet. Now the power cord connector can be run down through the ⅜ hole and connected to the power jack. The power adapter can be plugged into a standard electrical outlet available inside the cabinet. If this outlet is not available then one can be installed by a qualified electrician. 11. Plug power cord connector into the power jack in the back of the appliance. Plug into standard electrical outlet. Extra cord should be hung over cord management hooks behind unit [SEE ILLUSTRATION H]. CAUTION: Make sure power cord does not fall into the roll. 12. Your CLEANCut appliance is now ready for use! For operating instructions, see the HOW TO USE section of this manual. 5. Once paper towel roll is loaded onto the dowel rod, place into the dowel cradle. NOTE: It is recommended that you place the roll into the cradle so that the paper comes up from the bottom front of the roll [N]. 6. Load end of paper sheet through paper path [N]. 7. Push unit up until the opening latch clicks to securely close. OPERATING INSTRUCTIONS 1. Place hand between LED sensors in the dispense zone. NOTE: The CLEANCut is designed to dispense the amount of paper towel you desire. For short sheets, briefl y hold your hand in the dispense zone. For longer sheets, hold your hand in the dispense zone for a longer period of time. 2. Once the desired amount of paper has been dispensed, remove hand. CAUTION: To prevent paper jams, do not try to remove the paper towel without cutting. The CLEANCut is designed to give you the perfect size sheet regardless of the roll s perforation. 3. To cut, place hand between LED sensors in the cutting zone. 4. Remove cut paper towel sheet from the bottom of the CLEANCut appliance. [N] HOW TO USE WATCH ONLINE: LOADING INSTRUCTIONS 1. Pull opening latch to release the main body. 2. Push the main body down completely until it stops to ensure it is FULLY opened. CLEANING INSTRUCTIONS This product contains no user-serviceable parts. Repair should be done only by authorized service personnel. 1. Make sure the main body is opened or the power cord is removed before cleaning. 2. Small pieces of paper may remain in the paper path after numerous rolls are cut. 3. Clean with a mild, non-abrasive cleaner being careful not to soak the LED sensor windows. NOTE: Make sure pinch rollers are recessed to completely open the insertion slot [SEE ILLUSTRATION M]. NOTE: The CLEANCut appliance is equipped with a security feature to prevent operation while the unit is opened
7 TROUBLESHOOTING WATCH ONLINE: PROBLEM POSSIBLE CAUSE SOLUTION CLEANCut does not dispense paper Power adapter is not plugged into the wall Power cord connector is not plugged into the power jack Main body is open Power cord is hitting roll Paper is jammed Make sure the power adapter is plugged into a live outlet Fully press power cord connector into the power jack Close the main body and make sure the opening latch is fully locked Use cord management hooks to keep power cord from hitting the paper roll Unplug the power cord connector then remove any jammed paper. Replug power cord connector PROBLEM POSSIBLE CAUSE SOLUTION Paper does not cut Paper roll does not fit in main body There is no paper in the paper path Paper is jammed Dowel rod is not seated in slots Main body is not fully open Some rolls are cut unevenly and may jam Make sure paper is dispensed so it is hanging out of the bottom of the main body Unplug the power cord connector then remove any jammed paper. Replug power cord connector Make sure dowel rod is fully seated in slots Push the main body completely down until the paper roll fits inside Try another roll Main body is not fully open Push the main body completely down to fully open A new brand of paper towel is not dispensing Roll may be smashed in shipping or storing Squeeze the roll back into a round shape Paper does not load First sheet is either curled or damaged Paper path is clogged Tear off the first sheet to make sure its flat Make sure the main body is fully open and clear any loose paper Moisture may cause the roll to be sticky Allow the roll to dry or use another Cutter is blocking the path Unplug and replug the power cord connector to reset cutter HELPFUL HINTS After the main body is plugged in and closed, placing your hand into the dispense beam side will activate the dispense roller. This can be done with or without paper in the unit. The cut operation however can not be activated unless the unit is loaded and can sense paper in the paper path. Once cut, you can remove the paper by easily pulling the paper out or by dispensing another sheet. Paper can be loaded so it enters the paper path from the top of the roll, but this usually causes the paper to curl to the back of the unit and makes it more difficult to judge the length
8 NEED HELP? For service, repair or any questions regarding your appliance, call the appropriate toll free number on the cover of this book. DO NOT return the product to the place of purchase. Also, please DO NOT mail product back to the manufacturer, nor bring it to a service center. You may also want to consult the web site listed on the cover of this manual. Two-Year Limited Warranty What does it cover? Any defect in material or workmanship; provided; however, Smart Product Innovations liability will not exceed the purchase price of the product For how long? Twelve months after the date of original purchase What will we do to help you? Provide you with a reasonably similar replacement product that is either new or factory refurbished How do you get service? Save your receipt as proof of the date of sale Check our on-line service site at or call our number, +1 (866) , for general warranty service If you need parts or accessories, please call +1 (866) What does your warranty not cover? Damage from commercial use Damage from misuse, abuse or neglect Products that have been modified in any way Products used or serviced outside the country of purchase Glass parts and other accessory items that are packed with the unit Shipping and handling costs associated with the replacement of the unit Consequential or incidental damages (Please note, however, that some states do not allow the exclusion or limitation of consequential or incidental damages, so this limitation may not apply to you) 15
9 is a trademark of Clean Cut Int l, LLC, Juno Beach, Florida, USA SMART PRODUCT INNOVATIONS, INC. Copyright 2011 Smart Product Innovations, Inc. US Patent No: 6,994, E Made in China Printed in China
USER GUIDE DEEP FRYER WITH OIL FILTRATION SYSTEM
 USER GUIDE DEEP FRYER WITH OIL FILTRATION SYSTEM Emeril is a trademark of Martha Stewart Living Omnimedia, Inc. Copyright 2017, Martha Stewart Living Omnimedia, Inc. All rights reserved. Important Safeguards
COUNTERTOP OVEN. use and care manual. TOD3300 Series
 COUNTERTOP OVEN use and care manual TOD3300 Series Thank you for your purchase! Should you have any questions or concerns with your new product, please call our Customer Service Line at 1-800-231-9786
USER GUIDE 3-IN-1 GRILL AND GRIDDLE
 USER GUIDE 3-IN-1 GRILL AND GRIDDLE Emeril is a trademark of Martha Stewart Living Omnimedia, Inc. Copyright 2015, Martha Stewart Living Omnimedia, Inc. All rights reserved. Imported and Distributed by:
BL250. Pulse Blender OWNER S GUIDE
 BL250 OWNER S GUIDE Pulse Blender 1-877-646-5288 IMPORTANT SAFETY INSTRUCTIONS For Household Use Only WHEN USING ELECTRICAL APPLIANCES, BASIC SAFETY PRECAUTIONS SHOULD ALWAYS BE FOLLOWED, INCLUDING THE
Electric Digital Kettle
 Electric Digital Kettle OWNER S MANUAL Model EK119H 120V., 60Hz., 1800 Watts. EURO-PRO Operating LLC Boston, MA, 02465 1 (800) 798-7398 www.euro-pro.com COPYRIGHT 2008 EURO-PRO OPERATING LLC IMPORTANT
Power Opener Under-The-Cabinet Can Opener
 Power Opener Under-The-Cabinet Can Opener 840054200 IMPORTANT SAFEGUARDS When using electrical appliances, basic safety precautions should always be followed, including the following: 1. Read all instructions.
Food Slicer. USK AS V~ 60Hz 130W. Fax Front cover page (first page) Assembly page 1/12
 Assembly page 1/12") Food Slicer www.kalorik.com USK AS 35432 120V~ 60Hz 130W Front cover page (first page) Assembly page 1/12 IMPORTANT SAFEGUARDS When using electrical appliances, basic safety precautions should always be
Food Slicer www.kalorik.com USK AS 35432 120V~ 60Hz 130W Front cover page (first page) Assembly page 1/12 IMPORTANT SAFEGUARDS When using electrical appliances, basic safety precautions should always be
KETTLE. Customer Assistance (US) Model Number: UPC:
 Model Number: UPC:") KETTLE Model Number: 104556 UPC: 681131045568 Customer Assistance 1-855-451-2897 (US) Please consider the option to recycle the packaging material and donate any appliance you are no longer using. Kettle_104556_US_V3_121212.indd
KETTLE Model Number: 104556 UPC: 681131045568 Customer Assistance 1-855-451-2897 (US) Please consider the option to recycle the packaging material and donate any appliance you are no longer using. Kettle_104556_US_V3_121212.indd
IMPORTANT SAFEGUARDS SAVE THESE INSTRUCTIONS
 1 2 IMPORTANT SAFEGUARDS When using electrical appliances especially when children are present, basic safety precautions should always be followed to reduce the risk of fire, electric shock, and/or injury
Please consider the option to recycle the packaging material and donate any appliance you are no longer using.
 2 SLICE TOASTER Model Number: 103741 UPC: 681131037419 Customer Assistance 1-855-451-2897 (US) Please consider the option to recycle the packaging material and donate any appliance you are no longer using.
NO PREHEAT DIGITAL COUNTERTOP OVEN TOD5031SS. use and care manual
 NO PREHEAT DIGITAL COUNTERTOP OVEN use and care manual TOD5031SS TOD5031SS_IB_23433-002.indd 1 CONTENTS Important Safeguards... 3 Getting to Know Your Countertop Oven... 5 How to Use.... 6 Operating Your
e Bath Fan with Light User s Guide
 e Bath Fan with Light User s Guide abfl100rnl, BFL125RNL Item Stock Number(s): BFL100RNL, BFL125RNL IMPORTANT INSTRUCTIONS - OPERATING MANUAL READ AND SAVE THESE INSTRUCTIONS READ CAREFULLY BEFORE ATTEMPTING
OPERATING MANUAL Gfp 255C Please read this manual carefully before operating!
 OPERATING MANUAL Gfp 255C Please read this manual carefully before operating! Unpacking, assembly, and operating videos are available at www.gfpsmoothstart.com 1 Table of Contents Gfp 255C March 2015 Contents
IRON/TONES TM REQUIRED 2T1A TOOLS AND 1 MATERIALS T01-A INSTALLATION INSTRUCTIONS / SELF-RIMMING OR UNDERCOUNTER KITCHEN SINK K-6625
 IRON/TONES TM INSTALLATION INSTRUCTIONS / SELF-RIMMING OR UNDERCOUNTER KITCHEN SINK K-6625 damage. Cast iron sinks are very heavy. Get assistance lifting the sink into place. Observe all local plumbing
ELECTRIC FLAT PANEL FIREPLACE HEATER
 ELECTRIC FLAT PANEL FIREPLACE HEATER Model Numbers: WM50; WM-50-W; WS-G-01;WS-G-02 OWNER S MANUAL WARNING Read and understand this entire owner s manual, including all safety information, before plugging
Master Prep Frozen Treat & Drink Maker
 Master Prep Frozen Treat & Drink Maker QB750 series OWNER S GUIDE www.ninjakitchen.com IMPORTANT SAFETY INSTRUCTIONS For Household Use Only WHEN USING ELECTRICAL APPLIANCES, BASIC SAFETY PRECAUTIONS SHOULD
Important Safeguards. Save these instructions for future reference. (continued on next page)
") User Guide 2. Important Safeguards WARNING To reduce the risk of fire, electric shock or other injury, read and follow the safety precautions and instructions in this User Guide. Save these instructions
User Guide 2. Important Safeguards WARNING To reduce the risk of fire, electric shock or other injury, read and follow the safety precautions and instructions in this User Guide. Save these instructions
USE AND CARE GUIDE FOR MODEL MEK1, MEK15. Express Cordless Kettle
 USE AND CARE GUIDE FOR MODEL MEK1, MEK15 Express Cordless Kettle IMPORTANT SAFEGUARDS When using electrical appliances, basic safety precautions should always be followed, including the following: 1. Read
20 INCH ELECTRIC GRIDDLE
 20 INCH ELECTRIC GRIDDLE USER GUIDE Now that you have purchased a Chefman product you can rest assured in the knowledge that as well as your 3-year parts and labor warranty you have the added peace of
Instruction Manual. Window AC 12000BTU. Energy- Saving Mode. Wards.com MODEL: 12000BTU Item No.: V~, 60Hz, 1060W
 Energy- Saving Mode Window AC 12000BTU MODEL: 12000BTU 11.2 Montgomery Ward Customer Service 1112 7th Avenue, Monroe, WI 53566 8:00 am to Midnight, Monday through Friday Wards.com 1 888 557 3848 Instruction
OWNER S MANUAL ADVENTURER SERIES. Electric Grill A10-603E
 OWNER S MANUAL ADVENTURER SERIES Electric Grill A10-603E For questions regarding performance, assembly, operation, parts, or returns, contact the experts at MAGMA by calling (562) 627-0500 7:00 a.m. -
OWNER S MANUAL. Wall Hanging Mode. Pedestal Mode ELECTRIC FLAT PANEL FIREPLACE HEATER. Model Number: EFW-XB60B WARNING CAUTION
 ELECTRIC FLAT PANEL FIREPLACE HEATER Model Number: EFW-XB60B OWNER S MANUAL Wall Hanging Mode Pedestal Mode WARNING CAUTION Read and understand this entire owner s manual, including all safety information,
(The chances are you re never going to read me) Owner s Manual.
 Owner s Manual.") (The chances are you re never going to read me) Owner s Manual www.simplicityvac.com . CONTENTS Getting Started Important Safety Instructions 2 Polarization Instructions 3 State of California Proposition
(The chances are you re never going to read me) Owner s Manual www.simplicityvac.com . CONTENTS Getting Started Important Safety Instructions 2 Polarization Instructions 3 State of California Proposition
Electric Griddle. Owner s Guide READ AND SAVE THESE INSTRUCTIONS GR225
 Electric Griddle GR225 Owner s Guide READ AND SAVE THESE INSTRUCTIONS IMPORTANT SAFEGUARDS When using electrical appliances, basic safety precautions should always be followed, including the following:
Wall Hanging Mode. Pedestal Mode
 ELECTRIC FLAT PANEL FIREPLACE HEATER Model Number: EFW-XB60D OWNER S MANUAL Wall Hanging Mode Pedestal Mode WARNING CAUTION Read and understand this entire owner s manual, including all safety information,
WALL MOUNT RANGE HOOD. This manual is made with 100 % recycled paper. Electronic version of this manual is available at:
 WALL MOUNT RANGE HOOD This manual is made with 100 % recycled paper. Electronic version of this manual is available at: www.cosmoappliances.com Thank You Thank you for your purchase. We know that you have
SAVE THESE INSTRUCTIONS
 The Lightning flash with arrowhead symbol, within an equilateral triangle, is intended to alert the user to the presence of uninsulated dangerous voltage within the product s enclosure that may be of sufficient
INSTANT HOT WATER DISPENSER
 INSTANT HOT WATER DISPENSER Tank Installation Materials required (not provided) 2 mounting bracket screws (and 2 plastic anchors if attaching to drywall) Shut-Off valve and T fitting Components When you
SAVE THESE INSTRUCTIONS
 2 IMPORTANT SAFEGUARDS When using electrical appliances especially when children are present, basic safety precautions should always be followed to reduce the risk of fire, electric shock, and/or injury
OWNER S GUIDE
 QB3000SS series OWNER S GUIDE www.ninjakitchen.com IMPORTANT SAFETY INSTRUCTIONS For Household Use Only WHEN USING ELECTRICAL APPLIANCES, BASIC SAFETY PRECAUTIONS SHOULD ALWAYS BE FOLLOWED, INCLUDING THE
SAVE THESE INSTRUCTIONS
 IMPORTANT SAFEGUARDS When using electrical appliances especially when children are present, basic safety precautions should always be followed to reduce the risk of fire, electric shock, and/or injury
INSTALLATION AND OPERATING MANUAL
 RECORD THIS INFORMATION FOR FUTURE REFERENCES THE BUILT-IN VACUUM SYSTEM MODEL NUMBER DATE OF PURCHASE PLACE OF PURCHASE Manual: #RM120-e Rev. : 9/28/07 Part # W501 INSTALLATION AND OPERATING MANUAL MODEL
Turin LED Ceiling Fan
 Turin LED Ceiling Fan model no. no. 052-6972-6 Instruction Manual Toll-free: -866-827-4985 IMPORTANT: Please read and understand this manual before any assembly. Before beginning assembly of product, make
Electric Knife. User Manual AFTER SALES SUPPORT. English...2 MODEL: /2014. Type:
 User Manual English...2 USA MODEL: 44047-14 11/2014 Type: 44047-14 Table of contents 2 INTRODUCTION 3 IMPORTANT SAFEGUARDS 4 POLARIZED PLUG INSTRUCTIONS 4 SHORT CORD INSTRUCTIONS 4 PART DESCRIPTION 5 BEFORE
MODEL # ES
 DOUBLE BURNER MODEL # ES-3201 IMPORTANT SAFEGUARDS When using electrical appliances, basic safety precautions should always be followed to prevent the risk of fire, electric shock, burns, or other injuries
e Bath Fan with Light User s Guide
 e Bath Fan with Light User s Guide abfl125rok Item Stock Number(s): BFL125ROK IMPORTANT INSTRUCTIONS - OPERATING MANUAL READ AND SAVE THESE INSTRUCTIONS READ CAREFULLY BEFORE ATTEMPTING TO ASSEMBLE, INSTALL,
IMPORTANT SAFEGUARDS SAVE THESE INSTRUCTIONS
 IMPORTANT SAFEGUARDS When using electrical appliances especially when children are present, basic safety precautions should always be followed to reduce the risk of fire, electric shock, and/or injury
15 ELECTRIC SKILLET. Instruction Manual. Model: CES-1215R 120V/60Hz / 1400W
 15 ELECTRIC SKILLET Instruction Manual Model: CES-1215R 120V/60Hz / 1400W IMPORTANT SAFEGUARDS PLEASE READ CAREFULLY ALL INSTRUCTIONS BEFORE USING YOUR ELECTRIC SKILLET Do not use this appliance for any
VACUUM BAG SEALER POSITION ONLY
 VACUUM BAG SEALER POSITION ONLY Model: BS-20 IMPORTANT SAFEGUARDS When using electrical appliances, basic safety precautions should always be followed including the following: 1. Read all instructions.
WALL MOUNT RANGE HOOD. This manual is made with 100 % recycled paper. Electronic version of this manual is available at:
 WALL MOUNT RANGE HOOD This manual is made with 100 % recycled paper. Electronic version of this manual is available at: www.cosmoappliances.com Thank You Thank you for your purchase. We know that you have
Installation Instructions
 Installation Instructions Above the Cooktop Microwave Oven PVM1899 & PVM2155 Questions? Call 1-800-561-3344 or Visit our Website at: GEAppliances.ca BEFORE YOU BEGIN Read these instructions completely
e Bath Fan with Light User s Guide
 e Bath Fan with Light User s Guide abfl50uq, BFL60UQ, BFL70, BFL85 Item Stock Number(s): BFL50UQ, BFL60UQ, BFL70, BFL85 IMPORTANT INSTRUCTIONS - OPERATING MANUAL READ AND SAVE THESE INSTRUCTIONS READ CAREFULLY
ROTATING WAFFLE MAKER
 ROTATING WAFFLE MAKER Model Number: 104553 UPC: 681131045537 Customer Assistance 1-855-451-2897 (US) Please consider the option to recycle the packaging material and donate any applianceyou are no longer
TOASTER OVEN INSTRUCTION MANUAL. Model: MCSTO6B. 6 Slice
 TOASTER OVEN 6 Slice INSTRUCTION MANUAL Model: MCSTO6B THANK YOU FOR PURCHASING A MAGIC CHEF PRODUCT. PLEASE READ ALL INSTRUCTIONS CAREFULLY BEFORE USING THE PRODUCT. CONTENTS SAFETY INSTRUCTIONS.... 3
User Manual. Wine Cellar
 User Manual Wine Cellar MODEL: WWT060MB WWT080MB WWT100MB WWT120MB 1. READ these instructions carefully before installing and operating the Wine Cellar. Keep them for further reference. 2. Record in the
Installation Operation Care
 Installation Operation Care Roman Shades EasyRise and UltraGlide Lifting Systems CONTENTS Getting Started: Product View... 1 Tools and Fasteners Needed... 2 Mounting Types and Window Terminology... 2 Installation:
QB1000 series OWNER S GUIDE. Professional. Master Prep. ninjakitchen.com
 QB1000 series OWNER S GUIDE Master Prep Professional ninjakitchen.com 1 877 646-5288 IMPORTANT SAFETY INSTRUCTIONS For Household Use Only WHEN USING ELECTRICAL APPLIANCES, BASIC SAFETY PRECAUTIONS SHOULD
1.5 L Electric Kettle
 USER GUIDE 1.5 L Electric Kettle NS-TK15BK6/NS-TK15BL6/NS-TK15PK6 Before using your new product, please read these instructions to prevent any damage. Contents Introduction.....................................................
ELECTRIC FLAT PANEL FIREPLACE HEATER
 ELECTRIC FLAT PANEL FIREPLACE HEATER Model Numbers: 80-2000A-42 OWNER S MANUAL AC 120V 60Hz 1500W WARNING Read and understand this entire owner s manual, including all safety information, before plugging
Master Prep Professional
 QB1004 Series OWNER S GUIDE Master Prep Professional ninjakitchen.com 1 877 646-5288 IMPORTANT SAFETY INSTRUCTIONS For Household Use Only WHEN USING ELECTRICAL APPLIANCES, BASIC SAFETY PRECAUTIONS SHOULD
Master Prep Chopper OWNER S GUIDE QB600W
 Chopper OWNER S GUIDE QB600W IMPORTANT SAFETY INSTRUCTIONS For Household Use Only WHEN USING ELECTRICAL APPLIANCES, BASIC SAFETY PRECAUTIONS SHOULD ALWAYS BE FOLLOWED, INCLUDING THE FOLLOWING: READ ALL
OWNER S GUIDE
 QB3000SS Series OWNER S GUIDE www.ninjakitchen.com IMPORTANT SAFETY INSTRUCTIONS For Household Use Only WHEN USING ELECTRICAL APPLIANCES, BASIC SAFETY PRECAUTIONS SHOULD ALWAYS BE FOLLOWED, INCLUDING THE
INSTRUCTION BOOKLET. Electric Steam Sterilizer
 INSTRUCTION BOOKLET Electric Steam Sterilizer CS-6 SERIES For your safety and continued enjoyment of this product, always read the instruction book carefully before using. IMPORTANT SAFEGUARDS When using
Dishwasher. Installation manual DW60M9990AP
 Dishwasher manual DW60M9990AP DW9000M_DD68-00197B-00_EN.indd 1 6/1/2017 4:34:14 PM Contents Contents 3 What s included 3 requirements 7 Dimensions and specifications 9 Step-by-step installation 11 2 English
Professional Frying System
 Professional Frying System F300 F300C OWNER S GUIDE HELP LINE 1 877 646-5288 F300_15_F300C_15_IB_ENG_121114_3.indd 1 IMPORTANT SAFETY INSTRUCTIONS For Household Use Only WHEN USING ELECTRICAL APPLIANCES,
Wall Mount Electric Fireplace
 Wall Mount Electric Fireplace User Guide Thank you for purchasing the Ivation Wall Mount Electric Fireplace. This User Guide is intended to provide you with guidelines to ensure that operation of this
Installation Operation Care
 Installation Operation Care 2" Horizontal Aluminum Blinds MagnaView Tilt Feature 5102014000F 4/14 CONTENTS Getting Started: Product View Reveal with MagnaView... 1 Product View Natural Elements with MagnaView...
P.N User Manual STAINLESS STEEL ELECTRIC KETTLE 5964/5965 Series MODELS
 User Manual STAINLESS STEEL ELECTRIC KETTLE MODELS 5964/5965 Series www.oster.ca P.N. 166019 IMPORTANT SAFEGUARDS When using electrical appliances, basic safety precautions should always be followed to
DUVAL 52 CEILING FAN MODELS #50201, Español p. 19 LISTED FOR DAMP LOCATION
 DUVAL 52 CEILING FAN MODELS #50201, 50206 Español p. 19 LISTED FOR DAMP LOCATION Questions, problems, missing parts? Before returning to your retailer, call our customer service department at 1-877-361-3883,
INSTRUCTION MANUAL SO-1006 CONVECTION COUNTERTOP OVEN
 F INSTRUCTION MANUAL SO-1006 CONVECTION COUNTERTOP OVEN IMPORTANT SAFEGUARDS When using electrical appliances, basic safety precautions should always be followed, including the following: 1. Read all the
Please consider the option to recycle the packaging material and donate any appliance you are no longer using.
 WAFFLE MAKER Model Number: 103739 UPC: 681131037396 Customer Assistance 1-855-451-2897 (US) Please consider the option to recycle the packaging material and donate any appliance you are no longer using.
ELECTRIC SLICER. Multi-Purpose Household Slicer MODEL SL-16
 ELECTRIC SLICER Multi-Purpose Household Slicer MODEL SL-16 1 IMPORTANT SAFEGUARDS 1. Read all instructions. 2. DO NOT IMMERSE APPLIANCE IN WATER OR OTHER LIQUID. 3. Close supervision is necessary when
GLASS WINDOW TWO SLICE TOASTER User Guide
 BRAND BRAND GLASS WINDOW TWO SLICE TOASTER User Guide ITEM 736712 Ginnys.com 800.544.1590 Facebook.com/GinnysBrand Pinterest.com/GinnysBrand Ginnys.com/Blog Thank you for purchasing a Ginny s Brand Glass
Installation Operation Care
 Installation Operation Care Horizontal Blinds Standard Hardware System LiteRise Operating System UltraGlide Operating System CONTENTS Getting Started: Product View...1 Tools and Fasteners Needed...2 Unpack
MINI ELECTRIC CONVECTION HEATER
 MINI ELECTRIC CONVECTION HEATER FOR THE FOLLOWING MODELS: EE-8069 EE-8069R EE-8069W If you have any questions about the operation of your convection heater, please contact Crane Customer Care. Toll Free:
O w n e r s M a n u a l
 Owner s Manual . CONTENTS Getting Started Important Safety Instructions 2 Polarization Instructions 3 State of California Proposition 65 Warnings 3 Description of the Vacuum 4 Assembling the Vacuum Attaching
User s Manual and Operating Instructions
 User s Manual and Operating Instructions Model Numbers: PT-18W-DDF-A, PT-20F-DDF-A, PT-20S-DDF, PT-24O-DDF, PT-24-DDF, PT-24-DDF-F, PT-30-DDF, PT-30P-DDF-A, PT-30P-DDF-AF READ AND SAVE THESE INSTRUCTIONS
TRIPLE BASKET DEEP FRYER WITH TIMER
 BRAND TRIPLE BASKET DEEP FRYER WITH TIMER Instruction Manual ITEM: 733113 Ginnys.com 1.800.544.1590 Life is happening. We ll help you live it...one moment at a time. Thank you for purchasing a Ginny s
EcoBrite Smooth Light LED Light Fixtures
 Installation Guide EcoBrite Smooth Light LED Light Fixtures BEFORE YOU BEGIN INSTALLATION Read these instructions carefully. Failure to follow these instructions will invalidate the warranty on this product
POWERFORCE HELIX. Vacuum USER GUIDE 1700 & 1701 SERIES. (Model 1701 Shown)
") POWERFORCE HELIX Vacuum USER GUIDE 700 & 70 SERIES (Model 70 Shown) IMPORTANT SAFETY INSTRUCTIONS READ ALL INSTRUCTIONS BEFORE USING YOUR UPRIGHT VACUUM. Always connect to a polarized outlet (one slot
POWERFORCE HELIX Vacuum USER GUIDE 700 & 70 SERIES (Model 70 Shown) IMPORTANT SAFETY INSTRUCTIONS READ ALL INSTRUCTIONS BEFORE USING YOUR UPRIGHT VACUUM. Always connect to a polarized outlet (one slot
OWNER S MANUAL. FLAT PANEL FIREPLACE HEATER Model Number: Serena (EF202A) WARNING CAUTION
 WARNING CAUTION") FLAT PANEL FIREPLACE HEATER Model Number: Serena (EF202A) OWNER S MANUAL WARNING Read and understand this entire owner s manual, including all safety information, before plugging in or using this product.
FLAT PANEL FIREPLACE HEATER Model Number: Serena (EF202A) OWNER S MANUAL WARNING Read and understand this entire owner s manual, including all safety information, before plugging in or using this product.
NIAGARA. Niagara ShowerSpa Model #1048B-BN Owner s Manual
 NIAGARA Niagara ShowerSpa Model #1048B-BN Owner s Manual Niagara ShowerSpa Model 1048B-BN Please Read The Following Instructions COMPLETELY Before Beginning! Our goal is to ensure your installation goes
Instruction Manual. Professional. Electric Kettle. Questions or concerns about your electric kettle? Before returning to the store...
 AWK-299SD Instruction Manual Electric Kettle Professional Questions or concerns about your electric kettle? Before returning to the store... Aroma s customer service experts are happy to help. Call us
WALL MOUNTED ELECTRIC FIREPLACE HEATER. Model # : Onyx Ivory Mirror OWNER S MANUAL. AC V 60Hz 1500W
 WALL MOUNTED ELECTRIC FIREPLACE HEATER Model # : 80001 Onyx 80002 Ivory 80008 - Mirror OWNER S MANUAL AC 110-120V 60Hz 1500W WARNING Read and understand this entire owner s manual, including all safety
TO Slice Toaster Oven and Broiler. Owner s Guide READ AND SAVE THESE INSTRUCTIONS
 TO411 4-Slice Toaster Oven and Broiler Owner s Guide READ AND SAVE THESE INSTRUCTIONS IMPORTANT SAFEGUARDS When using electrical appliances, basic safety precautions should always be followed including
Installation & Operating Guide
 HOT WATER DISPENSER Installation & Operating Guide Read all instructions thoroughly. Keep this guide for future reference. Proof of purchase is required for Warranty. Staple receipt or proof of purchase
INTELLICRISP WAFFLE MAKER INSTRUCTION MANUAL MODEL: CKCLWF1. Calphalon_WaffleMaker_IB_SPEC_DarkGrey_CKCLWF1_19EM1.indd 1 1/25/19 09:30
 INTELLICRISP WAFFLE MAKER INSTRUCTION MANUAL MODEL: CKCLWF1 1 Calphalon_WaffleMaker_IB_SPEC_DarkGrey_CKCLWF1_19EM1.indd 1 1/25/19 09:30 TABLE OF CONTENTS IMPORTANT SAFEGUARDS 3 POLARIZED PLUG 4 PRODUCT
INSTRUCTION BOOKLET CWO-50. Cordless Wine Opener & Vacuum Sealer
 INSTRUCTION BOOKLET Cordless Wine Opener & Vacuum Sealer CWO-50 For your safety and continued enjoyment of this product, always read the Instruction Book carefully before using. CONTENTS IMPORTANT SAFEGUARDS..............2
MC510 Series OWNER S GUIDE. 2-in-1 Slow Cooker. ninjakitchen.com
 MC510 Series OWNER S GUIDE 2-in-1 Slow Cooker 1-877-646-5288 IMPORTANT SAFEGUARDS For Household Use Only WHEN USING ELECTRICAL APPLIANCES, BASIC SAFETY PRECAUTIONS SHOULD ALWAYS BE FOLLOWED, INCLUDING
RBT-875PC. Cuisinart Countdown 4-Slice Toaster INSTRUCTION BOOKLET
 INSTRUCTION BOOKLET Cuisinart Countdown 4-Slice Toaster For your safety and continued enjoyment of this product, always read the instruction book carefully before using. RBT-875PC IMPORTANT SAFEGUARDS
User s Manual and Operating Instructions
 User s Manual and Operating Instructions Model Numbers: CL-30P-DDF, CL-20F-DDF, CL-24O-DDF, CL-30-DDF READ AND SAVE THESE INSTRUCTIONS IMPORTANT: Read and understand all of the directions in this manual
READ AND SAVE THESE INSTRUCTIONS. Vacuum Food Storage System Reference Guide. Space Saving Design.
 Vacuum Food Sealer Space Saving Design Vacuum Food Storage System Reference Guide Preserves the taste and nutritional value of stored foods! www.sealameal.com READ AND SAVE THESE INSTRUCTIONS FSSMSL0160-033
ESS-2200 Double Station Scrub Sink. with Two Sensor Operated Gooseneck Spout. ESS-3200 Deluxe Double Station Scrub Sink
 ESS-2000/3000 Series I.I. Rev. 2 (02/03) Code No. 016162 INSTALLATION INSTRUCTIONS SINGLE, DOUBLE AND TRIPLE STATION SENSOR OPERATED SYSTEMS ESS-2000 SERIES ESS-2100 Single Station Scrub Sink with One
Electric Griddle READ AND SAVE THESE INSTRUCTIONS. Owner s Guide GR250
 Electric Griddle GR250 Owner s Guide READ AND SAVE THESE INSTRUCTIONS IMPORTANT SAFEGUARDS When using electrical appliances, basic safety precautions should always be followed, including the following:
USER MANUAL. PEDESTAL FAN (16 Inch)
") USER MANUAL PEDESTAL FAN (16 Inch) ACFP1016 Hydrofarm.com TABLE OF CONTENTS OVERVIEW 2 PARTS LIST - (WHAT S IN THE BOX) 3 IMPORTANT SAFEGUARDS 4 ASSEMBLY INSTRUCTIONS 4 ASSEMBLY 4 ELECTRIC SCHEMATIC DIAGRAM
USER MANUAL PEDESTAL FAN (16 Inch) ACFP1016 Hydrofarm.com TABLE OF CONTENTS OVERVIEW 2 PARTS LIST - (WHAT S IN THE BOX) 3 IMPORTANT SAFEGUARDS 4 ASSEMBLY INSTRUCTIONS 4 ASSEMBLY 4 ELECTRIC SCHEMATIC DIAGRAM
READ ALL INSTRUCTIONS BEFORE USE.
 INSTRUCTION BOOKLET READ ALL INSTRUCTIONS BEFORE USE. 6-SPEED HAND MIXER RJ17 Series For your safety and continued enjoyment of this product, 1 always read the instruction manual before using. 8IMPORTANT
SEARious Slow Cooker
 SEARious Slow Cooker MC501 MC501C OWNER S GUIDE HELP LINE 1 877 646-5288 IMPORTANT SAFETY INSTRUCTIONS For Household Use Only WHEN USING ELECTRICAL APPLIANCES, BASIC SAFETY PRECAUTIONS SHOULD ALWAYS BE
Instant Hot Water Dispenser Owner s Manual
 Model Hot1 Instant Hot Water Dispenser Owner s Manual Installation, Care & Use Instalacion, cuidado & uso Installation, soin et utilisation WHAT YOU SHOULD KNOW BEFORE YOU BEGIN For your satisfaction and
INSTALLATION INSTRUCTIONS
 OVER THE RANGE CONVECTION MICROWAVE OVEN INSTALLATION INSTRUCTIONS Please read all instructions thoroughly before installing the Over the Range Microwave Oven/Hood System. Two people are recommended to
CONVERTIBLE HAND/STAND MIXER
 OWNER S MANUAL Model EP585H 127V., 60Hz., 325 Watts CONVERTIBLE HAND/STAND MIXER EURO-PRO Operating LLC Boston, MA, 02465 1 (800) 798-7398 www.euro-pro.com COPYRIGHT EURO-PRO OPERATING LLC 2008 IMPORTANT
Instruction Manual. Electric Kettle. Questions or concerns about your electric kettle? Before returning to the store...
 Instruction Manual Electric Kettle AWK-1000 Questions or concerns about your electric kettle? Before returning to the store... Aroma s customer service experts are happy to help. Call us toll-free at 1-800-276-6286.
 BL454Q Series www.ninjakitchen.com 1 877 646-5288 IMPORTANT SAFETY INSTRUCTIONS For Household Use Only WHEN USING ELECTRICAL APPLIANCES, BASIC SAFETY PRECAUTIONS SHOULD ALWAYS BE FOLLOWED, INCLUDING THE
Installation Instructions
 GE Consumer & Industrial Appliances Installation Instructions Junction Box Cover Within this user bag, you will find a junction box cover and a #10 hex head screw used to attach the junction box cover
V. (Versus ) Bare Floor Vacuum
 Bare Floor Vacuum") V. (Versus ) Bare Floor Vacuum USER S GUIDE 76T8 SERIES 3 Safety Instructions 4 Product View 5 Assembly 6 Operation 7-8 Maintenance and Care 9 Troubleshooting 10 Consumer Services 11 Replacement Parts
V. (Versus ) Bare Floor Vacuum USER S GUIDE 76T8 SERIES 3 Safety Instructions 4 Product View 5 Assembly 6 Operation 7-8 Maintenance and Care 9 Troubleshooting 10 Consumer Services 11 Replacement Parts
Garment Steamer Model SC620
 OWNER S MANUAL Garment Steamer Model SC620 For information or assistance: EURO-PRO Corporation 178 West Service Rd. Champlain, NY 12919 1-800-798-7398 www.euro-pro.com IMPORTANT SAFETY INSTRUCTIONS When
Over-the-Range Microwave Oven Installation Instructions MVH130* MVH230* MVH330*
 Over-the-Range Microwave Oven Installation Instructions MVH130* MVH230* MVH330* * Additional alphanumeric characters representing other models in the series may follow each model number. Keep these instructions
K-SELECT Use & Care Guide. Get the most from your new Keurig brewer
 K-SELECT Use & Care Guide Get the most from your new Keurig brewer Small Cup MAX. Before You Brew 1 2 Plug & Place Rinse & Fill Remove packing tape from brewer and plug into a grounded outlet. Place a
Instructions for set-up, use and cleaning
 Nice job reading the instruction manual cover-to-cover! Here are a few extra tips to keep you & your Formula Pro Advanced happy. Push the drip tray firmly against the base to make sure it fits securely.
FS-75 Series. Kitchen Pro Food Slicer INSTRUCTION BOOKLET
 INSTRUCTION BOOKLET Kitchen Pro Food Slicer FS-75 Series For your safety and continued enjoyment of this product, always read the Instruction Book carefully before using. IMPORTANT SAFEGUARDS When using
Hot Dog Roller Grills
 Part No. 87630 Hot Dog Roller Grills Model No. 8022, 8022PE, 8023, 8023SL, 8023PE, 8024, 8024PE, 8024SL, 8025, 8025SL Cincinnati, OH 45241-4807 USA SAFETY PRECAUTIONS DANGER Machine must be properly grounded