Instruction Book for HD Punch Machines
|
|
|
- Karen Blake
- 6 years ago
- Views:
Transcription


1 Instruction Book for HD Punch Machines
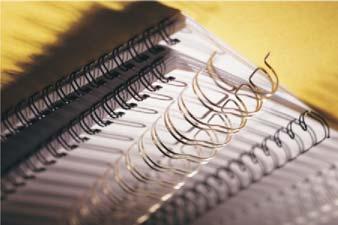
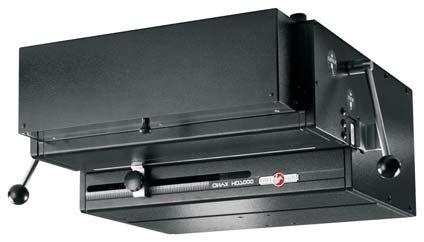
2 HD7700, HD7000 & HD7500H Setup & Operator Manual Issue 5 February 2012 Performance Design LLC. These electric punches have been designed to punch most any job that may pass through your bindery or office. No matter what type of binding you need to carry out, these punches can handle the job. Maximum punching length for the HD7700, HD7000 is 14 (356mm) and the HD7500H is 24 (610mm). The HD7700, HD7000 and the HD7500H utilize quick-change die handles to secure the die assembly. HD7700 HD7000 HD7500H 2
3 HD6500 Contents S/N: Punch (1) Chip Drawer (1) Power Cord (1) Foot Pedal (1) Oil (1) Brush (1) Instruction Book (1) Reversing Tool (1) Die Bolt Kit (1) a) 5/16 allen wrench (1) b) 3/8-16 X 1 Socket Head Screw (2) Inspected by: HD7000/HD7100 Contents S/N: Punch (1) Chip Drawer (1) Power Cord (1) Foot Pedal (1) Oil (1) Brush (1) Instruction Book (1) Reversing Tool (1) Inspected by: HD7700(H)/HD7650/HD7000 Plus/HD6700 Contents S/N: Punch (1) Chip Drawer (1) Power Cord (1) Foot Pedal (1) Oil (1) Brush (1) Instruction Book (1) Palm Switch (1) Tee Handle Reversing Tool (1) (Palm Switch not included with Die Bolt Kit (1) (HD6700 Only) HD7700H, HD7650, HD7000 Plus a) 5/16 allen wrench (1) or HD6700) b) 3/8-16 X 1 Socket Head Screw (2) Inspected by: HD7500H Contents S/N: Punch (1) Chip Drawer (1) Power Cord (1) Foot Pedal (1) Oil (1) Brush (1) Instruction Book (1) Reversing Tool (2) Inspected by:
4
5 Table of Contents Topic: Safety Alert Symbols Safe operating guidelines Proper machine placement Providing electric power Die installation / Maintenance Setting the paper stop Punching paper Removing paper waste Paper jam Troubleshooting Page Number:


6 Safety Alert Symbols Make sure you read this section very carefully! Learn to recognize these Safety Alert Symbols. The HD7700/H, HD7650, HD7000, HD6500, HD7100, HD7000 Plus, HD6700 & HD7500/H have been designed to provide a high level of protection to an operator. Follow the guidelines below while installing, operating and maintaining your machine.! CAUTION! DANGER CAUTION: Indicates a hazardous situation which, if not avoided, could result in minor or moderate injury. It may also be used without the safety alert symbol as an alternative to "Notice". WARNING: Indicates a hazardous situation which, if not avoided, could result in death or serious injury. DANGER: Indicates a hazardous situation which, if not avoided, will result in death or serious injury. This signal word is to be limited to the most extreme situations. Trip Hazard Electric Shock Cutting Hazard Two Person Lift Crushing Hazard Hint or Suggestion Safe Operating Guidelines Always keep this instruction manual with the machine for reference to safe operating guidelines and correct operation of the machine. The HD7700/H, HD7650, HD7000, HD7000 Plus, HD6500, HD7100, HD6700 & HD7500/H need to be plugged into a wall outlet that provides a 15-amp, 120 volt service (16-amp, 220 volt for European installations) and is protected by a fuse or circuit breaker at the main electrical panel. Always replace any fuse with the same type and amperage fuse as indicated on the machine. Hazardous voltage inside. Disconnect power before servicing. If machine cycles on its own, turn off power switch, unplug machine from the wall outlet and call your dealer immediately for service. 4


7 Turn power switch off before maintaining or changing die assembly. Use of appropriate hand protection should be utilized to avoid injury from handling of materials. Crush hazard. Keep hands away from moving parts. Lockout and disconnect power before servicing.! CAUTION Cutting Hazard Injury to fingers and hands. Use hand protection Follow all recommended workplace procedures for repetitive activities. Placing your machine in the proper location: Before lifting machine, turn power off and remove the power cord from the wall outlet. The machine is very heavy! Never attempt to lift the machine by yourself. Two people will be needed to lift the machine.! CAUTION Lifting Hazard Single person lift could result in injury. Two person lift required. Place the machine on a hard level surface, place the foot pedal on the floor in front of the machine. Ensure the placement of machine allows for ergonomic work flow (separate locations for un-punched books and a punched books). Connect the foot-pedal cord into the foot-pedal receptacle on the back of the machine, do not attempt to connect foot-pedal into anything other than the foot-pedal receptacle. HD7700 comes with a palm-switch that can be used instead of the foot-pedal. Decide which device you want to use to activate the machine and connect that device into the foot-pedal receptacle on the back of the machine. Optional paper activated switches are available for these punches. These switches replace the footpedal or palm switch and plug into the foot-pedal receptacle on the back of the machine.! CAUTION Tripping Hazard Bodily injury could occur from fall. Route cables away from walkways 5


8 Providing power to the machine: Power cord shall be certified for the country where the machine will be installed. Plug one end of the power cord into the power cord receptacle on the back of the machine. The other end goes into the wall outlet.! DANGER Hazardous voltage. Use only approved power cord assemblies. Die Installation: HD7700/H, HD7650, HD7100, HD7000, HD7000 Plus & HD7500/H: Diagram 1. Make sure the Crush hazard. Keep hands away machine is turned off before installing the from moving parts. Lockout and disconnect die. power before servicing. Make sure there is no paper dust or paper chips in the machine die slot before installing the die. Install the die by sliding it into the opening located on the right hand side of the machine. Make sure the punch pin retainer slides into the slot on the back side of the opening. Rotate both quick-change die handles to the lock position. The machine will not operate unless the handles are in the locked position. Diagram 1. (Image of HD7000) 6

9 HD6500 and HD6700: Diagram 2. Make sure the machine is turned off before installing the die. Make sure there is no paper dust or paper chips in the machine die slot before installing the die. Remove the chip drawer before installing the die assembly. Crush hazard. Keep hands away from moving parts. Lockout and disconnect power before servicing. Install the die by sliding it into the opening on the right hand side of the machine. Make sure the punch pin retainer slides into the slot on the back side of the opening. Using two 5/16-18 socket head cap screws provided with the machine along with the hex key, secure the die assembly in the punch by threading the screws through the holes in the punch and turning them clockwise until tight. Replace the chip drawer. Diagram 2. (Image of HD6500) Comb Die Backspace (Margin) Adjustment The comb die assemblies for the HD7700/H, HD7650, HD7100, HD6500, HD7000, HD7000 Plus, HD6700 and HD7500/H have a four position adjustable backspace. The positions are changed by pushing the adjustor bar to the left for deeper settings (commonly used for average to thicker sized books) and pulling the adjustor bar to the right for shallower settings (commonly used for thinner sized books). 7


10 Removing Punch Pins Turn machine power off and remove die assembly from the machine. On the opposite side of the die assembly from the handle, push down on the pin retainer. Pull the pin capture away from the pin retainer to expose the punch pins. Remove the desired punch pin or pins. Replace the pin capture by pressing down on the pin retainer and placing the pin capture back into place. Install die assembly into machine as described earlier and turn machine power back on. Die Maintenance Die maintenance should be performed with the die removed from the machine. To perform the die maintenance, remove the die assembly from the machine (see die installation section). Apply enough oil to lightly coat each pin. Remove any excess oil with a disposable cloth. After oiling, always punch some scrap paper to remove excess oil. Saturate a small section of a cloth with oil and using that portion of the cloth, wipe the punch pins to apply a light coating of oil. 8


11 Setting the paper stop: HD7500, HD7650, HD7100, HD7000, HD7000 Plus, HD6500 and HD Locate the paper stop on the front cover of the machine. Loosen the knob counterclockwise, so that the guide can be adjusted to the left or the right. Move the paper stop until the desired position is reached and tighten the knob clockwise until tight to lock the paper stop in place. Repeat this procedure until the punch pattern is centered on the paper. Paper stop The HD7650, HD7100, HD7000, HD7000 Plus, HD6700 and HD6500 punch machines allow for viewing of common sized paper position markings on the die assemblies. Aligning the paper stop with these marks will result in the punch pattern being centered on the paper and need only small adjustments if at all. HD7700/H - The HD7700/H utilizes a lift and move feature that combines with a fine adjustment knob located on the left side of the machine. To adjust the paper stop, lift up on the small knob of the paper stop and slide to the left or the right. Move the paper stop until the desired position is reached and let the paper stop back down. Minor adjustments of the paper stop can now be made by turning the knob on the left side of the HD7700/H to move the paper stop left or right until the punch pattern is centered on the paper. The HD7700/H has markings for common sized paper and punch patterns. Lift and move the paper stop to the paper size you are punching and align the pointer of the paper stop with the pattern you are punching in the paper. Set the paper stop down and utilize the knob on the left side to finalize the setting. The paper stop will now be correctly positioned to center the punch pattern on the paper. 9
12 Punching Paper: Select an appropriate number of sheets to be punched and slide the sheets down vertically (Horizontally for the HD7700H and HD7500H) into the opening of the die assembly. When the paper is fully inserted, slide it to the left so it comes in contact with the paper stop. Make sure all the edges of the sheets are flush by tapping the top and the right hand sides of the sheets before activating the punch. Note: Acetate and vinyl covers will require reducing the number of sheets being punched. It is recommended that only 2-3 sheets of 6 mil acetate be punched during any single cycle of the machine. Attempts to punch more than the recommended amount may lead to an incomplete punch or stall of the machine. Repeated attempts to punch more than the recommended amount may also lead to machine damage. If a paper activated switch is being used, tap the sheets flush before sliding the paper to the paper stop. Removing Paper Waste: The paper waste drawer is located conveniently on the front of the punch. The paper waste drawer is removed by lifting up on the front and pulling out away from the machine. This drawer should be checked frequently while punching and emptied as necessary. Paper Jam: The HD7700/H, HD7650, HD7100, HD7000, HD7000 Plus, HD6500, HD6700 and HD7500/H punches use a circuit board for controlling the punch cycle, this circuit board also has the ability to automatically reverse the punch pins to their starting position in the event of a paper jam. This condition could happen if too much material has been attempted to be punched at one time. If this condition occurs, the machine will attempt to reset itself back to its home position. If the punch does not reset itself back to its home position, the punch can be reversed manually. Turn the machine power switch off and remove some or all of the material in the punch. Crush hazard. Keep hands away from moving parts. Lockout and disconnect power before servicing. It is easier to remove one or two sheets at a time from the backside of the material in the punch, top side for the HD7700H and HD7500H. 10

13 HD7000, HD7100 and HD6500 Manual Reverse utilizes a reversing tool supplied with the punch. Turn the machine power switch off and unplug the power cord from the wall outlet. Remove the paper waste drawer and locate the silver plug in the front panel of the machine. Remove the silver plug by prying it out gently with a small flat tool. Insert the end of the reversing tool into the open hole and engage the tool with the end of the motor shaft. Rotate the tool clockwise 5-10 revolutions, until the punch pins have been retracted back to their starting position. Remove all of the material from the punch. It is easier to remove one or two sheets at a time from the backside of the material in the punch. Remove the reversing tool from the punch and replace the silver plug. Replace the paper waste drawer, plug the power cord back in to the wall outlet and turn the power switch on. Test cycle the machine by punching with no material in the punch, the machine will reset itself back to its home position. Reduce the amount of material being punched and continue working. HD7700/H, HD7650, HD7000 Plus and HD6700 Manual Reverse utilizes a reversing tool supplied with the punch. Turn the machine power switch off and unplug the power cord from the wall outlet. Remove the silver plug from the left side panel of the machine. Remove the silver plug by prying it out gently with a small flat tool. Insert the end of the reversing tool into the open hole and engage the tool with the end of the motor shaft. Rotate the tool counter-clockwise 5-10 revolutions, until the punch pins have been retracted back to the starting position. Remove all of the material from the punch. It is easier to remove one or two sheets at a time from the backside of the material in the punch. Remove the reversing tool from the punch and replace the silver plug. Plug the power cord into the wall outlet and turn the power switch on. Test cycle the machine by punching with no material in the punch, the machine will reset itself back to its home position. Reduce the amount of material being punched and continue working. 11 Crush hazard. Keep hands away from moving parts. Lockout and disconnect power before servicing. Crush hazard. Keep hands away from moving parts. Lockout and disconnect power before servicing.
14 HD7500/H Manual Reverse utilizes two reversing tools supplied with the punch. Turn the machine power switch off and unplug the power cord from the wall outlet. Crush hazard. Keep hands away from moving parts. Lockout and disconnect power before servicing. Remove the paper waste drawer from the machine. - HD7500H - Remove the power cord and foot-pedal from the back of the machine. Rotate the machine onto its backside. This machine is heavy and requires two people to move. Remove the silver plugs from the panel of the machine by prying them out gently with a small flat tool. Insert the ends of both reversing tools into the open holes and engage the tools with the ends of the motor shafts. Rotate the tools at the same time, clockwise 5-10 revolutions, until the punch pins have been retracted back to the starting position. Remove all of the material from the punch. It is easier to remove one or two sheets at a time from the topside of the material in the punch. Remove the reversing tools from the punch and replace the silver plugs. - HD7500H - Rotate the machine back onto its feet and plug the power cord and foot-pedal into the back of the machine. Plug the power cord into the wall outlet and turn the power switch on. Test cycle the machine by punching with no material in the punch, the machine will reset itself back to its home position. Reduce the amount of material being punched and continue working. 12
15 Only qualified personnel should attempt to work on this equipment. There are no user serviceable parts inside of the machine.! DANGER Hazardous voltage inside. Disconnect power before servicing. Your machine has been designed for years of trouble free operation. The following is a troubleshooting guide to help you through some of the problems that may be encountered. Troubleshooting Symptom Possible Cause Action Machine does not cycle Die does not go into machine 1) Machine is off 2) Machine is not plugged in 3) Foot-pedal is not plugged into machine 4) Die lock handle is not locked 5) Reversing tool is in machine 1) Pin retainer interference 2) Punch is stopped in mid cycle 3) Die lock handle is in lock position 1) Check power switch 2) Check both ends of power cord 3) Make sure foot-pedal cable is attached to machine. 4) Lock the die lock handle 5) Remove reversing tool and store properly 1) Make sure pin retainer enters slot in pusher-bar. 2) Restart machine by turning power off and back on 3) Move handle to unlock position The HD7700/H, HD7650, HD7100, HD7000, HD7000 Plus, HD6500, HD6700 and HD7500/H have been tested with a duty cycle of 25 cycles per minute with a 1 minute rest period after 2 minutes of run time. Operating outside of these limits could result in machine damage.! NOTICE The HD7000, HD7100 and HD6500 have earned the UL Listing Mark. E
16 ! IMPORTANT Be sure to fill out and return your Product Warranty Registration Card or Register online at: Part Number Rev. 5. Feb 2012
Installation. Built-in Full Height Wine Cellar VCWB301
 Installation Built-in Full Height Wine Cellar VCWB301 Table of Contents Warnings & Important Information _ 3 Dimensions _ 5 Specifications _ 6 Cutout Dimensions 7 Cabinet Information _ 8 Cabinet Information
Viking Installation Guide
 Viking Installation Guide Viking Range, LLC 111 Front Street Greenwood, Mississippi 38930 USA (662) 455-1200 For product information, call 1-888-(845-4641) or visit the Viking Web site at vikingrange.com
INSTRUCTION MANUAL FOR DUTCHESS MODEL 260 BAGEL & BUN SLICER
 INSTRUCTION MANUAL FOR DUTCHESS MODEL 260 BAGEL & BUN SLICER Table of Contents Safety Information I thru VII Uncrating Instructions 1 Introduction 2 Adjustment Instructions 3 Operating Instructions, Cleaning,
I N ST R UC T I ON. MODEL HAB500 AroMatic TM BREAD SLICERS MODEL FORM (4-99) AROMATIC BREAD SLICER 701 S. RIDGE AVENUE TROY, OHIO
 AROMATIC BREAD SLICER 701 S. RIDGE AVENUE TROY, OHIO") I N ST R UC AROMATIC BREAD SLICER T I ON S MODEL HAB500 AroMatic TM BREAD SLICERS MODEL HAB500 ML-104845 701 S. RIDGE AVENUE TROY, OHIO 45374-0001 FORM 34198 (4-99) TABLE OF CONTENTS GENERAL..........................................................
I N ST R UC AROMATIC BREAD SLICER T I ON S MODEL HAB500 AroMatic TM BREAD SLICERS MODEL HAB500 ML-104845 701 S. RIDGE AVENUE TROY, OHIO 45374-0001 FORM 34198 (4-99) TABLE OF CONTENTS GENERAL..........................................................
HEDMAN DI-50. Endorser Instructions. Hedman DI-50 Operators Guide
 HEDMAN DI-50 Endorser Instructions Hedman DI-50 Operators Guide 25-0132-20 TABLE OF CONTENTS 1. INTRODUCTION...1 1.1 DI-50 Description...1 1.2 Items Included...1 1.3 Safety Terms...2 1.4 Safety Precautions...3
MERCHANT POPCORN MACHINE SERVICE MANUAL
 3243 North California Avenue, Chicago, IL 60618 MERCHANT POPCORN MACHINE SERVICE MANUAL 120 Volt, Single Phase, 60 Hz 230 Volt, Single Phase, 50 Hz READ and UNDERSTAND this servicing, and safety instructions
FD Heavy Duty Feeder for FD 280 Tabbing System
 FD 280-10 Heavy Duty Feeder for FD 280 Tabbing System Operator Manual 8/2011 First Edition TABLE OF CONTENTS 1. INTRODUCTION... 1 1.1 Feeder Description... 1 1.2 Items Included... 1 1.3 Operating Manual
Undercounter Refrigeration
 INSTALLATION GUIDE Undercounter Refrigeration Contents Undercounter Refrigeration..................... 3 Undercounter Specifications.................... 4 Site Preparation..............................
INSTALLATION INSTRUCTIONS
 INSTALLATION INSTRUCTIONS BUILT-IN FULL HEIGHT WINE CELLAR (VCWB300 PROFESSIONAL MODEL) Retain for Future Reference VIKING RANGE CORPORATION 111 Front Street Greenwood, Mississippi 38930 USA (662) 455-1200
Installation Instructions
 Instructions For Fully Integrated NoFrost Combined Refrigerator-Freezers HC 1540/1541 7084 433-00 Important Please read and follow these instructions These instructions contain Danger, Warning and Caution
Operation and Maintenance Manual BLIZZARD50 CS6-50-VD 120V/60HZ
 Operation and Maintenance Manual BLIZZARD50 CS6-50-VD 120V/60HZ CS6-50-VD Operation & Maintenance Manual Table of Contents: 1.0 Introduction 1 2.0 Unpacking your COOL- SPACE 1 3.0 Set-up of COOL-SPACE
SS1095 Ice Maker.
 Installation Guide SS1095 Ice Maker www.u-lineservice.com Phone (414) 354-0300 FAX (414) 354-7905 Service & Parts Tech Lines Phone (800) 779-2547 FAX (414) 354-5696 OnlineService@U-Line.com 2008 U-Line
Operation and Maintenance Manual GLACIER TALL BASE CS5-16-VD-TB CS5-18-VD-TB2 120V/60HZ
 Operation and Maintenance Manual GLACIER TALL BASE CS5-16-VD-TB CS5-18-VD-TB2 120V/60HZ Operation & Maintenance Manual Table of Contents: 1.0 Introduction 1 2.0 Unpacking your COOL- SPACE 1 3.0 Set-up
Operation and Maintenance Manual 120V/60HZ
 Operation and Maintenance Manual 120V/60HZ GLACIER CS5-16-VD CS5-16-VD-TB CS5-18-VD CS5-18-VD-TB AVALANCHE CS6-36-1D CS6-36-VD BLIZZARD CS6-50-VD Operation & Maintenance Manual 60HZ Models Table of Contents:
DIGITAL DIPLOMAT 20 and 32 oz POPCORN MACHINE SERVICE MANUAL
 3243 North California Avenue, Chicago, IL 60618 DIGITAL DIPLOMAT 20 and 32 oz POPCORN MACHINE SERVICE MANUAL Included in this manual: *One Pop Option *Salt/Sugar Option 120/208-240 Volt, Single and Three
Mini-Rooter Operating Instructions
 Mini-Rooter Operating Instructions For 1-1/4 through 4 lines (30mm 100mm) Your Mini-Rooter is designed to give you years of trouble-free, profitable service. However, no machine is better than its operator.
INSTANT HOT WATER DISPENSER
 INSTANT HOT WATER DISPENSER Tank Installation Materials required (not provided) 2 mounting bracket screws (and 2 plastic anchors if attaching to drywall) Shut-Off valve and T fitting Components When you
Retrofit Instructions CLEARVIEW DAY COVER CAUTION: Please read this manual completely before attempting to install, operate or service this equipment
 Retrofit Instructions CLEARVIEW DAY COVER CAUTION: Please read this manual completely before attempting to install, operate or service this equipment This manual is Copyright 2019 Duke Manufacturing Co.
Integrated Refrigeration
 INSTALLATION GUIDE Integrated Refrigeration Contents Integrated Refrigeration....................... 3 Model Specifications.......................... 4 Site Preparation.............................. 6
RINGMASTER 5-1/2 & 7 COTTON CANDY MACHINE
 3243 North California Avenue, Chicago, IL 60618 RINGMASTER 5-1/2 & 7 COTTON CANDY MACHINE 120 Volt, Single Phase, 50/60 Cycle 230 Volt, Single Phase, 50 Cycle READ and UNDERSTAND these operating, servicing,
LC Series - Light Commercial Pump Station Installation and Operation Manual
 LC Series - Light Commercial Pump Station Installation and Operation Manual Please keep this manual with the pump station Content Rain Bird LC Series Overview... Safety Instruction... Operation... 3 Pump
Installation and Operation Manual CLEARVIEW DAY COVER CAUTION: To view a video scan the QR code above
 Installation and Operation Manual CLEARVIEW DAY COVER To view a video scan the QR code above CAUTION: Please read this manual completely before attempting to install, operate or service this equipment
TA-12. Tabbing System USER'S GUIDE
 TA-12 Tabbing System USER'S GUIDE SAFETY PRECAUTIONS THIS EQUIPMENT PRESENTS NO PROBLEM WHEN USED PROPERLY. HOWEVER, CERTAIN SAFETY RULES SHOULD BE OBSERVED WHEN OPERATING THE TA12 TABBER. BEFORE USING
TB-390 Conveyor Stacker
 TB-390 Conveyor Stacker OPERATIONS MANUAL Revised: 7-30-14 RENA Systems Inc. would like to Thank You for investing in our quality built products. Please record the following information for future reference:
CENTERLINE 2100 Motor Control Center (MCC) Doors and Units with Vertical Operating Handles
 Doors and Units with Vertical Operating Handles") Installation Instructions Original Instructions CENTERLINE 2100 Motor Control Center (MCC) Doors and Units with Vertical Operating Handles Bulletin Number 2100 Topic Page About This Publication 1 Important
Installation Instructions Original Instructions CENTERLINE 2100 Motor Control Center (MCC) Doors and Units with Vertical Operating Handles Bulletin Number 2100 Topic Page About This Publication 1 Important
F Rev. E (August 2008)
") FP350 FOOD PROCESSOR MODEL FP350 ML-104586 701 S. RIDGE AVENUE TROY, OHIO 45374-0001 937 332-3000 www.hobartcorp.com F-19353 Rev. E (August 2008) TABLE OF CONTENTS GENERAL...3 INSTALLATION...3 Unpacking...3
FP350 FOOD PROCESSOR MODEL FP350 ML-104586 701 S. RIDGE AVENUE TROY, OHIO 45374-0001 937 332-3000 www.hobartcorp.com F-19353 Rev. E (August 2008) TABLE OF CONTENTS GENERAL...3 INSTALLATION...3 Unpacking...3
Table of Contents. Specifications... page 2. Installation... page 3. Customizing... page 4. Reversing door swing... page 5
 Introduction The Scotsman Compact Refrigerator is a unique product, capable of being built into a cabinet because of its front vented, forced-air cooling system. It s also designed to be a companion to
SuperKlean Washdown Products
 February 2012 DURAMIX 8000 INSTALLATION AND MAINTENANCE INSTRUCTIONS **DO NOT THROW AWAY AFTER INSTALLATION** **SAVE AND DISPLAY PROMINENTLY WHERE THIS EQUIPMENT IS USED** WARNING HIGH PRESSURE AND HOT
ELECTRIC DRILL INSTRUCTIONS. Item #21285
 ELECTRIC DRILL INSTRUCTIONS Item #21285 The EASTWOOD ELECTRIC DRILL is great for use on virtually all metals including steel, aluminum, brass and more. The powerful 6.3 Amp motor and 1/2 capacity chuck
Air Paper Jogger AJ-700 Operation Manual. Keep this manual at hand where it can be referenced at any time.
 Air Paper Jogger AJ-700 Operation Manual Keep this manual at hand where it can be referenced at any time. June 25, 2004 Introduction Thank you for purchasing this product. Please carefully read this Operation
INSTALLATION INSTRUCTIONS
 INSTALLATION INSTRUCTIONS BUILT-IN FULL HEIGHT WINE CELLAR Retain for Future Reference VIKING RANGE CORPORATION 111 Front Street Greenwood, Mississippi 38930 USA (662) 455-1200 IMPORTANT - PLEASE READ
STEAM MOP INSTRUCTION MANUAL CATALOG NUMBER BDH1765SM PLEASE READ BEFORE RETURNING THIS PRODUCT FOR ANY REASON. SAVE THIS MANUAL FOR FUTURE REFERENCE.
 STEAM MOP INSTRUCTION MANUAL CATALOG NUMBER BDH1765SM Thank you for choosing BLACK+DECKER! PLEASE READ BEFORE RETURNING THIS PRODUCT FOR ANY REASON. SAVE THIS MANUAL FOR FUTURE REFERENCE. SAFETY GUIDELINES
INSTALLATION INSTRUCTIONS INSTRUCTIONS D INSTALLATION INSTRUCCIONES DE INSTALACIÓN
 EN FRONT LOAD DRYER FR SÉCHEUSE Á CHARGEMENT FRONTAL ES SECADORA DE CARGA FRONTAL INSTALLATION INSTRUCTIONS INSTRUCTIONS D INSTALLATION INSTRUCCIONES DE INSTALACIÓN 2 IMPORTANT SAFETY INSTRUCTIONS For
DISHWASHER INSTALLATION GUIDE SPECIFICATIONS, INSTALLATION, AND MORE
 DISHWASHER INSTALLATION GUIDE SPECIFICATIONS, INSTALLATION, AND MORE COVE DISHWASHER Contents 3 Cove Dishwasher 4 Specifications 7 Door Panel 9 Installation 15 Troubleshooting Features and specifications
MEGRIND55. Electric Meat Grinder Assembly & Operating Instructions
 MEGRIND55 Electric Meat Grinder Assembly & Operating Instructions READ ALL INSTRUCTIONS AND WARNINGS BEFORE USING THIS PRODUCT. This manual provides important information on proper operation & maintenance.
DIGITAL DIPLOMAT 48 and 60 oz. POPCORN MACHINE SERVICE MANUAL
 3243 North California Avenue, Chicago, IL 60618 DIGITAL DIPLOMAT 48 and 60 oz. POPCORN MACHINE SERVICE MANUAL 120/208; 120/ 240 Volt, Single and Three Phase, 60 Hz 230 Volt, Single Phase and Three Phase,
Installation and Operation Manual For Hunter Ceiling Fans
 Installation and Operation Manual For Hunter Ceiling Fans 1 2 CONGRATULATIONS! Your new Hunter ceiling fan is an addition to your home or office that will provide comfort and performance for many years.
OPERATING INSTRUCTIONS MIGHTYLAM 2700 ROLL LAMINATOR
 OPERATING INSTRUCTIONS MIGHTYLAM 2700 ROLL LAMINATOR TABLE OF CONTENTS Safety Messages and Electrical Safeguards...3-4 Introduction... Laminator Features...5 Specifications...5 Intial Set-up...6 Operating
ASTRO ENVELOPE FEEDER AMC FOR HEIDELBERG PRINTMASTER INSTALLATION AND OPERATING INSTRUCTIONS
 ASTRO ENVELOPE FEEDER AMC-2000-17 FOR HEIDELBERG PRINTMASTER INSTALLATION AND OPERATING INSTRUCTIONS INTRODUCTION Thank you for purchasing the Astro Envelope Feeder. It is fast, efficient, reliable, and
Downdraft Ventilation
 INSTALLATION GUIDE Downdraft Ventilation Contents Wolf Downdraft Ventilation...................... 3 Installation Considerations...................... 4 Downdraft Specifications.......................
Cooktop Chimney Ventilation Hoods
 INSTALLATION GUIDE Cooktop Chimney Ventilation Hoods Contents Wolf Cooktop Chimney Ventilation Hoods.......... 3 Cooktop Chimney Hood Specifications............ 4 Cooktop Chimney Hood Installation.............
Installation Instructions
 Dear customer! Thank you for choosing this quality product from ASKO. We hope it will meet your expectations and fulfil your needs for many years to come. Scandinavian design combines clean lines, everyday
Food Waste Disposer Instruction Manual
 Food Waste Disposer Instruction Manual See insert for specific information about your new disposer NOTE: IMPORTANT: CAUTION: This Food Waste Disposer has been designed to operate on 110-120 Volt, 60 Hz
INSTALLATION GUIDE Dual Fuel Ranges
 INSTALLATION GUIDE Dual Fuel Ranges Contents Wolf Dual Fuel Ranges......................... 3 Safety Instructions............................ 4 Dual Fuel Range Specifications.................. 5 Dual Fuel
Panel Fan Series Operators Manual (Galvanized and Polymer)
") Panel Fan Series Operators Manual (Galvanized and Polymer) Galvanized Panel Fan with Three Wing Blade IMPORTANT: READ AND SAVE THESE INSTRUCTIONS Read all instructions carefully before attempting to assemble,
Panel Fan Series Operators Manual (Galvanized and Polymer) Galvanized Panel Fan with Three Wing Blade IMPORTANT: READ AND SAVE THESE INSTRUCTIONS Read all instructions carefully before attempting to assemble,
CAUTION signals a situation where minor injury or product damage may occur if you do not follow instructions.
 S I N S T A L L A T I O N I N S T R U C T I O N S I M P O R T A N T I N F O R M A T I O N IMPORTANT NOTE: This installation must be completed by a qualified installer or service agency. Before you begin
Installation Instructions
 Installation Instructions For Fully Integrated NoFrost Combined Refrigerator-Freezers HCB 1560/1561 HC 1550 7084 327-00 Important Please Read and Follow these Instructions These instructions contain Danger,
OPERATING & SERVICE PARTS MANUAL 700ES ENERGY SMART WRAPPER SERIES C
 OPERATING & SERVICE PARTS MANUAL 700ES ENERGY SMART WRAPPER SERIES C READ ALL INSTRUCTIONS CAREFULLY BEFORE OPERATING EQUIPMENT TABLE OF CONTENTS Machine Components & Electrical Requirement... Preliminary
BUILT-IN MICROWAVE OVEN INSTALLATION INSTRUCTIONS 24" (61.0 cm), 27" (68.6 cm), 30" (76.2 cm)
, 27 (68.6 cm), 30 (76.2 cm)") BUILT-IN MICROWVE OVEN INSTLLTION INSTRUCTIONS 24" (61.0 cm), 27" (68.6 cm), 30" (76.2 cm) This product is suitable for use above electric or gas built-in ovens, and below non-vented electric or gas cooktops.
BUILT-IN MICROWVE OVEN INSTLLTION INSTRUCTIONS 24" (61.0 cm), 27" (68.6 cm), 30" (76.2 cm) This product is suitable for use above electric or gas built-in ovens, and below non-vented electric or gas cooktops.
POWER JUICER ELITE
 Operating Manual Contents 4 5 6 7 10 11 13 14 Important Safety Information Helpful Hints Parts/Main Unit Assembly/Main Unit Assembly/E-Z Loader Attachment Disassembly/Main Unit Cleaning Your Power Juicer
OPERATOR S MANUAL & PARTS LIST Ultra High Speed Burnishers
 OPERATOR S MANUAL & PARTS LIST Ultra High Speed Burnishers 1200 RPM Model M1200-3 1600 RPM Model M1600-3 2000 RPM Model M2000-3 U.S. Patent Number 4,845,798 U.S. Patent Number 4,756,042 U.S. Patent Number
Installation Instructions
 Installation Instructions For Fully Integrated NoFrost Combined Refrigerator-Freezers HCB 1560/1561 7084 429-00 Important Please read and follow these instructions These instructions contain Danger, Warning
STEAM MOP INSTRUCTION MANUAL CATALOG NUMBER BDH1725SM PLEASE READ BEFORE RETURNING THIS PRODUCT FOR ANY REASON. SAVE THIS MANUAL FOR FUTURE REFERENCE.
 STEAM MOP INSTRUCTION MANUAL CATALOG NUMBER BDH1725SM Thank you for choosing BLACK+DECKER! PLEASE READ BEFORE RETURNING THIS PRODUCT FOR ANY REASON. SAVE THIS MANUAL FOR FUTURE REFERENCE. SAFETY GUIDELINES
portable mini photo studio 65797
 portable mini photo studio 65797 Cleaning, Assembly, And Operation Instructions Distributed exclusively by Harbor Freight Tools. 3491 Mission Oaks Blvd., Camarillo, CA 93011 Visit our website at: http://www.harborfreight.com
BQ-260/260L. Important Information BOOK BINDER
 BOOK BINDER BQ-260/260L Important Information - This manual is designed to help you to install, operate and maintain Perfect Binder BQ- 260/260L. Read, understand and keep this manual in a safe and convenient
Easy-Lam School Budget Roll Laminator
 DO NOT DISCARD BOX! (If for any reason you need to ship your machine back and you discard your box you will be responsible for purchasing another one plus any freight charges to ship the box to you) Easy-Lam
 Installation Guide BI-98 Ice Maker www.u-lineservice.com Phone (414) 354-0300 FAX (414) 354-7905 Service & Parts Tech Lines Phone (800) 779-2547 FAX (414) 354-5696 OnlineService@U-Line.com 2005 U-Line
Operating Instructions
 Operating Instructions BA-003 Read and understand this manual before use. Keep this manual for future reference. CONFORMS TO UL STD.No.1017 Certified to CSA STD C22.2 No.243-10 For questions or concerns
TS0 Series Portable Bulb and Capillary
 TS0 Series Portable Bulb and Capillary Instruction Manual Read and understand this material before operating or servicing these heating tapes. Failure to understand how to safely operate these heaters
ELECTRIC BODY SAW INSTRUCTIONS. Item #31660
 ELECTRIC BODY SAW INSTRUCTIONS Item #31660 The EASTWOOD ELECTRIC BODY SAW is great for use on virtually all metals including steel, aluminum, brass and more. Cuts wood, fiberglass and other materials with
Model K 240 plus Part No
 Model K 240 plus Part No. 1.223 585.0 High Pressure Washer Operator Manual Overview... 2 Precautions... 2-4 Assembly Instructions... 4 Operating Instructions... 5 GFCI Instructions... 6 Using the Accessories...
FitchTM. Instruction Manual. Includes our Basic Function CoolTouch TM Control System Looks permanent, but goes wherever you go!
 Includes our Basic Function CoolTouch TM Control System Looks permanent, but goes wherever you go! FitchTM A Kichler Décor ceiling fan U.S. Patent Pending Kichler Lighting 7711 East Pleasant Valley Road
54" Skye. Instruction Manual Customer Service :30 AM to 5:00 PM EST, Monday - Friday A Kichler Decor ceiling fan
 54" Skye TM 300167 A Kichler Decor ceiling fan Includes wall mount control system Kichler Lighting 7711 East Pleasant Valley Road P.O. Box 318010 Cleveland, Ohio 44131-8010 Instruction Manual Customer
C-IV 60 CEILING FAN READ AND SAVE THESE INSTRUCTIONS. FAN RATING AC 120V. 60Hz
 C-IV 60 CEILING FAN READ AND SAVE THESE INSTRUCTIONS FAN RATING AC 120V. 60Hz Please do not use any electric or battery powered tools in the assembly and installation of this or any Matthews Fan Company
IMPORTANT SAFETY INSTRUCTIONS
 Power Shovel Form No. 3362-567 Rev A Model No. 38361 Serial No. 310000001 and Up Operator's Manual If you have questions or problems, call toll free 1-800-808-2963 (US) or 1-800-208-3072 (Canada) before
OPERATING and MAINTENANCE INSTRUCTIONS Models: H138NPS36CLCMQRL i7 Hot Cabinet
 Rev. 0 (/) Page of 9 OPERATING and MAINTENANCE INSTRUCTIONS Models: HNPS6CLCMQRL i7 Hot Cabinet Cabinet model number: Cabinet serial number: Authorized Service Agency: Ph: Fax: Keep this manual for future
OPERATING and MAINTENANCE INSTRUCTIONS Models: H138NPSCLCMCQRL Merchandising Hot Cabinets
 Rev. (/) Page of 0 OPERATING and MAINTENANCE INSTRUCTIONS Models: H8NPSCLCMCQRL Merchandising Hot Cabinets Cabinet model number: Cabinet serial number: Authorized Service Agency: Ph: Fax: Keep this manual
Toll Free: Fax: Ibico Kombo Binder
 Toll Free: 800-658-8788 Fax: 801-927-3037 info@abcoffice.com Ibico Kombo Binder Installation and Set-up Carefully unpack and inspect your new Ibico plastic binding machine for shipping damage. If any damage
OWNERS MANUAL FOR MEC 300E ATA
 OWNERS MANUAL FOR MEC 300E ATA PLEASE READ AND FULLY UNDERSTAND THE INSTRUCTIONS PRIOR TO SETTING OR TUNING THE MACHINE. CAUTION: ANY MEC CLAY TARGET MACHINE MUST BE IN THE DISARMED STATE WITH THE BATTERY
52 Lacey LED. Instruction Manual. 6 Speed DC Wall Control System
 6 Speed DC Wall Control System 52 Lacey LED HIGH EFFICIENCY DC MOTOR Kichler Lighting 7711 East Pleasant Valley Road P.O. Box 318010 Cleveland, Ohio 44131-8010 Customer Service 866.558.5706 8:30 AM to
INSTALLATION INSTRUCTIONS ELECTRIC DRYER
 INSTALLATION INSTRUCTIONS ELECTRIC DRYER Table of Contents... 2 IMPORTANT: Save for local electrical inspector s use. 3397627C DRYER SAFETY... 2 INSTALLATION INSTRUCTIONS... 4 Tools and Parts... 4 Location
Service Manual Q MODEL DISPENSER Q160/290/300
 Q MODEL DISPENSER Q160/290/300 Service Manual Thank you for selecting a Manitowoc Dispenser, the dependability leader in ice making equipment and related products. With proper care and maintenance, your
Product instruction manual Easymount Wide Format Laminators
 Product instruction manual Easymount Wide Format Laminators The Easymount has been designed to be user friendly, however we strongly recommend you take a few minutes to read through this manual to ensure
Operator s Manual. Floor Vac Model No. VF408 FOR YOUR SAFETY. Read and understand this manual before use Keep this manual for future reference
 Wet/Dry Vacuums Operator s Manual Floor Vac Model No. VF408 FOR YOUR SAFETY Read and understand this manual before use Keep this manual for future reference www.vacmaster.com Cleva North America 44 Parkway
Installation Instructions Dual Fuel Ranges
 Installation Instructions Dual Fuel Ranges E30DF74EPS E36DF76EPS E48DF76EPS 5995447082 2 Safety IMPORTANT SAFETY INSTRUCTIONS Safety Precautions Do not attempt to install or operate your unit until you
Model K 280 M Part No
 Model K 280 M Part No. 1.189-205.0 High Pressure Washer Operator Manual Overview...................................1 Precautions................................1-3 Assembly Instructions.........................3
The Danger signal indicates an immediately hazardous situation which, if not avoided, will result in death or serious injury.
 The Danger signal indicates an immediately hazardous situation which, if not avoided, will result in death or serious injury. The Warning signal alerts you to potential hazards or unsafe practices which,
WAILEA OWNER S MANUAL
 WAILEA OWNER S MANUAL The blades in each pack are matched for equal weight to assure smooth fan operation. If more than one fan is being installed, be careful not to mix blades from different cartons.
IMPORTANT SAFETY INFORMATION
 Service Manual Model BSL33 UL Part Number 6905280100 IMPORTANT SAETY INORMATION: Always read this manual first before attempting to service this fireplace. or your safety, always comply with all warnings
INSTRUCTION & USER MANUAL
 INSTRUCTION & USER MANUAL GRAND CRU BUILT-UNDER SERIES WINE COOLERS GC46D BUILT-UNDER SERIES BEVERAGE COOLERS GC46BC This manual contains important information including safety and installation instructions
Instruction Manual F KSTFD12AAG IMPORTANT SAFETY INSTRUCTIONS READ AND SAVE THESE INSTRUCTIONS. For Household Use Only
 Instruction Manual ETLus Electric Fan F KSTFD12AAG If the plug does not fit fully in the outlet, reverse the plug. If it still does not fit, contact a qualified electrician. Do not attempt to defeat this
D14 & D18 Upright Vacuum
 Operator's Manual D14 & D18 Upright Vacuum READ THIS BOOK This book has important information for the use and safe operation of this machine. Failure to read this book prior to operating or attempting
Operation and Maintenance Manual 120V/60HZ
 Operation and Maintenance Manual 120V/60HZ GLACIER CS5-18-VD CS5-18-VD-TB AVALANCHE CS6-36-1D CS6-36-VD BLIZZARD CS6-50-VD Contents 1.0 INTRODUCTION... 1 2.0 UNPACKING YOUR COOL-SPACE UNIT... 1 3.0 SET-UP
AquaSaver DISPOSER CONTROL CENTER Installation Manual. Model AS-101K
 AquaSaver DISPOSER CONTROL CENTER Installation Manual Model AS-1K The Danger signal indicates an immediately hazardous situation which, if not avoided, will result in death or serious injury. The Warning
BUILT-IN DISHWASHER INSTALLATION INSTRUCTIONS
 BUILT-IN DISHWASHER INSTALLATION INSTRUCTIONS PLEASE READ COMPLETE INSTRUCTIONS BEFORE YOU BEGIN LEAVE INSTALLATION INSTRUCTIONS AND USER'S GUIDE WITH OWNER ALL ELECTRIC WIRING AND PLUMBING MUST BE DONE
DRAFT INSTALLATION INSTRUCTIONS. Solid-State Series !! NOTE!! Covers the following models: Refer to INSERT for additional information
 INSTALLATION INSTRUCTIONS Solid-State Series!! NOTE!! Covers the following models: " CS6100 - CS7100 " CS6200 - CS9200 " CS6220 - CS9220 " CS6230 - CS9230 " CS6500 - CS7500 " CS6330 - CS9300 " CS9400 -
INSTALLATION INSTRUCTIONS
 INSTALLATION INSTRUCTIONS BUILT-IN BOTTOM MOUNT REFRIGERATOR/FREEZER Retain for Future Reference VIKING RANGE CORPORATION 111 Front Street Greenwood, Mississippi 38930 USA (662) 455-1200 IMPORTANT - PLEASE
Orrin. Instruction Manual. Includes our new CoolTouch TM Control System Looks permanent, but goes wherever you go! U.S.
 Includes our new CoolTouch TM Control System Looks permanent, but goes wherever you go! U.S. Patent Pending Orrin A Kichler Select ceiling fan Kichler Lighting 7711 East Pleasant Valley Road P.O. Box 318010
K 2.97 M. Specifications Operating pressure, max PSI Water volume GPM Voltage V Amp draw AMPS
 K 2.97 M High Pressure Washer Operator Manual Overview... 2 Important Precautions... 3-4 Assembly Instructions... 4 Operating Instructions... 5 GFCI Instructions... 6 Using the Accessories... 6 Working
RSH2455G OPERATOR S MANUAL ELECTRIC QUIET CHIPPER SHREDDER
 RSH2455G ELECTRIC QUIET CHIPPER SHREDDER OPERATOR S MANUAL Important! It is essential that you read the instructions in this manual before mounting and operating this machine. Subject to technical modifications.
OPERATIONAL & MAINTENANCE MANUAL
 Security Engineered Machinery Co., Inc OPERATIONAL & MAINTENANCE MANUAL SEM Model 0101 Hard Drive Crusher 110 volt or 220 volt (Serial Numbers 2000 and up) Contents IMPORTANT SAFETY PROCEDURES... 3 INSTALLATION
52 DorsetTM. Instruction Manual. Basic Function Wall Control System Included. A Kichler Decor ceiling fan
 Basic Function Wall Control System Included 52 DorsetTM II A Kichler Decor ceiling fan Kichler Lighting 7711 East Pleasant Valley Road P.O. Box 318010 Cleveland, Ohio 44131-8010 Customer Service 866.558.5706
Use & Care Manual. Electric Tankless Water Heaters. With Installation Instructions for the Installer AP15447 (10/10)
") Use & Care Manual With Installation Instructions for the Installer Electric Tankless Water Heaters The purpose of this manual is twofold: one, to provide the installer with the basic directions and recommendations
Use & Care Manual With Installation Instructions for the Installer Electric Tankless Water Heaters The purpose of this manual is twofold: one, to provide the installer with the basic directions and recommendations
Model K 520 M Part No
 Model K 520 M Part No. 1.069-680.0 High Pressure Washer Operator Manual Overview... 2 Precautions... 2-4 Assembly Instructions... 4 Operating Instructions... 5 Using the Accessories... 6 Working with Detergents...
ICE DISPENSER. Installation/Service Manual
 Installation/Service Manual ICE DISPENSER DPP 230-Push-Button Operated DPK 230-Key Operated (Optional) DPC 230-Card Operated (Optional) DPT 230-Token Operated (Optional) Part No. 16195201INS Release Date:
INSTALLATION & OPERATION MANUAL
 CHIP WARMERS MODELS: 500-CW 700-CW 500-CW-EX (New 2014) 700-CW-EX (New 2014) INSTALLATION & OPERATION MANUAL For additional information on WITTCO or to locate an authorized parts and service provider in
Operator s Manual. 6 Gallon Model No. VQ607SFD FOR YOUR SAFETY. Read and understand this manual before use Keep this manual for future reference
 Wet/Dry Vacuums Operator s Manual 6 Gallon Model No. VQ607SFD FOR YOUR SAFETY Read and understand this manual before use Keep this manual for future reference www.vacmaster.com Cleva North America 44 Parkway
CONVEYOR TOASTER MODEL QCS QCS Installation and Operation Instructions 2M-HG0657 Rev. D 6/13/05
 CONVEYOR TOASTER MODEL QCS-2-800 QCS-3-1000 Installation and Operation Instructions 2M-HG0657 Rev. D 6/13/05 SAFETY SYMBOLS These symbols are intended to alert the user to the presence of important operating
Model Letter Opener Revision 3 - Brush Transport
 Model 5050 Letter Opener Revision 3 - Brush Transport Before You Start The 5050 model letter opener is a high speed milling cutter letter opener, capable of opening up to 30,000 envelopes per hour with
Service Manual for / How to Remove the Cover
 Service Manual for 2903-28 / 2904-28 How to Remove the Cover Cover Specification Cast Iron White Porcelain 2903-28, Sensor Activation (replacement P/N: P15-420) 2904-28, Push Button Activation (replacement