CONTENTS I. INTRODUCTION II. SAFETY NOTES III. PRECAUTIONS IV. MAINTENANCE V. HOW DOES YOUR ATMOSPHERIC WATER GENERATOR WORK VI. TROUBLE SHOOTING IX
|
|
|
- Moses Melton
- 5 years ago
- Views:
Transcription


1 page 1
2 CONTENTS I. INTRODUCTION... 3 II. SAFETY NOTES... 3 III. PRECAUTIONS... 4 IV. MAINTENANCE... 5 V. HOW DOES YOUR ATMOSPHERIC WATER GENERATOR WORK... 5 VI. FEATURES OF THE ATMOSPHERIC WATER GENERATOR... 5 VII. OPERATING YOUR ATMOSPHERIC WATER GENERATOR... 7 VIII. TROUBLE SHOOTING IX. TECHNICAL SPECIFICATIONS Disclaimer Of Implied Warranties; Limitation Of Remedies NOTICE: The EcoloBlue Atmospheric Water Generator Model 28 is intended for residential use only. Model 28 has not been submitted to electrical testing organizations for purposes of obtaining approvals that are necessary in some jurisdictions for installation of such a device in a commercial establishment. Therefore, installation of Model 28 in a commercial establishment may constitute a violation by the commercial owner or tenant of a state or municipal electrical code, for which EcoloBlue Life & Energy disclaims any and all liability. Note: EcoloBlue, Inc. reserves the right to make changes/amendments/deletions/revisions and/or variations in and to the contents of this manual, at any time and without notice to the purchaser. page 2
3 I. INTRODUCTION Thank you for purchasing the Atmospheric Water Generator. The Atmospheric Water Generator is a new, stateof-the-art water-generating machine which uses some of the latest and most sophisticated technology available in the industry today. We have designed your Atmospheric Water Generator with one objective in mind: to produce the maximum amount of high quality drinking water while using only a minimum amount of electricity. With an external connection to city water, the machine will serve as water purifier as well. II. SAFETY NOTES 1. The electrical outlet to which the Generator is connected should be equipped with a reliable local or central ground fault interrupt circuit which is properly grounded. If the purchaser does not possess a ground fault detector (available as part of many power strips presently on the market), have an electrician verify proper grounding at the outlet where the Generator will be installed. 2. Never tamper with or remove the grounding terminal from the power cord plug. 3. Do not use extension plug, extension adaptor, or grounding adapter with the Generator. 4. Always protect the unit from contact with poisonous gas or liquid and/or corrosive gas or liquid. 5. If the unit s power cable or the cable plug has become damaged, do not use the unit until proper repair or replacement has been completed by a competent repair person. 6. Always unplug the power cord before performing any maintenance on your unit. 7. Do not power the Generator from an electrical outlet to which other high power consumption appliances or devices have been attached. 8. Always use correct replacement parts specified by the manufacturer. 9. Do not insert or unplug the power cord with wet hands or while in contact with another grounded device, appliance, or a radiator. 10. Use the enclosed water pipe kits to connect the unit to a city water supply. Do not supply water to the unit from any input source whose potable quality is not known to the user. 11. Before moving the unit, always unplug the power cord and completely empty water from all tanks. Take care to avoid tilting the machine more than 20º during moving. Using two persons allows the unit to be moved more easily. page 3
4 III. PRECAUTIONS 1. Do not place the unit too close to a wall. Most energy-effi cient performance is obtained when the unit is placed at least 20 cm (8 inches) from the wall. 2. This model of EcoloBlue Generator is not designed for or warranted for operation outdoors, regardless of whether it will be fi tted by the owner with a cover. 3. Avoid exposing the unit to prolonged direct sunlight. 4. The unit should be placed into operation only when it is standing upright on a level surface. 5. Supplied voltage during operation must not drop more than 10% below the rated volts of standard power supply, as in a brownout situation. When the unit operates below this level, it becomes noisy and may overheat Should this occur, immediately switch the unit off until the voltage returns reliably to its normal operating range. 6. Avoid prolonged direct eye exposure to the ultraviolet device which is part of this unit. Ultraviolet light from any source may permanently damage the eye. 7. The Generator is designed to be able to provide the user with heated water. Therefore, place the unit only in a location where children will not have access to its HOT button, in order to prevent scalding or burning injuries. 8. This unit is not suitable for use at places with spray water. Do not use spray water to clean the unit. 9. To prevent the machine from damage caused by freezing, as in a home used only during warmer months, be certain to drain off the remaining water completely and un-plug the machine if the environmental temperature of the installation location is anticipated to fall below 0º(32ºF). 10. If there is any damage to the power cables, the cables must be repaired or replaced by an authorized person to avoid danger of electric shock. 11. Before attempting to operate the Generator on uneven or non-level fl oors, a suitable leveling device should be affi xed to the unit. 12. Do not place any object on top of the machine. Good ventilation is required to ensure optimum and effi cient performance. page 4
5 IV. MAINTENANCE 1. Always keep the unit clean. Wipe the outer casing with soft, damp, but not wet, microfiber or similar cloth. Use water to clean; avoid using any harsh or abrasive cleaning agent. 2. Do not use any cleaning agents to clean the storage tanks. 3. Clean the air filters regularly to ensure proper air flow. 4. Always drain out water remaining in the tanks before any period of long inactivity or dis-use of the unit, regardless of the ambient room temperature. V. HOW DOES YOUR ATMOSPHERIC WATER GENERATOR WORK? It is important to be aware that your Atmospheric Water Generator is a humidity and temperature-driven machine. This means the machine s ability to generate water depends totally on the level of humidity in the air and the local temperature to produce water. Ideally, the humidity level should be at least 50% or above to achieve the machine s optimum performance. In places with lower humidity levels, the machine will still produce water, but not as quickly, nor in as great quantities over a particular period of time, as in places with higher levels of humidity. In the home environment, higher levels of humidity tend to be found around the kitchen area, near a bathroom used for bathing, near an open window in the warmer months, or generally in more spacious rooms. This unit also performs well in an air-conditioned room, but it is recommended to open the window at night to increase the humidity in the room. Because your Atmospheric Water Generator works by converting the humidity in the air to water, this unit also acts as an effective dehumidifier. In areas with high humidity, It not only acts as a good water generator, but also a perfect dehumidifier to keep you healthy and ensure your home appliances a long service life. To ensure high quality of produced drinking water, the Atmospheric Water Generator utilizes multiple filtration technologies. When the air is dry, as in the winter during the heating season, water generation will be slow. At such times, connection to city water supplies will allow the machine to serve as a water purifier by utilization of the filtration and sterilization system. VI. FEATURES OF THE ATMOSPHERIC WATER GENERATOR a. Microcomputer The unit is fitted with a microcomputer, which ensures proper working of internal parts, regulates hot or cool water temperature settings, and supervises and controls the functionality of individual internal working parts. b. Electronic Sensors Various electronic sensors are attached to parts such as the UV light, heating mechanism and storage tanks. These sensors ensure that all parts are working properly and warn you should a malfunction or performance irregularities occur. c. Energy Saving Features To conserve electricity, electronic sensors have been placed in the storage tank to automatically stop the machine from making more water when the tank is full and when hot/cold water reaches the preset temperature settings. page 5
6 d. Child-Proof Hot Water Lock Out The function of hot water lockout is to prevent children from scalding/burning upon touching the water tap. e. Venturi Fan Newly designed Venturi-type fan increases production efficiency and greatly reduces noise during operation. f. Water Leakage Detector In case of any unexpected situation of water leakage, the machine will stop working automatically. Shutdown is accompanied by a warning sound and flashing VFD. g. Condensing Coils The condenser is designed with a special food-contact grade coating to prevent any direct metal contact with the water and to improve water production efficiency. h. Electrostatic Air Filter The first filter that air passes through before being condensed and converted to water is electrostatic; our electrostatic air filter effectively prevents micro-particles and dust from entering the machine, as well as deterring slime and fungus growth. i. Ultraviolet Filter Treatment The proprietary ultraviolet lamp treats the water by sterilization to ensure the bacteria and microorganisms are effectively eliminated. The sterilization process is automatically controlled by the microprocessor. j. Multi-Stage Filtration System Our dedication to providing high-quality, great tasting water to our consumers is accomplished by our unique multi-stage filtration system. 1) LF2 Carbon Filter or Nanometer Molecular Sieve Removes ammonia, chlorine residuals, organic compounds, soil particles, dirt, etc. 2) Sediment Filter Removes micro-particles to protect the water pump. 3) Pre-Carbon Filter I Removes organic compounds, free chlorine, heavy metals, etc. 4) Pre-Carbon Filter II Removes organic compounds, free chlorine, heavy metals, etc. 5) Reverse Osmosis Membrane Removes dangerous bacteria, viruses, mineral salts, heavy metals, organic compounds, etc. 6) Post-Carbon Filter Removes volatile organic compounds and improves water taste and smell. 7) Top Tank UV Sterilization Minimizes bacteria levels in the upper tank to the least possible number. 8) Water Output UV Sterilization Ensures clean and safe water is dispensed from the cool water faucet. k. Water Recirculation Our patented proprietary technology ensures that stored water remains fresh and clean and avoids secondary pollution during storage. l. Overheat Protector Overheat protector offers further protection for your machine. In case of overheating in the heating chamber during the heating process, this protector will automatically shut off the heating device. page 6

7 m. Novel and Noble Body The Atmospheric Water Generator has a smaller and sleeker design compared to other Generators on the market. The unit is more compact and versatile. Advanced VFD display is added to make the operation, air humidity and water quality conditions more clearly understood by the owner. VII. OPERATING YOUR ATMOSPHERIC WATER GENERATOR By following these simple instructions and simple maintenance procedures, your Water Generator should give you years of trouble-free operation while producing the maximum amount of pure, high-quality, drinking water that is not only healthy, but also benefi cial to your health. Please read this operation manual carefully before you start the machine. By reading and following this simple manual, you will familiarize yourself with your new water machine and all its functions, ensuring yourself of a machine constantly operating at its optimum level. page 7
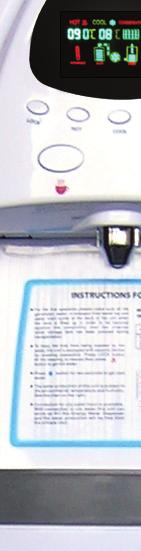
8 a. VFD INDICATION 1. Hot Water Indicator When hot water lock is unlocked, this logo will flash 2. Heating Icon Heating function is started when the icon stays on; the unit is in heating process when the icon flashes 3. Cool Water Indicator 4. Cooling Icon Cooling function is started when the icon stays on; the unit is in cooling process when the icon flashes 5. Hot Water Temperature Press C/F key on the panel to switch water temperature display between Centigrade and Fahrenheit. 6. Cool Water Temperature Press C/F key on the panel to switch hot water temperature display between Celsius and Fahrenheit 7. Top Tank UV Lamp Icon The UV is working well when the icon stays on. If it blinks, UV is not functioning properly. 8. Water Output UV Lamp Icon The UV is working well when the icon stays on. If it blinks, UV is not functioning properly. 9. Water Level Indicator for Top Tank The higher the level displays, the more water it contains 10. Booster Pump Icon The pump is working when the icon flashes 11. Water Level Indicator of Bottom Tank A higher level on the displays corresponds to more water in the Bottom Tank 12. Water Generating Icon The unit is generating water when the icon flashes 13. Humidity Displays the current humidity level 14. Warning Icon Operation is normal when the icon remains on; the icon will flash when water leakage is detected. 15. Defrost Icon The unit is in defrost mode when the icon flashes (There could be frost because of low temperature in some areas) 16. Water Recirculation Icon Water recycling is on when the icon flashes 17. Filter Icon Conditions are normal when the icon is lit. When it flashes, the filter should be cleaned or replaced. Please refer to the section on CLEANING, STERILIZATION & REPLACEMENT for details. page 8
9 b. SETTING UP 1. First, please confirm that the parts provided in the package constitute a complete set. The unit should be placed on solid and level flooring and be located with adequate air circulation on all sides. The unit should be placed no less than 20cm (8 in.) from the wall. Verify that the brake levers on the front wheels have been pushed down and locked after the machine is in its desired location. 2. Do NOT connect the unit to the power source within the first half hour after set-up. Leave the machine in a standing position to make sure all refrigerant drains to the compressor. Immediately connecting the machine to its power source after un-packing may damage the compressor and void its warranty. 3. Insert plug into an electrical outlet rated to deliver no less than 10 Amperes continuous. Check the panel box breaker rating for the outlet serving the unit or consult an electrician if you are not certain. 4. For initial operation, it is recommended to fill the bottom storage tank with city water until the top water tank level displayed on the screen indicates 3 levels. Next, drain out one liter(0.25 gal) of water from first the Cool outlet and then the Hot outlet, by pressing the respective buttons. Then drain out all remaining water from the rear HOT Water Drain outlet. c. OPERATION 1. When the unit starts to operate, you should be able to hear a beep; the light on the VFD should also be lit. The compressor will begin running in 2 minutes, and you will see the corresponding light on the VFD illuminated. If the unit is required to be shut off, keep pressing the POWER button. Press POWER again to switch it on. 2. Do not be alarmed when you do not obtain hot or cold water during the first few days of operation. Only when the water level in the machine reaches a proper level will the heating/cooling mechanism be triggered. (Generally, the first heating/cooling will start within ten to twenty hours during the first operation, depending on local temperature and humidity conditions.) 3. When there is enough water in your machine, you can press the HOT key on the panel to switch on or off the heating process. The red indicator will be lit when heating is switched on. It will turn off when the machine is not in the heating mode. The heating mechanism will be triggered on and the red indicator will blink when water level reaches a preset level. It will turn off automatically when the water is hot enough. When heating is operating, press the HOT button to switch off the heating process. 4. When there is enough water in your machine, press the COOL key on the panel to switch on or off the cooling process. The green indicator light will be lit when cooling is switched on. It will turn off when the machine is not in the cooling process. The cooling mechanism will be triggered on and the green indicator will blink when the water level reaches the preset level. It will turn off automatically when water is sufficiently cool. During the cooling stage, press the COOL button to switch off the cooling process. 5. Press C/F button to switch the temperature display between Celsius and Fahrenheit. 6. Generally, both heating and cooling can be turned on together. When the machine is in heating and cooling process, hot and cold water temperature will remain in the preset range automatically. Keep pressing C/F button to have the Hot water temperature display the current setting. Then press HOT or COOL button to adjust the setting. Press HOT to raise the temperature setting; press COOL to lower the temperature set point. Hot water adjustment range is 75º(167F)~93º(199F). To adjust the cool water temperature setting, press C/F again to have the Cool water temperature display indicate the current setting. Then press HOT or COOL button to adjust the temperature set point. Press HOT to raise the setting value; press COOL to lower the value. Cool water adjustment range is 4º(39F)~15º(59F). page 9

10 7. When it is time for filter replacement, REPLACE on the display will blink to remind user to clean or change filters. (Please refer to Filter Replacement for details). When cleaning or replacement is performed, press RESET until the REPLACE indicator stops blinking. Press RESET again to turn off REPLACE indicator and to reset the replacement warning time to work properly with the new filter. 8. The system will enter defrosting status and the DEFROST indicator on the screen will blink when the environmental temperature is too low. If it is required to check the current defrosting temperature, keep pressing COOL to show defrost temperature F## at the position of humidity level on the screen. 9. Press button to dispense cool water. To dispense hot water, keep pressing the LOCK button until the HOT indicator blinks and it beeps; then press button to dispense the desired hot water. 10. Do not be alarmed when your machine turns off automatically. To conserve energy, your machine has been fitted with an electronic sensor which automatically switches the machine off when the storage tank is full. 11. When the air is dry or during cold weather, water generation will be slow. At such times, external connection to city water will make the machine serve as a water purifier by utilization of the filtration and sterilization system. (Some parts are optional. Please contact your local distributor for purchase). When power is switched on, the machine will automatically turn to its normal operating mode. 12. For the first operation, when the top tank has filled with generated water, please follow the steps in CLEANING, STERILIZATION & REPLACEMENT to eliminate the odor unavoidably associated with the new components of the machine. d. CLEANING AND REPLACEMENT OF FILTERS Recommended Timing for Filter Replacement may vary according to different users water consumption levels. The time periods recommended below are based on 10 liters (2.6 gal) consumed on a daily basis: 1) LF2 Carbon Filter or Nanometer Molecular Sieve 3-6 months 2) Pre-Carbon Filter I 6 months 3) Pre-Carbon Filter II 6 months 4) Reverse Osmosis Membrane 24 months 5) Post-Carbon Filter 6 months 6) UV bulb 12 months or upon UV fault warning Note: 1. The above recommended service timing is for reference purposes only. 2. After a long period of service, we recommend that you replace the filters to ensure that your unit will always produce the cleanest and purest possible drinking water. page 10


11 The above structure and filtration system is for reference only. 1. Cleaning 1.1 Cleaning of Air Filter Please clean the air filter regularly according to the air pollution conditions in your area in order to ensure proper air supply. Take off air filter from the side, as shown in pics Rinse in clean cold water to remove dirt and then replace Cleaning of water collector Take out water collector from the back. Clean and place in its original position. 1.2 page 11
.")
 remove filter cup ( pic 1.3-4). d.")
. e.")
.")
 f.")


. b.")
. c.")
. d.")
. 1.4-1 1.4-2 1.4-3 1.4-4 e.")
12 1.3 Cleaning of bottom tank a. Keep pressing POWER to switch off the power as shown in ( pic 1.3-1). Unplug the power cord. b. take out bottom tank ( pic 1.3-2). c. open tank cover ( pic 1.3-3) remove filter cup ( pic 1.3-4). d. take out filter net, filter bracket, and filter fiber; rinse the filter cup with clean water ( pic 1.3-5). e. disconnect the pin of the bottom water sensor ( pic 1.3-6). Pull out water outlet tubing ( pic 1.3-7). (Note: In case a quick coupler is used for the connection, please press the front retainer ring inward and pull out.) f. remove the small outlet filter and rinse with clean water ( pic 1.3-8). Make sure the filter net is in good condition, otherwise, replace with a new one. Thoroughly wipe off any dirt on the tank walls. g. Re-assemble all parts Cleaning of Front filtration system a. Keep pressing POWER to switch off power. Open front bottom cover ( pic 1.4-1). b. Pull out water outlet tubing from the outlet connector of 2nd stage filter ( pic 1.4-2). c. Pull out water inlet tubing from the inlet connector of 3rd stage filter( pic 1.4-3). d. Connect the outlet of 2nd stage filter to the inlet of 3rd stage filter with tubing.( pic 1.4-4) e. Pull out outlet tubing from the outlet of 3rd stage filter ( pic 1.4-5). f. Connect the outlet of 3rd stage filter to a water tank with a tubing ( pic 1.4-6). g. Pull out bottom tank ( pic 1.4-7) remove cup filter ( pic 1.4-8) rinse the cup filter with clean water. Put the cup back. Fill bottom tank with city water. h. Switch on POWER and start cleaning the filtration system. Keep checking the water level of the bottom tank and fill with city water until clean water comes out page 12
13 i. Replace all the parts in their original positions ( pic 1.4-9). Make sure all connections are hand tight to prevent leakage. j. Disconnect the tubing from RO inlet ( pic ). k. Remove RO cover ( pic ). l. insert RO membrane into the cartridge ( pic ). Pay careful attention to assure it has been inserted in the correct orientation shown m. Press the membrane onto the open end ( pic ). n. Place back the cover and tubing ( pic ) o. Replace the front panel ( pic ). Switch on the unit and start cleaning the RO membrane by automatically running or filling city water into bottom tank until the top tank is full of water. p. Press keep pressing HOT to unlock, and press to release 2 Liters (.5 gal) of hot and cold water from each faucet respectively. Turn off the unit. Drain all remaining water from the hot water drain outlet in the rear of unit ( pic ) Sterilization The brand new machine should be sterilized after it has been in service one week. 2.1 Prepare sterilization Solution: prepare 10 liters (2.6 gal) of sterilization Solution (special Solution for water dispenser). It is recommended to use a standard USP hydrogen peroxide Solution. 2.2 Keep pressing POWER to shut down the unit ( pic 2.1) open top cover ( pic 2.2) open top tank cover ( pic 2.3) fill the top tank with the Solution ( pic 2.4) replace and tighten the top tank cover and make it tight. Replace the top cover. 2.3 Turn on the unit. Press. Keep pressing HOT to unlock, and press to release 1 Liter (.26 gal) of Solution from each faucet ( pic 2.5). Shut down the unit. Drain about 0.5 Liters (.13 gal) of the remaining Solution from the hot water drain outlet in the back. Keep the remaining Solution soaking in the top tank for more than 2 additional hours, or as indicated in the instructions accompanying the Solution. 2.4 Run the unit. Press. Keep pressing HOT to unlock, and press to release 2 Liters (.5 gal) of Solution from each faucet. Shut down the unit. Drain all remaining Solution from the hot water drain outlet in the back. page 13
 of water from each faucet. Shut down the unit.")

 using both hands, remove front panel from the bottom ( pic 3.1-2). b. replace carbon filter by pulling out tubing at both ends ( pic 3.1-3, 3.1-4).")
. d. replace the front panel. 3.1-1 3.1-2 3.1-3 3.1-4 3.1-5 3.1-6 3.1-7 3.1-8 Note: 1.")
14 2.5 Fill bottom tank with city water. Turn on the unit and leave it run on automatic setting until the top tank is full of water. 2.6 keep pressing HOT to unlock, and press to release 2 Liters(.5 gal) of water from each faucet. Shut down the unit. Drain all remaining water from hot water drain outlet in the back ( pic 2.6). 2.7 Repeat the above steps in 2.5 and 2.6 in order to clean out the Solution remaining in the top tank. When the top tank is empty, repeat the entire sterilization cycle process one more time Parts Replacement 3.1 To replace a filter: a. keep pressing POWER to shut down the unit ( pic 3.1-1) using both hands, remove front panel from the bottom ( pic 3.1-2). b. replace carbon filter by pulling out tubing at both ends ( pic 3.1-3, 3.1-4). c. replace RO membrane by pulling out tubing, removing cartridge cover, removing the membrane, and replacing it with a new one ( pic 3.1-5, 3.1-6, 3.1-7, 3.1-8). d. replace the front panel Note: 1. It is recommended to replace filters one by one, in order. 2. When replacement is completed, please clean the filtration system as indicated in the FILTRATION CLEANING section. page 14

. c. Remove screws on top end (pic 3.")
. f.")

. c. Remove foam cup of UV (pic 3.3-3). d.")
.")

15 3.2 Replace the top UV lamp a. Switch off the unit and unplug power cable from outlet before replacing lamp ( pic 3.2-1). b. Open top cover(pic 3.2-2). c. Remove screws on top end (pic 3.2-3). e. Disconnect UV connection pin (pic 3.2-4). Pull out UV bulb (pic 3.2-5). f. Replace with new bulb and replace top cover (pic 3.2-6) Replace the cool water out UV lamp a. Switch off the unit and unplug power cable from outlet before replacing lamp (pic 3.3-1). b. Open the top cover (pic 3.3-2). c. Remove foam cup of UV (pic 3.3-3). d. Remove black insulation cover (pic 3.3-4). e. Disconnect UV connection pin (pic 3.3-5). Pull out UV bulb (pic 3.3-6). Replace with a new bulb and replace all parts in reverse order page 15
16 4. Attention 4.1. To assure reliable operation of the Generator, it is recommended that you dispense no less than 3 liters (.75 gal) of water every day If hot water is not dispensed for a prolonged period, it is recommended to turn on the heating process for not less than 30 minutes once a week. Keep pressing the HOT button to unlock, and press to release 500 ml of hot water from the faucet If the machine has not been used to dispense water for between 2 to 5 days, please drain 500ml of cool water before dispensing for drinking use. If the machine is to be inactive for more than 5 days into the future, it is recommended that you drain the water from all tanks and switch off the machine in anticipation of the period of non-use. To re-activate, please run the system sufficiently to produce about 5 liters of water, then drain that water from the back drain outlets If the machine was not in use for more than 7 days or it has been in continuous operation for 4 months, it is time to run a sterilization cycle. Please follow the steps in CLEANING, STERILIZATION & REPLACEMENT to sterilize the system Disconnect the machine s plug from the outlet first before draining water from the back outlets. page 16
17 VIII. TROUBLE SHOOTING Problem: The UV WARNING light blinks and you hear three short beeps. Solution: Check the ultraviolet device in the top tank to make sure the bulb is lit and all wiring is correct. If the UV is not working, replace with a new bulb by following steps in CLEANING, STERILIZATION & REPLACEMENT. Problem: The whole UV WARNING logo blinks and you hear three short beeps. Solution: Check the ultraviolet device at the cool water output to make sure the bulb is lit and all wiring is correctly engaged. If the UV is not working, replace with a new bulb by following steps in CLEANING, STERILIZATION & REPLACEMENT. Problem: The machine does not work even after the power cord is plugged in. Solution: Check the circuit breaker and test with another device to assure the outlet is live. Check to ensure the voltage being delivered to the outlet is in the correct operating range for the device. Make certain that the plug connection to the wall outlet is tight and secure and the cable is not damaged. Problem: The indicator REPLACE on VFD display is blinking and beeping. Solution: After a long period of operation, the filter might be dirty. If so, it must be replaced. Replace with a new filter by following the steps in CLEANING, STERILIZATION & REPLACEMENT. Reset the filtration warning time by following Step No. 7 in Section VII.c. of this Manual, OPERATION. Problem: The system detected water leakage on the base. The red logo on the screen blinks and the system cannot produce water. Solutions: Press the POWER button immediately and unplug the power cord. Make sure the tubing of the filtration system is tight and secure. Make sure the tubing of the bottom tank is tight and secure. Make sure the drainage tubing in the back is tight and secure. Make sure the water collector is in the correct position. Problem: Remaining water cannot be drained out from the back outlets when cleaning top tank and hot tank. Solution: Make sure the water stopper inside the water drain outlet is removed from or not blocking the drain opening. Problem: There is a burning smell from the machine, and the hot temperature indicator has exceeded the preset temperature point. Solutions: Press the POWER button immediately and unplug the power cord. Stop draining immediately if you performing the draining operation from the back. Wait a few minutes; then continue draining until the hot temperature indicator reads normally. Problem: Water output from faucet is too small. Solutions: Clean the filter net inside the water faucet or replace with a new one, Replace check valve inside the water faucet with a new one. page 17
18 Problem: No hot or cool water output, ambient temperature water only. Solutions: The heating function will be activated only when the top tank water level on the screen is above two levels. The cooling function will be activated only when the top tank water level on the screen is above three levels. Problem: The machine makes water at a slow rate, even after a prolonged period of operation. Solutions: Make sure the machine operating temperature level is in the appropriate range. Check the humidity level in the room. Low humidity level results in less water production. Make sure that the hot/cold water spouts are not blocked. Make sure that the ingoing and outgoing air ventilation is not blocked; Check that the distance between the machine and the wall is not too close; Make sure that the power voltage is not too low or too high; Make sure that the internal booster pump is working well; Make sure that the water lines are not blocked and water flow is smooth; Make sure that the unit is placed in a well ventilated area, and that the air filter net is cleaned regularly to ensure the free air flow. Problem: The humidity indicator on the screen is different from the actual room humidity level. It is normal for readings on such devices to differ in a range of 5%, more or less. Make sure the machine and the individual humistat are placed in the same place. Make sure that the humistat sensor is not blocked, covered or too close to the wall. Problem: The machine is vibrating excessively and/or too noisy. Make sure there is no object placed on top of the machine. Make sure that there is no water cup placed on water tray. Open the front bottom panel and check if the copper tube at the side is touching the side panel. Correct the position of the copper tube slightly and slowly if it is. If your machine still does not work or does not work correctly after all the above procedures have been performed, please do not try to perform other repair procedures yourself. Always call a qualified and properly trained service technician to examine the machine and perform necessary repair procedures. The manufacturer will not bear any responsibility for damages to the Generator, damages to the owner s property, or personal injury sustained during attempts at self-repair. User repairs to the Generator not specifically referenced and permitted in this Manual, and/or use of replacement parts from sources other than EcoloBlue or maintenance procedures other than as instructed or explicitly referenced herein voids all manufacturer warranties. page 18
 ~ 40ºC(104ºF) Working Humidity 35% ~ 95% Water Storage Capacity 12.5 Liters (3.")
19 IX. TECHNICAL SPECIFICATIONS a. Dimensions Height Width Depth Net Weight 111 cm / 44 in. 40 cm / 16 in. 40 cm / 16 in kg / 91 lb. b. Power c. Coefficient of Water Quality Working Temperature 15ºC(59ºF) ~ 40ºC(104ºF) Working Humidity 35% ~ 95% Water Storage Capacity 12.5 Liters (3.3 gal) Temperature of Hot Water 75ºC(167ºF) ~ 93ºC(199ºF) Temperature of Cold Water 4ºC(39ºF) ~ 15ºC(59ºF) Atmospheric Water Production Capacity page 19
20 Disclaimer Of Implied Warranties; Limitation Of Remedies Implied warranties, including, to the extent applicable, warranties of merchantability or fitness for a particular purpose, are excluded to the extent legally permissible under the laws of the user s jurisdiction. Any implied warranties that may be imposed by law are limited to one year, or the shortest period allowed by law. Some states and Canadian provinces do not allow limitations or exclusions on the duration of an implied warranty of merchantability or fitness. In such locations, the above limitations or exclusions may not apply to you. If this product fails to work as warranted, customer s sole and exclusive remedy shall be repair or replacement, according to the terms of the limited warranty of EcoloBlue, Inc. EcoloBlue, Inc. does not assume any responsibility for incidental or consequential damages arising or resulting from the use of the EcoloBlue Atmospheric Water Generator, Model 28. This warranty gives you specific legal rights; you may also have other rights, which vary from state to state or province to province. page 20

21 Contact Information Customer Service: page 21
Instruction Manual. Please read this manual carefully before operating this unit.
 Instruction Manual Please read this manual carefully before operating this unit. Contents Ⅰ. INTRODUCTION...1 Ⅱ. SAFETY NOTES...1 Ⅲ. PRECAUTIONS...2 Ⅳ. MAINTENANCE...3 Ⅴ. HOW DOES YOUR ATMOSPHERIC WATER
Eco-$mart, Inc. (888) LIQUID-AIR 1 (L-A 1) OPERATIONS MANUAL
 LIQUID-AIR 1 (L-A 1) OPERATIONS MANUAL") Eco-$mart, Inc. (888)329-2705 info@eco-smart.com www.eco-smart.com LIQUID-AIR 1 (L-A 1) OPERATIONS MANUAL TABLE OF CONTENT I. INTRODUCTION II. GETTING TO KNOW YOUR L-A 1 WATER GENERATOR 1. HOW DOES YOUR
Eco-$mart, Inc. (888)329-2705 info@eco-smart.com www.eco-smart.com LIQUID-AIR 1 (L-A 1) OPERATIONS MANUAL TABLE OF CONTENT I. INTRODUCTION II. GETTING TO KNOW YOUR L-A 1 WATER GENERATOR 1. HOW DOES YOUR
Model 30/30S Atmospheric Water Generator TABLE OF CONTENTS
 TABLE OF CONTENTS Model 30/30S Atmospheric Water Generator INTRODUCTION... 3 SAFETY... 3 WARRANTY... 5 MODEL 30/30S GENERATOR DESCRIPTION... 5 How the Atmospheric Water Generator Works... 5 Key Features
THE ULTRA SERIES USER MANUAL
 Instruction manual for Hybrid Ultra 7 Series Systems. Advanced Ultra Water Manufacturing and Delivery Systems I. INTRODUCTION -------------------------------------------------------------------------------------------------------1
OWNE R S MA N UA L. Made in USA. September 2015
 September 2015 OWNE R S MA N UA L Made in USA www.drinkableair.com OWNER S MANUAL Warranty 02 Atmospheric Water Generators (AWGs) 03 Safety Precautions 04 Operational Diagram & System Specs 05 Getting
AW250M. Operator s Manual. Atmospheric Water Generator. Another Great Product of Air Water Corporation, USA. July 2008
 AW250M Atmospheric Water Generator Operator s Manual Another Great Product of Air Water Corporation, USA July 2008 Copyright 2008 Air Water Corporation Notice The information contained in this document
A few simple steps to ensure perfect water, every time.
 A few simple steps to ensure perfect water, every time. Use and Care Guide MODELS: A8CTBOTTLELESSWHT A8CTBOTTLELESSBLK Registration Please visit the website below to register your new water cooler within
CA-707. Manual. Read these instructions carefully before you start using the dehumidifier and keep the manual for later usage.
 Dehumidifier 2in1: Dehumidifying & air purifying CA-707 Manual Read these instructions carefully before you start using the dehumidifier and keep the manual for later usage. Copyright : Clean Air Optima
A few simple steps to ensure perfect water, every time.
 A few simple steps to ensure perfect water, every time. Use and Care Guide MODELS: A9CTELECTRICSS A9ELECTRICBLK A9ELECTRICWHT Registration Please visit the website below to register your new water cooler
A few simple steps to ensure perfect water, every time.
 A few simple steps to ensure perfect water, every time. Use and Care Guide MODELS: A7BOTTLELESS A7BOTTLELESSBLK Registration Please visit the website below to register your new water cooler within the
P O R T A B L E Air Conditioner
 Instruction Manual P O R T A B L E Air Conditioner Model No. WA-1400E Model No. WA-1410E Model No. WA-1400H Model No. WA-1410H It is important that you read these instructions before using your new purchase
Portable Air Conditioner
 Owner s Manual Portable Air Conditioner Model PCMB-12000E / PCMB-12000EH It is important that you read these instructions before using your new purchase and we strongly recommend that you keep them in
Portable Air Conditioner 6,000 BTU 8,000 BTU 10,000 BTU
 Portable Air Conditioner 6,000 BTU 8,000 BTU 10,000 BTU OPERATING INSTRUCTIONS PCR-06-01 PCR-08-01 PCR-10-01 3058080 V170223 PURCHASE INFORMATION Thank you for choosing a Chigo Portable Air Conditioner.
Portable Air Conditioner, Dehumidifier,Heater and Fan utilizing Heat Pump Technology
 Portable Air Conditioner, Dehumidifier,Heater and Fan utilizing Heat Pump Technology OWNER'S MANUAL Model # KY-34 3046364 Please read owner s manual carefully before operating unit. TABLE OF CONTENTS INTRODUCTION...3
Outdoor Refrigerator. Be sure unit is standing upright 24 hours prior to plug-in. Model: BLZ-SSRF-50DH
 Outdoor Refrigerator Be sure unit is standing upright 24 hours prior to plug-in. Model: BLZ-SSRF-50DH IMPORTANT SAFEGUARDS Read all instructions before using this appliance. Use this appliance only for
Mobile Air Conditioner Instruction Manual Model TC-N9KM
 Mobile Air Conditioner Instruction Manual Model TC-N9KM Please read and retain these instructions for future reference SPECIFICATION Model no. Cooling capacity Power/Ampere consumption for cooling* Air
5) Do not start or stop the unit by inserting or pulling out the power plug.
 Do not start or stop the unit by inserting or pulling out the power plug.") 3058080 V170306 PURCHASE INFORMATION Thank you for choosing a Soleus Air Portable Air Conditioner. This Owner s Manual will provide you with valuable information necessary for the proper care and maintenance
3058080 V170306 PURCHASE INFORMATION Thank you for choosing a Soleus Air Portable Air Conditioner. This Owner s Manual will provide you with valuable information necessary for the proper care and maintenance
Installation & Operating Guide
 5-036 HOT WATER TANK Installation & Operating Guide Read all instructions thoroughly. Keep this guide for future reference. Proof of purchase is required for Warranty. Staple receipt or proof of purchase
WA A Aqua Sub Bottom-load Water Cooler
 WA1-02-21A Aqua Sub Bottom-load Water Cooler 4002638 Thank you for choosing a Soleus Air Water Cooler. This owner s manual will provide you with valuable information necessary for the proper care and maintenance
gamma pond Ultraviolet Sterilizers
 gamma pond Ultraviolet Sterilizers Instructions for Models #1410 8w, 1411 15w, 1412 25w, 1403-40w Important Safety Instructions... Page 2 Installation... Page 3 Maintenance & Winterizing... Page 5 Warranty...
Whynter Portable Ice Maker 33 lb capacity - White
 Whynter Portable Ice Maker 33 lb capacity - White Model # : IMC-330WS INSTRUCTION MANUAL Congratulations on your new Whynter product. To ensure proper operation, please read this Instruction Manual carefully
USER MANUAL PORTABLE AIR-CONDITIONER 2011 FE A4320A BR14081R-1
 USER MANUAL PORTABLE AIR-CONDITIONER 2011 FE A4320A BR14081R-1 CONTENTS 3 Important Information and Safety Precautions 5 Parts and Accessories 6 Control Panel Description 7 Remote Control Guide 8 Power
Electric Digital Kettle
 Electric Digital Kettle OWNER S MANUAL Model EK119H 120V., 60Hz., 1800 Watts. EURO-PRO Operating LLC Boston, MA, 02465 1 (800) 798-7398 www.euro-pro.com COPYRIGHT 2008 EURO-PRO OPERATING LLC IMPORTANT
Air Conditioner PORTABLE. Instruction Manual. Your Guarantee. Portable Air Conditioner / Heater. For models WA-1010E, WA-1010H, WA-1010M
 Portable Air Conditioner / Heater Your Guarantee If this product is found to be faulty as a result of faulty materials or workmanship within one year from date of purchase, it will be repaired or replaced
PORTABLE DEHUMIDIFIER
 PORTABLE DEHUMIDIFIER User s Manual For information or assistance, please contact: Soleus International 9451 Telstar Ave. El Monte, CA 91731 Tel: 1-888-876-5387 www.soleusair.com POWERED BY: KEEP THESE
Outdoor Refrigerator USER S MANUAL
 Outdoor Refrigerator USER S MANUAL MODEL Number:BLZ-SSRF-40DH IMPORTANT:READ THIS USER S MANUAL PRIOR TO CONNECTING POWER AND USE Before the refrigerator is used, it must be PROPERLY POSITIONED, LEVELED
Air Conditioner PORTABLE. Instruction Manual. Your Guarantee. Portable Air Conditioner / Heater. For model WA-7500M
 Portable Air Conditioner / Heater Your Guarantee If this product is found to be faulty as a result of faulty materials or workmanship within one year from date of purchase, it will be repaired or replaced
USER S MANUAL. MODEL NO. CLTL100 (White) CLTL120 (Black) Top-Load Water Cooler
 CLTL120 (Black) Top-Load Water Cooler") USER S MANUAL MODEL NO. CLTL100 (White) CLTL120 (Black) Top-Load Water Cooler Thank you for purchasing a Lago water cooler. Please read this user s manual thoroughly for using the water coolers safely
USER S MANUAL MODEL NO. CLTL100 (White) CLTL120 (Black) Top-Load Water Cooler Thank you for purchasing a Lago water cooler. Please read this user s manual thoroughly for using the water coolers safely
PLEASEREADANDSAVETHESEINSTRUCTIONS. NewAir AC-14000E, AC-14000H Portable Air Conditioner Owner's Manual
 PLEASEREADANDSAVETHESEINSTRUCTIONS NewAir AC-14000E, AC-14000H Portable Air Conditioner Owner's Manual GENERAL SAFETY INSTRUCTIONS: ALWAYS OPERATE THE UNIT IN AN UPRIGHT POSITION AND PLACE IT ON A FLAT,
USER S MANUAL. Bottom-Load Water Cooler MODEL NO. CLBL420
 R USER S MANUAL Bottom-Load Water Cooler MODEL NO. CLBL420 Thank you for purchasing a Lago water cooler. Please read this user s manual thoroughly for using the water coolers safely and appropriately.
HC12W COOL MIST ULTRASONIC HUMIDIFIER OWNER S MANUAL. Read and save these instructions.
 COOL MIST ULTRASONIC HUMIDIFIER HC12W OWNER S MANUAL Read and save these instructions. 2 BECAUSE YOU RE NOT LIKE EVERYONE ELSE And neither are we. Always at the forefront of our industry, our goal is to
PRE INSTALLATION PROCEDURES
 PRE INSTALLATION PROCEDURES DANGER! ELECTRICAL SHOCK HAZARD. Only qualified personnel who have read and understand this entire manual should attempt to install, or service this WL250 Water Treatment System,
16" and 20" Economy Incandescent Full Hoods Owner s Manual
 16" and 20" Economy Incandescent Full Hoods Owner s Manual Central Aquatics 5401 West Oakwood Park Drive Franklin, WI 53132 May 2015 Aquarium Reflector Model 16" New Economy Incandescent fits 5-1/2 Aquariums.
Model No.: PS08-01 PS10-01 Ref: KY80 KY100
 8,000/10,000/12,000 BTU Portable Air Conditioner Operating Instructions Model No.: PS08-01 PS10-01 Ref: KY80 KY100 Model No.: PS12-03 Ref: KY120 3119233 V160310 Thank you for choosing a Soleus Air Portable
Outdoor Beverage Center
 ON/OFF SET TEMPERATURE Outdoor Beverage Center Use and Care Guide Be sure unit is standing upright 24 hours prior to plug-in. Model: BBQ10715 IMPORTANT SAFEGUARDS Read all instructions before using this
User Manual. Wine Cellar
 User Manual Wine Cellar MODEL: WWT060MB WWT080MB WWT100MB WWT120MB 1. READ these instructions carefully before installing and operating the Wine Cellar. Keep them for further reference. 2. Record in the
Industrial Dehumidifier Operating Instructions. Model: VG 1500
 Industrial Dehumidifier Operating Instructions Model: VG 1500 Read and save these instructions. This instruction manual provides important information concerning the use and care of the B-Air Vantage 1500
WHYNTER ECO-FRIENDLY 12,000 BTU PORTABLE AIR CONDITIONER
 WHYNTER ECO-FRIENDLY 12,000 BTU PORTABLE AIR CONDITIONER co MODEL# : ARC-12S Instruction Manual Congratulations on your new WHYNTER product. Please read this Instruction Manual carefully before using this
Model DAC12004RC. Please read this manual carefully before use and keep it for future reference.
 Model DAC12004RC Please read this manual carefully before use and keep it for future reference. CONTENTS. Page Introduction........................................................ 1 Features...........................................................
SAFETY ALERT SYMBOLS SAFETY PRECAUTIONS
 SAFETY ALERT SYMBOLS Read and follow all safety information carefully. The signal words used in this manual are selected as shown below and based on an assessment of the degree of potential injury or damage
Operating Instructions
 PH5-13R-35D Portable Air Conditioner with Heat Pump Operating Instructions 3092402 Item Number: LX-130 Model Number: PH5-13R-35D 201 Soleus Air International Thank you for choosing a Soleus Air PH5 Series
Air Conditioner. Instruction Manual. For Models WA-1010E, WA-1010H, WA-1010M WA-1230E, WA-1230H P O R T A B L E
 R Instruction Manual For Models WA-1010E, WA-1010H, WA-1010M WA-1230E, WA-1230H P O R T A B L E Air Conditioner It is important that you read these instructions before using your new purchase and we strongly
Portable Dehumidifier
 Portable Dehumidifier OPERATING INSTRUCTIONS HMT-D30-A Model Numbers: HMT-D30-A HMT-D45E-A HMT-D70E-A HMT-D45E-A HMT-D70E-A 3058080 V.161115 PURCHASE INFORMATION Thank you for choosing a Soleus Air Portable
SAFETY ALERT SYMBOLS SAFETY PRECAUTIONS
 SAFETY ALERT SYMBOLS Read and follow all safety information carefully. The signal words used in this manual are selected as shown below and based on an assessment of the degree of potential injury or damage
WHYNTER 11,000 BTU DUAL HOSE PORTABLE AIR CONDITIONER
 WHYNTER 11,000 BTU DUAL HOSE PORTABLE AIR CONDITIONER c o MODEL# : ARC-110WD Instruction Manual Congratulations on your new WHYNTER product. To ensure proper operation, please read this Instruction Manual
All about the Use &Care
 All about the Use &Care of your Dehumidifier TABLE OF CONTENTS Important Safety Instructions... 2 Care And Cleaning... 6 Location... 3 Storage... 6 How It Works... 3 Before You Call... 7 Operating Instructions...
Model 9000 Countertop Steam Distiller
 WARRANTY REGISTRATION Please call 1-800-624-5836 to register this distiller. OWNER S LIMITED WARRANTY Tuttnauer warrants, to the original purchaser, this product against defects in materials and workmanship,
HMT-D30-A HMT-D45E-A HMT-D70E-A. Model Numbers: HMT-D30-A HMT-D45E-A HMT-D70E-A. Portable Dehumidifier Operating Instructions V.
 HMT-D30-A HMT-D45E-A HMT-D70E-A Model Numbers: HMT-D30-A HMT-D45E-A HMT-D70E-A Portable Dehumidifier Operating Instructions 3058080 V.151201 General Dehumidifier Information RECOMMENDED HUMIDITY LEVELS
WHYNTER PORTABLE ICE MAKER 49 LB CAPACITY - STAINLESS STEEL
 WHYNTER PORTABLE ICE MAKER 49 LB CAPACITY - STAINLESS STEEL Model # : IMC-490SS INSTRUCTION MANUAL Congratulations on your new Whynter product. To ensure proper operation, please read this Instruction
15,000 BTU Portable Air Conditioner
 Instruction Manual 15,000 BTU Portable Air Conditioner Model: HYAC15 READ AND SAVE THESE INSTRUCTIONS Please read and follow the instructions in this user manual even if you feel you are familiar with
MODEL 7000 SUCTION UNIT
 MODEL 7000 SUCTION UNIT OPERATOR S MANUAL Caution Federal law restricts this device to sale by or on order of a physician, or any other practitioner licensed by the law of the State in which he practices
PRE-INSTALLATION PROCEDURE
 PRE-INSTALLATION PROCEDURE Required with each BLUPURA Water Treatment System. 1 each External Filter 1 each Chiller 1 each CO 2 Regulator 1 each External Filter 1 each Water Pressure Regulator 1 each 4
INSTRUCTION MANUAL PORTABLE FRIDGE/FREEZER. Models: RVX-35 / RVX-45 / RVX-50 RVX-55 / RVX-65 / RVX-75
 INSTRUCTION MANUAL PORTABLE FRIDGE/FREEZER Models: RVX-35 / RVX-45 / RVX-50 RVX-55 / RVX-65 / RVX-75 PLEASE READ THIS INSTRUCTION MANUAL CAREFULLY BEFORE CONNECTING AND OPERATING THE APPLIANCE. SAVE IT
WHYNTER ECO-FRIENDLY 12,000 BTU PORTABLE AIR CONDITIONER WITH HEATER
 WHYNTER ECO-FRIENDLY 12,000 BTU PORTABLE AIR CONDITIONER WITH HEATER co MODEL# : ARC-12SDH Instruction Manual Congratulations on your new WHYNTER product. Please read this Instruction Manual carefully
WHYNTER Eco Pure Air Purifier
 WHYNTER Eco Pure Air Purifier SB/W Instruction Manual MODEL# : AFR-300 Thank you for your purchase of this WHYNTER product. Please read this Instruction Manual carefully before using the product to ensure
WHYNTER ECO-FRIENDLY 12,000 BTU PORTABLE AIR CONDITIONER
 WHYNTER ECO-FRIENDLY 12,000 BTU PORTABLE AIR CONDITIONER co MODEL# : ARC-12SD Instruction Manual Congratulations on your new WHYNTER product. Please read this Instruction Manual carefully before using
HMT-D30-A HMT-D45E-A HMT-D70E-A. Model Numbers: HMT-D30-A HMT-D45E-A HMT-D70E-A. Portable Dehumidifier Operating Instructions V.
 HMT-D30-A HMT-D45E-A HMT-D70E-A Model Numbers: HMT-D30-A HMT-D45E-A HMT-D70E-A Portable Dehumidifier Operating Instructions 3119233 V.141217 General Dehumidifier Information RECOMMENDED HUMIDITY LEVELS
WL380 QUICK START GUIDE
 WL380 QUICK START GUIDE WARNING! Only trained and qualified technicians should attempt to install, maintain, or service Waterlogic equipment. Failure to follow all instructions in this manual could result
Glass Door Merchandisers GDC10, GDC12F, GDC15, GDC23, GDC24F, GDC40, GDC40F, GDS47, GDC69
 Commercial Refrigerator And Freezer User s Manual Glass Door Merchandisers GDC10, GDC12F, GDC15, GDC23, GDC24F, GDC40, GDC40F, GDS47, GDC69 12/2015 Please read the manual thoroughly prior to equipment
Downloaded from manuals search engine
 CONTENTS.SAFETY RULES... 2.NAMES OF PARTS... 2 3.ACCESSORIES... 3 4.OPERATION PANEL OF THE AIR CONDITIONER... 3 5.OPERATING INSTRUCTION FOR THE AIR CONDITIONER... 5 6.INSTALLATION... 8 7.MAINTENANCE...
Dosificador de agua. Use & Care Guide Guide d utilisation et d entretien Manual d uso y cuidado
 Premium Point-of-Use Water Dispenser Distributeur d eau individuel de première qualité Dosificador de agua de primera calidad disponible en donde se necesita Use & Care Guide Guide d utilisation et d entretien
Dehumidifier. Instruction Manual. Model DH-320/A
 Dehumidifier Instruction Manual Model DH-320/A CONTENTS Safety Warnings 2 Operation consideration 5 Construction & controls 6 Function selection 8 Preparation for use 10 Operation 12 Maintenance 14 Continuous
Portable Air Conditioner with Heat Pump Technology PH4-10R-01, PH4-12R-01, & PH4-14R-01 Operating Instructions
 Portable Air Conditioner with Heat Pump Technology PH4-10R-01, PH4-12R-01, & PH4-14R-01 Operating Instructions 3092402 2006 Soleus Air International Thank you for choosing a Soleus Air Portable Air Conditioner
Installation & Maintenance Guide
 Installation & Maintenance Guide Internal Mini Skimmer 115 For Model 510114 Skimmer 30 Gallon www.aquaticlife.com Thank you for purchasing an AquaticLife Internal Mini Skimmer for use with your marine
8L DEHUMIDIFIER OPERATING INSTRUCTIONS
 8L DEHUMIDIFIER OPERATING INSTRUCTIONS Attention: This Dehumidifier is rated to extract 8L per day in an environment of 80% humidity and temperature of 30 C. This is the world-wide standard for rating
STORM. Bottom-Load. Water Dispenser User Manual
 STORM Bottom-Load Water Dispenser User Manual 1 3 2 4 6 5 7 8 9 1.Indicator lights - Red (Top) Replace Bottle Alarm Light - Blue (Bottom) Replace SmartFlo SF-1 Water Cartridge Alarm Light 2.Cold Water
OPERATION MANUAL. Model: IC702/703 Ice Maker
 OPERATION MANUAL Model: IC702/703 Ice Maker Important Safety Instructions: read carefully and keep for future reference. Thank you for purchasing our IC702703 Ice Maker product. We hope you enjoy using
smardy - pure water Reverse osmosis system YR100-A 75 GPD
 smardy - pure water Reverse osmosis system YR100-A 75 GPD Instruction manual [EN] Please read this manual carefully before operating the device and subsequently keep the instruction manual safely and within
Outdoor/Commercial Refrigerator USER S MANUAL
 Outdoor/Commercial Refrigerator USER S MANUAL MODEL Number:BLZ-SSRF40D IMPORTANT:READ THIS USER S MANUAL PRIOR TO CONNECTING POWER AND USE Before the refrigerator is used, it must be PROPERLY POSITIONED,
Portable Air Conditioner. OWNER S MANUAL Read these instructions before use. Model: MM14CHCS. Voltage rating: 115V~60Hz Power rating : 1400W
 Portable Air Conditioner OWNER S MANUAL Read these instructions before use Model: MM14CHCS Customer Support : 1-800-474-2147 Voltage rating: 115V~60Hz Power rating : 1400W For product inquiries or support
SAFETY ALERT SYMBOLS SAFETY PRECAUTIONS
 SAFETY ALERT SYMBOLS Read and follow all safety information carefully. The signal words used in this manual are selected as shown below and based on an assessment of the degree of potential injury or damage
MEDICAL FREEZER. Model FS24L INSTRUCTION MANUAL. Write Serial Number (on back of unit) here:
 here:") MEDICAL FREEZER Model FS24L INSTRUCTION MANUAL - Write Serial Number (on back of unit) here: FELIX STORCH, INC. 770 Garrison Avenue Bronx, New York 10474 www.medicalrefrigerators.com TABLE OF CONTENTS
MEDICAL FREEZER Model FS24L INSTRUCTION MANUAL - Write Serial Number (on back of unit) here: FELIX STORCH, INC. 770 Garrison Avenue Bronx, New York 10474 www.medicalrefrigerators.com TABLE OF CONTENTS
CR13000-PAC OWNER S MANUAL. Portable Air Conditioner. PORTABLE AIR CONDITIONER with HEAT PUMP. Operating and Servicing Instructions
 OWNER S MANUAL Operating and Servicing Instructions CR13000-PAC PORTABLE AIR CONDITIONER with HEAT PUMP Portable Air Conditioner Questions or concerns? For assistance, please call Customer Service ClimateRight
USE AND CARE MANUAL. Before operating the iron, please read these instructions carefully and keep them for future reference.
 USE AND CARE MANUAL Before operating the iron, please read these instructions carefully and keep them for future reference. 1 IMPORTANT SAFETY INSTRUCTIONS When using electrical appliances, basic safety
Model Numbers: HCT-D30-A (TDA30) HCT-D45E-A (TDA45E) HCT-D70E-A (TDA70E) Portable Dehumidifier Operating Instructions V
 HCT-D45E-A (TDA45E) HCT-D70E-A (TDA70E) Portable Dehumidifier Operating Instructions V") Model Numbers: HCT-D30-A (TDA30) HCT-D45E-A (TDA45E) HCT-D70E-A (TDA70E) Portable Dehumidifier Operating Instructions 3119233 V.140529 General Dehumidifier Information RECOMMENDED HUMIDITY LEVELS Spring/Summer:
Model Numbers: HCT-D30-A (TDA30) HCT-D45E-A (TDA45E) HCT-D70E-A (TDA70E) Portable Dehumidifier Operating Instructions 3119233 V.140529 General Dehumidifier Information RECOMMENDED HUMIDITY LEVELS Spring/Summer:
Portable Air Conditioner with Heat Pump Technology Operating Instructions. Model No.: HCB-P13HP-D. Reference No.: BPD13HP V140217
 Portable Air Conditioner with Heat Pump Technology Operating Instructions 3092402 Model No.: HCB-P13HP-D Reference No.: BPD13HP V140217 Thank you for choosing a Soleus Air Portable Air Conditioner with
INSTRUCTION MANUAL BEFORE USE, PLEASE READ AND FOLLOW ALL SAFETY RULES AND OPERATING INSTRUCTIONS.
 INSTRUCTION MANUAL Model Number: WID260P Water Dispenser with Ice Maker BEFORE USE, PLEASE READ AND FOLLOW ALL SAFETY RULES AND OPERATING INSTRUCTIONS. Avanti has a policy of continuous improvement on
12,000 BTU Evaporative Portable Air Conditioner
 12,000 BTU Evaporative Portable Air Conditioner Owner s Manual Model # KY-32E Please read owner s manual carefully before operating the unit. TABLE OF CONTENTS PAGE Table of Contents. 2 Introduction....3
PORTABLE AIR CONDITIONER OWNER S MANUAL
 PORTABLE AIR CONDITIONER OWNER S MANUAL ASSEMBLY AND OPERATING INSTRUCTIONS MODELS: JHS-A018-10KR SKU#: 130004 JHS-A018-12KRH SKU#: 130005 JHS-A018-14KRH SKU#: 130009 WARNING: Read and follow all warnings
Portable Dehumidifier with Internal Pump
 Portable Dehumidifier with Internal Pump OPERATING INSTRUCTIONS 115 Pint Portable Dehumidifier With Internal Pump Model Number: DMC-115IP-210 3092402 V161220 PURCHASE INFORMATION Thank you for choosing
User Manual. Juice Extractor MODEL: WJE2BSLA
 User Manual Juice Extractor MODEL: WJE2BSLA 1. READ these instructions carefully before installing and operating the appliance. Keep them for further reference. 2. Record in the space below the SERIAL/MODEL
BEFORE USE, PLEASE READ AND FOLLOW ALL SAFETY RULES AND OPERATING INSTRUCTIONS
 WINE CELLAR Model SWC1840 Owner s Manual BEFORE USE, PLEASE READ AND FOLLOW ALL SAFETY RULES AND OPERATING INSTRUCTIONS Write the Serial Number here Felix Storch, Inc. Summit Appliance Division An ISO
OWNERS' GUIDE PRECISION WATER SYSTEMS WATER DISTILLER. Water Systems FOR MODELS: PWS MANUFACTURED BY:
 PREC SION Water Systems OWNERS' GUIDE FOR MODELS: PWS 45-75 MANUFACTURED BY: PRECISION WATER SYSTEMS WATER DISTILLER PRECISION DESIGN & MANUFACTURING INC. 9024 100 STREET WESTLOCK, ALBERTA, CANADA, T7P
IMPORTANT SAFEGUARDS
 IMPORTANT SAFEGUARDS Definitions Whenever used, the following symbol and terms identify safety and property damage messages and designate a level of hazard seriousness. - This is the safety alert symbol.
Paralda Air Purifier USER MANUAL
 Paralda Air Purifier USER MANUAL www.alencorp.com 1 2 Helping People Live Better Table of Contents Air Purifier Safety Know Your Air Purifier Care & Maintenance Why You Should Replace Your Filter Alen
With Remote Control. English. Model
 Digital Ceramic Heater With Remote Control, Owner s Manual English Model HPQ15F-E TABLE OF CONTENTS 2 INTRODUCTION Thank you for choosing the Hunter Ceramic Heater. This manual gives you complete instructions
Introduction. Features. Benefits. Records
 Owner s Manual Introduction Specifications Control Panel / Remote Unit Diagrams Unit Setup & Operation Maintaining the Unit Safety info / Warnings Warranty Information 3 4 5 6 7 8 10 11 Introduction Welcome
Utopian Portable Dehumidifier
 Utopian Portable Dehumidifier Thank you for purchasing this quality Portable Dehumidifier! Please read through this manual completely, and keep it in case you need to reference the information in the future.
PRE INSTALLATION PROCEDURES
 PRE INSTALLATION PROCEDURES DANGER! ELECTRICAL SHOCK HAZARD. Only qualified personnel who have read and understand this entire manual should attempt to install, or service this unit, failure to do so could
WINDOW TYPE ROOM AIR CONDITIONER OPERATION AND INSTALLATION MANUAL
 MODEL RA-0LDF RA-3LDF WINDOW TYPE ROOM AIR CONDITIONER OPERATION AND INSTALLATION MANUAL AIR DEFLECTORS VERTICAL DEFLECTORS Vertical de ectors at both sides of outlets can be set to either auto-swing or
WHYNTER PORTABLE AIR CONDITIONER
 WHYNTER PORTABLE AIR CONDITIONER MODEL# : ARC-13PG Instruction Manual Thank you for your purchase of this WHYNTER product. Please read this Instruction Manual carefully before using product to ensure proper
EVAPORATIVE COOLER W
 EVAPORATIVE COOLER 972-1003-W USER MANUAL INTRODUCTION READ AND SAVE THESE INSTRUTIONS! 1 Thanks for your support and choice of our unique tower fan, in order to help you use the product more conveniently,
Owner s Manual Compact Fluorescent Lunar Aqualight
 Owner s Manual Compact Fluorescent Lunar Aqualight Aquarium Light Fixture Featuring: Directional Lunar Blue LEDs IMPORTANT SAFETY INSTRUCTIONS WARNING: To guard against injury, basic safety precautions
Gallery Electric Fireplaces
 Gallery Electric Fireplaces Homeowner s Installation Instructions & Operating Manual Model: GBI-34, GBI-41 Only use this heater as described in this manual. Any other use is not recommended by the manufacturer,
Cool Mist Ultrasonic Humidifier
 Cool Mist Ultrasonic Humidifier Instruction Manual and Warranty Information HUM-CM50 IMPORTANT SAFETY INSTRUCTIONS: WHEN USING ELECTRICAL PRODUCTS, ESPECIALLY WHEN CHILDREN ARE PRESENT, BASIC SAFETY PRECAUTIONS
Dimplex Air Conditioner DAC 12000R
 Dimplex Air Conditioner DAC 12000R CONTENTS. Page Introduction........................................................ 2 Features........................................................... 2 Specification........................................................
14,000 BTU Portable Air Conditioner 14,200 BTU Heat Pump Model Number: LX-140 Operating Instructions. Model No. LX Soleus Air International
 14,000 BTU Portable Air Conditioner 14,200 BTU Heat Pump Model Number: LX-140 Operating Instructions 3092402 Model No. LX-140 2012 Soleus Air International Thank you for choosing a Soleus Air LX-140 Portable
TPP440. owner s guide. air purifier with uv light. air purifier with uv light TP
 TPP TPP air purifier with uv light air purifier with uv light TP-052511 by owner s guide by table of contents SAFETY INSTRUCTIONS 2 Thank you for purchasing the Therapure air purifier. With UV germicidal
BL250. Pulse Blender OWNER S GUIDE
 BL250 OWNER S GUIDE Pulse Blender 1-877-646-5288 IMPORTANT SAFETY INSTRUCTIONS For Household Use Only WHEN USING ELECTRICAL APPLIANCES, BASIC SAFETY PRECAUTIONS SHOULD ALWAYS BE FOLLOWED, INCLUDING THE
All about the Use &Care
 All about the Use &Care of your Dehumidifier TABLE OF CONTENTS Important Safety Instructions... 2 Care And Cleaning... 8 Location... 3 Storage... 8 How It Works... 3 Before You Call... 9 Operating Instructions...