Customers must fill in and mail the warranty card in order to activate the warranty.
|
|
|
- Eustace Cunningham
- 6 years ago
- Views:
Transcription

1 WARRANTY The Gentec-EO UNO Single Channel Laser Power Meter comes with a one-year warranty (from date of shipment) against material and/or workmanship defects, when used under normal operating conditions. The warranty does not cover damages related to battery leakage or misuse. Gentec-EO Inc. will repair or replace, optionally, any UNO that proves to be defective during the warranty period, except in the case of product misuse. Any attempt by an unauthorized person to alter or repair the product voids the warranty. The manufacturer is not liable for consequential damages of any kind. Customers must fill in and mail the warranty card in order to activate the warranty. In case of malfunction, contact your local Gentec-EO distributor or nearest Gentec-EO Inc. office to obtain a return authorization number. The material should be returned to: Gentec Electro-Optics, Inc. 445, St-Jean-Baptiste, Suite 160 Québec, QC Canada G2E 5N7 Tel: (418) Fax: (418) info@gentec-eo.com Website: CLAIMS To obtain warranty service, contact your nearest Gentec-EO agent or send the product, with a description of the problem, prepaid shipping and insurance, to the nearest Gentec-EO agent. Gentec-EO Inc. assumes no risk for damage in transit. Gentec-EO Inc. will, at its option, repair or replace the defective product free of charge or refund your purchase price. However, if Gentec-EO Inc. deems that the failure is caused by misuse, alterations, accident or abnormal condition of operation or handling, you will be billed for the repair and the repaired product will be returned to you (repetitive, see above).
2 UNO User s Manual Revision WARRANTY The Gentec-EO UNO Single Channel Laser Power, Energy and Power/Energy Meter carries a one-year warranty (from date of shipment) against material and/or workmanship defects, when used under normal operating conditions. The warranty does not cover damages related to battery leakage or misuse. Gentec-EO Inc. will repair or replace, optionally, any UNO that proves to be defective during the warranty period, except in the case of product misuse. Any attempt by an unauthorized person to alter or repair the product voids the warranty. The manufacturer is not liable for consequential damages of any kind. In case of malfunction, contact your local Gentec-EO distributor or nearest Gentec-EO Inc. office to obtain a return authorization number. The material should be returned to: Gentec Electro-Optics, Inc. 445, St-Jean-Baptiste, Suite 160 Québec, QC Canada G2E 5N7 Tel: (418) Fax: (418) service@gentec-eo.com Website: CLAIMS To obtain warranty service, contact your nearest Gentec-EO agent or send the product, with a description of the problem, transportation and insurance prepaid, to the nearest Gentec-EO agent. Gentec-EO Inc. assumes no risk for the damage in transit. Gentec-EO Inc. will, at its option, repair or replace the defective product free of charge or refund your purchase price. However, if Gentec-EO Inc. determines that the failure is caused by misuse, alterations, accident or abnormal condition of operation or handling, you will be billed for the repair and the repaired product will be returned to you, transportation prepaid.
3 UNO User s Manual Revision SAFETY INFORMATION Do not use the UNO if the device or the detector looks damaged, or if you suspect that the UNO is not operating properly. Appropriate installation must be done for water-cooled and fan-cooled detectors. Refer to the specific instructions for more information. The user must wait for a while before handling these detectors after power is applied. Surfaces of the detectors get very hot and there is a risk of injury if they are not allowed to cool down. Note: This equipment has been tested and found to comply with the limits for a Class B digital device, pursuant to part 15 of the FCC Rules. These limits are designed to provide reasonable protection against harmful interference in a residential installation. This equipment generates, uses, and can radiate radio frequency energy and, if not installed and used in accordance with the instructions, may cause harmful interference to radio communications. However, there is no guarantee that interference will not occur in a particular installation. If this equipment does cause harmful interference to radio or television reception, which can be determined by turning the equipment off and on, it is suggested to try to correct the interference by taking one or more of the following steps: Reorient or relocate the receiving antenna. Increase the distance between the equipment and receiver. Connect the equipment to an outlet that is on a different circuit than the receiver. Consult the dealer or an experienced radio/tv technician for help. Caution: Changes or modifications not expressly approved in writing by Gentec-EO Inc. may void the user s authority to operate this equipment.
4 UNO User s Manual Revision TABLE OF CONTENTS WARRANTY... 1 CLAIMS... 1 SAFETY INFORMATION... 2 TABLE OF CONTENTS... 3 LIST OF ILLUSTRATIONS THE UNO SINGLE CHANNEL LASER POWER METER INTRODUCTION SPECIFICATIONS FRONT PANEL DESCRIPTION CONNECTOR DESCRIPTION GETTING STARTED POWER MEASUREMENT PROCEDURE DISPLAY DESCRIPTION BATTERIES BATTERY SELECTION BATTERY INSTALLATION BATTERY REMOVAL DECLARATION OF CONFORMITY APPENDIX RECYCLING AND SEPARATION PROCEDURE SEPARATION DISMANTLING PROCEDURE LIST OF ILLUSTRATIONS FIG. 1-1 UNO FRONT PANEL... 6 FIG. 1-2 UNO CONNECTORS... 7 FIG. 1-3 UNO LCD DISPLAY... 9
5 UNO User s Manual Revision THE UNO SINGLE CHANNEL LASER POWER METER Introduction To obtain full performance from the UNO, we recommend that you read this manual carefully. The UNO is a large display laser power monitor that features outstanding efficiency, ease of use and battery life. Unpacking Each Gentec-EO UNO is thoroughly tested and calibrated prior to shipment. Visually inspect every UNO unit after removing it from the shipping containers. If you see any damage, retain all packaging materials and shipping receipts. Any damage claim should be made promptly to the shipping company. Notify the nearest Gentec-EO representative concerning the claim, so that any repair or replacement can be arranged as soon as possible.
6 UNO User s Manual Revision Specifications The following specifications are based on a one-year calibration cycle, an operating temperature of 18 to 28ºC (64 to 82ºF) and a relative humidity not exceeding 80%. Power Range Power Scales (photodetector) Power Scales (thermal head) Digital Resolution (photodetector) Digital Resolution (thermal detector) Digital Resolution (XLP-12 detector) Table 1-1 List of Specifications UNO POWER METER SPECIFICATIONS 10 nw to 10 kw autoscale single wide range scale 1 pw 1 mw 1 µw Monitor Accuracy ±1 % 5 µv Response Time (accelerated) 1 Sampling Frequency Digital Display Display Rate Dimensions Weight (including batteries) Batteries (included) Battery life (with thermal detector) External Power Supply (not included) 1 sec 16.7 Hz 76 x 57 mm LCD 2 Hz 210 mm(w) x 122 mm (H) x 44 mm (D) 0.47 kg 4 Alkaline AA batteries 670 hours (estimated) Input: 100/240 VAC Hz, Output 9 VDC 1.66 A 1 Varies with detector head.
7 UNO User s Manual Revision Front Panel Description 1- control key. UNO on and off. 2- Zero / dbm control key. Fig. 1-1 UNO Front Panel Cancels electronic offset, detector offset and ambient light on the detector. This key should be pressed before taking measurements. Refer to p.7 adjusting the zero (steps 8 and 9). The hidden dbm function is available by pressing more than 2 seconds on the Zero control key.the Uno will convert the displayed number in dbm (db referenced to 1mW) and will display dbm unit. To get back to the previous display in Watt, press again more than 2 seconds on the Zero control key. 3- Att control key. Photodetectors can be calibrated with and without attenuator. This key allows the user to select the proper configuration and wavelength. The ATT LCD annunciate indicates whether the attenuator sensitivity is activated. 4- Save λ control key. After selecting the proper wavelength using the λ up and λ down control keys, pressing the Save λ control key stores the wavelength in non-volatile memory and returns to the measurements with the corresponding sensitivity. 5- λ up and λ down control keys. Allows the user to select the appropriate wavelength. 6- Fast and Slow control keys. These keys are only useful with thermal detector heads. The fast mode enables anticipation, which shortens the natural response time of the detector. The slow mode disables anticipation. By default, the monitor is in Fast mode. This setting is not stored in non-volatile memory and therefore returns to Fast mode on every power-up.
8 UNO User s Manual Revision Connector Description Fig. 1-2 UNO Connectors 1- EXTERNAL POWER SUPPLY INPUT JACK. Input voltage required: 9 VDC/100 ma. The external power supply does not charge the batteries; it allows the use of the monitor without batteries, with dead batteries or simply to avoid discharging the batteries inside the monitor. CAUTION Permanent damage to the optical meter may occur if an external power supply other than the Gentec-EO P/N A is used. Please call Gentec-EO or your local distributor if extra power supplies are needed. 2- PROBE INPUT JACK. The UNO uses a DB-15 female connector to mate with the detector heads (probes). The UNO works with all Gentec-EO power detectors currently sold. It automatically recognizes every power detector head, which ensures accurate auto-calibration. More importantly, it can take advantage of our Personal wavelength correction. It reads the memory in the Smart Interface connector to provide a wavelength correction that is based on spectral data measured from that specific detector. 3 Getting Started 4 This section contains important information concerning the installation and operation of the UNO. The UNO is delivered ready to use. Just install the 4 AA batteries, insert a detector head in the Probe Input Jack (#2 in Figure 1-2) and press the I/O key. 4.1 Power measurement procedure 1- Install the power detector on its optical stand. 2- First, slide the connector latch to the right to unlock the connector. 3- Turn the UNO off and connect a power detector head to the UNO using the PROBE INPUT JACK (see Fig. 1-2). It is recommended to turn the UNO off before connecting a new head in order to prevent any loss of information from the detector head s EEPROM.
9 UNO User s Manual Revision Slide the latch to the left to lock the connector into place. 5- Switch the UNO ON using the I/O key. The UNO displays the current wavelength for a moment before displaying measurements. If this wavelength is not the wavelength of the laser, go to step 6, otherwise proceed to step Select the proper wavelength using the λ up and λ down control keys. Then press the Save λ control key to store the wavelength in non-volatile memory and return to the measurement mode. Adjusting the zero (steps 7 to 11) 7- Remove the detector s protective cover. Put the detector into the laser beam path. The entire laser beam must be within the sensor aperture. Do not exceed maximum specified densities, energies or powers. For the most accurate measurement, spread the beam across 60% to 80% of the sensor area. Leave it there until the detector has reached its equilibrium temperature. 8- Block off laser radiation to the detector. The power read by the UNO when no laser beam is incident on the detector may not be exactly zero. This is because the detector is not thermally stabilized OR there was a heat source in the detector s field of view when you turned on the UNO, OR from the internal electronic offset of the UNO. 9- To reset the zero, wait until the reading has stabilized and press the Zero button on the front panel. The UNO will display ZEro for a moment and then return to the normal measurement. You are now ready to make an accurate measurement. Pressing the Zero button again will not undo the zero; it will re-do it. 10- When you select ATT you must enter a wavelength and then press Save λ to exit. 11- Apply the laser beam to the detector. The laser must be CW for photodetectors. Notes: Refer to the specific power detector documentation for complete installation and operating instructions. The power detectors are thermal sensors sensitive to temperature variations. For high-precision measurements, it is recommended to: Allow the power detector s temperature to stabilize before zeroing the UNO. Do not touch the detector itself when handling the power detector. Touch only the stand. Avoid forced airflow or drafts around the detector.

10 UNO User s Manual Revision Display description Fig. 1-3 UNO LCD Display The LCD provides measurement information, wavelength information, attenuator selection and other useful messages. When the batteries are discharged enough to compromise the measurement, the UNO displays LO instead of the measurement. Refer to the battery maintenance section to replace the batteries. The ATT field indicates if the detector sensitivity used takes into account the presence of the attenuator that the detector was calibrated with. Error messages can also be displayed: E-05 indicates that no detector is present on power-up. E-07 appears after pressing the ATT control key with a detector that does not have attenuator calibration. The message disappears a few seconds after pressing the control key. E-08 indicates that the detector is not supported or that the detector calibration EEPROM is corrupted. It can also appear if the DB15 is poorly secured or is worn out. E-09 appears after pressing the FAST or SLOW control key with a detector that does not have anticipation (photodetectors). The message disappears a few seconds after pressing the control key. Any other error message indicates a malfunction and should be reported.

11 UNO User s Manual Revision BATTERIES Battery selection To avoid leakage and poor autonomy, it is highly recommended that only good quality, new and identical alkaline batteries be put into the UNO. Good quality rechargeable batteries can also be used with the UNO and recharged with an external charger. The batteries need to be replaced if the UNO displays LO on its digital display or if it does not power-up when the I/O control key is pressed. 6.2 Battery installation - Put the UNO face down on a flat surface. - Lift the kickstand. - Open and remove the battery door. - Insert one battery in the nylon strap (to ease removal) and insert it at one extremity of the UNO battery compartment with the right polarity. To avoid intermittent contact and involuntary disconnection, firmly insert the batteries. Insert the other batteries over the nylon strap with the right polarity so that pulling on the strap will pull every battery out of the UNO. - Put the battery door back in place. 6.3 Battery removal - Put the UNO face down on a flat surface. - Lift the kickstand. - Open and remove the battery door. - Hold down the UNO and slowly pull on the nylon strap to remove the batteries. Do not use a pointed tool to remove the batteries, since that could puncture them. The batteries need a firm pull to be removed in order to have a reliable contact.
12 UNO User s Manual Revision DECLARATION OF CONFORMITY Application of Council Directive(s): 2004/108/EC EMC Directive Manufacturer s Name: Gentec Electro Optics, Inc. Manufacturer s Address: 445 St-Jean Baptiste, suite 160 Québec (Québec), Canada G2E 5N7 European Representative s Name: Representative s Address: Type of Equipment: Model No.: Year of test & manufacture: 2011 Standard(s) to which Conformity is declared: EN : 2006 Emission generic standard Laser Components S.A.S. 45 bis Route des Gardes Meudon (France) Laser Power/Energy Meter UNO Standard Description Performance Criteria CISPR11 :2009 A1 :2010 Industrial, scientific and medical equipment Radio-frequency disturbance characteristics Limits and methods of measurement Class A EN EN A2:2010 EN A1:2010 Electromagnetic compatibility (EMC) Part 4-2: Testing and measurement techniques- Electrostatic discharge. Electromagnetic compatibility (EMC) Part 4-3: Testing and measurement techniques- Radiated, Radio Frequency, electromagnetic field immunity test Electromagnetic compatibility (EMC) Part 4-4: Testing and measurement techniques- Electrical fast transient/burst immunity test. Class B Class A Class B EN EN Electromagnetic compatibility (EMC) Part 4-5: Testing and measurement techniques- Surge immunity test. Electromagnetic compatibility (EMC) Part 4-6: Testing and measurements techniques- Immunity to conducted Radio Frequency. Class B Class A EN EN :2006 +A1:2009 Electromagnetic compatibility (EMC) Part 4-11: Testing and measurement techniques- Voltage dips, short interruptions and voltage variations immunity tests Electromagnetic compatibility (EMC) - Part 3-2: Limits - Limits for harmonic current emissions (equipment input current <= 16 A per phase) I, the undersigned, hereby declare that the equipment specified above conforms to the above Directive(s) and Standard(s). Class B Class B Class C Class C Class A Place: Québec (Québec) Date : May 4, 2011 (President)
13 UNO User s Manual Revision APPENDIX Recycling and separation procedure This section is used by the recycling center when the monitor reaches its end of life. Breaking the calibration seal or opening the monitor will void the UNO warranty. The complete Monitor contains 1 Monitor 4 AA Alkaline Batteries 1 Instruction manual 1 Calibration certificate 8.2 Separation Paper : manual and certificate. Plastic: stand, connector plate, battery door, monitor enclosure, keypad. Wires. AA batteries: inside battery compartment. Metal battery clips. Printed circuit board: inside the monitor featuring a liquid crystal display less than 100 cm Dismantling procedure - Remove batteries. - Remove the posts on each side of the DB15 connector using pliers. - Open monitor by removing the Phillips head screws in the 4 corners. - Cut the wires on the PCB side and battery clips side with cutters. - Remove battery clips with pliers.
14
Model 1916-C/-R Hand-held Optical Power Meter
 Model 1916-C/-R Hand-held Optical Power Meter User s Manual 1 Warranty Newport Corporation warrants that this product will be free from defects in material and workmanship and will comply with Newport
POWER METER INSTRUCTION MANUAL
 POWER METER INSTRUCTION MANUAL FOR KPD-1000 Version 1.0 Please read this instruction manual carefully and thoroughly Before installing or operating your power meter. TABLE OF CONTENTS 1. Introduction Introduction......1
Ambient Weather WS-28 Indoor/Outdoor Thermometer with Daily Min/Max Display User Manual
 Ambient Weather WS-28 Indoor/Outdoor Thermometer with Daily Min/Max Display User Manual Table of Contents 1 Introduction... 2 2 Getting Started... 2 2.1 Parts List... 2 3 Display Console Layout... 3 4
100 Ft. LASER DISTANCE METER
 Model #050012 Component #692527 100 Ft. LASER DISTANCE METER THIS MANUAL CONTAINS IMPORTANT INFORMATION REGARDING SAFETY, OPERATION, MAINTENANCE AND STORAGE OF THIS PRODUCT. BEFORE USE, READ CAREFULLY
PRESENTATION OVERVIEW OF THE DIFFERENT MODELS MONITORS
 THZ DETECTORS OPTICAL DETECTORS POWER DETECTORS ENERGY DETECTORS PRESENTATION OVERVIEW OF THE DIFFERENT MODELS The Gentec-EO monitors come is various sizes and types to cover all applications. We have
Our photo detectors are offered for both power or energy measurements. Measure as low as a few femtojoules in energy or a few picowatts in power.
 PHOTO DETECTORS BEAM DIAGNOSTICS SPECIAL PRODUCTS OEM DETECTORS THZ DETECTORS PHOTO DETECTORS HIGH POWER SOLUTIONS POWER DETECTORS ENERGY DETECTORS MONITORS PRESENTATION OVERVIEW OF THE DIFFERENT MODELS
Our photo detectors are offered for both power or energy measurements. Measure as low as a few femtojoules in energy or a few picowatts in power.
 BEAM DIAGNOSTICS SPECIAL PRODUCTS OEM DETECTORS THZ DETECTORS PHOTO DETECTORS HIGH POWER SOLUTIONS POWER DETECTORS ENERGY DETECTORS MONITORS PRESENTATION OVERVIEW OF THE DIFFERENT MODELS Our photo detectors
Table of Contents. What s in the Box... 3 Power Requirements... 4 Quick Setup... 5 Lighting Guide With Ring, you re Always home.
 Chime Setup Guide Table of Contents 2 What s in the Box... 3 Power Requirements... 4 Quick Setup... 5 Lighting Guide... 6 With Ring, you re Always home. What s in the Box 3 1. Ring Chime 2. Wall plugs
818E Series Energy Detector. User s Manual
 818E Series Energy Detector User s Manual 1 Warranty Newport Corporation warrants that this product will be free from defects in material and workmanship and will comply with Newport s published specifications
Ambient Weather WS Channel Wireless Thermometer with Min/Max Display User Manual
 Ambient Weather WS-0802 8-Channel Wireless Thermometer with Min/Max Display User Manual Table of Contents 1 Introduction... 1 2 Getting Started... 3 2.1 Parts List... 3 2.2 Thermometer Sensor Set Up...
Ambient Weather WS-16 8-Channel Wireless Thermometer with Min/Max Display User Manual
 Ambient Weather WS-16 8-Channel Wireless Thermometer with Min/Max Display User Manual Table of Contents 1 Introduction... 2 2 Getting Started... 3 2.1 Parts List... 3 2.2 Thermometer Sensor Set Up... 3
Ambient Weather RC-8461 ClearView Jumbo Atomic Digital Wall Clock with Temperature and Humidity User Manual
 Ambient Weather RC-8461 ClearView Jumbo Atomic Digital Wall Clock with Temperature and Humidity User Manual Table of Contents 1. Introduction... 1 2. Getting Started... 2 2.1 Product Features... 2 2.2
Thermometer model 02059
 Instruction Manual Thermometer model 02059 pm CONTENTS Unpacking Instructions... 2 Package Contents... 2 Product Registration... 2 Features & Benefits: Sensor... 2 Features & Benefits: Display... 3 Setup...
Ambient Weather WS-091-C Three Channel Display Wireless Thermometer (Console Only) User Manual
 User Manual") Ambient Weather WS-091-C Three Channel Display Wireless Thermometer (Console Only) User Manual Table of Contents 1 Introduction... 2 2 Getting Started... 2 Parts List... 3 2.2 Display Console Set Up...
Ambient Weather WS-091-C Three Channel Display Wireless Thermometer (Console Only) User Manual Table of Contents 1 Introduction... 2 2 Getting Started... 2 Parts List... 3 2.2 Display Console Set Up...
Ambient Weather WS-26 Indoor Thermo-Hygrometer with Daily Min/Max Display User Manual
 Ambient Weather WS-26 Indoor Thermo-Hygrometer with Daily Min/Max Display User Manual Table of Contents 1 Introduction... 2 2 Getting Started... 2 Parts List... 2 3 Display Console Layout... 3 4 Display
PRESENTATION OVERVIEW OF THE DIFFERENT MODELS MONITORS
 THZ DETECTORS PHOTO DETECTORS POWER DETECTORS ENERGY DETECTORS MONITORS PRESENTATION OVERVIEW OF THE DIFFERENT MODELS The Gentec-EO monitors come is various sizes and types to cover all applications. We
FEATURES AND SPECIFICATIONS
 PRECISE TEMP WIRELESS MULTI-ZONE THERMOMETER and HYGROMETER With CLOCK Model No. 91756 User's Manual BASE STATION REMOTE SENSOR FEATURES AND SPECIFICATIONS BASE STATION Indoor / wireless outdoor temperature,
INSTRUCTIONS FOR. Wireless Refrigerator Freezer Thermometer (#10378)
") CONTENTS Unpacking Instructions... 2 Package Contents... 2 Product Registration... 2 Features & Benefits: Sensors... 2 Features & Benefits: Display... 3 Setup... 4 Install or Replace Batteries... 4 Temperature
CONTENTS Unpacking Instructions... 2 Package Contents... 2 Product Registration... 2 Features & Benefits: Sensors... 2 Features & Benefits: Display... 3 Setup... 4 Install or Replace Batteries... 4 Temperature
Thermometer with Wired Sensor
 Instruction Manual Thermometer with Wired Sensor model 02042 CONTENTS Unpacking Instructions... 2 Package Contents... 2 Product Registration... 2 Features & Benefits... 3 Setup... 4 Temperature Units...
PRESENTATION OVERVIEW OF THE DIFFERENT MODELS MONITORS
 BEAM DIAGNOSTICS SPECIAL PRODUCTS OEM DETECTORS THZ DETECTORS PHOTO DETECTORS HIGH POWER DETECTORS POWER DETECTORS ENERGY DETECTORS PRESENTATION OVERVIEW OF THE DIFFERENT MODELS The Gentec-EO monitors
Light Level Detector, Surface Mount 5754PE. Installation Instructions
 Light Level Detector, Surface Mount 5754PE Contents 1.0 Introduction 3 2.0 Safety and Product Handling 3 3.0 Installation 4 3.1 Removing the Top Cover 4 3.2 Installing the Mounting Hardware 4 3.3 Mounting
Ambient Weather RC-9362 Atomic Digital Wall Clock with Temperature User Manual
 Ambient Weather RC-9362 Atomic Digital Wall Clock with Temperature User Manual Table of Contents 1. Introduction... 1 2. Getting Started... 2 2.1 Product and Display Features... 2 2.2 Parts List... 2 2.3
Digital Refrigerator/Freezer Thermometer model 00986
 Instruction Manual Digital Refrigerator/Freezer Thermometer model 00986 CONTENTS Unpacking Instructions... 2 Package Contents... 2 Product Registration... 2 Features & Benefits: Sensors... 2 Features &
Ambient Weather RC-8487 ClearView Radio Controlled Travel Alarm Clock with Indoor Temperature User Manual
 Ambient Weather RC-8487 ClearView Radio Controlled Travel Alarm Clock with Indoor Temperature User Manual Table of Contents 1. Introduction... 1 2. Getting Started... 2 2.1 Display Features... 2 2.2 Parts
Ambient Weather WS-09 8-Channel Wireless Refrigerator/Freezer Thermometer User Manual
 Ambient Weather WS-09 8-Channel Wireless Refrigerator/Freezer Thermometer User Manual Table of Contents 1. Introduction... 2 2.Getting Started... 2 2.1 Parts List... 2 2.2 Probe Thermometer Sensor Set
Room Monitor SAVE THIS MANUAL FOR FUTURE REFERENCE.
 Instruction Manual Room Monitor model 00276RM CONTENTS Unpacking Instructions... 2 Package Contents... 2 Product Registration... 2 Features & Benefits... 3 Setup... 4 Placement Guidelines... 5 Using the
LaserPoint srl - Via Burona, Vimodrone (Milano) - Italy Phone Telefax
 - Italy Phone Telefax") Cronos Instruction manual (Rev11- Dec 2011; Firm. vers.4) WARNING! The user of this instrument must be trained to the use of power lasers and associated risks. LaserPoint is in no way liable for any damage
Cronos Instruction manual (Rev11- Dec 2011; Firm. vers.4) WARNING! The user of this instrument must be trained to the use of power lasers and associated risks. LaserPoint is in no way liable for any damage
Honeywell Temperature & Humidity Sensor with LCD
 Honeywell Temperature & Humidity Sensor with LCD TABLE OF CONTENTS INTRODUCTION 3 PRODUCT OVERVIEW 4 BEFORE YOU BEGIN 5 BATTERY INSTALLATION 7 LOW BATTERY WARNING 7 PLACEMENT OF THE REMOTE SENSOR 7 GETTING
Wireless Driveway and Intruder Alert
 Wireless Driveway and Intruder Alert USER MANUAL SFA600 PLEASE READ THIS USER MANUAL COMPLETELY BEFORE OPERATING THIS UNIT AND RETAIN THIS BOOKLET FOR FUTURE REFERENCE. COMPLIANCE WITH FCC REGULATIONS
CONNEX Smart Thermostat CST R00
 CONNEX Smart Thermostat CST-240 7215100100R00 Table of Contents Welcome... 3 Features... 5 Specifications... 5 Selecting the Heater Type... 5 Installation... 7 Control Panel (User Interface)... 9 Operation...
safety & regulatory information
 safety & regulatory information Document Part Number: 338610-001 Sixth Edition June 2006 This guide provides safety and regulatory information that is compliant with U.S., Canadian, and International regulations.
Instruction Manual. AcuRite Atlas. Indoor Display model 06061
 Instruction Manual AcuRite Atlas Indoor Display model 06061 How It Works AcuRite Atlas is an environmental monitoring station that delivers key information on current outdoor conditions in your exact location.
Ambient Weather WS-0211 Wireless Wendy the Weather Wizard User Manual
 Ambient Weather WS-0211 Wireless Wendy the Weather Wizard User Manual Table of Contents 1. Introduction... 2 2. Getting Started... 2 2.1 Parts List... 2 2.2 Recommend Tools... 2 2.3 Thermometer Sensor
HIn3550 Magnetic Field Monitor User's Manual
 HIn3550 Magnetic Field Monitor User's Manual Copyright 1993 by Holaday Industries, Inc. Manual #600053 10/97 $12.50 Revision Record Manual #600053 HIn3550 Magnetic Field Monitor Revision Description Date
2 Ensure that all personnel in the area are wearing the appropriate protective eyewear.
 SYNRAD, Inc. 4600 Campus Place Mukilteo, WA 98275 tel 1.425.349.3500 fax 1.425.349.3667 e-mail synrad@synrad.com web www.synrad.com Power Wizard PW-250 Operating Instructions Important Power Wizard power
PL400 Patient Lift Scale Indicator Owner s Manual
 PL400 Patient Lift Scale Indicator Owner s Manual CARDINAL SCALE MFG. CO. 8551-M912-01 Rev C PO BOX 151 WEBB CITY, MO 64870 Printed in USA 07/04 PH (417) 673-4631 - FAX (417) 673-5001 www.cardinalscale.com
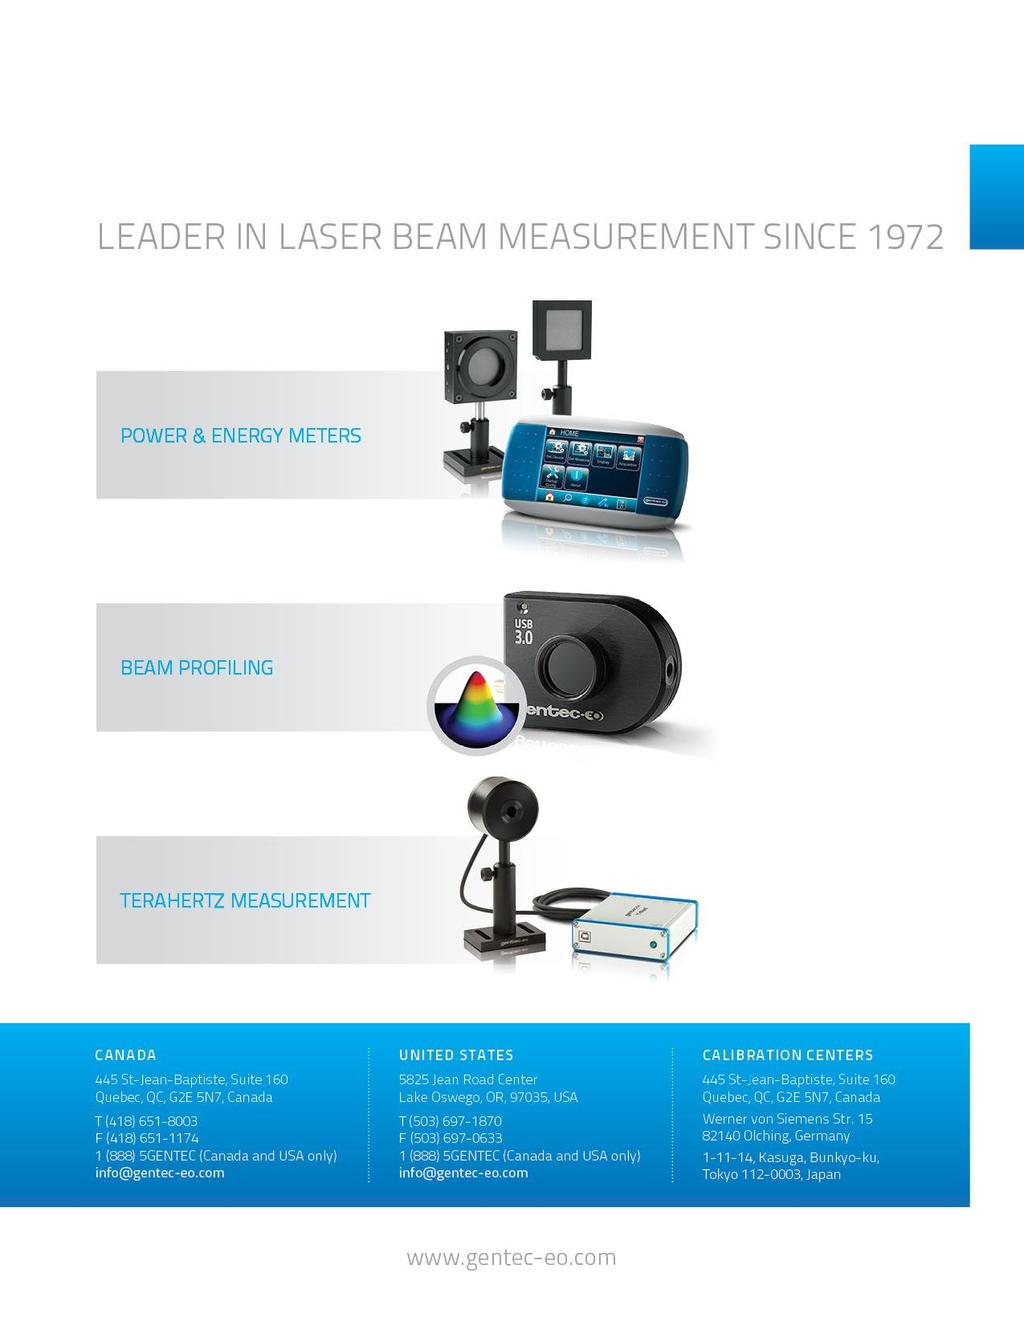
POWER & ENERGY METERS BEAM PROFILING THZ MEASUREMENT COMPANY PROFILE
 POWER & ENERGY METERS BEAM PROFILING THZ MEASUREMENT COMPANY PROFILE WHO WE ARE BEAM DIAGNOSTICS SPECIAL PRODUCTS OEM DETECTORS THZ DETECTORS PHOTO DETECTORS HIGH POWER SOLUTIONS POWER DETECTORS ENERGY
POWER & ENERGY METERS BEAM PROFILING THZ MEASUREMENT COMPANY PROFILE
 POWER & ENERGY METERS BEAM PROFILING THZ MEASUREMENT LASER BEAM MEASUREMENT COMPANY PROFILE WHO WE ARE BEAM DIAGNOSTICS SPECIAL PRODUCTS OEM DETECTORS THZ DETECTORS PHOTO DETECTORS HIGH POWER SOLUTIONS
Digital Cooking Thermometer models / 00282
 Instruction Manual Digital Cooking Thermometer models 00278 / 00282 CONTENTS Unpacking Instructions... 2 Package Contents... 2 Product Registration... 2 Features & Benefits... 2 Setup... 4 Install or Replace
Projection Alarm Clock
 Projection Alarm Clock Model: W8923v2 Instructional Manual DC: 0676 For online video support visit: http://bit.ly/laxtechtalk Table of Contents LCD Features... Buttons... Setup... Set Time, Date, etc....
Microprocessor Digital Thermometer
 Microprocessor Digital Thermometer Instruction Manual Models 819A, 820A and 821A This owner s manual was as current as possible when this product was manufactured. However, products are constantly being
Twin Bell Digital Clock
 Twin Bell Digital Clock Model: V50-500 Instruction Manual PLEASE READ THIS INSTRUCTION MANUAL CAREFULLY BEFORE USE AND KEEP IT FOR FUTURE REFERENCE. SPECIFICATIONS... 1 SAFETY INSTRUCTIONS... 2 FUNCTIONS...
IMPORTANT. 3-in-1 Weather Sensor model SAVE THIS MANUAL FOR FUTURE REFERENCE. Package Contents
 Instruction Manual 3-in-1 Weather Sensor model 06008 Package Contents 1. 3-in-1 Sensor 2. Mounting Hardware 3. Sensor Mounting Bracket 4. Instruction Manual IMPORTANT PRODUCT MUST BE REGISTERED TO RECEIVE
READ ME FIRST DIY WIRELESS ALERT. Add-on Alert Sensor. For Swann Wireless Alert systems. Instruction Manual
 READ ME FIRST DIY WIRELESS ALERT Add-on Alert Sensor For Swann Wireless Alert systems EN Instruction Manual 2 About this Manual The content in this manual is for information purposes only and is subject
WS-9117U-IT Wireless 915 MHz Temperature Station. Instruction Manual
 WS-9117U-IT Wireless 915 MHz Temperature Station Instruction Manual 1 TABLE OF CONTENTS Topic Inventory of Contents Quick Setup Detailed Setup Guide Battery Installation Setting the Time Features Minimum
Wireless External Alarm
 Wireless External Alarm Model: SA-001S User s Instructions TABLE OF content INTRODUCTION... 2 INSTALLATION... 2-4 PROGRAMMING LEARN REMOTE OR SENSORS OR CONTROL PANEL... 4-6 ERASE REMOTE OR SENSOR OR CONTROL
External Wireless Sounder
 External Wireless Sounder WL S50 Installation and Programming Instructions 2 Wireless Sounder Instructions Table of Contents Introduction... 4 Operational Functions... 4 Alarm / Tamper Indication...4 Low
IMPORTANT. Display for 5-in-1 Weather Sensor model 06005RM/1010RX SAVE THIS MANUAL FOR FUTURE REFERENCE. Package Contents
 Instruction Manual Display for 5-in-1 Weather Sensor model 06005RM/1010RX Package Contents 1. Display unit with tabletop stand 2. Instruction manual This product requires an AcuRite 5-in-1 Weather Sensor
Caution: To maintain compliance with the RF exposure guidelines, place the unit at least 20cm from nearby persons.
 Installation Guide: for the Warmup Tempo Digital Programmable Thermostat The world s best-selling floor heating brand Introduction The Tempo thermostat is designed to aid in the comfort of your home by
Universal Fan and Light Remote Control
 Universal Fan and Light Remote Control Hand-Held Remote and Wall Cradle Owner s Guide and Installation Manual English Form# 41316-01 20100930 2010 Hunter Fan Co. 1 Welcome Table of Contents Read and Save
Digital Thermometer with Ice Alert and Clock
 Digital Thermometer with Ice Alert and Clock Model: RAR381 USER MANUAL Specifications... 8 About Oregon Scientific... 8 EU-Declaration of Conformity... 9 FCC Statement... 9 Declaration of Conformity...
1126 Series Ceiling Mount PIR Motion Detector
 Installation Sheet 1126 Series Ceiling Mount PIR Motion Detector Description The 1126 Series PIR (Passive Infrared) Motion Detectors are a compact wireless PIR. The 1126 Series offer 360, Wide Angle, or
Forehead Infrared Thermometer
 Forehead Infrared Thermometer Model 09-347 3-YEAR INSTRUCTION MANUAL ENGLISH & ESPAÑOL Please read this instruction manual completely before operating this unit. STOP! PLEASE ENSURE YOU HAVE ALL OF THE
Model: WS-9133U-IT Quick Setup Guide DC: WIRELESS FORECAST STATION
 Model: WS-9133U-IT Quick Setup Guide DC: 041916 WIRELESS FORECAST STATION Time 12/24hr + Alarm Indoor Temp. ºF/ºC Forecast Icon + Tendency Arrow Outdoor Temp. ºF/ºC Wall Hanging Hole TX37U-IT Temperature
Little Anne. Important Product Information
 EN Little Anne Important Product Information English Little Anne This Important Product Information covers Little Anne, Little Anne AED and Little Anne QCPR. Unless otherwise specified the information
WIRELESS MULTI-ZONE DIGITAL THERMOMETER WITH RADIO CONTROLLED CLOCK. Model No (SF Version) Instruction Manual
 Instruction Manual") WIRELESS MULTI-ZONE DIGITAL THERMOMETER WITH RADIO CONTROLLED CLOCK Model No. 91049-1 (SF Version) Instruction Manual BASE STATION REMOTE SENSOR FEATURES AND SPECIFICATIONS BASE STATION Indoor / RF outdoor
WIRELESS MULTI-ZONE DIGITAL THERMOMETER WITH RADIO CONTROLLED CLOCK Model No. 91049-1 (SF Version) Instruction Manual BASE STATION REMOTE SENSOR FEATURES AND SPECIFICATIONS BASE STATION Indoor / RF outdoor
POWER & ENERGY METERS BEAM PROFILING THZ MEASUREMENT COMPANY PROFILE
 POWER & ENERGY METERS BEAM PROFILING THZ MEASUREMENT WHO WE ARE BEAM DIAGNOSTICS SPECIAL PRODUCTS OEM DETECTORS THZ DETECTORS PHOTO DETECTORS HIGH POWER SOLUTIONS POWER DETECTORS ENERGY DETECTORS MONITORS
Clipsal is a registered trademark of Clipsal Australia Pty Ltd. Saturn is a trademark of Clipsal Australia Pty Ltd.
 Clipsal is a registered trademark of Clipsal Australia Pty Ltd. Saturn is a trademark of Clipsal Australia Pty Ltd. Copyright Clipsal Australia Pty Ltd, 2008. All rights reserved. This material is copyright
FRESHAIR USER S MANUAL. CAUTION: Read manual carefully for proper procedures and operation.
 FRESHAIR Cube Purifies up to 1500 square FEET USER S MANUAL CAUTION: Read manual carefully for proper procedures and operation. welcome Congratulations on your new FreshAir Cube Your FreshAir Cube comes
Home Doorway Alert Kit
 READ ME FIRST DIY WIRELESS ALERT Home Doorway Alert Kit EN Instruction Manual 2 About this Manual The content in this manual is for information purposes only and is subject to change without notice. While
RGR150 USER S MANUAL. Wireless Rain Gauge with Thermometer and Clock
 RGR150 manual-final-091908:layout 1 9/19/08 8:59 AM Page 1 RGR150 USER S MANUAL Wireless Rain Gauge with Thermometer and Clock INTRODUCTION Thank you for selecting this Wireless Rain Gauge. This device
Owner s Manual. PIR-1 IR Learner
 Owner s Manual PIR-1 IR Learner PIR-1 Owner s Manual 2010-2013 Universal Remote Control, Inc. The information in this owner s manual is copyright protected. No part of this manual may be copied or reproduced
Atomic Digital Wall Clock
 Model: BBB87269 Instruction Manual DC:102015 Atomic Digital Wall Clock Table of Contents Welcome... Get Started... Button Functions... Settings: Time, Date, etc.... Time Zone Settings and 12/24 Hour Time...
BBQ THERMOMETER DESCRIPTION OF PARTS. MODEL NO.: AW129/AWR129 Instruction Manual
 BBQ THERMOMETER MODEL NO.: AW129/AWR129 Instruction Manual DESCRIPTION OF PARTS A. POWER BUTTON Turns the unit on/off. Press and hold for 2 seconds to activate unit. B. SELECT BUTTON Selects the type of
Ambient Weather RC-8365 ClearView Radio Controlled Projection Clock with Indoor and Outdoor Temperature User Manual
 Ambient Weather RC-8365 ClearView Radio Controlled Projection Clock with Indoor and Outdoor Temperature User Manual Table of Contents 1. Introduction... 1 2. Warnings... 2 3. Getting Started... 2 3.1 Product
IMPORTANT. Questions? Contact Customer Support at (877) or visit 5-in-1 PRO+ Weather Sensor model
 or visit 5-in-1 PRO+ Weather Sensor model") Instruction Manual 5-in-1 PRO+ Weather Sensor model 06014 Package Contents 1. 5-in-1 PRO+ Weather Sensor 2. Mounting Hardware 3. Sensor Mounting Bracket 4. Instruction Manual IMPORTANT PRODUCT MUST BE
Instruction Manual 5-in-1 PRO+ Weather Sensor model 06014 Package Contents 1. 5-in-1 PRO+ Weather Sensor 2. Mounting Hardware 3. Sensor Mounting Bracket 4. Instruction Manual IMPORTANT PRODUCT MUST BE
Safety Instructions. Be sure to observe the following instructions when using the device.
 Safety Instructions Be sure to observe the following instructions when using the device. Warning: Failure to observe the instructions may lead to death or serious injury. Directly plug the power cord in
Please Keep This Manual For Future Reference REV.01
 ELCG347 ELCG240 1-855-571-1044 Please Keep This Manual For Future Reference REV.01 IMPORTANT INFORMATION When using electrical appliances, basic precautions should always be followed to reduce the risk
Voice Module Installation Guide. For use with ProSYS 16, ProSYS 40, ProSYS 128
 Voice Module Installation Guide For use with ProSYS 16, ProSYS 40, ProSYS 128 Important Notice This guide is delivered subject to the following conditions and restrictions: This guide contains proprietary
E529 Smart Digital Thermostat Product Guide
 E529 Smart Digital Thermostat Product Guide Table of Contents Table of Contents... Page 1 Overview and General Concept... Page 2 Application... Page 3 Features... Page 4 LCD Item Descriptions... Page 5
23-IN Electric Logset
 23-IN Electric Logset ASSEMBLY, CARE & USE INSTRUCTIONS MODEL # ELCG240-INF Questions, problems, missing parts? Before returning to your retailer, call our customer service department at 1-855-571-1044
READ ME FIRST DIY WIRELESS ALERT. Driveway Alert Kit. Instruction Manual
 READ ME FIRST DIY WIRELESS ALERT Driveway Alert Kit EN Instruction Manual 2 About this Manual The content in this manual is for information purposes only and is subject to change without notice. While
Weather Station model 02001
 Instruction Manual Weather Station model 02001 CONTENTS Unpacking Instructions... 2 Package Contents... 2 Product Registration... 2 Features & Benefits: Sensor... 2 Features & Benefits: Display... 3 Setup...
Installation and Operation Manual. Model: STI TRIGGERED OUTPUT PLUG 12VDC, 75mA, 3 SEC. EMBOSSED PROGRAMMING
 EMBOSSED PROGRAMMING SWITCHES 1-8 ANTENNAS ZONES: LEFT BUTTON CALL Embossed Programming Instructions: Installation and Operation Manual STI 8-Channel 1 - MIRROR MASTER OFF/ON RIGHT BUTTON FRONT COVER RESTORE
Driveway Alarm INSTALLATION MANUAL.
 WIRELESS Driveway Alarm INSTALLATION MANUAL Kit Includes: A C A. Transmitter B. Sensor C. Receiver D. Transformer E. Mounting post (3 pcs) E D How It Works: The electromagnetic sensor detects vehicles
MicrOTDR. Optical Fault Locator. User Manual
 Optical Fault Locator Datacom Textron 11001 31 st Place West Everett, WA 98204 TEL: 425-355-0590 Toll Free: 800-468-5557 FAX: 425-290-1600 Internet: www.datacom.textron.com Warranty The MicrOTDR Optical
Ambient Weather WS-25 Wireless 8-Channel Floating Pool and Spa Thermometer with Indoor Temperature and Humidity User Manual
 Ambient Weather WS-25 Wireless 8-Channel Floating Pool and Spa Thermometer with Indoor Temperature and Humidity User Manual Table of Contents 1 Introduction... 2 2 Getting Started... 2 2.1 Parts List...
Wireless Color Weather Station
 Wireless Color Weather Station For online video support: http://bit.ly/laxtechtalk Model: M84282 DC: 071117 Table of Contents Button Function Explanation... Setup... Settings Menu... Fahrenheit Celsius...
Installation and ZONES: Operation Manual. Model: ON STI-34108
 N.O. COM N.C. + 12 V - IN + 12 V - OUT 500 ma 300 ma PLUG IN ADAPTER 12 V 500mA Trigger Output 12 V 75mA N.O. COM N.C. + 12 V - IN + 12 V - OUT 500 ma 300 ma PLUG IN ADAPTER 12 V 500mA Trigger Output 12
EW 40 Wireless Fan Control
 Installation & Operating Manual EW 40 Wireless Fan Control USA CAN Product Information... Chapters 1 + 2 Mechanical Installation... Chapter 3 Electrical Installation... Chapter 4 Start Up and Configuration...
1125 PIR Motion Detector
 Tamper Survey LED INSTALLATION SHEET 1125 PIR Motion Detector Description The 1125 PIR (Passive Infrared) Motion Detector is a wireless, low current sensor for use with the 1100D Wireless Receiver. Using
User Guide InfraRed (IR) Thermometer with Wireless Datalogger, Type K input & Laser Pointer MODEL 42560
 Thermometer with Wireless Datalogger, Type K input & Laser Pointer MODEL 42560") User Guide InfraRed (IR) Thermometer with Wireless Datalogger, Type K input & Laser Pointer MODEL 42560 Introduction Congratulations on your purchase of the Model 42560 IR Thermometer. The Model 42560
User Guide InfraRed (IR) Thermometer with Wireless Datalogger, Type K input & Laser Pointer MODEL 42560 Introduction Congratulations on your purchase of the Model 42560 IR Thermometer. The Model 42560
Wireless Rain Gauge with Rainfall Memory and Digital Clock MODEL: RGR382
 Wireless Rain Gauge with Rainfall Memory and Digital Clock MODEL: RGR382 EU-Declaration of conformity... 8 Fcc statement... 8 Declaration of Conformity... 9 USER MANUAL CONTTS Introduction... 2 Main unit
PERSONAL CUEING DEVICE MODEL NO. BDAAU100 INSTRUCTION MANUAL.
 PERSONAL CUEING DEVICE MODEL NO. BDAAU100 INSTRUCTION MANUAL www.agilitas.com.au CONTENTS Device Information 3 Safety Information 3 Features 5 Set up 6 Operation 7 Sensitivity Adjustment 8 Charging 10
Weather Light Model: BAR210 / BAR210U / BAR210A USER MANUAL. EU-Declaration of Conformity...7 FCC Statement...7 Declaration of Conformity...
 Weather Light Model: BAR210 / BAR210U / BAR210A CONTENTS USER MANUAL Overview...2 LCD Display...2 Back View...2 Bottom View...2 Remote Sensor...3 Getting Started...3 Power Supply...3 Remote Sensor...3
READ ME FIRST DIY WIRELESS ALERT. Gate Alert Kit. Instruction Manual
 READ ME FIRST DIY WIRELESS ALERT Gate Alert Kit EN Instruction Manual AT A GLANCE Thank you for choosing the Gate Alert Kit from Swann. It's the ideal system to detect unwanted access into a restricted
Humidity Monitor model 01080
 Instruction Manual Humidity Monitor model 01080 Features & Benefits 19 18 1 2 3 4 12 11 10 17 16 5 9 RECORDS ºC/ºF 15 14 FRONT 6 7 8 1. Humidity Level Indicator Indicates a high, low or ideal humidity
3R, 3G 5R, 5G Point Laser Levels
 3R, 3G 5R, 5G Point Laser Levels Users Manual December 2018 (English) 2018 Fluke Corporation. All rights reserved. Specifications are subject to change without notice. All product names are trademarks
Honeywell. Wireless Rain Gauge with Indoor. Temperature (TC152) USER MANUAL TABLE OF CONTENTS INTRODUCTION 3 PRODUCT OVERVIEW 4 REMOTE RAIN GAUGE 7
 USER MANUAL TABLE OF CONTENTS INTRODUCTION 3 PRODUCT OVERVIEW 4 REMOTE RAIN GAUGE 7") TABLE OF CONTENTS INTRODUCTION 3 PRODUCT OVERVIEW 4 REMOTE RAIN GAUGE 7 BEFORE YOU BEGIN 9 BATTERY INSTALLATION 10 LOW BATTERY WARNING 11 HOW TO USE THE TABLE STAND 11 GETTING STARTED 11 Honeywell Wireless
TABLE OF CONTENTS INTRODUCTION 3 PRODUCT OVERVIEW 4 REMOTE RAIN GAUGE 7 BEFORE YOU BEGIN 9 BATTERY INSTALLATION 10 LOW BATTERY WARNING 11 HOW TO USE THE TABLE STAND 11 GETTING STARTED 11 Honeywell Wireless
RT User Guide. Self-leveling, remote-controlled, simultaneous level and plumb rotational laser system
 RT-7690-2 Self-leveling, remote-controlled, simultaneous level and plumb rotational laser system User Guide Toolz 404 Villa Street Mountain View, CA 94041 (800) 984-0404 Domestic Revision 1 (650) 903-4944
Towel Warmer MAKE EVERYDAY A SPA DAY
 Towel Warmer MAKE EVERYDAY A SPA DAY TABLE OF CONTENTS Warnings and Cautions....1 FCC Information...4 Location of Parts and Controls...6 Set Up... 7 Using the Towel Warmer....8 Selecting the Timer...9
IMPORTANT SAFETY INSTRUCTIONS
 WARNING TO PREVENT FIRE OR SHOCK HAZARD, DO NOT USE THIS PLUG WITH AN EXTENSION CORD, RECEPTACLE OR OTHER OUTLET UNLESS THE BLADES CAN BE FULLY INSERTED TO PREVENT BLADE EXPOSURE. TO PREVENT FIRE OR SHOCK
INSTALLATION GUIDE. AXIS A1001 Network Door Controller
 INSTALLATION GUIDE AXIS A1001 Network Door Controller Liability Every care has been taken in the preparation of this document. Please inform your local Axis office of any inaccuracies or omissions. Axis
View the expanded manual: GEN5
 View the expanded manual: http://aeotec.com/support GEN5 1 Aeotec by Aeon Labs Door/Window Sensor. The Aeotec by Aeon Labs Door/Window Sensor Gen5 provides your Z-Wave network with the intelligence required
IMPORTANT SAFETY INFORMATION:
 Owner s Manual Model CX-MPC IMPORTANT SAFETY INFORMATION: Always read this manual first before attempting to install or use this device. For your safety, always comply with all warnings and safety instructions
Model: Av2 Quick Setup Guide DC: Atomic Projection Alarm Clock
 BUTTONS Model: 616-146Av2 Quick Setup Guide DC: 111815 Atomic Projection Alarm Clock Snooze/Backlight Time, Alarm with Snooze Projection Arm Rotates 180 Indoor Temperature + Trends Moon Phase + Calendar
Weather Forecaster models 75077/75107
 Instruction Manual Weather Forecaster models 75077/75107 CONTENTS Unpacking Instructions... Package Contents... Product Registration... Features & Benefits: Sensor... Features & Benefits: Display... 3
TECHNOLOGY CORP. Taking a bite out of energy costs. Instruction Manual for the ORKA Remote Thermostat/Humidity Controller.
 ORKA TECHNOLOGY CORP. Taking a bite out of energy costs Instruction Manual for the ORKA Remote Thermostat/Humidity Controller Model # RFTH-100 Thank you for your purchase of Orka Technology s RFTH-100
C-Bus PIR Occupancy Sensor. Installation Instructions 5751L
 C-Bus PIR Occupancy Sensor Installation Instructions 5751L Contents 1.0 Description 3 2.0 Important Notes 3 3.0 Installation 3 4.0 C-Bus Network Connection 6 5.0 Programming and Setup 7 6.0 Troubleshooting
Projection Alarm Clock USER GUIDE
 Projection Alarm Clock USER GUIDE Jazwares, Inc. 2012 CONTENTS Please read the instructions along with the Alarm Clock carefully before you use it, so that you can operate it conveniently. WELCOME, Warnings