Instructions for the Use and Care and Installation of BOSE902 MULTIFUNCTIONAL OVEN
|
|
|
- Randolph Griffith
- 5 years ago
- Views:
Transcription

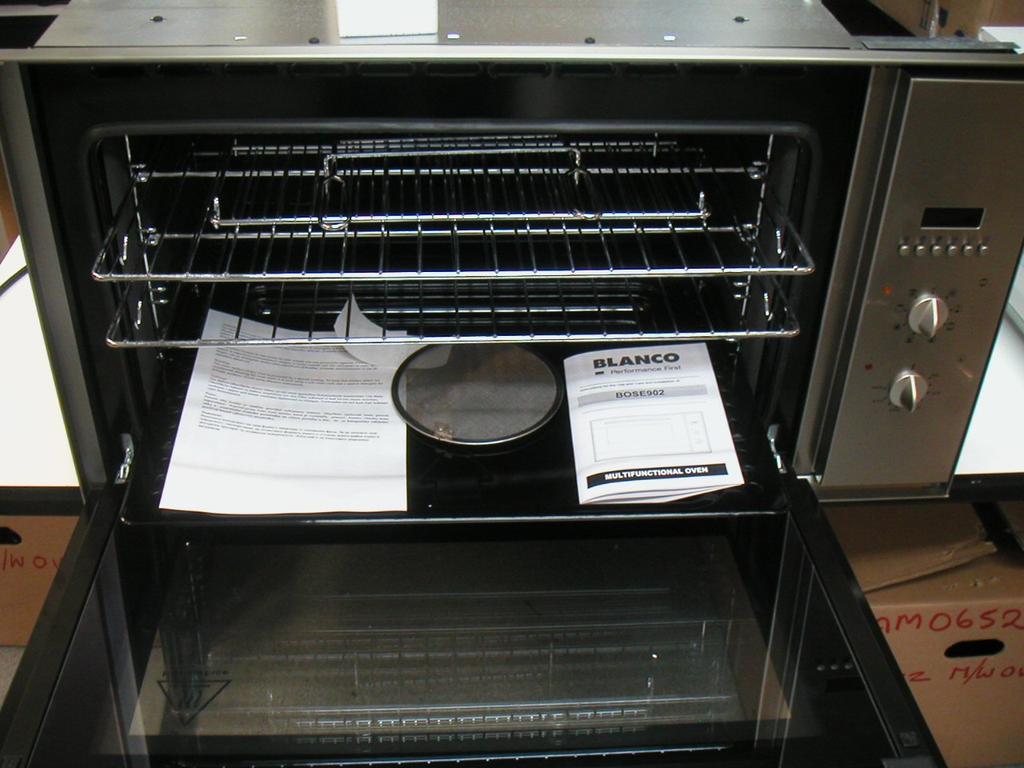
1 Instructions for the Use and Care and Installation of BOSE902 MULTIFUNCTIONAL OVEN
2 Dear Customer Thank you for choosing our product This appliances is easy to use; Please read this hand book carefully before installing and using the oven, as you will find the correct instructions for the best installation, use and care of the product. You will find that the clean lines and modern look of your Blanco oven blends in perfectly with your kitchen décor. It is easy to use and performs to a high standard. Blanco also makes a range of products that will enhance your kitchen such as cooktops, rangehoods, dishwashers, microwaves, sinks and taps. There are models to complement your new Blanco oven. Blanco now also has a premium range of laundry products. Of course, we make every effort to ensure that our products meet all your requirements, and our Customer Relations Department is at your disposal, to answer all your questions and to listen to all your suggestions. Please complete the warranty section of this manual and keep your receipt as proof of purchase. Retain all documents relating to the purchase of this Blanco product. Blanco is committed to providing increasingly efficient products that are easy to use, respect the environment and are attractive and reliable. BLANCO CONTENTS Introduction 3 Contents 3 Safety recommendations 4-5 Specification 6 Cabinetry Preparation 7 Important notice to the User 8 Notes for installation 9-10 Instructions for Use Instructions for Cooking Table of cooking times 17 Cleaning and Maintenance Technical assistance 21 Warranty card 22 3
3 Safety recommendations ELECTRIC OVEN Read the following carefully to avoid an electric shock or fire It is most important that this instruction book should be retained with the appliance for future reference. Should the appliance be sold or transferred, always ensure that the book is left with the appliance in order that the new owner can get to know the functions of the appliance and the relevant warnings. These warnings are provided in the interest of safety. You MUST read them carefully before installing or using the appliance. Safety Warnings. The appliance is not intended for use by young children or infirm persons unless they have been adequately supervised by a responsible person to ensure that they can use the appliance safely. Young children should be supervised to ensure that they do not play with the appliance. WARNING: Ensure the appliance is switched off before replacing the lamp to avoid the possibility of electric shock. WARNING - Accessible parts will become hot when in use. To avoid burns and scalds children should be kept away. Do not use a steam cleaner to clean a hob, oven or range. Do not spray aerosols in the vicinity of the appliance when it is in operation. Do not store flammable materials in or under the appliance, eg aerosols. Always turn the grill off immediately after use as fat left there may catch fire. Do not cover the insert with foil, as fat left there may catch fire. Always keep the grill dish clean as any fat left there may catch fire. Do not leave the grill on unattended. To avoid a fire, ensure that grill trays and fittings are always inserted into the appliance in accordance with the instructions. Switch the appliance off before removing the oven light glass for globe replacement. To avoid an accident, ensure that oven shelves and fittings are always inserted into the appliance in accordance with the instructions. Do not use the door as a shelf. Do not push down on the open oven door. An authorised person must install this appliance. Before using the appliance, ensure that all packing materials are removed from the appliance. In order to avoid any potential hazard, the installation instructions must be followed. Ensure that all specified vents, openings and airspaces are not blocked. Only authorised personnel should carry out servicing. Always ensure the appliance is switched off before cleaning or replacing parts. 4
4 Safety recommendations Always clean the appliance immediately after any food spillage. To maintain safe operation, it is recommended that the product be inspected every five years by an authorised service person. If the supply cord is damaged, it must be replaced by the manufacturer or its service agent or similarly qualified person in order to avoid hazard. During use the appliance becomes hot. Care should be taken to avoid touching heating elements inside the oven. HEADING GENERAL WARNINGS. Using for the first time: Before you use your oven for the first time, leave it empty and, with the door closed, turn it on to maximum temperature and let it heat up for 15 minutes. During this time there may be some smell from the mineral wool that insulates the oven and there could be some smoke. This is perfectly normal. Normal use: - Always close the door properly. The oven is fitted with a seal designed to work with a closed door. Always ensure the appliance is switched off before cleaning or replacing parts. - If the supply cord is damaged, it must be replaced by the manufacturer or its service agent or a similarly qualified person in order to avoid hazard. -During use the appliance becomes hot. Care should be taken to avoid touching heating elements inside the oven. Do not install the product if it is damaged. 5
5 0 0 SPECIFICATION Electrical features Input voltage Grill element Upper element Lower element Circular element Lighting bulb Oven fan Cooling fan V 50 Hz 2400 W 1100 W 1500 W 2600 W 2 x 25 W 25 W 20 W This appliance complies with EEC 89/336 specifications issued for the magnetic compatibility. For components coming in contact with foodstuffs, the appliance complies with EEC 89/109 specifications. ELECTRICAL CONNECTION: The appliance is fitted with an Australian approved 15 Amp flexible cord and plug which must be connected to a correctly earthed socket outlet. The manufacturer is not liable for any direct or indirect damage caused by faulty installation or connection. It is therefore necessary that all installation and connection operations are carried out by qualified personnel complying with the local and general regulations in force. 50 MAX Blanco 6
6 CABINETRY PREPARATION CABINETRY MATERIALS MUST BE SUITABLE TO WITHSTAND TEMPERATURES UP TO 90 C 7
7 Important Notice to the User The base element is concealed beneath the bottom of the oven to make the oven easier to clean and contribute to better access into the oven. Because the element is concealed beneath the oven the following rules will need to be observed during cooking to ensure optimum performance from the oven. DO NOT PLACE ALUMINIUM FOIL OR METAL OBJECTS ON THE BASE OF THE OVEN DURING COOKING. Foil or dishes must never be placed on the base of the oven during cooking as the concentration of the direct and reflected heat will damage the enamel surface. Provisions of the warranty do not cover damage resulting from such use NO YES 8
8 NOTES FOR THE INSTALLATION GENERAL INFORMATION The appliance must be installed in accordance with all relevant codes laid down by Electrical Supply Authorities. The original installation and adjustment must be made by a licensed electrician. ELECTRICAL CONNECTION The appliances are provided with a three-pole feeding cable and work with alternate current and single-phase voltage indicated on the rating plate of the product and in the instruction manual and on the product. The grounding conductor of the cable is marked with the colours yellow/green. CONNECTION OF THE FEEDING CABLE TO THE MAINS Connect the feeding cable of the oven to a plug suitable for the load indicated on the rating plate of the product. In case of a direct connection to the mains (cable without plug), it is necessary to insert a suitable omnipolar switch before the appliance, with minimum opening between contacts of 3 mm (the grounding wire should not be interrupted by the switch). Before connecting to the mains, make sure that: The electrical counter, the fuse, the feeding line and the socket are adequate to withstand the maximum load required (see rating plate). The supply system is regularly grounded, according to the regulations in force. The socket or the omnipolar switch can easily be reached after the installation of the oven. After carrying out the connection to the mains, check that the supplying cable does not come into contact with parts subject to heating. Never use reductions, shunts, adaptors which can cause overheating or burning. The manufacturer is not liable for any direct or indirect damage caused by faulty installation or connection. It is therefore necessary that all installation and connection operations are carried out by qualified personnel complying with the local and general regulations in force. 9
9 Stop max NOTES FOR THE INSTALLATION INSERTION AND ASSEMBLY Insert the oven into the opening of the furniture, resting it on the base and pushing it as far as the edge of the side stanchions against the shoulder of the piece of furniture. For technical specification and installation dimensions please refer to pages 6 and 7. Stop Open the door and fix the oven with four wood screws to be screwed up through the holes in the side stanchions of the oven. The sides and the base surface where the oven is to be installed should be rebated as shown in figure to allow a safe air intake and a free air circulation around the oven, thus granting its good operation and avoiding damages to the furniture. Pay attention to fix the oven in an absolutely firm way, as above indicated. Once the electrical connection has been carried out, apply voltage to the oven only after installing it. Before using the oven, we suggest to: remove the special film covering the oven door glass (when provided) heat the empty oven at max. temperature for 45 minutes (to remove unpleasant smell and smoke caused by working residues and by the thermal insulation) carefully clean inside the oven with soapy water and rinse it. IMPORTANT: When running, the front side of the appliance gets quite hot. See that children do not get near the oven. 10
10 INSTRUCTIONS FOR USE HEATING POSITIONS AND TEMPERATURE ADJUSTMENT The knobs for the selector and the thermostat controls allow you to select the various cooking temperatures most suitable for the products to be cooked. The oven door must be closed. The lamp of the oven is on, with no heating elements operated (electrical resistances). During oven operation the lamp will always remain on. DEFROST The oven-fan is operated; by stirring the cold air inside the oven, it aids in quick defrosting of frozen products. No heating elements are operated. TRADITIONAL Upper and lower heating elements operated; temperature adjustable from 50 C to MAX on the thermostat. Suitable for cooking meats, poultry and cakes that require long slow cooking. It is advisable to pre-heat the oven. FAN ASSIST Upper and lower heating elements and the oven-fan operated; temperature adjustable from 50 C to MAX on the thermostat. A continuous circulation of warm air is created. Suitable to use when cooking on multiple shelves. BOTTOM ELEMENT + FAN Lower heating element and the oven-fan operated; temperature adjustable from 50 C to MAX on the thermostat. FAN FORCED The circular heating element and fan come into operation and the heat is spread evenly to all shelf positions. Various types of food can be cooked on different shelves, naturally with the appropriate cooking times. The oven must be preheated before the foods are placed inside. Fan mode provides optimum results with: most cakes, large quantities of foods and cooking various dishes simultaneously. To operate, select Fan Forced function along with the temperature. GRILL Grill Element - Use for toasting and melting cheese or browning. No longer than 5 minutes cooking time. To operate, select Full Grill Function along with the temperature. FAN GRILL Grill Element and Fan. Use for grilling meats, vegetables and poultry. Preheat oven, place food on grill rack in baking tray and place in the middle of the oven. The oven door must be closed for all cooking methods 11
11 INSTRUCTIONS FOR USE PROGRAMMING THE OVEN The figure shows the keys, the pilot lights for all the functions and the programmer display. (1) Setting and displaying the minute counter - Timer (2) Setting and displaying the cooking time - Timer A U T O (3) Setting and displaying the end of the cooking time (4) Manual operation (5) Setting the times - Decrease (6) Setting the times - Increase Indicator Lights for the Time Functions When the indicator lights are on the appliance is operating, as follows. General operation A U T O Automatic programme Minute minder Setting the Timer Once the electronic connection is complete and power is applied, the display blinks and shows To set the time of day Press keys (1) and (2) at the same, and set the actual time, by pressing keys (-) and (+) within 4 seconds. The oven remains in manual operation and can be used without any programming. Important Information Between hrs and 6.00 hrs the display intensity is automatically dimmed. If the acoustic signal is not disconnected (as per subsequent instructions), it cuts off after 2 minutes. 12
12 INSTRUCTIONS FOR USE Any programming described below is activated after approximately 4 seconds from the presetting. 23 hrs and 59 minutes is the maximum programmed time. Any and all programmed settings are erased when there is a power cut or supply failure. When power is restored the display flashes and shows To reset the programmer set both the actual time and the programme again. Automatic Operation The oven can be programmed to switch on and off automatically. To do this proceed as follows: 1. Select the required cooking function and temperature using the function selector and the thermostat dial. 2. Press key (2) and set the cooking time by pressing keys (-) and (+) within the next 4 seconds 3. Press key (3) and set the end of the cooking time in the same way. The actual time reappears and pilot light (AUTO) remains ON, when the cooking process starts, pilot light (A) will remain on. The cooking time left can be controlled by pressing key (2), or the time can be changed by repeating the same procedure. Reset the cooking time to 0.00 to erase the preset programme, and when the actual time reappears, press key (4) to reset the manual function. Once the cooking process is over the acoustic signal goes off and the oven automatically switched off. Press one of the keys from (1) to (4) to return the programmer to the manual function. Semi-automatic Operation (Setting the end of cooking time) The oven can be programmed to switch off automatically. To do this proceed as follows: 1. Select the required function and temperature using the cooking function selector and the thermostat dial. 2. Press key (2) and set the cooking time by pressing keys (-) and (+) within the next 4 seconds. The actual time reappears and pilot lights (A) and (AUTO) remain ON. The cooking time left can be checked by pressing key (2), or the time can be changed by repeating the same procedure. To erase the pre-set programme, reset the cooking time to 0.00, when the actual time reappears, press key (4) to reset to manual function. Once the cooking programme is complete, the acoustic signal will sound and the oven is automatically switched off. Press one of the keys from (1) to (4) to switch off the acoustic signal. Press key (4) to return the programmer to the manual function. 13
13 INSTRUCTIONS FOR USE Minute minder When this device is used as a simple minute minder, press key (1) and programme the required time by pressing keys (-) and (+) within the next 4 seconds: the actual time reappears and the symbol (B) is activated. Press one of the keys from 1 to 4 to disconnect the acoustic signal. Also symbol (B) is deactivated. Manual Operation The oven may be used manually without any programming. Press key (4) for the manual operation ( AUTO pilot light off). SAFETY LOCK FOR CHILDREN The programmer is provided with a safety lock which stops the cooking programming and consequently the oven operation. Lock running: - press both switches (1) (2) at same time for about 10 seconds - the display shows ON ; release the switches - press switch (+); the display shows OF and the symbol..key.. Now the safety lock starts running and after about 5 seconds the display shows the current time and the symbol..key... Lock deactivation: - press both switches (1) (2) at same time for about 10 seconds - the display shows OF ; release the switches - press switch (+); the display shows ON Now the safety lock is deactivated and after about 5 seconds the display shows the current time. PILOT LIGHT FOR THE THERMOSTAT It comes on any time the thermostat settles the cooking temperature inside the oven and it is switched off when the oven reaches the preset temperature. PILOT LIGHT FOR THE OPERATION It signals that the appliance is powered and stays on in all working positions. SAFETY THERMOSTAT Cuts out the electric supply for preventing possible overheating when the appliance is not correctly used. In this case, wait for the oven to cool down before using it again. On the other hand, if a fault is present on the appliance s components, we advise calling the Technical Assistance Service. COOLING FAN The cooling fan task is to cool down the control panel, the knobs and the inside elements of the oven. The air flow comes out from both the control panel and oven door. The fan is automatically connected and disconnected when the oven is switched on or off. 14
14 INSTRUCTIONS FOR COOKING OVEN COOKING The oven door must be closed for all cooking methods It is necessary to pre-heat the oven to the preset cooking temperature. Only very fat meat can be placed into a cold oven. To minimise food splashes into the oven (which can sometimes produce smoke) deep baking dishes are recommended. Practical hints to save energy The oven can be switched off some minutes before cooking end; the residual temperature is enough to complete cooking. Open the oven door only when it is absolutely necessary; to check the cooking phase, look through the glass (the oven lamp is always on). General Advice The oven offers various kinds of heating: Traditional heating for the cooking of special roasts that require slow cooking. Fan forced - for cooking cakes, biscuits and similar. If the fan forced cooking is chosen, you can put your roast meat (as an example) on various shelf positions. You can also cook multiple dishes in the oven at the same time to help save energy. 15
15 INSTRUCTIONS FOR COOKING PROTECTION FILTER OF THE OVEN FAN During the cooking of fatty products, to avoid that too much fat residue striking the fan, the filter should be placed in the oven before use. When the cooking is finished and the oven cools, remove the filter and wash it carefully. Installing the Filter Mount the filter leaning it against the rear wall at the same level of the fan, then push the filter downwards. Reverse this operation to remove the filter. ATTENTION: The filter should only be used when cooking of "fatty" foods. Better cooking results for non fatty foods will be achieved without the filter installed. REMARK: For beef, veal, pork and turkey roasts-with bones or rolled, add about 20 minutes to the times shown in the table. The times indicated in the table refer to the cooking of one product only; for more than one product, the cooking times should be increased by 5-10 minutes. 16
16 TABLE OF COOKING TIMES The table below provides indicative shelf positions for use with your oven. Please note, the temperature and cooking times are indicative only. According to different cooking habits, it may be necessary to make further modifications. Add to the belowmentioned times about 15 minutes for preheating. Shelf position Fan oven Temperature ( C) Fan oven Time (Mins) Sweets Pastry 2 (3/4) Sponge cakes 2 (2/3/4) Fish Fillets or slices 2 (2/3) Meat Veal 2 (2/3/4) Pork 2 (2/3/4) Chicken 2 (2/3/4) Turkey 2 (2/3/4) Beef 2 (2/3/4) Lamb 2 (2/3/4) Bread and pizza Pizza 2 (2/3) Muffins 2 (2/3/4) Bread 3 (2/3/4) Bakes Vegetable bake 2 (2/3) FAN OVEN 1 2 SHELF POSITIONS
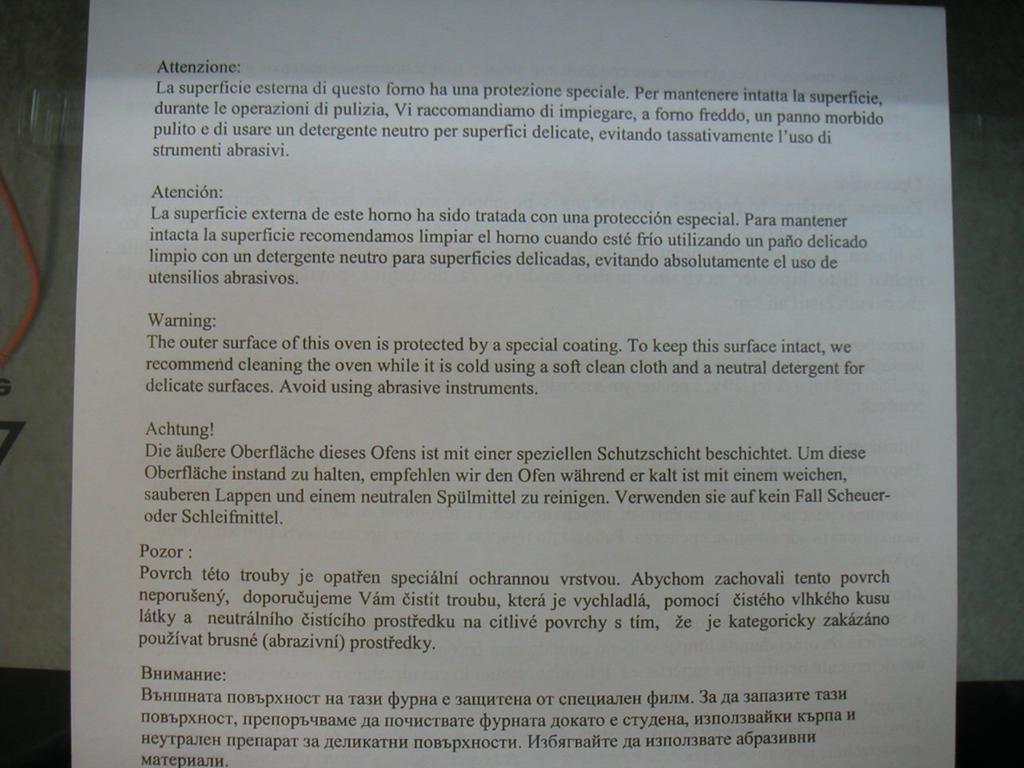
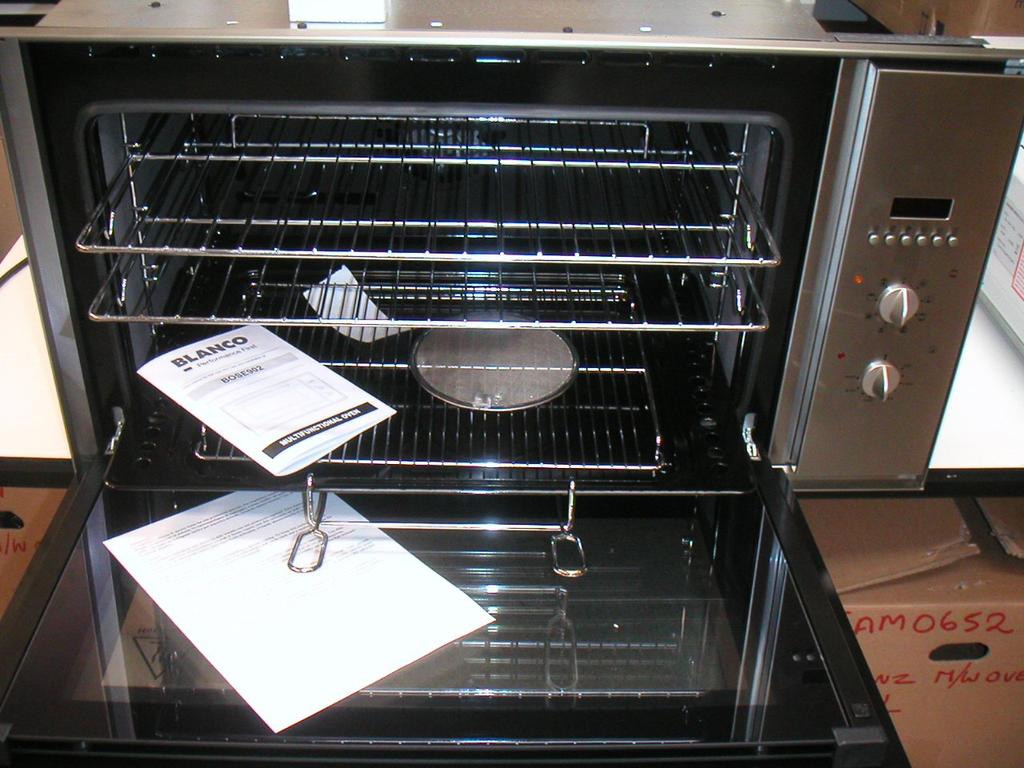
17 CLEANING AND MAINTENANCE Caution: before any operation, disconnect electrically the oven. GENERAL CLEANING To keep the characteristics of brightness of the enamelled parts for a long time it is necessary to clean the oven after each use. Once the oven is cold, you will be able to easily remove the fat deposits by means of a sponge or a cloth damp with warm soapy water and eventually a detergent to be found on the market. Never use abrasive cloths or sponges, that could irreparably damage the enamel. On white ovens even the parts of the control panel such as handgrip and knob have to be cleaned each time because they may become yellow due to the emissions of fat vapours. After the use, rinse throughly with water the parts in stainless steel and dry them with a soft cloth or with a bockskin. In case of persistent stain, use the normal non-abrasive cleaning agents or one of the specific products for stainless steel or some warm vinegar. Clean the door glass only with warm water, avoiding the use of rough cloths. Ovens with facility to lower grill for cleaning purposes 1 Warning: ensure that all controls are in the OFF position and wait for the grill element to cool. 2 Support the front of the grill element while you remove the knurled screw retaining the element. 3 Lower the front of the element carefully to the rest position. 4 When cleaning the oven take care to not apply any forces to the grill element 5 When the cleaning is complete, carefully remove any cleaning chemicals and water from the grill element. 6 Carefully raise the front of the element into position and secure with the knurled screw. NEVER USE THE OVEN WITH THE GRILL ELEMENT HANGING DOWN! Replacing the oven bulb Once the oven has been electrically disconnected, unscrew the glass protection cap and the bulb, replacing it with another one suitable for high temperatures (300 C / E14). Reassemble the glass cap and reconnect the oven. 18
18 CLEANING AND MAINTENANCE Cleaning the oven door ATTENTION: for your safety, before removing the glasses you should remove the oven door. 1. Set the oven door wide open. 2. Lift the hinge jumpers with your thumb and index fingers, then turn them fully outwards to the end of stroke (Fig.A). 3. Turn the door towards the closure position and lay it on the jumpers: in this way the hinge's spring is blocked. By fully closing the door the hinges are unhooked from the connection slits which are integral with the oven muffle (sequence 1,2,3 of fig.b). A B Re-assemble the door by carrying-out the aforesaid operations in the opposite order. Disassembling of the door glasses To facilitate the cleaning, after having removed the door from the oven, you can proceed with the disassembly of the glass. Release the two upper blocks (picture C) so that the glass can be removed (picture D). After the cleaning you should reassemble the glass, replace the blocks and lock into position. Check that all components have been assembled correctly and than you can re-assemble the door onto the oven. Please keep the OK symbol below on the right. OK C D 19
19 CLEANING AND MAINTENANCE Care of Catalytic Liners. (If your oven has had these fitted) Splashes of food and fats from cooking will collect on the catalytic liner. After cooking a dish with high fat content or when you can see grease spots on the liners, it is recommended that you : * Remove baking dishes and oven racks * Wipe out the bottom of the oven and clean the door * Turn oven to 220 C for approximately 20 minutes * When oven is cool, wipe out bottom of the oven Manual cleaning of the catalytic liner is not recommended. Damage will occur if soap impregnated steel wood pads, aerosol cleaners and any other abrasives are used. Slight discolouration and polishing of the Catalytic surface may occur in time. This does not affect the Catalytic properties in any way. 20
20
21
22
OE606X FAN FORCED OVEN
 Instructions for the Use and Care and Installation of OE606X FAN FORCED OVEN Dear Customer You will find that the clean lines and modern look of your Blanco oven blends in perfectly with your kitchen
PROF. RANGE COOKER MODEL: EPRC-A6456GE(SS) Owner s Manual Please read this manual carefully before operating your set. Retain it for future reference.
 Owner s Manual Please read this manual carefully before operating your set. Retain it for future reference.") PROF. RANGE COOKER MODEL: EPRC-A6456GE(SS) Owner s Manual Please read this manual carefully before operating your set. Retain it for future reference. Record model number and serial number of the set.
PROF. RANGE COOKER MODEL: EPRC-A6456GE(SS) Owner s Manual Please read this manual carefully before operating your set. Retain it for future reference. Record model number and serial number of the set.
GAS COOKER GAS OVEN SERIES. Owner s Manual Please read this manual carefully before operating your set. Retain it for future reference.
 GAS COOKER GAS OVEN SERIES Owner s Manual Please read this manual carefully before operating your set. Retain it for future reference. Record model number and serial number of the set. See the label attached
Built-in Conventional oven
 Built-in Conventional oven LAM3208 User Manual 2 CONTENTS S afety information 2 S afety instructions 3 Product description 5 B efore first use 6 Daily use 6 Using the accessories 7 Additional functions
Contents. Downloaded from manuals search engine
 Contents 1. INSTRUCTIONS FOR SAFE AND PROPER USE 6. INSTALLATION 8 3. DESCRIPTION OF CONTROLS 30 4. USE OF THE OVEN 35 5. AVAILABLE ACCESSORIES 36 6. COOKING HINTS 37 7. CLEANING AND MAINTENANCE 43 8.
operating & installation instructions SA20XMFR
 operating & installation instructions SA20XMFR Contents 1. INSTRUCTIONS FOR SAFE AND PROPER USE 26 2. INSTALLATION 28 3. DESCRIPTION OF CONTROLS 30 4. USE OF THE OVEN 35 5. AVAILABLE ACCESSORIES 36 6.
Built-in Conventional Oven
 Built-in Conventional Oven LAM3204 User & Installation Guide using this manual Thank you for choosing LAMONA Built - In Oven. This user Manual contains important information on safety and instructions
Operating Instructions
 Operating Instructions OVEN English, 1 FI 31 K.B FI 31 K.B IX FIE 36 K.B FIE 36 K.B IX Contents Installation, 2-3 Positioning Electrical connections Data plate Description of the appliance, 4 Overall view
SAFEGUARDING THE ENVIRONMENT IMPORTANT NOTES BEFORE USING THE OVEN OVEN ACCESSORIES CARE AND MAINTENANCE TROUBLESHOOTING GUIDE AFTER SALES SERVICE
 INSTRUCTIONS FOR USE SAFEGUARDING THE ENVIRONMENT IMPORTANT NOTES BEFORE USING THE OVEN OVEN ACCESSORIES CARE AND MAINTENANCE TROUBLESHOOTING GUIDE AFTER SALES SERVICE To make the most of your new oven,
Instruction Manual for Electric Warming Drawer BWD14B
 Instruction Manual for Electric Warming Drawer BWD14B Contents Appliance Description... 6 Main Components... 6 How the warming drawer works... 6 Use... 7 Before using for the first time... 7 Control Panel...
Owner s Manual GEMINI PETIT CHEF MULTIFUNCTION THERMOFAN
 Owner s Manual GEMINI PETIT CHEF MULTIFUNCTION THERMOFAN EYE LEVEL OVEN CONTENTS 2 Introduction 2 Unpacking 2 Cupboard Design 2 Safety Advice 3 Installation 3 Electrical Installation 4 The Control Panel
Operating Instructions
 Operating Instructions OVEN English, FIE 6 K.B FIE 6 K.B IX Contents Installation, - Positioning Electrical connections Data plate Description of the appliance, Overall view Control panel Start-up and
SAFEGUARDING THE ENVIRONMENT IMPORTANT NOTES BEFORE USING THE OVEN OVEN ACCESSORIES CARE AND MAINTENANCE TROUBLESHOOTING GUIDE AFTER SALES SERVICE
 31002018GB.fm Page 11 Tuesday, December 2, 2008 10:29 PM INSTRUCTIONS FOR USE SAFEGUARDING THE ENVIRONMENT IMPORTANT NOTES BEFORE USING THE OVEN OVEN ACCESSORIES CARE AND MAINTENANCE TROUBLESHOOTING GUIDE
INSTRUCTIONS FOR USE. To make the most of your new oven, read the user's instructions carefully and keep them on hand for consultation in the future.
 INSTRUCTIONS FOR USE INSTALLATION...4 SAFEGUARDING THE ENVIRONMENT... 7 IMPORTANT NOTES... 7 BEFORE USING THE OVEN... 8 OVEN ACCESSORIES... 9 CARE AND MAINTENANCE... 10 TROUBLESHOOTING GUIDE... 12 AFTER
T-60cm-OVEN-SS T-60cm-OVEN-CM T-60cm-OVEN-BL
 T-60cm-OVEN-SS T-60cm-OVEN-CM T-60cm-OVEN-BL USER INSTRUCTIONS GENERAL WARNINGS Read carefully all the instructions contained in this booklet. It provides you with important information regarding the safe
BUILT-IN OVEN MODEL: EBO-D7080D(SS) Owner s Manual Please read this manual carefully before operating your set. Retain it for future reference.
 Owner s Manual Please read this manual carefully before operating your set. Retain it for future reference.") BUILT-IN OVEN MODEL: EBO-D7080D(SS) Owner s Manual Please read this manual carefully before operating your set. Retain it for future reference. Record model number and serial number of the set. See the
BUILT-IN OVEN MODEL: EBO-D7080D(SS) Owner s Manual Please read this manual carefully before operating your set. Retain it for future reference. Record model number and serial number of the set. See the
SA990XR-8. operating and installation instructions
 SA990XR-8 operating and installation instructions Contents 1 INSTRUCTIONS FOR USE... 3 SAFETY PRECAUTIONS... 34 3 ENVIROMENTAL RESPONSIBILITY... 36 4 INSTALLATION... 37 5 DESCRIPTION OF CONTROLS... 39
Instruction Manual for Electric Oven BOSE604X
 Instruction Manual for Electric Oven BOSE604X 0 Contents Safety Instructions... 2 Description of your oven... 5 Basic settings... 6 Basic Functions... 7 Special Functions... 8 Care and maintenance... 9
installation and operating instructions SA708X oven
 installation and operating instructions SA708X oven Contents 1. INSTRUCTIONS FOR SAFE AND PROPER USE 4. INSTALLATION 6 3. DESCRIPTION OF CONTROLS 9 4. USE OF THE OVEN 19 5. AVAILABLE ACCESSORIES 0 6. COOKING
Contents qualified technician
 Contents 1. INSTRUCTIONS FOR SAFE AND PROPER USE 9. INSTALLATION 31 3. DESCRIPTION OF CONTROLS 34 4. USE OF THE OVEN 40 5. AVAILABLE ACCESSORIES 4 6. COOKING HINTS 43 7. CLEANING AND MAINTENANCE 47 8.
Owner, s Manual. Model TO5A TO29A TO30A Double oven Grill / Fan-Forced 8/98. cod
 Owner, s Manual Model TO5A TO29A TO30A Double oven Grill / Fan-Forced cod. 3077109 T H E W O R L D S B E S T 8/98 T H E W O R L D S B E S T INDEX FAN-FORCED OVEN - DOUBLE Welcome to Kleenmaid and to the
30L Mini Oven with Twin Hotplates. Model: MA0080MO READ AND FOLLOW THESE INSTRUCTIONS. RETAIN FOR FUTURE REFERENCE
 30L Mini Oven with Twin Hotplates Model: MA0080MO READ AND FOLLOW THESE INSTRUCTIONS. RETAIN FOR FUTURE REFERENCE Electrical Safety and You Before using this appliance please read and fully understand
BUILT-IN OVEN MODEL: EBO-E7081D(SS) Owner s Manual Please read this manual carefully before operating your set. Retain it for future reference.
 Owner s Manual Please read this manual carefully before operating your set. Retain it for future reference.") BUILT-IN OVEN MODEL: EBO-E7081D(SS) Owner s Manual Please read this manual carefully before operating your set. Retain it for future reference. Record model number and serial number of the set. See the
BUILT-IN OVEN MODEL: EBO-E7081D(SS) Owner s Manual Please read this manual carefully before operating your set. Retain it for future reference. Record model number and serial number of the set. See the
User Manual. Oven ZOB140
 EN User Manual Oven ZOB140 Contents Safety information 2 Safety instructions 3 Product description 5 Before first use 5 Daily use 6 Using the accessories 6 Additional functions 7 Hints and tips 7 Care
Thank you for choosing
 Thank you for choosing Please read this user manual before using this oven and keep it safe for future reference. Visit our page www.electriq.co.uk for our entire range of Intelligent Electricals 1 Contents
User Manual. Oven ZOB142W ZOB142X
 EN User Manual Oven ZOB142W ZOB142X Contents Safety information 2 Safety instructions 3 Product description 5 Before first use 5 Daily use 6 Using the accessories 7 Additional functions 7 Hints and tips
EV6004WH. Built-In Electric Oven User Manual
 EV6004WH Built-In Electric Oven User Manual ACKNOWLEDGMENT Thank you for purchasing our product. We hope you enjoy using the many features and benefits it provides. Before using this product please study
Installation and Operating Instructions
 Installation and Operating Instructions All models 5 and 8 function, stainless steel and white: OV-1 Dimoda OV-2 Optima OV-3 Davanti OV-4 Elegante For your convenience, we recommend to attach the serial
OVENS AUS. Installation - Use - Maintenance. Oven models: 60cm Built in Ovens
 OVENS Installation - Use - Maintenance AUS Oven models: 60cm Built in Ovens 539.07.031 539.07.041 GENERAL INFORMATION Please read this booklet thoroughly before you use this appliance. It is important
SCA709X. operating and installation instructions
 SCA709X operating and installation instructions Contents 1. INSTRUCTIONS FOR SAFE AND PROPER USE 4. INSTALLATION 6 3. DESCRIPTION OF CONTROLS 8 4. USE OF THE OVEN 17 5. AVAILABLE ACCESSORIES 18 6. COOKING
HOM600SS 60 cm 7 Function multifunction oven
 User Manual for your HOM600SS 60 cm 7 Function multifunction oven NOTE: This User Instruction Manual contains important information, including safety & installation points, which will enable you to get
Installation and Operating Instructions
 THE PERFECT BALANCE OF FUNCTION AND STYLE LAUNDRY DISHWASHING COOKING COOLING Installation and Operating Instructions 60cm Single Cavity Electric Cooker MSE60W White Please read these instructions carefully
BSM60SS / BSM60WH BUILT IN MULTI-FUNCTION ELECTRIC FAN OVEN. Instruction Manual
 BSM60SS / BSM60WH BUILT IN MULTI-FUNCTION ELECTRIC FAN OVEN Instruction Manual Please read these instructions carefully before use and retain for future reference CONTENTS Safety Instructions 2 Specifications
电烤炉 ELECTRIC OVEN ZOB 343 使用手册 INSTRUCTION BOOKLET
 电烤炉 ELECTRIC OVEN ZOB 343 使用手册 INSTRUCTION BOOKLET English Important Safety Information These warnings are provided in the interest of safety. You MUST read them carefully before installing or using the
BSF60WH / BSF60SS BUILT IN ELECTRIC FAN OVEN. Instruction Manual. Please read these instructions carefully before use and retain for future reference
 BSF60WH / BSF60SS BUILT IN ELECTRIC FAN OVEN Instruction Manual Please read these instructions carefully before use and retain for future reference SAFETY INSTRUCTIONS Important: This appliance is not
User Manual. Oven SCO1SS
 EN User Manual Oven SCO1SS Contents Safety information 2 Safety instructions 3 Product description 5 Before first use 5 Daily use 5 Additional functions 6 Safety information Hints and tips 6 Care and cleaning
User Manual. Oven ZZB25602XV
 EN User Manual Oven ZZB25602XV Contents Safety information 2 Safety instructions 3 Product description 5 Before first use 5 Daily use 6 Clock functions 8 Using the accessories 8 Additional functions 9
45CM BUILT-IN OVEN MODEL: EBO-C3580ST(SS) Owner s Manual Please read this manual carefully before operating your set. Retain it for future reference.
 Owner s Manual Please read this manual carefully before operating your set. Retain it for future reference.") 45CM BUILT-IN OVEN MODEL: EBO-C3580ST(SS) Owner s Manual Please read this manual carefully before operating your set. Retain it for future reference. Record model number and serial number of the set. See
45CM BUILT-IN OVEN MODEL: EBO-C3580ST(SS) Owner s Manual Please read this manual carefully before operating your set. Retain it for future reference. Record model number and serial number of the set. See
Installation and Operating Instructions
 Installation and Operating Instructions Model: PPOV-6S-DT-2 For your convenience, we recommend to attach the serial number label HERE. As part of Parmco Appliances commitment to improving and updating
User Manual. Oven ZZB20601XV
 EN User Manual Oven ZZB20601XV Contents Safety information 2 Safety instructions 3 Product description 5 Before first use 5 Daily use 6 Using the accessories 7 Additional functions 7 Hints and tips 7 Care
Dear Customer BLANCO - 3 -
 Instructions for the Use and Care and Installation of BCCT60N BCCT60X BCCT75N BCCT75X Electrical Touch Control Ceran Cooktop. Dear Customer You will find that the clean lines and modern look of your Blanco
Space-Saving Toaster Oven
 Toastower Space-Saving Toaster Oven 120V/60Hz, 900Watts Model Number: TO1235 User s Guide (English*) *French and Spanish manuals available from www.impecca.com IMPORTANT SAFETY INSTRUCTIONS When using
User Manual. Oven SMO1SS
 EN User Manual Oven SMO1SS Contents Safety information 2 Safety instructions 3 Product description 5 Before first use 5 Daily use 6 Clock functions 7 Additional functions 8 Safety information Hints and
USER INSTRUCTION OVENS EN 02. CANDY HOOVER GROUP S.R.L. Via Privata Eden Fumagalli Brugherio Milano Italy
 USER INSTRUCTION OVENS EN 02 CANDY HOOVER GROUP S.R.L. Via Privata Eden Fumagalli 20047 Brugherio Milano Italy Safety Indications WARNING: the appliance and accessible parts become hot during use. Be careful
USER INSTRUCTIONS OVENS EN 02. CANDY HOOVER GROUP S.R.L. Via Privata Eden Fumagalli Brugherio Milano Italy
 USER INSTRUCTIONS OVENS EN 02 CANDY HOOVER GROUP S.R.L. Via Privata Eden Fumagalli 20047 Brugherio Milano Italy Safety Indications WARNING: the appliance and accessible parts become hot during use. Be
User Manual Built-in Electric Oven HWO60S10TX1. Cod:
 User Manual Built-in Electric Oven HWO60S10TX1 Cod:0040304142 27 Recipes...28 18 20 21 The appliance and its accessible parts become hot during use. Care should be taken to avoid touching heating elements.
User manual. Oven ZOB 343
 EN User manual Oven ZOB 343 Contents Safety information 2 Product description 4 Before first use 4 Daily use _ 5 Hints, tips and cooking tables _ 7 Safety information Before the installation and use, read
VK902 Compact Combination Microwave Oven Installation, Use and Maintenance
 VK902 Compact Combination Microwave Oven Installation, Use and Maintenance Customer Care Department The Group Ltd. Harby Road Langar Nottinghamshire NG13 9HY T : 01949 862 012 F : 01949 862 003 E : customer.care@cda.eu
PROF. RANGE COOKER MODEL: EPRC-9850FE/SS EPRC-9860E/SS. Owner s Manual Please read this manual carefully before operating your set.
 PROF. RANGE COOKER MODEL: EPRC-9850FE/SS EPRC-9860E/SS Owner s Manual Please read this manual carefully before operating your set. Retain it for future reference. Record model number and serial number
INSTALLATION GUIDE / USER GUIDE GB IE
 BUILT-IN OVEN OB60 double oven under bench models INSTALLATION GUIDE / USER GUIDE GB IE Contents 1 Safety and warnings 2 Installation instructions 6 Using your oven for the first time 14 Clock and timer
P619SS-ANZ 60 cm Built in fan oven P629BS-ANZ/P629SS-ANZ P639BS-ANZ/P639SS-ANZ 60 cm Built in multifunction oven
 P619SS-ANZ 60 cm Built in fan oven P629BS-ANZ/P629SS-ANZ P639BS-ANZ/P639SS-ANZ 60 cm Built in multifunction oven 1 User Manual for your Baumatic P619SS-ANZ 60 cm 4 Function fan oven P629BS-ANZ/P629SS-ANZ
INSTRUCTIONS FOR THE INSTALLER
 Contents 1. INSTRUCTIONS FOR SAFETY AND USE... 3. INSTALLATION... 35 3. DESCRIPTION OF CONTROLS... 37 4. USING THE OVEN... 43 5. AVAILABLE ACCESSORIES... 45 6. COOKING HINTS... 46 7. CLEANING AND MAINTENANCE...
Professional WTO450. For your safety and continued enjoyment of this product, always read the instruction book carefully before using.
 Professional Toaster Oven WTO450 For your safety and continued enjoyment of this product, always read the instruction book carefully before using. IMPORTANT SAFEGUARDS SAVE AND READ THESE INSTRUCTIONS
Double Oven Instruction Manual EP8060DS EURO APPLIANCES BY EUROSTYLE GROUP
 Double Oven Instruction Manual EP8060DS EURO APPLIANCES BY EUROSTYLE GROUP Contents Environmental note 3 Important safety information 4 6 Specifications 7 Control panel 8 Oven programmer/timer display
22L Oven (Black) Instructions for Use
 Instructions for Use") PLEASE SAVE THESE INSTRUCTIONS FOR FUTURE REFERENCE. Power Details: 220-240V a.c. 1500W 50Hz Accessories: wire rack, back tray, tray handle, crumb tray Please read this instruction manual thoroughly before
PLEASE SAVE THESE INSTRUCTIONS FOR FUTURE REFERENCE. Power Details: 220-240V a.c. 1500W 50Hz Accessories: wire rack, back tray, tray handle, crumb tray Please read this instruction manual thoroughly before
INSTRUCTION MANUAL ELECTRIC OVEN CBCONX14
 INSTRUCTION MANUAL ELECTRIC OVEN CBCONX14 Contents Safety Warnings... 4 Unpacking... 7 Product Overview... 8 Front View...8 Control Panel...8 Connecting to the Mains... 9 First Time Use of the Oven...
EOB2100CCX EOB2100COX. EN Oven User Manual
 EOB2100CCX EOB2100COX EN Oven User Manual 2 www.electrolux.com CONTENTS 1. SAFETY INFORMATION...3 2. SAFETY INSTRUCTIONS...4 3. PRODUCT DESCRIPTION... 6 4. BEFORE FIRST USE... 7 5. DAILY USE... 7 6. CLOCK
GETTING STARTED? EASY.
 User Manual GETTING STARTED? EASY. ZOB31471WK ZOB31471XK EN User Manual Oven SAFETY INFORMATION Before the installation and use of the appliance, carefully read the supplied instructions. The manufacturer
BS6FS 60 cm Fan Oven
 BS6FS 60 cm Fan Oven 1 User Manual for your Baumatic BS6FS 60 cm Fan oven NOTE: This User Instruction Manual contains important information, including safety & installation points, which will enable you
Instruction Manual for Electric Ovens OO757X OO986X
 Instruction Manual for Electric Ovens OO757X OO986X 1 2 DEAR CUSTOMER, We thank you and congratulate you on your choice. This new carefully designed product, manufactured with the highest quality materials,
Instructions for Use and Installation Multifunction Ovens. Mechanical Timer models
 Instructions for Use and Installation Multifunction Ovens Mechanical Timer models Contents For Your Safety..................................... 3 Use and Care Controls...........................................
Instructions for the Use and Care and Installation of FD9045WX. Multi-fuel Freestanding Fan forced Cookers
 Instructions for the Use and Care and Installation of FD9045WX Multi-fuel Freestanding Fan forced Cookers Dear Customer Thank you for choosing our product. Please read this hand book carefully before
INSTALLATION AND OPERATING INSTRUCTION BOOKLET
 INSTALLATION AND OPERATING INSTRUCTION BOOKLET LIBERTY SINGLE ELECTRIC FAN OVEN MODELS C210 F/A & C210 F/W IMPORTANT: You must read this instruction Book before installing or using this appliance and retain
Caple sense single oven instruction manual Model: C2362
 Caple sense single oven instruction manual Model: C2362 Contact Caple on 0117 938 7420 or for spare parts www.caple.co.uk www.caple.co.uk CONTENTS C2105 Safety Warnings 3 Installation warnings 7 Environmental
SK110, SK210 & SK310 Single Ovens Installation, Use and Maintenance
 SK110, SK210 & SK310 Single Ovens Installation, Use and Maintenance Customer Care Department The Group Ltd. Harby Road Langar Nottinghamshire NG13 9HY T : 01949 862 012 F : 01949 862 003 E : customer.care@cda.eu
User manual. Oven ZOB343
 EN User manual Oven ZOB343 Contents Safety information _ 2 Safety instructions 3 Product description 5 Before first use 5 Daily use 6 Clock functions 7 Additional functions 8 Safety information Using the
OV.60.5F. Built-in Electric Oven User Manual
 OV.60.5F Built-in Electric Oven User Manual ACKNOWLEDGMENT Thank you for purchasing our product. We hope you enjoy using the many features and benefits it provides. Before using this product please study
User Manual. Oven SFO2SS
 EN User Manual Oven SFO2SS Contents Safety information 2 Safety instructions 3 Product description 5 Before first use 5 Daily use 6 Clock functions 7 Additional functions 8 Safety information Hints and
Built-in Multi-Function Oven
 Instruction / Installation Manual Built-in Multi-Function Oven LBMULB13 Contents Safety Warnings... 4 Unpacking... 7 Product Overview... 8 Front View...8 Control Panel...8 Connecting to the Mains... 9
Installation instructions. Built-in oven. and User guide NZ AU GB IE. OB60 single & double multifunction models
 Installation instructions and User guide Built-in oven OB60 single & double multifunction models NZ AU GB IE Contents 1 Safety and warnings 2 Installation instructions 6 SEVEN-FUNCTION SINGLE OVEN MODELS
Downloaded from manuals search engine. EP6004SX Built-In Electric Oven User Manual
 EP6004SX Built-In Electric Oven User Manual ACKNOWLEDGMENT Thank you for purchasing our product.we hope you enjoy using the many features and benefits it provides. Before using this product please study
Built in Electric Fan Oven
 Built in Electric Fan Oven LAM3400 LAM3402 LAM3403 User & Installation Guide LAMONA Appliances Dear Customer, Congratulations on your choice of oven which has been designed to give you excellent service.
Professional WTO450. For your safety and continued enjoyment of this product, always read the instruction book carefully before using.
 Professional Toaster Oven WTO450 For your safety and continued enjoyment of this product, always read the instruction book carefully before using. IMPORTANT SAFEGUARDS SAVE AND READ THESE INSTRUCTIONS
GETTING STARTED? EASY.
 User Manual GETTING STARTED? EASY. ZOB35471BK ZOB35471WK ZOB35471XE ZOB35471XK EN User Manual Oven SAFETY INFORMATION Before the installation and use of the appliance, carefully read the supplied instructions.
User Manual. Oven SFO1SS
 EN User Manual Oven SFO1SS Contents Safety information 2 Safety instructions 3 Product description 5 Before first use 5 Daily use 5 Additional functions 6 Safety information Hints and tips 6 Care and cleaning
HOF600SS 60 cm Fan oven HOS600SS 60 cm Static oven
 User Manual for your HOF600SS 60 cm Fan oven HOS600SS 60 cm Static oven NOTE: This User Instruction Manual contains important information, including safety & installation points, which will enable you
ELECTRIC COOKER EEP. mod. Fitters and Users Instructions. Before operating this cooker, please read these instructions carefully
 ELECTRIC COOKER mod. 5104.1 EEP Fitters and Users Instructions Before operating this cooker, please read these instructions carefully Introduction Installation CONTENTS Introduction...page 2 Installation...
Instructions. 1 Instructions. 1.2 This user manual. 1.1 How to read the user manual. 1.3 Appliance purpose. 1.4 General safety instructions
 Contents 1 Instructions 30 1.1 How to read the user manual 30 1.2 This user manual 30 1.3 Appliance purpose 30 1.4 General safety instructions 30 1.5 Manufacturer liability 31 1.6 Identification plate
Owner s Manual STOVES. MODELS 620 Kitchenaire. 621 Kitchenaire 711S
 Owner s Manual STOVES MODELS 620 Kitchenaire 621 Kitchenaire 711S CONTENTS 2 Introduction 2 Unpacking 2 Installation 2 Electrical Installation 3 Safety Advice 3 Control Panels 4 The Oven 5 Solid Plates
Professional WTO150. For your safety and continued enjoyment of this product, always read the instruction book carefully before using.
 Professional Toaster Oven/Toaster WTO150 For your safety and continued enjoyment of this product, always read the instruction book carefully before using. IMPORTANT SAFEGUARDS SAVE AND READ THESE INSTRUCTIONS
Built-in Conventional Oven
 Built-in Conventional Oven LAM3201 LAM3205 LAM3206 User & Installation Guide LAMONA Appliances Dear Customer, Congratulations on your choice of oven which has been designed to give you excellent service.
6 IN 1 MULTICHEF WITH TIMER Model Number: IG1190
 6 IN 1 MULTICHEF WITH TIMER Model Number: IG1190 INSTRUCTIONS FOR USE Thank you for purchasing this product. Please read these instructions carefully before use ABOUT YOUR IGENIX HALOGEN MULTICHEF The
DAILY REFERENCE GUIDE
 DAILY REFERENCE GUIDE THANK YOU FOR PURCHASING AN INDESIT PRODUCT To receive more comprehensive help and support, please register your product at www.indesit.com/register EN You can download the Safety
User Manual. Oven ZOB35301
 EN User Manual Oven ZOB35301 Contents Safety information 2 Safety instructions 3 Product description 5 Before first use 5 Daily use 6 Clock functions 7 Using the accessories 8 Additional functions 8 Hints
DE 91 MPS MULTIFUNCTION BUILT-IN OVEN
 INSTALLATION and SERVICE INSTRUCTIONS USE and CARE INSTRUCTIONS DE 91 MPS MULTIFUNCTION BUILT-IN OVEN distributed by DèLonghi Pty Ltd Dear Customer, Thank you for having purchased and given your preference
OPERATING AND MAINTENANCE INSTRUCTIONS FOR BUILT-IN OVENS ISTRUZIONI D'USO E MANUTENZIONE PER FORNI AD INCASSO
 OPERATING AND MAINTENANCE INSTRUCTIONS FOR BUILT-IN OVENS ISTRUZIONI D'USO E MANUTENZIONE PER FORNI AD INCASSO INSTRUCCIONES DE USO Y MANTENIMIENTO PARA HORNOS DE ENCASTRE INSTRUÇÕES DE USO E MANUTENÇÃO
MULTI-FUNCTION OVENS. Instruction for the use - Installation advice KEEP IN A SAFE PLACE
 MULTI-FUNCTION OVENS Instruction for the use - Installation advice KEEP IN A SAFE PLACE Before operating this oven, please read these instructions carefully Dear Customer, Thank you for having purchased
Toaster Oven + Instruction Manual. Model TO001 CONTENTS. Important Safeguards 1. Know Your Toaster Oven 4. Using Your Toaster Oven 6
 Toaster Oven + Instruction Manual Model TO001 CONTENTS Important Safeguards 1 Know Your Toaster Oven 4 Using Your Toaster Oven 6 Toaster Oven Functions 10 Care and Cleaning 23 Troubleshooting 24 CETSTROVN_MAN_QVC_V8_20120502
J70 BIO ( ) Built-In Electric Oven User Manual
 Built-In Electric Oven User Manual") J70 BIO (538.01.001) Built-In Electric Oven User Manual ACKNOWLEDGMENT Thank you for purchasing our product. We hope you enjoy using the many features and benefits it provides. Before using this product
J70 BIO (538.01.001) Built-In Electric Oven User Manual ACKNOWLEDGMENT Thank you for purchasing our product. We hope you enjoy using the many features and benefits it provides. Before using this product
DOUBLE OVEN. Instructions for use - Installation advice. Before operating this oven, please read these instructions carefully P A U
 P A U TO DOUBLE OVEN model CKB 300 Instructions for use - Installation advice Before operating this oven, please read these instructions carefully 2 CONTENTS Page Number Introduction.....................................
USER INSTRUCTIONS OVENS EN 02. CANDY HOOVER GROUP S.R.L. Via Privata Eden Fumagalli Brugherio Milano Italy
 USER INSTRUCTIONS OVENS EN 02 CANDY HOOVER GROUP S.R.L. Via Privata Eden Fumagalli 20047 Brugherio Milano Italy Safety Indications WARNING: the appliance and accessible parts become hot during use. Be
BIC603T BIC604T BIC75T
 Instructions for the Use and Care and Installation of BIC603T BIC604T BIC75T Induction Cooktop Dear Customer You will find that the modern look of your Blanco rangehood blends in perfectly with your kitchen
Microwave Oven BM258-A INSTRUCTIONS MANUAL. For original parts & reliable service: CASA (S) PTE. LTD. 15 KIAN TECK CRESCENT, SINGAPORE
 PTE. LTD. 15 KIAN TECK CRESCENT, SINGAPORE") Microwave Oven For original parts & reliable service: CASA (S) PTE. LTD. 15 KIAN TECK CRESCENT, SINGAPORE 628884 INSTRUCTIONS MANUAL BM258-A TEL: +65 6268 0066 FAX: +65 6266 8069 Table of Contents From
Microwave Oven For original parts & reliable service: CASA (S) PTE. LTD. 15 KIAN TECK CRESCENT, SINGAPORE 628884 INSTRUCTIONS MANUAL BM258-A TEL: +65 6268 0066 FAX: +65 6266 8069 Table of Contents From
Built-in single oven instruction manual C2233 / C2233BK. Contact Caple on or for spare parts
 Built-in single oven instruction manual C2233 / C2233BK Contact Caple on 0117 938 7420 or for spare parts www.caple.co.uk CONTENTS Safety instructions 3 Environmental protection 6 Preparation for installation
Instructions. 1 Instructions. 1.2 This user manual. 1.1 How to read the user manual. 1.3 Appliance purpose. 1.4 General safety instructions
 Contents 1 Instructions 4 1.1 How to read the user manual 4 1.2 This user manual 4 1.3 Appliance purpose 4 1.4 General safety instructions 4 1.5 Manufacturer liability 5 1.6 Identification plate 5 1.7
Built-In Oven KF 839 DGI
 Built-In Oven KF 839 DGI 285450068 Please read this user manual first! Dear Customer, Thank you for purchasing this Arçelik product. We hope that you get the best results from your product which has been
DC740 Built-under & DC940 Built-In
 DC740 Built-under & DC940 Built-In Double Oven Installation, use and maintenance www.cda.eu Contents: 3 Important information 4 Important safety notes 6 Before first use 7 Notes on usage 8 Oven controls
Cooking Appliances. Installation and operating instructions. Professional Series Stretch Oven TO851X
 Cooking Appliances Installation and operating instructions Professional Series Stretch Oven TO851X 9111 TO851 Use and Care.indd 1 28/4/08 12:07:30 PM Contents Dear customer 3 The first time you use the
SAFETY WARNINGS GENERAL INSTALLATION INSTRUCTIONS
 Instructions for the Use and Care and Installation of BCCT9X Touch Control Cooktop Dear Customer You will find that the modern look of your Blanco rangehood blends in perfectly with your kitchen décor.
EED EED EED EED 29800
 EED 14700 EED 14800 EED 14650 EED 29800 Warming Drawer EN User Manual 2 WWW.ELECTROLUX.COM CONTENTS SAFETY INFORMATION... 3 SAFETY INSTRUCTIONS... 5 PRECAUTIONS DURING USE... 6 APPLIANCE DESCRIPTION...