Table of Contents Introduction... 3 Basic Custodial Responsibilities... 3 Custodial Supplies... 6
|
|
|
- Erin Malone
- 5 years ago
- Views:
Transcription
1
2 Table of Contents Introduction... 3 Basic Custodial Responsibilities... 3 Light Bulb Replacement... 5 Ceiling Tile Replacement... 6 Custodial Supplies... 6 Chemical Disposal... 7 Custodial Carts... 8 Maintaining Custodial Equipment... 9 Classroom Cleaning Procedures Corridor Cleaning Procedures Office and Media Center Cleaning Procedures Restroom Cleaning Procedures Cafeteria Cleaning Procedures Cafeteria Bloodborne Pathogens Cleanup Multipurpose Room Cleaning Procedures Synthetic Sports Floors Tile Floors Carpeted Floors Nurse s Office and Clinic Cleaning Procedures Auditorium Cleaning Procedures Locker Room and Shower Cleaning Procedures Athletic Field Restroom Cleaning Procedures Dust Mopping Floor Mopping Floor Scrubbing Floor Stripping Floor Waxing Burnishing Spray Buffing Carpet Vacuuming Carpet Shampooing Carpet Spot Cleaning Bodily Fluids Cleanup Flu Disinfection Definitions References Appendix... 68
3 Program No: SP-017 Page 3 Program Name: Custodial Cleaning Procedures Origination Date: 04/29/09 Revision Date: 07/17/12 Issued By: Mike Whitford Revision No.: PURPOSE AND INTRODUCTION CUSTODIAL CLEANING PROCEDURES This program establishes a uniform standard for custodial care of Pitt County Schools in order to provide for the long-term conservation of our facilities. All facilities are expected to be maintained in a satisfactory and attractive condition. In addition to routine cleaning procedures, more extensive and thorough cleaning of buildings and equipment should be scheduled for vacation periods, particularly during the summer. Maintaining a clean and orderly school building is not the sole responsibility of the custodian. Teachers and staff members need to be thoughtful and cooperative. Proper custodial work makes teaching and studying easier and healthier. Personal Property Watering of plants and dusting of personal property, such as trophies and desk pictures, is not the responsibility of custodians. 2.0 SCOPE Coverage includes all Pitt County Schools custodians. 3.0 TRAINING 3.1 Read and understand this procedure. 3.2 Participate in periodic technical training. 4.0 BASIC CUSTODIAL RESPONSIBILITIES 4.1 Perform all duties in accordance with applicable safety requirements. This primarily affects the operation of equipment and use of cleaning chemicals. If a question arises concerning the safe use of equipment or chemicals, it is the custodian s responsibility to seek assistance from the Principal or Facility Services prior to use. 4.2 Clean all classrooms, offices, corridors, and outside areas, as scheduled. Classroom cleaning will include a combination of the following: removing trash, dusting furniture, blinds, and equipment, emptying pencil sharpeners, cleaning marker boards and trays, and sweeping and mopping floors.
4 Program No: SP-017 Page 4 Program Name: Custodial Cleaning Procedures Origination Date: 04/29/09 Revision Date: 07/17/12 Issued By: Mike Whitford Revision No.: Follow proper procedures for scrubbing, stripping, waxing, and buffing of tile and terrazzo floors. 4.4 Follow proper procedures for vacuuming, spot cleaning, and shampooing carpeted areas. 4.5 Clean all restrooms daily; including dining area restrooms. Each restroom should be checked multiple times daily to provide clean restroom facilities. All toilet fixtures, sinks, and floors will be cleaned and disinfected daily. 4.6 Refill dispensers for toilet tissue, paper towels, and soap. 4.7 Prior to leaving the school at night, check all sinks, urinals, and toilets to make sure water is not left running over night. 4.8 Check school grounds daily to remove trash, rocks, bottles, cans, and other items that could become a safety or environmental hazard or detract from the general appearance of the school. This includes checking playgrounds for obvious hazards. 4.9 Maintain grounds and grass around the school, mobile units, fence lines, playground equipment, plumbing valve boxes, and electrical poles Facility Services will mow all schools with tractor driven flail mowers. Custodians are responsible for mowing everything the tractors cannot reach and for edging around all portions of the building Maintain a clean fence line around the school property. Fences are part of campus security and should be maintained free of high grass, weeds, trees, and debris. Any needed repairs should be reported to Facility Services Landscaped areas should be maintained in an attractive condition. Any plant beds should be kept free of weeds Trees and shrubs should be trimmed to prevent damage to buildings and/or fences Obscenities and graffiti should be removed as soon as possible, preferably before students arrive Remove all snow and ice from steps and walkways prior to staff and student arrival.
5 Program No: SP-017 Page 5 Program Name: Custodial Cleaning Procedures Origination Date: 04/29/09 Revision Date: 07/17/12 Issued By: Mike Whitford Revision No.: Move or transport school furniture, such as chairs, file cabinets, desks, television monitors, etc. as requested by the Principal or Site Administrator Report excessive pest activity to the Principal or Site Administrator for evaluation Raise and lower the flag daily unless this is completed by students Periodically, check all gutters for accumulation of leaves, pine straw, trash, rocks, or anything that may cause drainage problems and clean as needed Troubleshoot basic problems, such as clogged toilets, before calling Facility Services or submitting a work order Clean bleachers after games/events using a broom or leaf blower and remove trash. At least annually remove trash and clean under bleachers Light Bulb Replacement Custodians are responsible for routinely changing burned out light bulbs less than 10 feet from the floor. Note Old light bulbs need to be placed in the designated recycling cylinder at each school for recycling. When the light bulb cylinder is full, submit a service request for Facility Services to pickup Facility Services is responsible for replacing light bulbs over 10 feet from the floor Occasionally, while attempting to replace burned out bulbs, defective ballasts are discovered. Ballasts will be changed by Facility Services. However, when a bad ballast is discovered the custodian attempting to replace the bulb should submit a work order noting the light location Periodically check nighttime security lighting around the school. Submit a work order to Facility Services noting the light number or light location Exit signs and emergency lights shall be checked monthly. Anything not functioning properly should be reported to Facility Services for repair.
6 Program No: SP-017 Page 6 Program Name: Custodial Cleaning Procedures Origination Date: 04/29/09 Revision Date: 07/17/12 Issued By: Mike Whitford Revision No.: Ceiling Tile Replacement It is the responsibility of the custodial staff to replace broken, water stained, or fallen ceiling tiles Custodians are responsible for replacing ceiling tiles less than 10 feet from the floor Facility Services is responsible for replacing ceiling tiles over 10 feet from the floor Facility Services is also responsible for replacing ceiling tiles that must be cut for fit, regardless of ceiling height Maintain and clean entrance mats daily. Entrance mats perform four primary functions: Stop dirt and water at the door Store soil and water for removal Minimize the tracking of soil and water into a facility Provide a safe walking surface that is slip-resistant The majority of all soil enters a building on the feet of building occupants. Since entrance mats stop and contain soil and water, it is obvious that removing soil from a mat can be less expensive than removing it from a building since the soil is concentrated in one area. 5.0 CUSTODIAL SUPPLIES 5.1 All supplies and equipment are to be stored in a Custodial Room or supply room in a neat and orderly fashion. 5.2 Custodial closets/supply rooms must remain closed and locked at all times. 5.3 Custodial supplies from Facility Services are for custodial use only. Custodians may not bring to the school, use, or request any cleaning chemicals other than those supplied by Facility Services. Cleaning chemicals are not to be placed or left in the classroom. 5.4 If classrooms are equipped with a towel dispenser, the custodial staff is responsible for stocking the dispenser on a daily basis. Cleaning chemicals are not to be placed in the classroom.

7 Program No: SP-017 Page 7 Program Name: Custodial Cleaning Procedures Origination Date: 04/29/09 Revision Date: 07/17/12 Issued By: Mike Whitford Revision No.: Anticipate usage of supplies and reorder as needed. 5.6 Cardboard boxes should be removed as soon as possible and products stored on shelving in open view. Cardboard is an excellent home for roaches. 5.7 Chemical Disposal Diluted cleaning chemicals may be poured down drains within the school Do not pour any cleaning chemicals in a storm water drain or on the ground.
8 Program No: SP-017 Page 8 Program Name: Custodial Cleaning Procedures Origination Date: 04/29/09 Revision Date: 07/17/12 Issued By: Mike Whitford Revision No.: CUSTODIAL CARTS 6.1 Before starting your work schedule, make sure that all supplies you will need are on your cart. Try to eliminate any unnecessary trips back for supplies. You need the proper equipment and supplies in the correct quantity and at the proper place and time in order to do your job effectively. 6.2 If you are called away from your work area, the custodial cart should be locked in a Custodial Room or empty classroom. 6.3 The following items should be stocked on custodial carts prior to beginning the work shift: Cleaning Chemicals All Purpose Cleaner Cleanser Powder with Bleach Disinfectant Pronto Furniture Polish Glass Cleaner Gum Remover Heavy Duty Degreaser Neutral Floor Cleaner Pine Scent Disinfectant Non-latex Gloves Putty Knife Large Trash Bags Small Trash Bags Cleaning Rags Classroom Rag Furniture Polish Rag Restroom Rags (2) Mops Classroom Mop Restroom Mop Bucket Mop Handle Mop Wringer Duster Classroom Floors Dust Mop Stick Broom Dust Pan Vacuum Cleaner Restroom Items Bowl Brush Jumbo Tissue Paper (2) Jumbo Hand Towels (2) Pumice Stick Urinal Screens (6)
9 Program No: SP-017 Page 9 Program Name: Custodial Cleaning Procedures Origination Date: 04/29/09 Revision Date: 07/18/12 Issued By: Mike Whitford Revision No.: MAINTAINING CUSTODIAL EQUIPMENT Custodial equipment can be expensive and for that reason it is not something that can or will be replaced on a routine basis. The most common reason for equipment failure is user abuse and lack of care and maintenance. If your equipment is being used properly and maintained, you can expect to use your equipment for years without problems. Listed below are some guidelines on caring for and maintaining your equipment. 7.1 Return damaged or faulty custodial equipment to Facility Services for repair. Empty any fluids and clean the equipment prior to bringing to Facility Services. 7.2 Custodial equipment will be repaired and continued to use until it is considered uneconomical to repair. 7.3 Mop and Mop Bucket All custodians should have at least three mops 1 for cleaning classrooms and corridors, 1 for cleaning restrooms, and 1 for waxing floors Note: Wet mops should be rinsed out well each time they are used with clean water, wrung as dry as possible, and then after shaking the strands apart, hung with the head up where they will dry. If stored very long in a damp place, wet mops will mildew and develop an odor that will render them unfit for use Rinse out after each use (Especially after waxing) If a mop is used to pick up blood or potential bloodborne pathogens, it should be disposed of immediately after the cleanup Mop heads should not be in service for more than a week without laundering. 7.4 Vacuum Cleaner See the VACUUM CLEANER MANUAL and VACUUM CLEANER GUIDE included in the appendix Check belts for fraying before each use and clean the brush regularly Vacuum cleaner bags need to be replaced regularly.
10 Program No: SP-017 Page 10 Program Name: Custodial Cleaning Procedures Origination Date: 04/29/09 Revision Date: 07/18/12 Issued By: Mike Whitford Revision No.: Floor Scrubbers See the FLOOR SCRUBBER QUICK GUIDE and the FLOOR SCRUBBER MANUAL included in the appendix Use only Neutral Floor Cleaner in the detergent tank Empty the dirty tank each time you fill the detergent tank Rinse out and wipe off after each use to avoid building up in the detergent tank and dirty water tank of the machine, which could clog up hoses and suction parts of the machine Do not use bleach with this machine. 7.6 Floor Machine (Buffer) See the FLOOR MACHINE MANUAL included in the appendix Change pads as needed Wipe off after each use. This includes the cord The cord needs to be wound on the machine properly If storing upright, the block needs to be removed from the machine so that the pad driver/brush is not damaged. 7.7 Floor Burnisher See the BURNISHER MANUAL included in the appendix Change pads as needed Wipe off after each use. This includes the cord The cord needs to be wound on the machine properly If storing upright, the block needs to be removed from the machine so that the pad driver/brush is not damaged.
11 Program No: SP-017 Page 11 Program Name: Custodial Cleaning Procedures Origination Date: 04/29/09 Revision Date: 07/18/12 Issued By: Mike Whitford Revision No.: Carpet Shampooer (Blue Goose) See the CARPET SHAMPOOER MANUAL included in the appendix Use only the Carpet Shampoo supplied by Facility Services in the detergent tank Pour approximately 1-2 capfuls of Defoamer in the dirty water tank prior to using Rinse out and wipe off after each use to avoid build up in the detergent tank and dirty water tank of the machine, which could clog up hoses and suction parts of the machine Remove spray heads, then rinse/clean out the spray heads, and reattach to machine Wipe off the exterior of the machine including the cord Wrap the cord to the machine. 7.9 Wet/Dry Vacuum See the WET/DRY VACUUM MANUAL included in the appendix Rinse out and wipe off after each use to avoid build up of wax in the machine, which could clog up hoses and suction parts of the machine Pour approximately 1-2 capfuls of Defoamer in the tank prior to using with any sudsy materials Weed Eaters Be sure to use the proper proportion of gas/oil mixture. Note Due to ethanol in lower octane gas, premium gas is recommended Clean the head off regularly Pitt County Schools will only maintain weed eaters purchased by Facility Services.
12 Program No: SP-017 Page 12 Program Name: Custodial Cleaning Procedures Origination Date: 04/29/09 Revision Date: 07/18/12 Issued By: Mike Whitford Revision No.: Lawn Mowers and Lawn Tractors Note Due to ethanol in lower octane gas, premium gas is recommended. Before each use check: Look for any missing parts, screws, or bolts Look for signs of fluid leakage (oil, transmission fluid, anti-freeze) Check tires Check engine oil Check hydraulic oil (Hydrostatic lawn tractors only) Periodically grease fittings (Especially deck blade spindles) After each use check: Clean deck thoroughly Check belts Open hood and rinse engine compartment (After engine is cool) Pitt County Schools will only maintain lawn mowers purchased by Facility Services.
13 Program No: SP-017 Page 13 Program Name: Custodial Cleaning Procedures Origination Date: 04/29/09 Revision Date: 07/18/12 Issued By: Mike Whitford Revision No.: Classroom Cleaning Procedures CLASSROOM CLEANING PROCEDURES A proper daily cleaning schedule should be followed to keep classrooms clean at all times. You should make two loops around a classroom. The first loop will be to empty trash cans, pencil sharpeners, and clean all horizontal surfaces, tables, desks, sills, etc. The second loop will be to vacuum the carpet and/or dust mop the floor. Daily 1. Empty pencil sharpeners and clean surrounding wall and floor area. 2. Empty trashcans. Note Do not use hands to pack down waste. Sharp objects or glass could cause injury. 3. If there was trash in the trashcan replace the liner. 4. Spot clean all entry windows and doors. 5. Clean and sanitize counters, sinks, and mirrors. 6. Resupply paper and soap dispensers. 7. If there are restrooms inside the classroom, clean per the restroom cleaning procedures (located in section 8.4 RESTROOM CLEANING AND SANITATION). 8. Vacuum interior carpeted mats. 9. Remove any gum from the floors with the gum remover. 10. Vacuum carpet. Note Pick up all debris too large for the vacuum first.
14 Program No: SP-017 Page 14 Program Name: Custodial Cleaning Procedures Origination Date: 04/29/09 Revision Date: 07/18/12 Issued By: Mike Whitford Revision No.: Spot clean carpet stains. Note Spray with a carpet shampoo solution. Let the solution soak into the spot for 2 5 minutes, then attempt to remove it by rubbing it with a damp cloth. Always rub from the outside of the spot toward the center to prevent spreading. If the spot remains, repeat the procedure. 12. Dust mop tile and terrazzo floors. Note Be sure to keep the same side of the dust mop in the forward position at all times with the mop strands out in front to trap the dust. Try not to lift the mop unless it is absolutely necessary to remove collected dust. Weekly Note Sweep trash outside the classroom door for pickup. Note Dust mops should be taken outside daily for a good shaking out. 1. Dust all horizontal surfaces to head height. 2. Spot clean desk tops using the All Purpose Cleaner or the disinfectant (Pronto) solution. 3. Remove spots, fingerprints, and stains from walls, doors, doorknobs, door frames, light switches, and windows. 4. Clean smudges and marks from glass with the Glass Cleaner. 5. Damp clean window ledges. 6. Damp wipe chalk and white board trays. 7. Weekly, or more often if needed, damp mop tile and terrazzo floors with Neutral Floor Cleaner. Note It is important to damp mop floors in order to keep them in good condition and to keep them looking good. Floors that are not spot mopped will not hold up, as the spots get tracked onto the rest of the floor and the surface soil cuts the finish. This can quickly result in a very dull and unsightly floor.
15 Program No: SP-017 Page 15 Program Name: Custodial Cleaning Procedures Origination Date: 04/29/09 Revision Date: 07/18/12 Issued By: Mike Whitford Revision No.: Spray buff tile and terrazzo floors. Note Floors must be maintained in good condition and thoroughly swept prior to being spray buffed. Monthly 1. Dust areas above head height including shelves, ceiling, moldings, ducts, vents, air registers, etc. 2. Remove bugs, dust, and cobwebs from ceiling areas and light covers. 3. Dust blinds. 4. Damp clean baseboards. Semi-Annually (Semi-annual services are to be performed during the summer and Christmas break) or as needed 1. Clean entire surfaces of student's desks and chairs using the All Purpose Cleaner or the disinfectant (Pronto) solution. This includes removing any gum. 2. Shampoo carpet as described in the carpet shampooing procedures (located in section 9.9 CARPET SHAMPOOING). 3. Semi-annually, or more often if needed, scrub and refinish floor tile and terrazzo as described in floor scrubbing procedures (located in section 9.4 FLOOR SCRUBBING). Note Make sure all the desks in the classroom are left in the same order in which you found them. Annually (Annual services are to be performed during the summer) 1. Wash all windows and glass (inside and outside). 2. Diagram furniture placement and remove furniture from room. 3. Shampoo carpet as described in the carpet shampooing procedures (located in section 9.9 CARPET SHAMPOOING).
16 Program No: SP-017 Page 16 Program Name: Custodial Cleaning Procedures Origination Date: 04/29/09 Revision Date: 07/18/12 Issued By: Mike Whitford Revision No.: Completely strip and refinish tile and terrazzo floors as described in the stripping and finishing procedures (located in section 9.5 STRIPPING AND FINISHING). Note Make sure all the desks in the classroom are left in the same order in which you found them. Miscellaneous A. An outside rubber mat and an inside carpeted mat should be placed at each entrance door. Both mats should be shaken or vacuumed daily. B. Sweep outside steps and sidewalks to keep soil away from the doors. This can also be done with a leaf blower.
17 Program No: SP-017 Page 17 Program Name: Custodial Cleaning Procedures Origination Date: 04/29/09 Revision Date: 07/18/12 Issued By: Mike Whitford Revision No.: Corridor Cleaning Procedures Daily CORRIDOR CLEANING PROCEDURES 1. Clean all entry windows and doors. 2. Vacuum interior carpeted mats. 3. Clean drinking fountains with the Disinfectant (Pronto). Be sure to clean the mouthpiece as well. Dry with a clean cloth. 4. Remove any gum from the floors with the gum remover. 5. Dust mop tile and terrazzo floors. Note Be sure to keep the same side of the dust mop in the forward position at all times with the mop strands out in front to trap the dust. Try not to lift the mop unless it is absolutely necessary to remove collected dust. Weekly Note Dust mops should be taken outside daily for a good shaking out. 1. Dust all horizontal surfaces to head height. 2. Remove spots, fingerprints, and stains from walls, doors, doorknobs, door frames, light switches, and windows. 3. Clean smudges and marks from glass with the Glass Cleaner. 4. Damp clean window ledges. 5. At the entrance doors, step outside to sweep the outside rubber mats and remove any cobwebs in the corners. 6. Clean corners and floors behind doors and fire doors. 7. Clean under inside carpeted entrance mats.
18 Program No: SP-017 Page 18 Program Name: Custodial Cleaning Procedures Origination Date: 04/29/09 Revision Date: 07/18/12 Issued By: Mike Whitford Revision No.: Weekly, or more often if needed, damp mop tile and terrazzo floors with Neutral Floor Cleaner. Note It is important to damp mop floors in order to keep them in good condition and to keep them looking good. Floors that are not spot mopped will not hold up, as the spots get tracked onto the rest of the floor and the surface soil cuts the finish. This can quickly result in a very dull and unsightly floor. 9. Spray buff tile and terrazzo floors. Note Floors must be maintained in good condition to be spray buffed. Monthly 1. Dust areas above head height including ceiling, moldings, ducts, vents, air registers, etc. 2. Remove bugs, dust, and cobwebs from ceiling areas and light covers. 3. Damp clean baseboards. Semi-Annually (Semi-annual services are to be performed during the summer or Holidays) or as needed Scrub and refinish all floor tile and terrazzo as described in floor scrubbing procedures (located in section 9.4 FLOOR SCRUBBING). Annually (Annual services are to be performed during the summer) 1. Wash all windows and glass (inside and outside). 2. Completely strip and refinish all tile and terrazzo floors as described in the stripping and finishing procedures (located in section 9.5 STRIPPING AND FINISHING).

19 Program No: SP-017 Page 19 Program Name: Custodial Cleaning Procedures Origination Date: 04/29/09 Revision Date: 07/18/12 Issued By: Mike Whitford Revision No.: 003 Miscellaneous A. Corridors should be dust mopped in the morning, after lunch, and at the end of the day. High traffic corridors should be dust mopped more frequently. Examples of high traffic areas include: entrances for students coming from mobile units, corridors leading to playgrounds, corridors at main entrances, etc. B. An outside rubber mat and an inside carpeted mat should be placed at each entrance door. Floor mats are your first defense to keep dirt from within a school. Both mats should be shaken or vacuumed daily. C. Sweep outside steps and sidewalks to keep soil away from the doors. This can also be done with a leaf blower.
20 Program No: SP-017 Page 20 Program Name: Custodial Cleaning Procedures Origination Date: 04/29/09 Revision Date: 07/18/12 Issued By: Mike Whitford Revision No.: 003 OFFICE AND MEDIA CENTER CLEANING PROCEDURES 8.3 Office and Media Center Cleaning Procedures Daily 1. Empty trashcans. Note Do not use hands to pack down waste. Sharp objects or glass could cause injury. 2. If there was trash in the trashcan replace the liner. 3. Clean all entry windows and doors. 4. Spot clean desk tops with the Furniture Polish. Note Be careful not to disturb paperwork on the desktops. 5. If there are restrooms inside the office clean per the restroom cleaning procedures (located in section 8.4 RESTROOM CLEANING AND SANITATION). 6. Remove any gum from the floors with the gum remover. 7. Vacuum all carpet Note Pick up all debris too large for the vacuum first 8. Spot clean carpet stains Note Spray with a carpet shampoo solution. Let the solution soak into the spot for 2 5 minutes, then attempt to remove it by rubbing it with a damp cloth. Always rub from the outside of the spot toward the center to prevent spreading. If the spot remains, repeat the procedure. 9. Dust mop tile and terrazzo floors. Note Be sure to keep the same side of the dust mop in the forward position at all times with the mop strands out in front to trap the dust. Try not to lift the mop unless it is absolutely necessary to remove collected dust. Note Sweep trash outside the office door for pickup.
21 Program No: SP-017 Page 21 Program Name: Custodial Cleaning Procedures Origination Date: 04/29/09 Revision Date: 07/18/12 Issued By: Mike Whitford Revision No.: 003 Weekly Note Dust mops should be taken outside daily for a good shaking out. 1. Dust all horizontal surfaces to head height. 2. Spot clean desk tops using the Furniture Polish. Note Be careful not to disturb paperwork on the desktops. 3. Remove spots, fingerprints, and stains from walls, doors, doorknobs, door frames, light switches, and windows. 4. Clean smudges and marks from glass with the Glass Cleaner. 5. Damp clean window ledges. 6. Damp clean baseboards. 7. Weekly, or more often if needed, damp mop all tile and terrazzo floors with Neutral Floor Cleaner. Note It is important to damp mop floors in order to keep them in good condition and to keep them looking good. Floors that are not spot mopped will not hold up, as the spots get tracked onto the rest of the floor and the surface soil cuts the finish. This can quickly result in a very dull and unsightly floor. 8. Spray buff tile and terrazzo floors. Note Floors must be maintained in good condition to be spray buffed. Monthly 1. Dust areas above head height including shelves, ceiling, moldings, ducts, vents, air registers, etc. 2. Remove bugs, dust, and cobwebs from ceiling areas and light covers. 3. Dust blinds.
22 Program No: SP-017 Page 22 Program Name: Custodial Cleaning Procedures Origination Date: 04/29/09 Revision Date: 07/18/12 Issued By: Mike Whitford Revision No.: 003 Semi-Annually (Semi-annual services are to be performed during the summer and Holidays) or as needed 1. Shampoo carpet as described in the carpet shampooing procedures (located in section 9.9 CARPET SHAMPOOING). 2. Scrub and refinish all floor tile and terrazzo as described in floor scrubbing procedures (located in section 9.4 FLOOR SCRUBBING). Annually (Annual services are to be performed during the summer) 1. Wash all windows and glass (inside and outside). 2. Shampoo carpet as described in the carpet shampooing procedures (located in section 9.9 CARPET SHAMPOOING). 3. Completely strip and refinish all tile and terrazzo floors as described in the stripping and finishing procedures (located in section 9.5 STRIPPING AND FINISHING).
23 Program No: SP-017 Page 23 Program Name: Custodial Cleaning Procedures Origination Date: 04/29/09 Revision Date: 07/18/12 Issued By: Mike Whitford Revision No.: Restroom Cleaning and Sanitation RESTROOM CLEANING PROCEDURES The single, most important area to be cleaned is the restroom. A common misconception about restroom cleaning is if it smells good, it must be clean and healthy. There are no shortcuts in cleaning a rest room. Plenty of water, disinfectant solution, and proper daily cleaning are the only solutions for clean and odor-free restrooms. Odors are caused by germs and bacteria that are breeding. Areas around pipes, underneath sinks, the outside of a toilet bowl or urinal, and the floor drain are favorite breeding places for germs and bacteria. If you kill the bacteria, you kill the odors. Daily 1. Empty trashcans. Note Do not use hands to pack down waste. Sharp objects or glass could cause injury. 2. If there was trash in the trashcan replace the liner. 3. Resupply toilet paper, hand towel, and soap dispensers. 4. Remove any toilet tissue, spit balls, and cobwebs from the ceiling with a broom. 5. Remove any graffiti with the Graffiti Remover. 6. Using a cloth and Glass Cleaner, wash the mirrors. 7. Wipe the towel and soap dispensers and the wall around the sink. 8. Dip the sponge or cloth into the disinfectant; scrub the sink bowl, scrub around the faucets, and scrub underneath the sink. Be sure to clean the pipes and the wall around them. 9. Flush the toilets and urinals. Add 2 ounces of Pine Scent Disinfectant to the bowl water. Swab the bowl with a bowl brush. Let stand for 10 minutes. After 10 minutes, flush the toilets and urinals. Note The disinfectant should sit at least 10 minutes to be effective against germs.
24 Program No: SP-017 Page 24 Program Name: Custodial Cleaning Procedures Origination Date: 04/29/09 Revision Date: 07/18/12 Issued By: Mike Whitford Revision No.: Clean the pipes, the wall around the toilet/urinal, and outside of the toilet/urinal bowl and base. 11. Clean the top and bottom of the seat. The seat should be left up when finished to allow the disinfectant to run off. 12. Use a cloth or scrub pad to clean the wall behind the toilet and around the base of the toilet. 13. Dry and polish the chrome. 14. Dry the toilet seat if it is to be used soon. 15. Remove any gum from the floors with the gum remover. 16. Sweep floors. 17. Wet mop floor with Pine Scent Disinfectant. Dip the mop in disinfectant solution (Pine Scent Disinfectant); allow excess to run back into bucket; do not wring out; apply solution to floor. Start at the far end of the room and work toward the door. As the area around the toilet fixtures is reached, wash thoroughly. Some neglected areas around the toilets may require the use of a brush for heavy scrubbing. Starting at the farthest corner from the door, lay the solution on the floor. Be careful not to splash the baseboards. Go back to the bucket as necessary for more solution. When the entire floor is covered, wring out the mop and pick up the excess solution. 18. Pour the remainder of the disinfectant down the floor drain, a favorite breeding place for bacteria and a source of odors. Note If liquid is not occasionally poured down the floor drain, the water in the drain trap will evaporate allowing sewer gas to come back up the drain. Weekly 1. Dust all horizontal surfaces to head height. 2. Remove stains from stall partitions, walls, doors, door frames, and light switches using the Disinfectant (Pronto) solution. 3. Damp clean baseboards using the Disinfectant (Pronto) solution.
25 Program No: SP-017 Page 25 Program Name: Custodial Cleaning Procedures Origination Date: 04/29/09 Revision Date: 07/18/12 Issued By: Mike Whitford Revision No.: Every Friday, spray the toilets, urinals, sinks, and floors with a water hose. This should be done after everything has been cleaned and disinfected. Use a squeegee to pull the water to the floor drain. Monthly 1. Dust areas above head height including ceiling, moldings, ducts, vents, air registers, exhaust fans, etc. 2. Remove bugs, dust, and cobwebs from ceiling areas and light covers. Annually (Annual services are to be performed during the summer or Holidays) Pressure wash the restroom walls and floors. Use a squeegee to pull the water to the floor drain. Miscellaneous A. Restrooms should be checked between every classroom change during the day. This includes flushing toilets and urinals, filling dispensers for toilet paper, hand towels, and soap, and sweeping the floor. B. Prior to leaving at the end of the day, custodians should thoroughly clean the rest room in preparation for the next school day. C. Sinks, toilets, urinals, and associated chrome that are cleaned each day as instructed above should not need cleaning with abrasive cleaners. However, when needed, Cleanser Powder with Bleach can be used on chrome. A pumice stick can be used on sinks, toilets, and urinals. Be very careful as both can cause damage and leave scratches. D. Cold water should always be used with a disinfectant, as hot water weakens its ability to kill germs. Be sure to wear non-latex gloves. E. Do not damp mop a restroom floor. You need liberal solution on the floor long enough to kill the germs and bacteria and leave the restroom odor-free. F. Do not wax restroom floors. G. Glass and chrome are the only items you dry. Allow the rest to air dry. This allows time for the disinfectant to kill the germs and bacteria.
26 Program No: SP-017 Page 26 Program Name: Custodial Cleaning Procedures Origination Date: 04/29/09 Revision Date: 07/18/12 Issued By: Mike Whitford Revision No.: Cafeteria Cleaning Procedures CAFETERIA CLEANING PROCEDURES Child Nutrition employees are responsible for the Kitchen during the school year. They are graded by the Pitt County Health Department for cleanliness and upkeep. Child Nutrition is responsible for cleaning all food preparation equipment and surfaces, walls, and floors in the Kitchen. They are also responsible for sweeping and mopping the floors and cleaning tables in the Dining Room. The following are custodial responsibilities: Daily 1. Clean all entry windows and doors. 2. If there are restrooms inside the Dining Room clean per the restroom cleaning procedures (located in section 8.4 RESTROOM CLEANING AND SANITATION). Weekly 1. Dust all horizontal surfaces including ceiling, moldings, ducts, vents, air registers, etc. 2. Remove fingerprints and stains from walls, doors, door frames, and light switches. 3. Damp clean window ledges. Monthly 1. Dust blinds. 2. Remove bugs, dust, and cobwebs from ceiling areas and light covers 3. Damp clean baseboards 4. Periodically buff the dining room floors as needed. The frequency of buffing will be dependent upon the school s usage.
27 Program No: SP-017 Page 27 Program Name: Custodial Cleaning Procedures Origination Date: 04/29/09 Revision Date: 07/18/12 Issued By: Mike Whitford Revision No.: 003 Semi-Annually (Semi-annual services are to be performed during the summer and Holidays) or as needed Scrub and refinish all floor tile and terrazzo as described in floor scrubbing procedures (located in section 9.4 FLOOR SCRUBBING). Annually (Annual services are to be performed during the summer or Holidays) 1. Wash all windows and glass (inside and outside). 2. Completely strip and refinish tile and terrazzo floors as described in the stripping and finishing procedures (located in section 9.5 STRIPPING AND FINISHING). Miscellaneous A. An outside rubber mat and an inside carpeted mat should be placed at each entrance door. Floor mats are your first defense to keep dirt from within a school. Both mats should be shaken or vacuumed daily. B. Custodians are responsible for routinely changing burned out light bulbs less than 10 feet from the floor, including the Kitchen. Facility Services is responsible for replacing light bulbs over 10 feet from the floor. C. Custodians are responsible for replacing broken, water stained, or fallen ceiling tiles less than 10 feet from the floor, including the Kitchen. Facility Services is responsible for replacing ceiling tiles over 10 feet from the floor. Facility Services is also responsible for replacing ceiling tiles that must be cut for fit, regardless of ceiling height. D. Custodians should periodically assist cafeteria staff with cleaning around dumpsters. E. Child Nutrition is responsible for cleaning restrooms found in the Kitchen. Any restrooms found in the Dining Room are a custodial responsibility.
28 Program No: SP-017 Page 28 Program Name: Custodial Cleaning Procedures Origination Date: 04/29/09 Revision Date: 07/18/12 Issued By: Mike Whitford Revision No.: 003 Bloodborne Pathogens Cleanup A. Pitt County Schools employs part-time child nutrition employees that also work as part-time custodians. If an incident occurs requiring bodily fluids cleanup while an employee is working as a cafeteria employee, the school shall contact another custodian to cleanup in order to prevent any possible food contamination. B. In addition, cafeteria equipment such as brooms, mops, buckets, and dish towels should not be used for cleaning up areas where a child has been sick. If cafeteria equipment is mistakenly used, it must be discarded. Only custodial equipment shall be used.
29 Program No: SP-017 Page 29 Program Name: Custodial Cleaning Procedures Origination Date: 04/29/09 Revision Date: 07/18/12 Issued By: Mike Whitford Revision No.: 003 MULTIPURPOSE ROOM CLEANING PROCEDURES 8.6 Multipurpose Room Cleaning Procedures Daily 1. Empty trashcans. Note Do not use hands to pack down waste. Sharp objects or glass could cause injury. 2. If there was trash in the trashcan replace the liner. 3. Clean all entry windows and doors. 4. Vacuum interior carpeted mats. Weekly 1. Dust all horizontal surfaces to head height. 2. Remove spots, fingerprints, and stains from walls, doors, doorknobs, door frames, light switches, and windows. 3. Clean smudges and marks from glass with the Glass Cleaner. 4. Damp clean window ledges. 5. Damp clean baseboards. Monthly 1. Dust areas above head height including shelves, ceiling, moldings, ducts, vents, air registers, etc. 2. Remove bugs, dust, and cobwebs from ceiling areas and light covers. Annually (Annual services are to be performed during the summer) 1. Dust blinds (if applicable). 2. Wash all windows and glass (inside and outside).
30 Program No: SP-017 Page 30 Program Name: Custodial Cleaning Procedures Origination Date: 04/29/09 Revision Date: 07/18/12 Issued By: Mike Whitford Revision No.: 003 Cleaning Multipurpose Rooms with Synthetic Sports Flooring Synthetic sports floors are found in the Multipurpose Rooms at the following schools: Ayden Elementary Ayden Grifton High Belvoir Elementary Creekside Elementary Eastern Elementary Falkland Elementary Farmville Central High G.R. Whitfield Hope Middle J.H. Rose High Lakeforest Elementary North Pitt High Ridgewood Elementary Stokes W.H. Robinson Elementary Wahl Coates Elementary Wintergreen Intermediate Daily 1. Remove any gum from the floors with the gum remover. 2. Dust mop flooring. 3. Spot clean any heavy marked spots with the All Purpose Cleaner. Weekly At least weekly, more often if needed, scrub the entire floor area with the floor scrubber using a scrubbing pad (red pad) and the Neutral Floor Cleaner. Note Do not apply any type of floor stripper, floor sealer, or floor wax to the synthetic sports flooring. Note Do not place rubber mats on top of the synthetic sports flooring.
31 Program No: SP-017 Page 31 Program Name: Custodial Cleaning Procedures Origination Date: 04/29/09 Revision Date: 07/18/12 Issued By: Mike Whitford Revision No.: 003 Cleaning Multipurpose Rooms with Tile Floors Tile Floors are found in the Multipurpose Rooms at the following schools: Pactolus Daily 1. Remove any gum from the floors with the gum remover. 2. Dust mop tile floor. Weekly 1. At least weekly, more often if needed, damp mop tile flooring. It is most important to spot mop floors in order to keep them in good condition and to keep them looking good. Floors that are not spot mopped will not hold up, as the spots get tracked onto the rest of the floor and the surface soil cuts the finish. This can quickly result in a very dull and unsightly floor. 2. Periodically spray buff tile flooring. Floors must be maintained in good condition to be spray buffed. Semi-Annually (Semi-annual services are to be performed during the summer and Holidays) or as needed Semi-annually, or more often if needed, lightly scrub and refinish tile flooring as described in the floor scrubbing procedures (located in section 9.4 FLOOR SCRUBBING). Annually (Annual services are to be performed during the summer or Holidays) Strip and refinish tile floors as described in the stripping and finishing procedures (located in section 9.5 STRIPPING AND FINISHING).
32 Program No: SP-017 Page 32 Program Name: Custodial Cleaning Procedures Origination Date: 04/29/09 Revision Date: 07/18/12 Issued By: Mike Whitford Revision No.: 003 Cleaning Multipurpose Rooms with Carpeted Floors Carpeted floors are found in the Multipurpose Rooms at the following schools: H.B. Sugg Northwest Elementary Wintergreen Primary Daily 1. Pick up all debris too large for the vacuum. 2. Remove gum with the gum remover. 3. Remove any spots that may be on the carpet by spraying with a carpet shampoo solution. Let the solution soak into the spot for 2 5 minutes, then attempt to remove it by rubbing it with a damp cloth. Always rub from the outside of the spot toward the center to prevent spreading. If the spot remains, repeat the procedure. 4. Vacuum the carpet. Annually (Annual services are to be performed during the summer or Holidays) Shampoo carpeted floors as described in the carpet shampooing procedures (located in section 9.9 CARPET SHAMPOOING). Miscellaneous A. An outside rubber mat and an inside carpeted mat should be placed at each entrance door. Floor mats are your first defense to keep dirt from within a school. Both mats should be shaken or vacuumed daily. B. Clean drinking fountains with the disinfectant (Pronto). Dry with a clean cloth or paper towel. Pour a capful of the disinfectant (Pronto) in the drain when finished.
33 Program No: SP-017 Page 33 Program Name: Custodial Cleaning Procedures Origination Date: 04/29/09 Revision Date: 07/18/12 Issued By: Mike Whitford Revision No.: 003 NURSE S OFFICE AND CLINIC CLEANING PROCEDURES 8.7 Nurse s Office and Clinic Cleaning Procedures Daily 1. Empty trashcans. Note Do not use hands to pack down waste. Sharp objects or glass could cause injury. 2. If there was trash in the trashcan replace the liner. 3. Clean all entry windows and doors. 4. Clean doorknobs and light switch plates with the Disinfectant (Pronto) Solution. 5. Clean sinks and counter tops with the Disinfectant (Pronto) Solution. 6. If there are restrooms inside the office clean per the restroom cleaning procedures (located in section 8.4 RESTROOM CLEANING AND SANITATION). 7. Vacuum all carpet. Note Pick up all debris too large for the vacuum first. 8. Spot clean carpet stains. Note Spray with a carpet shampoo solution. Let the solution soak into the spot for 2 5 minutes, then attempt to remove it by rubbing it with a damp cloth. Always rub from the outside of the spot toward the center to prevent spreading. If the spot remains, repeat the procedure. 9. Dust mop tile and terrazzo floors. Note Be sure to keep the same side of the dust mop in the forward position at all times with the mop strands out in front to trap the dust. Try not to lift the mop unless it is absolutely necessary to remove collected dust. Note Sweep trash outside the office door for pickup. 10. Damp mop all tile and terrazzo floors with Pine Scent Disinfectant.
34 Program No: SP-017 Page 34 Program Name: Custodial Cleaning Procedures Origination Date: 04/29/09 Revision Date: 07/18/12 Issued By: Mike Whitford Revision No.: 003 Weekly 1. Dust all horizontal surfaces to head height. 2. Remove spots, fingerprints, and stains from walls, doors, doorknobs, door frames, light switches, and windows using the Disinfectant (Pronto) Solution. 3. Clean smudges and marks from glass with the Glass Cleaner. 4. Damp clean window ledges. 5. Damp clean baseboards. Monthly 1. Dust areas above head height including shelves, ceiling, moldings, ducts, vents, air registers, etc. 2. Remove bugs, dust, and cobwebs from ceiling areas and light covers. 3. Dust blinds. Semi-Annually (Semi-annual services are to be performed during the summer and Christmas break) or as needed 1. Shampoo carpet as described in the carpet shampooing procedures (located in section 9.9 CARPET SHAMPOOING). 2. Scrub and refinish all floor tile and terrazzo as described in floor scrubbing procedures (located in section 9.4 FLOOR SCRUBBING). Annually (Annual services are to be performed during the summer) 1. Wash all windows and glass (inside and outside). 2. Shampoo carpet as described in the carpet shampooing procedures (located in section 9.9 CARPET SHAMPOOING). 3. Completely strip and refinish all tile and terrazzo floors as described in the stripping and finishing procedures (located in section 9.5 STRIPPING AND FINISHING).
35 Program No: SP-017 Page 35 Program Name: Custodial Cleaning Procedures Origination Date: 04/29/09 Revision Date: 07/18/12 Issued By: Mike Whitford Revision No.: Auditorium Cleaning Procedures Daily 1. Empty trashcans. AUDITORIUM CLEANING PROCEDURES Note Do not use hands to pack down waste. Sharp objects or glass could cause injury. 2. If there was trash in the trashcan replace the liner. 3. Remove any gum from the floors with the gum remover. Weekly (Check flooring daily and vacuum or mop if needed. Otherwise vacuum and mop weekly.) 1. Dust all horizontal surfaces to head height, including seats. 2. Remove spots, fingerprints, and stains from walls, doors, door frames, light switches, and windows. 3. Damp clean window ledges. (If applicable) 4. Sweep baseboards. 5. Vacuum carpet. Note Pick up all debris too large for the vacuum first. 6. Spot clean carpet stains. Note Spray with a carpet shampoo solution. Let the solution soak into the spot for 2 5 minutes, then attempt to remove it by rubbing it with a damp cloth. Always rub from the outside of the spot toward the center to prevent spreading. If the spot remains, repeat the procedure. 7. Dust mop tile and terrazzo floors. Note Be sure to keep the same side of the dust mop in the forward position at all times with the mop strands out in front to trap the dust. Try not to lift the mop unless it is absolutely necessary to remove collected dust.
36 Program No: SP-017 Page 36 Program Name: Custodial Cleaning Procedures Origination Date: 04/29/09 Revision Date: 07/18/12 Issued By: Mike Whitford Revision No.: 003 Note Sweep trash outside the auditorium door for pickup. Note Dust mops should be taken outside daily for a good shaking out. 8. At least weekly, more often if needed, damp mop tile and terrazzo floors with Neutral Floor Cleaner. Note It is important to damp mop floors in order to keep them in good condition and to keep them looking good. Floors that are not spot mopped will not hold up, as the spots get tracked onto the rest of the floor and the surface soil cuts the finish. This can quickly result in a very dull and unsightly floor. Monthly 1. Dust areas above head height including ceiling, moldings, ducts, vents, air registers, etc. 2. Remove bugs, dust, and cobwebs from ceiling areas. 3. Clean all entry windows and doors. Annually (Annual services are to be performed during the summer) 1. Wash all windows and glass (inside and outside). 2. Annually shampoo carpeted floors as described in the carpet shampooing procedures (located in section 9.9 CARPET SHAMPOOING). 3. Completely strip and refinish all tile and terrazzo floors as described in the stripping and finishing procedures (located in section 9.5 STRIPPING AND FINISHING).
37 Program No: SP-017 Page 37 Program Name: Custodial Cleaning Procedures Origination Date: 04/29/09 Revision Date: 07/18/12 Issued By: Mike Whitford Revision No.: 003 LOCKER ROOM AND SHOWER CLEANING PROCEDURES 8.9 Locker Room and Shower Cleaning Procedures Daily 1. Empty trashcans. Note Do not use hands to pack down waste. Sharp objects or glass could cause injury. 2. If there was trash in the trashcan replace the liner. 3. Clean and sanitize counters, benches, sinks, and mirrors with the Disinfectant (Pronto) Solution. 4. Resupply paper, hand towel, and soap dispensers. 5. Clean the restrooms per the restroom cleaning procedures (located in section 8.4 RESTROOM CLEANING AND SANITATION). Note Check all shower heads to make sure they are turned off. 6. Remove any gum from the floors with the gum remover. 7. Dust mop tile and terrazzo floors. Note Be sure to keep the same side of the dust mop in the forward position at all times with the mop strands out in front to trap the dust. Try not to lift the mop unless it is absolutely necessary to remove collected dust. Weekly Note Sweep trash outside the locker room door for pickup. Note Dust mops should be taken outside daily for a good shaking out. 1. Dust all horizontal surfaces to head height. 2. Remove spots, fingerprints, and stains from walls, doors, door frames, light switches, kick plates, and windows. 3. Damp clean window ledges.

38 Program No: SP-017 Page 38 Program Name: Custodial Cleaning Procedures Origination Date: 04/29/09 Revision Date: 07/18/12 Issued By: Mike Whitford Revision No.: Damp clean baseboards. 5. Damp mop floors with Pine Scent Disinfectant. Note Pour the remainder of the disinfectant down the floor drain, a favorite breeding place for bacteria and a source of odors. Monthly 1. Dust areas above head height including shelves, ceiling, moldings, ducts, vents, air registers, etc. 2. Remove bugs, dust, and cobwebs from ceiling areas and light covers. Annually (Annual services are to be performed during the summer) Wash all windows and glass (inside and outside). Miscellaneous A. If liquid is not occasionally poured down the floor drains, the water in the drain trap will evaporate allowing sewer gas to come back up the drain. B. Do not wax locker room floors.
39 Program No: SP-017 Page 39 Program Name: Custodial Cleaning Procedures Origination Date: 04/29/09 Revision Date: 07/18/12 Issued By: Mike Whitford Revision No.: 003 ATHLETIC FIELD RESTROOM CLEANING PROCEDURES 8.10 Athletic Field Restroom Cleaning Procedures Refer to restroom cleaning procedures (located in section 8.4 RESTROOM CLEANING PROCEDURES). Weekly and After Games/Events 1. Empty trashcans. Note Do not use hands to pack down waste. Sharp objects or glass could cause injury. 2. If there was trash in the trashcan replace the liner. 3. Resupply toilet paper, hand towel, and soap dispensers 4. Remove any gum from the floors with the gum remover. 5. Sweep floors. 6. Damp mop all tile and terrazzo floors with Pine Scent Disinfectant As Needed 1. Dust all horizontal surfaces, including vents and exhaust fans. 2. Remove spots, fingerprints, and stains from walls, doors, door frames, light switches, kick plates, and windows. 3. Damp clean window ledges. 4. Damp clean baseboards. 5. Remove bugs, dust, and cobwebs from ceiling areas and light covers. 6. Wash all windows and glass (inside and outside).

40 Program No: SP-017 Page 40 Program Name: Custodial Cleaning Procedures Origination Date: 04/29/09 Revision Date: 07/18/12 Issued By: Mike Whitford Revision No.: 003 Miscellaneous A. Restrooms should remain locked when not in use. B. At the conclusion of athletic events, custodians should flush toilets and urinals and pick up trash. A more thorough cleaning and disinfecting should occur the next day per section 8.43 RESTROOM CLEANING PROCEDURES. After cleaning, the restrooms should be locked until the next event. C. Restrooms should remain locked during the winter months when the restrooms have been winterized.
41 Program No: SP-017 Page 41 Program Name: Custodial Cleaning Procedures Origination Date: 04/29/09 Revision Date: 07/18/12 Issued By: Mike Whitford Revision No.: 003 DUST MOPPING 9.1 Dust Mopping Dust mopping is recommended for the removal of dust, light soil, and litter from smooth finished floors as wood, linoleum, terrazzo, and vinyl tile. It should be done after the dusting of furniture and equipment so that the soil deposited on the floor will be removed. The equipment and supplies that are needed for dust mopping are: Dust Mop & Dust Pan Broom or Duster Putty Knife Clean Cloths 1. A pattern is recommended for dust mopping procedures. In the case of office areas with a number of desks, it is important to dust mop not only the aisles, but also the areas between the desks and the kneehole area under them. Chairs and other wheeled furniture should be rolled aside, and then returned to their original positions after dust mopping the area they cover. Special care should be taken to mop closely around the legs of furniture where dust clings and along the baseboard and behind open doors. A broom may be needed for getting dust out of corners. 2. As much as possible, while dust mopping is in progress, avoid lifting the mop head from the floor surface. When it becomes necessary to shake the mop, keep it as close to the floor as possible to avoid unnecessary scattering of dust and litter into the air. 3. Try to keep dust piles to the side, out of the traffic lane, to avoid scattering. When emptying dustpans, make sure this is done well down in the cart to minimize the possibility of dust circulating back into the air. 4. Exterior rubber mats, interior carpeted mats, and dust mopping are your main line of defense against soil that will destroy your floor finish. Interior carpeted mats should be vacuumed each day.
42 Program No: SP-017 Page 42 Program Name: Custodial Cleaning Procedures Origination Date: 04/29/09 Revision Date: 07/18/12 Issued By: Mike Whitford Revision No.: 003 FLOOR MOPPING 9.2 Floor Mopping The equipment and supplies that are needed for wet mopping are: Wet Mop & Mop Bucket Neutral Floor Cleaner Pine Scent Disinfectant (Only for Restroom Floors) Broom or Duster Putty Knife Wet Floor Signs Clean Cloths NOTE: The Neutral Floor Cleaner should be used on all floors except restrooms. NOTE: The Pine Scent Disinfectant should be on restrooms floors. In the following instructions substitute the neutral floor cleaner with pine scent disinfectant when mopping restrooms floors. Tip: A tennis ball attached to a broom handle can be used to remove black streaks from floors. 1. Remove any items stuck to the floor with the putty knife. 2. Place wet floor signs in the area you plan to mop. 3. Fill the mop bucket to the correct level with water and add 1 2 ounces of Neutral Floor Cleaner for each 1 gallon of water. 4. After thoroughly dipping the mop head in the Neutral Floor Cleaner, allow some of the excess liquid to pour back into the bucket. You do not want to flood the floor and harm the tile. 5. Lay the mop head on the floor, about 8 inches from the baseboard, and lay the neutral floor cleaner down parallel to the wall. 6. Make a figure U with the mop and, standing upright, mop a figure-eight stroke between the two lines. For best results, the mop should be turned over two to three times for every mop full of solution. As you mop, shift the weight of your
43 Program No: SP-017 Page 43 Program Name: Custodial Cleaning Procedures Origination Date: 04/29/09 Revision Date: 07/18/12 Issued By: Mike Whitford Revision No.: 003 body from foot to foot in the direction of the stroke. Use your whole body to move the mop, not just your arm muscles. 7. Rinse the mop often so that dirt is not redistributed over the floor. Change the mop water as needed. 8. If you splash the baseboard or wall by accident, wipe it off immediately. Always carry a rag for this purpose. The reason the first border stroke is made away from the baseboard is to prevent splashing. 9. Mop over the entire area with a wrung out mop.
44 Program No: SP-017 Page 44 Program Name: Custodial Cleaning Procedures Origination Date: 04/29/09 Revision Date: 07/18/12 Issued By: Mike Whitford Revision No.: 003 FLOOR SCRUBBING 9.3 Floor Scrubbing When a floor is not dirty enough to need complete stripping, but it is soiled enough to need stronger action then mopping, it should be scrubbed. The equipment and supplies that are needed for scrubbing are: Floor Scrubber (Red Scrub Pads) Neutral Floor Cleaner Dust Mop & Dust Pan Putty Knife Clean Cloths Buffing Machine (Blue Scrub Pads) Wet/Dry Vacuum & Two Buckets Broom or Duster Wet Floor Signs Mop and Mop Bucket CAUTION ASBESTOS FLOOR TILE Prior to scrubbing tile floors, determine whether the tile contains asbestos. This information can be found below with more detailed information in the Asbestos Inventory located in the appendix of the Custodial Safety Program or in the facility s Asbestos Management Plan. If the tile contains asbestos, the following precautions must be taken: Use a less aggressive pad. Keep floor wet during the entire scrubbing process. Do not use a high-speed buffer or burnisher. Exposed asbestos floor tile is found in various locations at the following schools: A.G. Cox Middle Ayden Grifton High Belvoir Elementary Bethel C.M. Eppes Middle Chicod D.H. Conley High E.B. Aycock Middle Elmhurst Elementary Falkland Elementary Farmville Central High Farmville Middle G.R. Whitfield Grifton J.H. Rose High North Pitt High Pactolus Sam D. Bundy South Greenville Elementary W.H. Robinson Elementary Wahl Coates Elementary Wellcome Middle
45 Program No: SP-017 Page 45 Program Name: Custodial Cleaning Procedures Origination Date: 04/29/09 Revision Date: 07/18/12 Issued By: Mike Whitford Revision No.: 003 Automatic Floor Scrubber 1. Diagram furniture placement and remove furniture from room. 2. Go over the entire floor with a dust mop in order to remove all surface dirt and debris. Use the broom or duster and the dustpan to take care of any loose litter that you may find. 3. Place wet floor signs in the area you plan to scrub. 4. Fill the detergent tank with 4 gallons of water and 8 ounces of neutral floor cleaner. 5. Lower the squeegee using the lever. 6. Press the ON button. 7. Press the brush button to activate suction and water delivery. This will also activate the detergent. 8. Begin working. 9. The floor should now be clean and dry and ready for a coat of floor finish. If possible, wait until the next day to refinish floor. Buffing Machine with Scrub Pad 1. Diagram furniture placement and remove furniture from room. 2. Go over the entire floor with a dust mop in order to remove all surface dirt and debris. Use the broom or duster and the dustpan to take care of any loose litter that you may find. 3. Place wet floor signs in the area you plan to scrub. 4. Mix a solution of Neutral Floor Cleaner with water. Add 1-2 ounces of Neutral Floor Cleaner to each 1 gallon of water. 5. One person should start laying the Neutral Floor Cleaner in a corner away from the door. Be careful not to splash furniture or baseboards. If this occurs, wipe off immediately with a damp cloth.
46 Program No: SP-017 Page 46 Program Name: Custodial Cleaning Procedures Origination Date: 04/29/09 Revision Date: 07/18/12 Issued By: Mike Whitford Revision No.: After the Neutral Floor Cleaner has been down a couple of minutes, the machine operator begins by scrubbing in a left to right motion while moving backwards. 7. After the scrubber moves on, the second person moves over the same area and picks up the soiled solution with the wet/dry vacuum. This person should carry an abrasive pad that can be used to remove any marks the scrubber missed. The dirty solution must be picked up quickly before it dries and has to be scrubbed again. If the water extraction machine leaves any residue behind, it should be mopped up as soon as possible. 8. The next step is rinsing. This is a critical step, because if it is not done properly the floor finish may not stick to the floor. Fill the rinse bucket with warm water, lightly flood the area, and pick up the water with the wet/dry vacuum. When floors are flooded, be sure to remove the water as soon as possible to prevent floor damage. Wring a clean mop head to a damp consistency before putting it on the floor. Once again, rinse the same way for all mopping except change the water more often. 9. The floor should now be clean and dry and ready for a coat of floor finish. If possible, wait until the next day to refinish floor. Note If you have a very small area to refinish, you may want to pour the finish directly on the mop and apply. Note For large areas, you will need a clean mop bucket and wringer. Whatever the case, apply a thin coat of finish. Note In a scrubbing operation, you do not remove all of the original floor finish, so you only need to replace a thin coat of finish. A second coat in traffic lanes should be applied if time permits.
47 Program No: SP-017 Page 47 Program Name: Custodial Cleaning Procedures Origination Date: 04/29/09 Revision Date: 07/18/12 Issued By: Mike Whitford Revision No.: 003 FLOOR STRIPPING 9.4 Floor Stripping The purpose of stripping a floor is simple: to remove all the sealer, wax, and dirt and lay a new finish on to protect the surface. The procedure for stripping a floor is basically the same as for scrubbing. The same equipment and supplies are needed as in the scrubbing operation, with two exceptions: Use a stripping solution and use the black stripping pads. The equipment and supplies that are needed for stripping are: Buffing Machine Black Stripper Pads Floor Stripper Defoamer Dust Mop & Dust Pan Broom or Duster Wet/Dry Vacuum & Two buckets Putty Knife Clean Cloths Mop and Mop Bucket Wet Floor Signs Pullover Stripping Shoes There are six basic steps in a professional stripping and finishing job: (1) Dust mopping (2) Laying the stripping solution and letting it soak (3) Machine scrubbing (4) Picking up the slurry (5) Rinsing the floor three times; one light flood, two wet mop (6) Laying the floor wax
48 Program No: SP-017 Page 48 Program Name: Custodial Cleaning Procedures Origination Date: 04/29/09 Revision Date: 07/18/12 Issued By: Mike Whitford Revision No.: 003 CAUTION ASBESTOS FLOOR TILE Prior to stripping tile floors, determine whether the tile contains asbestos. This information can be found below with more detailed information in the Asbestos Inventory located in the appendix of the Custodial Safety Program or in the facility s Asbestos Management Plan. If the tile contains asbestos, the following precautions must be taken: Strip infrequently. Use a less aggressive pad. Keep floor wet during the entire stripping process. Do not use a high-speed buffer or burnisher. Exposed asbestos floor tile is found in various locations at the following schools: A.G. Cox Middle Ayden Grifton High Belvoir Elementary Bethel C.M. Eppes Middle Chicod D.H. Conley High E.B. Aycock Middle Elmhurst Elementary Falkland Elementary Farmville Central High Farmville Middle G.R. Whitfield Grifton J.H. Rose High North Pitt High Pactolus Sam D. Bundy South Greenville Elementary W.H. Robinson Elementary Wahl Coates Elementary Wellcome Middle 1. Diagram furniture placement and remove furniture from room. 2. Dust mop the floor thoroughly. Be sure to sweep all corners and edges. 3. Remove any gum from the floors with the gum remover. 4. Use towels or rags to protect the edges of carpet and under the doors to prevent the stripping solution from running onto floors that connect to the one you are stripping. 5. Place wet floor signs in the area you plan to strip. 6. Put on pullover stripping shoes.
49 Program No: SP-017 Page 49 Program Name: Custodial Cleaning Procedures Origination Date: 04/29/09 Revision Date: 07/18/12 Issued By: Mike Whitford Revision No.: Mix the stripper solution in a 1 4 ratio (1 gallon of stripper to 4 gallons of water) in one of the mop buckets. Hot water (if available) should be used as it will soften the old finish and make it easier to remove. 8. Lay a full coat of floor stripper solution down. 9. After 10 minutes use the mop to agitate the stripper solution on the floors. 10. After 5 minutes agitate the floor using a black stripper pad on the buffing machine. 11. Most floors are slightly uneven, with small hills and valleys throughout. The buffing machine needs to be moved back and forth over the same area at different angles. 12. A floor scrapper or putty knife should be used to clean and remove buildup on the floor along the baseboards, edges, and corners. 13. Pick up the dirty stripper solution with the wet/dry vacuum and mop. Pour approximately 1-2 capfuls of Defoamer in the wet/dry vacuum tank prior to picking up the stripper solutions. Note Do not allow the stripper to dry on the floor. Important Do not use an automatic scrubber machine to remove stripping solution. 14. Rinse the floor at least twice with clean mops and clean water. When floors are flooded, be sure to remove the water as soon as possible to prevent floor damage. Note Because you are using a stripping solution, the rinsing operation is the most important step. If any stripper stays on the floor, the finish will not stick, and the entire job will have to be redone. Tip Fans may be used to help dry the floors. 15. When the rinsing is complete, take a damp cloth or sponge and wipe any splashes off walls, woodwork, and baseboards.
50 Program No: SP-017 Page 50 Program Name: Custodial Cleaning Procedures Origination Date: 04/29/09 Revision Date: 07/18/12 Issued By: Mike Whitford Revision No.: When the floor is completely dry, run your hand across it to see if any residue is left. If there is, the floor will have to be rinsed again. This residue is stripper and the finish that has not been removed by a previous stripping. If no residue appears on your hand and there is no visible evidence of unstripped finish or sealer, the floor is now ready for a new finish. A. New Vinyl Floors Newly laid vinyl floors require special care until they are cured and ready to finish. If they are not properly taken care of, the tile glue may begin to bleed up around the edges of the tile, and you will have a never-ending problem with your finish and the appearance of your floors. For the first 2 weeks: The floor may be dust mopped and damp mopped only. Do not flood the floor with water; do not use floor stripper, any soap, or apply floor wax during the first 2 weeks. After 2 weeks: Scrub the floor using the auto floor scrubber or a buffing machine with a scrubbing pad. Use the Neutral Floor Cleaner. Note The floor must be scrubbed or the wax will not bond. The tile comes from the manufacturer with a protective coating that must be removed before applying the finish. B. Asbestos Floor Tile Care All remaining asbestos floor tile in Pitt County Schools is progressively being removed as needed and as funding is available. Stripping Asbestos Floor Tile: The floor must be kept wet at all times while stripping. A high-speed buffing machine will not be used in stripping a floor.
51 Program No: SP-017 Page 51 Program Name: Custodial Cleaning Procedures Origination Date: 04/29/09 Revision Date: 07/18/12 Issued By: Mike Whitford Revision No.: 003 FLOOR WAXING 9.5 Floor Waxing The equipment and supplies that are needed for waxing are: Buffing Machine White Buffing Pads Floor Sealer Floor Wax Mop and Mop Bucket Dust Mop & Dust Pan Clean Cloths Wet Floor Signs CAUTION ASBESTOS FLOOR TILE Prior to buffing tile floors, determine whether the tile contains asbestos. This information can be found below with more detailed information in the Asbestos Inventory located in the appendix of the Custodial Safety Program or in the facility s Asbestos Management Plan. If the tile contains asbestos, the following precautions must be taken: Do not use a high-speed buffer or burnisher. Exposed asbestos floor tile is found in various locations at the following schools: A.G. Cox Middle Ayden Grifton High Belvoir Elementary Bethel C.M. Eppes Middle Chicod D.H. Conley High E.B. Aycock Middle Elmhurst Elementary Falkland Elementary Farmville Central High Farmville Middle G.R. Whitfield Grifton J.H. Rose High North Pitt High Pactolus Sam D. Bundy South Greenville Elementary W.H. Robinson Elementary Wahl Coates Elementary Wellcome Middle
52 Program No: SP-017 Page 52 Program Name: Custodial Cleaning Procedures Origination Date: 04/29/09 Revision Date: 07/18/12 Issued By: Mike Whitford Revision No.: Apply a light thin coat of floor sealer evenly across the floor. Stay at least 1 foot away from all walls. 2. After the floor sealer has dried, you are ready to begin applying light coats of floor wax. 3. Four coats of wax should be applied. Note Use only a clean mop head. 4. Dip the mop into the floor wax and gently press any excess back into the bucket. Always avoid agitating the wax because you may create bubbles that will appear on the floor once the finish is applied. This promotes quicker drying and prevents puddling and streaking. 5. Be careful to avoid getting wax on the baseboards. If you miss a spot, do not try to go back and cover it. It will be covered with the next coat. In addition, be careful to avoid floor receptacles. 6. Most wax will dry in minutes. Always be sure the last coat is thoroughly dry before the next application is made. Note The temperature, humidity, and ventilation affect the speed in which the finish will dry. Try to schedule your waxing jobs on clear, low humidity days. Note The air conditioner is not turned off during the summer. For energy management purposes it is set back to The second and remaining coats of wax should be laid down 6 8 inches from the baseboards, corners, and obstacles. These are areas that receive little or no traffic, so any additional coats will only cause a buildup. Alternate the direction the wax is applied between each coat. This will eliminate the streaked look and will ensure that the entire floor will be covered. Remember, each time you buff you will be taking a very thin layer of finish off. The scratches and scuffs are buffed out this way. 8. After at least 48 hours, buff the floor to a shine with a white buffing pad. 9. Replace the furniture only after the final coat of finish is completely dry. 10. Do not return leftover wax to the original container.
53 Program No: SP-017 Page 53 Program Name: Custodial Cleaning Procedures Origination Date: 04/29/09 Revision Date: 07/18/12 Issued By: Mike Whitford Revision No.: Always keep a top on the container when storing. Floor wax will spoil if contaminated. Asbestos Floor Tile Care All remaining asbestos floor tile in Pitt County Schools is progressively being removed as needed and as funding is available. Waxing Asbestos Floor Tile: Asbestos floor tile that has no finish on it will not be dry buffed or burnished. Make sure the floor is clean and damp mopped prior to buffing. A high-speed buffing machine or burnisher will not be used in waxing or buffing. Asbestos floor tile can be buffed with a standard speed machine as long as a minimum of four coats of wax is kept on the floor.
54 Program No: SP-017 Page 54 Program Name: Custodial Cleaning Procedures Origination Date: 04/29/09 Revision Date: 07/18/12 Issued By: Mike Whitford Revision No.: 003 BURNISHING 9.6 Burnishing The purpose of burnishing is to harden the floor finish. A floor finish hardened by burnishing will better protect the floor surface and will reflect an enhanced appearance. The equipment and supplies that are needed for waxing are: Buffing Machine White Buffing Pads Dust Mop & Dust Pan Putty Knife CAUTION ASBESTOS FLOOR TILE Prior to burnishing tile floors, determine whether the tile contains asbestos. This information can be found in the facility s Asbestos Management Plan or the Asbestos Inventory found in the appendix of the Custodial Safety program. If the tile contains asbestos, the following precautions must be taken: Do not use a high-speed buffer or burnisher. Exposed asbestos floor tile is found in various locations at the following schools: A.G. Cox Middle Ayden Grifton High Belvoir Elementary Bethel C.M. Eppes Middle Chicod D.H. Conley High E.B. Aycock Middle Elmhurst Elementary Falkland Elementary Farmville Central High Farmville Middle G.R. Whitfield Grifton J.H. Rose High North Pitt High Pactolus Sam D. Bundy South Greenville Elementary W.H. Robinson Elementary Wahl Coates Elementary Wellcome Middle
55 Program No: SP-017 Page 55 Program Name: Custodial Cleaning Procedures Origination Date: 04/29/09 Revision Date: 07/18/12 Issued By: Mike Whitford Revision No.: 003 Note Never burnish an unfinished floor or a floor where the finish has been worn to the point that the tile is exposed. Note Burnishing finish that has not hardened may cause swirls in the finish and/or remove finish increasing the need for additional floor care. 1. Before burnishing the floor must be prepared. There are three options to prepare the floor: Option 1 Dust mop the floor Option 2 Scrub and refinish the floor Option 3 Strip and refinish the floor 2. Use the putty knife to remove gum and other deposits from the floor. 3. Pick up entrance mats and take them outside. Shake them vigorously or vacuum them to remove the grit and soil. 4. Burnish at a slow to moderate walking pace in a straight line, overlapping the previous pass as you proceed. Note Continuous burnishing in one spot will remove the finish and may damage the finish or tile. Note Do not burnish areas of the floor that contain chipped or loose floor tile. 5. When burnishing is complete, go over the entire floor with a dust mop again. Pick up any dust or debris you have created.
56 Program No: SP-017 Page 56 Program Name: Custodial Cleaning Procedures Origination Date: 04/29/09 Revision Date: 07/18/12 Issued By: Mike Whitford Revision No.: 003 SPRAY BUFFING 9.7 Spray Buffing The best way to keep an attractive floor is to regularly spray buff. The equipment and supplies that are needed for waxing are: Buffing Machine White Buffing Pads Spray Buff Dust Mop & Dust Pan Clean Cloths 1. Before spray buffing, the floor must first be dust mopped and damp mopped to remove all the surface soil. 2. Use the putty knife to remove gum and other deposits from the floor. 3. Pick up entrance mats and take them outside. Shake them vigorously or vacuum them to remove the grit and soil. 4. Follow the procedures given in the section on damp mopping. 5. Use a white buffing pad for spray buffing. Spray a small amount of Spray Buff on the floor to one side of the machine and begin to buff. Continue to buff until a shine is obtained. 6. Continue this procedure, moving the machine from side to side and overlapping each pass of the machine with the previous pass. Do not spray the Spray Buff close to the walls. This will help to prevent buildup around the edges. 7. When a heel mark or other hard to remove mark is encountered, spray the area and rub lightly with the centerpiece from a buffing pad. Use your foot to apply slight pressure. Do not rub too hard and do not heel the machine on such spots, as this will result in removing the finish, leaving a dull spot, which will soil rapidly and detract from the floor s overall appearance. 8. When one side of the pad becomes too loaded with soil and finish to do a good job, turn it over and use the other side. It is possible to go a long way on one pad.

57 Program No: SP-017 Page 57 Program Name: Custodial Cleaning Procedures Origination Date: 04/29/09 Revision Date: 07/18/12 Issued By: Mike Whitford Revision No.: When spray buffing is complete, go over the entire floor with a dust mop again. Pick up any dust or debris you have created. 10. One very important thing to remember is to always dust mop and damp mop before spray buffing. If you do not, dirt is ground into the floor, causing browning and powdering of the finish.

58 Program No: SP-017 Page 58 Program Name: Custodial Cleaning Procedures Origination Date: 04/29/09 Revision Date: 07/18/12 Issued By: Mike Whitford Revision No.: 003 CARPET VACUUMING 9.8 Carpet Vacuuming It is not foot traffic that wears a carpet out, but the dirt and grit that works its way down into the pile of the carpet. This grit works like sandpaper and cuts the carpet strands at the base of the carpet pile. Daily vacuuming will remove most of the dirt while it is on or near the surface of the carpet. A. Vacuum cleaners must be kept in good repair in order to do a proper job. Check the vacuum cleaner after each use; empty the bag, check the belt, brush, and wheels for any strings and lint. The success of the job depends on the condition of the equipment used. B. Loose and frail carpet pile should be cut to prevent the loose ends from getting caught in the vacuum cleaner brush or the wet/dry vacuum.
59 Program No: SP-017 Page 59 Program Name: Custodial Cleaning Procedures Origination Date: 04/29/09 Revision Date: 07/18/12 Issued By: Mike Whitford Revision No.: 003 CARPET SHAMPOOING 9.9 Carpet Shampooing Carpet shampooing can effectively remove dirt and restore carpet appearance. The equipment and supplies that are needed for carpet shampooing are: Carpet Shampooer (Blue Goose) Wet/Dry Vacuum & Two Buckets Carpet Shampoo Defoamer Putty Knife Gum Remover Broom or Duster Clean Cloths Wet Floor Signs 1. Diagram furniture placement and remove furniture from room. 2. Thoroughly vacuum traffic areas. 3. Remove any gum from the floors with the gum remover. 4. Post wet floor signs. 5. Pour approximately 1-2 capfuls of Defoamer in the recovery (dirty water) tank of the carpet shampooer. Note Do not over mix the solution. Using too much carpet shampoo can leave residue in the carpet that can quickly attract and hold soil. Too much shampoo can also cause too much foam to develop. 6. Pour approximately 1-2 capfuls of Defoamer in the tank of the wet/dry vacuum.

60 Program No: SP-017 Page 60 Program Name: Custodial Cleaning Procedures Origination Date: 04/29/09 Revision Date: 07/18/12 Issued By: Mike Whitford Revision No.: Extract the carpet shampoo thoroughly. Note Using too much water may/will: Increase drying time Increase the possibility for mold to develop Cause the carpet to separate from the floor Cause discoloration 8. Follow each wet pass with at least three dry passes. 9. Use fans to help dry the carpet. Allow 3 hours of drying time after final extraction before allowing traffic on the carpet. Note The air conditioner is not turned off during the summer. For energy management purposes it is set back to 82.
61 Program No: SP-017 Page 61 Program Name: Custodial Cleaning Procedures Origination Date: 04/29/09 Revision Date: 07/18/12 Issued By: Mike Whitford Revision No.: 003 CARPET SPOT CLEANING 9.10 Carpet Spot Cleaning Time is important in spot removal. The faster you remove a spot, the better chance you have of preventing it from becoming a stain. Spots are concentrated substances lying near the carpet surface. Carpet shampoo can often remove a spot. However, stains that have penetrated the carpet fibers are more difficult to remove. 1. Remove any solid soils by gently scraping with a dull knife or putty knife. 2. Remove liquid spillage by blotting with a clean cloth or paper towel. 3. Apply carpet shampoo to the stained area and allow it to work for 30 seconds. 4. Blot the treated area with a clean cloth or paper towel to remove the loosened stain and excess solution. 5. Repeat steps 3 and 4 until most of the spot has disappeared. 6. Add water to the area with a sponge, wet cloth, or spray bottle. 7. Agitate with a sponge or cloth to generate foam. 8. Blot to dampness with a cloth or paper towel. 9. Avoid rubbing or over wetting of stains that tend to spread. 10. Difficult or deep stains may be more effectively treated by working spot remover into stain with a soft brush or sponge. Avoid rubbing. Note Some stains may have to be treated over a period of four or five days before the stain disappears. Note For chewing gum removal, use the chewing gum remover to freeze the gum. When the gum becomes brittle, smash it with a blunt instrument.
62 Program No: SP-017 Page 62 Program Name: Custodial Cleaning Procedures Origination Date: 04/29/09 Revision Date: 07/18/12 Issued By: Mike Whitford Revision No.: 003 BODILY FLUIDS CLEANUP 9.11 Bodily Fluids Cleanup IF BLOOD IS VISIBLE Follow the steps below 1. Use only the Disinfectant (Pronto) for this cleaning procedure. 2. Put gloves on both hands. Do not touch anything unnecessarily while performing this procedure. 3. Prepare a red biohazard bag (usually available in the Nurse s Office or in the Bloodborne Pathogen Kits) by folding bag top back. This will allow easy filling and expose the inside of the bag so that it is the only area that comes in contact with gloves, fluids, and clean up materials. 4. Spray Disinfectant (Pronto) generously on the body fluids and the immediate area. 5. Sprinkle Voban Absorbent on the area to contain and absorb the fluid. Allow time for the fluid to be absorbed. 6. Remove absorbent (if used) with a disposable scraper or broom and dustpan (do not use a vacuum cleaner). Place absorbent and scraper in red biohazard bag. 7. Remove remaining residue by blotting the area with paper towels or clean rags. 8. Place used paper towels and/or rags in the red biohazard bag. 9. Remove disposable gloves, place in the red biohazard bag and tie bag closed. 10. Put clean pair of gloves on both hands. 11. CARPET Spray carpeted areas with Disinfectant (Pronto) and extract. When complete, liberally spray carpeted areas again with Disinfectant (Pronto) and allow to air dry. 12. TILE Liberally spray tile and terrazzo floors with Disinfectant (Pronto) and mop. Spray floor with Disinfectant (Pronto) again and mop again. 13. Spray any items touched in the area with Disinfectant (Pronto) and allow to air dry.
63 Program No: SP-017 Page 63 Program Name: Custodial Cleaning Procedures Origination Date: 04/29/09 Revision Date: 07/18/12 Issued By: Mike Whitford Revision No.: Clean all equipment and tools used with Disinfectant (Pronto). Soak wet mop, if used, in Disinfectant (Pronto) for at least 10 minutes and hang to dry. Dispose of cleaning solution in floor sink. 15. Wash hands using running water, soap, and friction. 16. Contact Facility Services for pickup and disposal. IF BLOOD IS NOT VISIBLE Follow the Steps Below Follow steps from above with the following exceptions: 1. Do not use a red biohazard disposal bag. Use a standard disposal bag. 2. Do not label the disposal bag(s). Dispose of materials in dumpster.
64 Program No: SP-017 Page 64 Program Name: Custodial Cleaning Procedures Origination Date: 04/29/09 Revision Date: 07/18/12 Issued By: Mike Whitford Revision No.: 003 FLU DISINFECTION 9.12 Flu Disinfection In addition to daily cleaning, the following steps should be taken during outbreaks of flu, norovirus, and other viral infections: 1. Put gloves on both hands. 2. Clean all frequently touched surfaces with the Disinfectant (Pronto). Note Only use the Disinfectant (Pronto). No other cleaning products should be used as they do not kill viruses and disinfect. Note Do not dilute the Disinfectant (Pronto). Note Frequently touched surfaces include: Doorknobs Computer keyboards and mice Phones Sinks Toilets Water fountains Student and teacher desks Hand rails Counters Light switches Vending machines Refrigerator handles Coffee pots Elevator buttons 3. Wash hands when complete using running water, soap, and friction.
65 Program No: SP-017 Page 65 Program Name: Custodial Cleaning Procedures Origination Date: 04/29/09 Revision Date: 07/18/12 Issued By: Mike Whitford Revision No.: DEFINITIONS Abrasive A substance that wears away or scratches another material. Acidity A measure of the acid strength of a chemical, which has a ph of less than 7. Adhesive A substance that causes materials to stick together, such as glue. Most commonly found in conjunction with floor tile, wall tile, and cove base. Floor tile glue is commonly called mastic. Algae Very small plants that cause green or brown "scum" on water or damp surfaces. Alkalinity A measure of the caustic or basic strength of a chemical, which has a ph of more than 7. Asbestos A general name given to naturally occurring minerals that possess a unique crystalline structure that is separable into fibers. When fibers are present in the air, they are normally invisible to the naked eye. Asbestos is heat resistant, chemical resistant (particularly to acids), bacterial resistant, pliable, very strong, is fire resistant, and has excellent insulating properties. Asbestos is used in many building products such as floor tile and pipe insulation. Asbestos in Pitt County Schools is found in facilities built before the mid 1980 s. Bacteria Tiny, living organisms that can only be seen under a microscope. Bacteria often cause disease. Black Marking Marks on a floor surface, usually caused by the impact of the soles and heels of shoes. Bloodborne Pathogens Pathogenic microorganisms that are present in human blood and can cause disease in humans. These pathogens include, but are not limited to, the Hepatitis B Virus (HBV) and the Human Immunodeficiency Virus (HIV). Buffable The ability to improve the glossy appearance of a floor wax with a buffing machine. Carpet Browning Change of carpet color caused by over wetting during cleaning, or flooding, followed by a slow dry. Concentrate An undiluted substance.
66 Program No: SP-017 Page 66 Program Name: Custodial Cleaning Procedures Origination Date: 04/29/09 Revision Date: 07/18/12 Issued By: Mike Whitford Revision No.: 003 Corrosion Eating or wearing away of a material by chemical action. Defoamer A chemical that prevents foam from forming. Detergent A cleaning agent that aids wetting, soil loosening, and suspending of soils. Dilute To thin liquid by adding something, usually water. It is done to reduce the strength of a concentrate. Disinfectant Any substance that kills bacteria. Usually the word "disinfectant" means the same thing as "germicide". Efflorescence A white, powdery, or crystalline substance found on concrete, masonry, and plaster. Efflorescence appears when water evaporates through a wall, floor, or ceiling bringing the salts to the surface. If found indoors it can indicate a potential moisture problem. Extraction The act of removing a substance, such as water, from a carpet. Floor Sealer A base coat that protects flooring by filling pores and seams and preparing the floor for application of wax. Floor Stripper A chemical product designed to remove floor finish and sealer. Hazardous Chemical Any chemical that presents a physical or health hazard to an employee. Humidity Moisture contained in the air. Most notable during the summer months. Mold Types of fungi that grow on almost any substance, providing that moisture is present, and can be found almost anywhere. Mold is unsightly, can cause odor, and can cause allergic reactions in susceptible individuals. MSDS Material Safety Data Sheet. A document which describes pertinent information related to the use of a chemical product, including its physical and health hazards, the permissible exposure level, precautions for safe handling, spill cleanup, emergency and first aid procedures, Personal Protective Equipment (PPE) needs, and the name and telephone number of who can be contacted to obtain emergency procedures or other related information.
67 Program No: SP-017 Page 67 Program Name: Custodial Cleaning Procedures Origination Date: 04/29/09 Revision Date: 07/18/12 Issued By: Mike Whitford Revision No.: 003 ph A number describing the acidity or alkalinity of water. The scale ranges from 1 to 14, with 7 as the neutral point. ph 1 to 4 is strongly acidic, and ph 11 to 14 is highly alkaline. Powdering Partial or total disintegration of floor wax resulting in a fine, lightcolored material. Soluble The ability to be dissolved. Ex. Salt is soluble in water. Terrazzo A hard, smooth floor surface consisting of stone chips suspended in a binding material such as cement. Found in some hallways REFERENCE DOCUMENTS Brevard County Schools Viera, FL. (2010). Custodial Procedures. Broward County Schools Fort Lauderdale, FL. (2006). Facilities Servicepersons Guidelines and Procedures Handbook. Jefferson County Public Schools Louisville, KY. (2007). Housekeeping Standard Operating Procedures. Pitt County Schools Greenville, NC. Facility Services Standard Operating Procedures. Seminole County Public Schools Sanford, FL. Custodial Handbook. Union County Public Schools Monroe, NC. (2008). Custodial Handbook.
68 Program No: SP-017 Page 68 Program Name: Custodial Cleaning Procedures Origination Date: 04/29/09 Revision Date: 07/18/12 Issued By: Mike Whitford Revision No.: 003 APPENDIX 1. Custodial Supplies Order Guide (SF-035) 2. Facility Services Work Order Guide (SF-043) 3. Custodial Weekly Checklist 4. Head Custodial Inspection 5. Custodial Inspection Form 6. Vacuum Cleaner Owner s Manual 7. Vacuum Cleaner Guide 8. Floor Scrubber Quick Guide 9. Floor Scrubber Owner s Manual 10. Floor Machine Owner s Manual 11. Burnisher Manual 12. Carpet Shampooer Owner s Manual 13. Wet/Dry Vacuum Manual
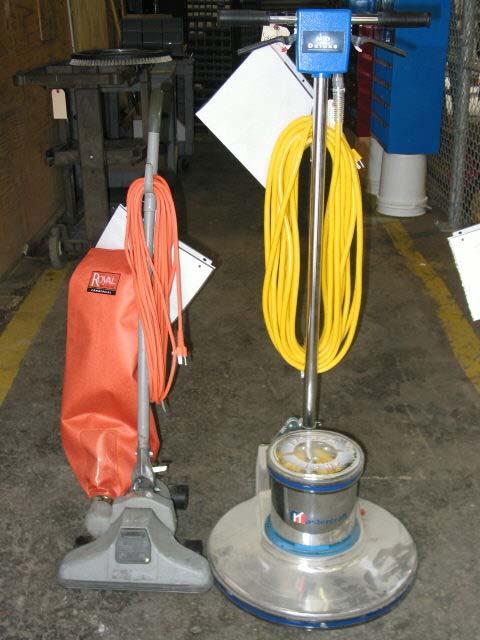
69
70 CUSTODIAL SUPPLIES Part Number BU0002 BU0004 BU0006 BU0007 BU0008 BU0026 BU0027 BU0028 BU0029 BU0030 BU0052 BU0053 BU0055 BU0056 BU0100 BU0612 PU0060 Description 100 Watt CFL Bulb (Replaces Standard Watt Bulb) (order 1 pack, get 6 bulbs) Watt CFL Outdoor/Indoor Flood Bulb 40 Watt Regular Bulb 75 Watt Regular Bulb 150 Watt Regular Bulb Exit Light Bulb 4.5 Long (Regular Base) Exit Light Bulb 4.5 Long (Small Base) Exit Light Bulb 3 Long (Short Bulb) Exit Light Bulb PLS 7 Watt Exit Light Bulb PLS 9 Watt 4 T12 Fluorescent Tube (order 1 case to get 30 bulbs) (Pickup Only) 4 T8 Fluorescent Small Tube (order 1 case to get 36 bulbs) (Pickup Only) U-Shaped Fluorescent Tube (T8 Style) U-Shaped Fluorescent Tube (T12 Style) 8 High Output T12 2-Pin Bulb (order 1 case to get 15 bulbs) (Pickup Only) PLT 32 Watt 4 Pin Bulb 8 Fluorescent T12 1-Pin Bulb (order 1 case to get 15 bulbs) (Pickup Only) Page 2 Revised 04/23/13 SF-035 Rev 005
 Metal Dust Pan Toilet Bowl Brush Counter Brush Page 3 Revised 04/23/13 SF-035 Rev")
71 Part Number CS0001 Description Broom Handle 60 Threaded End CS0003 Push Broom Head (24 ) CS0004 Push Broom Head (36 ) CS0005 CS0006 CS0007 CS0008 Broom (Straw Type) Metal Dust Pan Toilet Bowl Brush Counter Brush Page 3 Revised 04/23/13 SF-035 Rev 005
 Page 4 Revised 04/23/13 SF-035 Rev")
72 Part Number CS0101 CS0102 CS0103 Description Bucket (10 Quart) Wet Mop Handle Wet Mop Head (order 1 box to get 12 heads) Page 4 Revised 04/23/13 SF-035 Rev 005
 Page 5 Revised 04/23/13 SF-035 Rev")
73 Part Number Description CS0201 Floor Squeegee (24 ) CS0202 Window Squeegee (12 ) Page 5 Revised 04/23/13 SF-035 Rev 005
 Custodial Cart with Bag (Pickup Only) Custodial Cart Replacement Bag Page 6 Revised 04/23/13 SF-035 Rev")
74 Part Number CS0301 CS0302 CS0303 CS0304 Description Vacuum Cleaner Belt Vacuum Cleaner Bags (order 1 package to get 10 bags) Custodial Cart with Bag (Pickup Only) Custodial Cart Replacement Bag Page 6 Revised 04/23/13 SF-035 Rev 005

75 Part Number CS0401 CS0402 CS0403 CS0404 Description Trash Bags Classroom Size Trash Bags Gallon Size Trash Can Classroom Size Trash Can 44 Gallon Size Page 7 Revised 04/23/13 SF-035 Rev 005
 Chalkboard Eraser General Purpose Cloth Rags (25-lb Box) Page 8 Revised 04/23/13 SF-035")
76 Part Number CS0501 CS0502 CS0503 CS0504 CS0505 Description Toilet Plunger Pencil Sharpener (Wall Mount) Bottle Sprayer Head (No Bottle) Chalkboard Eraser General Purpose Cloth Rags (25-lb Box) Page 8 Revised 04/23/13 SF-035 Rev 005


77 CS0601 = Part Number Inside Carpeted Door Mat (4 X6 ) = Description Page 9 Revised 04/23/13 SF-035 Rev 005

78 CS0602 = Part Number Neutral Floor Cleaner = Common Name Dazzle Neutral Floor Cleaner = MSDS Name Used for: Neutral floor cleaner is a ph balanced floor cleaner used for mopping floors. It should not damage floor finish if used properly. Directions for use: 1. Add 1-2 ounces of Neutral Floor Cleaner to 1 gallon of water. 2. Mop area. 3. Let air dry. Page 10 Revised 04/23/13 SF-035 Rev 005

 and complete before moving to a new area. 3.")
79 CS0699 = Part Number Shazam Spray Buff = Common Name ShaZam Spectacular Spray Buff = MSDS Name Used for: A spray buff polish for floors to be used with a buffing machine. Directions for use: 1. Remove all dust and dirt from floor. 2. Use buffing pad with a buffing machine. Work a small area (4 X 4 ) and complete before moving to a new area. 3. Lightly spray with spray buff and machine buff until dry and shiny. Page 11 Revised 04/23/13 SF-035 Rev 005
 and wet/dry vacuum (water pickup). The Defoamer will help prevent foam from occurring.")
 Pour 1-2 capfuls into the recovery tank before using.")
80 CS0700 = Part Number Defoamer for Water Pickup = Common Name and Blue Goose De-Foam = MSDS Name Used for: The Defoamer should be used in the recovery tanks of the carpet shampooer (blue goose) and wet/dry vacuum (water pickup). The Defoamer will help prevent foam from occurring. Too much foam in the carpet shampooer and wet/dry vacuum will cause damage to the internal parts and motor. Directions for use: Carpet Shampooer (Blue Goose) Pour 1-2 capfuls into the recovery tank before using. Wet/Dry Vacuum (Water Pickup) Pour 1-2 capfuls into the recovery tank before using. Page 12 Revised 04/23/13 SF-035 Rev 005

81 CS0701 = Part Number Carpet Shampoo = Common Name Water Extraction Carpet Cleaner = MSDS Name Used for: Used for cleaning carpets and carpet spot cleaning. Directions for use: 1. Vacuum the carpet thoroughly. 2. Add 1-2 ounces of Carpet Shampoo to 1 gallon of water. 3. Do not walk on the carpet until it is completely dry. 4. After the carpet has dried, vacuum the floor. 5. Do not over wet the carpet. Page 13 Revised 04/23/13 SF-035 Rev 005

82 CS0702 = Part Number Cleanser Powder with Bleach = Common Name N.C.C.E Cleanser Powder with Bleach = MSDS Name Used for: Heavy-duty scouring restroom cleaner. Used for cleaning and bleaching stains on restroom toilets, urinals, floors, and tile walls. Directions for use: 1. Wet area to be cleaned. 2. Sprinkle a small amount of powder on the area to be cleaned. 3. Scrub with a cloth or toilet bowl brush. 4. Rinse any residue with water. Page 14 Revised 04/23/13 SF-035 Rev 005

83 CS0703 = Part Number Disinfectant = Common Name Pronto II = MSDS Name OR Pronto = MSDS Name Used for: A disinfectant, virucide, cleaner, mildewstat, fungicide, and deodorizer. Used for cleaning bathrooms, toilets, urinals, sinks, water fountains, nurse s clinics, bodily fluids, locker rooms, shower stalls, etc. Directions for use: 1. Pre-clean heavily soiled areas. 2. Apply undiluted solution to hard, non-porous surfaces. 3. To disinfect, all surfaces must remain wet 10 minutes. 4. Wipe surfaces clean. 5. Let air dry. Additional Information: Do not contaminate food. Do not mix with other chemicals. Do not use this product to clean or disinfect glassware, utensils, and dishes. Page 15 Revised 04/23/13 SF-035 Rev 005

84 CS0704 = Part Number Glass Cleaner = Common Name N.C.C.E. Glass Cleaner = MSDS Name Used for: Used for cleaning glass, Plexiglas, mirrored surfaces, and chrome. Page 16 Revised 04/23/13 SF-035 Rev 005

85 CS0705 = Part Number Heavy Duty Degreaser = Common Name N.C.C.E. Heavy Duty Cleaner and Degreaser = MSDS Name Used for: A heavy duty cleaner and all purpose degreaser. Used for removing heavy build up, stains, grease, grime, oil, soap scum, fingerprints, and crayon. Directions for use: 1. Spray on area to be cleaned. 2. Let sit for 5 minutes. 3. Wipe clean Additional Information: Do not mix with any other chemicals. Page 17 Revised 04/23/13 SF-035 Rev 005

86 CS0706 = Part Number All Purpose Cleaner = Common Name N.C.C.E. All Purpose Cleaner = MSDS Name Used for: An all purpose cleaner. Can be used on most surfaces to help with hard to remove stains. Used for cleaning tabletops, desks, counters, and furniture. This product does not disinfect, therefore a disinfectant may be required after cleaning an area with this product. Directions for use: 1. Spray on area to be cleaned. 2. Wipe clean. 3. After the area is wiped clean, a fresh water rinse is required for food contact surfaces and food equipment. Additional Information: Do not use on glass. Do not mix with any other chemicals. Page 18 Revised 04/23/13 SF-035 Rev 005

87 CS0707 = Part Number Pumice Stick = Description Used for: Used for removing rust stains in toilets, urinals, and sinks. Page 19 Revised 04/23/13 SF-035 Rev 005

88 CS0708 = Part Number Furniture Polish = Common Name Brame Furniture Polish with Lemon Oil = MSDS Name OR All Shine Lemon Oil Polish for Furniture = MSDS Name Used for: An all purpose furniture polish. Additional Information: Do not allow spray to dry before wiping. Avoid overspray on flooring as it will make the floor slippery. Page 20 Revised 04/23/13 SF-035 Rev 005

89 CS0800 = Part Number Foam Soap Refill = Common Name GOJO Clear & Mild Foam Handwash = MSDS Name Used for: Foam soap that comes packaged for use in GoJo style foam dispensing machines. Page 21 Revised 04/23/13 SF-035 Rev 005
90 CS0802 = Part Number Wet Floor A-Frame Sign = Description Page 22 Revised 04/23/13 SF-035 Rev 005

91 CS0804 = Part Number Laundry Detergent = Common Name N.C.C.E. Powdered Laundry Detergent = MSDS Name Used for: Used in school washing machines. Page 23 Revised 04/23/13 SF-035 Rev 005

92 CS0805 = Part Number Pine Scent Disinfectant = Common Name N.C.C.E. Pine Scent Disinfectant = MSDS Name Used for: A general-purpose disinfectant, virucide, mildewstat, and cleaner, used for general purpose floor mopping in restrooms. It is also used for disinfecting bathrooms, toilets, urinals, and sinks. Read the label for correct dilution ratio. The dilution rate will depend upon what you are cleaning. Directions for use: 1. Add 2 ounces of Pine Scent Disinfectant to 1 gallon of water. The Pine Scent Disinfectant can be used in toilets and urinals. 2. Flush the toilets and urinals. 3. Add 2 ounces of Pine Scent Disinfectant to the bowl water. 4. Swab the bowl with a bowl brush. Let stand for 10 minutes. 5. After 10 minutes, flush the toilets and urinals. Additional Information: To disinfect, all surfaces must remain wet 10 minutes. Page 24 Revised 04/23/13 SF-035 Rev 005
 Paper Towels Jumbo Roll Page 25 Revised 04/23/13 SF-035 Rev")
93 Part Number CS0901 CS0902 CS0903 CS0904 Description Tissue Paper Regular Roll Tissue Paper Jumbo Roll Paper Towels Folded (order 1 case get 16 packages) Paper Towels Jumbo Roll Page 25 Revised 04/23/13 SF-035 Rev 005
 Part Number CS1000")
 Page 26 Revised 04/23/13 SF-035 Rev")
94 Part Number CS0999 Description Auto Scrubber Pad 13 White (Box of 5) (for use with the IPC Eagle CT15 floor scrubbing machine) Part Number CS1000 Description Auto Scrubber Scrubbing Pad 13 Red (Box of 5) (for use with the IPC Eagle CT15 floor scrubbing machine) Page 26 Revised 04/23/13 SF-035 Rev 005
 Scrubbing Aid Pad Holder Stripping Pad 20 (Black) (Box of 5) Scrubbing Aid Pad (Black) Page 27 Revised 04/23/13 SF-035")
95 Part Number CS1001 CS1002 CS1003 CS1004 CS1005 CS1500 Description Buffing Pad 20 (White or Tan) (Box of 5) Scrubbing Pad 20 (Blue) (Box of 5) Scrubbing Aid Pad (White) Scrubbing Aid Pad Holder Stripping Pad 20 (Black) (Box of 5) Scrubbing Aid Pad (Black) Page 27 Revised 04/23/13 SF-035 Rev 005


96 Part Number CS1310 CS1311 CS1320 Description Dry Board Eraser **NEW ITEM** Dry Erase White Board Cleaner Wall Clock Page 28 Revised 04/23/13 SF-035 Rev 005


97 CS1010 = Part Number Grout Brush = Description Used for: Used for cleaning bathroom tile and grout. Page 29 Revised 04/23/13 SF-035 Rev 005

98 Part Number CS1011 CS1012 Description Long Handle Floor Scraper Replacement Scraper Blades Used for: Used for scraping wax and sealer from edges of floors. Page 30 Revised 04/23/13 SF-035 Rev 005

99 Part Number CS1013 CS1014 Description Ceiling Grill Duster (Complete with Pole) Ceiling Grill Duster Replacement Head (Head Only) Used for: Used for removing cobwebs, dusting ceilings, ceiling moldings, ducts, vents, air registers, high horizontal surfaces, etc. 3 foot telescopic pole can extend to 5 foot pole. Page 31 Revised 04/23/13 SF-035 Rev 005

100 CS1101 = Part Number Floor Stripper = Common Name N.C.C.E. Floor Stripper = MSDS Name Used for: An emulsifying agent for removing floor wax. Directions for use: 1. Mix 1 part stripper to 16 parts cold water. 2. Apply the stripper solution liberally with a mop. 3. After 10 minutes use the mop to agitate the stripper solution on the floors. 4. After 5 minutes agitate the floor using a black stripper pad on the buffing machine. 5. Pick up the dirty stripper solution with the wet/dry vacuum and mop. 6. Rinse the floor at least twice with clean mops and clean water. When floors are flooded, be sure to remove the water as soon as possible to prevent floor damage. Additional Information: Do not use without diluting. Do not allow the stripper to dry on the floor. Page 32 Revised 04/23/13 SF-035 Rev 005

101 CS1102 = Part Number Floor Sealer = Common Name N.C.C.E. Acrylic Floor Sealer = MSDS Name Used for: Protects tile and terrazzo flooring. A thin coat helps seal water and any contaminants from penetrating between seams. Do not use on wood floors. Directions for use: 1. Remove all old sealer and wax prior to sealing. 2. Apply a thin coat of sealer on the floor. Page 33 Revised 04/23/13 SF-035 Rev 005


102 CS1103 = Part Number Floor Wax = Common Name N.C.C.E. Acrylic Floor Waxes = MSDS Name Used for: Protection of tile and terrazzo flooring and provides a shiny appearance. Be sure that the floor is clean and completely dry before applying any floor finish. Apply four thin coats for floor protection. Floors should be sealed prior to first coat of wax. Additional Information: Apply finish in thin even coats. Allow the floor to dry between coats of finish. Page 34 Revised 04/23/13 SF-035 Rev 005

103 CS1104 = Part Number Gum Remover = Common Name Gum Buster Gum Remover = MSDS Name or Chewing Gum Remover = MSDS Name Used for: Used for removing gum from carpeting, floors, etc. Breaks down gum and adhesives. This product freezes the gum so that it may be chipped away. Use the label directions and cautions when using this product and never spray it on exposed skin. Directions for use: 1. Hold can 4 to 6 away and spray chewing gum or wax deposit for 5 seconds. 2. Remove deposit by scraping with a spatula, spoon or dull knife. 3. If initial application does not remove all the deposit, reapply. Page 35 Revised 04/23/13 SF-035 Rev 005

104 CS1105 = Part Number Mark Remover = Common Name VAN-GO Vandalism Mark Remover = MSDS Name or Vandal Mark Remover = MSDS Name Used for: Used for removing graffiti. An aerosol chemical, which emulsifies ink-based products, crayons, paint, and adhesives. Allow product to sit for a few minutes before removing. Page 36 Revised 04/23/13 SF-035 Rev 005

105 CS1201 = Part Number Deodorizing Urinal Screens = Common Name (order 1 case to get 10 screens) Wave Urinal Deodorizer = MSDS Name or Urinal Screen with Block = MSDS Name Used for: For use in urinals. Additional Information: Install with spiked side up. The spiked side helps prevent splashback. Freshens urinal a full 30 days Reminds you when to change it pull off the date tabs upon installation to remind you when to change the urinal screen Page 37 Revised 04/23/13 SF-035 Rev 005

106 CS1202 = Part Number Vomit Solution = Common Name Voban Absorbent = MSDS Name Used for: Absorbing and congealing vomit for clean up. Also deodorizes area. Always use in conjunction with a disinfectant and follow bloodborne pathogen procedures. Directions for use: 1. Spread a ½ inch layer on the problem area. 2. Allow a short time for the product to absorb. 3. Sweep or scrape into a dust pan. Page 38 Revised 04/23/13 SF-035 Rev 005

107 CS1204 = Part Number Deodorant Spray = Common Name Airlift Lemon Scent Air Freshener = MSDS Name or Lemon Fragrance Air Freshener = MSDS Name Used for: For staff restroom usage only. Page 39 Revised 04/23/13 SF-035 Rev 005

108 CS1206 = Part Number Tile & Grout Cleaner = Common Name N.C.C.E. Tile and Grout Cleaner = MSDS Name Used for: Used with the Grout Brush to clean restroom tile and grout. Directions for use: 1. Spray on area to be cleaned. 2. Using the Grout Brush, scrub restroom tile and grout clean. Additional Information: Do not use on chrome, glass, painted surfaces, wood, marble, or aluminum. Page 40 Revised 04/23/13 SF-035 Rev 005


109 CS1301 = Part Number Wasp & Hornet Killer = Common Name Bee Bopper Wasp and Hornet Killer = MSDS Name or Wasp & Yellow Jacket Foam V = MSDS Name Additional Information: Shake before using. Apply in the morning or evening when insects are less active. Page 41 Revised 04/23/13 SF-035 Rev 005

110 CS1505 = Part Number Cleaning Pads = Common Name Mr. Clean Magic Eraser (Duo) = MSDS Name Used for: Can be used on painted walls, doors, plastic, and dry erase boards. May dull paint. Other surfaces should be spot tested before use. Additional Information: Do not apply any chemicals to the pad. The pads work with water only. Page 42 Revised 04/23/13 SF-035 Rev 005


111 EN0001 = Part Number Boric Acid = Common Name Borid Powder = MSDS Name Used for: Used for controlling ants, roaches, water bugs, and silverfish. Read label before use. Use along with the Crusader Duster to apply small amounts into cracks and crevices. Additional Information: Do not contaminate food. Do not over apply. A puff of powder is all that is needed to be successful. Only apply to cracks and crevices and along baseboards. Page 43 Revised 04/23/13 SF-035 Rev 005

112 EN0002 = Part Number Mop Up = Description Used for: Used for controlling ants, roaches, and silverfish. Read label before use. For cafeteria usage only. Directions for use: 1. Add 1 package of powder to each gallon of rinse water. 2. Apply to floor areas only. 3. Reapply as necessary. 4. Pour mop water down drains in order to coat the drains with Mop Up. Additional Information: Contamination of food or food contact surfaces should be avoided. In kitchens, apply to floor areas only. Do not apply in serving areas while food is exposed. Care should be taken to avoid depositing the product onto exposed surfaces or introducing the material into the air. Apply by mopping onto floor surfaces. Any powder visible after application must be brushed into crack and crevices. Mop Up may dull or leave a film on floors. As a result, only use Mop Up around the edge of the wall and at door thresholds. Do not mix with other chemicals. Page 44 Revised 04/23/13 SF-035 Rev 005

113 EN0010 = Part Number Roach Bait Stations = Common Name (Order 1 bag to get 72 stations) MAXFORCE Roach Bait Stations = MSDS Name Used for: Used for controlling roach problems. Read label before use. Directions for use: 1. To stick on vertical surfaces, remove peel and stick backing on reverse side of bait station. 2. Use 4-6 bait stations per 100 square feet of floor area. 3. Place adjacent to walls and corners. For best results, also place bait stations along walls, baseboards, in corners, under sinks, in cabinets, pantries, near plumbing, electrical lines, waste receptacles, inside drop ceilings, wall voids, under and around equipment and appliances. 4. Replace bait stations when necessary. Additional Information: Do not contaminate food. Do not place above food preparation areas due to possibility of falling on food. Should be placed off the floor due to mopping. Place stations where they can be checked periodically. After roach bait has been eaten, replace bait station. Page 45 Revised 04/23/13 SF-035 Rev 005

114 EN0011 = Part Number Ant Bait Stations = Common Name (Order 1 pack to get 4 stations) Advance 360A Dual Choice Ant Bait Stations = MSDS Name Used for: Used for controlling household ant problems. Read label before use. Directions for use: ADVANCE 360A Dual Choice Ant Bait Stations contain a slow acting insect bait. For best results placement of the bait should be into or near ant activity sites. Ants are attracted to the bait and it is carried back to the nest to kill the queen and destroy the colony. 1. Break bait stations apart from the plastic frame. To stick on vertical surfaces, remove peel and stick backing on reverse side of bait station. 2. For thorough ant control, use as many bait stations as necessary (normally 3-4 stations for an average size room or 6-8 stations for a heavy infestation). 3. For best results, also place bait stations along walls, baseboards, in corners, under sinks, in cabinets, pantries, near plumbing, electrical lines, waste receptacles, inside drop ceilings, wall voids, under and around equipment and appliances. 4. Replace bait stations when necessary, approximately every 3 months. Additional Information: Do not contaminate food. Inside Place bait stations around edges of walls, near window sills, and vented areas. Outside Place bait stations near back doors and under dumpsters. Bait stations are not fast acting and may take several days or weeks to work. It is best to be proactive instead of waiting for ants to appear. Page 46 Revised 04/23/13 SF-035 Rev 005

115 EN0012 = Part Number Crusader Duster = Description Used for: Used to distribute boric acid powder for pest control. Page 47 Revised 04/23/13 SF-035 Rev 005

116 EN0014 = Part Number Sticky Glue Boards = Common Name Catchmaster Rodent and Insect Glue = MSDS Name Used for: Used for controlling mice, ants, roaches, spiders, and other insects. Can be used to monitor areas for pest problems as well. Directions for use: 1. Place mouse traps perpendicular to the wall. 2. Place mouse traps where rodent activity is seen. (Signs of chewing, droppings, runway, and burrow) 3. Check mouse traps daily and replace as needed. Page 48 Revised 04/23/13 SF-035 Rev 005


117 Part Number PL0503 Description 4-Way Water Key Part Number PL0504 Description Zurn Water Key Page 49 Revised 04/23/13 SF-035 Rev 005
 Page 50 Revised 04/23/13 SF-035 Rev")
118 Part Number PU0001 PU0002 Description Mop Bucket (Pickup Only) Mop Bucket Wringer (Pickup Only) Page 50 Revised 04/23/13 SF-035 Rev 005
119 PU0059 = Part Number Outside Rubber Door Mat (4 X6 ) = Description Page 51 Revised 04/23/13 SF-035 Rev 005
 Page 52 Revised 04/23/13 SF-035 Rev")
120 Part Number PU0100 PU0101 Description Ceiling Tile 2 X2 (Pickup Only) Ceiling Tile 2 X4 (Pickup Only) Page 52 Revised 04/23/13 SF-035 Rev 005
 18 X16 X14")
 Page 53 Revised 04/23/13 SF-035")
121 Part Number PU0501 PU0502 PU0550 Description 20 X20 X20 Boxes (Pickup Only) 18 X16 X14 Boxes (Pickup Only) Rock Salt (50-lb Bag) (Pickup Only) Page 53 Revised 04/23/13 SF-035 Rev 005
 Sharps Container Sanitary Napkin Disposal Bag Page 54 Revised 04/23/13 SF-035 Rev")
122 Part Number SA0001 SA0002 SA0004 SA0006 Description Bloodborne Pathogens Kit (High Risk & Assembly Area Kits) Bloodborne Pathogens Kit (Classroom Size Kits) Sharps Container Sanitary Napkin Disposal Bag Page 54 Revised 04/23/13 SF-035 Rev 005
 Strap on Stripping Shoes (Large) Used for:")

123 Part Number SA0019 SA0020 Description Strap on Stripping Shoes (Small) Strap on Stripping Shoes (Large) Used for: Used to reduce or prevent slips and falls during stripping, waxing, and mopping floors. Page 55 Revised 04/23/13 SF-035 Rev 005

124 Part Number SA0026 SA0027 SA0028 SA0029 Description Small Vinyl Gloves Medium Vinyl Gloves Large Vinyl Gloves X-Large Vinyl Gloves Page 56 Revised 04/23/13 SF-035 Rev 005

125 TO0760 = Part Number 5-in-1 Scraping Tool = Description Used for: Used for scraping wax and sealer from edges of floors. Also used for removing gum from flooring. Page 57 Revised 04/23/13 SF-035 Rev 005
126 CUSTODIAL WEEKLY CHECKLIST LOCATION 100 Wing 200 Wing 300 Wing 400 Wing 500 Wing LOCATION Offices Multipurpose Rm Media Center Mobile Units DATE: CUSTODIAN: Area Task Frequency Check Off Tile and Terrazzo Flooring Carpeted Flooring Restrooms Glass Sweep and remove gum Mop floor Buff floor Vacuum carpet Clean spots and remove gum Mop and disinfect floor Clean and disinfect toilets, urinals, and chrome Clean and disinfect sinks Stock tissue, soap, and towel dispensers Clean entrance door glass Clean hall and classroom glass (as needed, but at least annually) Daily Daily Weekly Daily Daily Daily Daily Daily Daily Daily Annually Walls Clean and remove marks Weekly Water Fountains Clean and disinfect Daily Dusting Dust blinds, windows, vents, and flat surfaces Monthly Desktops Clean and remove marks Weekly Countertops Clean Twice/Week Chalk/Dry Erase Boards Clean and wipe trays Daily Trash Grass Basic Repairs Empty trash cans Pick up litter Trim around buildings, playgrounds, fence lines, and signs Replace missing/water damaged ceiling tile Replace burned out light bulbs Daily Daily Weekly During Season Weekly Weekly COMMENTS:
127 HEAD CUSTODIAN WEEKLY INSPECTION CUSTODIAN: DATE: S = Satisfactory U = Unsatisfactory Area Task 100 Wing 200 Wing 300 Wing 400 Wing 500 Wing Office MP Room Media Center Mobile Units Tile and Terrazzo Flooring Sweep and remove gum Mop floor Buff floor Carpeted Flooring Vacuum carpet Clean spots and remove gum Mop and disinfect floor Restrooms Clean and disinfect toilets, urinals, and chrome Clean and disinfect sinks Stock tissue, soap, and towel dispensers Glass Clean entrance door glass Clean hall and classroom glass Walls Clean and remove marks Water Fountains Clean and disinfect Dusting Dust blinds, windows, vents, and flat surfaces Desktops Clean and remove marks Countertops Clean Chalk/Dry Erase Boards Clean and wipe trays Trash Grass Basic Repairs Empty trash cans Pick up litter Trim around buildings, playgrounds, fence lines, and signs Replace missing/water damaged ceiling tile Replace burned out light bulbs
128 APPLIANCE MFG CO OWNER'S MANUAL Operating and Servicing Instructions 1 WARNING: READ ALL INSTRUCTIONS - BEFORE USING THIS APPLIANCE. Please read these instructions carefully before using your cleaner. 4: A WARNING: For quick reference, please record your Cleaner assembly may vacuum information below. include small parts. Small Model tt: parts can present a choking hazard. $: Zydcateci on the lower backside of cleaner)

129 THlS VACUUM CLEANER IS INTENDED FOR COMMERCIAL USE ONLY. IMPORTANT SAFETY INSTRUCTIONS When you use an appliance, basic precautions should always be followed, including the following: READ ALL INSTRUCTIONS BEFORE USING THlS APPLIANCE. ALWAYS FOLLOW THESE SAFETY INSTRUCTIONS. WARNING: THE CORDS, WIRES AND/OR CABLES SUPPLIED WITH THlS PRODUCT CONTAINS CHEMICALS, INCLUDING LEAD OR LEAD COMPOUNDS, KNOWN TO THE STATE OF CALIFORNIA TO CAUSE CANCER AND BIRTH DEFECTS OR OTHER REPRODUCTIVE HARM. WASH HANDS AFTER USING. WARNING: TO REDUCE THE RISK OF FIRE, ELECTRIC SHOCK OR INJURY: Do not leave appliance when plugged in. Unplug from outlet when not in use and.. before servicing. Do not use outdoors or on wet surfaces. Electrical shock could occur. Do not allow to be used as a toy. Close attention is necessary when used by or near children. Use only as described in this manual. Use only manufacturer's recommended attachments. Regularly examine the supply cord for damage, such as cracking or ageing. If damage is found, replace the cord before further use; only replace the supply cord with the type specified in the instructions. Do not pull or carry by cord, use cord as handle, close a door on cord, or pull cord around sharp edges or corners. Do not run appliance over cord. Keep cord away from heated surfaces. Do not unplug by pulling on cord. To unplug, grasp the plug, not the cord. Do not handle plug or appliance with wet hands. Do not put any objects into openings. Do not use with any opening blocked; keep free of dust, lint, hair, and anything that may reduce air flow. Keep hair, loose clothing, fingers, and all parts of body away from openings and moving parts. Do not pick up anything that is burning or smoking, such as cigarettes, matches, or hot ashes. Do not use without dust bag and filters in place. Turn off all controls before unplugging. Use extra care when cleaning on stairs. Do not use to pick up flammable or combustible liquids, such as gasoline, or use in areas where they may be present. Do not use an extension cord with this vacuum cleaner. Store the vacuum cleaner indoors. Put the vacuum cleaner away after use to prevent tripping accidents.
130 Look on your vacuum cleaner and follow all label and marking instructions. CAUTION: This appliance is not suitable for picking up hazardous dust. If the supply cord is damaged, it must be replaced by the manufacturer or its services agent or a similarly qualified person in order to avoid hazards. CAUTION: This appliance is for dry use only and is not to be used or stored outdoors in wet conditions. WARNING: Only use the brushes provided with the appliance or those specified in the instructions. The use of other brushes may impair safety. The appliance is to be disconnected from its power source during cleaning or maintenance and when replacing parts or converting the appliance to another function. This appliance is suitable for commercial use, for example in hotels, schools, hospitals, factories, shops, offices and rental businesses. Do not allow the rotating brushes to come in contact with the supply cord. Only use the socket outlet on the appliance for purposes specified in the instructions. Sound power level is 95.2dBa. Remove the plug from the socket outlet before connecting or removing the hose. Using improper voltage may damage motor and injure user. Connect to a properly grounded outlet only. SAVE THESE INSTRUCTIONS WARNING: Electrical shock could occur if used outdoors or on wet surfaces.
131 I I You CONGRATULATIONS are now the proud owner of a RoyaP Upright. We trust your new purchase will bring you many years of satisfaction. 1) Our company designed and developed this product with you in mind. I We are very proud of our products and hope that you are equally satisfied with their quality and performance, I Thank you for your support of Royal" products. Visit our website at TABLE OF CONTENTS Safety Instructions.... Page 2,3 Features.... Page 5 How to Assemble.... Page 6 Attach Belt... Page 6 How To Operate.... Page 7 Paper Bag: Removal & Replacement... Page 8 Belt or Brushroll: Removal & Replacement.... Page 8 General Maintenance.... Page 9 Accessories/Options.... Page 9 Attachment Kit.... Page WARRANTY 111 To the consumer, Royal Appliance Mfg. Go. warrants this vacuum cleaner to be free of defects in material or workmanship. The period of the warranty is a LIFETIME on the housing (nozzle, fancase and motor housing) and a limited number of years (stated on original carton) on all other components, depending on model purchased. The warranty commences upon the date of original purchase and receipt of your warranty card. If the vacuum cleaner should become defective within the warranty period, complete selvice (parts and labor) will be provided free of charge: 1. At the store where machine was purchased, if the store is an AUTHORIZED DEALER and WARRANTY STATION. In the event of a charge in the purchaser's residence of 50 or more miles from residence at time of purchase from an AUTHORIZED DEALER, such sewice will be provided by the nearest warranty station. The warranty does notcover the following: 1. Parts that normally require replacement such as flat belts, bags, brushes and bulbs. 2. Failure, loss or deterioration due to ordinary wear and tear or from misuse or unauthorized repair. 3. Machines used for other than normal personal, family or household purposes. Commercial purposes are warrantied for two years. 4. Costs of any transportation to and from any place of repair, all of which costs are to be paid by the owner. 11 This warranty gives you specific legal rights and you may also have other rights which may vary from slate to state. Il IMPORTANT: USE ONLY GENUINE ROYAL" REPLACEMENT PARTS.
132 1. Fingertip Toggle Switch - conveniently located for quick control. 2. Eyelet of Upper Cord Hook 3. *Special Bag Assembly - Outer bag resists wear and has full length metal zipper for easy access to top-filling "Toss-Out" paper filter bag OR Cotton top-filling shake-out bag. 4. Handle Fork 5. Bag Coupling 6. Exhaust Couplet 7. *Wheel Arrangement 8. Heavy Duty Vinyl Comfort Grip - culved to fk your hand comfortably. 9. *Strong Metal Cord Hooks 10. Power Cord - permits wide range cleaning. 11. Adjustable Handle - made of chrome-plated tubular steel. Centered on motor housing for balance and maximum maneuverability. 12. Wing Nut 13. Handle Lock - holds handle securely in 3 positions. 14. *Headlight - hinged housing with protective vinyl bumper guard and exclusive deodorizing, demothing, sanitizer chamber OR standard, brilliant headlight as shown. 15. Wrap Around Vinyl Nozzle Bumper - protects walls and furniture. 16. Belt Lifter Lip 17. Belt Lifter Base 18. Cast Aluminum Nozzle, Fancase, and Motor Housing 19. Adjustable Revolving Brush, beater bar or double helical brush 20. Metal Rug Nozzle Guard 21. *"Rite-Hite" Adjustor Knob - lets you set nozzle to exact height for carpet plushness. 22. "Five Position Height Adjustor - lets you set the nozzle at five different carpet heights with the touch of your toe. *Style of feature may differ according to model. 5

133 Your new upright has many special features. All were designed for effortless cleaning because suction alone does not make a vacuum cleaner clean. There must be "air movement" to have cleaning power. That's why the nozzle has deep, wide air vents at both ends. These vents permit air to circulate between the nozzle and carpet at all times; the result... our special self-propelling Cushionaire Cleaning. Your new upright also has exclusive curved fan blades which create more air volume per minute at less motor speed than straight blades. This means more efficient carpet cleaning and less electricity consumption; thus you save time and money. NOTE: Do not connect cleaner to electrical outlet until it, Upper handle Square neck is assembled. C U N ~ head ~ bolt Assemble the Handle (Diagram 1) 1. Slide the upper and lower handle sections together, aligning the square or round holes on both handle sections. 2. From the literature pack, get the square neck curved head bolt, curved washer and 711 6" nut. 3. lnsert square neck curved head bolt through square aligned hole opening, until curved head is flush with handle. WARNING: DO NOT FORCE HANDLE BOLT. MAY SEVER CORD, COULD CREATE SHOCK. 4. Place curved washer over threaded end of bolt and tighten 7/16" nut with appropriate tool (tool not included). All except models below: Remove wing nut and bolt from fork completely. Insert handle and power cord into the fork. Tighten. Models with a &tail: Loosen the large wing nut on the handle fork located on the motor unit. Inset the handle into the fork and tighten the large wing nut. 5. Connect the cords at the handle bottom and the motor unit. Wind the extra-long electrical cord over the cord hooks when cleaner is not being used. The electrical cord is permanently attached to the upper part of the handle and a short connector plug is at the other end. Check to be sure the belt is in place. If not, follow these easy steps: ATTACH BELT Pry belt cover from front of cleaner with screwdriver to remove or rotate the grey rubber nozzle cover* (Diagram 1). *Feature may differ according to model I I I I Insert belt lifter tool through belt The front of the belt will be to your loop, being sure to hook belt around right when installed properly the lip of the belt lifter tool from the (Diagram 3). Snap belt cover or left (Diagram 2). Using the tool as a rotate the grey rubber nozzle cover pry bar, slip the belt onto the motor over the belt access opening. shaft until the belt lifter base meets the shaft. Gently turn the tool to the right (clockwise) to insure proper belt placement. Remove tool. ATTACH THE BAG Place the bag coupling over the exhaust outlet of the machine..slide it on and twist to the right to lock. Attach the top of the bag by snapping the hook on the bag chain into the eyelet on the upper cord hook.

134 YOUR NEW UPRIGHT IS READY TO GO! PLUG IN THE CLEANER Plug the electrical cord into your most convenient outlet, making sure the voltage indicated on the serial number date of vour cleaner is the same as vour electrical source. SET THE NOZZLE HEIGHT Infinite Height Settings: Lets you clean every type of carpet. Your new upright will glide easily over your carpets and rugs, "air-lifting" them as it vacuums. To adjust the nozzle on models with an ''Adjustor Knobn*: 1. Turn the "Rite-Hite" knob (located above rear wheels) counter-clockwise to raise the nozzle off the carpeting. 2. Turn on the vacuum cleaner. Use the finger switch conveniently located on the handle. Push down to start - up to stop. 3. Now, gradually turn the "Rite-Hite" knob clockwise to lower the nozzle to the carpet. FIVE POSITION HEIGHT SEITINGS* RELEASE THE CORD Adiust caroet settinos for floor surface to be cleaned. Set the nozzle at 0 n models equipped with a fivk different carpe<heights with the touch of yourtoe. The illustrations quick cord release (Diagram 3), show the height adjustor in the lowest (Diagram 1) and highest simply push the quick release (Diagram 2) positions. The setting should be low enough for effective cord hook forward or backward cleaning, yet high enough that the cleaner is not difficult to push. until it is upside down. The cord NOTE: If cleaner is difficult to push, adjust to a higher carpet setting will slide off easily. Return quick height. release cord hook to its upright position so it is ready to store the cord when you complete your cleaning tasks. TILT NOZZLE To clean throw rugs and carpets with fringed edges, push handle down below normal operating position thereby raising the nozzle (so fringe or binding will not catch). Throw rugs should be cleaned by working from the center toward and over the fringe, tilting the nozzle upward and over the edge of the carpet. LOWER HANDLE To clean carpeted stairways and under low furniture and beds, start with handle back in tilting position. Then lift handle lock lever (located where handle meets motor housing) with your toe and lower handle to floor. For stairways, depress handle lock lever so cleaner can be held in a horizontal position. To raise handle, release handle lock lever. *Style of feature may differ according to model.
135 NOTE: Disconnect machine from electrical outlet prior to performing any maintenance function. "TYPE B" PAPER BAGS 1. Pull cardboard connector of paper bag away from top-fill tube and dispose of used paper bag. 2. Place new paper bag into cloth bag. Keep cardboard connector facing top-fill tube. 3. Tuck paper bag down into cloth bag as far as possible. 4. Push cardboard connector over top-fill tube opening as far as possible. 5. Close outer bag. If your cleaner has the wide-opening cloth "shake-out" bag, follow these directions when dirt reaches the half-full point: 1. Unhook bag at the top and remove from cleaner by turning inlet copling counter-clockwise. 2. Turn bag upside down and shake vigorously until dirt settles at bag clamp end. 3. Slide off bag clamp and empty dirt on papers spread on floor or in suitable waste container. NOTE: Regardless of iype of bag, empty frequently for maximum cleaning efficiency and machine life. WARNING: TO REDUCE RISK OF PERSONAL INJURY - UNPLUG CLEANER BEFORE SERVICING If you have occasion to remove the revolving brush, either for making adjustments or for replacing belt: 1. Pry the belt cover* with a screwdriver or rotate the grey rubber nozzle cover on the front of the nozzle. 2. Lift the belt off the drive shaft with belt lifter tool (reverse directions for attaching belt shown on page 6). 3. Remove the metal guard on the bottom of the nozzle. Remove the belt and brush. 4. To adjust the height of the brushroll or to change the brush, pull the brush out of the nozzle. Slip the belt over the revolving brush before brush is put into the new position. Align the arrow on the brushroll with the direction of the arrow on the nozzle guard as shown in (Diagram 1). 5. The belt is then placed over the motor drive shaft as described in "Attach Belt" on page 6. Place the belt so that the right hand side of the belt is nearest to you. If the belt dislodges when you turn the unit "on", the belt is on "backwards". Reverse the belt, twist and place over motor drive shaft. Replace round nozzle name plate* or grey rubber nozzle cover*. For ALL brushrolls, arrows on brushroll and nozzle guard must match (Diagram 1). CAUTION: Never place any fingers, tools, etc. in nozzle or belt area while the unit is operating. The nozzle name plate* or grey rubber nozzle cover* must be securely installed whenever operating the unit without, attachments. *Feature may differ according to model

136 TO REPLACE LIGHT BULB: Press bulb in and turn counter-clockwise to remove. Insert new bulb, press in and turn clockwise until it is in place. TO USE DEODORIZING UNIT: If your vacuum cleaner is equiped with a deodorizing, demothing unit under the headlight, use the sanitizing crystals to eliminate musty odors or repel moths by following the directions printed on the container. BRUSH BRISTLES: Rmse in soapy water, then in clear water. Dry thoroughly before using. The Round Dusting Brush bristles, 10" Floor Brush Bristles and 6" nozzle insert are removable for washing. TOUSEYOURCLEANERFORBLOWING Sometimes only a powerful blast of air will do the cleaning job needed. You may wish to blow-clean open bookcases, stereos, piano interior, refrigerator or freezer coils. When blowing, be conscious of where you will be blowing the dust. Our suggestion is to always blow it toward a dampened towel which will trap the dust and not scatter it in the air to resettle on other furniture. When you are finished, just toss the "dusty" towel into your washer. TO BLOW: Unplug cleaner. Detach outer cloth bag coupling from exhaust outlet. Attach metal end of hose in its place. Insert crevice tool at opposite end of hose. Plug in cleaner. Place dampened towel behind object to be cleaned and direct air so that it blow the dust against the towel. When you are finished, turn off and unplug the cleaner; remove the hose. Twist and lock the cloth bag to its usual cleaning position. ACCESSORlESlOPTlONS (available from participating dealers) ABOVE THE FLOOR CLEANING IS EASY: 1. Disconnect the cleaner from the electrical outlet, remove the belt cover * or rotate grey rubber nozzle cover* and disengage the belt. 2. Snap in the hose connector adaptor by sliding spring into nozzle slot. It will stay firmly in place without twisting or turning. 3. Twist and lock the end of the hose to the adaptor. Add either the extension wands or the cleaning tool you plan to use. Plug in the cleaner, flip the switch and you're ready to go. *Feature may differ according to model USING THE FELT POLISHER PAD: The convenient accessory makes light work of dusting and polishing hardwood, linoleum, and other hard surface floors. Made of special felt composition, the Pad loosens dirt and surface film without scratching. When you want to use the Felt Polisher Pad, exchange it for the metal Rug Nozzle Guard. Adjust the Pad to the hard surface floor as you would for a rug or carpet, until the button pops IN. At this point, the cleaner's front wheels will be "floating" slightly so that the Pad makes full contact with the floor.
137
 U) U~'01---0QJC...C:~ roqj 0 QJ ro 0 QJ...c:.-0) 0 ~ ~ ro...c: N QJ +-I ~ +-I... :J '01--, ;. QJ ~.-QJ \"'...c: QJ ~ U).")
 -0:JQJ- 0 0.. 0.= 0 N +-I ~ :J ~ -- U QJ ro...c: QJ QJ.-C ~ >< 0 ro C 0.. 'v QJ > +-I ~...c:.= ~...c: QJ U +-I QJ ro..s.")
+-1 :J.QJ 0 QJ QJ.-~ O QJ.- I.. C-0C0..:5C...c:U)+-1~..oC.c :p C.-:J QJ +-1 QJ QJ.-. E ro..ro '\" E u.~...c: -0 > 0.")
t:~02~CiJ~+-1U)-000 E c.-~ ~.-~ QJ +-1 E QJ E e -0.> -0 u 0) '01-- ro ~ c ro...c: U) QJ --0.-ro ~ QJ QJ -0 ~ +-1 QJ QJ ~ ~ 0 QJ..0..0 L > -0.")
 U) ro -0.-U).c ro -a. QJ ~ QJ U) ~ U ro.-u) QJ C U) IiI.I.9:l 't- U.-C E O):J:51-~U»O)Ia~=~ro U) 0 U.")
 ~.-QJ '01-- 0 ~ \"'C 't:.-qj ~ NO) ro O la...c:...c: QJ.- ;.ro ~ U O 0 ro ~..0 ~ C 0) +-1..0 ro lil.lro-c..0~.01a:ju)~c ~ -0.")
138 CiJ QJC:- c -0 E...C: +-I...c:ro 0 0 0). :J :p 2 ~:JEQJO C ro QJ.' I -U) ~ ~ 0...C: I I QJ QJ ~.0C 0) ~ QJ.ro +-I ~ 0 +-I :5 >- QJ QJ QJ ro 'v..0 +-I = ~ U) U) U~'01---0QJC...C:~ roqj 0 QJ ro 0 QJ...c:.-0) 0 ~ ~ ro...c: N QJ +-I ~ +-I... :J '01--, ;. QJ ~.-QJ "'...c: QJ ~ U)...C:C+-1OCOU) +-I E+-1QJ-+-1ro~c E C~O) QJ"-'...c: :J o'01--e~~~:5ro:jo)c~+-1 U) 00 curo ~:J...ro~+-1 E ~ +-I ~ QJ ro...c: -0QJ 0) ~.9:l -0...c: ro :J 0):J0...c: I 0)- -c.-> NQJ+-1-0 U :J +-I ro -0 E U) -0:JQJ = 0 N +-I ~ :J ~ -- U QJ ro...c: QJ QJ.-C ~ >< 0 ro C 0.. 'v QJ > +-I ~...c:.= ~...c: QJ U +-I QJ ro..s.= ro C:==+-1ro:J+-1U)QJU...c:U' ~ QJ.~ QJ ~ QJ....-~ ~ +-I.~ -0 U)..0...c: ~ ~ ~.- "'C ~...N.-ro -0 E +-I ro c.- C..O 0 QJI-CNro ) +-I ~ C.-~ C la 0)+-1 :J.QJ 0 QJ QJ.-~ O QJ.- I.. C-0C0..:5C...c:U)+-1~..oC.c :p C.-:J QJ +-1 QJ QJ.-. E ro..ro '" E u.~...c: -0 > 0.. ro 0) QJ -U) +-1 'v +-1 ~ ro ro - OQJOU)~+-1-0 CroroQJ..0...C:U _U~-0QJ~cEro...c:uf)+-1u ~ ~ o~ C ro 0-0 >- QJ E U) ~ E. "'C1- ro+-1 ~~QJ=...c: :JO O~0)t:~02~CiJ~+-1U)-000 E c.-~ ~.-~ QJ +-1 E QJ E e -0.> -0 u 0) '01-- ro ~ c ro...c: U) QJ --0.-ro ~ QJ QJ -0 ~ +-1 QJ QJ ~ ~ 0 QJ L > ) QJ ~ O...c:...c: ~ > :J~rooQJ ~U :J lae- ~:g UQJ-0 E ~U) E u laco :J E ro QJ C 0.. C :J QJ 1- > U U ro..0.-ro 0 U) +-1 :J.--0 C 0) ro U E O.. :J -0 C.-C > ~ C >- E QJ QJ ro U U) U) ro -0.-U).c ro -a. QJ ~ QJ U) ~ U ro.-u) QJ C U) IiI.I.9:l 't- U.-C E O):J:51-~U»O)Ia~=~ro U) 0 U.-~ C 0 QJ O 0 V).- QJ ro.8 U) la t:.ro.c...c: 0.. QJ >- U) +-1 ~ C ~ >.-ro.c >< ~..0 U) >..0 ~.-QJ O +-1 QJ QJ QJ QJ ~ ~, > C -..0 I.. U...c: ~ 0 -QJ QJ ~ Ū I C 0 --O ro..n '01-- la 0) ~.-QJ ' ~ "'C 't:.-qj ~ NO) ro O la...c:...c: QJ.- ;.ro ~ U O 0 ro ~..0 ~ C 0) ro lil.lro-c..0~.01a:ju)~c ~ -0.-~ 't QJ QJ I.. ~ 0) 0 ~ e.-qj ~ AJ C ~ :J ~...c:...c:. Q-:J ro E ū...c:.= ~ - w.ro U) Iro'01--U E.....


139 I. General Maintenance Guide II. Lubrication Schedule III. Noise Reduction Information Comfort grip Metal toggle switch 'Metal cord hook Durable link chain - with metal bag clamp High Filtration, Top-fill bag Extra-Iong 50 ft. power cord L APPliANCE MF6. (0 High impact urethane wheels 3-position handle nozzle Wrap-around bumper
 Check front plug or adjust-o-rite covers. {use duct tape if cover is missing or damaged) Check brushroll.")
 1. 2. 3. 4. 5. 6. 7. 8. 9. Check carpet height adjustment; lock with lock nut or tighten ratchet system. Check fan visually for breaks and clogs.")

140 Check switch plate screws on handle. {tighten if needed) Check plug end. {straighten if needed) Check disposable paper bag. {replace if needed) Check outer bag. {vacuum or shake out if very soiled) Check front plug or adjust-o-rite covers. {use duct tape if cover is missing or damaged) Check brushroll. {it must spin free and arrow must be in the same direction as nozzle guard) Check belt. {brushroll should spin on carpet with load. Replace if necessary) Check nozzle guard. {this base plate must be on for vac to work properly) Check carpet height adjustment; lock with lock nut or tighten ratchet system. Check fan visually for breaks and clogs. {always unplug vac!} Check cord condition. {repair any cuts} Check bag clamp tension. {tighten if needed} {shake out bags only} Check all handle hardware. {tighten if needed} Check and perform lubrication. {see lubrication guide} Scrape fan housing if vac is used in dining area. Clean drive shaft and brushroll of hair and thread. Replace belt. I Check wheels and axles. (straighten axles, use graphite on wheels} Check entire machine visually. Complete clean and service of machine.

141 Brushroll Wheels White lithium grease or equ. Graphite or other dry lubricant Monthly Monthly


142 Broken or chipped fan Dry bearing Brushroll or bottom plate not installed properly Replace with new balanced fan Replace inner bag and vacuum outer bag. Check fill t~be for clog. With unit on bag should be squeezed easily Lubricate or replace bearing Check "Less Work" flyer for proper installation instructions. Brushroll and nozzle guard (bottom plate) must be installed properly!


143 If you want to make your job easier when vacuuming with your All Metal Royal Vacuum, follow the three steps below: 1. Make sure the arrow on the brushroll and the arrow on the nozzle guard are pointing in the same direction! 2. : Make sure that both end caps of the brushroll are on the number 1 (ridges up). The two ridges should be pointing to the nozzle guard! Both should be changed to the number 2 setting after 600 hours. 3. Make sure the belts are on properly. When facing the vacuum, the right side of the belt is closer to you than the left side. Always install the belt from the bag side of the machine. Be sure that the front plug, as well as the nozzle guard (base plate) are on all the way! That's It!


 to the proper height setting for the carpet.")
144 1. Check I change the paper bag. Always check the paper bag before vacuuming to ensure that your Royal operates at peak performance. 2. Releasing the handle. To dispose of the old paper bag, simply unzip the outer bag, remove the full bag from the dirt tube at its cardboard collar. To install a new bag, push the collar past the raised locking tabs on the top and bottom of the dirt tube. Be sure to tuck in the paper when zipping the outer bag. The handle of your Royal vacuum locks in the upright position for storage. To release the handle, simply push the handle slightly forward and depress the release lever with your foot. This is the "use" position. Should you wish to lay the handle flat, again, raise the handle and depress the lever a second time and the handle will lock flat. 3. Before you begin vacuuming, you must adjust the nozzle (head) to the proper height setting for the carpet. Using The five position foot pedal adjustment, lower the nozzle until the brushroll engages the carpet surface. The setting should be low enough for effective cleaning, yet high Enough that the cleaner is not difficult to push.
:lugged your I:):ower cord, turn the vacuum over")


 be sure that both endcaps are turned so ~44~~ The side")
 will be facing up towards you.")


145 I. Remove old belt I clean brushroll. After you've uni:):lugged your I:):ower cord, turn the vacuum over so that you can see the brushroll. Remove the metal bottom plate by pulling up on the tab. Remove brush and broken belt. Clean endcaps of brush so it spins freely. Loop new belt around brushroll and see next step. 2. Brushroll endcaps turned properly. Royal's brushroll design is engineered to provide extra service time as well as superior cleaning. First, when replacing the brush ( with belt looped. the middle) be sure that both endcaps are turned so ~44~~ The side with the number 2 will be placed down into the nozzle. The number 1 (and ridges) will be facing up towards you., Finally when replacing the brush, you must make sure that the arrow on the brushroll and the arrow on the bottom plate are pointing in the same direction. Please note that you will have not yet connected the belt to the motor shaft. The belt is loosely around the middle of the brushroll, the endcaps are turned properly and the arrows are pointing the same direction. Now replace the bottom plate. To reattach the belt onto the motor pulley, you will first need to turn the machine back over to the use position. Now remove the nozzle cover from the front of the nozzle by grabbing the tab and pull towards vml. Rot::Jtp. no7:7:1p. ('ovp.r to p.xno~p. thp. motor


.")


146 5. Using the Belt Lifter Tool (which is provided), reach into the nozzle and grab hold of the belt. Always enter from the same side as the outer bag so you will be coming across the nozzle. 6. Pull the belt towards you resting the end of the Belt Lifter Tool onto the motor pulley once you reach the 7 o'clock position. Reinstalling the belt {step 3). Once the belt is resting at the 7 o'clock position on the motor pulley, simply rotate the belt by twisting your wrist clockwise over the pulley. The belt will be firmly attached when you reach the 3 o'clock position. You do not need to force the belt further back on the pulley. When the machine is turned on, the belt will pull itself into place If you are directly facing the nozzle, the right side of a properly installed belt will be a little closer to you than the left. Now replace the Nozzle Cover and turn on the vacuum. If installed properly, the belt will remain on the motor pulley and the brushroll will spin. If it was not installed properly, the belt will fall off the pulley. Repeat the steps for re-attaching the belt. 7. Belt lifter Tool storage. When finished using the Belt Lifter Tool, store it as well as a few spare belts on the outer bag chain. As you can see, you do not need additional tools to change the belt on your Royal -which limits your downtime. By following the steps in this routine maintenance


147 CT15 B - C Quick Guide This Guide is intended for quick consultation only and does not replace the Use and Maintenance Manual. Before using the machine, read the Use and Maintenance Manual contained in the machine packaging thoroughly and rigorously respect all the instructions. PREPARATION/ OPERATION 4. Open the detergent tank tap. 7. Operate the drive lever. 1. Fill the detergent tank. 2. Adjust the slope of the handle by pulling the handle release lever. 5. Press the ON button. 8. Begin working. 9. When you have finished cleaning, proceed as follows: Press the brush button. Turn the machine off by pressing the ON button for at least 4 seconds. Raise the squeegee. Close the detergent tank tap. If necessary, charge the batteries (BATTERY VERSION) 3. Lower the squeegee using the lever. 6. Press the brush button to activate suction and water delivery. PLDC01957
 Clean the brush. Clean the dirty water tank.")


148 DAILY MAINTENANCE Empty the dirty water tank. Check the dirty water tank float is undamaged and clean and moves freely on the pin. Check the squeegee is clean and the blades are not damaged. Check the battery charge (BATTERY VERSION) Clean the brush. Clean the dirty water tank. To recharge the batteries, plug in the battery charger (OPTIONAL) using the extension provided with the machine. SOSTITUZIONE LAME DI ASCIUGATURA TERGIPAVIMENTO unscrew the nuts fixing the blade retainers; remove the two blade retainers; remove the blade; put the same blade back, reversing the edge in contact with the floor until all four edges are worn, or replace with a new one; put the two blade retainers back on the squeegee and screw up the nuts again; AUTOMATIC BRUSH ATTACHMENT Attaching the brush: rest the brush on the floor in front of the machine. Raise the front of the machine by levering on the handle, then lower it onto the brush, centring it with the brush cover. Action the drive lever repeatedly until the brush engages. Removing the brush: Raise the front of the machine by levering on the handle, then operate the brush lever repeatedly. After operating the lever a few times, the brush is released and falls to the ground. TROUBLESHOOTING THE MACHINE DOES NOT COME ON/START UP CHECK THE BATTERY CHARGE (BATTERY VERSION) CHECK THE POWER CABLE IS PLUGGED INTO A FUNCTIONING SOCKET (CABLE VERSION) CHECK THE SQUEEGEE BLADES ARE NOT WORN CHECK THERE IS NO DEBRIS BETWEEN THE TWO SQUEEGEE BLADES THE MACHINE LEAVES THE FLOOR WET CHECK THERE IS NO DEBRIS IN THE SUCTION HOSE CHECK THE DIRTY WATER TANK IS NOT FULL CHECK THE DETERGENT TANK LID IS CLOSED CORRECTLY CHECK THE SUCTION HOSE IS CORRECTLY ATTACHED TO THE SQUEEGEE THE MACHINE LEAVES THE FLOOR DIRTY CHECK THE TYPE OF BRUSH IN USE IS SUITABLE FOR THE TYPE OF DIRT AND FLOOR. CHECK THE FLOOR HAS BEEN BRUSHED BEFORE USING THE MACHINE THE MACHINE LEAVES STRIPES OF WET FLOOR CHECK THERE IS NO DEBRIS BETWEEN THE TWO SQUEEGEE BLADES CHECK THE SQUEEGEE BLADES ARE NOT WORN CHECK THE SQUEEGEE IS CORRECTLY ADJUSTED PLDC01957

149 OPERATIONS MANUAL CT15B35
150 1. INDEX 1. INDEX GENERAL INFORMATION SCOPE OF THE MANUAL IDENTIFYING THE MACHINE DOCUMENTATION PROVIDED WITH THE MACHINE TECHNICAL INFORMATION GENERAL DESCRIPTION LEGEND DANGER ZONES ACCESSORIES SAFETY INFORMATION SAFETY REGULATIONS HANDLING AND INSTALLATION LIFTING AND TRANSPORTING THE PACKAGED MACHINE CHECKS ON DELIVERY UNPACKING ELECTRICAL CONNECTIONS AND EARTH (CABLE MODELS) POWER SUPPLY BATTERIES (BATTERY MODELS) Batteries: preparation Batteries: installation and connection Batteries: removal BATTERY CHARGER (BATTERY MODELS) Choosing a battery charger (machines without ON-BOARD battery charger) Preparing the battery charger LIFTING AND TRANSPORTING THE MACHINE PRACTICAL GUIDE FOR THE OPERATOR CONTROLS - DESCRIPTION MOUNTING AND ADJUSTING THE SQUEEGEE MOVING THE MACHINE WHEN NOT IN OPERATION MOUNTING AND CHANGING THE BRUSH/DRIVE DISKS DETERGENTS - INSTRUCTIONS PREPARING THE MACHINE FOR WORK WORKING SOME USEFUL TIPS TO GET THE MOST FROM YOUR SCRUBBER DRIER Prewashing with brushes or pads Drying DRAINING THE DIRTY WATER DRAINING THE CLEAN WATER PERIODS OF INACTIVITY BATTERY MAINTENANCE AND CHARGING CHARGING PROCEDURE MAINTENANCE INSTRUCTIONS MAINTENANCE - GENERAL RULES ROUTINE MAINTENANCE Float switch: cleaning Squeegee blades: replacing Fuses: replacement (battery models) (Fig. L) Fuses: replacement (cable models) (fig. M) ROUTINE MAINTENANCE Daily operations ENGLISH
151 Weekly operations Six monthly operations TROUBLESHOOTING HOW TO RESOLVE POSSIBLE PROBLEMS ENGLISH 3
152 2. GENERAL INFORMATION Read this manual carefully before carrying out any work on the machine Scope of the manual This manual has been written by the Manufacturer and is an integral part of the machine. It defines the purpose for which the machine has been designed and constructed and contains all the information required by operators 2. In addition to this manual containing all user information, other publications are available providing specific information for maintenance personnel 3. Constant respect for the instructions guarantees the safety of the operator and the machine, low running costs and high quality results and extends the working life of the machine. Failure to respect the instructions may lead to damage to the operator, machine, floor being washed and environment. To find the topic that interests you more rapidly, consult the list of contents at the beginning of the manual. Parts of the text requiring special attention are highlighted in bold and preceded by the symbols illustrated and described here.! DANGER Indicates the need for attention in order to avoid a series of consequences which could cause death or damage to the health of the operator. IMPORTANT Indicates the need for attention in order to avoid a series of consequences which could cause damage to the machine or work environment or financial loss. i INFORMATION Particularly important instructions. In line with the company's policy of constant product development and updating, the Manufacturer reserves the right to make modifications without warning. Although your machine may differ appreciably from the illustrations in this document, safety and the information contained in this manual are guaranteed. 1 The definition "machine" replaces the trade name covered by this manual.. 2 Persons responsible for using the machine without performing any operations requiring precise technical skills. 4 3 Persons with experience, technical training and a knowledge of legislation and standards, able to perform all the necessary operations and to recognise and avoid possible risks in handling, installation, use and maintenance of this machine. ENGLISH
153 2.2. Identifying the machine The rating plate provides the following information: model; power supply; total nominal power; serial number; year of fabrication; dry weight; maximum slope; barcode with serial number; manufacturer's identification Documentation provided with the machine User manual; guarantee certificate; EC certificate of conformity. 3. TECHNICAL INFORMATION 3.1. General description This machine is a scrubber drier for sweeping, washing and drying flat, horizontal, smooth or moderately rough, even and obstacle free floors in civil and industrial premises. It is available in both battery and cable versions to meet all running time and weight requirements. The scrubber drier spreads a solution of water and detergent in the correct concentration on the floor and then scrubs it to remove the dirt. By carefully choosing the detergent and brushes (or abrasive disks) from the wide range of accessories available, the machine can be adapted to a wide range of combinations of types of floor and dirt. A suction system incorporated in the machine dries the floor after washing by means of the low pressure generated in the dirty water tank by the suction motor. The squeegee connected to the tank collects the dirty water Legend The main parts of the machine are as follows (fig. A): the detergent tank (fig. A, ref. 1): contains and transports the mixture of clean water and detergent; the dirty water tank (fig. A, ref. 2): collects the dirty water picked up from the floor after washing; control panel (fig. A, ref. 3); head assembly (fig. A, ref. 4): the main element is the brush which distributes the detergent solution on the floor and remove the dirt; squeegee assembly (fig. A, ref. 5): wipes and dries the floor by collecting the water Danger zones A - Tank assembly: when using certain detergents, danger of irritation for eyes, skin, mucous membranes and respiratory tract and of asphyxia. Danger represented by the dirt collected from the environment (germs and chemical substances). Danger of crushing between the two tanks when the dirty water tank is replaced on top of the detergent tank. B - Control panel: danger of short circuit. C - Bottom of washing head: danger due to brush rotation. D - Rear wheels: danger of crushing between the wheel and chassis. ENGLISH 5
154 E -Battery compartment (in the detergent tank): danger of short circuit between the battery poles and presence of hydrogen during charging Accessories Bristle brushes: for washing delicate floors and polishing; Polypropylene brushes: for normal floor washing; Tynex brushes: for removing accumulated stubborn dirt on resistant floors; Drive disks: enable the following disks to be used: Yellow disks: for washing and polishing marble and similar surfaces; Green disks: for washing resistant floors; Black disks: for thorough washing of resistant floors with stubborn dirt Safety regulations 4. SAFETY INFORMATION Read the "User Manual" carefully before start-up and use or before performing maintenance or any other work on the machine. IMPORTANT Rigorously respect all instructions in the Manual (in particular those relating to danger and important information) and on the safety plates fitted to the machine. The Manufacturer declines all liability for damage to people or things resulting from failure to observe the instructions. The appliance must be used exclusively by persons trained in its use and/or who have demonstrated their ability and have been expressly instructed to use the appliance. The machine must not be used by minors. The machine must not be used for purposes other than those for which it was expressly designed. Scrupulously respect all safety standards and conditions applicable to the type of building in which the machine is to be operated (eg: pharmaceutical companies, hospitals, chemicals, etc). Do not use the machine in places with inadequate lighting or explosive atmospheres, on public roads, in the presence of dirt hazardous to health (dust, gas, etc) and in unsuitable environments. The machine is designed for indoor use only. The machine is designed for temperatures of between +4 C and +35 C when in use and between +0 C and +50 C when not in use. The machine is designed to work in a humidity of between 30% and 95%. Never use or pick up flammable liquids or explosives (e.g. petrol, fuel oil, etc), flammable gases, dry dusts, acids and solvents (e.g. paint solvents, acetone etc) even if diluted. Never pick up flaming or incandescent objects. Never use the machine on slopes or ramps of more than 2%. In the case of slight slopes, do not use the machine transversally, always manoeuvre with care and do not reverse. When transporting the machine on steeper ramps or slopes, take the utmost care to avoid tipping up and/or uncontrolled acceleration. Tackle ramps and/or steps with the front of the machine raised only. Never park the machine on a slope. The machine must never be left unattended with the motor or engine on. Before leaving it, turn the motor or engine off, make sure it cannot move accidentally. 6 ENGLISH
155 Always pay attention to other people, children in particular, present in the place where you are working. Children must be supervised to make sure they do not play with the appliance. The appliance is not intended for use by persons (including children) with reduced physical, sensory or mental capabilities, or lack of experience and knowledge, unless they have been given supervision or instruction concerning use of the appliance by a person responsible for their safety. Never use the machine to transport people or things or to tow things. Do not tow the machine. Never rest objects of any weight on the machine for any reason. Never obstruct ventilation and heat dispersion slits. Never remove, modify or circumvent safety devices. Numerous unpleasant experiences have shown that a wide range of personal objects may cause serious accidents. Before beginning work, remove jewellery, watches, ties, etc. The operator must always use personal protection devices - protective apron or overalls, non-slip waterproof shoes, rubber gloves, protective goggles and ear protectors and mask to protect the respiratory tract. Keep the hands away from moving parts. Never use detergents other than those specified. Follow the instructions on the relative safety sheet. We recommend keeping detergents out of reach of children. In the event of contact with the eyes, wash immediately with abundant water. If ingested, consult a doctor immediately. Make sure the power sockets used for the models with cable or battery charger are connected to a suitable earth system and protected by differential thermal solenoid switches. Make sure the electrical characteristics of the machine (voltage, frequency, absorbed power) given on the rating plate are the same as those of the mains electricity supply. The machine with cable has a three-wire cable and a three pin earthed plug for use in an appropriate earthed socket. The earth wire is yellow and green. Never connect this wire to anything other than the earth contact of the socket. It is indispensable to respect the battery manufacturer's instructions and current legislation. The batteries should always be kept clean and dry to avoid surface leakage current. Protect the batteries from impurities such as metal dust. Never rest tools on the batteries as this could cause short circuit and explosion. When using battery acid, always follow the relative safety instructions scrupulously. When using cable models, take care not to crush or pull the power supply cable. While using the machine, make sure the rotating brush does not come in contact with the power cable (cable powered version). Check the power cable regularly. If damaged, do not under any circumstances use the machine. Replace it with one of the same type or contact a specialised service centre (cable powered version). In the presence of particularly strong magnetic fields, assess the possible effect on the control electronics. Never wash the machine with water jets. The fluids collected contain detergent, disinfectant, water and organic and inorganic material. They must be disposed off in accordance with current legislation. In the case of malfunction and/or faulty operation, turn the machine off immediately (disconnecting it from the mains power supply or batteries) and do not tamper. Contact a service centre authorised by the Manufacturer. All maintenance operations must be performed in an adequately lit place and only after disconnecting the machine from the power supply, in cable models by unplugging the machine from the socket, in battery models by disconnecting the battery connector; in cable models, the operator must be able to verify from any position that the machine remains unplugged from the mains socket while maintenance is being carried out. ENGLISH 7

156 All work on the electrical system and all maintenance and repair operations other than those explicitly described in this manual must be performed by specialised personnel expert in the sector only. If the power cable, plug or terminals require replacing, make sure the electrical connections and cable grip are tightly fastened to guarantee the resistance of the cable if pulled. Only original accessories and spare parts supplied by the Manufacturer may be used in order to guarantee safe problem-free operation of the machine. Never use parts removed from other machines or from other kits. This machine has been designed and constructed to provide ten years' service from the fabrication date shown on the rating plate. After this time, whether the machine has been used or not, it should be disposed of according to current legislation in the country in which it is used: - the machine must be disconnected from the power supply, emptied of liquids and cleaned; - the product is classified as WEEE type special waste and is covered by the requisites of the new environmental protection regulations (2002/96/EC WEEE). It must be disposed of separately from ordinary waste in compliance with current legislation and standards. Special waste. Do not dispose of with ordinary waste. Alternatively the machine must be returned to the Manufacturer for a complete overhaul. If you decide to stop using the machine, you are recommended to remove the batteries and dispose of them at an authorised collection centre. You should also make sure that all parts of the appliance which could represent a hazard, particularly to children, are made safe. 8 ENGLISH
157 5. HANDLING AND INSTALLATION 5.1. Lifting and transporting the packaged machine IMPORTANT During all lifting operations, make sure the packaged machine is firmly anchored to avoid it tipping up or being accidentally dropped. Always load/unload lorries in adequately lit areas. The machine, packaged on a wooden pallet by the Manufacturer, must be loaded using suitable equipment (see EC Directive 2006/42 and subsequent amendments and/or additions) onto the transporting vehicle. At destination, it must be unloaded using similar means. A fork lift truck must always be used to lift the packaged body of the machine. Handle with care to avoid knocking or overturning the machine Checks on delivery When the carrier delivers the machine, make sure the packaging and machine are both whole and undamaged. If the machine is damaged, make sure the carrier is aware of the damage and before accepting the goods, reserve the right (in writing) to request compensation for the damage Unpacking IMPORTANT When unpacking the machine, the operator must be provided with the necessary personal protection devices (gloves, goggles, etc) to limit the risk of accident. Unpack the machine as follows: cut and remove the plastic straps using scissors or nippers; open the packaging; remove the bags included in the packaging and check the contents: - guarantee slip; - use and maintenance manual; - battery bridges with terminals (battery model only); - battery charger connector (battery models only); remove the machine from the packaging; clean the outside of the machine in respect of safety regulations; after unpacking the machine, install the batteries (battery models) or connect the electrical connections (cable models). See relevant sections. The packaging may be kept as it can be reused to protect the machine if it is moved to another site or to a repair workshop. Otherwise it must be disposed off in compliance with current legislation Electrical connections and earth (cable models) The electrical characteristics of the machine are given on the rating plate. Make sure the frequency and voltage correspond to those of the mains supply where the machine will be operated. As far as voltage is concerned, models where the rating plate specifies a voltage of 230 V can be used with voltages of between 220 V and 240 V. Similarly, models rated at 115 V can be used at between 110 V and 120 V. The frequency on the plate must always correspond to the mains voltage. ENGLISH 9
158 IMPORTANT Make sure the mains circuit is suitably earthed and that the sockets (and any adaptors used) ensure the continuity of the earth conductors.! DANGER Failure to observe these instructions could cause possibly serious damage to people and things and invalidates the guarantee Power supply batteries (battery models) Two different types of battery may be installed on these machines: tubular leak-proof batteries: the electrolyte level must be checked regularly. When necessary, top up with distilled water until the plates are covered. Do not over fill (5 mm max. above the plates). gel batteries: this type of battery requires no maintenance. The technical characteristics must correspond to those indicated in the paragraph on the technical specification of the machine. The use of heavier batteries could seriously jeopardise manoeuvrability and lead to the brush motor overheating. Batteries with a lower capacity and weight will require charging more frequently. They must be kept charged, dry and clean and the connections must be tight Batteries: preparation! DANGER During installation of the batteries or any type of battery maintenance, the operator must be provided with the necessary personal protection devices (gloves, goggles overalls, etc) to limit the risk of accident. Keep away from naked flames, avoid short circuiting the battery poles, avoid sparks and do not smoke. The batteries are normally supplied filled with acid and ready for use. If the batteries are dry, before mounting them on the machine, proceed as follows: remove the caps and fill all elements with specific sulphuric acid solution until the plates are entirely covered (this requires at least a couple of passes for each element); leave for 4-5 hours to allow the air bubbles to come to the surface and the plates to absorb the electrolyte; make sure the level of electrolyte is still above the plates and if necessary top up with sulphuric acid solution; close the caps; mount the batteries on the machine (following the procedure described below). Before starting up the machine for the first time, charge the batteries as follows Batteries: installation and connection! DANGER Check that all switches on the control panel are in the "0" (off) position. Make sure you connect the terminals marked with a "+" to the positive poles of the battery. Do not check the battery charge by sparking. Meticulously follow the instructions given below as short circuiting the batteries could cause them to explode. Make sure the dirty water tank is empty and empty if necessary (see relevant paragraph). Lift the dirty water tank (fig. B, ref. 1) off the detergent tank by pulling it upwards, making sure you have previously removed the suction hose and dirty water tank drain hose from their housings. Place the batteries in the battery compartment. 10 ENGLISH
159 IMPORTANT Mount the batteries on the machine using lifting means suitable for their weight. The positive and negative poles have different diameters. Connect the battery wiring and bridge terminals to the battery poles. Tighten the terminals on the poles and cover with Vaseline. Put the dirty water tank back on the detergent tank. When using the machine, follow the instructions below Batteries: removal! DANGER When removing the batteries, the operator must be equipped with suitable personal protection devices (gloves, goggles, overalls, safety shoes, etc) to reduce the risk of accidents. Make sure the switches on the control panel are in the "0" position (off) and the machine is turned off. Keep away from naked flames, do not short circuit the battery poles, do not cause sparks and do not smoke. Proceed as follows: disconnect the battery wiring and bridge terminals from the battery poles. if necessary, remove the devices fixing the battery to the base of the machine. lift the batteries from the compartment using suitable lifting equipment Battery charger (battery models) IMPORTANT Never allow the batteries to become excessively flat as this could damage them irreparably. i INFORMATION If the machine has an ON-BOARD battery charger (installed by the manufacturer), no operations are required as it will already be ready for use Choosing a battery charger (machines without ON-BOARD battery charger) Make sure the battery charger is compatible with the batteries to be charged: tubular lead batteries: you are recommended to use a 24V - 5A automatic battery charger. However, you should always consult the battery charger manufacturer and manual to confirm the choice. gel batteries: use a charger specific for this type of battery Preparing the battery charger If you wish to use a battery charger not provided with the machine, you must fit it with the connector supplied with the machine (see paragraph "Unpacking" in this manual). To install the connector, proceed as follows: remove about 13 mm of protective sheath from the red and black wires of the battery charger; insert the wires into the connector contacts and squeeze them forcefully with suitable pliers; respect the polarity (red wire + black wire ) when inserting the wires into the connector. ENGLISH 11
160 5.7. Lifting and transporting the machine IMPORTANT All phases must be performed in an adequately lit room and adopting the safety measures most appropriate to the situation. The operator must always use personal protection devices. To load the machine onto a means of transport, proceed as follows: empty the dirty water and detergent tanks; place the machine in the packaging, then rest the packaging on a pallet and fix it with plastic straps; lift the pallet (with the machine) using a fork lift truck and load it onto the means of transport; anchor the machine to the means of transport with cables connected to the pallet and machine itself Controls - Description 6. PRACTICAL GUIDE FOR THE OPERATOR With reference to fig. C, the machine has the following controls and indicator lights: Power on light (fig. C, ref. 7 - cable model only): green, indicates that the machine's power cable is connected to the mains. Battery charge light (fig. C, ref. 2 - battery models only): 3 LEDs (red, yellow and green) which indicate the level of battery charge. There may be: a) red, yellow and green LEDs on: battery voltage >24V; b) red and yellow LEDs on: battery voltage <24V; c) red LEDs on: battery voltage <23V; d) red LED flashing: battery voltage <21.5V, batteries completely flat; after a few seconds the brush and suction motor shut down; Main Switch (fig. C, ref. 3): enables and disables electrical power to all machine functions (to turn the machine off, hold the button down for at least 4 seconds). Brush button with light (fig. C, ref. 4): enables (LED on) and disables (LED off) the "brush" function. The brush does not start rotating until the brush lever is operated. Suction button with light (fig. C, ref. 5): turns the suction motor on (LED on) and off (LED off) to dry the floor being washed. The light is on when there is power to the suction motor. Detergent button (fig. C, ref. 6): enables (LED on) and disables (LED off) detergent flow. The detergent does not flow unless the brush is rotating. Brush lever (fig. D, ref. 1): enables brush rotation. Squeegee lever (fig. D, ref. 2): raises (if lowered) or lowers (if raised) the squeegee. Handle regulation lever (fig. D, ref. 3): allows the angle of the handle to be adjusted Mounting and adjusting the squeegee The squeegee (fig. A, ref. 5) is responsible for the first phase of drying. To mount the squeegee on the machine, proceed as follows: 1) check that the squeegee mount (fig. E, ref. 1) is lowered, otherwise lower it by means of the squeegee lever (fig. D, ref. 2); 2) rotate the machine backwards and rest the handle on the floor; 3) insert the two threaded pins on the squeegee into the slots on the support (fig. E, ref. 1); 4) fix the squeegee by tightening the two knobs (fig. E, ref. 2); 12 ENGLISH
161 5) insert the sleeve of the suction hose (fig. E, ref. 4) fully into the squeegee; The squeegee blades scrape the film of water and detergent from the floor and prepare the way for perfect drying. With time, the constant rubbing makes the edge of the blade in contact with the floor rounded and cracked, reducing the drying efficiency and requiring it to be replaced. The state of wear should be checked frequently. For perfect drying, the squeegee must be adjusted in such a way that the edge of the rear blade bends during operation by about 45 with resp ect to the floor at every point. Adjust the height of the blade during operation by regulating the height of the wheels positioned behind and alongside the squeegee (fig. E ref. 3) Moving the machine when not in operation To move the machine, proceed as follows: lift the squeegee using the squeegee lever (fig. D, ref. 2); raise the front of the machine by levering on the handle and move it to the destination. on arrival, lower the front of the machine Mounting and changing the brush/drive disks IMPORTANT Never work without the brushes and drive disks correctly installed. Brush attachment: turn the machine on by pressing the main switch (fig. C, ref. 3) (LED on), then press the brush button (fig. C, ref. 4 (LED on). Rest the brush on the floor in front of the machine. Raise the front of the machine by levering on the handle, then lower it onto the brush, centring it with the brush cover. Operate the brush lever (fig. D, ref. 1) repeatedly until the brush automatically engages on the flange hub. If the manoeuvre is not successful, press on the handle again and repeat the centring and repeated operation of the brush lever. Brush release: turn the machine on by pressing the main switch (fig. C, ref. 3) (LED on), then press the brush button (fig. C, ref. 4 (LED on). Raise the front of the machine by levering on the handle, then operate the brush lever (fig. D, ref. 1) repeatedly. After a few pulses, the brush (or drive disk) is released and falls to the ground Detergents - Instructions IMPORTANT Always dilute the detergent according to the manufacturer's instructions. Do not use sodium hypochlorite (bleach) or other oxidants, particularly in strong concentrations. Do not use solvents or hydrocarbons. The temperature of the water and detergent must not exceed the maximum indicated in the technical specification. They must be free of sand and/or other impurities. The machine has been designed for use with low-foam biodegradable detergents made specifically for scrubber driers. For a complete and up-to-date list of the detergents and chemicals available, contact the Manufacturer. Use products suitable for the floor and dirt to be removed only. Follow the safety regulations on use of detergents given in the section "Safety regulations". ENGLISH 13
162 6.6. Preparing the machine for work IMPORTANT Before starting work, wear overalls, ear protectors, non-slip waterproof shoes, mask to protect the respiratory tract, gloves and all other personal protection devices recommended by the supplier of the detergent used or necessitated by the work environment. Before starting work, proceed as follows: Battery models: check the battery charge (charge if necessary); make sure the dirty water tank (fig. A, ref. 2) is empty. If necessary, empty it; via the opening at the front, fill the detergent tank (fig. A, ref. 8) with a suitable concentration of clean water and low-foam detergent. Leave at least 5 cm between the surface of the liquid and the opening of the tank; mount the most suitable brushes or drive disks for the floor and work to be performed (see paragraph 3.4); make sure the squeegee (fig. A, ref. 5) is firmly attached and connected to the suction hose (fig. E, ref. 4). Make sure the back blade is not worn. i INFORMATION If you are using the machine for the first time, we recommend trying it on a large obstacle-free surface first to acquire the necessary familiarity. Always empty the dirty water tank before filling the detergent tank again. For effective cleaning and to extend the working life of the machine, follow a few simple rules: prepare the work area by removing all possible obstacles; begin working from the furthermost point to avoid walking on the area you have just cleaned; choose the straightest possible working routes; divide large floors into parallel rectangular sections. If necessary, finish off by passing a mop or rag rapidly over parts inaccessible to the scrubber drier Working After setting up the machine, proceed as follows: Connect the machine as follows: - cable model: plug the machine into the mains power socket; lower the squeegee by means of the squeegee lever (fig. D, ref. 2); press the main switch (fig. C, ref. 3) (LED on); press the brush button (fig. C, ref. 4) (LED on), the suction motor and detergent flow are also activated automatically; press the brush lever (fig. D, ref. 1); check regularly that detergent is reaching the brushes and top up if necessary; while working, check the quality of washing and adjust the flow of detergent to the brushes using the detergent tap (fig. G, ref. 2). IMPORTANT Empty the dirty water tank each time you fill the detergent tank. The float switch in the dirty water tank turns suction off when the tank is full. If the switch trips, stop work and empty the tank; Battery models: if the red LED (fig. C, ref. 2) starts flashing, the batteries are nearly flat. After a few seconds, the brush and suction motor shut down to prevent draining the batteries excessively. Charge the batteries. 14 ENGLISH
163 At the end of work: release the brush lever (fig. D, ref. 1); press the detergent button (fig. C, ref. 6) (LED off); press the brush button (fig. C, ref. 4) (LED off); lift the squeegee lever (fig. D, ref. 2) to raise the squeegee from the floor to prevent the continuous pressure from warping the blades; press the suction button (fig. C, ref. 5) (LED on) and brush lever (fig. D, ref. 1) to start suction. Allow the suction to run for 2 minutes, then release the brush lever and press the suction button (fig. C, ref. 5) (LED off) to turn the motor off. Turn the machine off by pressing the button (fig. C, ref. 3) for at least 4 seconds. remove the brush (or drive disk) to prevent it from warping permanently; depending on the model, unplug from the mains socket or disconnect the batteries, empty and clean the dirty water tank Some useful tips to get the most from your scrubber drier In the event of particularly stubborn dirt on the floor, washing and drying can be performed in two separate operations Prewashing with brushes or pads press the main switch (fig. C, ref. 3) (LED on); press the brush button (fig. C, ref. 4) (LED on); press the suction button (fig. C, ref. 5) (LED off) to turn suction off; operate the brush lever (fig. D, ref. 1) to enable brush rotation; make sure the suction motor is off and the squeegee is raised; begin washing. adjust the flow of detergent to the brush by means of the detergent tap (fig. G, ref. 2). Flow speed must be regulated according to the operator's chosen advance speed. The slower the machine moves forwards, the less water is needed. Persist when washing particularly dirty points to give the detergent time to perform its chemical action detaching and suspending the dirt and the brushes time to exert an effective mechanical action Drying Lower the squeegee and with the suction motor on, pass over the same area washed previously. The result is equivalent to in-depth washing and subsequent ordinary maintenance will take less time. To wash and dry at the same time, operate the brush, detergent flow, squeegee and suction motor simultaneously Draining the dirty water! DANGER Use suitable personal protection devices. Drain the water with the machine disconnected from the power supply. The dirty water tank drain hose is at the back of the machine on the right. To empty the tank: move the machine near a drain; detach the drain hose (fig. A, ref. 7) from its seat by holding it near the fixing spring and pulling horizontally; keeping the end of the hose as high as possible and remove the cap; lower the end of the hose gradually, controlling the intensity of the flow of water by adjusting the height from the ground; check the amount of dirt left in the dirty water tank and if necessary wash it out; ENGLISH 15
164 close the drain hose with the cap. Check that it is tightly closed and replace the hose in its housing. You are then ready to wash and dry again Draining the clean water! DANGER Use suitable personal protection devices. Drain the water with the machine disconnected from the power supply. To empty the tank: move the machine near a drain; remove the cap (fig. G, ref. 1); when the detergent tank is completely empty, replace the cap (fig. G, ref. 1). i INFORMATION The water and detergent solution can also be used to wash the dirty water tank. 7. PERIODS OF INACTIVITY If the machine is not used for some time, remove the squeegee and brush (or drive disk), wash them and put them away in a dry place (preferably in a bag or wrapped in plastic film) away from dust. Make sure the tanks are completely empty and perfectly clean. Disconnect the machine from the power supply (depending on the model, unplug from the mains or disconnect the connector from the battery wiring). Battery models: charge the batteries completely before storing them. During long periods of inactivity, you should charge the batteries regularly (at least once every two months) to keep them constantly at maximum charge. IMPORTANT If you do not charge the batteries regularly, they may be irrevocably damaged. 8. BATTERY MAINTENANCE AND CHARGING! DANGER Do not check the batteries by sparking. The batteries give off flammable fumes. Put out all fires and hot embers before checking or topping up the batteries. Perform the operations described above in a ventilated room. To avoid permanent damage to the batteries, do not run them down completely. Remember that when the corresponding red light (fig. C, ref. 2) flashes on the control panel, you must charge the batteries Charging procedure if the machine does not have an on-board charger, connect the external battery charger connector to the battery wiring connector. if the machine has an on-board battery charger, connect the on-board battery charger power cable (fig. H, ref. 1). 16 ENGLISH
165 IMPORTANT In the case of gel batteries, use a charger specific for gel batteries only. Charge the batteries as described in the battery charger manual; at the end of charging, disconnect the connectors; reconnect the battery wiring connector to the machine connector (machine with external battery charger). 9. MAINTENANCE INSTRUCTIONS! DANGER Never perform any maintenance operations without first unplugging the machine from the mains (cable version) or disconnecting the batteries. In cable models, the operator must be able to verify from any position that the machine remains unplugged from the mains socket while maintenance is being carried out. Maintenance on the electrical circuit and all other operations not explicitly described in this manual must be performed by specialised personnel only, in compliance with current safety legislation and as described in the maintenance manual Maintenance - General rules Performing regular maintenance according to the Manufacturer's instructions improves performance and extends the working life of the machine. When cleaning the machine, respect the following: avoid the use of high pressure washers. Water could penetrate the electrical compartment or motors leading to damage or the risk of short circuit; do not use steam to avoid the heat warping plastic parts; do not use hydrocarbons or solvents as they could damage the cowling and rubber parts Routine maintenance Float switch: cleaning Remove the dirty water tank cap and clean the float switch (fig. I, ref. 1). Make sure it runs freely on the pin Squeegee blades: replacing The squeegee blades collect the film of water and detergent from the floor and prepare the way for perfect drying. With time, the constant rubbing makes the edge of the blade in contact with the floor rounded and cracked, reducing the drying efficiency and requiring it to be replaced. Turning or replacing the blades: lower the squeegee by means of the squeegee lever (fig. D, ref. 2); tip the machine backwards and rest the handle on the floor. remove the suction hose sleeve (fig. E, ref. 4) from the squeegee; remove the squeegee (fig. E ref. 1) from its mount by completely unscrewing the two knobs (fig. E ref. 2) remove the blade retainers and blades by unscrewing the knobs (fig. E, ref. 5); reuse the same blade by reversing the edge in contact with the floor until both edges are worn out, or replace with a new blade, fitting it onto the screws on the body of the squeegee; ENGLISH 17
166 replace the two blade retainers and the blades and screw up the knobs unscrewed previously. Replace the squeegee in its support following the instructions in paragraph Fuses: replacement (battery models) (Fig. L) The fuse protecting the electrical circuit is located on the battery bridge. To replace it: make sure the dirty water tank is empty and empty if necessary; lift the dirty water tank to access the batteries; lift the fuse holder lid and remove the fuse; fit a new fuse and close the fuse holder cover. lower the dirty water tank. Fuse table: for the complete fuse table, see the spare parts catalogue Fuses: replacement (cable models) (fig. M) The fuses protecting the electrical components are on the electrical components box. To replace: make sure the dirty water tank is empty and empty if necessary; lift the dirty water tank to access the electrical components compartment; open the cover of the fuse holder on the electrical components box and remove the fuse; fit a new fuse and close the fuse holder cover. lower the dirty water tank. Fuse table: for the complete fuse table, see the spare parts catalogue. IMPORTANT Never use a fuse with a higher amperage than specified. If a fuse continues to blow, the fault in the wiring, boards (if present) or motors must be identified and repaired. Have the machine checked by qualified personnel Routine maintenance Daily operations After each day's work, proceed as follows: disconnect the machine from the power supply; empty the dirty water tank and clean if necessary; clean the squeegee blades and check for wear. If necessary, replace. check that the suction hole in the squeegee is not blocked, if necessary remove encrusted dirt; Battery model: charge the batteries according to the procedure described; Weekly operations clean the dirty water tank float switch and make sure it is working correctly; clean the suction hose; clean the dirty water tank and detergent tank; Battery model: check the level of battery electrolyte and top up with distilled water if necessary; Six monthly operations Have the electrical circuit checked by qualified personnel. 18 ENGLISH
167 10. TROUBLESHOOTING How to resolve possible problems [B]= battery machines [C]= cable machines Possible problems affecting the whole machine. PROBLEM CAUSE REMEDY The machine does not function [B]= battery connector disconnected [B]= the batteries are flat [B] [C]= fuse blown [B]= temperature power board > 85 C [B]= MOSFET temperature > 150 C [C]= the machine is not plugged into the mains socket [B]= connect the batteries to the machine [B]= charge the batteries. [B] [C]= replace the fuse [B]= stop the machine, leave to cool down for 45' [B]= stop the machine, leave to cool down for 45 [C]= plug into the mains socket The brush doesn t rotate the brush button LED is off press the brush button The brush motor has trouble in starting (cable models only) The machine does not clean evenly the brush lever has not been pressed [B] [C] the brush motor thermal cutout has tripped; the motor has overheated [B]= MOSFET temperature > 150 C [B]= excessive motor absorption >30 A for 1 second the power supply or motor thermal cutout connectors are disconnected [C]= fuse blown [B]= the batteries are flat the reduction unit is faulty the motor is faulty you are working with a dry brush on a very rough floor you are working with power cable extensions with an inadequate section, or the voltage is considerably lower than the rated value for the scrubber drier as shown on the rating plate (15% less) the motor is faulty the brush or disk is worn press the brush lever [B] [C] release the brush lever, press the brush button (LED off), leave the machine to cool down for at least 45' [B]= stop the machine, leave to cool down for 45 [B]= stop the machine and check the motor reconnect the power supply or motor thermal cutout connectors [B] [C]= replace fuse [B]= charge the batteries have the reduction unit replaced have the motor replaced open the detergent tap avoid the use of inappropriate extensions. Increase the section of the electric wires and locate sockets with a higher voltage have the motor replaced replace ENGLISH 19
168 No detergent is delivered the detergent button LED is off press the detergent button detergent tank empty fill the detergent tank the brush motor is off turn the motor on by operating the brush lever the hose delivering the unblock and open the circuit detergent to the brush is blocked the tap is dirty or faulty have the tap cleaned or replaced the solenoid valve is faulty replace the solenoid valve The detergent flow does not stop The suction motor does not start The squeegee does not clean or suction is ineffective the solenoid valve is faulty the suction button LED is off There is no power to the suction motor or the motor is faulty [B]= MOSFET temperature > 150 C [B]= excessive motor absorption >30 A for 2 second the edge of the rubber blades in contact with the floor is worn the squeegee or hose is blocked or damaged the float switch has tripped (dirty water tank), is clogged by dirt or broken the suction hose is blocked the suction hose is not connected to the squeegee or is damaged there is no power to the suction motor or the motor is faulty replace the solenoid valve press the suction button. check that the motor power connector is correctly connected to the main wiring; if it is correctly connected, have the motor replaced [B]= stop the machine, leave to cool down for 45 [B]= stop the machine and check the motor replace the rubber blade unblock and repair the damage empty the dirty water tank or reset the float switch unblock the hose connect or repair the hose see: "The suction motor does not start" The batteries do not provide the normal work time (battery models only) the battery poles and charging terminals are dirty and oxidised the electrolyte level is low the battery charger does not work or is unsuitable there are considerable differences in density between the various elements of the battery clean and grease the poles and terminals, charge the batteries top up all the elements with distilled water as described in the instructions see battery charger instructions replace the damaged battery 20 ENGLISH
169 The battery discharges too fast during use, even though it has been charged correctly and when tested with a hydrometer at the end of recharging, it turned out to be uniformly charged (battery models only) The battery discharges too fast during use, recharging with an electronic battery charger is too fast and after recharging the battery supplies the right voltage (about 2.14V for each element without load), but when tested with a hydrometer is found not to be uniformly charged (battery models only) At the end of charging with the electronic battery charger, the battery does not provide the correct voltage (about 2.14 V per element without load) and appears to be uniformly not charged when tested with a hydrometer (battery models only) the battery is new and does not deliver 100% of its expected capacity the machine is being used at maximum capacity for continuous periods and the working time is not sufficient the electrolyte has evaporated and does not cover the plates completely the battery supplied filled with acid by the Manufacturer has been stored for too long before being charged and used for the first time The battery has not been connected to the battery charger (for example, because the low voltage connector of the battery charger has been erroneously connected to the machine connector) the battery charger and power socket to which the battery is connected are not compatible the battery charger has not been installed correctly the battery charger is not working the battery must be "run-in" by performing charges and discharges to obtain maximum performance if possible, use batteries with a higher capacity or replace the batteries with others charged previously top up all elements with distilled water until the plates are covered then charge the battery if recharging with a normal battery charger is not effective, you must use a double recharging cycle: - charge it slowly over a 10 hour period at a current of 1/10 the nominal capacity for 5 hours (e.g. for a 100Ah(5) battery the current must be set at 10A, using a manual battery charger); - rest for one hour; - charge it with the normal battery charger. connect the battery charger to the battery connector check that the power supply characteristics indicated on the battery charger rating plate comply with those of the mains power supply taking the actual voltage available at the socket into account, make sure that the connections of the primary of the transformer inside the battery charger are correct (consult the battery charger manual) make sure there is voltage to the battery charger, that the fuses are not blown and that the current reaches the battery; try charging with another rectifier. If the battery charger is not working, contact the technical service centre and indicate the serial number of the battery charger ENGLISH 21
170 At the end of charging with the electronic battery charger, the battery does not provide the correct voltage (about 2.14 V per element without load) and only one or a few elements are found to be discharged when tested with a hydrometer (battery models only) The electrolyte in the battery is turbid (battery models only) one or more elements are damaged the battery has reached the end of the charging/discharging cycles declared by the manufacturer the battery has been charged with too high a current the battery has been charged beyond the limit suggested by the Manufacturer replace the damaged elements if possible. For 6 or 12 V single block batteries, replace the entire battery replace the battery replace the battery replace the battery 22 ENGLISH

171 SAFETY, OPERATION AND MAINTENANCE MANUAL HIGH, DUO & VARIABLE SPEED FLOOR MACHINE This unit is intended for commercial use. READ & FOLLOW ALL INSTRUCTIONS, WARNINGS & CAUTIONS BEFORE USING THIS FLOOR MACHINE This floor machine will afford you many years of trouble free operating satisfaction if it is given proper care. All parts have passed rigid quality control standards before being assembled to produce the finished product. Prior to packaging, the floor machine is again inspected for assurance of flawless assembly. This floor machine was protectively packed to prevent damage in shipment. We recommend that upon delivery, remove the unit from its carton and carefully inspect it for any possible damage in transit. If damage is discovered, immediately notify the transportation company that delivered your floor machine. As a shipper, we are unable to act upon any claim for concealed damage. You must originate any claim within 5 days of delivery. These instructions are for your protection and information. PLEASE READ CAREFUL- LY! Failure to follow these precautions could result in injury or discomfort. Treat this floor machine as you would any other high grade precision made product. Throwing, dropping, unreasonable bumping across thresholds and other misuse may result in a damaged unit and invalidate the warranty. PLEASE READ CAREFULLY BEFORE OPERATING SAVE THESE INSTRUCTIONS PAGE 1 High, Duo & Variable Speed FM Manual - PN Printed in USA 09/06/05
172 IMPORTANT SAFETY INSTRUCTIONS WARNING: To reduce the risk of fire, electric shock or injury; Read all instructions before using this floor machine. When using this floor machine, basic precautions should always be followed, including the following: 1) DO NOT leave this machine plugged in when not in use. Unplug from outlet when not in use and/or before servicing. 2) Electric shock could occur if exposed to rain. Store indoors. 3) This is NOT a toy. Close attention is necessary when used around or near children. 4) Use only as described in this manual. Use only manufacturer's recommended attachments. 5) DO NOT use with damaged cord plug. If the floor machine is not working as it should because it has been dropped, damaged, left outdoors, or dropped into water, contact the manufacturer or authorized service center. 6) DO NOT pull or carry by cord, use power cord as a handle, close a door on cord, or pull cord around sharp edges or corners. DO NOT run floor machine over the cord. Keep cord away from heated surfaces. 7) DO NOT handle the plug or operate with wet hands. 8) DO NOT put any object into the motor openings. 9) DO NOT unplug by pulling on cord. To unplug, grasp the plug, not the power cord. 10) Keep hair, loose clothing, fingers and all parts of body away from moving parts. 11) DO NOT operate where oxygen or anesthetics are used. 12) DO NOT use around flammable or combustible liquids such as gasoline or use in areas where they may be present. 13) DO NOT use an extension cord unless absolutely necessary. If an extension cord is used, then wire size must be #14 gauge or thicker and should not exceed 50 feet in length. Use only a 3 wire grounded extension cord to ensure grounding protection. 14) Replace damaged or worn parts immediately with genuine original equipment parts to maintain safety and protect your limited warranty. GROUNDING INSTRUCTIONS This floor machine must be grounded. If it should malfunction or breakdown, grounding provides a path of least resistance for electrical current to reduce the risk of electric shock. This machine is equipped with a cord having an equipment-grounded plug. The plug must be inserted into an appropriate outlet that is properly installed and grounded in accordance with all local codes and ordinances If repair or replacement of the cord or plug is necessary, DO NOT connect the grounding wire to either flat blade terminal. The wire with insulation having an outer surface that is green with or without yellow stripes is the grounding wire. GROUNDING METHODS DANGER: Improper use of the grounding plug can result in a risk of electrical shock. This floor machine is for use on a nominal 120 volt circuit, and has a grounding plug that looks like the plug illustrated in (Fig A). A temporary adaptor that looks like the adaptor illustrated in (Fig B & C) may be used to connect the plug to a 2-pole receptacle as shown in (Fig A) if a properly grounded outlet is not available. The temporary adaptor should be used only until a properly grounded outlet (Fig A) can be installed by a qualified electrician. The green color rigid ear, lug, or like extending from the adaptor must be connected to a permanent ground such as a properly grounded outlet box cover. Whenever the adaptor is used, it must be held in place by the metal screw (Fig C). WARNING: Improper connection of the equipment-grounding conductor can result in a risk of electrical shock. Check with a qualified electrician or service person if you are in doubt as to whether the outlet is properly grounded. DO NOT modify the plug provided with the burnisher. If it will not fit the outlet, have a proper outlet installed by a qualified electrician. NOTE: In Canada, the use of a temporary adaptor is not permitted by the Canadian Electrical Code. PAGE 2
173 The machine is designed for may different floor cleaning applications. It is important to select the correct brush or floor pad depending upon the type of cleaning operation you are doing. When using floor pads, to achieve the best results use clean pads and change them as they load up. The brush/pad surface should by flat and level on the floor. CAUTION: Brush/Pad Installation: 1) Unplug the power cable and LOCK handle in upright position. 2) Tilt the machine back until the handle is laying on the floor and underside of the machine is fully exposed. 3) Holding the pad driver/brush in both hands straddling the motor with your back to the handle, bend over and fit the three slots of the clutch plate over the three lugs of the drive plate. 4) Turn brush counterclockwise as far as it will go. It is now seated and ready for operation Brush/Pad Removal: Disengage clutch plate slots from drive plate lugs by turning clockwise. DO NOT leave a plugged in floor machine unattended. Always unplug machine before leaving to prevent accidental startup. BRUSH/ PAD DRIVER INSTALLATION The handle adjustment is controlled by a clamping lever located at the rear of the machine at the base of the handle tube. 1) To release, pull up on the clamping lever and pull back on the handle to a comfortable operating position. 2) Step down firmly on the clamping lever and lock handle place. Note: When transporting or attaching pad driver/brush, handle must LOCKED in the upright position. HANDLE ADJUSTMENT Never turn this floor machine ON with handle locked in the upright position. This floor machine is designed to move from side to side. Begin operating this machine at the closest possible point to an electrical outlet and work away from the outlet. This will prevent running over the electrical cord. Setup for operation: 1) Install pad driver/brush and plug in power cable. 2) Adjust handle to a comfortable operating position and lock clamping lever in place. 3) Place your hands on the handle grips and squeeze trigger locks beneath grips to activate the motor and start the brush operating. To begin operating: 1) To move unit right, slowly apply slight upward pressure. As the handle is raised higher, the faster it will move to the right. 2) To move unit left, slowly apply slight pressure downward. As the handle is lower, the faster it will move to the left. 3) To move unit forward or backward, keep brush/pad surface flat on the floor and push or pull machine in the direction required. 4) To stop the machine, release triggers. OPERATING INSTRUCTIONS CAUTION: DO NOT operate this machine without brush or pad driver and pad in place. Never attempt to lock brush/pad driver on floor machine by positioning (JUMPING) running floor machine on unattached brush/pad drive. PAGE 3
 After each use, wipe off all of polished and painted areas with a clean cloth. 2) Always remove the pad driver/brush when the machine is not in operation, and hang on a peg or lay flat on its back.")
174 FLOOR MACHINE MAINTENANCE CAUTION: Disconnect plug from wall before leaving the floor machine unattended to prevent accidental startup. 1) After each use, wipe off all of polished and painted areas with a clean cloth. 2) Always remove the pad driver/brush when the machine is not in operation, and hang on a peg or lay flat on its back. 3) NEVER store pad driver/brush with the bristles down. This will ruin the balance of the brush and cause machine to wobble. 4) With floor machine unplugged, check power cord for any breaks in the wire. Breaks will most likely occur near the plug or switch. Any breaks should be repaired or replaced immediately. 6) If the machine wobbles or vibrates: A) Adjust by turning pad or brush 1 /3 turn, then reinstall on machine. B) Inspect the pad driver/brush for warpage or out of round. Lay floor machine down on handle with pad driver/brush in place. With machine running, observe if pad driver/brush appears to wobble or is out of round. Replace if this problem occurs. You are not required to lubricate this machine. Lubricant has been applied and permanently sealed at the factory. 5) When machine is not in use, remove pad driver/brush, wrap power cord around cord hooks and store in a dry area. TROUBLE SHOOTING GUIDE ADDRESS: 777 South Street Newburgh, N Y TEL: (800) (845) FAX: (800) (845) INTERNET ADDRESS: techsupport@mastercraftusa.com PROBLEM: Motor won t run. CAUSE SOLUTION 1. Blown fuse or tripped circuit 1. Replace fuse or reset circuit breaker breaker. at wall panel. 2. Defective switch. 2. Replace switch. 3. Defective power cord. 3. Replace power cord. PROBLEM: Floor machine runs slow. CAUSE SOLUTION 1. Low line voltage. 1. If voltage is under recommended minimum, check size of wiring from the main switch. If okay, contact the power company. 2. Pad loaded, heavily soiled. 2. Clean or replace pad. PROBLEM: Noisy machine. CAUSE SOLUTION 1. Defective motor or gear box. 1. Contact the manufacturer or authorized service center. WARNING: Always disconnect power cable from electrical outlet when working on the machine. PAGE 4 High, Duo & Variable Speed FM Manual - PN Printed in USA 09/06/05
175 The Dual Speed Floor Machine operates at 190 RPM for polishing or scrubbing and at 320 RPM for spray buffing floors. It is designed to be used with a pad driver and pad, polish brush or scrub brush on bare floors. DUAL SPEED FLOOR MACHINE OPERATION INSTRUCTIONS ( RPM) OPERATION INSTRUCTIONS Begin operating the Dual Speed Floor Machine at the closest point to your electrical outlet and work away from the outlet. This will prevent running over the electric cord. Always remove brush or pad driver when machine is not in operation. Hung brush on a wall peg or laid flat on its back. NEVER store the brush with bristles down. This will ruin the balance of the brush which will cause machine to wobble. If machine wobbles, vibrates or pulls, follow theses instructions. A. Never let machine set on brush, pad driver or insta-lock when not in use. A few minutes with machine setting idle on brush will cause bristles to lose their normal shape, causing uneven operation. B. If wobble continues, adjust by turning brush 1 /3 turn and reinstall on machine. Inspect brush for warped or out of round block: A. Lay the machine down on the handle with brush in place. With unit running, observe if brush appears to wobble or is out of round. This is the main reason for wobble or vibration and if it occurs brush must be replaced. 1) After each use, wipe off all of polished and painted areas with a clean cloth. 2) Check cord for any breaks in the wire. Breaks will most likely occur near the plug or switch. Any breaks should be repaired or replaced immediately. 3) When machine is not in use, remove brush or pad driver, wrap power cord around cord hooks and store machine in a dry area. MAINTENANCE Part No Dual Speed Operating Instructions - Printed in USA 08/02/04

176 1000 / 1500 / 2000 RPM BURNISHERS SAFETY, OPERATION & MAINTENANCE MANUAL READ & FOLLOW ALL INSTRUCTIONS, WARNINGS & CAUTIONS BEFORE USING THIS BURNISHER This burnisher will afford you many years of trouble free operating satisfaction if it is given proper care. All parts have passed rigid quality control standards before being assembled to produce the finished product. Prior to packaging, the units again inspected for assurance of flawless assembly. Your burnisher was protectively packed to prevent damage in shipment. We recommend that upon delivery, remove the unit from its carton and carefully inspect it for any possible damage in transit. If damage is discovered, immediately notify the transportation company that delivered your burnisher. As a shipper, we are unable to act upon any claim for concealed damage. You must originate any claim within 5 days of delivery. These instructions are for your protection and information. PLEASE READ CAREFUL- LY! Failure to follow these precautions could result in injury or discomfort. READ ALL INSTRUCTIONS BEFORE OPERATING SAVE THESE INSTRUCTIONS PAGE 1 Burnisher Manual - PN Printed in USA 05/12/06
177 IMPORTANT SAFETY INSTRUCTIONS WARNING: To reduce the risk of fire, electric shock or injury: When using an electric burnisher, basic precautions should always be following, including the following: 1) DO NOT leave burnisher plugged in when not in use. Unplug from outlet when not in use and before servicing. 2) Electric shock could occur if exposed to rain. Store indoors. 3) This is NOT a toy. Close attention is necessary when used around or near children. 4) Use only as described in this manual. Use only manufacturer's recommended attachments. 5) DO NOT use with damaged cord plug. When burnisher is not working as it should because it has been dropped, damaged, left outdoors, or dropped into water, contact the manufacturer or authorized service center. 6) DO NOT pull or carry by the cord, use power cord as a handle, close a door on cord, or pull cord around sharp edges or corners. DO NOT run burnisher over cord. Keep cord away from heated surfaces. 7) DO NOT handle the burnisher plug with wet hands. 8) DO NOT unplug by pulling on the cord. To unplug, grasp the plug, not the power cord. 9) DO NOT put any objects into motor openings. 10) Keep hair, loose clothing, fingers and all parts of body away from moving parts. 11) DO NOT operate where oxygen or anesthetics are used. 12) DO NOT use around flammable or combustible liquids such as gasoline or use in areas where they may be present. 13) DO NOT use an extension cord unless absolutely necessary. If an extension cord is used, then wire size must be #14 gauge or thicker and should not exceed 50 feet in length. Extension cord must be three-wire type to insure grounding protection. 14) Replace damaged or worn parts immediately with genuine original equipment parts to maintain safety and to protect your limited warranty. GROUNDING SAFETY INSTRUCTIONS Improper use of the grounding plug can result in a risk of electric shock. This burnisher must be grounded. If it should malfunction or breakdown, grounding provides a path of least resistance for electrical current to reduce the risk of electric shock. The burnisher is equipped with a cord having an equipment-grounded plug. The plug must be inserted into an appropriate outlet that is properly installed and grounded in accordance with all local codes and ordinances DANGER: If repair or replacement of the cord or plug is necessary, DO NOT connect the grounding wire to either flat blade terminal. The wire with insulation having an outer surface that is green with or without yellow stripes is the grounding wire. PAGE 2
178 GROUNDING METHODS This burnisher is for use on a nominal 120 volt circuit, and has a grounding plug that looks like the plug illustrated in (Fig A). A temporary adaptor that looks like the adaptor illustrated in (Fig B & C) may be used to connect the plug to a 2-pole receptacle as shown in (Fig A) if a properly grounded outlet is not available. The temporary adaptor should be used only until a properly grounded outlet (Fig A)can be installed by a qualified electrician. The green color rigid ear, lug, or the like extending from the adaptor must be connected to a permanent ground such as a properly grounded outlet box cover. Whenever the adaptor is used, it must be held in place by the metal screw (Fig C). NOTE: In Canada, the use of a temporary adaptor is not permitted by the Canadian Electrical Code. WARNING: Improper connection of the equipment-grounding conductor can result in a risk of electrical shock. Check with a qualified electrician or service person if you are in doubt as to whether the outlet is properly grounded. DO NOT modify the plug provided with the burnisher. If it will not fit the outlet, have a proper outlet installed by a qualified electrician. WARNING: To avoid fire, DO NO use with a flammable or combustible liquid to clean a floor. OPERATING INSTRUCTIONS This burnisher can be used in conjunction with any of the ultra high speed chemical systems. It is mandatory, however, that the floor be prepared as directed by the chemical manufacturer. This will eliminate a possibility of damage to floor due to the burnishers high speed. The burnisher is pre-set at the factory for use with a 1" thick buffing pad (1 shpd w/unit). The rougher hair surface is preferred for high luster floor finishing. 1. Before operating this burnisher, check to see that the buffing pad is properly centered on driver and that center pad lock is tight on pad. 2. When operating the burnisher it MUST be kept moving, as holding machine stationary while running will result in damage to floor and floor finish. 3. Begin operating the burnisher at the closest point to your electrical outlet and work away from the outlet. This will prevent running over the electric cord. 4. Never leave burnisher resting on buffing pad for an extended period of time. This will cause buffing pad to lose its normal shape, causing wobbling or vibration and pad must be replaced. Also, replace pad if glazed, clogged, torn or shredded. 5. The rear wheels on the 1500 RPM and 2000 RPM burnishers are factory-set for low amp rating and high luster burnishing with buffing pad. See instruction sheet. 6. A carbon brush wear indicator warning light is located on the motor canopy. When lit, motor carbon brushes must be replaced within 20 hours running time to prevent damage to motor. See instruction sheet. CAUTION: This burnisher is NOT a low speed floor machine. DO NOT use the burnisher for stripping or sanding of floors. PAGE 3
179 CARE AND MAINTENANCE This burnisher requires limited maintenance for proper operation and years of service. 1) After each use, wipe off all of the polished and painted areas with a clean cloth. 2) Check all bolts and screws at the switch box, handle and wheels. Tighten if they are loose and replace any that are broken. 3) Unplug burnisher and check power cord for and breaks in the wire. Breaks will most likely occur near the plug or switch. Any breaks should be repaired or replaced immediately. 4) When the burnisher is not in use, remove buffing pad, unplug power cord and wrap it around the cord hooks. Store in a dry area. TROUBLE SHOOTING GUIDE PROBLEM: Not polishing floor to high luster. POSSIBLE CAUSE: POSSIBLE SOLUTION: 1) Improperly prepared floor or 1) Refinish floor. floor needs refinishing. 2) Buffing pad is flattened from 2) Replace with new 1" buffing pad. unit sitting on pad. 3) Hard glazed surface on pad. 3) Replace with new 1" buffing pad. 4) Pad used on wet surface or 4) Replace with new 1" buffing pad. clogged with dirt. 5) Pad too thin. 5) Replace with new 1" buffing pad. 6) Burnisher out of adjustment, 6) Have a certified technician adjust rear wheels. rear wheels shifted. PROBLEM: pulling to one side or skipping sideways. POSSIBLE CAUSE: POSSIBLE SOLUTION: 1) Buffing pad too thick for 1) Replace with 1" buffing pad. machine setting. 2) Rear wheels are out of adjustment. 2) Have a certified technician adjust rear wheels. PROBLEM: Machine not running. POSSIBLE CAUSE: POSSIBLE SOLUTION 1) Defective power cord. 1) Contact Manufacturer or Service Center. 2) Defective switch. 2) Contact Manufacturer or Service Center. 3) Defective motor. 3) Contact Manufacturer or Service Center. 4) Motor unplugged from handle cord. 4) Plug motor lead into handle cord receptacles. 777 South Street, P.O. Box 2310, Newburgh, NY TEL: (800) (845) FAX: (800) (845) Internet Access: sales@mastercraftusa.com Burnisher Manual - Part No Rev A - Printed in USA 05/12/06 PAGE 4

180 The 1500 RPM burnisher should only be used for high luster burnishing or polishing. It can be used in conjunction with any of the ultra high speed chemical systems. It is mandatory, however, that the floor be prepared as directed by the chemical manufacturer. This will eliminate a possibility of damage to floor due to the high speed of the burnisher RPM BURNISHER OPERATING INSTRUCTIONS This unit is intended for commercial use. Begin operating this burnisher at the closest point to your electrical outlet, working away from the outlet. This will prevent running over the electric cord. Operate the burnisher in a straight-line path and avoid continuous operation in one spot. DO NOT hold burnisher stationary while it is running, this will result in damage to floor and floor finish. If burnisher wobbles, vibrates or pulls, follow these instructions: 1) This burnisher is factory adjusted and set to operate between 13.2 and 14 amps. 2) Never leave burnisher resting on floor pad overnight. This will cause the pad to lose its normal shape, causing wobbling and vibration. Check pad for unevenness and change is necessary. 3) Before turning burnisher on, run tip of finger between outside of pad and floor. The outer ring face should be in full contact with the floor in order for high speed buffing to be most effective. If necessary change pad. 4) If steps 2 and 3 do not correct the problem, a certified technician should reset rear wheels, of the burnisher as follows: Adjusting knobs operate individually. To raise or lower the rear portion of the large wheels, untighten set screw on the under side of each knob using a 5/32 allen wrench. The body is raised when knob is turned to the right and lowered when knob is turned to the left. OPERATION INSTRUCTIONS If the Burnisher Has: Forward Pull: Raise left side only Backward Push: Raise right side only Right Pull: Lower Both sides equally Left Pull: Raise both sides equally After adjustments have been made the technician must check the amp draw keeping it within the amp, factory specifications. Failure to do so may cause the unit to draw excessive current and damage the burnisher. Retighten both set screws. This burnisher is equipped with a carbon brush wear indicator warning light, located in the motor canopy facing the operator. The instructions on the top surface of the motor canopy read as follows: When the lamp is lit, the Motor Carbon Brushes must be replaced within 20 hours of service to prevent damage to the motor. Carbon Brushes Part Nos: Imperial Motor: Part No (4) Ohio Motor*: Part No (3) & (1) *Burnishers with Ohio Motors have "X" after the serial number. Note: After replacing the second set of carbon brushes, the commutator of the armature may need to be undercut and the mica slotted. This should be done by an experienced motor repair shop. CARBON BRUSH WEAR WARNING LIGHT PAGE 1 Part No Rev D- Printed in USA 05/12/06
181 HANDLE ASSEMBLY INSTRUCTIONS This burnishers is shipped without the handle attached to the chassis. Handle hardware kit (#372811) contains the necessary parts to attach the handle to the burnisher. 1) Remove burnisher chassis and handle assembly for the carton. 2) Using screws # and nuts #354791, insert one screw into each hole and secure with nuts on opposite side of handle tube. DO NOT over-tighten nuts, this will deform the handle tube. 3) Slide the handle assembly over handle "T" on the chassis making sure the line cord is towards back of burnisher and loosen handle clamp. 4) Remove speed- pin (A) from clevis. Line up strut with clevis and insert speed-pin (A) thru clevis and strut. FLOOR PAD INSTALLATION The floor pad packed with this burnisher MUST BE attached to pad driver before operating the unit. DO NOT OPERATE the burnisher pad driver without the pad securely in place to avoid damage to the floor and/or burnisher. To Install Pad: 1) Remove center cut-out from the floor pad 2) Tilt burnisher back on rear wheel and unscrew center lock clamp pad retainer by turning counterclockwise in "OPEN" position. 3) Center pad on center lock clamp or collar with hair side down for optimum finish. 4) Secure the pad to pad driver by turning the center lock clamp clockwise in the "CLOSE" position until it is locked in position. CARE & MAINTENANCE 1) After each use, wipe off all polished and painted areas with a clean cloth. 2) Check all bolts and screws at the switch box, handle and wheels. Tighten if they are loose and replace any that are broken. PAGE 2 3) Unplug burnisher and check power cord for any breaks in the wire. Breaks will most likely occur near the plug or switch. Any breaks should be repaired or replaced immediately. 4) When the burnisher is not in use, remove buffing pad, unplug power cord and wrap it around the cord hook. Store in a dry area.
182 BEXT Pro Operator's Manual / Manuel d'utilisation / Libro de Instrucciones Models: (100), (100H), (400H) READ THIS BOOK LEA ESTE MANUAL LISEZ CE MANUEL EN ES FR English (2, 5, 10, 12, 14, 16, 18) Español (3, 6, 11, 13, 15, 17, 19) Français (4, 8, 11, 13, 15, 17, 19) This book has important information for the use and safe operation of this machine. Failure to read this book prior to operating or attempting any service or maintenance procedure to your Clarke American Sanders machine could result in injury to you or to other personnel; damage to the machine or to other property could occur as well. You must have training in the operation of this machine before using it. If your operator(s) cannot read this manual, have it explained fully before attempting to operate this machine. All directions given in this book are as seen from the operator s position at the rear of the machine. Form No /11 Clarke
183 ENGLISH TABLE OF CONTENTS INSTRUCTIONS FOR USE Page REVISED DATE Introduction... A-3 Parts and Service... A-3 Nameplate... A-3 Uncrating the Machine... A-3 Cautions and Warnings... A-4 Grounding Instructions... A-5 Know Your Machine... A-6 A-7 Know Your Switch Plate... A-8 Preparing the Machine for Use... A-9 Operating the Machine... A-10 A-11 After Use After Using the Machine... A-12 Maintenance Maintenance Schedule... A-12 Power Cord Maintenance... A-12 Troubleshooting... A-13 Technical Specifications... A-13 Material Composition and Recyclability... A-13 A - 2 BEXT Pro 100, /11
184 REVISED DATE INSTRUCTIONS FOR USE INTRODUCTION This manual will help you get the most from your Clarke carpet extractor. Read it thoroughly before operating the machine. ENGLISH This product is intended for commercial use only. PARTS AND SERVICE Repairs, when required, should be performed by your Authorized Clarke Service Center, who employs factory trained service personnel, and maintains an inventory of Clarke original replacement parts and accessories. Call the CLARKE DEALER named below for repairs or service. Please specify the Model and Serial Number when discussing your machine. MODIFICATIONS Modifications and additions to the cleaning machine which affect capacity and safe operation shall not be performed by the customer or user without prior written approval from Nilfisk-Advance Inc. Unapproved modifications will void the machine warranty and make the customer liable for any resulting accidents. NAMEPLATE The Model Number and Serial Number of your machine are shown on the Nameplate, located at the rear of the machine on the base. This information is needed when ordering repair parts for the machine. Use the space below to note the Model Number and Serial Number of your machine for future reference. MODEL SERIAL NUMBER UNCRATING THE MACHINE When the machine is delivered, carefully inspect the shipping carton and the machine for damage. If damage is evident, save the shipping carton so that it can be inspected. Contact the Clarke Customer Care Department immediately to file a freight damage claim. WARNING! The Products sold with this Manual contain or may contain chemicals that are known to certain governments (such as the State of California, as identified in its Proposition 65 Regulatory Warning Law) to cause cancer, birth defects or other reproductive harm. In certain locations (including the State of California) purchasers of these Products that place them in service at an employment job site or a publicly accessible space are required by regulation to make certain notices, warnings or disclosures regarding the chemicals that are or may be contained in the Products at or about such work sites. It is the purchaser s responsibility to know the content of, and to comply with, any laws and regulations relating to the use of these Products in such environments. The Manufacturer disclaims any responsibility to advise purchasers of any specific requirements that may be applicable to the use of the Products in such environments. 8/ BEXT Pro 100, 400 A - 3

185 ENGLISH INSTRUCTIONS FOR USE IMPORTANT SAFETY INSTRUCTIONS REVISED DATE This machine is only suitable for commercial use, for example in hotels, schools, hospitals, factories, shops and offices other than normal residential housekeeping purposes. When using any electrical appliance, basic precautions should always be followed, including the following: NOTE: Read all instructions before using this machine. WARNING! To reduce the risk of fire, electric shock, or injury: Do not leave the machine unattended when it is plugged in. Unplug the unit from the outlet when; not in use, before cleaning the machine, prior to servicing or performing any maintenance on the machine, and when replacing parts or converting the machine to another function. To avoid electric shock, do not expose to rain or snow. Store and use machine indoors only, store in a heated location. Do not let the machine or wand freeze. Do not allow to be used as a toy. Close attention is necessary when used near children. High pressure cleaners shall not be used by children or untrained personnel. Use only as described in this manual. Use only the manufacturer s recommended attachments. Never add water over 130º F/54º C to the solution tank. Always use a defoamer when foaming occurs to prevent vacuum motor damage. Do not let the pump run dry. Do not use with damaged cord or plug. If the machine is not working as it should, has been dropped, damaged, left outdoors or dropped into water, return it to a service center. Turn off all controls before unplugging. Do not pull by the cord, use the cord as a handle, close a door on the cord, or pull the cord around sharp edges or corners. Do not run the machine over the cord. Keep the cord away from heated surfaces. To unplug, grasp the plug, not the cord. Do not handle the plug, the cord or the machine with wet hands. Extension cords must be 12/3 and no longer than 50 feet. Replace the cord or unplug immediately if the ground prong becomes damaged. Connect to a properly grounded outlet only. Do not put any object into openings. Do not use with any opening blocked; keep free of dust, lint, hair, and anything that may reduce air flow. Keep loose clothing, hair, fingers, and all parts of body away from openings and moving parts. Do not pick up anything that is burning or smoking, such as cigarettes, matches, or hot ashes, or any health endangering dusts. Do not use to pick up flammable or combustible liquids such as gasoline or use in areas where they may be present. Risk of explosion Do not spray flammable liquids. Use extra care when cleaning on stairs. Wear gloves or use rags when removing quick disconnects to prevent burns. Liquid ejected at the spray nozzle could be dangerous as a result of its temperature, pressure, or chemical content. High pressure jets can be dangerous if subject to misuse. The jet must not be directed at persons, live electrical equipment or the machine itself. Do not use the machine within range of persons unless they wear protective clothing. Do not direct the jet against yourself or others in order to clean clothes or foot-wear. High pressure hoses, fittings and couplings are important for the safety of the machine. Use only hoses, fittings and couplings recommended by the manufacturer. To ensure machine safety, use only original spare parts from the manufacturer or approved by the manufacturer. Water that has flown through backflow preventers is considered to be non-potable. Do not use the machine if a supply cord or important parts of the machine are damaged, e.g. safety devices, high pressure hoses, trigger gun. A - 4 BEXT Pro 100, /11
186 REVISED DATE INSTRUCTIONS FOR USE ENGLISH 120VAC GROUNDING INSTRUCTIONS This appliance must be grounded. If it should electrically malfunction, grounding provides a path of least resistance for electric current to reduce the risk of electric shock. This appliance is equipped with a cord having an equipment-grounding conductor and grounding plug. The plug must be plugged into an appropriate outlet that is properly installed and grounded in accordance with all local codes and ordinances. DANGER! Improper connection of the equipment-grounding conductor can result in a risk of electric shock. Check with a qualified electrician or service person if you are in doubt as to whether the outlet is properly grounded. Do not modify the plug provided with the appliance. If it will not fit the outlet, have a proper outlet installed by a qualified electrician. This appliance is for use on a nominal 120-volt circuit, and has a grounding plug that looks like the plug illustrated in Figure 1 below. A temporary adapter illustrated in Figures 2 and 3 may be used to connect this plug to a 2-pole receptacle as shown in Figure 2 if a properly grounded outlet is not available. The temporary adapter should be used only until a properly grounded outlet (Figure 1) can be installed by a qualified electrician. The green-colored rigid ear, tab, or the like extending from the adapter must be connected to a permanent ground such as a properly grounded outlet box cover. Whenever the adapter is used, it must be held in place by a metal screw. Grounding adapters are not approved for use in Canada. Replace the plug if the grounding pin is damaged or broken. The Green (or Green/Yellow) wire in the cord is the grounding wire. When replacing a plug, this wire must be attached to the grounding pin only. Extension cords connected to this machine should be 12 gauge, three-wire cords with three-prong plugs and outlets. DO NOT use extension cords more than 50 feet (15 m) long. WARNING! If an extension cord is used, the plug and socket must be of watertight construction. Inadequate extension cords can be dangerous. PLEASE NOTE: FOR NORTH AMERICA ONLY 8/ BEXT Pro 100, 400 A - 5
187 ENGLISH KNOW YOUR MACHINE 1 Recovery Tank Lid 2 Vacuum Hose Barb 3 Recovery Tank Drain (gate valve) 4 Clamp 5 Solution Hose Quick Disconnect 6 Castor 7 Recovery Tank Shutoff Float INSTRUCTIONS FOR USE REVISED DATE A - 6 BEXT Pro 100, /11
188 REVISED DATE KNOW YOUR MACHINE (CONTINUED) 8 Solution Tank Fill Opening 9 Switch Plate 10 Filter Bag 11 Wheel 12 Pigtail Power Cord (Yellow) 13 Pressure Adjustment Knob (400H only) 14 Solution Filter 15 Pressure Gauge (400H only) 16 Cord Retainer Straps (two) 17 Hour Meter (Optional) 18 Pigtail Power Cord (Red) (100H & 400H only) INSTRUCTIONS FOR USE ENGLISH / BEXT Pro 100, 400 A - 7
189 ENGLISH KNOW YOUR SWITCHPLATE A B C D E INSTRUCTIONS FOR USE REVISED DATE Model - This label identifies the model of your machine. Vacuum Switch - This push-button switch turns on the vacuum. The switch will illuminate when it is on. Pump Switch - The pump switch will illuminate when it is activated, and it will turn on the pump. Heat Switch - The heat switch will illuminate when it is activated and will turn on the heater. NOTE: if the green, two-circuit indicator light is not turned on, you may have both power cords on the same circuit and this can trip the circuit breaker in the wall. Circuit Indicator (green) - When this light is on, it indicates that the two cords are plugged into separate circuits. CAUTION! The circuit breaker in the wall panel can trip if both cords are on the same circuit. A B C D E 100H & 400H A B C 100 A - 8 BEXT Pro 100, /11
190 REVISED DATE INSTRUCTIONS FOR USE ENGLISH PREPARING THE MACHINE FOR USE 1 Inspect the machine, hoses, and cleaning tools for cleanliness and completeness. 2 Screw the Recovery Tank Lid (1) closed. Ensure the Recovery Tank Drain (3) is closed tightly. 3 Pre-spray spots and heavy traffic areas before extracting with the detergent of your choice. Mix the pre-spray according to the detergent manufacturer s directions. 4 Fill the solution tank (8) with clear water (13 gal. / 49 L capacity). If desired, add a detergent or rinse of your choice (we recommend a CRI approved detergent). If you choose to add a detergent to the solution tank, be sure to mix well, and always follow the use & dilution instructions on the detergent label. Only use a detergent with a ph between 5 and 10. Although this machine is designed to supply instant hot water, the addition of warm water to the solution tank would increase heater efficiency. Never use water above 130º F/54º C in the solution tank. CAUTION! Use low-sudsing, liquid detergents designed for carpet extraction. 8/ BEXT Pro 100, 400 A - 9
191 ENGLISH INSTRUCTIONS FOR USE REVISED DATE OPERATING THE MACHINE 1 Follow the instructions in the Preparing the Machine for Use section of this manual. 2 Turn off all the switches. Plug the power cords into properly grounded outlets. Do not connect both cords to the same outlet; the green, Circuit Indicator Light (E) on the switch plate should light up. If the indicator light does not come on, try different outlets until it does. Do not connect both cords to the same outlet. 3 Attach the priming hose to the machine and place the open end into the solution tank. 4 Turn ON the solution pump (C) and let it run until the pump is fully primed (approximately 30 seconds to 1 minute). Once the pump is primed, turn off the pump and remove the priming hose. NOTE: If priming is difficult, place the open end of the priming hose into the Vacuum inlet hose barb, and turn the vacuum on. Use your hand to block the open area in the hose barb. This will allow the pump and the vacuum to work together to get the water moving. 5 Connect a solution line to the Solution Hose Quick Disconnect (5). Attach the other end of the solution line to the cleaning tool. 6 Connect a vacuum hose to the Vacuum Hose Barb (2). Attach the other end of the vacuum hose to the cleaning tool. 7 To use heated water for cleaning, press the Heat Switch (D) on. Wait two minutes for the heat exchanger to reach temperature. 8 Press the Pump Switch (C) to ON (I). 9 Press the Vacuum Switch (B) to ON (I). 10 Spray through your tool a few times to fill the lines with solution. Begin cleaning. 11 Note for 400H models only: To adjust the solution spray pressure; rotate the Pressure Adjustment Knob (13) clockwise to increase pressure and counterclockwise to decrease pressure. The pump spraying pressure will be observable at the Pressure Gauge (15) while spraying. Make sure the cleaning tool is spraying when adjusting the pressure, otherwise the pressure reading will be inaccurate. 12 Watch the fluid entering the Recovery Tank Lid (1). If there is a large amount of suds in the recovery tank, add a defoamer chemical to the recovery tank. CAUTION! Empty the recovery tank before the fluid or foam enters the vacuum motor. If foam or liquid escapes from the machine, switch off immediately. CAUTION! Always make sure the float is clean and travels freely before turning on the machine. A float that is stuck will cause the vacuum motor to suck in water, resulting in vac motor damage. 13 The recovery tank has a Recovery Tank Shutoff Float (7) to block the vacuum system when the recovery tank is full. You can tell when the float closes by the sudden change in the sound of the vacuum motor. When the float closes, the recovery tank must be emptied. The machine can continue to dispense solution, but will not pick up water with the float closed. 14 Monitor the water level in the solution tank. Do not let the pump run dry. When the solution tank gets low, turn off the pump and the vacuum motor, refill the solution tank with water and the proper ratio of cleaning detergent. Empty the recovery tank and continue cleaning. 15 When the operator has completed the job; vacuum all unused solution from the solution tank into the recovery tank, turn off the pump, vacuum motor and heat exchanger. Unplug the machine. 16 Push the machine to a designated waste water DISPOSAL SITE and empty the recovery tank. Drain the recovery tank by opening the drain gate (3) over a drain or a bucket. 17 Follow the instructions in the After Using the Machine section of this manual. A - 10 BEXT Pro 100, /11
192 REVISED DATE OPERATING THE MACHINE INSTRUCTIONS FOR USE ENGLISH B C D E / BEXT Pro 100, 400 A - 11
193 ENGLISH INSTRUCTIONS FOR USE REVISED DATE AFTER USING THE MACHINE 1 To empty the solution tank, open Solution Tank Fill Opening (8) and vacuum out all unused solution into the recovery tank using the vacuum hose. Rinse the tank with clean water. 2 Turn all the Power Switches (B, C & D) to OFF (O). Unplug the Power Cords (12). Coil the cords and secure them to the rear of the machine using the two Cord Retainer Straps (14). 3 To empty the recovery tank, move the machine to a designated waste water DISPOSAL SITE and open the recovery drain gate (3). Rinse the tank with clean water. 4 Disconnect the solution and vacuum hoses from the machine, at the Solution Hose Quick Disconnect (5) and Vacuum Hose Barb (2) respectively. Flush the vacuum hose with warm water to wash any debris out of the vacuum hose and cleaning tool. Inspect them for damage.5 Wipe the machine with a damp cloth. Do not use abrasive chemicals or solvents. 6 Perform any required maintenance before storage. MAINTENANCE SCHEDULE MAINTENANCE ITEM Daily Weekly Monthly Yearly Check / Clean Tanks & Hoses X Check / Clean Recovery Tank Shut-Off Float X Clean Extraction Wand/Tool X Inspect & Clean Solution Filter X Use a flushing compound (descale machine) X *Check Carbon Brushes X * Have a Clarke service technician check the vacuum motor carbon brushes once a year or after 300 operating hours. Check the pump motor carbon brushes every 500 hours or once a year. IMPORTANT! Motor damage resulting from failure to service the carbon brushes is not covered under warranty. See the Limited Warranty Statement. 7 Store the machine indoors in a clean, dry place with the recovery tank lid open. Keep from freezing. 8 Lubricate the wheels, castors and quick disconnects with an all-purpose silicone spray. 9 Once a month, run a flushing compound (a mild acid descaler) through the machine to break up any mineral or chemical build-up that may have formed. Rinse the descaler out of the system with a few gallons of clear water. POWER CORD MAINTENANCE Once a week (or more often if necessary), check the power cords for cracked or damaged insulation, exposed wires in the cord or plug, and damaged or missing ground pin. Repair or replace damaged cord or plug immediately. A - 12 BEXT Pro 100, /11
194 REVISED DATE TROUBLESHOOTING: INSTRUCTIONS FOR USE ENGLISH IF THIS OCCURS NO SPRAY PUMP DOES NOT RUN LOW SUCTION NO SUCTION LOW HEAT NO HEAT CHECK THIS Solution tank is empty, or filter is plugged. Clogged spray tip(s). Pump not running or not primed. Valve on wand not operating. Solution hose not completely connected to hose or to machine. This pump motor runs on AC voltage, so it should start running as soon as you turn on the switch. If the pump motor does not start running, check the wiring to the switch and to the motor. Check the switch to see if it is open. Debris is plugging cleaning tool or vacuum hose. Drain gate is not completely closed, or seals are damaged. Recovery tank lid is not seated or gasket is damaged. Ball in the float is blocking air flow. Turn off the vacuum so the ball will drop down, or the recovery tank is full and needs to be emptied. No power to motor. Test the switch. Test the vacuum motor. Spraying too long. Try spraying for seconds, or about three strokes. Heat exchanger needs to be flushed. Wrong tool being used. Too much water passing through. Longer hose or larger diameter hose, than standard. Heat is not turned on. The green circuit indicator light must be on. No power in the wall outlet - check to see if the breaker has tripped. Call your distributor for additional help. TECHNICAL SPECIFICATIONS (as installed and tested on the unit) Model BEXT Pro-100 BEXT Pro-100H BEXT Pro-400H Model No Voltage/frequency 120 V / 60 Hz 120 V / 60 Hz 120 V / 60 Hz Rated Current 15 Amp 15 Amp 15 Amp Protection Class (electrical) Class 1 Class 1 Class 1 Solution Tank Capacity 13 gal (49 L) 13 gal (49 L) 13 gal (49 L) Recovery Tank Capacity 10 gal (37.8 L) 10 gal (37.8 L) 10 gal (37.8 L) Total Weight 70 lbs. (31.7 kg) 75 lbs. (34 kg) 90 lbs. (40.8 kg) Material Composition and Recyclability Type % of machine weight % of machine weight % of machine weight H 400H % recyclable Aluminum 1% 9% 8% 100% Electrical / motors / engines - misc 9% 8% 22% 29% Ferrous metals 11% 11% 9% 100% Harnesses / cables 6% 5% 4% 80% Liquids 0% 0% 0% 100% Plastic - non-recyclable 3% 3% 2% 0% Plastic - recyclable 6% 5% 4% 100% Polyethylene 60% 55% 47% 92% Rubber 4% 4% 3% 20% 8/ BEXT Pro 100, 400 A - 13


195 SAFETY, OPERATION & MAINTENANCE MANUAL POLY & STEEL DRY & WET/DRY VACUUM CLEANERS This unit is intended for commercial use. READ AND FOLLOW ALL INSTRUCTIONS, WARNINGS & CAUTIONS BEFORE USING THIS VACUUM/BLOWER This vacuum cleaner will afford you many years of trouble-free operating satisfaction, provided it is given proper care. All parts have passed rigid quality control standards prior to being assembled to produce the finished product. Prior to packaging, the vacuum was again inspected for assurance of flawless assembly. Your vacuum is protectively packed to prevent damage in shipment. We recommend that upon delivery, unpack the vacuum and inspect it for any possible damage. Only a visual examination will reveal damage that may have occurred. If damage is discovered, immediately notify the transportation company that delivered your vacuum. As a shipper, we are unable to report claims for concealed damage. You must originate any claims within 5 days. This manual is for your protection and information. PLEASE READ CAREFULLY since failure to follow precautions could result in discomfort or injury. SAVE THESE INSTRUCTIONS READ ALL INSTRUCTIONS BEFORE OPERATING PAGE 1 Part No Rev D - W/D Vacuum Manual - Printed in USA 07/19/04
BURLEIGH MANOR MIDDLE SCHOOL HOWARD COUNTY PUBLIC SCHOOL SYSTEM
 BURLEIGH MANOR MIDDLE SCHOOL HOWARD COUNTY PUBLIC SCHOOL SYSTEM Built in 1992 108, 407 Square Feet 771 Student Population 91 Staff Population 2 Building Supervisors, 3 Custodians 102, 663 Square Feet of
Custodial Guide
 Custodial Guide 2018-2019 Table of Contents Page Number 1 General Items to Note 2-3 Maintenance for Office Areas 4-5 Maintenance for Classrooms and Hallways 6 Maintenance for Lounge Areas 7 Maintenance
Stanfield School District Cleaning Standards
 Stanfield School District Cleaning Standards Universal Precautions Always wear protective gloves. Do not use gloves that have holes or tears. Treat all body fluid spills as if they were contaminated. Items
1. Protective hand wear non-sterile latex or cloth gloves 2. Protective mask (if needed for dust)
") DAILY CLASSROOM CLEANING Standard: Upon completion of this work activity, the classroom must be clean and safe with furniture positioned in an orderly arrangement. Floor surfaces must be free of dirt,
DAILY CLASSROOM CLEANING Standard: Upon completion of this work activity, the classroom must be clean and safe with furniture positioned in an orderly arrangement. Floor surfaces must be free of dirt,
PLANT OPERATIONS CLEANING PROTOCOL
 PLANT OPERATIONS CLEANING PROTOCOL October 17, 2014 1 CLASSROOM CLEANING Custodian Cart Liquid Abrasive Cleaner Protective Gloves Dust Mop Hydrogen Peroxide Cleaner Dust Mask Cleaning Sponge or Cleaning
ATTACHMENT A - Services Specifications
 ATTACHMENT A - Services Specifications Notes- Annual services to be performed prior to the start of the school year (June 15-Aug 1) Schedules for clearing must be approved by each building s chief administrator
University of Kentucky Physical Plant Custodial Master Plan PART A
 University of Kentucky Physical Plant Custodial Master Plan PART A Last Updated: August 23, 2012 OVERVIEW Core Management Services has been selected as a strategic partner by the University of Kentucky
Beaufort County Community College. Maintenance and House Keeping Plan
 Beaufort County Community College Maintenance and House Keeping Plan Summary: The College s facility management is handled by the Maintenance Department. The Director of Plant and Maintenance Operations
University of Kentucky Med Center Custodial Master Plan PART A
 University of Kentucky Med Center Custodial Master Plan PART A Last Updated: September 13, 2012 OVERVIEW Core Management Services has been selected as a strategic partner by the University of Kentucky
Cleaning Service Levels
 Restrooms Empty waste receptacles and change liner, as needed. Restock dispensers: soap, paper towel and toilet tissue. Clean mirrors; clean and disinfect urinals, toilets, and sinks. Polish stainless
RESTROOMS. Proper daily cleaning procedures. Custodial Best Practices
 RESTROOMS Proper daily cleaning procedures Custodial Best Practices Cleaning tools Toilet bowl brush stiff bristle brush used for basic scrubbing and cleaning of toilets Toilet bowl swab soft nylon applicator
Cleaning and Sanitation Procedures Module Cafe/Dining Restroom
 Cafe/Dining Restroom Restrooms Materials Requirement Planning A. Materials requirement planning (MRP) a. Clean rags b. Mop buckets and wringers c. Cotton wet mops and handles d. Dust mop and dustpan e.
Restrooms. Proper daily cleaning procedures. Custodial Best Practices
 Restrooms Proper daily cleaning procedures Custodial Best Practices Cleaning tools Bowl brush stiff bristle brush used for basic scrubbing and cleaning of toilets and urinals. Bowl swab soft nylon applicator
Task Definitions Exhibit C. Task Definitions: The following definitions outline minimum acceptable standards for the activity to be performed.
 Task Definitions Exhibit C Task Definitions: The following definitions outline minimum acceptable standards for the activity to be performed. Vacuum Carpet and Spot Cleaning: Thoroughly vacuum all carpeted
TASK PERFORMANCE STANDARDS
 TASK PERFORMANCE STANDARDS Standard Number Task Performance Standard Description 1 Empty and Clean Ashtrays, Sand Urns and Receptacles 2 Remove Trash and Recycling 3 Dust-Mop or Vacuum Non-Carpeted Floors
BASIC OFFICE CLEANING GUIDE FOR GENERAL
 BASIC OFFICE CLEANING GUIDE FOR GENERAL OFFICE CLEANING After many years in the office cleaning business, I realized that most people do not know the best way to clean an office. Many are unable to mop
JANITORIAL SPECIFICATIONS
 JANITORIAL SPECIFICATIONS A. Office Areas 1. Empty and wipe outside wastebaskets, replacing liners, if necessary. Remove to appropriate receptacle for disposal. All bins will be returned to their original
4.0 SERVICES AND SCHEDULE
 4.0 SERVICES AND SCHEDULE 4.1 GENERAL INFORMATION The janitorial services listed below are required at the designated facilities shown in Section 4.3 on the basis of the commencement cleaning times indicated.
Task Definitions Exhibit C. Task Definitions: The following definitions outline minimum acceptable standards for the activity to be performed.
 Task Definitions Exhibit C Task Definitions: The following definitions outline minimum acceptable standards for the activity to be performed. Vacuum Carpet and Spot Cleaning: Spot Vacuuming: Leave no visible
To describe the process for training new hire custodians (and substitute custodians) and establishing cleaning expectations
 and establishing cleaning expectations") Title: Custodial Training System: Operations Sub-System: Custodial Services Process: Training Issue Date: 12/8/08 Issue Number: 3 Approved by: Mike Casey Document author: Christopher Bullinger Summary
Title: Custodial Training System: Operations Sub-System: Custodial Services Process: Training Issue Date: 12/8/08 Issue Number: 3 Approved by: Mike Casey Document author: Christopher Bullinger Summary
Bedroom Cleaning Standards: Sunrise Village
 Bedroom Cleaning Standards: Sunrise Village Tools/Cleaners: Plain white vinegar (poured into a spray bottle), rubbing alcohol (poured into a spray bottle), glass cleaner, disinfecting cleaner, multi-purpose
Custodial- General Cleaning Duties
 Custodial- General Cleaning Duties This document is a general list of scheduled custodial routines. All cleaning is scheduled Sunday through Thursday nights with minimal coverage on weekends while classes
MARSHALLTOWN MEDICAL AND SURGICAL CENTER ENVIRONMENTAL SERVICES. SUBJECT: Room Cleaning Occupied Room (All Areas) PROCEDURE NO: 032
 PROCEDURE NO: 032") MARSHALLTOWN MEDICAL AND SURGICAL CENTER ENVIRONMENTAL SERVICES SUBJECT: Room Cleaning Occupied Room (All Areas) PROCEDURE NO: 032 PURPOSE: To provide a systematic approach to remove the accumulation of
MARSHALLTOWN MEDICAL AND SURGICAL CENTER ENVIRONMENTAL SERVICES SUBJECT: Room Cleaning Occupied Room (All Areas) PROCEDURE NO: 032 PURPOSE: To provide a systematic approach to remove the accumulation of
EXHIBIT A-1 CITY OF BELLFLOWER JANITORIAL MAINTENANCE SPECIFICATIONS
 EXHIBIT A-1 CITY OF BELLFLOWER JANITORIAL MAINTENANCE SPECIFICATIONS Janitorial Service Specifications Services shall include furnishing all labor, equipment, tools, fuel, materials, insurance, supervision,
Facilities, Custodial Services
 UNIVERSITY OF WISCONSIN EAU CLAIRE FACILITIES MANAGEMENT, CUSTODIAL BLUGOLD SERVICE LEVEL STANDARDS Cleaning Activity OFFICES CONFERENCE ROOMS DEPARTMENTAL CLASSROOMS, LIBRARIES & LOUNGES GENERAL PURPOSE
YEAR ONE COST PER MONTH COST PER YEAR ONE 6, YEAR TWO COST PER MONTH
 CONTRACT AWARD AB2016-32 JANITORIAL SERVICES FOR THE COUNTY CONNECTION AND VETERAN'S HOME RESOLUTION NO. 2017-282 NAME OF BIDDER ALL CLEAN BUILDING SERVICES INC. ADDRESS 990 SPRUCE STREET CITY, STATE,
WILLIAM & MARY CUSTODIAL TASK & FREQUENCY LIST. PUBLIC SPACE: ENTRANCES, LOBBIES, AND CORRIDORS Daily Weekly Monthly Quarterly Yearly
 WILLIAM & MARY CUSTODIAL TASK & FREQUENCY LIST PUBLIC SPACE: ENTRANCES, LOBBIES, AND CORRIDORS Daily Weekly Monthly Quarterly Yearly Collect & properly dispose of recycling as needed Dust, or wipe all
Daily Office Cleaning
 Daily Office Cleaning Procedure Cards If you have any questions, comments or need to reorder this set of cards, please call -800-558-2332. Getting Started Verify your equipment, supplies and cleaning products
Commit 2 Clean TM/MC. Restroom Care
 Commit 2 Clean TM/MC Restroom Care Commit 2 Clean TM/MC Restroom Care Program Table of Contents Restroom Cleaning Procedures... 2-3 Process... 4-6 Daily Cleaning Inside the Restroom... 7-11 After Cleaning...
PLANT OPERATIONS PROCEDURE MANUAL
 PLANT OPERATIONS PROCEDURE MANUAL Cleaning Procedures SECTION 3 CLEANING PROCEDURES CLEANING PROCEDURES...3-1 Annual Summer Cleaning...3-3 Auditorium Cleaning and Care...3-4 Auditorium Care Frequency...3-5
Daily Office Cleaning
 Daily Office Cleaning Procedure Cards If you have any questions, comments or need to reorder this set of cards, please call -800-558-2332 Getting Started Verify your equipment, supplies and cleaning products
Safety procedures: Wear your PPE. Gloves and goggles when filling the chemical bottle, using the machine, and cleaning the machine.
 iclean Custodian who Learns, Educates, Achieves & Networks Success. Providing Safe, Clean, Efficient & Attractive Schools. KAIVAC TRAINING Recommended PPE: GFCI, goggles, and gloves. Safety procedures:
CUSTODIAL CUSTOMER SERVICE GUIDE
 CUSTODIAL CUSTOMER SERVICE GUIDE INSIDE what we clean & how often we clean it 2. Classrooms & Teaching Labs 3. Research Labs & Halls & Lobbies 4. Offices & Restrooms 5. Stairwells & Conference Rooms 6.
Cleaning Checklist and Instructions
 Cleaning Checklist and Instructions The following guideline is provided to assist our residents in cleaning their leased home prior to vacating and to convey our expectations on how the property should
3. Franchisee has successfully completed the STRATUS training program and carries all required certifications and insurance.
 This Agreement, dated June 29, 2018 is made between Stratus Building Solutions ( STRATUS ) and Explore Community School ( CLIENT ). Both STRATUS and CLIENT agree that STRATUS will begin service on July
UMass Amherst Standard Procedures
 UMass Amherst Standard Procedures OFFICES/LOUNGES, GENERAL CLEANING 2) >Hard floors: dust mop traffic lanes and knee holes of desks. >Carpeted: HOKY visible litter. 2) Dust all horizontal surfaces approximately
Muskogee Public Schools Custodial Procedures for Floor Care
 FLOOR CARE ENTRANCE MATS PURPOSE OF ENTRANCE MATS A. Exterior Mats a. Remove sand and gravel from shoes prior to entering the building. b. Minimize the amount of abrading material that will scratch and
Commit 2 Clean TM/MC. Daily Office Cleaning Program
 Commit 2 Clean TM/MC Daily Office Cleaning Program Commit 2 Clean TM/MC Daily Office Cleaning Program Table of Contents Daily Office Cleaning Procedures...2 Getting Started... 2-3 Common Areas...3-5 Entryways
CUSTODIAL SERVICES CUSTOMER SERVICE GUIDE
 CUSTODIAL SERVICES CUSTOMER SERVICE GUIDE WHAT WE CLEAN AND HOW OFTEN WE CLEAN IT As part of an ongoing effort to improve custodial customer service, we developed the Custodial Services Customer Service
BYU Residence Life Cleaning Document: Heritage
 Cleaning Items to Use The following supplies should be used in cleaning your apartment. Please see the detailed instructions sheet which further outlines the appropriate use of these products. Broom and
Bedroom Cleaning Standards: Sunrise Village
 Bedroom Cleaning Standards: Sunrise Village Tools/Cleaners: Plain white vinegar (poured into a spray bottle), rubbing alcohol (poured into a spray bottle), glass cleaner, disinfecting cleaner, multi-purpose
Washroom care programs
 Washroom care programs Table of contents The basics..1 Combining substances...2 Cleaners classification... 6 All day maintenance..12 Daily maintenance......13 Periodic maintenance.....23 Emergency maintenance...
REQUEST FOR PROPOSALS
 Janitorial Contract Parks Canada Building REQUEST FOR PROPOSALS Inuvialuit Development Corporation Bag #7, Inuvik, NT X0E 0T0 Tel: (867) 777-7000 Fax: (867) 777-3256 www.idc.inuvialuit.com Page 2 of 10
Butte County Board of Supervisors Agenda Transmittal
 Butte County Board of Supervisors Agenda Transmittal Clerk of the Board Use Only Agenda Item: 3.15 Subject: Amendment to Janitorial Contracts for Leased Facilities Department: General Services Meeting
Health Emergency MRSA / Flu Epidemic Infection Prevention Cleaning Guidelines
 Health Emergency MRSA / Flu Epidemic Infection Prevention Cleaning Guidelines 1 Assignment Description: Office Areas / Conference Rooms / Classrooms Health Emergency MRSA / Flu Epidemic Note: The guidelines
Commit 2 Clean Restroom Care Program TM/MC
 TM/MC TM/MC Table of Contents Restroom Cleaning Procedures... 4-5 Process... 6-8 Daily Cleaning Inside the Restroom... 9-13 After Cleaning...14-15 Periodic Cleaning...16 Tools for Inspection of Restrooms...17
FLOOR FINISH. Extended Performance Floor Finish
 Assemble mop buckets. Fill two rinse mop buckets with clean water. If using an auto scrubber [for rinsing only] fill with clean water. Assemble two mop sticks with clean cotton mop heads. In one bucket
Pty. Ltd. 1. Classroom Cleaning Daily Wkly Mthly Other Vacuum and mop all hard surfaces Vacuum and spot clean all carpeted areas Remove any cobwebs Cl
 Pty. Ltd. CLEANING SPECIFICATION Pre-school Building Block A and Block B (New Building) Classrooms Staff Rooms Science Labs Library & Multi-Purpose Hall All Toilets and Amenities Front Entry and Foyer
Washroom. PURPOSE: To provide clean washrooms for staff, visitors and patients MATERIALS: 19-1
 Washroom 1 High to Low Outside Clean 2 3 to Inside to Dirty Remember the Cleaning Basics PURPOSE: To provide clean washrooms for staff, visitors and patients MATERIALS: Disposable gloves If needed: --Disposable
Cleaning Contract Maintenance Specifications General Information
 Cleaning Contract Maintenance Specifications General Information The Janitorial Service (hereinafter called Contractor) hereby agrees to perform the following outlined tasks and Maintenance Specifications.
Maintain and restore hard floors
 Learning Guide Maintain and restore hard floors 29391 Maintain and restore hard floor surfaces Level 3 10 credits Name: Workplace: Issue 1.0 Copyright 2017 Careerforce All rights reserved. Careerforce
Recommended Floor Care Procedures
 TB11 Recommended Floor Care Procedures PREFAC E To achieve optimum appearance and proper film protection for your floor coverings, it is extremely important to use the right equipment for each task. The
CUSTODIAL TRAINING GUIDE RESTROOM CARE
 CUSTODIAL TRAINING GUIDE RESTROOM CARE Objectives and Materials The purpose of rest room care is to eliminate germs from fixtures and provide a safe environment for the users. Rest room care is a priority
VOCATIONAL: JANITORIAL
 VOCATIONAL: JANITORIAL T.E.K.S. 125.29 (5) The student applies the concepts and skills of the trade to simulated and actual work situations. ----------- -------------------------------------------------
Commit 2 Clean Daily Office Cleaning Program TM/MC
 TM/MC TM/MC Table of Contents Daily Office Cleaning Procedures...2 Getting Started...3 Common Areas...4-5 Entryways and Hallways...6 Floors...7 Vacuuming...8 Daily Cleaning Inside the Restroom...9-12 Restroom
Industrial Science Seminar
 Equipment Maintenance A. Automatic Scrubbers 1) Battery-operated power equipment, like an automatic floor scrubber, needs special care and maintenance. See owners manual before proceeding. 2) These units
WYTHE COUNTY PUBLIC SCHOOLS
 WYTHE COUNTY PUBLIC SCHOOLS CUSTODIAL PROCEDURES MANUAL Table of Contents IMPORTANCE OF THE CUSTODIAN S JOB... 1 PUBLIC RELATIONS... 1 GROUNDS... 1 LIGHTS... 1 SAFETY RECOMMENDTIONS... 2 Chemical and Cleaning
MARSHALLTOWN MEDICAL AND SURGICAL CENTER ENVIRONMENTAL SERVICES. SUBJECT: Room Cleaning Patient Discharge (All Areas) PROCEDURE NO: 033
 PROCEDURE NO: 033") MARSHALLTOWN MEDICAL AND SURGICAL CENTER ENVIRONMENTAL SERVICES SUBJECT: Room Cleaning Patient Discharge (All Areas) PROCEDURE NO: 033 PURPOSE: To provide a systematic approach to remove the accumulation
MARSHALLTOWN MEDICAL AND SURGICAL CENTER ENVIRONMENTAL SERVICES SUBJECT: Room Cleaning Patient Discharge (All Areas) PROCEDURE NO: 033 PURPOSE: To provide a systematic approach to remove the accumulation
For quality janitorial supplies and service, look to... HOW TO USE THE. MARKO, INC Southport Road Spartanburg, SC 29306
 For quality janitorial supplies and service, look to... TM MARKO, INC. 1310 Southport Road Spartanburg, SC 29306 Phone: 864-585-2259 Toll Free: 1-866-GOMARKO (1-866-466-2756) Fax: 864-585-0750 Website:
CLEANING TOOLS. Cleaning Checklist
 Cleaning Checklist BEDROOMS and ceiling fans Replace lightbulbs as needed Dust and wipe down any vents Test smoke detector and replace battery if needed Wipe down closet shelves Wipe down closet doors
MONORA PARK PAVILION/ MONO COMMUNITY CENTRE
 MONORA PARK PAVILION/ MONO COMMUNITY CENTRE JOB DESCRIPTION/DUTIES RE MONO CARETAKERS Position includes but is not limited to the following duties and is subject to change at the discretion of the Town
Induction and Training Guide for Cleaning
 SAFE CLEANING INSTRUCTIONS Induction and Training Guide for Cleaning This manual is the property of: Emergency: Nearest Hospital: Nearest Medical Facility: First Aid Box Located: First Aider: Supervisor:
Housekeeping Specifications
 Housekeeping Specifications Individual Offices and Suites: Vacuum all carpeting Clean baseboards/cove base Sweep hard surface floors Mop hard surface floors Spot clean stains/spills Clean inside and outside
CLEANING TOOLS. Cleaning Checklist
 Cleaning Checklist MISCELLANEOUS Test surfaces of walls with Magic Eraser before using to remove marks. Do not use abrasives on Stainless Steel appliances. A microfiber cloth and stainless-steel polish
Mental Aspects. Methods, Techniques, Procedures
 Essential Functions Analysis Name: Department: University Housing Employee ID number: Job Title: Building Services Worker I Completed By: Lee Motsinger Job Title: HR Manager Day Phone: 706-4-899 1. Essential
HELENA PUBLIC SCHOOLS FRONT STREET LEARNING CENTER CLEANING OUTCOMES ASSESSMENT. May 2013
 HELENA PUBLIC SCHOOLS FRONT STREET LEARNING CENTER CLEANING OUTCOMES ASSESSMENT May 2013 HPS FRONT STREET LEARNING CENTER CLEANING OUTCOMES ASSESSMENT PURPOSE During the week of May 20th, 2013 BRUCO INC.
Floor Care Methodization
 CAUTION WET FLOOR A. Preparation 1) Collect all supplies required (see materials requirement planning list) 2) Ensure that equipment is operational 3) Pick up walk-off mats after they are vacuumed B. Post
A GUIDE TO BUILDING CARE
 A GUIDE TO BUILDING CARE HOW BUILDING STAFF CAN WORK TOGETHER TO CREATE A CLEAN, SAFE AND HEALTHY LEARNING AND WORKING ENVIRONMENT Created by the Peninsula School District Facilities Department This Guide
Washroom care programs
 Washroom care programs Table of contents The basics..1 Combining substances...2 Cleaners classification... 6 All day maintenance..12 Daily maintenance......13 Periodicmaintenance.....23 i Emergency maintenance...
FLOOR CARE. Avmor s Floor Care Training Guide
 FLOOR CARE Avmor s Floor Care Training Guide CONTENTS FLOOR PREPARATION & FLOOR STRIPPING FLOOR SEALING & FLOOR FINISH 6 DAILY CLEANING 8 FLOOR MAINTENANCE 0 TOP SCRUB & RECOAT ADDITIONAL NOTES FLOOR
GENERAL CLEANING General Cleaning
 GENERAL CLEANING General Cleaning General Cleaning A properly cleaned facility positively impacts everyone who uses it including tenants, visitors and service providers. Thorough daily cleaning extends
Methods & Procedures. Operational Cleaning
 Methods & Procedures Operational Cleaning Prepared for: The Cleaning Site 11 Barber Close Oswestry SY11 2UE Contents Brush Sweep Floor Dust Control Mopping Vacuum Cleaning Damp Mopping Machine Damp Mop
Now that you have given your 30 Day Notice to Vacate, what are the next steps?
 Move-Out Procedures Move-Out Procedures Now that you have given your 30 Day Notice to Vacate, what are the next steps? Your lease agreement requires that you leave the property in a clean and undamaged
Sharon Public Schools CUSTODIAL/MAINTENANCE CARE PROGRAM
 Sharon Public Schools CUSTODIAL/MAINTENANCE CARE PROGRAM Table of Contents PURPOSE AND OBJECTIVE OF MAINTENANCE PLANNING.. 1 IMPORTANCE OF THE CUSTODIAN S JOB... 1 PUBLIC RELATIONS... 2 GROUNDS... 2 LIGHTS...
JOB DESCRIPTION. Reports To : Laundry Supervisor, Assistant Director of Housekeeping, Director of Housekeeping
 JOB DESCRIPTION Position : Laundry Attendant Department : Housekeeping Reports To : Laundry Supervisor, Assistant Director of Housekeeping, Director of Housekeeping Position Summary : The Laundry Attendant
Housekeeping. Note. Areas that are not covered under contractor services must adhere to the same cleaning standards as specified in this section.
 Housekeeping Although microorganisms are normal contaminants of walls, floors, and other surfaces, these environmental surfaces rarely are associated with transmission of infections to patients or personnel.
t.! Queen Clean Janitorial
 Professional Cleaning Services Proposal Prepared for: Lacamas Lake Lodge 227 NE Lake Road Camas, WA 98607 Submitted By: PO BOX 1274 Washougal, WA 98671 Alanna Olson President 1.800.889.4541 alanna@thequeenclean.com
HYGIENE AND SANITATION
 HYGIENE AND SANITATION In accordance with the policy of the board of education, the following regulation and attached procedures contains guidelines for cleaning and disposal of body fluids. For the purpose
For routine maintenance of polished granite installations with a cleaner and protector:
 NOTE: For all recommended products: read the entire product label before using. Use only as directed. Always test in a small inconspicuous area with a 24-hour cure time to determine ease of application
HOW TO CLEAN UNIT FOR HEALTHIER LIVING AND EASIER MOVING LANDLORDS OF IOWA, INC.
 HOW TO CLEAN UNIT FOR HEALTHIER LIVING AND EASIER MOVING LANDLORDS OF IOWA, INC. For monthly/periodic cleaning any tenant who follows the suggestions provided should be maintaining a clean and sanitary
ANNEX I CLEANING PROCEDURES
 ANNE I CLEANING PROCEDURES Annex I Cleaning Procedure Contents Introduction... 3 A. Chemicals... 3 1. EnvirOx Required Use... 3 2. Other Chemicals... 3 B. Cross Contamination Prevention Program... 4 C.
Checklist for final cleaning camp buildings Page 1 of 3. As you clean, please report anything that is broken, damaged, or not working properly.
 Checklist for final cleaning camp buildings Page 1 of 3 As you clean, please report anything that is broken, damaged, or not working properly. Bathrooms Toilets; under lids too Sinks; polish faucets. Clean
Visual Assessment of Cleanliness
 Visual assessment is only one of a number of methods available to assess the efficacy of cleaning. Visual assessment is most applicable to the monitoring of Hotel Clean procedures. Evaluation of Hospital
TYPICAL AUTOMOBILE DEALERSHIP. All Exterior Entry ways
 TYPICAL AUTOMOBILE DEALERSHIP HOW OFIEN All Exterior Entry ways Reception Area Showroom floor (get corners use clean water rinse 7X/week On white ceramic tile Sales offices along back of showroom floor
HINTS TO HELP YOUR UNIT PASS CLEANING CHECKS
 CLEANING SUPPLIES Below is a list of suggested cleaning supplies for cleaning. Save time and energy by using the right cleaning products. Plain water will not work. Good quality mop, broom, and dustpan
Discharge and Transfer Cleaning - Isolation
 Approved by: Corporate Director, Environmental Supports Discharge and Transfer Cleaning - Isolation Environmental Services Operating Standards Manual Number: 3.1.1.11 Date Approved Next Review March 3,
Tenant Vacating Checklist
 Tenant Vacating Checklist Your move is coming up quickly and we hope you are excited about your new place. The last few weeks prior to moving out are no doubt busy and hectic; however there are some important
spring cleaning ingredients ALL-PURPOSE SUPPLIES CLEANER
 qu ick start Gather your supplies and ingredients in a caddy or bucket and work through this simple checklist as you get started. Do a little bit every day until the cleaning is done or power through the
MOVE OUT CLEANING CHECKLIST
 MOVE OUT CLEANING CHECKLIST You are required to return the home empty and in a clean condition. Cleaning issues will NOT be considered to be normal and wear, under any circumstances whatsoever. If the
The sleeping cabins, Annex, Main Lodge, porch, picnic area, and grounds must be thoroughly cleaned by the scheduled inspection time.
 Point Reyes National Seashore Association Clem Miller Environmental Education Center Facility & Grounds Cleaning in Preparing for Departure Day Site Inspection As stipulated in the Use Agreement, each
Janitors room Sweep the floor and then mop it
 Clean up for a group Please do not empty any of the trash cans unless they are completely full until every area in the whole building is cleaned. All bags must be sealed or tied up before they are put
S P R I N G C L E A N I N G G U I D E
 S P R I N G C L E A N I N G G U I D E Supplies: Vacuum Duster Broom/dustpan Mop/bucket Paper towels Sponges All-purpose cleaner Wood cleaner Shower cleaner Bleach Garbage bags Scrubbing brush Cleaning
Discharge and Transfer Cleaning
 Approved by: Corporate Director, Environmental Supports Discharge and Transfer Cleaning Environmental Services Operating Standards Manual Number: 3.1.1.2 Date Approved Next Review March 3, 2018 Purpose
THANK YOU for your cooperation in cleaning this property we hope you have enjoyed living here.
 RE/MAX Home and Land Property Management Phone: (509)332-4546 Fax: (509)334-5495 Email: rmhlrentals@gmail.com Website: rmhlrentals.com MOVE-OUT GUIDELINES THANK YOU for your cooperation in cleaning this
Application Procedure Manual
 Procedure Manual One-Day Court Restoration Gabriel Court Mate Gym Gym Finish Finish Application Procedure Manual Apply Today _ Play Tomorrow Quick & Easy Spreading High-Gloss Ready-To-Use Water-Base Urethane
CleaningProtocol. Guidelines for Frontline Staff
 CleaningProtocol Guidelines for Frontline Staff Healthy Measures Ι www.healthymeasuresonline.com Network Services Company Ι 1100 E. Woodfield Road, Suite 200 Ι Schaumburg This document assumes environmental
MELBOURNE ADELAIDE SYDNEY BRISBANE PERTH
 Task Sheets General Agar has developed the following Task Sheets as an easy reference for cleaning staff. Offering a comprehensive step by step guide for many cleaning tasks, the Task Sheets will facilitate
GENERAL CLEANING AND MAINTENANCE FOR ELEVATOR INTERIORS.
 GENERAL CLEANING AND MAINTENANCE FOR ELEVATOR INTERIORS. This package is designed to give instructions on the cleaning and maintenance of the many products used in the modernization of elevator interiors.
GREEN BAY METROPOLITAN SEWERAGE DISTRICT REQUEST FOR PROPOSAL FOR JANITORIAL SERVICES
 GREEN BAY METROPOLITAN SEWERAGE DISTRICT REQUEST FOR PROPOSAL FOR JANITORIAL SERVICES NEW Water, the brand of the Green Bay Metropolitan Sewerage District (GBMSD), owns and operates two wastewater treatment
FOODSERVICE SANITATION GUIDE
 FOODSERVICE SANITATION GUIDE Code: FS-BR1 DINING AREA - FRONT OF THE HOUSE Cleaning & Sanitation Maintain Place Caution/Wet Floor signs Cover, protect, and properly store any food Move any chairs, tables,