Stainless Steel Kitchen Sink
|
|
|
- Ross Evans
- 5 years ago
- Views:
Transcription
1 Stainless Steel Kitchen Sink Model AS FEATURES 16 Gauge premium grade SUS304 stainless steel Stain brush finish Sound silencer pad and fully coated underneath 15mm radius corners Flat apron front DIMENSIONS Outside Dimensions 33" X 21" Depth 10" Inside Dimensions 31" X 17-1/2" Depth 9" Standard 3-1/2" drain replacement


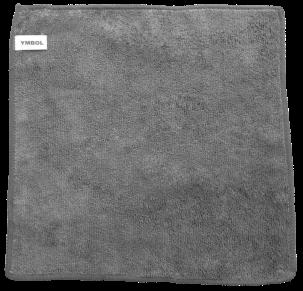
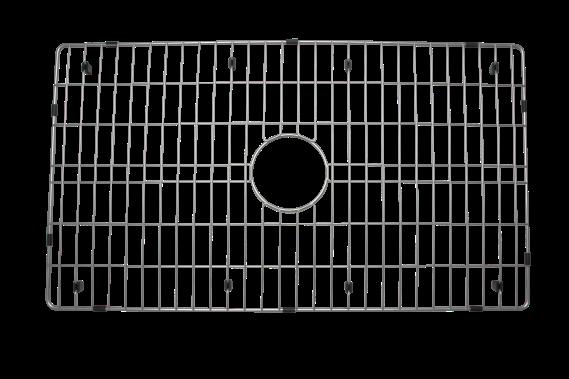
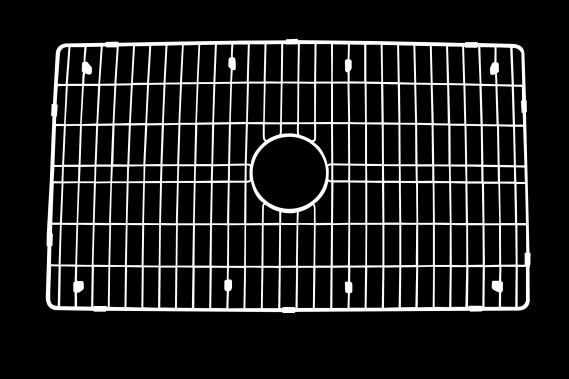
2 PACKING LIST Sink Fasteners Strainer Bottom Grid Gift Towel
3 Stainless Steel Farmhouse Sinks General Recommendations: Check all the matching products inside when opening the package. Inspect your sink for any noticeable damage before installation. Read the installation and maintenance instructions thoroughly before installation. Consult your cabinet dealer before custom order cabinet for the sink. YMBOL suggests using experienced and professional installers. YMBOL does not responsible for any damage to countertop, sink fixture, faucet and personal injury during installation. Yours sincerely, YMBOL
4 INSTALLATION INSTRUCTIONS TOOLS Safety glasses, marker, silicone adhesive sealant, tape measure, Jigsaw, rags, wood braces, level, screws, bladed screwdriver Step 1 Carefully cut away the front of the cabinet to create a 33 x 10 hole. Step 3 Make sure there is a proper spacing before gluing and inserting screws into the wood and cabinet. Step 2 Cut two support framings to extend along the inner walls of the cabinet on each side of the base. Mark the location of the support mounting as shown to ensure that the rim of the sink will sit at or slightly below the top edge of the cabinet. Step 4 Position and level the supports.
5 INSTALLATION INSTRUCTIONS Step 5 Lower the sink into the cabinet. Check if the sink is resting on the supports. Step 8 Lower the sink onto the support and place into your desired position. Sink should be positioned at least 4 between the back of the cabinet and the back of the bowl allows faucet installation. Step 6 Remove the sink. Step 9 Install the countertop Step 7 support. Apply the silicone sealant to the top of each Step 10 Install the sink installation clips to the countertop, make sure each clip engages with the rim of the sink (minimum 4 clips in back, 2 clips per side). Tighten each clips evenly. Step 11 Complete countertop installation and wipe away any excess caulk from the sink rim.


6 MAINTENANCE INSTRUCTIONS FAQs 1.Why is there rust in my new kitchen sink? Reasons: i. The rust may be caused by the welding, cement, or oil residue on the sink. Which when not cleaned on time, can lead the sink to rust. ii. Chemical, cleaning agent, paint, sauces or cooking oil left in the kitchen sink. After a certain period of time these will create molds and the molds would stick on the surface. Prevention and Treatments: i. Install the sink after everything else is done, and clean your sink right after installation. ii. Clean your sink after every use. iii. Properly remove the rust and molds using a scouring pad 2. What will scratch or harm the sink? Reasons: Improper packaging can lead to scratch marks. The accessories may scratch the sinks during transit. YMBOL will try our best to pack the sinks well which would avoid the scratches. But the sink is easily scratched by sharp objects. Preventions and Treatments: i. Minor scratch: You can use a sponge with toothpaste to polish it again and again. ii. Moderate scratch: Using a scouring pad to polish small areas. iii. Serious scratch: Purchase stainless steel polisher. 3. What cause the hard water stains? Reasons: This is normal if you use the sink after a certain period of time. Preventions and Treatments: i. Scouring powder can easily solve the problem. ii. Clean Daily. Use a soft towel to wipe the sink with warm water. Mixing in some washer-fluid is advisable. Remember wipe it dry at last.


7 MAINTENANCE INSTRUCTIONS DO Clean Daily. Use a soft towel to wipe the sink with warm water. Mixing in some washer-fluid is advisable. Remember to wipe it dry. Remember to rinse the sink after using any cleaning agent and wipe dry. If any mineral deposits built up on the sink, clean up it as soon as possible. Properly remove the rust, molds or scratches with a scouring pad. Rubbing the sink in the direction of the grain. Rub it lightly with a soft towel in the direction of grain lines. Keep the sink dry after you use it. Because any standing water can cause a buildup of mineral deposit, which will become hard water stains. DO NOT Leave water spots, utensils or steel cookware in the sink for a long time, which would become rust spots in your sink surface. Leave cleaning agents or bleach sitting in your sink for a long period of time which may cause the sink to discolor or damage the surface. Use a steel wool or scouring pad rubbing against the direction of the grain. Leave rubber mats, cleaning pads or sponges in the sink for a long time as this may ruin the finish of your sink. Use the inside of the sink as cutting surface. How to use scouring pad correctly? 1. Get a dry and clean non-scratch scrub pad. 2. Scrub the rust off according to the direction of the grain.


8
Model SD2318. Stainless Steel Kitchen Sink INSTALLATION INSTRUCTIONS DIMENSIONS FEATURES
 Stainless Steel Kitchen Sink INSTALLATION INSTRUCTIONS Model SD2318 DIMENSIONS Outside Dimensions 23 X 18 Depth 10" Inside Dimensions 21 X 16 Depth 10" Standard 3 1/2-Inch drain replacement FEATURES 16
MODENA ZUHNE
 MODENA 28 28in x 18in x 10in 1-855-55-ZUHNE www.zuhne.com info@zuhne.com 16" 18" 10" PRODUCT DESCRIPTION Premium grade handmade sink 16 gauge Stainless Steel T304 10mm/0.4inch radius coved corners Best-in-breed
RIGA ZUHNE
 RIGA 33 33in x 19 1 2 in x 10in 1-855-55-ZUHNE www.zuhne.com info@zuhne.com Fig.1 PRODUCT DESCRIPTION Premium grade handmade sink 16 gauge Stainless Steel T304 10mm/0.4inch radius coved corners Best-in-breed
G16 Luxury Collection. Twin Bowls Kitchen Sink. Drop-in. Owner s Manual. Undermount
 G16 Luxury Collection Drop-in Undermount Owner s Manual Twin Bowls Kitchen Sink Tools Required: Ruler/Tape Measure Pencil Masking Tape Safety Glasses Kitchen Silicone Sealant Screwdriver Drill Jigsaw &
Kitchen Solutions. Sophisticated Affordable Elegant. Stainless Steel.
 T Kitchen Solutions Sophisticated Affordable Elegant Stainless Steel www.teago.ca Teago Stainless Steel Teago offers a wide selection of sinks and faucets for your home. Featuring functional, professional
Use and Care Manual VERONA 32 OM 16 GAUGE STAINLESS STEEL SINGLE BOWL OVERMOUNT SINK ZUHNE
 Use and Care Manual VERONA 32 OM 16 GAUGE STAINLESS STEEL SINGLE BOWL OVERMOUNT SINK 1 855 55 ZUHNE www.zuhne.com info@zuhne.com 22.01" 16.54" 9.02" 3.90" 29.84" 32.99" Fig.1 PRODUCT DESCRIPTION Premium
CARE & CLEANING GUIDE. Bathroom & Kitchen Products
 CARE & CLEANING GUIDE Bathroom & Kitchen Products TM REGISTER YOUR NEW KRAUS PRODUCT And Let Us Serve You Better Why Should You Register Your New Kraus Product? Are you tired of keeping track of receipts
Drop-In Installation Instructions. Undermount Installation Instructions
 Drop-In Installation Instructions Undermount Installation Instructions Drop-In Instructions please refer to pages 3-4. Undermount Instructions please refer to pages 5-6. Since the undermounting process
Forteza Series Granite Kitchen Sink
 INSTALLATION MANUAL Forteza Series Granite Kitchen Sink KGD-50 / KGD-52 / KGD-54 / KGU-55 www.kraususa.com I Toll Free: 1.800.775.0703 I 2017 Kraus USA Inc. I REV. November 2, 2017 Thank you for your purchase
FAQ s ABOUT TOPZERO STAINLESS STEEL SINKS: >What type of stainless steel does TopZero use?
 FAQ s ABOUT TOPZERO STAINLESS STEEL SINKS: >What type of stainless steel does TopZero use? All TopZero Stainless Steel Sinks are manufactured with top grade stainless steel that is non porous, hygi enic,
CARE & CLEANING GUIDE. Bathroom & Kitchen Products
 CARE & CLEANING GUIDE Bathroom & Kitchen Products REGISTER YOUR NEW KRAUS PRODUCT And Let Us Serve You Better Why Should You Register Your New Kraus Product? Are you tired of keeping track of receipts
INSTALLATION MANUAL. Granite Sinks KGD-410B / KGD-412B/ KGU-413B / KGD-430B / KGD-433B / KGU-431B / KGU-413B / KGU-434B
 INSTALLATION MANUAL Granite Sinks KGD-410B / KGD-412B/ KGU-413B / KGD-430B / KGD-433B / KGU-431B / KGU-413B / KGU-434B www.kraususa.com I toll free: 1.800.775.0703 I 2016 Kraus USA Inc. Thank you for your
ENGINEERED QUARTZ SINK Installation & Care Instructions
 Installation & Care Instructions FOR MODEL NUMBERS CA344D25-M CA344SB22-M CA3241E33-B CA3241E33-M CA324233-B CA324233-M CA344SB24-B CA344SB24-M CA344133-B CA344133-M CA3241L33-B CA3241L33-M CA344SB22-B
GRANITE COMPOSITE SINK
 GRANITE COMPOSITE SINK CONTENTS Sink Installation Faucet Drilling Drop-In Sink Undermount Sink Drain Installation 2 3 4 5 Materal Care and Maintenance 6 1 FAUCET DRILLING The hole for the faucet can be
How To Clean Stainless Steel Sink Step By Step Guideline
 Step By Step Guideline r If you own a stainless steel sink you have to admit a certain degree of sheepishness when you know that your sink is not as clean and as bright as it could be. Table of Content
ACRYLIC CLAWFOOT TUB
 ACRYLIC CLAWFOOT TUB INSTALLATION INSTRUCTIONS AND CARE GUIDE CONTENTS Tub Installation...2 Rough-In...2 Drain Installation...3 Drain without Overflow...3 Waste and Overflow Drain...3 Trimming Drain Pipes...4
Product Description and Measurements. Thank You. Prior To Installation Steps. Waterfall Faucet Installation
 Product Description and Measurements Exclusive Kraus Collection Waterfall Faucet Glass Thickness: 12mm-19mm Diameter: 14 17 For Above Counter Installation Thank You Dear Valued Customer, Kraus would like
SINKOLOGY 101: THE 3C S COPPER, CLEANING AND CARE
 SINKOLOGY 101: THE 3C S COPPER, CLEANING AND CARE COPPER The charisma and charm of copper is its living finish. It will change and react over the course of use. That means if you accidentally leave toothpaste
All purpose Cleaner I. All-purpose Cleaner II. Drain Cleaner. 1 quart of warm water. clear water. 1 Tbsp. ammonia* 4 Tbsp.
 All purpose Cleaner I 4 Tbsp. baking soda 1 quart of warm water Dissolve baking soda in warm water. Apply with a sponge. Rinse with clear water. All-purpose Cleaner II 1 Tbsp. ammonia* 1 Tbsp. liquid detergent
STOP ACRYLIC TUB WITH INTEGRAL DRAIN PLANNING BEFORE YOU BEGIN TOOLS AND MATERIALS: GETTING STARTED INSTALLATION INSTRUCTIONS.
 BEFORE YOU BEGIN We recommend consulting a professional if you are unfamiliar with installing bathroom fixtures and plumbing. Signature Hardware accepts no liability for any damage to the floor, walls,
HANDCRAFTED WORK CENTRE SINK KIT
 DELUXE STAINLESS STEEL HANDCRAFTED WORK CENTRE SINK KIT INSTALLATION GUIDE AND USER MANUAL ITM. / ART. 40801 Model No. QKA051 Table of Contents Table of Contents...2 Safety Information...2 Warranty...
STAINLESS STEEL OFFSET DOUBLE BOWL SINK
 STINLESS STEEL OFFSET DOUBLE BOWL SINK INSTLLTION GUIDE ND USER MNUL Model No. QK01 Table of Contents Table of Contents...2 Safety Information...2 Warranty... One-Year Limited Warranty... Warranty Claim
O.D / 2" (444) 15 1 / 2 " (393) Maximum I.D / 4 " (336) 1 3 / 4 " (45) 1 1 / 4 " (32)
 15 1 / 2 (393) Maximum I.D / 4 (336) 1 3 / 4 (45) 1 1 / 4 (32)") standard basin 100 Specifications 1.1.3 Standard Round Basin with Overflow Item No. 100 For Undercounter Mount Installation Recommended openings for Under Counter mounting: Min. Diameter: 13 1 / 4 (337).
standard basin 100 Specifications 1.1.3 Standard Round Basin with Overflow Item No. 100 For Undercounter Mount Installation Recommended openings for Under Counter mounting: Min. Diameter: 13 1 / 4 (337).
KOHLER Care and Cleaning Guide
 KOHLER Care and Cleaning Guide We believe in creating kitchen and bath products that endure from timeless designs to reliable performance. Because we use materials of exceptional quality, the right care
Product Description and Measurements MODEL-FVS-1000 MODEL-FVS-1002 MODEL-KBF-1300 MODEL-FVS Thank You
 Glass Vessel Sink and Faucet ombo Product escription and Measurements Exclusive Kraus ollection Glass Vessel Sink & Faucet ombo Glass Thickness: 12mm-19mm iameter: 14 17 For Above ounter Installation A
INSTALLATION AND CARE GUIDE MARCO VANITY FRAME BASE & SINKTOP E E E E052463
 INSTALLATION AND CARE GUIDE MARCO VANITY FRAME BASE & SINKTOP E052131 E052431 PRE-INSTALLATION Tools Required Materials Included E052131 E052431 4 anchors (For Installation with frame only) 4 long bolts
Please do not return this product to the retailer!!! If you find that you have any trouble with assembly or missing or damaged parts please contact
 Please do not return this product to the retailer!!! If you find that you have any trouble with assembly or missing or damaged parts please contact us INTERNATIONAL PLEASE REVIEW THIS WARRANTY POLICY IN
Product Care and Maintenance Information
 Product Care and Maintenance Information Contents 1.0 Kitchen Frontals and Carcases 2 1.1 Care and Cleaning of 18mm Rigid Carcase 2 1.2 Care and Cleaning of Door and Drawer Frontals 2 2.0 Appliances 2
Layout and Design by T. Palimenio, Picture credit: Freepik. Cleaning Manual
 Layout and Design by T. Palimenio, Picture credit: Freepik Cleaning Manual Solution Recipes Vinegar/Water Solution 4 cups Water 1 cup Vinegar Vinegar/Soap Solution 1 cup Dish Soap 1 cup Vinegar Vinegar/Water
Flipside Handshower and Showerhead Installation and User Guide
 K-7293IN K-7294IN K-7295IN K-5513IN Flipside Handshower and Showerhead Installation and User Guide MODEL NUMBERS K-7293IN, K-7294IN, K-7295IN, K-5513IN Important! Please quote the above model number(s)
Dimensions: 39 1/2" w x 22" D x 35.5 H. kk25 installation. Things you might need for the installation: vessel sink,
 Things you might need for the installation: vessel sink, plumber's putty(home depot), liquid nails(home depot), Bucket silicone caulk(home depot), Putty knife Plumber's putty Pipe wrench Channel-lock pliers
Thermal Steel Care & Maintenance Guide
 Thermal Steel Care & Maintenance Guide Introduction Arcadia Custom Thermal Steel products require regular and proper inspection, cleaning and maintenance before, during and after installation in order
Pocket Hardmount. Preventative Maintenance.
 Pocket Hardmount Preventative Maintenance www.comlaundry.com Part No. 7-04-49 November 2005 Table of Contents Daily...2 Beginning of the Day...2 End of the Day...4 Weekly...6 Monthly...7 Quarterly...11
RESIN FREESTANDING TUB
 RESIN FREESTANDING TUB INSTALLATION INSTRUCTIONS AND CARE GUIDE CONTENTS Tub Installation...2 Rough-In...2 Drain Installation...3 Air Tub Installation...4 Electrical Installation...4 Remote Control Installation...5
Installation Guide. Install your new sink with step-by-step instructions.
 Installation Guide Install your new sink with step-by-step instructions. Installation Guide Bath Sinks Drop-In Undermount Dual Flex Vessel Drains Bathtubs Freestanding Overflow and Waste Kit Rough-In Kit
Things you might need for the installation: vessel sink, plumber's putty(home depot), liquid nails(home depot), Bucket silicone caulk(home depot),
, liquid nails(home depot), Bucket silicone caulk(home depot),") Things you might need for the installation: vessel sink, plumber's putty(home depot), liquid nails(home depot), Bucket silicone caulk(home depot), Putty knife Plumber's putty Pipe wrench Channel-lock pliers
Things you might need for the installation: vessel sink, plumber's putty(home depot), liquid nails(home depot), Bucket silicone caulk(home depot), Putty knife Plumber's putty Pipe wrench Channel-lock pliers
Care and Maintenance Guide
 Care and Maintenance Guide KoKoMo Grills Outdoor Kitchens, Fireplaces, & Fire Pits Care and Maintenance Guide KoKoMo Grills Outdoor Kitchens, Fireplaces, & Fire Pits This brief guide provides general details
ACRYLIC PEDESTAL TUB
 BEFORE YOU BEGIN We recommend consulting a professional if you are unfamiliar with installing bathroom fixtures and plumbing. Signature Hardware accepts no liability for any damage to the floor, walls,
SKY Stainless Steel Compact Dishwasher. Instructions
 SKY4313 - Stainless Steel Compact Dishwasher Instructions Please retain these instructions for future reference. Notice: Do not allow children to operate this appliance. Keep appliance out of reach of
For routine maintenance of polished granite installations with a cleaner and protector:
 NOTE: For all recommended products: read the entire product label before using. Use only as directed. Always test in a small inconspicuous area with a 24-hour cure time to determine ease of application
INSTRUCTION MANUAL SILHOUETTE SOFA. By GamFratesi
 INSTRUCTION MANUAL SILHOUETTE SOFA By GamFratesi INTRODUCTION GamFratesi s Silhouette Sofa series is characterised by the smooth curve of the sofa s back, which seamlessly combines a strong character with
The multi-layering continues throughout the whole pan ensuring excellent heat conduction performance from base to rim preventing hot-spots.
 Le Creuset 3-ply stainless steel pans are made using a high technology, triple-layer system. An aluminium core is sandwiched between two layers of premium quality stainless steel which includes special
Washroom. PURPOSE: To provide clean washrooms for staff, visitors and patients MATERIALS: 19-1
 Washroom 1 High to Low Outside Clean 2 3 to Inside to Dirty Remember the Cleaning Basics PURPOSE: To provide clean washrooms for staff, visitors and patients MATERIALS: Disposable gloves If needed: --Disposable
Hello Kitty Pancake Maker Item # APP Owner s Manual
 Hello Kitty Pancake Maker Item # APP-61209 Owner s Manual Important Safety Precautions When using any electrical appliance, basic safety precautions should always be followed, including the following:
COPENHAGUE TABLE C PH10
 INSTRUCTION MANUAL COPENHAGUE TABLE C PH10 By Ronan & Erwan Bouroullec INTRODUCTION Copenhague is a furniture series designed by Ronan and Erwan Bouroullec designed especially for the University of Copenhagen
GENERAL CLEANING AND MAINTENANCE FOR ELEVATOR INTERIORS.
 GENERAL CLEANING AND MAINTENANCE FOR ELEVATOR INTERIORS. This package is designed to give instructions on the cleaning and maintenance of the many products used in the modernization of elevator interiors.
CARRON PHOENIX Homecare Pack
 CARRON PHOENIX Homecare Pack YOUR STAINLESS STEEL SINK Tips on taking care of your Carron Phoenix Stainless Steel sink and tap We recommend regular maintenance to keep your sink looking its best! Commercial
Stainless Steel. nuveraproducts.com CLEANER + POLISH
 Stainless Steel CLEANER + POLISH CLEANS + SHINES + PROTECTS For all stainless steel appliances and furnishings, including bbq grills, counter tops, metal decorative trim, drinking fountains, metal fixtures,
RESTROOMS. Proper daily cleaning procedures. Custodial Best Practices
 RESTROOMS Proper daily cleaning procedures Custodial Best Practices Cleaning tools Toilet bowl brush stiff bristle brush used for basic scrubbing and cleaning of toilets Toilet bowl swab soft nylon applicator
We recommend regular maintenance to keep your sink looking its best!
 We recommend regular maintenance to keep your sink looking its best! Commercial detergents often affect stainless steel. After a while, the sink becomes dull and the glaze is damaged. The new Franke Kitchen
BASIC OFFICE CLEANING GUIDE FOR GENERAL
 BASIC OFFICE CLEANING GUIDE FOR GENERAL OFFICE CLEANING After many years in the office cleaning business, I realized that most people do not know the best way to clean an office. Many are unable to mop
COPENHAGUE TABLE CPH90
 INSTRUCTION MANUAL COPENHAGUE TABLE CPH90 By Ronan & Erwan Bouroullec INTRODUCTION Copenhague is a furniture series designed by Ronan and Erwan Bouroullec designed especially for the University of Copenhagen
KITCHEN INSTALLATION GUIDE
 KITCHEN INSTALLATION GUIDE The step-by-step guide to installing your new kitchen right This brochure is your guide to preparing and installing your new kitchen yourself. Inside you ll find tips and ideas,
TOULOUSE DOUBLE SINK CONSOLE
 TOULOUSE DOUBLE SINK CONSOLE Date: 2016 05 19 www. potterybarn.com Page 1 of 8 Important Safety Instructions: CAUTION: Keep natural stone materials in its packaging until installation and store on its
Installation Instructions Model: EB Single-Lever Lavatory Faucet
 by Dawn Kitchen & Bath Products, Inc. 877-Dawn-USA dp@dawnusa.net www.dawnusa.net Installation Instructions Model: EB1359150 Single-Lever Lavatory Faucet TABLE OF CONTENTS Preparation Parts Installation
Operating Instructions
 Operating Instructions Fryer KM 403 To prevent accidents and reduce machine damage, read these lnstructions before installation or use. UV M.-Nr. 05 825 170 2 Contents IMPORTANT SAFETY INSTRUCTIONS.................................
STAINLESS STEEL TUB INSTALLATION
 BEFORE YOU BEGIN We recommend consulting a professional if you are unfamiliar with installing plumbing fixtures. Signature Hardware accepts no liability for any damage to the faucet, plumbing, sink, counter
Restrooms. Proper daily cleaning procedures. Custodial Best Practices
 Restrooms Proper daily cleaning procedures Custodial Best Practices Cleaning tools Bowl brush stiff bristle brush used for basic scrubbing and cleaning of toilets and urinals. Bowl swab soft nylon applicator
kk21 installation Kk21-WF21 Things you might need for the installation: vessel sink,
 Kk21-WF21 Things you might need for the installation: vessel sink, plumber's putty(home depot), liquid nails(home depot), Bucket silicone caulk(home depot), Putty knife Plumber's putty Pipe wrench Channel-lock
Prior to Installation: Inspect the sink prior to installation to make sure the sink has not been damaged during shipping Use the cut-out template prov
 INSTALLATION MANUAL Stainless Steel Farmhouse Kitchen Sink KHF200-30 / KHF200-33 / KHF200-36 KHF203-33 / KHF203-36 KHF204-33 www.kraususa.com I toll free: 1.800.775.0703 I 2016 Kraus USA Inc. Prior to
Things you might need for the installation: vessel sink, plumber's putty(home depot), liquid nails(home depot), Bucket silicone caulk(home depot),
, liquid nails(home depot), Bucket silicone caulk(home depot),") Things you might need for the installation: vessel sink, plumber's putty(home depot), liquid nails(home depot), Bucket silicone caulk(home depot), Putty knife Plumber's putty Pipe wrench Channel-lock pliers
Things you might need for the installation: vessel sink, plumber's putty(home depot), liquid nails(home depot), Bucket silicone caulk(home depot), Putty knife Plumber's putty Pipe wrench Channel-lock pliers
USER GUIDE & CARE INSTRUCTIONS
 procook.co.uk USER GUIDE & CARE INSTRUCTIONS Contents 1. Cookware a. General tips applying to all ranges b. Tips for caring for and using all non-stick cookware c. Tips for caring for and using induction
Installation and User Guide
 Deerfield Undercounter Kitchen Sink Installation and User Guide MODEL NUMBERS 5838W-7U-0 Important! Please quote the above model number(s) when ordering spares IMPORTANT Installer: This manual is the property
 KitchenAid Microwave Canisters White Sponge Bucket Counters Top of Stove Inside and Around Stove Floor Baseboards Cupboards Inside Handle Pulls Sink Under Sink Plate Cupboard Silverware Drawer Small Utensil
AUBREY with MAJOLICA PORTO Operation / Installation manual
 AUBREY with MAJOLICA PORTO Operation / Installation manual Contents Preparation before Installation (Specification Drawings) Usage condition Parts List / Accessory Parts Installation Procedure Safety Precautions
INSTALLATION INSTRUCTIONS
 Model: MPN: AN5534 INSTALLATION INSTRUCTIONS Version: 1.0 READ ALL INSTRUCTIONS BEFORE UNPACKING THE PRODUCT INSTRUCTIONS THAT, IF IGNORED COULD RESULT IN DEATH OR SERIOUS INJURY CAUSED BY INCORRECT HANDLING
RESIDENTIAL LIMITED LIFETIME WARRANTY.
 www.samsungradianz.co.za RESIDENTIAL LIMITED LIFETIME WARRANTY RESIDENTIAL LIMITED LIFETIME W A R R A N T Y CONSISTENT, RELIABLE COLOR Radianz is available in more than 30 colors in variety of patterns
ONE PIECE TOILET LT3. Model: MPN: B0940 INSTALLATION INSTRUCTIONS. Version: 1.0
 Model: MPN: B0940 INSTALLATION INSTRUCTIONS Version: 1.0 READ ALL INSTRUCTIONS BEFORE UNPACKING THE PRODUCT INSTRUCTIONS THAT, IF IGNORED COULD RESULT IN DEATH OR SERIOUS INJURY CAUSED BY INCORRECT HANDLING
OWNER S MANUAL MODULAR DIRECT CONNECTED TILTING STEAM JACKETED KETTLE
 OWNER S MANUAL MODULAR DIRECT CONNECTED TILTING STEAM JACKETED KETTLE MODELS: MT6 MT6T6 MT10 MT10T10 MT10T6 LFT6 LFT10 LFT10T6 LFT10T10 Form Number: S-2306 REV:C 10/12 Printed in U.S.A. 35 Garvey Street
Installation Instructions
 Installation Instructions SELECTRONIC Hard-Wired AC Powered ICU Lavatory Proximity Faucet PRODUCT NUMBER 0. Certified to comply with ASME A..M 0 American Standard M 0. ICU Faucet shown Installed on American
Bedroom Cleaning Standards: Sunrise Village
 Bedroom Cleaning Standards: Sunrise Village Tools/Cleaners: Plain white vinegar (poured into a spray bottle), rubbing alcohol (poured into a spray bottle), glass cleaner, disinfecting cleaner, multi-purpose
Operating Instructions
 ZLQ WHU K OWHU Operating Instructions Winterhalter Gastronom Glasswasher GS 24 Summary 1. Application 2. Installation and initial start-up 3. Safety instructions for the operator 4. General information
Classic 6 & 18 Prep Procedure Tables Owner s Manual
 Classic 6 & 18 Prep Procedure Tables Owner s Manual Durable, heli-arc welded, stainless steel Variety of styles for your convenience 48-in. and 60-in. widths to suit your needs Removable prep rack SSCI
DOGGIE WASH STATIONS Phone
 DOGGIE WASH STATIONS TM ADA DOG WASH STATION MODEL ADA60HTY Model: DL-DWPRO-ADA60 FEATURES: 14-gauge 304 stainless steel all-welded construction. Built in Hair Catching System (U.S. Patent 7080608). Multiple
INSTRUCTIONS FOR USE AND INSTALLATION Glass Ceramic Hobs HVK 400-1
 INSTRUCTIONS FOR USE AND INSTALLATION Glass Ceramic Hobs HVK 400 41011020-1 READ THE INSTRUCTIONS BOOKLET CAREFULLY TO MAKE THE MOST OF YOUR HOB. We recommend you keep the instructions for installation
STOP RESIN TUB WITH INTEGRAL DRAIN PLANNING BEFORE YOU BEGIN TOOLS AND MATERIALS: GETTING STARTED INSTALLATION INSTRUCTIONS.
 BEFORE YOU BEGIN We recommend consulting a professional if you are unfamiliar with installing bathroom fixtures and plumbing. Signature Hardware accepts no liability for any damage to the floor, walls,
Care and Maintenance
 Care and Maintenance Keep in mind, like any floor covering, hardwood floors will show signs of wear over time. By observing a few precautions and setting up a regular cleaning routine/maintenance program,
BATH DRAIN. Tools Required T01-G INSTALLATION INSTRUCTIONS K-18355T/K-10164T/K-98171T K-17758T/K-45606T
 TH DRIN INSTLLTION INSTRUCTIONS K-18355T/K-10164T/K-98171T K-17758T/K-45606T EFORE YOU EGIN Thank you. You have just purchased the best bath drain your money can buy. Kohler drains work smoothly and reliably,
XOE30 XOE36 READ AND SAVE THE INSTRUCTIONS FOR RESIDENTIAL COOKING ONLY
 XOE30 XOE36 READ AND SAVE THE INSTRUCTIONS FOR RESIDENTIAL COOKING ONLY Register your product online at: www.xoventilation.com NEED HELP? Call our ventilation experts at 800-966-8300 1 Dear Customer, If
1501 Westpark Drive, Suite 5 Little Rock, Arkansas International
 Retail Merchandising Installation Instructions Trade Fixtures Gravity Feed Bin 1501 Westpark Drive, Suite 5 Little Rock, Arkansas 72204 800-872-3490 International 1+501-664-1318 PLEASE START HERE: Thank
PARTS LIST. 1 x POST. 1 x BOOM. 1 x ELBOW. 1 x CANOPY CLIP BRACKET. 1 x CRANK HANDLE. 1 x BASE SLEEVE. 1 x RUBBER COVER. 6 x WASHERS LOCKING PIN
 COMPONENTS PARTS LIST x POST (SEE OVERLEAF FOR ASSEMBLY DIAGRAM.) x BOOM x ELBOW 0 x CANOPY CLIP BRACKET x CRANK HANDLE x BASE SLEEVE SPIGOT (INSIDE BASE SLEEVE) x RUBBER COVER LOCKING PIN x WASHERS 7
INSTRUCTIONS FOR OPERATION AND CARE OF
 INSTRUCTIONS FOR OPERATION AND CARE OF SPLINT PANS MODELS A426112 (SM-1501) & A426110 (SM-1502) A426112 (SM-1501) A426110 (SM-1502) 1000 Remington Blvd Suite 210 Bolingbrook, II 60440 1800-323-5547 Canada
WARM/CANCEL button While the cooker is in standby mode, press WARM/CANCEL button to start the keep warm function.
 Product introductions 1. Detachable steaming valve and inner cover for easy clean 2. Aluminum alloy inner pot with non-stick coating 3. Safety protection for high temperature 4. LED digital display Knowing
Merry Maids # 372/373/458/946/947. New Employee Training Day 4 Script
 Merry Maids # 372/373/458/946/947 J.R. Nichols Company, Inc New Employee Training Day 4 Script Module 6 Bathrooms Slide 1 The last room you ll learn to clean is a bathroom. Slide 2 Most homes have more
CLEANING TOOLS. Cleaning Checklist
 Cleaning Checklist BEDROOMS and ceiling fans Replace lightbulbs as needed Dust and wipe down any vents Test smoke detector and replace battery if needed Wipe down closet shelves Wipe down closet doors
GLASS DECORATIVE COOKER HOOD INSTRUCTION MANUAL READ AND SAVE THE MANUAL BEFORE INSTALLATION AND USE
 GLASS DECORATIVE COOKER HOOD INSTRUCTION MANUAL READ AND SAVE THE MANUAL BEFORE INSTALLATION AND USE Dear Customer, If you follow the recommendations contained in this Instruction Manual, our appliance
CARE & MAINTENANCE FACT SHEET OUTDOOR LOUNGE
 OUTDOOR LOUNGE Material Properties Weatherproof, Outdoor Lounge cushion covers (as used on both fully upholstered Outdoor Lounge collections, integral cushions on seating items and some optional cushion
Genware Care & Guidance
 Genware Care & Guidance Genware products are manufactured to provide the robustness and durability required for maximum performance in the hospitality and foodservice industry. We want you to be confident
Diamond Whirlpool/Air pool INSTALLATION & OPERATION INSTRUCTION
 Diamond Whirlpool/Air pool INSTALLATION & OPERATION INSTRUCTION WARNING When using this unit, precautionary steps should be followed to prevent electrical shock or personal injury. 1. Do not permit children
Cleveland. Operators Manual. Direct Steam Table Top Kettles. Installation & Operation. Table-Top Direct Steam Kettles. SD Stands. Kettles on SD Stands
 Operators Manual Installation & Operation Direct Steam Table Top Kettles Table-Top Direct Steam Kettles MODELS: KDT- 1- T KDT- 3- T KDT- 6- T KDT-12- T KDT-20- T SD Stands MODELS: SD- 450 SD- 650 SD- 760
Installation and Operating Instructions
 Installation and Operating Instructions Model: HOB6S-4E-4 HOB6W-4E-4 For your convenience, we recommend to attach the serial number label HERE. As part of Parmco Appliances commitment to improving and
Consumer Flooring Guide. Maintenance and Warranty Information.
 Consumer Flooring Guide Maintenance and Warranty Information www.congoleum.com 1 CARING FOR YOUR FLOOR IMMEDIATELY AFTER INSTALLATION Keep traffic to a minimum during the first 24 hours to allow the adhesive
CLEANING TOOLS. Cleaning Checklist
 Cleaning Checklist MISCELLANEOUS Test surfaces of walls with Magic Eraser before using to remove marks. Do not use abrasives on Stainless Steel appliances. A microfiber cloth and stainless-steel polish
6L PRESSURE COOKER. Instruction Manual. Model: PLA1424
 6L PRESSURE COOKER Instruction Manual Model: PLA1424 Due to ongoing product improvements, specifications and accessories may change without notice. Actual product may differ slightly to that depicted.
2175DWRWC Wine Captain Drawer
 Installation Guide 2175DWRWC Wine Captain Drawer www.u-lineservice.com Phone (414) 354-0300 FAX (414) 354-7905 Service & Parts Tech Lines Phone (800) 779-2547 FAX (414) 354-5696 OnlineService@U-Line.com
CAST IRON CLAWFOOT TUB
 BEFORE YOU BEGIN We recommend consulting a professional if you are unfamiliar with installing bathroom fixtures and plumbing. Signature Hardware accepts no liability for any damage to the floor, walls,
Care and Maintenance Guide
 Care and Maintenance Guide For Cal Flame barbecue islands, grills, fireplaces, and fire pits This brief guide describes how to clean, protect, and repair your Cal Flame product. Natural Stone A natural
Instructions on How to Wash and Dry Laundry
 Instructions on How to Wash and Dry Laundry Prepared by Group 2 Jenna, Anna, Christina, Dylan TECM 2700.001 April 8, 2014 i Table of Contents Table of Contents... iii Introduction... iv How to Wash and
Instructions for Installing the MMD Rear Window Louvers
 Instructions for Installing the MMD Rear Window Louvers Time Required: Less than 1 hour of labor (5 hours total installation if the 4 hours of letting the brackets set are included). Required Tools: Socket
CARE AND MAINTENANCE OF PRAVOL DURA-SHIELD COMPOSITE DECK BOARDS
 AND MAINTENANCE OF PRAVOL DURA-SHIELD COMPOSITE DECK BOARDS Before you start: Using a pressure washer is applicable, with a wide fan tip, but only at pressures under 1,500 psi and at a distance of 12 above