Short instructions for use ESTETICA E30
|
|
|
- Nelson Ball
- 5 years ago
- Views:
Transcription

1 Short instructions for use ESTETICA E30
2 Distributed by: KaVo Dental GmbH Bismarckring 39 D Biberach Phone +49 (0) Fax +49 (0) Manufacturer: Kaltenbach & Voigt GmbH Bismarckring 39 D Biberach
3 Table of contents 1 Controls Dentist element TM table Dentist element S-table Assistant element Groups of keys Foot control Moving the patient chair Positioning the dental chair manually Positioning the patient chair with the foot control Automatic positioning of patient chair User menu Starting and exiting from the user menu Selecting and setting an option Standby menu Setting the timer Select the timer time Set the timer time Setting the handpieces Adjusting functions Turbine INTRA LUX Motor KL 701 / KL 703 LED PIEZOsoft/PiezoLED KL 703 LED in ENDO mode (optional accessories) Operate handpieces with the foot control Hygiene Tumbler filling and bowl flushing Manual hygiene functions of the water-conducting system Manual intensive germ reduction Reprocessing of the suction system Replenishing Oxygenal Troubleshooting / warning signals Safety shut-off Troubleshooting Service and error messages in the stand-by menu... 29
4 1 Controls 4 1 Controls CAUTION These brief instructions for use only contain the essential operating functions. It does not substitute for the Instructions for Use and Servicing. The Instructions for Use and Servicing include all safety notes relevant for the user that need to be heeded for safe operation of the product! Prior to first startup of the unit, the accompanying documents need to be inspected! The current accompanying documents are available for downloading at Dentist element TM table A B C D E F A Group of keys for the dental chair B Group of keys for illumination C Group of keys for the handpieces D Group of keys for the menu E Group of keys for hygiene F Group of keys for the timer 1.2 Dentist element S-table A B D C E F A Group of keys for the menu B Group of keys for illumination C Group of keys for hygiene D Group of keys for the handpieces E Group of keys for the timer F Group of keys for the dental chair
5 1 Controls Assistant element A Group of keys for hygiene B Group of keys for illumination C Group of keys for the timer D Group of keys for the dental chair 1.4 Groups of keys Group of keys for the dental chair The keys of the assistant unit each have two functions and show two symbols. Assistant unit key Dentist unit key Labelling "Chair up" key "AP 0" key (automatic position 0) "Chair down" key "SP" key (rinsing position) "LP" key (last position) "AP" key (activate automatic position) "Backrest down" key "AP 1" key (automatic position 1)
6 1 Controls 6 Assistant unit key Dentist unit key Labelling "Backrest up" key "AP 2" key (automatic position 2) "Collapsed position" key Group of keys for illumination/handpieces Key Name Control element Key "Operating light" Dentist element and assistant element "Operating light dimming" key Dentist element Key "X-ray viewer" "Direction of motor rotation" button "Preselected spray" button Dentist element Dentist element Dentist element "Cold light" button Dentist element Group of keys for hygiene Key Name Control element "Tumbler filler" key Dentist element and assistant element "Bowl rinsing" key "Bell" key Dentist element and assistant element Dentist element "Intensive disinfection" key "HYDROclean" key Assistant element (unassigned key) Assistant element (unassigned key)
7 1 Controls 7 Group of keys for the menu Group of keys for the menu 1 Menu function selection keys 2 Display Group of keys for the timer Key Name Control element "Remote Control" key unassigned key "Additional motor drives" key Dentist element "Timer 1" key Dentist element and assistant element 1.5 Foot control Item Name with mounted Handpiece 1 "LP/preselected spray" footswitch Drives dental chair to previous position. with removed Handpiece Optional. Sets the spray pre-selection. 2 U-shaped switch Switches the footswitches to the "Chair motion" function. 3 "SP/blown air" footswitch Drives dental chair to rinsing position. Optional. Sets the preset blown air (Chipblower) at the handpiece (does not apply to PiezoLED).
8 1 Controls 8 Item Name with mounted Handpiece 4 5 "Chair position/direction of Changes the position of the motor rotation" 4-way switch dental chair. "Preselection of level/handpieces" foot-pedal Preselection of level with removed Handpiece Selects the direction of motor rotation (for KL 701 / KL 703 motor). Starts the handpieces and controls the speed/intensity of the handpieces. "Chair position" cross switch 1 Chair up 2 Backrest up 3 Chair down 4 Backrest down
9 2 Moving the patient chair 9 2 Moving the patient chair 2.1 Positioning the dental chair manually Key Function The chair moves up. The chair moves down. The backrest moves upward. The backrest moves downward. 2.2 Positioning the patient chair with the foot control See also: 2 "Chair position" cross switch, Page Foot control, Page Automatic positioning of patient chair Recalling automatic position through the dentist element Briefly press the desired button. ð Chair automatically moves to the saved chair position. ð When the saved chair position is reached, the LED on the button lights up. Saving the automatic position through the dentist element Move the chair to the desired position. To save the chair position, press the "AP 0", "AP 1", "AP 2", "SP" or "Collapsed position" button until you hear a signal. ð LED of the pressed button lights up. The chair position is saved.
10 2 Moving the patient chair 10 Recalling an automatic position through the assistant element Briefly press the "AP" key. ð The LEDs of the "AP 0", " AP 1", " AP 2", "SP", and "LP" keys flash for approximately four seconds. During these four seconds, briefly press the "AP 0", " AP 1", " AP 2", "SP" or "LP" key. ð The chair moves into the selected automatic position. Saving an automatic position through the assistant element Move the chair to the desired position. Briefly press the "AP" key. ð The LEDs of the "AP 0", " AP 1", " AP 2", "SP", and "LP" keys flash for approximately four seconds. During these four seconds, press the "AP 0", "AP 1", "AP 2", "SP" or "LP" button, until a signal sound is transmitted. ð LED of the pressed button lights up. The chair position is saved. Recalling an automatic position through the foot control or Press the "SP" foot-operated button. or Press the "LP" foot-operated button. ð The chair moves into the selected automatic position. Saving an automatic position with the foot control Hold down the foot pedal and foot-operated button "SP", and simultaneously press any button for an automatic position ("AP 0", "AP 1", "AP 2" or "SP") on the dentist or assistant unit until you hear a beep. ð The automatic position is saved to the foot-operated button. or or Hold down the foot pedal and foot-operated button "LP", and simultaneously press any button for an automatic position ("AP 0", "AP 1", "AP 2" or "SP") on the dentist or assistant unit until you hear a beep. ð The automatic position is saved to the foot-operated button.
11 3 User menu 11 3 User menu The following options can be opened in the user menu: Option Function Description 1 Users Set number of users. 2 Tumbler Set tumbler filling time. 3 Bowl Set bowl rinsing time. 4 Handpiece light Set cold light afterglow period. 5 ENDO Set ENDO holder. Available only if an ENDO license is existent. 6 Time of day Set time of day. 7 Date Set date. 8 Time/date display mode Set display mode for time of day and date: Time of day only Time of day without seconds Time of day and date Date only 9 LCD Set contrast of LCD display. 10 Language Set menu language: Deutsch Firmware English Italiano Français Castellano Display current firmware version. 3.1 Starting and exiting from the user menu S1 S2 S3 S4 Press the "Next" key (S4) to start-up the user menu. ð The user menu displays options and parameters that can be set and changed by the user. Press the "Save" (S1) key to save the selection made.
12 3 User menu 12 Option 1: Set number of users S1 S2 S3 S4 S1 S2 S3 S4 Press the "S1", "S2", "S3" key to select user 1, 2, and 3, respectively. Press the "S4" button to call up the second level. Press the "S1", "S2", "S3" key to select user 4, 5, and 6, respectively. 3.2 Selecting and setting an option S1 S2 S3 S4 Press the "Increase value" and "Decrease value" keys to select the desired parameter or value. See also: 2 Instructions for use ESTETICA E30, Page 0
13 4 Standby menu 13 4 Standby menu The stand-by menu is used to start the device. The device switches to the stand-by menu upon closing of the handpiece and endo menus. S1 S2 S3 S4 Press the "Next" key (S4) to start-up the user menu. ð The user menu displays options and parameters that can be set and changed by the user. Press the "Save" (S1) key to save the selection made.
14 5 Setting the timer 14 5 Setting the timer 5.1 Select the timer time Press the "Timer" key briefly to start or stop the timer. ð LED flashes while the timer counts down. 5.2 Set the timer time Press the "Timer" key for an extended period of time to start the timer programming mode. The programming mode can be started in the stand-by menu only. S1 S2 S3 S4 Key S1 S2 S3 S4 Settings Saves the parameters. Quits the programming mode. Changes the value. Changes the value. Switches counter/timer function.
15 6 Setting the handpieces 15 6 Setting the handpieces 6.1 Adjusting functions Settings can be changed using the corresponding keys on the control element or on the foot control. The motor speed can be set with the foot control only. The direction of motor rotation, cooling status and light intensity can be set with the foot control or keys on the control element. The current settings are saved and activated the next time the handpiece is taken out. Setting Actuation Pane Motor speed Foot control Display Light intensity Foot control, control keys Display Direction of motor rotation Foot control, control keys LED control keys Spray status Foot control, control keys LED control keys Saving the values Press the "Save" key to save the values. Single values or all values can be saved simultaneously. ð Saving is acknowledged by a beep. speed/intensity Remove the handpiece (e.g turbine, motor) from the holder. ð The handpiece is active. Press the foot pedal. ð The removed handpiece runs at the set speed or intensity. Changing speed or intensity with the foot pedal. ð The left stop corresponds to the minimum speed/intensity. ð The right stop corresponds to the maximum speed/intensity. Setting the light intensity Only the spray status and light intensity can be set for air instruments. Press the button for "light intensity" (S4) to set the light intensity from 1 to 9 (ring counter). S1 S2 S3 S4
16 6 Setting the handpieces 16 Setting the direction of motor rotation Note The direction of motor rotation can only be changed when the motor is at rest. Take motor off the holder. ð The handpiece is active. Press the "Direction of motor rotation" key on the dentist element. ð The direction of motor rotation is reversed each time the switch is actuated: counterclockwise rotation - clockwise rotation. ð The direction of motor rotation is displayed on the dentist element. Setting the cooling level Remove the handpiece (e.g turbine, motor) from the holder. ð The handpiece is active. Press the "Preselected spray" key on the dentist element. ð The cooling status is switched each time the key is pressed: air - spray. ð The cooling level is displayed on the dentist and assistant element. 6.2 Turbine The following settings can be changed with the foot control: Speed Cooling status 6.3 INTRA LUX Motor KL 701 / KL 703 LED The following settings can be changed with the foot control: Direction of motor rotation Speed Spray status Light on/off 6.4 PIEZOsoft/PiezoLED Note Please comply with the enclosed "PiezoLED" or "PIEZOsoft" Instructions for Use. The PiezoLED menu and all PiezoLED functions are only available if a PiezoLED license is existent. Setting the PIEZOsoft Settings can be changed using the corresponding keys on the control element or on the foot control.
17 6 Setting the handpieces 17 The intensity can be set with the foot control only. The spray status can be changed either with the foot control or the key on the control element. The current settings are saved and activated the next time the handpiece is taken out. Setting the PiezoLED Settings can be changed using the corresponding keys on the control element or on the foot control. The intensity can be set with the foot control only. The mode, spray and light On/Off can be set with the foot control or the keys on the control element. The current settings are saved and activated the next time the handpiece is taken out. S1 S2 S3 S4
18 6 Setting the handpieces KL 703 LED in ENDO mode (optional accessories) Note The functions of the ENDO menu are available only if an ENDO license is existent. Start-up ENDO menu Take the ENDO motor out of the dentist element (setting in user menu, option 5). Press the "Additional motor drives" key (M). Press the "S1" key for long to select the ENDO menu. Parameters can be set and changed. S1 S2 S3 S4 Key S1 S2 S3 S4 Settings Saves the parameters. Selects the ENDO menu. Changes the value. Changes the value. Moves the flashing cursor: Torque mode, speed, torque, torque mode,... (ring counter). Setting options Press the "S4" key to select the ENDO options menu.
19 6 Setting the handpieces 19 S1 S2 S3 S4 Parameters Values Transmission factor 1:1, 3:1 Parameter memory Torque mode Direction of motor rotation Speed Torque P1,P2,P3,P4,P5,P6 TQ-Ctrl, Autoreverse, AutoRev/Forw. R, L 100 to 6,000 rpm Transmission ratio 1:1: 0.15 to 2.50 Ncm Transmission ratio 3:1: 0.4 to 8.0 Ncm The following parameters can be changed: Speed Torque Torque mode Speed The speed can be adjusted as follows: in steps of ten: in the range from 100 rpm to 500 rpm in steps of fifty: in the range from 500 rpm to 1,000 rpm in steps of 100: in the range from 1,000 rpm to 6,000 rpm Torque 1:1 transmission ratio The torque can be changed as follows: in steps of 0.05 Ncm: in the range from 0.15 Ncm to 2.5 Ncm in steps of 2%: in the range from 1 % to 100 % 3:1 transmission ratio
20 6 Setting the handpieces 20 The torque can be changed as follows: in steps of 0.05 Ncm: in the range from 0.4 Ncm to 8 Ncm in steps of 2%: in the range from 1 % to 100 % Torque mode Three different torque modes are available: Torque only Auto-reverse Auto-reverse / Forward
21 7 Operate handpieces with the foot control 21 7 Operate handpieces with the foot control Remove the handpiece (e.g turbine, motor) from the holder. ð The handpiece is active. Press the foot pedal. ð The removed handpiece runs at the set speed or intensity. Changing speed or intensity with the foot pedal. ð The left stop corresponds to the minimum speed/intensity. ð The right stop corresponds to the maximum speed/intensity. Preselect counterclockwise motor rotation Take motor off the holder. ð The handpiece is active. Slide the cross switch upward. ð The direction of motor rotation is reversed each time the cross-switch is actuated: counterclockwise rotation - clockwise rotation. ð The direction of motor rotation is displayed on the dentist element. Setting the instrument light Slide the cross switch to the right. (spotlight function) ð Cold light "On" (even if Cold light "Off" is preselected). Slide the cross switch to the left. ð Change the cold light status: "On/Off".
22 8 Hygiene 22 8 Hygiene 8.1 Tumbler filling and bowl flushing The following settings can be changed: Tumbler filling time or or Bowl rinsing time Press the "Tumbler filler" button briefly to start filling the tumbler. Press the "Bowl flush" key briefly to start the bowl flush. Press the "Set hygiene function" button for more than 4 seconds to start the programming mode. Set the period of time in 200 ms increments. Minimum: 0.4 s. An acoustic signal is heard every second. Release the button to save the selected value. 8.2 Manual hygiene functions of the water-conducting system Note KaVo recommends rinsing all water-conducting systems at all dispensing sites while no handpiece is attached, such as, e.g., syringe, turbine, motor, ultrasonic scaler and tumbler filler: - at the start of every working day (for 2 minutes) - after every patient (for 20 seconds) Note The "continuous germ reduction" hygiene function is available only with the water bottle kit. Treatment water that comes into contact with the patient, e.g. at the tumbler or handpieces, can be germ-reduced manually or intensively germ-reduced manually. During normal operation of the treatment centre, the continuous germ reduction function (available with water bottle kit and added disinfectant KaVo OXYGENAL 6) ensures continuous germ reduction of the water-supplying systems. Manual rinsing and manual intensive germ reduction facilitate the rinsing and germ reduction of the water-supplying system. This counteracts the formation of micro-organisms at times of stagnation and ensures a hygienic water supply for the patients. 8.3 Manual intensive germ reduction Intensive germ reduction must be carried out: At first start-up Before, during and after prolonged downtimes (more than 4 weeks)
23 8 Hygiene 23 Over the weekend During vacations After treatment of patients at high risk Note The intensive germ reduction bottle must be newly filled prior to every intensive germ reduction process. Fill the intensive germ reduction bottle. See also: 2 Filling the intensive germ reduction bottle, Page 0 Press the button during the rinse. Rinse each dental instrument for 20 seconds (without attachment handpieces or cannulas), including the triple-function handpiece. Fill the tumbler 3x in order to rinse and disinfect the entire water-supplying system. Allow water and KaVo OXYGENAL 6 to act for at least 30 minutes, and preferably over the weekend. After the time of exposure is elapsed, fill the tumbler 3x and rinse each dental instrument (without attachment handpieces or cannulas) for 20 seconds. See also: 2 Servicing Instructions ESTETICA E30, Page Reprocessing of the suction system Note Clean the suction hoses after each treatment and disinfect them with DEKASEP TOL Gel daily. Application of DEKASEPTOL Gel Note Regarding the air jet suction system (Venturi), only one aliquot may be drawn into each hose. Aspirate one tumbler of cold water with each suction hose. With the suction handpiece attached or by hand, press down the DEKASEPTOL dosing facility once each for the saliva ejector hose and the spray mist ejector. Aspirate the DEKASEPTOL Gel from the dosing facility.
24 8 Hygiene 24 Note In suction processes with air jet suction systems (Venturi), the two following steps must not be carried out as they could lead to blockage of the thin hoses. Without air jet suction system (Venturi) Aspirate another tumbler of cold water with each suction hose. Finally, aspirate another dose of DEKASEPTOL Gel and allow it to act. With/without air jet suction system (Venturi) Place the suction hoses in the holder. DEKASEPTOL Gel basic set DEKASEPTOL Gel refill canister Mat. no Mat. no Replenishing Oxygenal Turn the device off. Remove the water bottle 1 and intensive germ reduction bottle 2 through a slow counterclockwise rotation. Note This allows the over-pressure to be released slowly from the water bottle. If the pressure supply to the equipment is not switched off, a permanent venting sound can be heard. Note The water in the water bottle needs to be changed at least one daily. In order to ensure the efficiency of the measures, KaVo urgently recommends reprocessing the water with KaVo OXYGENAL 6.
25 8 Hygiene 25 For cleaning, rinse the water bottle with water at less than 50 o C. Filling the water bottle Wipe up any spilled OXYGENAL immediately in order to prevent discolouration of the surfaces. Remove the protective hose from the tube of the KaVo OXYGENAL 6 dosing facility. Guide the tube through the orifice of the coarse sieve of the KaVo OXYGENAL 6 bottle. Screw the KaVo OXYGENAL 6 dosing facility tightly to the KaVo OXYGENAL 6 bottle. Rotate the orifice in the lid to a filling level of 1.5 litres. ð Lid snaps-in in the filling position. Place the KaVo OXYGENAL 6 bottle on a level surface. Squeeze the KaVo OXYGENAL 6 bottle until the germ reduction liquid rises above the red marker. ð In response to over-filling, the excess quantity above the tick mark is aspirated automatically to ensure exact dosing. Filling the intensive germ reduction bottle CAUTION Wrong germ reduction liquid or the dose is too high Injury hazard Use KaVo OXYGENAL 6 only. Do not exceed the maximum concentration of 0.25% KaVo OXYGENAL 6. Proceed like for filling the water bottle, but use a different dose of KaVo OXYGENAL 6. See also: 2 Filling the water bottle Fill the four-fold dose of KaVo OXYGENAL 6 (equivalent to 20 ml) in the intensive germ reduction bottle. Make sure that the spout of the KaVo OXYGENAL 6 dosing facility (nose) is situated right above the opening of the intensive germ reduction bottle. Then fill-up the intensive germ reduction bottle with tap water. Screw the intensive germ reduction bottle tightly to the treatment centre through a clockwise rotation. ð Apply compressed air to the intensive germ reduction bottle. Check the OXYGENAL 6 concentration Fill the tumbler with water. Use Merckoquant peroxide test strips 100 to 1,000 mg/l H 2 O 2 (Mat. no ) to determine the OXYGENAL 6 concentration in the water germ reduction system. The OXYGENAL 6 concentration should be in the range from 150 to 250 mg/l H 2 O 2 in normal operation.
26 9 Troubleshooting / warning signals 26 9 Troubleshooting / warning signals 9.1 Safety shut-off 5 Pos. no. Safety switch-off actuated LED on assistant element LED on dentist element 1 Bracket on the foot control 2 Assistant element 3 Backrest 4 Kickplate 5 Seat For right/left conversion with bench removed To deactivate an activated safety shutoff, remove the triggers from the to the range of movement of the stool.
27 9 Troubleshooting / warning signals Troubleshooting Malfunction Cause Remedy Nothing works. Main switch is off. Turn on the main switch. Main service fuse interrupted the electric circuit. Unplug the unit from the mains. Check and replace, if required, the main service fuse. The main service fuse is situated next to the master switch. For this purpose, open the bayonet closure with a screwdriver and replace the fine-wire fuse (T 6.3 H Mat. no ). The re-close the bayonet closure with the screwdriver. The patient chair does not move. The safety shutoff is activated. (The LED on the control panel flashes.) Check the safety shutoff and eliminate the reason for the shutoff. Display without indicator. Operating device no function. Turbine making loud running noises. Satelec Mini LED / KaVo Poly One does not work. Bus / hardware error. Turn the device off and on. Call the service technician to look into the problem if it continues to exist. Bus / hardware error. Turn the device off and on. Call the service technician to look into the problem if it continues to exist. Turbine wheel faulty. Replace turbine wheels. Follow the operating instructions for the turbine. Also refer to: Instructions for Use of the Satelec Mini LED / KaVo Poly One No cold light on the handpieces. Cold light not preselected. Preselect cold light. The high-pressure lamp or Multi LED on the handpiece is defective. Replace the high-pressure lamp or Multi LED. Also refer to: Instructions for Use of the handpiece See also: 2 Instructions for Use of the handpiece No spray in the handpieces. No spray preselected. Preselect spray. Check setting on butterfly valves of the dentist element.
28 9 Troubleshooting / warning signals 28 Malfunction Cause Remedy Close the ring for controlling the spray on the handpieces. Spray throttle Ws20 connected to control valve. The main water valve in the office is closed. The compressor is not turned on. Open the ring for controlling the spray on the handpieces. Check setting on butterfly valves of the dentist element. Open main valve. Turn on the compressor. No water in the tumbler and spittoon bowl Water bottle is empty. Fill the water bottle. No air pressure in the Turn on the compressor. unit. Spray at the instruments is insufficient. The spray nozzles are dirty/clogged. Clean the spray nozzles according to the accompanying instrument operating instructions. Leaks in instruments. O-rings at MULTIflex or motor coupling, gripping sleeve or cannula of the triple-function handpiece are damaged. Replace O-rings. No PiezoLED function PiezoLED does not vibrate The suction hoses do not have any suction. Slides on the conical sections are closed. Open the slide valve. Sieves in suction connector are blocked. Replace sieves. Base plate for vacustop has been activated. Relieve base plate. Suction machine not running. Turn on the suction machine. Check the suction machine fuse. Water in the return air filter. O-rings of the MULTIflex coupling are damaged. Replace all O-rings of the MULTIflex coupling. The operating light cannot be switched on. Switch on the lamp head is switched off. Turn on the switch.
29 9 Troubleshooting / warning signals Service and error messages in the stand-by menu Service and error messages are displayed in the stand-by menu through the "!" symbol. S1 S2 S3 S4 S1 S2 S3 S4 Key S2 S3 S4 Press the "S2" button to display messages. Press the function keys to navigate between the messages. Settings Previous message Next message Switch to stand-by menu Error messages in the status display Malfunction Cause Remedy Display shows: ID 64 Water is shut off. Turn water on. Water works leaks strongly. Water works malfunction Call a technician. Display shows: ID 65 Safety switch of bowl suction has been reached. Turn external suction on. Check and clean, if required, the bowl valve. Display shows: ID 68 Call for service Have a service performed. Call a technician. Display shows: ID XX This error is not described in this chapter. Call a technician. Display shows: CAN fail Internal communication error. Turn the unit off and on again, consult a service technician according to need.
30 9 Troubleshooting / warning signals 30
31
32 dw en
Short instructions for use ESTETICA E30
 Short instructions for use ESTETICA E30 Distributed by: KaVo Dental GmbH Bismarckring 39 D-88400 Biberach Tel. +49 7351 56-0 Fax +49 7351 56-1488 Manufacturer: Kaltenbach & Voigt GmbH Bismarckring 39 D-88400
Care instructions. Primus 1058 Life
 Care instructions Primus 1058 Life Manufacturer: Kaltenbach & Voigt GmbH Bismarckring 39 D-88400 Biberach www.kavo.com Distributed by: KaVo Dental GmbH Bismarckring 39 D-88400 Biberach Phone +49 (0) 7351
Care instructions ESTETICA E80. Always be on the safe side.
 Care instructions ESTETICA E80 Always be on the safe side. Distributed by: KaVo Dental GmbH Bismarckring 39 D-88400 Biberach Tel. +49 7351 56-0 Fax +49 7351 56-1488 Manufacturer: Kaltenbach & Voigt GmbH
Dental Unit User's Guide
 Dental Unit User's Guide MDD 93/42/EEC May 1999 8200590 Quint-7000 User's Guide We reserve the right to make changes. Manufactured by: FINNDENT OY Teollisuustie 5 FIN-07230 MONNINKYLÄ Tel. +358 19 5221500
Instructions for use KaVo Primus 1058 S/TM/C/G. Always be on the safe side.
 Instructions for use KaVo Primus 1058 S/TM/C/G Always be on the safe side. Sales: KaVo Dental GmbH Bismarckring 39 D-88400 Biberach Tel. +49 7351 56-0 Fax +49 7351 56-1488 Manufacturer: Kaltenbach & Voigt
VIVA ace Quick Operation Guide
 VIVA ace Quick Operation Guide Contents 1. Installing the Holder Bar and Arm...2 2. Connecting the Motor, the Scaler, and the Syringe...3 3. Installing the Vacuum...4 4. Installing the Water Bottle...5
Operating Manual for Profident / Profident PLUS
 Operating Manual for Profident / Profident PLUS Content: 1. Accessories... 1 2. First Steps... 2 2.1 Air Pressure... 2 2.2 Positioning of the Handpieces... 2 2.3 Pressurised Water Bottle... 3 2.3.1 Refill
OPERATION AND MAINTENANCE MANUAL
 OPERATION AND MAINTENANCE MANUAL ADU-10CF (NSN: 6520-01-456-7170) Part 1 of 2 P.O. Box 1548 Woodinville, WA 98072-1548 1-800-426-5913 * 425-487-3157 * Fax: 425-487-2608 email: info@aseptico.com * Internet:
`P H I=`Q H I=`R H I=`R H =qìêå
 `P H I=`Q H I=`R H I=`R H =qìêå `~êé=~åç=åäé~åáåö=áåëíêìåíáçåë=ñçê=íüé=éê~åíáåé=íé~ã båöäáëü General information Sirona Dental Systems GmbH General information Care and cleaning instructions for the practice
`O H I=jN H. `~êé=~åç=åäé~åáåö=áåëíêìåíáçåë=ñçê=íüé=éê~åíáåé=íé~ã. båöäáëü
 `O H I=jN H `~êé=~åç=åäé~åáåö=áåëíêìåíáçåë=ñçê=íüé=éê~åíáåé=íé~ã båöäáëü General information Sirona Dental Systems GmbH Care and cleaning instructions for the practice team Hygiene and disinfection Care
Instructions for use. EXPERTsurg LUX REF
 Instructions for use EXPERTsurg LUX REF 1.008.3500 Distributed by: KaVo Dental Corporation 11729 Fruehauf Drive Charlotte, NC 28273 USA Phone: 847 550 6800 Fax: 847 550 6825 Manufacturer: Kaltenbach &
OPERATION and MAINTENANCE INSTRUCTION MANUAL. ADU-12 Task Force Pneumatic Portable Dental System
 OPERATION and MAINTENANCE INSTRUCTION MANUAL ADU-12 Task Force Pneumatic Portable Dental System TABLE OF CONTENTS: Package Contents....................1 Introduction.........................2 Setting Up
Instructions for use INTRAsurg 300 / INTRAsurg 300 plus. Always be on the safe side.
 Instructions for use INTRAsurg 300 / INTRAsurg 300 plus Always be on the safe side. Distributed by: KaVo Dental GmbH Bismarckring 39 D-88400 Biberach Tel. +49 7351 56-0 Fax +49 7351 56-1488 Manufacturer:
OPERATING INSTRUCTIONS
 DENTAL UNIT AND CHAIR OPERATING INSTRUCTIONS IMPORTANT This manual provides operating instructions for VOYAGER-II L. The instructions contained in this booklet should be thoroughly read and understood
OPERATING INSTRUCTIONS
 H DENTAL UNIT BOOK NO. 1E03D2C0 (3E) Printed in JAPAN. 2014-07 OPERATING INSTRUCTIONS Thank you for purchasing TAKARA BELMONT product. Please read through this instruction manual carefully before using
Contents. English. English
 OM-E0798E 000 Thank you for purchasing VIVA ace Basic Set. This product is a Portable Dental Treatment Unit used for on-site patient treatment. Please read this Operation Manual carefully before use so
OPERATING INSTRUCTIONS
 DENTAL UNIT AND CHAIR OPERATING INSTRUCTIONS IMPORTANT This manual provides operating instructions for VOYAGER II. The instructions contained in this booklet should be thoroughly read and understood before
UL U TR LTRASONIC S ONIC SCALE ALER PIEZO MINI
 ULTRASONIC SCALER PIEZO MINI CONTENTS XI - SYMBOLS 1. INTRODUCTION 1 Alternating current Type BF device 2. WARNINGS 1 3. PRESENTATION 1 3.1 Presentation 1 3.2 Technical description 2! Warning, please refer
`P H I=`Q H I=`R H I=`R H =qìêå
 `P H I=`Q H I=`R H I=`R H =qìêå `~êé=~åç=`äé~åáåö=äó=íüé=mê~åíáåé=qé~ã= båöäáëü Sirona Dental Systems GmbH Care and Cleaning by the Practice Team Contents Contents 1 General information... 5 1.1 Dear
OPERATION and MAINTENANCE INSTRUCTION MANUAL. ADU-10 AseptiMini Pneumatic Portable Dental System
 OPERATION and MAINTENANCE INSTRUCTION MANUAL ADU-10 AseptiMini Pneumatic Portable Dental System TABLE OF CONTENTS: Introduction.........................1 Package Contents....................1 Setting Up
Instructions for use. 301 plus
 Instructions for use 301 plus Contents W&H symbols... 3 1. Introduction...4 5 2. Unpacking... 6 3. Package contents... 7 4. Safety precautions... 8 5. Description of the front side... 9 6. Description
OPERATION and MAINTENANCE INSTRUCTION MANUAL. ADU-20B CompriCart
 OPERATION and MAINTENANCE INSTRUCTION MANUAL ADU-20B CompriCart TABLE OF CONTENTS: Introduction.........................1 Package Contents....................1 Setting Up the Unit...................2 -
Table of Contents. English
 OM-E0799E 000 English Thank you for purchasing VIVA ace Motor Kit. Please read this Operation Manual and the VIVA ace Basic Set Operation Manual carefully before use for operating instructions and care
Installation and Operating Instructions DÜRR Regeneration Unit for X-ray developers XR 24, XR24 II, XR 24 Nova, XR 24 Pro
 Installation and Operating Instructions DÜRR Regeneration Unit for X-ray developers XR 24, XR24 II, XR 24 Nova, XR 24 Pro 2006/01 Content Important Information 1. Notes... 3 1.1 CE - Labeling... 3 1.2
Q: What can be done if my dishes have a cloudy, white film on them after a wash?
 TROUBLESHOOTING 45 TROUBLESHOOTING FAQs: Frequently Asked Questions Q: Does this dishwasher require a rinse aid to be used? A: Rinse aid is strongly recommended to enhance the drying performance of the
OPERATION and MAINTENANCE INSTRUCTION MANUAL. ADU-17X2 Express Plus II Portable Dental System
 OPERATION and MAINTENANCE INSTRUCTION MANUAL ADU-17X2 Express Plus II Portable Dental System TABLE OF CONTENTS: Introduction.........................1 Package Contents....................1 Safety Precautions...................2
OPERATION MANUAL. LED Coupling OM-TR355E. Please read this operation manual carefully and file for future reference.
 OPERATION MANUAL LED Coupling OM-TR355E Please read this operation manual carefully and file for future reference. Caution When operating the product always consider the safety of the patient. The product
Söring Ultrasonic Generator Sonoca 300
 0-0,9 bar 0 100 % 0 150 ml 0 100 % Schlauch befüllen Filling hose User Manual Söring Ultrasonic Generator Sonoca 300 Absaugung Aspiration Ultraschall Ultrasound Spülung Irrigation Information Pump on/off
OPERATION and MAINTENANCE INSTRUCTION MANUAL. ADU-17A Express Air Portable Dental System
 OPERATION and MAINTENANCE INSTRUCTION MANUAL ADU-17A Express Air Portable Dental System TABLE OF CONTENTS: Introduction.........................1 Package Contents....................1 Safety Precautions...................2
DENTAL UNIT U5000 DENTAL UNIT U1500
 DENTAL/MEDICAL EQUIPMENT DENTAL UNIT U5000 DENTAL UNIT U1500 U5000 U1500 Instructions for use G_U5000, U1500_V1.07_36269_GB.pdf Order no.: 36269GB Foreword Dear customer, To begin with, we would like
FINO JETSTEAM PRO 52072
 Original FINO Germany FINO JETSTEAM PRO 52072 Dampfstrahlgerät Steam Cleaner Appareil à jet de vapeur Vaporizadora Vaporizzatrice Stoomstraalapparaat Parní čistička Ångstråleapparat Parownica Gőzsugár
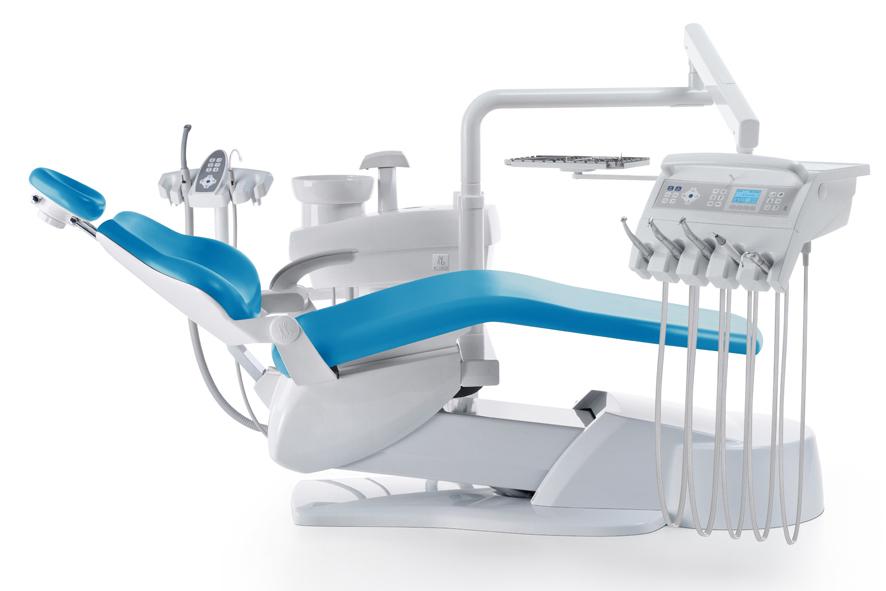
Flexibility and individual design turn your dental unit into an active partner. Quality is not a consideration quality is the solution
 X X Flexibility and individual design turn your dental unit into an active partner Quality is not a consideration quality is the solution 2 3 Complete control - with the foot Leave the possibilities open
Glass and Dishwashers 402/452/502. (original instructions) (incl. Australian /502) Starting from Serial No.:
 (incl. Australian /502) Starting from Serial No.:") Glass and Dishwashers ECOMAX 402/452/502 (incl. Australian 452-90/502) INSTALLATION AND OPERATION INSTRUCTIONS (original instructions) Starting from Serial No.: 8663 4000 REV. 05.10.2015 EN IMPORTANT NOTES
Glass and Dishwashers ECOMAX 402/452/502 (incl. Australian 452-90/502) INSTALLATION AND OPERATION INSTRUCTIONS (original instructions) Starting from Serial No.: 8663 4000 REV. 05.10.2015 EN IMPORTANT NOTES
CLEAN MIST SMART HUMIDIFIER TABLETOP & FLOOR STANDING WITH REMOTE CONTROL. Instruction Manual and Warranty Information
 CLEAN MIST SMART HUMIDIFIER TABLETOP & FLOOR STANDING WITH REMOTE CONTROL Instruction Manual and Warranty Information IM0034A READ AND SAVE THESE INSTRUCTIONS Contents Safety Instructions... 1 Unpacking
Service Information. WNes 2956 appliance documentation. Service Information no. 27/2004 LHG/TKD-Fe/June SI
 After Sales Service International Service Information Service Information no. 27/2004 LHG/TKD-Fe/June 2004 WNes 2956 appliance documentation Page 1/26 Contents 2.0. Extract from Operating Instructions
X99 Series. Dental Handpiece. Instruction For Use
 X99 Series Dental Handpiece Instruction For Use 0413 Table of Contents Symbols... 2 Introduction... 3-4 Before Use... 5 Product description... 6 Technical Specifications... 7 Operation... 8-11 Hygienic
AS Medizintechnik GmbH Sattlerstrasse 15, Tuttlingen, Germany Tel 07461/ Fax 07461/
 General Information Use The Air drill System is a pneumatic powered system used for many applications orthopedic and trauma surgery. To ensure proper operation of the air drill, use only original attachment
Dohse Aquaristik GmbH & Co. KG. T-Control Pro. Item no Status: 03/2013. Dohse Aquaristik GmbH & Co. KG
 Dohse Aquaristik GmbH & Co. KG www.dupla.com Using instructiontion T-Control Pro Item no. 80696 Status: 03/2013 Dohse Aquaristik GmbH & Co. KG www.dohse-aquaristik.com Table of contents 1. Introduction.............................................
MANUAL OWNER S. Operating and Servicing Instructions IMPORTANT: READ CAREFULLY BEFORE ASSEMBLY AND USE.
 OWNER S MANUAL Operating and Servicing Instructions www.hoover.com.hk HW-FM-HKA IMPORTANT: READ CAREFULLY BEFORE ASSEMBLY AND USE. THIS PRODUCT IS INTENDED FOR HOUSEHOLD USE ONLY. IF USED COMMERCIALLY
Operating instructions
 Operating instructions for Winterhalter Gastronom dishwasher GS 502 and GS 515 Contents Page 1 Intended use... 1 2 Installation and commissioning... 1 3 Safety instructions... 2 4 Operating panel... 3
Read this owner's manual thoroughly before operating the appliance and retain it for future reference. TYPE : PORTABLE AIR CONDITIONER
 ENGLISH ESPAÑOL Read this owner's manual thoroughly before operating the appliance and retain it for future reference. TYPE : PORTABLE AIR CONDITIONER MODEL : LP0817WSR LP1017WSR LP1217GSR LP1417SHR LP1417GSR
WHA 3000V Hot Air Station
 WHA 3000V Hot Air Station Operating Instructions Version 1.1 Page 1 of 14 Table of contents 1. Description 5 Technical data 5 2. Commissioning 6 2.1 Manual operating mode 6 2.2 Automatic operating mode
HI COD REACTOR and Test Tube Heater 2008 Series
 Instruction Manual HI 839800 COD REACTOR and Test Tube Heater 2008 Series www.hannainst.com This Instrument is in Compliance with the CE Directives 1 Dear Customer, Thank you for choosing a Hanna product.
Sensor Control Panel
 USER S MANUAL PU SENS 01 Sensor Control Panel V55-6EN-03(SENS).indd 1 18.08.2015 10:37:16 2 PU SENS 01 CONTENTS Safety Requirements 2 Main Technical Data 3 Control Panel Mounting 3 Control Panel Operation
CR-1730R User s Manual
 CappRondo Refrigerated Centrifuge CR-1730R User s Manual AHN Biotechnologie GmbH Uthleber Weg 14 99734 Nordhausen Germany www.capp.dk info@capp.dk Tel. +49(0)3631 65242-0 Fax +49(0)3631 65242-90 DOC. No.:
DENTAL UNIT. Rod Type OPERATING INSTRUCTIONS
 DENTAL UNIT Rod Type OPERATING INSTRUCTIONS IMPORTANT This manual provides operating instruction for CLESTA II ROD TYPE. The instructions contained in this booklet should be thoroughly read and understood
HX-30/40 and HX-30/40 S Glass and Dishwashers
 HX-30/40 and HX-30/40 S Glass and Dishwashers INSTALLATION OPERATION VERSION 18/01/00 2 Installation and Operation Instructions for Model HX-30/40 and HX-30/40 S (with built-in softener) Content Page 1
Installation and maintenance instructions for cabin units type vertical IDAC (V50)
") GB Installation and maintenance instructions for cabin units type vertical IDAC (V50). Application. Bundled parts. Handling. Marking. Weight. Transport. Storage 5. Installation 5. Mounting 5. Water trap
GB Installation and maintenance instructions for cabin units type vertical IDAC (V50). Application. Bundled parts. Handling. Marking. Weight. Transport. Storage 5. Installation 5. Mounting 5. Water trap
Installation Operation Maintenance Troubleshooting Version Dec/17. Mobile Cabinets
 Installation Operation Maintenance Troubleshooting Version Dec/17 Mobile Cabinets Table of Contents WARRANTY... 3 Important Information... 4 Technical Specifications... 4 Weight & Dimensions... 5 Dimensions...
HD 525 S 06/03 A ! 5.960
 HD 525 S 5 960 845 A2005225 06/03! Please read these operating instructions before starting and strictly observe the Safety Instructions for High Pressure Cleaners (5.951-949). WARNING DO NOT SPRAY ELECTRICAL
Bedienungsanleitung. Ideas for dental technology. Made in Germany C
 Bedienungsanleitung 216604 C 01022013 Made in Germany Ideas for dental technology GLISH Instruction manual 1. Introduction...1 1.1 Employed Symbols...1 2. Safety...2 2.1 Intended use...2 2.2 Improper use...2
Operating, Installation and Service Manual W3400H, CLC 41 Clarus Control
 Operating, Installation and Service Manual W3400H, CLC 41 Clarus Control 438 9202-01 05.26 Washer extractor, drum volume 400 litres 3 Contents Machine operation... 7 General description... 7 Automatic
OPERATION and MAINTENANCE INSTRUCTION MANUAL. AEU-525 Transport III Portable Dental System
 OPERATION and MAINTENANCE INSTRUCTION MANUAL AEU-525 Transport III Portable Dental System TABLE OF CONTENTS: Introduction.........................1 Package Contents....................1 Safety Precautions...................2
FONA DURION Dental unit operation instruction
 Dental unit operation instruction Index 1. General information... 5 General information on the Operation Instructions... 5 Scope of these Operation Instructions... 5 Other valid documents... 5 Warranty
MS7 Single Zone Mini Split System Air Conditioners and Heat Pumps
 2011 Lennox Industries Inc. Dallas, Texas, USA 506789 01 08/2011 MS7 Single Zone Mini Split System Air Conditioners and Heat Pumps This manual is the property of the homeowner and must be left with the
Unlimited Mobility The Mobile Dental Units By. BPR Swiss
 Unlimited Mobility The Mobile Dental Units By Product Overview The world of mobile dental carts: The world of portable plug-and-play dental units: The world of portable dental units: The world of portable
DEHUMIDIFIER INSTRUCTION MANUAL
 MODEL: OBZ-50DHPN CONTENTS SAFETY PRECAUTIONS Warning...2 Caution...2 Electrical information...3 DEHUMIDIFIER CONTROLS Control panel...4 Other features......5 DESCRIPTION OF PARTS Identifying the parts.......6
1850 Series TRIPLE TREAT Operation Manual
 1850 Series TRIPLE TREAT Operation Manual BRINE TANK RESIN TANK CARBON TANK System shown with optional tank jackets. Note: 1. Read all instructions carefully before operation. 2. Avoid pinched o-rings
USER'S MANUAL PU SENS 01 (A11) PU SENS 01 (A19) Sensor Control Panel
 PU SENS 01 (A19) Sensor Control Panel") USER'S MANUAL PU SENS 01 (A11) PU SENS 01 (A19) Sensor Control Panel PU SENS 01 CONTENTS Safety requirements... 3 Purpose... 4 Technical data... 4 Overall dimensions [mm]... 4 Mounting and set-up... 5
USER'S MANUAL PU SENS 01 (A11) PU SENS 01 (A19) Sensor Control Panel PU SENS 01 CONTENTS Safety requirements... 3 Purpose... 4 Technical data... 4 Overall dimensions [mm]... 4 Mounting and set-up... 5
Instructions for use. Always be on the safe side.
 Instructions for use EXPERTmatic LUX E15 L - 1.007.5530 EXPERTmatic LUX E20 L - 1.007.5540 EXPERTmatic E15 C - 1.007.5531 EXPERTmatic E20 C - 1.007.5541 Always be on the safe side. Distributed by: KaVo
BL Series INSTRUCTIONS
 BL Series Models: EX5204/BL514 EX5204/BL515 EX5214/BL524 EX5214/BL525 EXT5214/BL524 EXT5214/BL525 EX5404/BL614 EX5404/BL615 EX5414/BL624 EX5414/BL625 EXT5214H/BL528 EXT5214H/BL529 Automatic Backlatcher
CHIRANA Medical, a. s.
 CHIRANA Medical, a. s. Námestie Dr. A. Schweitzera 194 916 01 Stará Turá Slovak Republic tel.: +421 (32) 775 2257 fax: +421 (32) 775 2218 e-mail: medical@chirana.eu www.chirana.eu Registered trade marks:
Instructions for Use. A-dec 461 Cuspidor with Support Center
 Instructions for Use A-dec 461 Cuspidor with Support Center A-dec 461 Cuspidor with Support Center Instructions for Use Copyright 2014 A-dec Inc. All rights reserved. A-dec Inc. makes no warranty of any
Bravo. Troubleshooting Guide
 Bravo Troubleshooting Guide Table of Contents Table of Contents 2 Bravo Alarm Code by Alarm Code Indication 3 Alarm Codes A022, A023, A024, E020 & E021 Door Locking Problems 4-9 Alarm Code E010 10 Alarm
Tornado Operations & Maintenance Manual
 TORNADO INDUSTRIES 7401 W. LAWRENCE AVENUE CHICAGO, IL 60706 (708) 867-5100 FAX (708) 867-6968 www.tornadovac.com Tornado Operations & Maintenance Manual MODEL NO. 99690 BD 22/14, 99720 BD 26/14 L9722
Foot control. No instrument selected. A Raise chair Chair to working position 1 B Incline backrest Chair to spitting. positioning
 Quick guide Foot No instrument selected Key Press briefly Preset ing A Raise chair Chair to working 1 B Incline backrest Chair to spitting C Lower chair Chair to entry and exit D Decline backrest Chair
Dynamics Precision Speed
 English FD-8000 Dental Units Vol. 07/2014 Dynamics Precision Speed 8000B floor units are known for reliability and style. The possibilities are endless, with several options for suction, cuspidor, amalgam
Operating Instructions. Rotating Vacuum Filter Type VRF
 Operating Instructions Rotating Vacuum Filter Type VRF GB Rotating Vacuum Filter Type VRF Table of Contents 1 Description of machine and functions... 5 2 Danger and safety instructions... 6 2.1 General
Enteral Pump Instructions for Use To Assemble When the low
 Enteral Pump Instructions for Use Before initial use on battery power and after extended storage periods, the pump must be plugged into an AC power source for a minimum of 12 hours (pump may be operated
Unlimited Mobility. The Mobile Dental Units From. B-Productions
 Unlimited Mobility The Mobile Dental Units From B-Productions Mobile Units from B-Productions: Unlimited Mobility in elegant stainless steel DENTA-PORT 303 Specifications» Portable: Treat your patients
ULTRASONIC DIGITAL HUMIDIFIER Instruction Manual and Warranty Information IM0002A READ AND SAVE THESE INSTRUCTIONS
 ULTRASONIC DIGITAL HUMIDIFIER Instruction Manual and Warranty Information IM0002A READ AND SAVE THESE INSTRUCTIONS Contents Safety Instructions... 1 Unpacking / Specifications... 2 Parts & Contents...
Glass and Dishwashers. BarAid 500/800. Installation and. Starting from Serial No.:
 Glass and Dishwashers BarAid 500/800 Installation and operation Instructions Starting from Serial No.: 8652 0001 REV. 19.01.2009 1617-A-01-09 Content Page 1 Important Notes... 4 2 Installation... 5 2.1
Instruction Manual for FORMALDEHYDE GAS DETECTOR MODEL FP-30/FP-40
 Instruction Manual for FORMALDEHYDE GAS DETECTOR MODEL FP-30/FP-40 This instrument is sold and serviced by RKI Instruments, Union City, CA For questions, parts, or service please contact RKI at (800) 754-5165.
MODEL 7000 SUCTION UNIT
 MODEL 7000 SUCTION UNIT OPERATOR S MANUAL Caution Federal law restricts this device to sale by or on order of a physician, or any other practitioner licensed by the law of the State in which he practices
MIX Boiler & Font Range Service Manual
 MIX Boiler & Font Range Service Manual 1000870# 1000871# 1000875# 1000880# 1000887# 1000878 1000879 2300268 www.marcobeveragesystems.com Ireland Tel: +353 (1) 295 2674 UK Tel: +44 (0207) 2744577 Service
Glass and Dishwashers AMX / AUX Series
 Glass and Dishwashers AMX / AUX Series INSTALLATION OPERATION VERSION 24.02.04 Important Notes Use in Accordance with Regulations This machine is exclusively to be used to wash ware such as plates, cups,
HOT WASHER MODEL NO: KING150
 WARNING: Do not use the hot washer without reading this manual HOT WASHER MODEL NO: KING150 PART NO: 7320175 OPERATION & MAINTENANCE INSTRUCTIONS LS1215 INTRODUCTION Thank you for purchasing this CLARKE
CLEAN MIST SMART HUMIDIFIER Instruction Manual and Warranty Information IM0002E READ AND SAVE THESE INSTRUCTIONS
 CLEAN MIST SMART HUMIDIFIER Instruction Manual and Warranty Information IM0002E READ AND SAVE THESE INSTRUCTIONS Contents Safety Instructions... 1 Unpacking / Specifications... 2 Parts & Contents... 3
Water Runs Continuously out of the Bubbler. Water Quality Problem (taste and odor) Water Flow is Intermittent or Erratic
 Water Flow is Intermittent or Erratic") No Water Flow out of Bubbler No water flow No power to outlet Confirm cooler is plugged into electrical outlet. Check if circuit ***No water flow from bubbler on products with a refrigeration system. Water
No Water Flow out of Bubbler No water flow No power to outlet Confirm cooler is plugged into electrical outlet. Check if circuit ***No water flow from bubbler on products with a refrigeration system. Water
TECHNICAL INFORMATION Touchtronic Clothes Dryers
 TECHNICAL INFORMATION Touchtronic Clothes Dryers Includes: T1302, T1303, T1322, T1329ci T1403 & T1405 2004 Miele This page intentionally left blank. Table of Contents GENERAL INFORMATION A. Warning and
CONTROL PANEL INTERFACE ACTIVATE THE GENERATOR DISPLAY INTERFACE MENUS. Control Panel USING THE AUTO/OFF/MANUAL SWITCH
 CONTROL PANEL INTERFACE USING THE AUTO/OFF/MANUAL SWITCH With the switch set to AUTO, the engine may crank and start at any time without warning. Such automatic starting occurs when utility power source
How to Use and Care for Your Sleek
 How to Use and Care for Your Sleek Table of Contents Get to know the important buttons, lights and key parts.. 3 This part should be read carefully: it s about safety!...4 First time using The Sleek? Follow
POWER WASHER MODEL NO: JET 9000 OPERATION & MAINTENANCE INSTRUCTIONS. WARNING: Do not use the machine without reading this manual PART NO:
 WARNING: Do not use the machine without reading this manual POWER WASHER MODEL NO: JET 9000 PART NO: 7333502 OPERATION & MAINTENANCE INSTRUCTIONS GC0913 INTRODUCTION Thank you for purchasing this CLARKE
One-Touch Dispense. Multi-temp selections. 208 F For tea, coffee, instant noodle. 194 F Keep warm around 194 F. 176 F Keep warm around 176 F.
 Instruction Manual Automatic Dispensing Hot Water Pot with Multi-temperature Function Automatic Dispensing One-Touch Dispense FEATURES Reboil Function 5 Temperature Settings Image Of SP-5016 208 F For
FAULT FINDING. Water Gas Cassette Toilet FAULT FINDING
 Water... 208 Gas... 210 Cassette Toilet... 211 207 WATER FAULTS Water Fault Cause Remedy Water not flowing from any tap when operated but pump runs Pump does not run Water flows from cold tap but not from
Glass and Dishwashers AMX / AUX Series
 Glass and Dishwashers AMX / AUX Series INSTALLATION OPERATION REV. 8.xx 04.07.2005 Installation and Operation Instructions for Models of AMX / AUX Series Content Page 1 Installation... 3 2 Connections...
A-dec 300 Support Systems
 Instructions for Use A-dec 300 Support Systems 351, 352, and 353 Assistant s Instrumentation 362 and 363 Support Center and Cuspidor A-dec 300 Support Systems Instructions for Use Copyright 2017 A-dec
WARNING VL-220CZGV-E. 1. Safety Precautions LOSSNAY HEAT RECOVERY VENTILATOR (RESIDENTIAL USE) Contents. Eng-1. English
 Contents. Eng-1. English") English LOSSNAY HEAT RECOVERY VENTILATOR (RESIDENTIAL USE) MODEL VL-220CZGV-E Instruction Manual For user Contents 1. Safety Precautions 1-2 2. Features 2 3. Preparations Before Use 3 4. Names and Functions
English LOSSNAY HEAT RECOVERY VENTILATOR (RESIDENTIAL USE) MODEL VL-220CZGV-E Instruction Manual For user Contents 1. Safety Precautions 1-2 2. Features 2 3. Preparations Before Use 3 4. Names and Functions
MTKOMNS. kéï=~ë=çñw= a^`=rkfsbop^i. lééê~íáåö=fåëíêìåíáçåë. båöäáëü. Cover page
 kéï=~ë=çñw= MTKOMNS a^`=rkfsbop^i lééê~íáåö=fåëíêìåíáçåë båöäáëü Cover page = Dear Customer, Sirona Dental A/S Dear Customer, Thank you for purchasing a DAC UNIVERSAL unit. DAC UNIVERSAL cleans, oils and
CONTROLS INSTRUCTIONS MANUAL ENGLISH
 CONTROLS INSTRUCTIONS MANUAL ENGLISH Table of Contents 1. Introduction of the Innova Controls 3 1.1 Precautions 3 2. Direction of Use 2.1 Turning on the Control Unit 4 4 2.2 Switching the Heater or Steamer
Geberit AquaClean 8000plus UP Service instructions
 Geberit AquaClean 8000plus UP Service instructions 01-2010 998.601.00.1 (00) Contents Contents ESD protection... 4 Service spare parts... 5 Fault clearance by fault pattern... 8 Fault clearance by error
OPERATION and MAINTENANCE INSTRUCTION MANUAL. AEU-425 Transport II Portable Dental System
 OPERATION and MAINTENANCE INSTRUCTION MANUAL AEU-425 Transport II Portable Dental System TABLE OF CONTENTS: Introduction.........................1 Package Contents....................1 Specifications.......................2
CLEAN MIST SMART HUMIDIFIER Instruction Manual and Warranty Information IM0031B READ AND SAVE THESE INSTRUCTIONS
 CLEAN MIST SMART HUMIDIFIER Instruction Manual and Warranty Information IM0031B READ AND SAVE THESE INSTRUCTIONS Contents Safety Instructions... 1 Unpacking / Specifications... 2 Parts & Contents... 3
Schuco byallied MEDICAL ASPIRATOR. USER'S MANUAL A Caution
 S168-544-OO1E REV.A Schuco byallied MEDICAL ASPIRATOR MnrInI -33OA USER'S MANUAL A Caution Federal law restricts this device to sale by or on order of a physician, or any other practitioner licensed by
DESCALING INSTRUCTIONS for: CS220, CS200, CS100 Page 3 Cappucinatore CS20 Page 5 Gemini CS223 Page 6 Zenius ZN100 Page 7
 Australia & New Zealand DESCALING INSTRUCTIONS for: CS220, CS200, CS100 Page 3 Cappucinatore CS20 Page 5 Gemini CS223 Page 6 Zenius ZN100 Page 7 Call us on AU 1800 182 206 or NZ 0800 466 060 (24/7) if
HD Kompakt Service Manual
 HD Kompakt Service Manual English 5.906-583.0 Rev. 00 (08/13) 1 1 Contents 1 Contents.................................................... 2 2 Preface.....................................................
LAUFEN CLEANET RIVA OPERATING MANUAL
 LAUFEN CLEANET RIVA OPERATING MANUAL CONTENTS 1 SAFETY AND WARNING NOTICES 6 2 INTRODUCTION 8 2.1 Notices 8 2.2 Remote control: All Laufen symbols at a glance 8 2.3 Shower toilet: LED indicator light
51AKS I S O OWNER S MANUAL
 LLOYD'S REGISTER QUALITY ASSURANCE 51AKS I S O 9 00 1 OWNER S MANUAL This manual applies to the following models Stand-alone Split 51AKS 085--- 51AKS 010--- 51AKS 185--- 51AKS 013--- 51AKS 113--- 51AKS
CryoPod Carrier. Quick Start Guide. English Quick Start Guide, 2 Français Guide de démarrage rapide, 8 Deutsch Schnellstartanleitung, 14
 CryoPod Carrier Quick Start Guide English Quick Start Guide, 2 Français Guide de démarrage rapide, 8 Deutsch Schnellstartanleitung, 14 Italiano Guida all avvio rapido, 20 Português Guia de introdução rápida,
B 353 COFFEE BREWING MACHINES MACHINES A CAFE KAFFEEBRUEHMASCHINEN KOFFIEZETAPPARATEN
 Chiller A B C1 C2 C3 C4 C D E L H G F J M I K N Fig. 1 Principal components and Control organs E=154 W=78 115 572 755 200 35 482 415 245 E/W = 61 Fig. 2 Dimensions Bravilor Bonamat GB Operating instructions