INSTALLATION & OPERATING INSTRUCTIONS
|
|
|
- Joanna Jennings
- 6 years ago
- Views:
Transcription
1
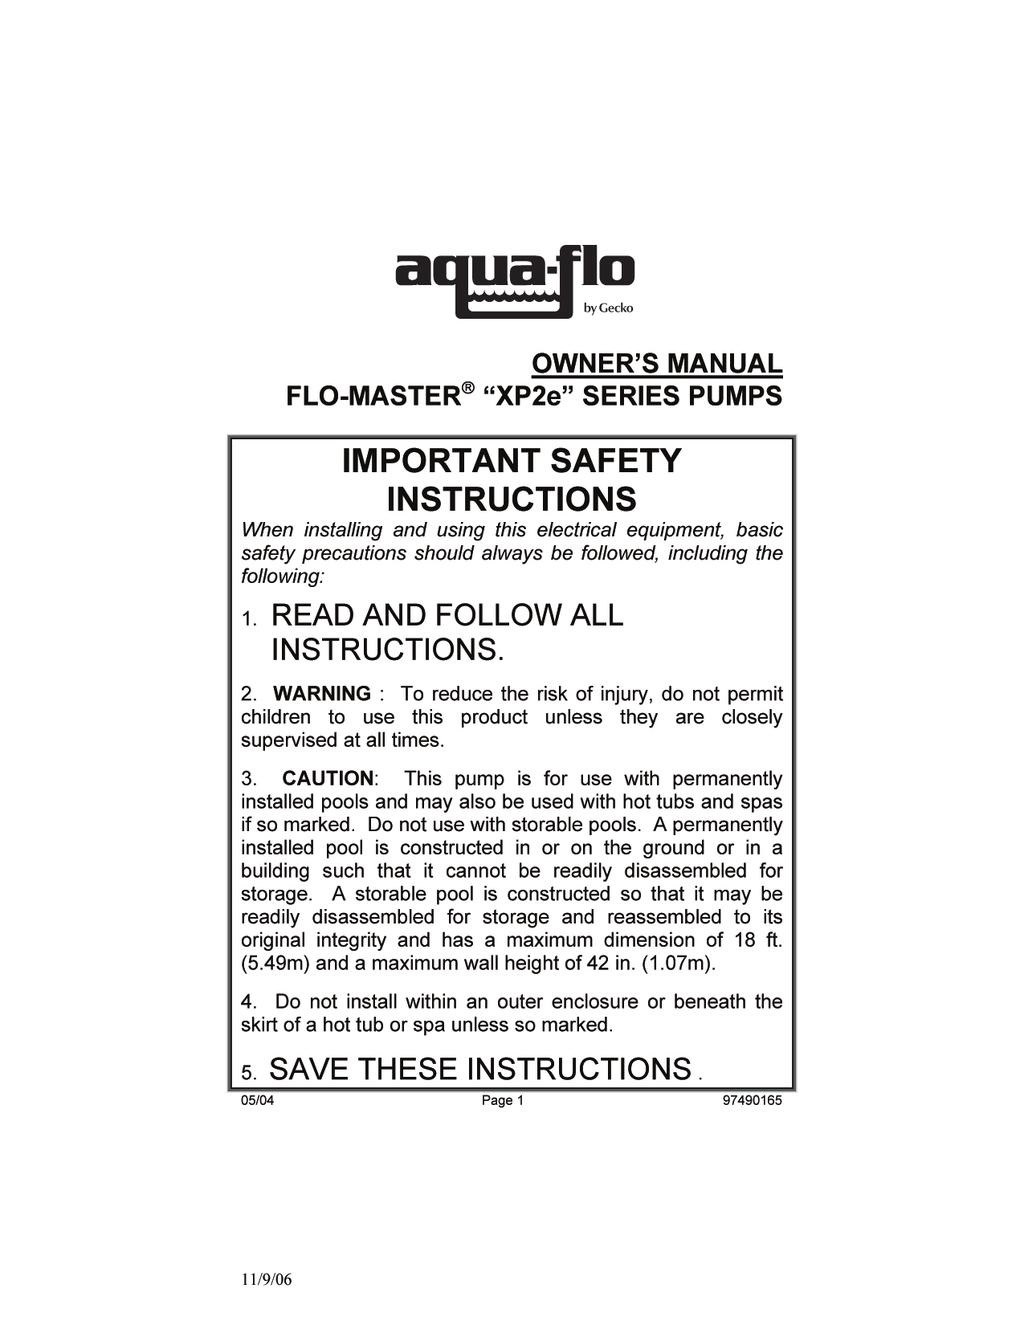
2 INSTALLATION & OPERATING INSTRUCTIONS WARNING RISK OF ELECTRIC SHOCK. CONNECT ONLY TO A CIRCUIT PROTECTED BY A GROUND-FAULT CIRCUIT-INTERRUPTER. THE UNIT SHOULD BE INSTALLED BY A QUALIFIED SERVICE REPRESENTATIVE. ALL ELECTRICAL WIRING OF THE MOTOR INSTALLATION MUST BE DONE BY A QUALIFIED ELECTRICIAN IN ACCORDANCE WITH APPLICABLE ELECTRICAL CODES. GROUNDING IS REQUIRED. BEFORE WORKING ON ANY MOTOR, BE CERTAIN THAT THE SOURCE OF ELECTRICAL POWER IS OFF AT THE MAIN JUNCTION BOX. BONDING WIRE UPON INSTALLATION OF THE PUMP, THE MOTOR MUST BE BONDED WITH (NO SMALLER THAN) A NO.8 AWG (8.4MM 2 ) SOLID COPPER CONDUCTOR PER NATIONAL ELECTRIC CODE. THE CONNECTION SHOULD BE FROM THE ACCESSIBLE WIRE CONNECTOR ON THE MOTOR TO ALL METAL PARTS OF THE SWIMMING POOL, SPA, OR HOT TUB STRUCTURE AND TO ALL ELECTRICAL EQUIPMENT, METAL CONDUIT AND METAL PIPING WITHIN 5 FEET (1.5M) OF THE INSIDE WALLS OF THE SWIMMING POOL, SPA, OR HOT TUB, WHEN THE MOTOR IS INSTALLED WITHIN 5 FEET OF THE INSIDE WALLS OF THE SWIMMING POOL, SPA, OR HOT TUB. NOTE: FOR ELECTRICAL CONNECTIONS, SEE WIRING DIAGRAM ON MOTOR RATING PLATE. GENERAL Your AQUA-FLO pump has been quality built and engineered to give maximum efficiency under normal water pumping conditions. Consult the manufacturer for any other applications. LOCATION OF PUMP For best pump performance, locate the system as close to the water source as possible. Provide adequate access around the pump for inspection and maintenance. MODELS LESS TRAP This pump was designed for below water level (flooded suction) applications. Make sure the pump is installed at a level that will allow the pump casing (volute) to be completely filled with water. Two quick disconnect compression fittings are included with your pump for ease of installation and maintenance. Make sure the fittings are correctly aligned with pump connections to allow the o-ring to make the proper seal. Hand tighten only. Do not use a wrench to tighten fittings. MODELS WITH TRAP Avoid excessive tightening of pipe or fittings in any areas where threaded connections are used. For NPT threaded connections, use Quick-Seal Teflon Thread Sealing Compound, Plasto-Joint Stick or any other sealants formulated specifically for plastics. 2
3 STARTING & PRIMING PUMP Do not run unit dry. Always be certain that the pump casing and/or trap is filled with water before starting the unit. Allow a reasonable amount of time for priming. If pump will not start or will not prime, see troubleshooting section in this manual. MAINTENANCE The trap basket should be inspected frequently and kept clean. To avoid damage to the basket, do not strike when cleaning. Inspect trap cover o-ring regularly and replace as necessary. Keep the motor clean. Ensure that the louvered openings are free from debris and obstructions. Over a period of time, the shaft seals may become damaged or worn and must be replaced. WINTERIZATION To prevent damage during freezing conditions, disconnect all electrical power. Drain thoroughly and clean out any debris. Protect pump and motor from elements by covering or, if possible, store in a dry, well ventilated room. TROUBLESHOOTING MOTOR WILL NOT START: 1) Check circuit breaker. 2) Check for incorrect or loose wire connections. 3) Make sure the correct power supply is being used. 4) Any on/off switch or pneumatic switch should be in the on mode. MOTOR OVERHEATING AND CYCLING ON AND OFF: 1) Check for incorrect or loose wire connections. 2) Check for low voltage supply (frequently caused by undersized wire). 3) Make sure that the motor gets a fresh air supply and the vents are kept unclogged. MOTOR MAKES HUMMING NOISE BUT WILL NOT START: 1) Check for low voltage supply (frequently caused by undersized wire). 2) Make sure that the motor shaft turns free. 3) Check for jammed impeller or an obstruction in the pump casing (volute). NOISE: 1) Check plumbing vibration. Make sure lines are adequately supported. 2) Check for cavitation due to obstructed or undersized suction line. PUMP WILL NOT PRIME: 1) Make sure pump is installed at the proper level and the plumbing lines have been correctly installed to allow the water to enter pump freely. 2) Open air control valves to release any possible air lock. 3) Make sure all suction and discharge lines are clear and unobstructed and all valves are open. 4) Check for air leaks in the suction line. 3
4 LOW WATER FLOW: 1) Check for clogged plumbing lines. 2) Check for worn or damaged impeller. 3) Check for low voltage. 4) Check filter pressure gauge, filter may need cleaning. WATER LEAKS: 1) Check contamination or damage to shaft rotary seal. Replace if necessary. 2) Check compression fittings (union connectors); make sure they are properly aligned and secured. Hand tighten only. Do not use tools. 3) Make sure o-rings are properly seated and not damaged. ASSEMBLY INSTRUCTION (Impeller & Seal Replacement) WARNING RISK OF ELECTRIC SHOCK. BEFORE PERFORMING ANY WORK ON THE PUMP UNIT, BE CERTAIN THAT THE SOURCE OF ELECTRICAL POWER IS OFF AT THE MAIN JUNCTION BOX AND DISCONNECTED TO DISASSEMBLE PUMP CAUTION: DRAIN THE WATER FROM THE PLUMBING LINES BEFORE DISCONNECTING THE PUMP. ALWAYS PROTECT THE MOTOR FROM POSSIBLE WATER DAMAGE. Removing the Suction Cover 1. Remove the cover by removing the screws securing the cover to the volute (casing). These screws are located at the perimeter of the cover. 2. Note the orientation of the loose wear ring on the impeller hub before disassembling. Removing the Impeller 3. Hold the motor shaft from rotating by using a needle nose vise grip or pliers to hold the shaft at the opening between the motor face and impeller sleeve. CAUTION: DO NOT GRIP IMPELLER SLEEVE. 4. Turn the impeller counter clockwise until it is completely free from the motor shaft thread. Removing the Volute (Casing) from the Motor 5. Unscrew the four screws securing the four legs of the volute to the motor. These bolts extend through the entire length of the motor into the 4 legs of the volute. 6. When the four legs of the volute are completely disengaged from all screws, carefully slide the volute off of the motor shaft. Inspecting the Seal 7. Carefully examine the surfaces of the carbon disk (black rigid part of seal rotating assembly, mounted on impeller) and the white ceramic ring (at seal stationary assembly on the volute) for edge chipping, surface scratches, or uneven wear. The surfaces should be smooth and free from damage. 4
5 8. The rest of the seal assembly should be free from cracks and should fit snugly with their respective mating parts. 9. Use alcohol wipes or isopropyl alcohol with clean lint free soft cloth to clean the carbon ring and the ceramic ring surfaces if reusing the same assemblies. NOTE: IT IS ADVISIBLE TO REPLACE THE COMPLETE SEAL ASSEMBLY (BOTH THE CERAMIC AND CARBON SIDES) EVERY TIME THE PUMP IS DISASSEMBLED. Removing the Seal Assemblies 10. Remove seal rotating assembly from the impeller by carefully sliding off of the impeller sleeve. 11. Remove the ceramic ring and rubber boot by knocking it out and/or prying it loose through the rear opening of the volute. Be sure not to scratch or damage the ceramic surface if you are reusing this part. Caution must be used so as not to damage the volute wall. TO REASSEMBLE PUMP Installing the New Seal Assemblies 1. Seal Rotating Assembly-Carbon Ring, Spring, Steel Collar, Rubber Ring: A. Before installing the seal rotating assembly, apply water to the impeller sleeve for lubrication. B. Grasp the assembly with the carbon ring facing outward. Insert the impeller sleeve through the steel collar side. Using a twisting motion, push until the steel collar touches the base of the sleeve. 2. Seal Stationary Assembly-Ceramic Ring, Rubber Boot: A. Before installing the stationary assembly, apply water to the rubber boot s ribbing for lubrication. B. Being careful not to damage the ceramic ring surface, press the seal assembly squarely into the seal cavity of the volute. Reinstalling the Volute (Casing) to the Motor 3. Inserting four screws at the rear of the motor. Align them with the volute legs. Be sure to use proper screws. 4. Pre-tighten the four screws. Make sure that the motor shaft is accurately located in the center of (not touching) the ceramic ring. 5. When the motor shaft is properly located, tighten the four screws to secure the volute in place. Reinstalling the Impeller 6. Hold the motor shaft from rotating by using a needle nose vise grip or pliers to hold the shaft at the opening between the motor face and impeller sleeve. 7. Thread the impeller clockwise over the motor shaft thread. Hand tighten only. Make sure the seal carbon ring is making contact with the ceramic ring. CAUTION: DO NOT GRIP IMPELLER SLEEVE. 8. Reinstall the wear ring over the impeller hub in the correct orientation noted earlier. Reinstalling the Suction Cover 9. Inspect the o-ring for damage. Replace if necessary. 10. Properly install the o-ring on the cover before mounting the cover to the volute. 5
6 11. Cover can be mounted to the volute in one orientation only. An aligning feature is built-in with each part to ensure proper mounting. When properly aligned, the cover should slide in easily. 12. Secure the cover to the volute with screws. Tighten all screws alternately (crisscrossing the cover) to achieve proper o-ring compression and cover seating. 13. Rotate the impeller by hand to make sure that it is rotating freely without interference. Reconnecting the Pump Unit 14. Clean the seals, gaskets, or o-rings for the plumbing connectors. Replace if cracked, worn, or damaged. 15. Reconnect the plumbing lines to the pump. Hand tighten only. 16. Be sure that the pump unit is secured properly to the platform or base, if applicable. Tighten the bolts if necessary. 17. Reconnect the power supply. Be sure that all wiring is properly and securely connected. CAUTION: BEFORE TURNING THE POWER ON, BE SURE THAT: 1. THERE IS AN ADEQUATE AMOUNT OF WATER IN THE SYSTEM. 2. ALL VALVES ARE OPEN TO ALLOW WATER CIRCULATION. 3. ALL CONNECTORS AND FITTINGS ARE PROPERLY ALIGNED AND SECURED. 6
7 FLO-MASTER XP2e REPLACEMENT PARTS Ref. Part No. Description No. 1 Motor, 48 Frame/56 Frame 6.3" Dia Volute, XP2e, 48 Frame Volute, XP2e, 56 Frame, 6.3 Dia Seal Replacement, # Impeller, XP2e Series, 1.5 HP Impeller, XP2e Series, 2.0 HP Impeller, XP2e Series, 2.5 HP Wear Ring, Flanged, XP2e/XP3 Series O-ring, Volute, XP2e Series, # Cover, Suction,XP2e Series, 2", Std Drain 7A Replacement Kit Cover, Complete,2", XP2e Series Std Drain O-ring, Drain Plug, # Plug, Drain 1/4-18 NPSM, Wing Screw, #8-32 x 5/8" Long O-ring, # Fitting, Tail Piece, 2" Fitting, Union Nut, 2" Fitting, Compression, Complete, 2" x 2" Q HP, Wet End, 2", XP2e, Std Drain, 48F Q HP, Wet End, 2", XP2e, Std Drain, 48F Q HP, Wet End, 2", XP2e, Std Drain,48F Q HP, Wet End, 2", XP2e, Std Drain, 56F, 6.3 Dia. Q HP, Wet End, 2", XP2e, Std Drain,56F, 6.3 Dia. Q HP, Wet End, 2", XP2e, Std Drain,56F, 6.3 Dia. Q Includes Ref. No.'s
TIDALWAVE I/G POOL PUMP INSTRUCTION MANUAL
 TIDALWAVE I/G POOL PUMP INSTRUCTION MANUAL READ THIS MANUAL CAREFULLY BEFORE USING YOUR PUMP 88 PUMP PARTS BREAKDOWN REF # Order # Mfr # Description 1 NEP4 AC 348 Lid Knobs NEP AC 380 Strainer Lid 3 NEP6
2 SPEED PUMP INSTRUCTION MANUAL READ THIS MANUAL CAREFULLY BEFORE USING YOUR 2 SPEED PUMP
 2 SPEED PUMP INSTRUCTION MANUAL READ THIS MANUAL CAREFULLY BEFORE USING YOUR 2 SPEED PUMP 8308 PUMP PARTS BREAKDOWN Ref # Part # Manf. # Descrip on 1 NEP2134 AC 81361 PUMP LID 2 NEP2135 AC 81396 PUMP LID
MAXI PUMP INSTRUCTION MANUAL NE6151B /NE6171B READ THIS MANUAL CAREFULLY BEFORE USING YOUR MAXI PUMP
 MAXI PUMP INSTRUCTION MANUAL NE6151B /NE6171B READ THIS MANUAL CAREFULLY BEFORE USING YOUR MAXI PUMP 8104 MAXI-PUMP PARTS BREAKDOWN Re f # 1 2 3 4 5 6 7a 7b 8 9 10 11 12 13 14 15 16 2 Part # NEP2134 NEP2135
CHAMPION PUMP OWNER S MANUAL
 CHAMPION PUMP OWNER S MANUAL IMPORTANT SAFETY INSTRUCTIONS READ AND FOLLOW ALL INSTRUCTIONS SAVE THESE INSTRUCTIONS WARNING: Before installing this product, read and follow all warning notices and instructions
ECONO FLO 2.7HP VARIABLE SPEED PUMP OWNER S MANUAL
 ECONO FLO 2.7HP VARIABLE SPEED PUMP OWNER S MANUAL IMPORTANT SAFETY INSTRUCTIONS READ AND FOLLOW ALL INSTRUCTIONS SAVE THESE INSTRUCTIONS WARNING: Before installing this product, read and follow all warning
ECONO FLO VSA 165 VARIABLE SPEED PUMP OWNER S MANUAL
 ECONO FLO VSA 165 VARIABLE SPEED PUMP OWNER S MANUAL IMPORTANT SAFETY INSTRUCTIONS READ AND FOLLOW ALL INSTRUCTIONS SAVE THESE INSTRUCTIONS WARNING: Before installing this product, read and follow all
SMF PUMP OWNER S MANUAL
 SMF PUMP OWNER S MANUAL IMPORTANT SAFETY INSTRUCTIONS READ AND FOLLOW ALL INSTRUCTIONS SAVE THESE INSTRUCTIONS WARNING: Before installing this product, read and follow all warning notices and instructions
Elite Primer Baldor Series External Pond Pump
 Elite Primer Baldor Series External Pond Pump ( 5250PPB21, 6440PPB23, 7550PPB26, 9600PPB28) Installation and User s Guide IMPORTANT SAFETY INSTRUCTIONS, READ AND FOLLOW ALL INSTRUCTIONS. SAVE THESE INSTRUCTIONS
MECHANICAL SEAL REPLACEMENT UNPACKING MAINTENANCE. Figure 1 & 2 - Mechanical Seal Replacement
 Please read and save this Repair Parts Manual. Read this manual and the General Operating Instructions carefully before attempting to assemble, install, operate or maintain the product described. Protect
568X, 587X, 588X Series
 Please read and save this Repair Parts Manual. Read this manual and the General Operating Instructions carefully before attempting to assemble, install, operate or maintain the product described. Protect
MECHANICAL SEAL REPLACEMENT UNPACKING MAINTENANCE. Figure 1 & 2 - Mechanical Seal Replacement
 Please read and save this Repair Parts Manual. Read this manual and the General Operating Instructions carefully before attempting to assemble, install, operate or maintain the product described. Protect
SELF-PRIMING CENTRIFUGAL PUMPS BMLS-M & BMLS-H
 SELF-PRIMING CENTRIFUGAL PUMPS BMLS-M & BMLS-H INSTALLATION, OPERATION & MAINTENANCE INSTRUCTIONS HP Phase Medium Head High Head 3 1 BMLS 300 M BMLS 300 H 3 3 BMLS 300 M3 BMLS 300 H3 5 1 BMLS 500 M BMLS
Specifications Information and Repair Parts Manual 316A-95, 316B-95, 393A-95, 393B A-95 thru 394D-95, 399A-95
 Specifications Information and Repair Parts Manual 316A-95, 316B-95, 393A-95, 393B-95 394A-95 thru 394D-95, 399A-95 Please read and save this Repair Parts Manual. Read this manual and the General Operating
IMPORTANT SAFETY INSTRUCTIONS READ AND FOLLOW ALL INSTRUCTIONS SAVE THESE INSTRUCTIONS. Table of Contents WARNING.
 Eagle Pump Owners Manual IMPORTANT SAFETY INSTRUCTIONS READ AND FOLLOW ALL INSTRUCTIONS SAVE THESE INSTRUCTIONS Table of Contents SECTION I. INSTALLATION... 2 SECTION II. OPERATION & MAINTENANCE... 2 SECTION
SuperFlo High Performance Pump
 SuperFlo High Performance Pump Installation and User's Guide IMPORTANT SAFETY INSTRUCTIONS READ AND FOLLOW ALL INSTRUCTIONS SAVE THESE INSTRUCTIONS Customer Service If you have questions about ordering
QUIETFLO OWNER S MANUAL
 QUIETFLO OWNER S MANUAL INSTALLATION, OPERATION & PARTS To prevent potential injury and to avoid unnecessary service calls, read this manual carefully and completley. CAUTION - We highly recommend a qualified
OWNERS GUIDE TO INSTALLATION AND OPERATION
 OWNERS GUIDE TO INSTALLATION AND OPERATION SPM SERIES HIGH POWER CENTRIFUGALS READ THESE INSTRUCTIONS CAREFULLY Read these installation instructions in detail before installing your pump. Be sure to check
STAINLESS STEEL UNITS
 Please read and save this Repair Parts Manual. Read this manual and the General Operating Instructions carefully before attempting to assemble, install, operate or maintain the product described. Protect
489 & 490 Series CAST IRON UNITS BRONZE UNITS STAINLESS STEEL UNITS MAINTENANCE. Figure 1 - Mechanical Seal Replacement
 Please read and save this Repair Parts Manual. Read this manual and the General Operating Instructions carefully before attempting to assemble, install, operate or maintain the product described. Protect
REF. NO Clamp Assembly 8 1 set Gasket (4 per set) S.S. Lock-washer 3/8 x 1/ Brass Impeller 3.
 S.S. Lock-washer 3/8 x 1/ Brass Impeller 3.") 4.4 SUPPLY PUMPAK ASSEMBLY NOTE: This section applies only to systems, which include a supply pumpak. Only the H6, XA, and XC series systems contain a supply pumpak. If your system is a single zone, H6
4.4 SUPPLY PUMPAK ASSEMBLY NOTE: This section applies only to systems, which include a supply pumpak. Only the H6, XA, and XC series systems contain a supply pumpak. If your system is a single zone, H6
OWNER S MANUAL INSTALLATION, OPERATION, & PARTS. Super Pump Series
 P/N: ISSPSERIES REV. A OWNER S MANUAL INSTALLATION, OPERATION, & PARTS *50HZ Models are not UL or CSA Listed. Super Pump Series The Hayward Super Pump TM is specifically engineered for the demanding requirements
Pump - Owner s Manual
 Pump - Owner s Manual INSTALLATION, OPERATION, & PARTS To prevent potential injury and to avoid unnecessary service calls, read this manual carefully and completely. SAVE THIS INSTRUCTION MANUAL Use only
Patterson/AMT Inline Circulator Pump Refer to pump manual for General Operating and Safety Instructions.
 Please read and save this Repair Parts Manual. Read this manual and the General Operating Instructions carefully before attempting to assemble, install, operate or maintain the product described. Protect
569, 570, 571, 572 Series
 Please read and save this Repair Parts Manual. Read this manual and the General Operating Instructions carefully before attempting to assemble, install, operate or maintain the product described. Protect
569, 570, 571, 572 Series
 Please read and save this Repair Parts Manual. Read this manual and the General Operating Instructions carefully before attempting to assemble, install, operate or maintain the product described. Protect
SPARUS 160 ENERGY EFFICIENT AQUACULTURE DUTY PUMP
 AQUATIC ECO-SYSTEMS SPARUS 160 ENERGY EFFICIENT AQUACULTURE DUTY PUMP INSTALLATION AND USER S GUIDE IMPORTANT SAFETY INSTRUCTIONS READ AND FOLLOW ALL INSTRUCTIONS SAVE THESE INSTRUCTIONS i CUSTOMER SERVICE
Patterson/AMT Inline Circulator Pump Refer to pump manual for General Operating and Safety Instructions.
 Please read and save this Repair Parts Manual. Read this manual and the General Operating Instructions carefully before attempting to assemble, install, operate or maintain the product described. Protect
DESCRIPTION MAINTENANCE INSTALLATION OF NEW SEAL REMOVAL OF OLD SHAFT SEAL
 Please read and save this Repair Parts Manual. Read this manual and the General Operating Instructions carefully before attempting to assemble, install, operate or maintain the product described. Protect
AQUA-FLO A SERIES. The Bronze Pump designed exclusively for any swimming pool or spa application.
 The Bronze Pump designed exclusively for any swimming pool or spa application. The A Series pump, including motor bracket, impeller, volute and trap, are unit cast from corrosion-resistant fine old world
LC Series - Light Commercial Pump Station Installation and Operation Manual
 LC Series - Light Commercial Pump Station Installation and Operation Manual Please keep this manual with the pump station Content Rain Bird LC Series Overview... Safety Instruction... Operation... 3 Pump
Patterson/AMT Inline Circulator Pump Refer to pump manual for General Operating and Safety Instructions.
 Please read and save this Repair Parts Manual. Read this manual and the General Operating Instructions carefully before attempting to assemble, install, operate or maintain the product described. Protect
J SERIES. Technical Specifications. Centrifugal Pumps for J Series Condensate & Boiler Feed Pumps. Features
 Steam Traps Condensate Boiler Feed Valves Strainers Pumps J SERIES Centrifugal Pumps for J Series Condensate & Boiler Feed Pumps Technical Specifications The Sterlco J Series Centrifugal Pumps are designed
Installation and operating instructions. E.2 Series high efficiency circulator
 Installation and operating instructions E.2 Series high efficiency circulator File No: 10.84 Date: august 16, 2012 Supersedes: 10.84 Date: july 20, 2010 contents 1.0 Operating limits 4 2.0 Electrical
"S" SERIES IMMERSIBLE PUMP OWNER'S MANUAL INSTALLATION OPERATION PARTS Models S12 S16
 Webster Pumps "S" SERIES IMMERSIBLE PUMP OWNER'S MANUAL INSTALLATION OPERATION PARTS Models S12 S16 PLEASE READ THE FOLLOWING INFORMATION PRIOR TO INSTALLING AND USING Webster PUMPS or HAYWARD VALVES,
INSTALLATION INSTRUCTIONS
 INSTALLATION INSTRUCTIONS VARIABLE SPEED BOOSTER PUMP IMPORTANT SAFETY INSTRUCTIONS READ AND FOLLOW ALL INSTRUCTIONS SAVE THESE INSTRUCTIONS IMPORTANT SAFETY INFORMATION WARNING: RISK OF ELECTRICAL SHOCK
SERIES 'HE' PLASTIC HORIZONTAL PUMP MODEL: H2 x1½
 SERIES 'HE' PLASTIC HORIZONTAL PUMP MODEL: H2 x1½ OPERATION AND SERVICE GUIDE O-820_R FEBRUARY 2013 Refer to Bulletin P-201 and Parts Lists: P-7200, P-7250. SAFETY PRECAUTIONS BEFORE STARTING PUMP 1. Read
VL Series Pump. Owner s Manual. NOTE - To prevent potential injury and to avoid unnecessary service calls, read this manual carefully and completely.
 ISVL1285 Rev B VL Series Pump Owner s Manual NOTE - To prevent potential injury and to avoid unnecessary service calls, read this manual carefully and completely. READ AND FOLLOW ALL INSTRUCTIONS SAVE
Clean & Clear. Cartridge Filter System Owner s Manual IMPORTANT SAFETY INSTRUCTIONS READ AND FOLLOW ALL INSTRUCTIONS SAVE THESE INSTRUCTIONS
 Clean & Clear Cartridge Filter System Owner s Manual IMPORTANT SAFETY INSTRUCTIONS READ AND FOLLOW ALL INSTRUCTIONS SAVE THESE INSTRUCTIONS SECTION I. SECTION II. SECTION III. SECTION IV. SECTION V. SECTION
489G DESCRIPTION CAST IRON UNITS BRONZE UNITS 316 STAINLESS STEEL UNITS. Maintenance. General Safety Information for 12 Volt DC Power
 Please read and save this Repair Parts Manual. Read this manual and the General Operating Instructions carefully before attempting to assemble, install, operate or maintain the product described. Protect
Vertical Inline Models
 Please read and save this Repair Parts Manual. Read this manual and the General Operating Instructions carefully before attempting to assemble, install, operate or maintain the product described. Protect
E.2 series high efficiency circulator. Installation and operating instructions
 E.2 series high efficiency circulator Installation and operating instructions File No: 10.84 Date: august 16, 2012 Supersedes: 10.84 Date: july 20, 2010 contents 1.0 Operating limits 4 2.0 Electrical
"S" SERIES IMMERSIBLE PUMP OWNER'S MANUAL INSTALLATION OPERATION PARTS Models S2 S4 S5 SS6 SS7 S8
 Webster Pumps "S" SERIES IMMERSIBLE PUMP OWNER'S MANUAL INSTALLATION OPERATION PARTS Models S2 S4 S5 SS6 SS7 S8 PLEASE READ THE FOLLOWING INFORMATION PRIOR TO INSTALLING AND USING Webster PUMPS or HAYWARD
K 3.97 M. Specifications or visit our website: In USA call: Part No
 K 3.97 M High Pressure Washer Operator Manual Overview... 2 Precautions... 2-4 Assembly Instructions... 4-5 Operating Instructions... 5-6 GFCI Instructions... 6 Using the Accessories... 6 Working with
Warranty Details page 2. Pump Description & Technical page 3 Specifications. Transportation, Storage & Installation page 4. Pump Maintenance page 5
 5 . Manual Contents Warranty Details page 2 Pump Description & Technical page 3 Specifications Transportation, Storage & Installation page 4 Pump Maintenance page 5 Wet end Dismantling page 6 Wet end Assembly
CONSUMER SERVICES TECHNICAL EDUCATION GROUP PRESENTS
 CONSUMER SERVICES TECHNICAL EDUCATION GROUP PRESENTS L-71 SinkSpa JETTED SINK Model LJD1306L JOB AID Part No. 8178201 FORWARD This Whirlpool Job Aid, SinkSpa Jetted Sink, (Part No. 8178201), provides the
Kallista Bath Flip Drain
 P21586 Page 1 of 7 THANK YOU FOR CHOOSING KALLISTA We appreciate your commitment to Kallista quality products. Please take a moment to review this manual before you install your Kallista product. If you
K 2.90 M. Specifications Operating pressure, max PSI Water volume GPM Voltage V Amp draw AMPS
 K 2.90 M High Pressure Washer Operator Manual Overview... 2 Important Precautions... 3-4 Assembly Instructions... 4 Operating Instructions... 5 GFCI Instructions... 6 Using the Accessories... 6 Working
Water Distiller Service Manual
 Water Distiller Service Manual Water Distiller Service Manual L70478WT 2008 Regal Ware, Inc. Table of Contents RECOMMENDED TOOLS... 2 GENERAL INSPECTION...3 BOILING CHAMBER TROUBLESHOOTING & REPAIRS Description...
3/4 HP Model Trimmer Operating Instructions
 3/4 HP Model Trimmer Operating Instructions Whip Mix Corporation 361 Farmington Ave. P.O. Box 17183 Louisville, KY 40217-0183 USA 502-637-1451 800-626-5651 Fax 502-634-4512 www.whipmix.com Technical Specifications
TECHNICAL INSTRUCTIONS
 TID-0004_0A TECHNICAL INSTRUCTIONS Hardware Procedure: Coil and Riser Replacement Procedures for All Styles of A, B, C, and D Indirect-Fired Water Heaters Applies to: Indirect-Fire Water Heaters. Description
QUICK PRIME INSTALLATION AND SERVICE MANUAL
 QUICK PRIME INSTALLATION AND SERVICE MANUAL NOTE! To the installer: Please make sure you provide this manual to the owner of the equip ment or to the responsible party who maintains the system. Part #
K 2.97 M. Specifications Operating pressure, max PSI Water volume GPM Voltage V Amp draw AMPS
 K 2.97 M High Pressure Washer Operator Manual Overview... 2 Important Precautions... 3-4 Assembly Instructions... 4 Operating Instructions... 5 GFCI Instructions... 6 Using the Accessories... 6 Working
SAVE THIS INSTRUCTION MANUAL
 ISPF SERIES Rev. C OWNER S MANUAL INSTALLATION, OPERATION, & PARTS Power-Flo LX / Power-Flo II Pump Series The Hayward Power-Flo LX and Power-Flo II Pump Series are specifically engineered for the demanding
HIGH PERFORMANCE PUMPS
 WHISPERFLOXF AND MAX-E-PROXF HIGH PERFORMANCE PUMPS INSTALLATION AND USER S GUIDE IMPORTANT SAFETY INSTRUCTIONS READ AND FOLLOW ALL INSTRUCTIONS SAVE THESE INSTRUCTIONS P/N 352036 REV. D 8/28/12 i CUSTOMER
Electrical cable Water supply tube Fittings for tube Coupler Teflon tape. Hole saw min. 2½" bit
 Installation Parts and Tools Parts not Provided Electrical cable Water supply tube Fittings for tube Coupler Teflon tape Air gap Wire nuts for 6-gauge wiring Hose clamp ⅞" UL approved strain relief Electrical
50 HZ. MAX-E-PRO CENTRIFUGAL PUMPS WITH INTEGRAL TRAP
 50 HZ. MAX-E-PRO CENTRIFUGAL PUMPS WITH INTEGRAL TRAP O W N E R S M A N U A L INSTALLATION, OPERATION & PARTS 5P6R Series MODELS HP 1 Phase 3 Phase 3/4 5P6R6D-209 5P6R6D3-209 1 5P6R6E-210 5P6R6E3-210 1-1/2
Installation Manual PS-225 & PS-275
 Installation Manual PS-225 & PS-275 Table of Contents Pre-Uncrating Checklist... 1 Verifying System Requirements... 2 Verifying System Direction... 2 Verifying the Electrical Requirements... 2 Removal
AC6 & AC8 HORIZONTAL SERIES Sealed Metallic Centrifugal Pumps Installation and Maintenance Instructions
 AC6 & AC8 HORIZONTAL SERIES Sealed Metallic Centrifugal Pumps Installation and Maintenance Instructions ASSEMBLY PUMPS WITH MOTORS 1. No assembly required. Unpack the pump and motor and examine for any
KC22/32 SERIES Sealless Non-Metallic Centrifugal Pumps Installation and Maintenance Instructions
 KC22/32 SERIES Sealless Non-Metallic Centrifugal Pumps Installation and Maintenance Instructions ASSEMBLY Unpack pump from carton and check for shipping damage. WARNING: Magnetic field hazard. This pump
1 1/8 Inch Centrifugal Pump Operation and Maintenance Guide
 1 1/8 Inch Centrifugal Pump Operation and Maintenance Guide Installation Location! The pump should be located as close as possible to the liquid source so that the suction line can be as short and direct
Model K 520 M Part No
 Model K 520 M Part No. 1.069-680.0 High Pressure Washer Operator Manual Overview... 2 Precautions... 2-4 Assembly Instructions... 4 Operating Instructions... 5 Using the Accessories... 6 Working with Detergents...
DYNA-PRO TM CENTRIFUGAL PUMPS WITH INTEGRAL TRAP
 DYNA-PRO TM CENTRIFUGAL PUMPS WITH INTEGRAL TRAP O W N E R S M A N U A L (Unions optional) INSTALLATION, OPERATION & PARTS Series MPRA, MPEA, and MPE See Page 3 for Model Numbers Pentair Water Pool and
FIREPLACE INSTALLATION
 CHECK GAS TYPE Use proper gas type for the fireplace unit you are installing. If you have conflicting gas types, do not install fireplace. See retailer where you purchased the fireplace for proper fireplace
Instruction Sheet AquaMotionHot One AMH1K-1 Point of Use Hot Water Recirculation System
 Effective: 5/13/15 Supersedes: New IS-AM09-601 Instruction Sheet Point of Use Hot Water Recirculation System THANK YOU for purchasing a new Aquamotion Hot System! For optimum reliability and performance
Installation Instructions. For the 18 Built-In Dishwasher and Front Color Panels
 Installation Instructions For the 18 Built-In Dishwasher and Front Color Panels Printed in USA 154232102 Before You Begin DO NOT INSTALL DISHWASHER UNTIL YOU HAVE READ ALL INSTRUCTIONS. FOR YOUR SAFETY,
Installation Manual PS-200 & PS-201
 Installation Manual PS-200 & PS-201 Table of Contents Pre-Uncrating Checklist... 1 Verifying System Requirements... 2 Verifying System Direction... 2 Verifying the Electrical Requirements... 2 Removal
DRAINMAKER INSTALLATION INSTRUCTIONS PREINSTALLATION CHECKLIST
 Manufacturers of... Quality Products since 1866 95 N. Oak St. Kendallville, IN 46755 1-800-345-9422 DRAINMAKER INSTALLATION INSTRUCTIONS PREINSTALLATION CHECKLIST FW0771 0116 Supersedes 0415 MODEL: DATE
SuperKlean Washdown Products
 February 2012 DURAMIX 8000 INSTALLATION AND MAINTENANCE INSTRUCTIONS **DO NOT THROW AWAY AFTER INSTALLATION** **SAVE AND DISPLAY PROMINENTLY WHERE THIS EQUIPMENT IS USED** WARNING HIGH PRESSURE AND HOT
BSP4/BSPD4, BSP6/BSPD6 & BSPD8 Self-Priming Sewage and Trash Pumps. Installation and Service Manual
 BSP4/BSPD4, BSP6/BSPD6 & BSPD8 Self-Priming Sewage and Trash Pumps Installation and Service Manual 056255121 GENERAL INFORMATION The Berkeley self-priming centrifugal pump has a semiopen impeller and suction
IPT Series 2P5X, 2S5X, 2S5XC & 3S5X Pumps Refer to pump manual for General Operating and Safety Instructions.
 Please read and save this Repair Parts Manual. Read this manual and the General Operating Instructions carefully before attempting to assemble, install, operate or maintain the product described. Protect
SuperKlean Washdown Products
 DURAREEL DR8 & DR8S INSTALLATION AND MAINTENANCE INSTRUCTIONS **DO NOT THROW AWAY AFTER INSTALLATION** **SAVE AND DISPLAY PROMINENTLY WHERE THIS EQUIPMENT IS USED** GENERAL WARNINGS High pressure and hot
CHALLENGER CENTRIFUGAL PUMP
 CHALLENGER CENTRIFUGAL PUMP INSTALLATION AND USER S GUIDE IMPORTANT SAFETY INSTRUCTIONS READ AND FOLLOW ALL INSTRUCTIONS SAVE THESE INSTRUCTIONS i CUSTOMER SERVICE / TECHNICAL SUPPORT If you have questions
OWNER S MANUAL INSTALLATION, OPERATION, & PARTS
 P/N: IS2800X5 Rev. C OWNER S MANUAL INSTALLATION, OPERATION, & PARTS The Hayward Max-Flo is specifically engineered for the demanding requirements of today s in-ground swimming pool/spa that is equipped
Oil burners fuel unit with solenoid valve
 Oil burners fuel unit with solenoid valve Type VM www.deltapumps.com VM1 - VM4U flanged Certified Quality System Printed in Italy - DE112/0404 Oil burners fuel unit with solenoid valve Type VM The DELTA
HIGH PERFORMANCE 3-PHASE PUMPS
 WHISPERFLOXF AND MAX-E-PROXF HIGH PERFORMANCE 3-PHASE PUMPS INSTALLATION AND USER S GUIDE IMPORTANT SAFETY INSTRUCTIONS READ AND FOLLOW ALL INSTRUCTIONS SAVE THESE INSTRUCTIONS i CUSTOMER SERVICE / TECHNICAL
HIGH PERFORMANCE PUMP
 WHISPERFLOXF HIGH PERFORMANCE PUMP INSTALLATION AND USER S GUIDE IMPORTANT SAFETY INSTRUCTIONS READ AND FOLLOW ALL INSTRUCTIONS SAVE THESE INSTRUCTIONS P/N L300203 B1012 i CUSTOMER SERVICE / TECHNICAL
STOP ACRYLIC TUB WITH INTEGRAL DRAIN PLANNING BEFORE YOU BEGIN TOOLS AND MATERIALS: GETTING STARTED INSTALLATION INSTRUCTIONS.
 BEFORE YOU BEGIN We recommend consulting a professional if you are unfamiliar with installing bathroom fixtures and plumbing. Signature Hardware accepts no liability for any damage to the floor, walls,
CONSTANT SUCTION UNIT
 CONSTANT SUCTION UNIT OPERATOR/MAINTENANCE M A N U A L Squire-Cogswell/Aeros Instruments Inc 1111 Lakeside Drive Gurnee, IL 60031-4099 1-800-662-5822/847-855-0800 Fax: 847-855-6218 www.aerosinstruments.com
GP22/32 SERIES Sealed Non-Metallic Centrifugal Pumps Installation and Maintenance Instructions
 GP22/32 SERIES Sealed Non-Metallic Centrifugal Pumps Installation and Maintenance Instructions ASSEMBLY Unpack pump from carton and check for shipping damage. PUMPS WITH MOTOR No assembly required. Simply
Astro 2 circulator models. Installation and operating instructions
 Astro 2 circulator models Installation and File No: 10.89 Date: august 05, 2013 Supersedes: 10.89 Date: june 26, 2013 contents 1.0 Introduction 4 2.0 Installing 4 2.1 Terminal box 4 2.2 Electrical wiring
OWNER S MANUAL INSTALLATION, OPERATION, & PARTS SAVE THIS INSTRUCTION MANUAL
 OWNER S MANUAL INSTALLATION, OPERATION, & PARTS 72729 To prevent potential injury and to avoid unnecessary service calls, read this manual carefully and completely. SAVE THIS INSTRUCTION MANUAL Use of
SERIES ABG SWIMMING POOL PUMP
 SERIES ABG SWIMMING POOL PUMP O W N E R S M A N U A L DO NOT OVER TIGHTEN INSTALLATION, OPERATION & PARTS This manual should be furnished to the end user of this pump; its use will reduce service calls
rev3 INSTALLATION & OPERATION MANUAL OIL CIRCULATING HEATING SYSTEM MODEL OSM
 216279-000 rev3 INSTALLATION & OPERATION MANUAL OIL CIRCULATING HEATING SYSTEM MODEL OSM IDENTIFYING YOUR SYSTEM IOM216279-000 The HOTSTART heating system is designed to heat fluids for use in marine
Oil burners fuel unit with solenoid valve
 Oil burners fuel unit with solenoid valve Type VM www.deltapumps.com VM1 - VM4U flanged Certified Quality System Printed in Germany VM_e.pdf - 18.05.08 Page 1/6 Oil burners fuel unit with solenoid valve
OWNER S MANUAL INSTALLATION, OPERATION, & PARTS
 P/N: IS2700 REV. A OWNER S MANUAL INSTALLATION, OPERATION, & PARTS Max-Flo II Pump Series *50HZ Models are not UL Listed. The Hayward Max-Flo II is a series of high technology self-priming pumps that combines
CONTENTS CONSIDERATIONS. General Plumbing Component Connection ILLUSTRATION. Control System CONFIGURATION. Voltage Verification CONNECTION
 AIR SERIES SYSTEM INSTALLATION MANUAL CONTENTS CONSIDERATIONS General Plumbing Component Connection 2 2 2 ILLUSTRATION Control System 3 CONFIGURATION Voltage Verification 4 CONNECTION Component Connection
DAGNY LK. Ceiling Mounted Rotational Fan READ AND SAVE THESE INSTRUCTIONS. FAN RATING AC 110V~60Hz
 DAGNY LK Ceiling Mounted Rotational Fan READ AND SAVE THESE INSTRUCTIONS FAN RATING AC 110V~60Hz Please do not use any electric or battery powered tools in the assembly and installation of this or any
DESCRIPTION IMPELLER INSPECTION MAINTENANCE POWER CORD REPLACEMENT IMPELLER REPLACEMENT MECHANICAL SEAL REPLACEMENT IMPELLER INSPECTION /REPLACEMENT
 Please read and save this Repair Parts Manual. Read this manual and the General Operating Instructions carefully before attempting to assemble, install, operate or maintain the product described. Protect
K Specifications. Max. Water Volume
 K 2.35 High Pressure Washer Operator Manual Overview... 2 Precautions... 2-4 Assembly Instructions... 4 Operating Instructions... 5 Using the Accessories... 6 Working with Detergents... 7 Shut Down and
Model K 330 M Part No
 Model K 330 M Part No. 1.994-916.0 High Pressure Washer Operator Manual Overview..................................1 Precautions...............................1-3 Assembly Instructions.........................3
MAX-E-GLAS 2 SPEED CENTRIFUGAL PUMPS with TRAP
 MAX-E-GLAS 2 SPEED CENTRIFUGAL PUMPS with TRAP O W N E R S M A N U A L INSTALLATION, OPERATION & PARTS MODELS Horsepower 3/4 HP PEXYD-133L PE5YD-133L 1 HP PEAXYE-133L PEAXYE-124L 2 HP PEAXYG-126L PEAXYG-126LS
Instructions. Certifications Brass w/built-in Stop Valve. Pressure Balance Shower Valve. Tools Required. Important Points.
 Instructions Tools Required Adjustable Wrench Groove Joint Pliers Pipe Wrench Phillips Screwdriver Pipe Tape or Pipe Thread Compound Safety Tips If you solder the joints during installation, the seats,
EQ SERIES High Performance Commercial Pump
 EQ SERIES High Performance Commercial Pump Installation and User's Guide IMPORTANT SAFETY INSTRUCTIONS READ AND FOLLOW ALL INSTRUCTIONS SAVE THESE INSTRUCTIONS Technical and Customer Support (Europe) For
MODEL SK2750. COMPRESSOR SERVICE KIT For use on 2750 Series Compressors
 MODEL SK2750 COMPRESSOR SERVICE KIT For use on 2750 Series Compressors WARNING: Unplug the compressor before beginning disassembly. CAUTION: Improper assembly or use of damaged parts may lead to premature
QUICK PRIME INSTALLATION AND SERVICE MANUAL
 QUICK PRIME INSTALLATION AND SERVICE MANUAL NOTE! To the installer: Please make sure you provide this manual to the owner of the equip ment or to the responsible party who maintains the system. Part #
ONE PIECE TOILET LT3. Model: MPN: B0940 INSTALLATION INSTRUCTIONS. Version: 1.0
 Model: MPN: B0940 INSTALLATION INSTRUCTIONS Version: 1.0 READ ALL INSTRUCTIONS BEFORE UNPACKING THE PRODUCT INSTRUCTIONS THAT, IF IGNORED COULD RESULT IN DEATH OR SERIOUS INJURY CAUSED BY INCORRECT HANDLING
OWNER S MANUAL INSTALLATION AND OPERATING INSTRUCTIONS REPAIR PARTS LIST
 OWNER S MANUAL INSTALLATION AND OPERATING INSTRUCTIONS REPAIR PARTS LIST SCX1740 SERIES CENTRIFUGAL PUMP High Head - Noryl Impellers MODELS Model ODP MOTORS TEFC MOTORS HP Number 115/230/60/1 20-230/460/60/3
C-IV 60 CEILING FAN READ AND SAVE THESE INSTRUCTIONS. FAN RATING AC 120V. 60Hz
 C-IV 60 CEILING FAN READ AND SAVE THESE INSTRUCTIONS FAN RATING AC 120V. 60Hz Please do not use any electric or battery powered tools in the assembly and installation of this or any Matthews Fan Company
HE120, HE160 Humidifier Installation Kit
 HE120, HE160 Humidifier Installation Kit INSTALLATION INSTRUCTIONS WELCOME To the comfortable world of humidified air. When you use your Honeywell humidifier, you notice that your skin is not as dry, and
Installation Guide. Pedicure Spa D K-163, K-1006, K-1011, K-1012
 Installation Guide Pedicure Spa K-163, K-1006, K-1011, K-1012 1063564-2-D Important Information WARNING: When using electrical products, basic precautions should always be followed, including the following: