ECCOTEMP. Point of Use Tankless Water Heaters EP-2.4 / EP-7.0. Installation and Operating Instruction Manual. Shop Online.
|
|
|
- Harriet Ford
- 6 years ago
- Views:
Transcription


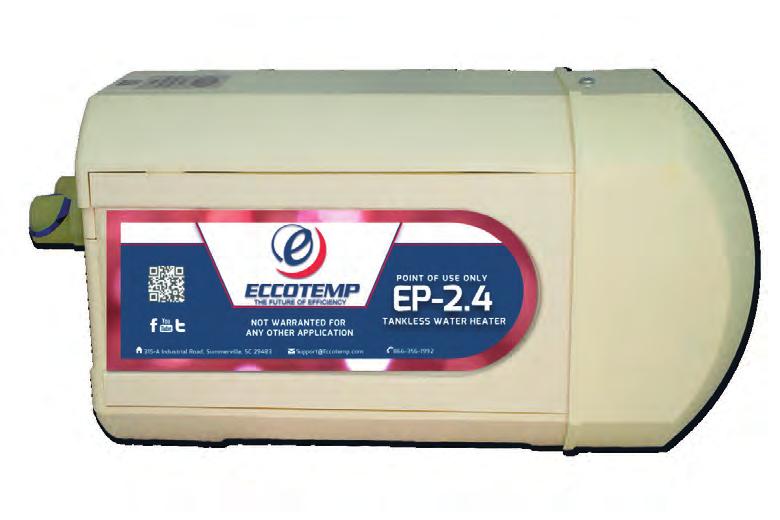
1 ECCOTEMP Point of Use Tankless Water Heaters EP-2.4 / EP-7.0 Installation and Operating Instruction Manual Product Support Eccotemp.com/help-desk Shop Online Eccotemp.com/products Store Locator Eccotemp.com/locator support@eccotemp.com 315-A Industrial Road, Summerville, SC 29483
2 ELECTRIC TANKLESS POINT OF USE WATER HEATER INSTALLATION GUIDE & OWNERS MANUAL This manual is provided as a guide to installation. All installations must comply with any and all local and national electrical and plumbing codes. Warranty of this heater will depend on proper installation and operation. The manufacturer will not be liable if the heater has been modified in any way or the installation and operating instructions outlined in the following pages have not been followed in their entirety. Your Eccotemp water heater can be serviced by most heating, plumbing or HVAC repair centers in your area. If your preferred service center does not already have Eccotemp service information, Eccotemp will promptly provide the necessary information to the service center on request. For information regarding service companies in your area, please contact your original installer or Eccotemp. Eccotemp Systems, LLC 315-A Industrial Rd. Summerville, SC Support@Eccotemp.com If you have any questions regarding the installation or performance of this heater, please call Eccotemp s customer service department and provide the information listed below: Model: Serial Number: Install Date: ANY RETURNS AUTHORIZED BY Eccotemp MUST HAVE A VALID RETURN MERCHANDISE AUTHORIZATION NUMBER CLEARLY VISIBLE ON THE PACKAGE. ALL OTHER SHIPMENTS WILL BE REFUSED. BE SURE TO RETURN THE PACKAGE TO THE ADDRESS LISTED ON THE AUTHORIZATION


3 A. MOUNTING THE UNIT The unit must be mounted level on the wall (or with the water fittings up to 3 higher in the vertical position). Be sure to allow adequate clearance and proper orientation for field wiring installation and inspection. It can only be mounted in one of four possible orientations as shown in the diagram below. The water fittings must be at the top when mounted vertically or toward the top left or top right when mounted horizontally with the word ECCOTEMP right side up on the cover. FAILURE TO FOLLOW THESE INSTRUCTIONS WILL RESULT IN SERIOUS DAMAGE TO THE UNIT 1. The cold-water inlet and hot- water outlet are clearly marked and must not be reversed. 2. The heater should be fastened to the wall using the included mounting bracket. Remove the bracket from the heater and secure it to a solid wall surface. Be sure the bracket is level and in the proper orientation. If mounting to a hollow wall, care should be taken to locate a stud or to use appropriate hollow wall anchors. After mounting the bracket, slide the unit onto the bracket and replace the screws to secure the unit to the bracket. 3. Never solder water supply lines to the heater s fittings. Heat from soldering may damage the one- piece fittings and tank. Do not use Plumber s Putty or PVC/CPVC primer and glue on the threads of the heater s inlet and outlet fittngs. These products may dissolve the threads on the heater s fittngs causing permanent damage and/ or leaks. Teflon tape is the only sealer that should be used on the threads of the fittings or included adapters. 4. Open the valve on any nearby sink allowing water to run for a couple of minutes to ensure that all air is purged from the unit. 5. T&P Valve/Anti-scald Device: National codes do not require the installation of these devices. Consult local codes for requirements for external T&P or Anti-Scald devices.
4 B. PLUMBING HOOK-UP 1. The unit is supplied with 3/4 NPT fittings molded into the heating chamber. DO NOT USE PIPE DOPE OR PVC PRIMER OR GLUE ON THE FITTINGS. DO NOT USE A TORCH ON ANY FITTING CONNECTED TO THE HEATER. Use only TEFLON TAPE on the threads ensuring that no tape or debris enters the heater. 2. If an adapter is required to reduce fitting size, use the enclosed adapter with O- ring. No additional sealants or teflon tape is required. For other adapters, be sure to use 3/4 NPT fittings and seal with TEFLON TAPE ONLY. Connect plumbing to the adapters with teflon tape Flex-pipe is recommended for ease of installaion and service. Where fixed pipe is used, a plumbing union is recommended for ease of service. 4. Always use two wrenches to tighten plumbing fittings to the heater to avoid stress to the fittings and heating chamber. 5. Install ball valves on the inlet and outlet pipes to allow isolation of the heater for service. Be sure both valves are open prior to activating the heater. 6. Recommended operating pressure is 60 to 80 PSI. For installations with higher pressure a PRV is required. For installations above the ceiling or attic, a bleed air separator is recommended. Where water hammer exists, a properly sized arrestor should be installed. 7. Run water through the unit for a few minutes until all visible air is purged from the lines and unit and the flow is continuous without spitting air. NOTE: ALL PLUMBING MUST BE COMPLETED BEFORE STARTING ELECTRICAL HOOKUP TEST ALL CONNECTIONS FOR LEAKS BEFORE CONNECTING ELECTRICITY C. COMMISSIONING THE UNIT 1. Open all ball valves and turn on water outlets. 2. Activate power at breaker. 3. Cycle the water on and off and verify unit operation. 4. Verify temperature and adjust as necessary. 5. If desired temperature is not reached, verify flow and sizing information to ensure adequately sized unit has been installed.

5 D. ELECTRICAL HOOK-UP 1. Wire entry into the unit should be made through the knockout in the bottom of the cover. 2. Cover End Cap must be removed to allow installation and inspection of proper wiring. (Verify correct installation in accordance with diagram on page 2 of this manual prior to wiring unit for proper operation). 3. Proper connectors should be chosen for the wire/conduit selected. 4. Connect properly sized copper leads to the terminal block as shown. 5. Connect the power circuits to L1 and L2 as shown and the ground to GND. (For 120V models connect the Neutral to L2/N on the terminal block). PRE-POWER CHECK: 1. Verify that all connections are secure. 2. Verify that an adequate ground has been properly connected. 3. Verify that adequate sized breakers have been properly connected. Remember that breakers that are too large are more dangerous that breakers that are too small. 4. Verify proper wire size has been used for connection. 5. Check voltage at the terminal block for each circuit. THIS INSTALLATION MUST BE DONE BY A QUALIFIED AND LICENSED CONTRACTOR. Refer to your local electric and plumbing codes for additional information. VERIFY PROPER INSTALLATION PRIOR TO WIRING UNIT (SEE DIAGRAM ON PAGE 2)
6 E. Limited Warranty Eccotemp Systems, LLC, hereinafter Eccotemp, warrants the Chamber Body and Heating Element of its tankless water heaters against defects in materials and workmanship for a period of three years. The Chamber Body and Heating Element as referred to herein shall mean the plastic body of the heat exchanger and the standard immersion heat element itself, and does not include component parts attached to them. Eccotemp warrants the Circuit Board and other Electronic Components to be free of defects in materials and workmanship for a period of eighteen (18) months. All other parts are warranted for a period of one (1) year. This warranty begins on the date of retail purchase or, in the absence of proof of purchase, from the date of manufacture. Circuit Board or Chamber Body replacements to the original purchaser, made after the initial warranty expires and not later than five years will be replaced by Eccotemp, subject to replacement charges not to exceed 25% of the current manufacturer s suggested retail price of the unit model for which it was originally installed, or a currently sold comparable unit. Shipping charges are not included. Eccotemp reserves the right to use remanufactured parts when repair becomes necessary. When advance shipping of replacements are requested, Eccotemp may require a deposit until the failed items are returned and inspected for warranty coverage. This warranty does not cover the cost of any shipping or labor charges. EXCLUSIONS AND LIMITATIONS OF THESE LIMITED WARRANTIES THE LIMITED WARRANTIES PROVIDED HEREIN ARE IN LIEU OF ANY AND ALL WARRANTIES, EXPRESSED OR IMPLIED, INCLUDING BUT NOT LIMITED TO IMPLIED WARRANTIES OF MERCHANTABILITY AND THE FITNESS FOR A PARTICULAR PURPOSE; PROVIDED, HOWEVER, THAT IMPLIED WARRANTIES ARE NOT DISCLAIMED DURING THE ONE YEAR PERIOD FROM THE DATE OF ORIGINAL RETAIL PURCHASE. Eccotemp SHALL HAVE NO LIABILITY HEREUNDER EITHER DIRECT OR CONTINGENT, FOR INCIDENTAL OR CONSEQUENTIAL DAMAGES. SOME STATES DO NOT ALLOW THE EXCLUSION OR LIMITATION OF INCIDENTAL OR CONSEQUENTIAL DAMAGES, SO THE ABOVE LIMITATION OR EXCLUSION MAY NOT APPLY TO YOU. This warranty gives you specific legal rights, and you may have other rights THAT vary from state to state. These warranties shall be void and have no effect: 1. If the Eccotemp heater is not used for its intended application; 2. If the design or structure of the Eccotemp heater is modified or altered in any way; 3. If appliances or equipment not approved by Eccotemp are attached to the water heater; 4. If the water heater is not property installed in compliance with the latest issue of (1) the National Electric Code, (2) the applicable plumbing codes, (3) all local ordinances and regulations pertinent to similar water heaters, and (4) the installation guide and operational manual provided with the Eccotemp water heater; 5. If the Eccotemp water heater is installed upside-down, or is not protected from freezing; 6. If the Eccotemp water heater is not operated within the factory calibrated temperature limits; 7. If leaks or defects arise as the result of improper use, improper installation, negligence in operation, failures resuling from accident, or from inability of the Eccotemp water heater or any parts to function because of improperly made replacements and repairs, or damage by fire, floods, lightning, or any other act of God; 8. If the plumbing design allows water to flow in reverse through the Eccotemp heater; 9. If the Eccotemp heating element(s) fail due to air entrapment; 10. If the serial number has been altered or has become illegible; 11. If the Eccotemp heater is installed in any area where leakage of the tank or connections would result in property damage of any kind, or where such a location is unavoidable, a suitable drain pan was not installed under thewater heater. (When a drain pan must be used, the pan must meet all applicable plumbing codes and be at least 2 1/2 deep, extending not less than 1 above the unit s base plates, must protect an area at least 1-1/2 greaterthan the lower external dimensions of the heater, and must be piped by a minimum 1 pipe to an adequate drain; 12. If the Eccotemp heater or any of its components warranted herein are used other than as a part of the complete and integrated system as sold to the original purchaser; 13. If leaks in the tank or defects in other parts occur as a result of the Eccotemp heater containing or being operated with de- ionized water; 14. If leaks in the tank or defects in other parts arise as a result of sizing that does not comply with the manufacturer s currently published sizing recommendations; Replacements and/or repairs furnished under this warranty carry only the unexpired portion of the original warranty or 90 days whichever is longer. The terms of this warranty may not be varied by anyone, whether or not purporting to represent or act on behalf of Eccotemp.

7 F. Applications Point of Use Models Point of Use Models are designed to be connected to the COLD water line near the desired point of use needing hot water. Unit must be properly sized to provide sufficient hot water for the desired number of fixtures to be served. Contact your dealer or Eccotemp sales representative for assistance in sizing for your application. Point of Use Models can also be connected to the HOT water line at the point of use to provide hot water sooner than is possible from the main hot water source located in a central location a longer distance from the fixture. As all Eccotemp models are temperature rather than flow controlled, the POU unit will modulate and add only the amount of energy necessary to maintain the hot water set point and return to standby once hot water arrives from the primary hot water source. This offers energy AND water savings over other alternatives such as recirculation.
8 TROUBLESHOOTING The Eccotemp microprocessor control depends on the temperature information it receives from each of the temperature sensors to detect water flow and maintain proper temperature. If any sensor or its connection to the circuit board is bad, the Eccotemp may not turn on at all or if it does the temperature may fluctuate. Whenever servicing a Eccotemp, the proper operation of the sensors and the circuit board should always be verified regardless of the trouble code. Eccotemp recommends you follow the pre- service checklist every time you service the unit to verify proper operation. PRE-SERVICE CHECKLIST: Verify Installation: Verify proper plumbing, cold to the inlet and hot to the outlet. Verify flow rate matches the specifications of the unit. Verify the heater is mounted properly and level. INLET NIPPLES ARE ALWAYS AT THE TOP OF THE UNIT WHETHER MOUNTED HORIZONTAL OR VERTICAL. Record the serial number in the event you need to contact Eccotemp Customer Service. Tests with Power OFF Verify water flow through the heater. Check that shut off valves are in the open position. Check the plumbing and the unit for any signs of leaks. Check for any loose wires to the circuit board and verify the power connections are tight. If stranded wire is used, check that all strands are inside the lug. Tests with Power ON Verify circuit breakers are turned on and verify power to the heater. Check the voltage at the terminal block. Check the circuit board LED for any diagnostic codes. Visit or contact customer service for latest diagnostic code information. HEATER TESTING TEST WITH POWER OFF AND METER SET TO MEASURE RESISTANCE COMPONENT EXPECTED RESULTS Temperature sensors Readings should be taken after the heater has been cooled down so that the temperature in the chamber is uniform. (Run water with power off for 3-5 minutes) All sensor resistance measurements should be within 10% of the others. Heating Elements Read across screws at the Red & Black wires. Typical readings are in the range of 5 to 14 ohms but vary with wattage and voltage. Moisture Detect Switch Should normally read open. If closed, check for water leaks or water on the switch pad. Correct the leak, dry the switch and retest. POWER ON TESTS (SHOULD ONLY BE PERFORMED BY A QUALIFIED TECHNICIAN) COMPONENT TEST EXPECTED RESULTS Incoming Power Lugs Voltage L1 to L2: VAC depending on model; L1 to Neutral VAC (for 120V models). Heating Element Amps Measure Amps on wires leading to element with water flowing, Maximum reading at full power calculated as Watts/Volts.
9
10 ECCOTEMP Point of Use Tankless Water Heaters EP-2.4 / EP-7.0 Installation and Operating Instruction Manual Product Support Eccotemp.com/help-desk Shop Online Eccotemp.com/products Store Locator Eccotemp.com/locator support@eccotemp.com 315-A Industrial Road, Summerville, SC 29483
SEISCO SUPERCHARGER EXTENDER/BOOSTER INSTALLATION GUIDE & OWNERS MANUAL
 SEISCO SUPERCHARGER EXTENDER/BOOSTER INSTALLATION GUIDE & OWNERS MANUAL This manual is provided as a guide to installation. All installations must comply with any and all local and national electrical
OPERATION & INSTALLATION MANUAL IR-30, IR-234, IR-245, IR-260, IR-288, IR-14K220, IR-18K220. Electric Tankless Hot Water Heater
 OPERATION & INSTALLATION MANUAL IR-30, IR-234, IR-245, IR-260, IR-288, IR-14K220, IR-18K220 Electric Tankless Hot Water Heater Table of Contents SAFETY INFORMATION... 1 INTRODUCTION... 2 Unit Operation...
INSTALLATION INSTRUCTIONS
 INSTALLATION INSTRUCTIONS FOR AQUECOIL HYDRONIC HEATING UNITS GENERAL INFORMATION The AQUECOIL Hydronic Heating Unit is offered in many different capacities and physical configurations in order to match
Installation Instructions PP-AS20 Anti-Scale System
 Installation Instructions PP-AS20 Anti-Scale System THIS UNIT MUST BE INSTALLED BY A LICENSED PLUMBER TO VALIDATE THE WARRANTY. COMPONENTS PP-AS20 Filter Housing PP-AS20R Filter Cartridge Installation
OPERATION & INSTALLATION MANUAL
 OPERATION & INSTALLATION MANUAL Model: SIO 14 & SIO 18 Electric Tankless Hot Water Generators Table of Contents SAFETY INFORMATION... 1 INTRODUCTION... 2 Unit Operation:... 2 Unit Freezing:... 3 Maintenance:...
Model TWBS.EW.H Tempered Water Blending System
 INSTALLATION, OPERATION & MAINTENANCE INSTRUCTIONS 1455 Kleppe Lane Sparks, NV 89431-6467 (775) 359-4712 Fax (775) 359-7424 E-mail: haws@hawsco.com website: www.hawsco.com Model TWBS.EW.H Tempered Water
Electric Mini Tank Water Heaters ME10 ME25 ME40 ME60
 Electric Mini Tank Water Heaters ME10 ME25 ME40 ME60 Installation and Operating Instruction Manual V01.2018 Table of Contents Important Safety Instructions 3 General Information 3/6 Technical Data 4-5
ispring Whole House Water Filter Systems USER S MANUAL
 ispring Whole House Water Filter Systems USER S MANUAL Version 2014-5 Introduction Congratulations on your purchase of the ispring Whole House Water Filter system. Featuring a three-stage filtration process,
Model EPWHP. How to install, operate and maintain your Water Heater Protector. Do not return unit to store
 Model EPWHP How to install, operate and maintain your Water Heater Protector Do not return unit to store If you have any questions or concerns when installing, operating or maintaining your water heater
SEISCO MOUNTING CLEARANCES
 SEISCO MOUNTING CLEARANCES SEISCO (Water Heater) Installation Guide FRONT VIEW Two -Chamber Unit Horizontal Spacing** 24 Models Rated 5KW to 14KW Screw Holes 14 ¾ 12 * 15 ¾ Screw Holes 10 7/8 15 ¾ FRONT
SAVE THESE INSTRUCTIONS
 Important Safety Instructions When using this electrical equipment, basic safety precautions should always be followed, including the following: 1. READ AND FOLLOW ALL INSTRUCTIONS. 2. This appliance must
EEMAX ProAdvantage Series 1
 EEMAX ProAdvantage Series 1 ELECTRIC INSTANTANEOUS WATER HEATER INSTALLATION GUIDE AND OWNER S MANUAL MODELS COVERED: PA004120T 1Φ 120V PA008208T 1Φ 208V PA005240T 1Φ 240V PA007240T 1Φ 240V PA010240T 1Φ
Use & Care Manual. Electric Tankless Water Heaters. With Installation Instructions for the Installer AP15447 (10/10)
") Use & Care Manual With Installation Instructions for the Installer Electric Tankless Water Heaters The purpose of this manual is twofold: one, to provide the installer with the basic directions and recommendations
Use & Care Manual With Installation Instructions for the Installer Electric Tankless Water Heaters The purpose of this manual is twofold: one, to provide the installer with the basic directions and recommendations
ALL WEATHER SL-SERIES QUARTZ TUBE ELECTRIC INFRARED RADIANT HEATER INSTALLATION USE & CARE MANUAL
 ALL WEATHER SL-SERIES QUARTZ TUBE ELECTRIC INFRARED RADIANT HEATER TABLE OF CONTENTS: INSTALLATION USE & CARE MANUAL IMPORTANT INFORMATION Assembly Instructions 2 Wiring Instructions 2 Outdoor Installation
INSTALLATION USE & CARE MANUAL ALL WEATHER SL-SERIES QUARTZ TUBE ELECTRIC INFRARED RADIANT HEATER
 INSTALLATION USE & CARE MANUAL ALL WEATHER SL-SERIES QUARTZ TUBE ELECTRIC INFRARED RADIANT HEATER TABLE OF CONTENTS IMPORTANT INFORMATION Warnings 2 Installation Instructions 3 Wiring Instructions 3 Outdoor
EEMAX SERIES-TWO WATER HEATERS
 EEMAX SERIES-TWO WATER HEATERS ELECTRIC INSTANTANEOUS WATER HEATER INSTALLATION GUIDE AND OWNERS MANUAL MODELS COVERED:- EX190 TC, T2-240/208 V EX144 TC, T2-240/208 V EX1608 TC, T2 208V EX160 TC, T2-277
Controlled Energy Corp. 340 Mad River Park Waitsfield, VT TOLL FREE
 Controlled Energy Corp. 340 Mad River Park Waitsfield, VT 05673 TOLL FREE 866-330-2729 www.controlledenergy.com/tech Important Safety Instructions When using this electrical equipment, basic safety precautions
SEISCO - MOUNTING CLEARANCES
 SEISCO - MOUNTING CLEARANCES SEISCO Installation Guide Horizontal Spacing** 24 Minimum Top Clearance: 12 inches * 15 ¾ 15 ¾ SEISCO FRONT VIEW Screw Holes 14 ¾ SIDE VIEW Screw Holes 16 1/8 Front Clearance
NOTICE TO INSTALLER: Instructions must remain with installation. FW Supersedes HomeGuard OPTIMA
 NOTICE TO INSTALLER: Instructions must remain with installation. FW1379 1018 Supersedes 0615 Product information presented here reflects conditions at time of publication. Consult factory regarding discrepancies
Installation Instructions AS-WH Whole House Water Filter
 Installation Instructions AS-WH Whole House Water Filter Contents The AS-WH Whole House System is tested to NSF standards to reduce 97% of chlorine. It can also reduce sediment, synthetic chemicals and
Point-of-Use Water Heater Owner s Manual. Installation, Care & Use
 Point-of-Use Water Heater Owner s Manual Installation, Care & Use W152 T & P VALVE (PRE-INSTALLED ON SOME MODELS) HOT WATER OUTLET (½" NPT FEMALE) COLD WATER INLET VALVE (NOT SUPPLIED) ON-OFF SWITCH COLD
Installation and Operating Instructions
 Installation and Operating Instructions WaterQuick Pro II Advanced - Hot Water Circulation Pump WaterQuick Pro II Advanced Step 1. Choose the appropriate place to install the pump and Flow Monitor: WaterQuick
Installation, Operation, and Maintenance Manual
 Installation, Operation, and Maintenance Manual Product Preservers Anti-Scale System Chemical-Free, Salt-Free Scale Prevention Introduction The Product Preservers Anti-Scale System will condition the tap
OZONE SYSTEM FOR IN-GROUND POOLS New and Existing
 INSTALLATION & OPERATIONS MANUAL FOR Z0-910/912 OZONE SYSTEM FOR IN-GROUND POOLS New and Existing MANUFACTURED BY 3428 Bullock Lane San Luis Obispo, CA 93401 800-676-1335 4-0454-041900/03 IMPORTANT SAFETY
STOP. SAFETY INFORMATION Please read and understand this entire manual before attempting to assemble, operate or install the product.
 STOP Power supply required Questions, problems, missing parts? Before returning to your retailer, call our customer service department at 1-800-742-5044, 7:30 a.m. - 5 p.m., EST, Monday - Friday. 115 volts
INSTALLATION INSTRUCTIONS AND OWNER S MANUAL
 INSTALLATION INSTRUCTIONS AND OWNER S MANUAL ELECTRIC INSTANTANEOUS WATER HEATERS WITH PhD 208 and 480 VAC three phase 32 144 kw 600 VAC three phase 130 / 150 kw BEFORE ATTEMPTING ANY INSTALLATION OR SERVICE
THE CHATEAUX 52"/60" UNI PACK CEILING FAN INSTALLATION INSTRUCTIONS
 THE CHATEAUX 52"/60" UNI PACK CEILING FAN INSTALLATION INSTRUCTIONS Please read and save these instructions These instructions are to be used in the installation of the following QUORUM INTERNATIONAL fans...
Hawkins 44 in Ceiling Fan Owner s Manual. Hawkins Ventilador de Techo de 1,12 m Manual del Propietario
 117 391 Hawkins 44 in Ceiling Fan Owner s Manual Hawkins Ventilador de Techo de 1,12 m Manual del Propietario 44 Hawkins Ceiling Fan by Hampton Bay Thank you for purchasing our ceiling fan. This product
Whole House Descaler Installation Instructions
 Whole House Descaler Installation Instructions MODEL HF-SOFT Safe, effective scale prevention without the use of chemicals or salt. HF-SOFT DIRECTION OF FLOW 26" Shut-Off Valve 48" 5-Micron Pre-Filter
WAIWELA SERIES-TWO WATER HEATERS
 WAIWELA SERIES-TWO WATER HEATERS ELECTRIC INSTANTANEOUS WATER HEATER INSTALLATION GUIDE AND OWNERS MANUAL MODELS COVERED WET-12 T, TC, T2-240/208 V SPECIAL, V READ THE GENERAL SAFETY SECTION BEGINNING
THE BARCLAY HUGGER CEILING FAN INSTALLATION INSTRUCTIONS
 THE BARCLAY HUGGER CEILING FAN INSTALLATION INSTRUCTIONS Please read and save these instructions These instructions are to be used in the installation of the following QUORUM INTERNATIONAL fans... The
Comfort Series Instant Hot Water System
 GRUNDFOS INSTRUCTIONS Installation and Operation Comfort Series Instant Hot Water System ANSI/NSF61 and IAPMO listed Shipment Inspection page 1. Pre-Installation Checklist page 1. Pump Mounting page 2.
INSTALLATION 125 PSI (8.6 BAR) MAXIMUM OPERATING PRESSURE
 MAXIMUM OPERATING PRESSURE") Bulletin XL-150 February 2015 INSTALLATION ADJUSTMENT SERVICE HIGHLOW THERMOSTATIC WATER MIXING VALVE SERIES XL-150, XL-150-LF IMPORTANT! Provide valve serial number, (located on valve cover) when ordering
Bulletin XL-150 February 2015 INSTALLATION ADJUSTMENT SERVICE HIGHLOW THERMOSTATIC WATER MIXING VALVE SERIES XL-150, XL-150-LF IMPORTANT! Provide valve serial number, (located on valve cover) when ordering
Mixing Degas Vessel (MDV) EC-1, EC-2, EC-4, Total Eclipse 2 or 4, and TrioPure-25 or TrioPure-50
 EC-1, EC-2, EC-4, Total Eclipse 2 or 4, and TrioPure-25 or TrioPure-50") INSTALLATION MANUAL for MDV Mixing Degas Vessel (MDV) EC-1, EC-2, EC-4, Total Eclipse 2 or 4, and TrioPure-25 or TrioPure-50 MANUFACTURED BY 3428 Bullock Lane San Luis Obispo, CA 93401 800-676-1335 4-0635
INSTALLATION MANUAL for MDV Mixing Degas Vessel (MDV) EC-1, EC-2, EC-4, Total Eclipse 2 or 4, and TrioPure-25 or TrioPure-50 MANUFACTURED BY 3428 Bullock Lane San Luis Obispo, CA 93401 800-676-1335 4-0635
INSTALLATION 125 PSI (8.6 BAR) MAXIMUM OPERATING PRESSURE
 MAXIMUM OPERATING PRESSURE") . Bulletin XL-200 INSTALLATION ADJUSTMENT SERVICE THERMOSTATIC WATER MIXING VALVE SERIES XL-200, XL-200-LF, XL-200-SW, XL-200-SW-LF IMPORTANT! Provide valve serial number, (located on valve cover) when
. Bulletin XL-200 INSTALLATION ADJUSTMENT SERVICE THERMOSTATIC WATER MIXING VALVE SERIES XL-200, XL-200-LF, XL-200-SW, XL-200-SW-LF IMPORTANT! Provide valve serial number, (located on valve cover) when
Warnings 2. Installation Instructions 3. Wiring Instructions 3. Mounting Instructions 4. Replacement Element Installation 5. Replacement Parts 5
 TABLE OF CONTENTS Warnings 2 Installation Instructions 3 Wiring Instructions 3 Mounting Instructions 4 Replacement Element Installation 5 Replacement Parts 5 Heater Coverage Areas 6 General Notes 6 Maintenance
User s Manual and Warranty Information for Counterweighted Chain Drive ThyssenKrupp Access
 II User s Manual and Warranty Information for Counterweighted Chain Drive ThyssenKrupp Access Part #2139703 Rev. G II Table of Contents Introduction...3 Elevator Overview...4 Description of Features...5-7
INSTALLATION ADJUSTMENT SERVICE HIGHLOW THERMOSTATIC WATER MIXING VALVE SERIES XL-32, XL-82
 Bulletin XL-38 March 00 INSTALLATION ADJUSTMENT SERVICE HIGHLOW THERMOSTATIC WATER MIXING VALVE SERIES XL-3, XL-8 IMPORTANT! Provide valve serial number, (located on valve cover) when ordering parts!!
THE GUSTO CEILING FAN INSTALLATION INSTRUCTIONS
 THE GUSTO CEILING FAN INSTALLATION INSTRUCTIONS Please read and save these instructions These instructions are to be used in the installation of the following QUORUM INTERNATIONAL fans... The Gusto 2010
EEMAX THREE MODULE, SINGLE PHASE WATER HEATERS
 EEMAX THREE MODULE, SINGLE PHASE WATER HEATERS ELECTRIC INSTANTANEOUS WATER HEATER INSTALLATI GUIDE AND OWNERS MANUAL MODELS COVERED:- EX230T2T 208/240V EX280T2T 208/240 V SPECIAL, V READ THE GENERAL SAFETY
INSTALLATION INSTRUCTIONS AND OWNER S MANUAL FOR
 INSTALLATION INSTRUCTIONS AND OWNER S MANUAL FOR ELECTRIC ON-DEMAND TANKLESS WATER HEATERS: SpecAdvantage with PhD Technology SafeAdvantage with PhD Technology 208 and 480 VAC three phase 32 144 kw 600
TORRID MARINE YACHT QUALITY Since Owner s Manual
 Marine Water Heaters Owner s Manual Plumbing Configuration Note: While Torrid Marine is always happy to offer advice, we highly recommend you choose a professional marine technician to install your new
THE NIKKO CEILING FAN INSTALLATION INSTRUCTIONS
 THE NIKKO CEILING FAN INSTALLATION INSTRUCTIONS Please read and save these instructions The Nikko 44 & 52" 9 P.O.Box 961008 Fort Worth, TX 76161 (817) 626-5483 FAX (817) 626-5540 IO183-11/09 QUORUM'S UNIQUE
INSTALLATION 125 PSI (8.6 BAR) MAXIMUM OPERATING PRESSURE
 MAXIMUM OPERATING PRESSURE") Bulletin GLV-101 Old Rev. LV-101 INSTALLATION ADJUSTMENT SERVICE THERMOSTATIC WATER MIXING VALVE SERIES LV-983, LV-983-LF & LV-984, LV-984 -LF IMPORTANT! Provide valve serial number, (located on valve
Bulletin GLV-101 Old Rev. LV-101 INSTALLATION ADJUSTMENT SERVICE THERMOSTATIC WATER MIXING VALVE SERIES LV-983, LV-983-LF & LV-984, LV-984 -LF IMPORTANT! Provide valve serial number, (located on valve
WKS 4000 SERIES (USA only) --INSTALLATION INSTRUCTIONS--
 --INSTALLATION INSTRUCTIONS--") 8610 Production Avenue San Diego, California 92121 (858) 566-7465 Fax (858) 566-1943 WKS 4000 SERIES (USA only) --INSTALLATION INSTRUCTIONS-- Thank you for choosing a BREEZAIRE cooling unit. We believe
8610 Production Avenue San Diego, California 92121 (858) 566-7465 Fax (858) 566-1943 WKS 4000 SERIES (USA only) --INSTALLATION INSTRUCTIONS-- Thank you for choosing a BREEZAIRE cooling unit. We believe
Wrap-Around TOTE Tank / IBC Heaters (TOTE and TOT Series)
") Wrap-Around TOTE Tank / IBC Heaters (TOTE and TOT Series) Instruction Manual Read and understand this material before operating or servicing these heating tapes. Failure to understand how to safely operate
Wrap-Around TOTE Tank / IBC Heaters (TOTE and TOT Series) Instruction Manual Read and understand this material before operating or servicing these heating tapes. Failure to understand how to safely operate
INSTANT HOT WATER RECIRCULATING SYSTEM
 INSTANT HOT WATER RECIRCULATING SYSTEM INSTALLATION AND OPERATING INSTRUCTIONS Save manual for future reference MODEL 500800 Pump and Comfort Valve CS VW 12" Supply Line and Adapters MH26400 65GM U P C
Owner s Manual. Pelican Custom Premium WHWF 1354/1665
 Owner s Manual Pelican Custom Premium WHWF 1354/1665 Page 2 Copyright 2013 Enviro Water Solutions Inc. All rights reserved. All information contained herein is the property of Pelican Water Systems. Pelican
EEMAX HOME ADVANTAGE
 EEMAX HOME ADVANTAGE ELECTRIC INSTANTANEOUS WATER HEATER INSTALLATION GUIDE AND OWNERS MANUAL MODELS COVERED:- SS015240TC 208-240V SS019240TC 208-240V READ THE GENERAL SAFETY SECTION BEGINNING ON THE INSIDE
Mini Tank water heater Electric undersink Water heaters GL GL 4 - GL 6+
 Mini Tank water heater Electric undersink Water heaters GL 2.5 - GL 4 - GL 6+ IMPORTANT SAFETY INSTRUCTIONS WARNING When using electrical appliances, safety precautions to reduce the risk of fire, electric
24 VAC SYSTEM CONTROL KIT Model: CK-91F and CK-91FG
 24 VAC SYSTEM CONTROL KIT Model: CK-91F and CK-91FG Designed for use with the SWG Series Power Venter for controlling Natural Gas or L.P. Gas draft induced appliances with a 24 VAC Gas Valve and a 30-millivolt
INSTALLATION 125 PSI (8.6 BAR) MAXIMUM OPERATING PRESSURE
 MAXIMUM OPERATING PRESSURE") Bulletin 82 August, 208 INSTALLATION ADJUSTMENT SERVICE HIGHLOW THERMOSTATIC WATER MIXING VALVE SERIES, -LF,, -LF IMPORTANT! Provide valve serial number, (located on valve cover) when ordering parts!!!
Bulletin 82 August, 208 INSTALLATION ADJUSTMENT SERVICE HIGHLOW THERMOSTATIC WATER MIXING VALVE SERIES, -LF,, -LF IMPORTANT! Provide valve serial number, (located on valve cover) when ordering parts!!!
Model Combination Shower Eye/Face Wash
 INSTALLATION, OPERATION & MAINTENANCE INSTRUCTIONS 1455 Kleppe Lane Sparks, NV 89431-6467 (775) 359-4712 Fax (775) 359-7424 E-mail: haws@hawsco.com website: www.hawsco.com Model 8300.158 Combination Shower
THE VALOR CEILING FAN INSTALLATION INSTRUCTIONS
 THE VALOR CEILING FAN INSTALLATION INSTRUCTIONS Please read and save these instructions These instructions are to be used in the installation of the following QUORUM INTERNATIONAL fans... The Valor 2011
Warnings 2. Installation Instructions 3. Wiring Instructions 3. Mounting Instructions 4-5. Replacement Element Installation 5. Replacement Parts 5-6
 TABLE OF CONTENTS Warnings 2 Installation Instructions 3 Wiring Instructions 3 Mounting Instructions 4-5 Replacement Element Installation 5 Replacement Parts 5-6 Heater Coverage Areas 6 General Notes 6
Roanoke 48 in Ceiling Fan Owner s Manual. Roanoke Ventilador de Techo de 1,22 m Manual del Propietario
 160 854 Roanoke 48 in Ceiling Fan Owner s Manual Roanoke Ventilador de Techo de 1,22 m Manual del Propietario 48 Roanoke Ceiling Fan by Hampton Bay Thank you for purchasing our ceiling fan. This product
TUB AND SHOWER FAUCET
 ITEM #043465 TUB AND SHOWER FAUCET MODEL #F0E509CP Français / Español p. 4 Project Source ATTACH YOUR RECEIPT HERE Serial Number Purchase Date Questions, problems, missing parts? Before returning to your
MKTF CRO-Series 5-Stage Reverse Osmosis System Installation and Maintenance Manual
 MKTF - 215 CRO-Series 5-Stage Reverse Osmosis System Installation and Maintenance Manual Please fill out the following information at the time of installation. Save for future reference. Model: Date Code:
SYSTEM CONTROL KIT Model: CK-41P
 SYSTEM CONTROL KIT Model: CK-41P READ THE INSTALLATION INSTRUCTIONS CAREFULLY & COMPLETELY BEFORE BEGINNING THE INSTALLATION! Designed for use with the SWG Series Power Venter for controlling Natural Gas
Standard and CELDEK Evaporative Cooler Modules Installation, Operation, and Maintenance Manual
 Standard and CELDEK Evaporative Cooler Modules Installation, Operation, and Maintenance Manual Standard Evaporative Cooler CELDEK Evaporative Cooler RECEIVING AND INSPECTION Upon receiving unit, check
INSTALLATION ADJUSTMENT SERVICE THERMOSTATIC WATER MIXING VALVE SERIES LV-981 & LV-982
 Bulletin LV-98 March 010 INSTALLATION ADJUSTMENT SERVICE THERMOSTATIC WATER MIXING VALVE SERIES & LV-98 IMPORTANT! Provide valve serial number, (located on valve cover) when ordering parts!! ASSE 1017
THE CAPRI III CEILING FAN INSTALLATION INSTRUCTIONS
 THE CAPRI III CEILING FAN INSTALLATION INSTRUCTIONS Please read and save these instructions These instructions are to be used in the installation of the following QUORUM INTERNATIONAL fans... The Capri
THE DAVENPORT CEILING FAN INSTALLATION INSTRUCTIONS
 THE DAVENPORT CEILING FAN INSTALLATION INSTRUCTIONS Please read and save these instructions The Davenport 8 P.O.Box 961008 Fort Worth, TX 76161 (817) 626-5483 FAX (817) 626-5540 IO171-04/08 QUORUM'S UNIQUE
THE LIBERTY CEILING FAN INSTALLATION INSTRUCTIONS
 THE LIBERTY CEILING FAN INSTALLATION INSTRUCTIONS Please read and save these instructions These instructions are to be used in the installation of the following QUORUM INTERNATIONAL fans... The Liberty
e Heater/Exhaust Fan/Light User s Guide
 e Heater/Exhaust Fan/Light User s Guide abflh70l, BFLH85L Item Stock Number(s): BFLH70L, BFLH85L IMPORTANT INSTRUCTIONS - OPERATING MANUAL READ AND SAVE THESE INSTRUCTIONS READ CAREFULLY BEFORE ATTEMPTING
Installation Instructions EQ-AST-WH & EQ-AST-WH-C. Whole House Water Filter
 Installation Instructions EQ-AST-WH & EQ-AST-WH-C Whole House Water Filter Welcome to the Aquasana experience. You are about to enjoy clean, clear water and the peace of mind that comes from knowing award
Model NOTE TO INSTALLER: Please leave this information with the Maintenance Department. LIMITED WARRANTY
 INSTALLATION, OPERATION & MAINTENANCE INSTRUCTIONS 1455 Kleppe Lane Sparks, NV 89431-6467 (775) 359-4712 Fax (775) 359-7424 E-mail: haws@hawsco.com website: www.hawsco.com Model 9400 No. 2080243(7) NOTE
INSTALLATION 125 PSI (8.6 BAR) MAXIMUM OPERATING PRESSURE
 MAXIMUM OPERATING PRESSURE") Bulletin GLV-98 Old Rev. LV-98 February 1 INSTALLATION ADJUSTMENT SERVICE THERMOSTATIC WATER MIXING VALVE SERIES, LV981-LF &, -LF IMPORTANT! Provide valve serial number, (located on valve cover) when ordering
Bulletin GLV-98 Old Rev. LV-98 February 1 INSTALLATION ADJUSTMENT SERVICE THERMOSTATIC WATER MIXING VALVE SERIES, LV981-LF &, -LF IMPORTANT! Provide valve serial number, (located on valve cover) when ordering
The Monaco Patio. Please read and save these instructions
 Please read and save these instructions These instructions are to be used in the installation of the following QUORUM INTERNATIONAL fans... The Monaco Patio 2007 P.O.Box 961008 Fort Worth, TX 76161 (817)
Murano Shower Cabin Installation Instruction
 Murano Shower Cabin Installation Instruction IMPORTANT Please read carefully the following instructions before installing your shower cabin. If you have any questions on this shower cabin installation
Whirlpool Bathtub Model Number: MT618
 INSTALLATION AND OWNER'S MANUAL Whirlpool Bathtub Model Number: MT618 Please carefully read these instructions before you begin to install the products. 07/11 Rev A P/N:100056-03 Thank you for purchasing
Read and save these instructions! DRANE-KOOLER. Water tempering device Installation, operation and maintenance manual
 Read and save these instructions! DRANE-KOOLER Water tempering device Installation, operation and maintenance manual PLEASE: read this manual! This manual will guide you through installation, operation
INSTALLATION, OPERATION AND MAINTENANCE
 INLINE HEATER INSTALLATION, OPERATION AND MAINTENANCE MODELS: ILS SERIES 1.5kW 120V SINGLE PHASE BEFORE YOU BEGIN CHECK ALL ELECTRICAL CONNECTIONS TO ALL COMPONENTS WITHIN THE HEATER FOR TIGHTNESS. CONNECTIONS
 http://waterheatertimer.org/how-to-install-under-counter-water-heater.html 1 IMPORTANT SAFETY INSTRUCTIONS Warning When using electrical appliances, basic safety precautions to reduce the risk of fire,
THE ALTON CEILING FAN INSTALLATION INSTRUCTIONS
 THE ALTON CEILING FAN INSTALLATION INSTRUCTIONS Please read and save these instructions These instructions are to be used in the installation of the following QUORUM INTERNATIONAL fans... The Alton 60
e Bath Fan with Light User s Guide
 e Bath Fan with Light User s Guide abfl125rok Item Stock Number(s): BFL125ROK IMPORTANT INSTRUCTIONS - OPERATING MANUAL READ AND SAVE THESE INSTRUCTIONS READ CAREFULLY BEFORE ATTEMPTING TO ASSEMBLE, INSTALL,
WHOLE HOUSE FILTER &
 INSTALLATION, OPERATION AND MAINTENANCE MANUAL Warning Please read carefully before proceeding with installation. Your failure to follow any attached instructions or operating parameters may lead to the
Solar Indirect Water Heater
 To the Installer: Please attach these instructions next to the water heater. To the Consumer: Please read these and all component instructions and keep for future reference. Solar Indirect Water Heater
TECHNICAL ASSISTANCE TOLL FREE TELEPHONE NUMBER TECHNICAL ASSISTANCE FAX:
 ACORN SAFETY P.O. BOX 3527 CITY OF INDUSTRY, CA 91744-0527 UNITED STATES OF AMERICA WWW.ACORNSAFETY.COM INSTALLATION, OPERATION AND MAINTENANCE INSTRUCTIONS ELECTRIC ALARM WITH LIGHT AND HORN Model: S0000-AL2-C1D1-DB1
INSTALLATION USE & CARE MANUAL ALL WEATHER W-SERIES AND WD-SERIES QUARTZ TUBE ELECTRIC INFRARED RADIANT HEATER
 INSTALLATION USE & CARE MANUAL ALL WEATHER W-SERIES AND WD-SERIES QUARTZ TUBE ELECTRIC INFRARED RADIANT HEATER TABLE OF CONTENTS Warnings 2 Installation Instructions 3 Wiring Instructions 3 Mounting Instructions
INSTALLATION INSTRUCTIONS & HOME OWNERS MANUAL ECO 18 ECO 24 ECO 27 IMPORTANT SAFETY INFORMATION
 INSTALLATION INSTRUCTIONS & HOME OWNERS MANUAL ECO 18 ECO 24 ECO 27 IMPORTANT SAFETY INFORMATION As when installing or using any high voltage electrical appliance, basic safety precautions should always
READ THESE INSTRUCTIONS CAREFULLY AND COMPLETELY BEFORE PROCEEDING WITH THE INSTALLATION.
 Combustion Air system MODEL: CAS-4JR This product is designed for use with any natural gas or LP burning furnace, water heater, or boiler with a 24 VAC control system. It may be used with a residential
INSTALLATION INSTRUCTIONS
 THE ORBIT PATIO CEILING FAN INSTALLATION INSTRUCTIONS Please read and save these instructions These instructions are to be used in the installation of the following QUORUM INTERNATIONAL fans... The Orbit
Flow Factor ~
 Flow Factor ~ 216-765-4231 The DHC-E series is tested and certified by WQA against NSF/ANSI 372 for lead free compliance. STIEBEL ELTRON Inc. 17 West Street West Hatfield MA 01088 Tel. 413-247-3380 Fax
INSTALLATION ADJUSTMENT SERVICE
 Bulletin XL-670 July 201 INSTALLATION ADJUSTMENT SERVICE HIGHLOW THERMOSTATIC WATER MIXING VALVE MODEL XL-670-LF IMPORTANT! Provide valve serial number, (located on valve cover) when ordering parts!! ECO-MIX
INSTALLATION & TESTING MANUAL
 INSTALLATION & TESTING MANUAL ***CAUTION: Do not lift by yellow enclosure. Reference installation instructions for proper lifting and moving techniques. IMPROPER INSTALLATION MAY RESULT IN RISK OF SCALDING
OPERATION AND INSTALLATION
 F C OPERATION AND INSTALLATION TANKLESS ELECTRIC BOOSTER FOR TANK WATER HEATERS» MEGABOOST Tankless electric booster for tank water heaters Max. power, below set temp. Modulating power Off 86 F - 105 F
Standard and CELDEK Evaporative Cooler Modules Installation, Operation, and Maintenance Manual
 Standard and CELDEK Evaporative Cooler Modules Installation, Operation, and Maintenance Manual Standard Evaporative Cooler CELDEK Evaporative Cooler RECEIVING AND INSPECTION Upon receiving unit, check
ELECTRIC INSTANTANEOUS WATER HEATER INSTALLATION GUIDE AND OWNERS MANUAL THERMOSTATIC
 ELECTRIC INSTANTANEOUS WATER HEATER INSTALLATION GUIDE AND OWNERS MANUAL THERMOSTATIC MODELS COVERED: EFT-5500-4-S-10 240V EFT-6500-4-S-10 240V EFT-7500-4-S-10 240V EFT-9500-4-S-10 240V EFT-8300-2-S-10
e Bath Fan with Light User s Guide
 e Bath Fan with Light User s Guide abfl100rnl, BFL125RNL Item Stock Number(s): BFL100RNL, BFL125RNL IMPORTANT INSTRUCTIONS - OPERATING MANUAL READ AND SAVE THESE INSTRUCTIONS READ CAREFULLY BEFORE ATTEMPTING
Laing Thermotech. Autocirc The Instant Hot Water Pump Models E1-BCANCT1W-06 and E1-BCANRT1W. Installation & Operating Manual
 Installation & Operating Manual Please read this manual carefully before attempting to install, operate or maintain the product described. Failure to comply with the information provided in this manual
Peerless Partner PV Series Indirect Fired Water Heater
 Operation and Installation Manual Peerless Partner PV Series Indirect Fired Water Heater Limited Warranty and Tank Replacement GENERAL INFORMATION PLEASE READ INSTRUCTIONS CAREFULLY BEFORE INSTALLING WATER
CELDEK Evaporative Cooler Module Installation, Operation, and Maintenance Manual. CELDEK Evaporative Cooler
 CELDEK Evaporative Cooler Module Installation, Operation, and Maintenance Manual CELDEK Evaporative Cooler RECEIVING AND INSPECTION Upon receiving unit, check for any interior and exterior damage, and
Alliance SL Indirect - Fired Water Heater
 INSTALLATION, OPERATING AND SERVICE INSTRUCTIONS FOR Alliance SL Indirect - Fired Water Heater Including Warranty Information For service or repairs to the water heater, call your heating contractor. When
TA-300, TA-300-LF, TA-350, TA-350-LF
 Bulletin G-5 INSTALLATION SETUP AND OPERATING INSTRUCTIONS EMERGENCY MIXING VALVE SYSTEM TA-300, TA-300-LF, TA-350, TA-350-LF IMPORTANT! Provide valve serial number (located on valve body) when ordering
INSTALLATION GUIDE Little Butler Hot Water Dispensing Faucets and Drinking Water Dispensing Faucets
 INSTALLATION GUIDE Little Butler Hot Water Dispensing Faucets and Drinking Water Dispensing Faucets DW000 / LB00 Series LB00 Series DW00 / LB00 Series LB00 Series DW7000 / LB700 Series LB700 Series DW8000
Silicone Rubber Heating Tape with Adjustable Thermostat Control (HSTAT Series) Instruction Manual
 Instruction Manual") Silicone Rubber Heating Tape with Adjustable Thermostat Control (HSTAT Series) Instruction Manual Read and understand this material before operating or servicing these heating tapes. Failure to understand
Silicone Rubber Heating Tape with Adjustable Thermostat Control (HSTAT Series) Instruction Manual Read and understand this material before operating or servicing these heating tapes. Failure to understand
WMWLB / WMWFM / WTWLB / WTWFM Series Hydronic Heating Unit
 January 2008 WMWLB / WMWFM / WTWLB / WTWFM Series Hydronic Heating Unit Installation Operation Maintenance The units are designed for permanent up flow, counter flow, or horizontal left or right airflow
DUST FREE CARBON Whole House Air Purifier
 DUST FREE CARBON Whole House Air Purifier Installation & Operation Manual This manual covers the following model: DF CARBON 14" - #13052 GENERAL This device is designed to be installed into an existing
Installation Manual NPE-180A/240A WARNING. Add-on Controller Installation Kit
 Installation Manual Add-on Controller Installation Kit NPE-180A/240A This device is designed to work with NPE-180A/240A models ONLY. WARNING All Installations should be done only by a qualified expert