Disclaimer. Trademarks. Copyright. Warranty
|
|
|
- Bathsheba Craig
- 5 years ago
- Views:
Transcription
1 1
2 Disclaimer Trademarks Copyright Control4 makes no representations or warranties with respect to any Control4 hardware, software, or the contents or use of this publication, and specifically disclaims any express or implied warranties of merchantability or fitness for any particular purpose. Control4 reserves the right to make changes to any and all parts of Control4 hardware, software, and this publication at any time, without any obligation to notify any person or entity of such changes. Control4 is a registered trademark of Control4 Corporation. Other product and company names mentioned in this document may be the trademarks or registered trademarks of their respective owners. Copyright Control4 Corporation. All rights reserved. No part of this publication may be reproduced, photocopied, stored on a retrieval system, or transmitted without the express written consent of the publisher. Control4 Corporation S. Election Road, Suite 200 Salt Lake City, UT USA Wireless Thermostat User Guide Part Number: Rev A Model Number: CCZ-T1-W Warranty This device has a limited one (1) year warranty on parts from the date of installation. Control4 will replace or repair any defective unit. Return unit to the place of purchase for replacement. For any damages incurred, the warranty will never exceed the purchase price of the device. This warranty does not cover installation, removal, or reinstallation cost. The warranty is not valid in cases where damage was incurred due to misuse, abuse, incorrect repair, or improper wiring or installation. It does not cover incidental or consequential damage. This warranty gives you specific legal rights, and you might also be entitled to other rights that vary from state to state. Some states do not allow limitations on how long an implied warranty lasts or the exclusion or limitation of incidental or consequential damages. In these cases, the above mentioned limitations might not apply to you. 2
3 Important Information Graphical Symbols in this Guide The following symbols and their descriptions draw your attention to important safe practices and additional information that can help you avoid injury, death, or loss of material or time. CAUTION! This indicates a potentially hazardous situation that, if not avoided, may result in minor or moderate injury. DO NOT IGNORE A CAUTION! IMPORTANT! This indicates information that will help you avoid damage to your equipment, loss of materials, or loss of time. PAY ATTENTION TO THESE IMPORTANT STATEMENTS! NOTE: This indicates a note on related information about the current topic. TIP: This indicates a tip that might save you time or effort. Safety Instructions 1. Read these instructions. 2. Keep these instructions. 3. Heed all warnings. 4. Follow all instructions. 5. Clean only with dry cloth. 6. Install in accordance with the manufacturer s instructions. 7. Do not install near any heat sources such as radiators, heat registers, stoves, or other apparatuses that produce heat. 8. Only use attachments/accessories specified by the manufacturer. Battery Replacement Safety Rules Keep battery contacts and compartment clean. Remove battery if thermostat use is not expected for several months. Ensure that you insert the CR123A (3V) battery (included with the product) in the Control4 thermostat faceplate according to the polarity labels, POS (+) and NEG (-), on the thermostat circuit board. CAUTION! To prevent battery shorting, leakage or rupture: Use CR123A (3V) Battery. Do not attempt to recharge a battery unless the battery is specifically marked rechargeable. Never dispose of batteries in a fire. Additional Resources The following resources are available to provide you with additional support: Your authorized Control4 reseller. Control4 Web Site: Composer online help. 3
4 Contents Introduction... 5 Features... 6 Display... 6 Options of Control... 7 Change Heating and Cooling System Mode... 8 Change Fan Settings Change Hold Options View or Change Temperature Heat and Cool Points Options for Program Scheduling Additional Programming Battery Maintenance Low Battery Battery Replacement Regulatory Compliance FCC Industry Canada
5 Introduction Congratulations on your purchase of the Wireless Thermostat from Control4. This intelligent programmable thermostat works as an integral part of the Control4 system. Having the thermostat integrated with the Control4 system allows you to control the temperature either using the Wireless Thermostat or any of the Control4 navigation control options: the 10.5 Wireless Touch Screen, the Mini Touch Screen, the System Remote Control (On-Screen display or LCD display), or the LCD Keypad. You can use some of these navigation control options to program the schedule. This Wireless Thermostat goes beyond typical programmable thermostats. It features ZigBee ( ) mesh networking for two-way wireless communication. In mesh networking, each node acts as a repeater so there are multiple paths that a signal can take. If there is trouble communicating on one path due to interference, the signal automatically takes a different path, making this network topology very robust and reliable. The Wireless Thermostat also includes the following features: Beautiful On Any Wall Compact design Sophisticated, sleek profile fits beautifully in any home. Backlit LCD Easy to read and make adjustments. User-friendly icons Intuitive icons for common features make the thermostat easy for everyone to use. Intelligent From Front to Back Ultimate climate control Program the thermostat to follow a schedule of up to six Program Events per day. Manual override Three levels of manual hold settings using the Wireless Thermostat or remote control navigation devices or displays. Bi-directional communication Home automation system can perform automated functions based on the temperature. Flexible control Automatic changeover between heating/cooling and manual temperature override. Wireless Intelligent, reliable, wireless connectivity using ZigBee mesh networking. This document covers the following main sections: Features. See next page. Display. See next page. Options of Control. See page 7. Options for Program Scheduling. See page 19. Additional Programming. See page 22. Battery Maintenance. See page 22. Regulatory Compliance. See page 24. 5
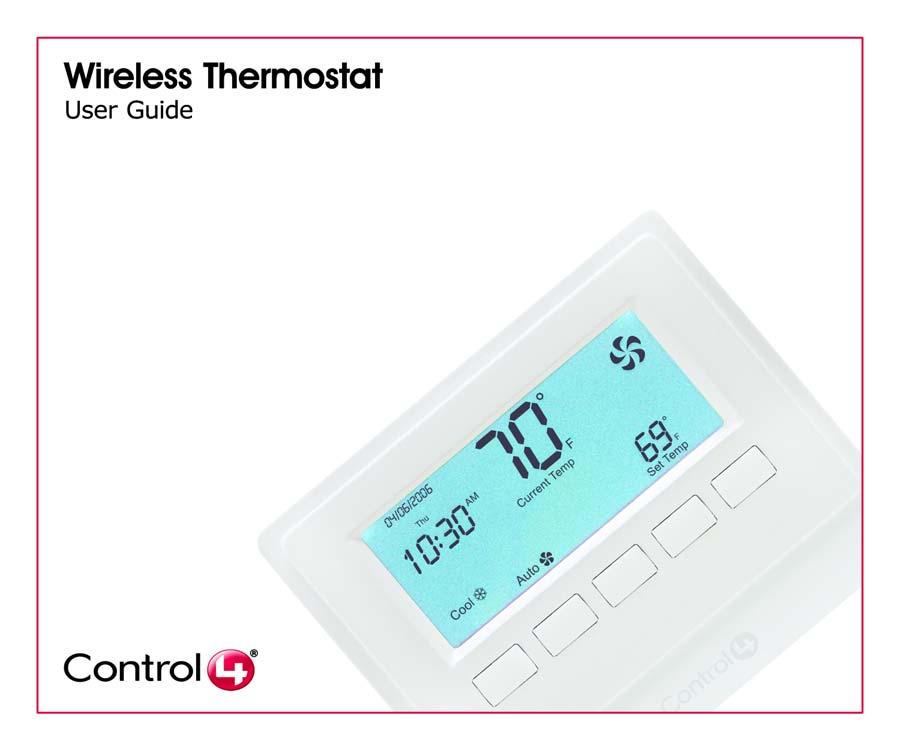
6 Features Heat Point and Cool Point. The Wireless Thermostat works with your heating and cooling system to maintain a consistent temperature called a set point. With the Wireless Thermostat, you can specify separate heating and cooling set points. The Wireless Thermostat automatically engages the appropriate heating or cooling system until the room reaches the desired temperature. The Wireless Thermostat follows a programmed temperature-change schedule or temperature changes that you set manually. Navigation control options. The Wireless Thermostat gives you the ability to control your heating and cooling system from the comfort of your couch using multiple navigation control options, including the Wireless Touch Screen, the Mini Touch Screen, the System Remote Control (On-Screen display or LCD display), and the LCD Keypad. Navigation device programming. The Wireless Thermostat is programmable through navigation control options, including the Wireless Touch Screen, the Mini Touch Screen, and the System Remote Control (On-Screen display). You can program the Wireless Thermostat s schedule using up to six Program Events per day (seven days a week), including Wake, Away, Return, Sleep, Custom 1, and Custom 2. Communication with a Control4 controller. The Wireless Thermostat communicates with your Control4 controller to obtain scheduling commands. Along with scheduling, the Wireless Thermostat receives time (date, day of week, and time) data from the Control4 controller and displays it accordingly. The Wireless Thermostat also displays temperature, the mode (Off, Heat, Cool, and Auto), whether the fan is operating, whether its button s are locked, and whether the battery needs replacing. External temperature sensors available. Through your authorized reseller, external temperature sensors are available that allow you to install the Wireless Thermostat in an inconspicuous location. You can then place the easily hidden remote sensor where you want to measure the temperature for your best comfort level. Additional programming. Your authorized reseller can also help you with a variety of configuration changes. See Additional Programming on page Display The Wireless Thermostat size is approximately 3 1/2 inches high by 4 1/2 inches wide. It displays an easy-to-read screen and has five manual control buttons. Each of the buttons controls a different aspect of your comfort control system. Button 1: System Mode Changes the mode of operation to Off, Heat, Cool, Auto and Emergency Heat (for heat pumps). See Change Heating and Cooling System Mode on page 8. Button 2: Fan Turns Fan On or sets it to be automatically controlled by heating and cooling system. See Change Fan Settings on page 11. Button 3: Hold Holds a temperature adjustment for a specified duration (On, 2 Hours, or Permanent), or turns off the Hold feature (see Change Hold Options on page 13). Button 4 or Button 5: Temperature Down or Up Adjusts temperature down or up in one degree increments and sets an automatic hold for 2 hours. See View or Change Temperature Heat and Cool Points on page 16.


7 Options of Control You can change the comfort settings using the following devices or displays: Wireless Thermostat Wireless Touch Screen Mini Touch Screen System Remote Control (On- Screen display or LCD display) LCD Keypad From either the Wireless Thermostat or one of the navigation control options, you can do the following tasks: Change Heating and Cooling System Mode. See next section. Change Fan Settings. See page 11. Change Hold Options. See page 13. View or Change Temperature Heat and Cool Points. See page 16. Wireless Thermostat System Remote Control LCD Navigation Device or Display LCD Keypad 7

8 Change Heating and Cooling System Mode The Wireless Thermostat allows you to select the mode of operation for the climate control system. Using modes can help with efficiency. Modes include: Off. When in the Off state, the Wireless Thermostat does not make any requests to the heating or cooling system. Heat mode. During cold winter months, if you do not want to run your air conditioning system, set the Wireless Thermostat mode to Heat. The system then uses the furnace exclusively. Cool mode. During hot summer months, if you do not want to run your furnace, set the Wireless Thermostat mode to Cool. The system then uses the cooling system exclusively. Auto. During spring and fall when your home might needs to be warmed at times or cooled at other times, set the Wireless Thermostat mode to Auto to automatically switch between heating and cooling based on the desired set points. To change the Thermostat Mode using one of the navigation control options, see the following sections: Change Thermostat Mode using Wireless Thermostat. See next section. Change Thermostat Mode using Navigation Device or Display. See page 9. Change Thermostat Mode using System Remote Control LCD. See page 10. Change Thermostat Mode using LCD Keypad. See page 10. Change Thermostat Mode using Wireless Thermostat 1 Press Button 1 repeatedly until the desired mode appears (Off, Heat, Cool, or Auto). The desired mode change is immediately reflected. 2 Leave it on the desired mode when it appears. 8

.")

9 Change Thermostat Mode using Navigation Device or Display 1 From the Main Navigator screen, select Comfort. 2 From the options that appear, select Thermostat (name can vary and some navigation devices skip this step). Main Navigator Screen Options on Menu or Bar 3 From the Thermostat screen, select Mode. 4 From the pull-down menu, select one of the mode options: Off, Heat, Cool or Auto. The screen updates immediately to reflect the new mode and set temperature. Thermostat Screen 9

10 Change Thermostat Mode using System Remote Control LCD 1 Press the Comfort button. 2 Press the Down or Up Arrow buttons to highlight Thermostat on the LCD screen, then press the Select button to view the thermostat s current settings. 3 Press the Down or Up Arrow buttons to highlight the Mode option and press the Select button to view the mode options. 4 Press the Down or Up Arrow buttons to highlight a mode option: Auto, Heat, Cool or Off. 5 Press the Select button to apply the option you have highlighted. 6 Press the Left Arrow button to go back to view the previous screen to verify that the mode change is applied. NOTE: When making a selection on the System Remote Control LCD, if an arrow appears on the right side of the LCD screen, in addition to using the Select button, you can also use the Right Arrow button to make the selection. Selecting the Left Arrow or Back button allows you to return to the previous screen. Change Thermostat Mode using LCD Keypad 1 From the Main LCD screen, select Comfort. 2 Turn the Select Dial to highlight Thermostat and press the Select Dial to view the thermostat options. 3 Scroll down to the Mode option and press the Select Dial. 4 From the Mode options that appear, select one of the mode options: Auto, Heat, Cool or Off. The screen updates immediately to reflect the change. 10

11 Change Fan Settings You can turn the fan on manually or set it to be automatically controlled by the HVAC system. When you turn the fan manually to On, it stays on through the programmed schedule, creating more circulation. (The next preprogrammed time does not overcome the change you made.) You can set the fan to: On Turns fan on manually and it will continue to run until turned off manually. Auto Allows heating and cooling system to control turning the fan on and off as necessary to maintain the temperature Heat Point or Cool Point. NOTE: The system displays the large fan icon in the upper right corner whenever the fan is operating. To change the Fan Settings using one of the navigation control options, see the following sections: Change Fan Setting using Wireless Thermostat. See next section. Change Fan Setting using Navigation Device or Display. See page 11. Change Fan Setting using System Remote Control LCD. See page 12. Change Fan Setting using LCD Keypad. See page 12. Change Fan Setting using Wireless Thermostat 1 Press Button 2 to toggle between the On or Auto fan setting appear. 2 Leave it on the desired fan setting when it appears. Change Fan Setting using Navigation Device or Display 1 From the Main Navigator screen, select Comfort. 2 From the options that appear, select Thermostat (name can vary and some navigation devices skip this step). 3 From the Thermostat screen, select Fan. 4 From the Fan screen, select one of the fan options: Auto or On. The Fan mode immediately changes to selected mode. 11


12 Change Fan Setting using System Remote Control LCD 1 Press the Comfort button. 2 Press the Down or Up Arrow buttons to highlight Thermostat on the LCD screen, then press the Select button to view the thermostat s current settings. 3 Press the Down or Up Arrow buttons to highlight the Fan option and press the Select button to view the fan options. 4 Press the Down or Up Arrow buttons to highlight a fan option: Auto or On. 5 Press the Select button to apply the option you highlighted. 6 Press the Left Arrow button to go back to view the previous screen to verify that the mode change is applied. Change Fan Setting using LCD Keypad 1 From the Main LCD screen, select Comfort. 2 Turn the Select Dial to highlight Thermostat and press the Select Dial to view the thermostat options. 3 Scroll down to the Fan option and press the Select Dial. 4 From the Fan options that appear, select one of the fan options: Auto or On. The screen updates immediately to reflect the change. 12
13 Change Hold Options The Thermostat Hold options allow you to hold a desired temperature setting, overriding the programmed schedule. You can set the system to hold the temperature (1) until the next programmed event, (2) for two hours, or (3) permanently. To change the Hold options using one of the navigation control options, see the following sections: Change Thermostat Hold Option using Wireless Thermostat. See next section. Change Thermostat Hold Option using Navigation Device or Display. See page 14. Change Thermostat Hold Option using System Remote Control LCD. See page 15. Change Thermostat Hold Option using LCD Keypad. See page 15. Change Thermostat Hold Option using Wireless Thermostat 1 Press Button 4 (adjusts set point down) or Button 5 (adjusts set point up) to desired setting. When you change the temperature it automatically sets a two-hour hold. 2 Press Button 3 to select the desired setting: On Holds setting until next programming event. 2 Hrs Holds setting for two hours. Perm Holds setting permanently. (No display) Cancels the current hold setting and returns Wireless Thermostat to follow the programmed schedule. 13
. 3 From the Thermostat screen, select Hold.")
14 Change Thermostat Hold Option using Navigation Device or Display 1 From the Main Navigator screen, select Comfort. 2 From the options that appear, select Thermostat (name can vary and some navigation devices skip this step). 3 From the Thermostat screen, select Hold. 4 From the Thermostat Hold screen, select one of the options: Hold Until Holds setting until next programming event. Two-Hour Holds setting for two hours. Permanent Holds setting permanently. Cancel Hold Cancels the current hold setting and returns Wireless Thermostat to follow the programmed schedule. The Thermostat screen returns and the current hold status appears next to the Hold button. NOTE: When a hold is canceled, the Wireless Thermostat returns immediately to follow the previously programmed schedule. 14

15 Change Thermostat Hold Option using System Remote Control LCD 1 Press the Comfort button. 2 Press the Down or Up Arrow buttons to highlight Thermostat on the LCD screen, then press the Select button to view the thermostat s current settings. 3 Press the Down or Up Arrow buttons to highlight the Hold option and press the Select button to view the hold options. 4 Press the Down or Up Arrow buttons to highlight a hold option: Off, On (Until next event), 2 Hours, Permanent or Hold Cancel. 5 Press the Select button to apply the option you have highlighted. 6 Press the Left Arrow button to go back to view the previous screen to verify that the mode change is implemented. Change Thermostat Hold Option using LCD Keypad 1 From the Main LCD screen, select Comfort. 1 Turn the Select Dial to highlight Thermostat and press the Select Dial to view the thermostat options. 2 Scroll down to the Hold option and press the Select Dial. 3 From the Hold options that appear, select one of the hold options: Off, On (Until next event), 2 Hours, or Permanent. The screen updates immediately to reflect the change. 15
16 View or Change Temperature Heat and Cool Points You can set the system to hold a temperature adjustment that varies from the programmed schedule. When you manually set a temperature, the system automatically sets a two-hour hold. NOTE: The system automatically makes sure that the Heat Point (the setting that turns the furnace on) is at least two degrees lower than the Cool Point (the setting that turns the air conditioning on). This keeps the two systems from competing with each other. To view or change the Temperature Heat and Cool Points using one of the navigation control options, see the following sections: View or Change Temperature using Wireless Thermostat. See next section. View or Change Temperature using Navigation Device or Display. See page 17. View or Change Temperature using System Remote Control LCD. See page 18. View or Change Temperature using LCD Keypad. See page

. The current temperature and current-mode settings appear.")
17 View or Change Temperature using Wireless Thermostat 1 Press Button 1 to toggle between Cool or Heat icons that appear above Button 1. 2 Press repeatedly Button 4 to decrease or Button 5 to increase the temperature in one degree increments until the desired temperature is reached. When you change the temperature, it sets an automatic hold for 2 hours. View or Change Temperature using Navigation Device or Display 1 From the Main Navigator screen, select Comfort. 2 From the options that appear, select Thermostat (name can vary and some navigation devices skip this step). The current temperature and current-mode settings appear. 3 Press the Down or Up Arrows repeatedly to decrease or increase the temperature in one degree increments. When you change the temperature, the thermostat sets an automatic hold for 2 hours. As you select the arrow buttons, the screen automatically updates. 17
18 View or Change Temperature using System Remote Control LCD 1 Press the Comfort button. 2 Press the Down or Up Arrow buttons to highlight Thermostat on the LCD screen, then press the Select button to view the thermostat s current settings. 3 Press the Down or Up Arrow buttons to highlight either the Heat Set Point or Cool Set Point and press the Select button to view the option you have highlighted. 4 Press the Down or Up Arrow buttons to highlight the Lower Set Point -1 to decrease or Raise Set Point +1 to increase the mode s temperature. 5 Press the Select button repeatedly to change the temperature down or up in one degree increments until you have the desired set point. 6 Press the Left Arrow button to go back to view the previous screen to verify that the mode change is applied. View or Change Temperature using LCD Keypad 1 From the Main LCD screen, select Comfort. 2 Turn the Select Dial to highlight Thermostat and press the Select Dial to view the thermostat options. 3 Scroll down to the Heat Set Point or Cool Set Point option and press the Select Dial. 4 From the Heat Set Point or Cool Set Point options that appears, scroll down to the Raise Set Point +1 or the Lower Set Point -1 and press the Select Dial repeatedly to adjust the temperature down or up as desired. The screen updates immediately to reflect the change. 18

19 Options for Program Scheduling The Wireless Thermostat comes with a pre-programmed schedule. Using any of the navigation programming options, you can modify this pre-programmed schedule to meet individual needs. Navigation programming options include: Wireless Touch Screen, the Mini Touch Screen, and the System Remote Control (On-Screen display). There are six Program Events per day for each day of the week. For each Program Event, you can enable, set a time, and set unique set points for heat and cool. The default pre-programmed schedule applies to every day of the week as follows: Navigation Device or Display MTuWThFSaSu Wake: Enabled 6:00 AM Heat Point: 70 Cool Point: 78 MTuWThFSaSu Away: Enabled 8:00 AM Heat Point: 62 Cool Point: 85 MTuWThFSaSu Return: Enabled 6:00 PM Heat Point: 70 Cool Point: 78 MTuWThFSaSu Sleep: Enabled 10:00 PM Heat Point: 62 Cool Point: 82 MTuWThFSaSu Custom 1: Disabled 11:00 PM Heat Point: 62 Cool Point: 85 MTuWThFSaSu Custom 2: Disabled 11:00 PM Heat Point: 62 Cool Point: 85 NOTE: You cannot program the schedule on the LCD Keypad or with the System Remote Control LCD Screen. 19

20 To Program a schedule: 1 From the Main Navigator screen, select Comfort. 2 From the options that appear, select Thermostat (name can vary and some navigation devices skip this step). 3 At the Thermostat screen, select the Program button. 4 From the Day Selection screen that appears, select the day or set of days you want to program. Weekday (Monday through Friday) Allows you to program the Wireless Thermostat for the 5-day week. Weekend (Saturday and Sunday) Allows you to program the Wireless Thermostat for the 2-day weekend). Mon through Sun (Mon, Tue, Wed, Thu, Fri, Sat, and Sun) Allows you to program the Wireless Thermostat for individual days. TIP: New schedule changes automatically override any conflicting existing schedule.. Thermostat Screen Day Selection screen 20
 in Step 4<StepNumber>, a programming wizard displayed the Wake event screen (like the example on the right).")
21 5 For the day (or set of days) you selected, program these six events as needed, beginning with Wake: Wake, Away, Return, Sleep, Custom 1 and Custom 2. When you chose a day (or set of days) in Step 4<StepNumber>, a programming wizard displayed the Wake event screen (like the example on the right). This is the first of six screens you can choose to edit. You can edit the Wake program event or select Next one or more times to skip to another program event (such as Away). a. If you want to edit the program event currently displayed (such as Wake) for the day(s) selected (such as Weekday), then: Select Enable to make this program event active. Set a time for this program event. Set a Heat Point and a Cool Point for this program event. b. If you want to edit another program event (Away, Return, Sleep, Custom 1 or Custom 2), select Next one or more times until the event displays on the screen (as shown), then repeat Step a.<stepnumber> Program Event Screen (Example: Wake) TIP:The Program Event you are programming appears in the upper-left corner of your screen next to the selected day. To continue to the next Program Event, select Next (in the lower-right corner of your screen). c. If you are done programming events, select Done to save your changes and exit the programming wizard. 6 From the Thermostat screen, select Done. 21
22 Additional Programming Your authorized reseller can help you configure additional preferences for your Wireless Thermostat or Control4 system. These include: The use of Celsius, instead of default setting Fahrenheit. The use of the Remote Sensor, instead of the default setting On-board Temperature Sensor. The use of a Custom Overshoot and Undershoot settings. The use of Locked buttons to disable use of buttons, instead of default setting Unlocked buttons. The use of the 24 hour clock, instead of the default setting 12 hour clock. The use of Date-listed first format DD/MM/YYYY, instead of Month-listed first format MM/DD/YYYY. The ability to define interaction between the Wireless Thermostat and the other devices on the Control4 system. Battery Maintenance NOTE: The Wireless Thermostat requires power from the heating and cooling system to maintain regular communication with the controller. The battery is intended to provide supplemental or backup power only. Keep battery contacts and compartment clean. Remove battery if thermostat use is not expected for several months. To prevent battery shorting, leakage or rupture, when replacing the battery: Use a CR123A (3V) Battery only. Do not attempt to recharge a battery unless the battery is specifically marked rechargeable. Never dispose of batteries in a fire. 22

 and NEG (-), on the thermostat")

23 Low Battery When battery is low, a battery icon indicating a low battery power appears right of the temperature on Wireless Thermostat LCD screen. Battery Replacement To replace battery: 1 Detach front faceplate by releasing the latch at the bottom of the Thermostat and sliding the faceplate up and off. 2 Remove old battery. See Battery Replacement Safety Rules on page 3. 3 Install new battery by ensuring that you insert the battery into the thermostat according to the polarity labels, POS (+) and NEG (-), on the thermostat circuit board. 4 Replace the Thermostat faceplate. 1. Align the faceplate with the rear plate and push the straight pins to the back of the thermostat. 2. With the faceplate slightly above the rear plate, slide the top edge of the faceplate onto the rear plate, engaging the plastic hooks with the corresponding holes. 3. Press firmly on the bottom center edge of the faceplace to snap and lock the bottom connector in place. 23
24 Regulatory Compliance This product complies with standards established by the following regulatory bodies: Federal Communications Commission (FCC) Industry Canada FCC FCC ID: R33CCZT11: This device complies with Part 15 of the FCC Rules. Operation is subject to the following two conditions: (1) this device may not cause harmful interference, and (2) this device must accept any interference received, including interference that may cause undesired operation. This equipment has been tested and found to comply with the limits for a Class B digital device, pursuant to Part 15 of the FCC Rules. These limits are designed to provide reasonable protection against harmful interference in a residential installation. This equipment generates, uses, and can radiate radio frequency energy and, if not installed and used in accordance with the instructions, may cause harmful interference to radio communications. However, there is no guarantee that interference not occur in a particular installation. If this equipment does cause harmful interference to radio or television reception, which can be determined by turning the equipment off and on, the user is encouraged to try to correct the interference by one or more of the following measures: Reorient or relocate the receiving antenna. Increase the separation between the equipment and receiver. Connect the equipment into an outlet on a circuit different from that to which the receiver is connected. Consult the dealer or an experienced radio/tv technician for help. IMPORTANT! Changes or modifications not expressly approved by Control4 could void the user s authority to operate the equipment. Industry Canada This Class B digital apparatus complies with Canada ICES-003. Cet appareil numérique de la classe B est conforme à la norme NMB-003 du Canada. 24
Wireless Thermostat (WTS10) Keypad Operation Guide
 Keypad Operation Guide") Keypad Operation Guide This Guide is intended to provide basic instructions for operating the thermostat from its on-board user interface prior to it being commissioned into the wireless ControlScope network.
Keypad Operation Guide This Guide is intended to provide basic instructions for operating the thermostat from its on-board user interface prior to it being commissioned into the wireless ControlScope network.
Operating Manual. Series Touchscreen Programmable Demand Control Thermostat. UtilityPRO TM
 Operating Manual UtilityPRO TM Series Touchscreen Programmable Demand Control Thermostat 85-3126 BE CAREFUL! Never use sharp instruments, such as a pencil or pen, to press touchscreen keys. To prevent
ELECTRONIC COMMUNICATING THERMOSTAT COOL AUTO. Hold Prog Mode Fan. Owner's Manual. RC-120 Two Stage Heat/Cool 2 Stage Heat / 2 Stage Cool
 O M N I S T A T ELECTRONIC COMMUNICATING THERMOSTAT : P DAY COOL AUTO Hold Prog Mode Fan OMNISTAT Owner's Manual RC-120 Two Stage Heat/Cool 2 Stage Heat / 2 Stage Cool Document Number 13R00-7 January,
Owner s Manual. Digital Thermostat. Heat/Cool & Heat Pump 7-Day Programmable S1-THEM22P7S COMMERCIAL. Model HVAC SERVICE PARTS
 Owner s Manual Model COMMERCIAL TM BACKLIT DISPLAY HVAC SERVICE PARTS Heat/Cool & Heat Pump 7-Day Programmable Digital Thermostat Use with most Heat Pump Systems: 2-Heat, 2-Cool Stages: 2-Heat, 2-Cool
ELECTRONIC COMMUNICATING THERMOSTAT : P COOL AUTO. Owner's Manual
 O M N I S T A T ELECTRONIC COMMUNICATING THERMOSTAT : P DAY COOL AUTO Hold Prog Mode Fan OMNISTAT Owner's Manual RC-112 Two Speed Heat Pump 3 Stage Heat / 2 Stage Cool With Energy Efficient Control Document
ELECTRONIC COMMUNICATING THERMOSTAT
 O M N I S T A T ELECTRONIC COMMUNICATING THERMOSTAT : P DAY COOL AUTO Hold Prog Mode Fan OMNISTAT Owner's Manual RC-101 Heat Pump Real Time Pricing System 2 Stage Heat / 1 Stage Cool Document Number 13R00-4
Projection Alarm Clock
 Projection Alarm Clock Model: W8923v2 Instructional Manual DC: 0676 For online video support visit: http://bit.ly/laxtechtalk Table of Contents LCD Features... Buttons... Setup... Set Time, Date, etc....
CONNEX Smart Thermostat CST R00
 CONNEX Smart Thermostat CST-240 7215100100R00 Table of Contents Welcome... 3 Features... 5 Specifications... 5 Selecting the Heater Type... 5 Installation... 7 Control Panel (User Interface)... 9 Operation...
Wireless Weather Station. Table of Contents
 Wireless Weather Station Model: T83646v2 Instructional Manual DC:071916 For online video support: http://bit.ly/laxtechtalk Table of Contents LCD Features... Buttons... Setup... Set Time, Date etc....
Owner s Manual. PIR-1 IR Learner
 Owner s Manual PIR-1 IR Learner PIR-1 Owner s Manual 2010-2013 Universal Remote Control, Inc. The information in this owner s manual is copyright protected. No part of this manual may be copied or reproduced
Thermometer model 02059
 Instruction Manual Thermometer model 02059 pm CONTENTS Unpacking Instructions... 2 Package Contents... 2 Product Registration... 2 Features & Benefits: Sensor... 2 Features & Benefits: Display... 3 Setup...
2018 thesimple, Inc.
 TM User Guide 2018 thesimple, Inc. Introduction The Simple thermostat supports supports 2 heating stages and 2 cooling stages for conventional systems, and 2 heating/cooling stages for heat pumps, with
IMPORTANT SAFETY INFORMATION:
 Owner s Manual Model CX-MPC IMPORTANT SAFETY INFORMATION: Always read this manual first before attempting to install or use this device. For your safety, always comply with all warnings and safety instructions
7-Day. Digital Thermostat. residential. & 2-cool
 Digital Thermostat residential THERMOSTAT T1100FS 7-Day PROGRAMMABLE up to 2-heat & 2-cool PUMP Control up to 2 Heat & 2 Cool Stages 7-Day Programmable 4 Settings/Day Auto Changeover 5 minute Built-In
WIRELESS TEMPERATURE & HUMIDITY STATION INSTRUCTION MANUAL
 WIRELESS TEMPERATURE & HUMIDITY STATION INSTRUCTION MANUAL MODEL: S82967 DC: 071118 FIND MANUALS, FAQS, AND MORE UNDER THE SUPPORT TAB HERE: www.lacrossetechnology.com/s82967 TABLE OF CONTENTS 3. Power
Digital Refrigerator/Freezer Thermometer model 00986
 Instruction Manual Digital Refrigerator/Freezer Thermometer model 00986 CONTENTS Unpacking Instructions... 2 Package Contents... 2 Product Registration... 2 Features & Benefits: Sensors... 2 Features &
Table of Contents. Product Image 1 Locking/Unlocking the neoair 24 Table of Contents 2 Frost Protection 25 What is a Programmable Room Thermostat?
 Table of Contents Product Image 1 Locking/Unlocking the neoair 24 Table of Contents 2 Frost Protection 25 What is a Programmable Room Thermostat? 3-4 Power ON/OFF 26 Holiday Programming 27 Installation
Yale Real Living Touchscreen Deadbolt Installation and Programming Instructions
 Yale Real Living Touchscreen Deadbolt Installation and Programming Instructions x3 #8-32 x 5/16" Machine screws x4 #7 wood & #8-32 machine x 20mm Combination screws x2 M6x47mm Long through bolt 1 Preparing
Thermometer with Wired Sensor
 Instruction Manual Thermometer with Wired Sensor model 02042 CONTENTS Unpacking Instructions... 2 Package Contents... 2 Product Registration... 2 Features & Benefits... 3 Setup... 4 Temperature Units...
VisionPRO Series with RedLINK. User Guide
 TM VisionPRO Series with RedLINK User Guide Welcome Congratulations on your purchase of a Honeywell touch screen programmable thermostat. When used with the optional RedLINK Internet Gateway, you can remotely
Owner s Manual. Part Number 33CSCPACHP-01
 Comfort Pro Programmable Commercial Thermostat Owner s Manual Part Number 33CSCPACHP-01 SAFETY CONSIDERATIONS Read and follow manufacturer instructions carefully. Follow all local electrical codes during
Yale Real Living Assure Lock Push Button Deadbolt Installation and Programming Instructions (YRD216)
") Yale Real Living Assure Lock Push Button Deadbolt Installation and Programming Instructions (YRD216) Optional Network Module x3 #8-32 x 5/16" Machine screws x4 #7 wood & #8-32 machine x 20mm Combination
Yale Real Living Assure Lock Push Button Deadbolt Installation and Programming Instructions (YRD216) Optional Network Module x3 #8-32 x 5/16" Machine screws x4 #7 wood & #8-32 machine x 20mm Combination
Owner s Manual. Digital. Heat Pump. 5+2 Day Programmable. Model S1-THEH21P5S HVAC SERVICE PARTS TM
 Owner s Manual Model S1-THEH21P5S HVAC SERVICE PARTS TM Heat Pump 5+2 Programmable Digital T h e rm ostats t a t BACKLIT DISPLAY Use with most Heat Pump systems: 1-Heat, 1-Cool 2-Heat, 1-Cool Control up
TP WEM01 A Carrierr Côr Thermostat AC/HP Wi-Fir Thermostat Performance Series. Installation Guide
 TP WEM01 A Carrierr Côr Thermostat AC/HP Wi-Fir Thermostat Performance Series Installation Guide INTRODUCTION Welcome and from all of us at Carrier, thank you for purchasing your new Côr thermostat: the
ELECTRONIC THERMOSTAT
 110-792B 7/12/01 8:28 AM Page 1 ELECTRONIC THERMOSTAT Owner s Manual MODEL 8554 5-2 Day Programmable Thermostat 110-792B 7/12/01 8:28 AM Page 2 OWNER S MANUAL TABLE OF CONTENTS ENERGY STAR Program Information............................................................
Optima ZigBee Thermostat
 Optima ZigBee Thermostat Quick Start Guide For other language versions, please visit: www.salusinc.com LET S GET STARTED Make sure you have the following items: Thermostat with Mounting Plate Trim Plate
Caution: To maintain compliance with the RF exposure guidelines, place the unit at least 20cm from nearby persons.
 Installation Guide: for the Warmup Tempo Digital Programmable Thermostat The world s best-selling floor heating brand Introduction The Tempo thermostat is designed to aid in the comfort of your home by
Concord 5 TouchScreen Installation Sheet
 Concord 5 TouchScreen Installation Sheet Safety information IMPORTANT SAFETY INFORMATION. READ ENCLOSED WARNINGS AND SAFETY INFORMATION. WARNING! Disconnect panel power before servicing. CAUTION: Use static
1 For All Programmable Digital Thermostat
 OWNER'S MANUAL P/N P374-2300FM 1 For All Programmable Digital Thermostat Am OFF OVERRIDE Meets California Title 24 unts flush to the wall 7 Day Programmable 3 Occupied, 1 Unoccupied Auto-Changeover Large,
2017 EcoFactor, Inc.
 User Guide 2017 EcoFactor, Inc. Introduction The thermostat supports up to 2 stages of heating and 2 stages of cooling for conventional systems, and 2 stages of heating/ cooling for heat pumps, with and
PTAC WIRELESS KITS (DT01*, DS01*, DD01*) INSTALLATION INSTRUCTIONS
 INSTALLATION INSTRUCTIONS") PTAC WIRELESS KITS (DT01*, DS01*, DD01*) INSTALLATION INSTRUCTIONS AIR CONDITIONING SENSOR DD01* IO-644C~IO-644C~092007~4 DS01* DT01* The following installation instructions are for a typical installation.
PTAC WIRELESS KITS (DT01*, DS01*, DD01*) INSTALLATION INSTRUCTIONS AIR CONDITIONING SENSOR DD01* IO-644C~IO-644C~092007~4 DS01* DT01* The following installation instructions are for a typical installation.
Ambient Weather WS-0211 Wireless Wendy the Weather Wizard User Manual
 Ambient Weather WS-0211 Wireless Wendy the Weather Wizard User Manual Table of Contents 1. Introduction... 2 2. Getting Started... 2 2.1 Parts List... 2 2.2 Recommend Tools... 2 2.3 Thermometer Sensor
E529 Smart Digital Thermostat Product Guide
 E529 Smart Digital Thermostat Product Guide Table of Contents Table of Contents... Page 1 Overview and General Concept... Page 2 Application... Page 3 Features... Page 4 LCD Item Descriptions... Page 5
safety & regulatory information
 safety & regulatory information Document Part Number: 338610-001 Sixth Edition June 2006 This guide provides safety and regulatory information that is compliant with U.S., Canadian, and International regulations.
Pet Immune SAW PIR Motion Sensor
 PET Immune SAW PIR Motion Sensors Installation Sheet Description This is the Installation Sheet for SAW PIR and PET Immune Motion Sensors. See Table 1. Table 1: Motion Sensors 60-807-95R 60-807-01-95R
Projection Alarm Clock USER GUIDE
 Projection Alarm Clock USER GUIDE Jazwares, Inc. 2012 CONTENTS Please read the instructions along with the Alarm Clock carefully before you use it, so that you can operate it conveniently. WELCOME, Warnings
Owner s Manual MODEL 8555
 110-793B 7/11/01 3:29 PM Page 1 ELECTRONIC THERMOSTAT Owner s Manual MODEL 8555 7 Day Programmable Thermostat 110-793B 7/11/01 3:29 PM Page 2 OWNER S MANUAL TABLE OF CONTENTS ENERGY STAR Program Information............................................................
Color Forecast Station. Table of Contents
 Color Forecast Station Model: C884 Instructional Manual DC: 01816 View online setup video at: http://bit.ly/laxtechtalk Table of Contents LCD Features... Setup... Atomic Time... Set Language, Time, Date
Mood Light and Nature Sound Alarm Clock
 Mood Light and Nature Sound Alarm Clock For online video support: http://bit.ly/laxtechtalk Model: C83117 DC: 031518 TABLE OF CONTENTS 3 3 4 4 4 4 5 5 5 6 6 6 6 7 7 7 7 8 8 9 9 9 9 10 10 Power Up Settings
Model: WS-9133U-IT Quick Setup Guide DC: WIRELESS FORECAST STATION
 Model: WS-9133U-IT Quick Setup Guide DC: 041916 WIRELESS FORECAST STATION Time 12/24hr + Alarm Indoor Temp. ºF/ºC Forecast Icon + Tendency Arrow Outdoor Temp. ºF/ºC Wall Hanging Hole TX37U-IT Temperature
Yale Real Living Key Free Push Button Deadbolt B1L Installation and Programming Instructions
 Yale Real Living Key Free Push Button Deadbolt B1L Installation and Programming Instructions Before you begin DOWNLOAD THE BILT APP for step-by-step installation instructions & to register your product
Model: C87207 / C87061 Instruction Manual DC: DUAL ALARM CLOCK
 Model: C87207 / C87061 Instruction Manual DC: 081115 DUAL ALARM CLOCK FRONT VIEW USB Charge Port 1 Amp Output BACK VIEW SIDE VIEW Battery Compartment 2 AAA AC Power Jack Model: C87207 / C87061 www.lacrossetechnology.com/support
ACONT600AF11MA/ACONT602AF22MA Programmable Comfort Control
 ACONT600AF11MA/ACONT602AF22MA Programmable Comfort Control OWNER S GUIDE M28617 Pub. No. 12-5039-03 69-1831-04 Quick Reference Card Grasp and pull to see basic operating instructions at a glance. Battery
Pioneer Z100 Smart Thermostat Operating and Installation Manual
 Pioneer Z100 Smart Thermostat Operating and Installation Manual AW000286-D Page 2 Operating and Installation Manual Congratulations on the purchase of your new thermostat. It has been designed for easy
Room Monitor SAVE THIS MANUAL FOR FUTURE REFERENCE.
 Instruction Manual Room Monitor model 00276RM CONTENTS Unpacking Instructions... 2 Package Contents... 2 Product Registration... 2 Features & Benefits... 3 Setup... 4 Placement Guidelines... 5 Using the
Touchscreen Comfort Control
 12-5058-04 Touchscreen Comfort Control Model ACONT624AS42DA User Guide Nexia Home Intelligence Customer Service: (877) 288-7707 For HVAC related issues, contact your servicing dealer ÎÎ NOTE: A 24 Volt
Ambient Weather WS-091-C Three Channel Display Wireless Thermometer (Console Only) User Manual
 User Manual") Ambient Weather WS-091-C Three Channel Display Wireless Thermometer (Console Only) User Manual Table of Contents 1 Introduction... 2 2 Getting Started... 2 Parts List... 3 2.2 Display Console Set Up...
Ambient Weather WS-091-C Three Channel Display Wireless Thermometer (Console Only) User Manual Table of Contents 1 Introduction... 2 2 Getting Started... 2 Parts List... 3 2.2 Display Console Set Up...
RC-1000 and RC-2000 Programmable Communicating Thermostat. User s Guide
 RC-1000 and RC-2000 Programmable Communicating Thermostat User s Guide Contents About your thermostat... 1 Features:...1 Getting to know your thermostat s controls... 2 Getting to know your thermostat
CT2800 Programmable Thermostat
 CT2800 Programmable Thermostat INSTALLATION AND PROGRAMMING INSTRUCTIONS Welcome to the world of comfort and energy savings with your new Honeywell Programmable Thermostat. Your new thermostat will automatically
LED CEILING LIGHT WITH MOTION SENSOR AND REMOTE. ITM. / ART Model: LM56123 CARE & USE INSTRUCTIONS
 LED CEILING LIGHT WITH MOTION SENSOR AND REMOTE ITM. / ART. 1165831 Model: LM56123 CARE & USE INSTRUCTIONS IMPORTANT, RETAIN FOR FUTURE REFERENCE: READ CAREFULLY For assistance with assembly or installation,
Owner s Manual. Part Number 33CSSP2-FC BACK LIT LIQUID CRYSTAL DISPLAY MODE BUTTON
 Owner s Manual Part Number 33CSSP2-FC 33CS Fan Coil Programmable Thermostat SAFETY CONSIDERATIONS Read and follow manufacturer instructions carefully. Follow all local electrical codes during installation.
5+2 Day. up to HEAT COOL
 Digital Thermostat residential THERMOSTAT T1050 5+2 Day PROGRAMMABLE up to 2-heat & 2-cool PUMP Control up to 2 heat & 2 Cool Stages 4 Settings Per Day Self-prompting programming Auto changeover Separate
Self-Setting Clock Radio
 Self-Setting Clock Radio Just plug it in it sets itself TimeSmart table of contents Cautions and Warnings................................................. 2-6 Location of Controls....................................................
WIRELESS MULTI-ZONE DIGITAL THERMOMETER WITH RADIO CONTROLLED CLOCK. Model No (SF Version) Instruction Manual
 Instruction Manual") WIRELESS MULTI-ZONE DIGITAL THERMOMETER WITH RADIO CONTROLLED CLOCK Model No. 91049-1 (SF Version) Instruction Manual BASE STATION REMOTE SENSOR FEATURES AND SPECIFICATIONS BASE STATION Indoor / RF outdoor
WIRELESS MULTI-ZONE DIGITAL THERMOMETER WITH RADIO CONTROLLED CLOCK Model No. 91049-1 (SF Version) Instruction Manual BASE STATION REMOTE SENSOR FEATURES AND SPECIFICATIONS BASE STATION Indoor / RF outdoor
Owner s Manual. 5+2 Day Programmable Digital Thermostat
 Model Air Conditioning & Heating 5+2 Programmable Digital Thermostat 1-Heat & 1-Cool Heat Pump Compatible Battery or System Powered Backlit Digital Display Fahrenheit or Celsius Service Filter Indicator
Pioneer Z100 Smart Thermostat Operating and Installation Manual
 Pioneer Z100 Smart Thermostat Operating and Installation Manual AW000515-B Page 2 Operating and Installation Manual Congratulations on the purchase of your new thermostat. It has been designed for easy
RC300 IntelliFire Plus Multifunction Remote Control Installation & Operating Instructions
 RC300 IntelliFire Plus Multifunction Remote Control Installation & Operating Instructions Hearth & Home Technologies disclaims any responsibility for, and the warranty will be voided by, the following
Instruction Manual. AcuRite Atlas. Indoor Display model 06061
 Instruction Manual AcuRite Atlas Indoor Display model 06061 How It Works AcuRite Atlas is an environmental monitoring station that delivers key information on current outdoor conditions in your exact location.
On initial power up the thermostat will guide you through set up procedure for the following:
 Operating Guide: for the Warmup 3iE Programmable Thermostat INTRODUCTION Your thermostat s default screen is the Home Screen. This screen displays important information such as the time, current floor
Door/Window Sensor Installation Instructions
 Door/Window Sensor Installation Instructions Product Overview Z-Wave+ enabled device which provides open/closed position status Transmits open/closed status Reports tamper condition when cover is open
Installation Guide. Model TBZ48A Battery Powered Z-Wave Thermostat. This thermostat is compatible with most HVAC systems, including the following:
 Installation Guide Model TBZ48A Battery Powered Z-Wave Thermostat This thermostat is compatible with most HVAC systems, including the following: 24VAC systems Note: requires both the R and C wires unless
Ambient Weather RC-8487 ClearView Radio Controlled Travel Alarm Clock with Indoor Temperature User Manual
 Ambient Weather RC-8487 ClearView Radio Controlled Travel Alarm Clock with Indoor Temperature User Manual Table of Contents 1. Introduction... 1 2. Getting Started... 2 2.1 Display Features... 2 2.2 Parts
Atomic Digital Office Clock
 Atomic Digital Office Clock Model: 3-49-INT Instructional Manual DC: 0 Table of Contents LCD Features... Custom Display Modes... Setup... Atomic Time Signal... Settings: Language, Time, Date, etc.... Set
Owner s Manual. Part Number 33CS250-FS and 33CS220-FS
 Debonair 33CS Flush-Mounted Flatstat Commercial Programmable Thermostat IMPORTANT: Read entire instructions before programming the thermostat. Owner s Manual Part Number 33CS250-FS and 33CS220-FS GENERAL
FEATURES AND SPECIFICATIONS
 PRECISE TEMP WIRELESS MULTI-ZONE THERMOMETER and HYGROMETER With CLOCK Model No. 91756 User's Manual BASE STATION REMOTE SENSOR FEATURES AND SPECIFICATIONS BASE STATION Indoor / wireless outdoor temperature,
Powerley Thermostat. Installation & Operation Guide
 Powerley Thermostat Installation & Operation Guide i Welcome! After a quick installation, your new Powerley Thermostat will allow you to monitor and control your HVAC system from anywhere in the world.
Low Voltage Fan Coil Thermostat ST101ZB. Quick Start Guide. For other language versions, please visit
 Low Voltage Fan Coil Thermostat ST101ZB Quick Start Guide For other language versions, please visit www.salusinc.com Notices Please read these instructions carefully before installing and using the Low
Honeywell. Wireless Rain Gauge with Indoor. Temperature (TC152) USER MANUAL TABLE OF CONTENTS INTRODUCTION 3 PRODUCT OVERVIEW 4 REMOTE RAIN GAUGE 7
 USER MANUAL TABLE OF CONTENTS INTRODUCTION 3 PRODUCT OVERVIEW 4 REMOTE RAIN GAUGE 7") TABLE OF CONTENTS INTRODUCTION 3 PRODUCT OVERVIEW 4 REMOTE RAIN GAUGE 7 BEFORE YOU BEGIN 9 BATTERY INSTALLATION 10 LOW BATTERY WARNING 11 HOW TO USE THE TABLE STAND 11 GETTING STARTED 11 Honeywell Wireless
TABLE OF CONTENTS INTRODUCTION 3 PRODUCT OVERVIEW 4 REMOTE RAIN GAUGE 7 BEFORE YOU BEGIN 9 BATTERY INSTALLATION 10 LOW BATTERY WARNING 11 HOW TO USE THE TABLE STAND 11 GETTING STARTED 11 Honeywell Wireless
RGR150 USER S MANUAL. Wireless Rain Gauge with Thermometer and Clock
 RGR150 manual-final-091908:layout 1 9/19/08 8:59 AM Page 1 RGR150 USER S MANUAL Wireless Rain Gauge with Thermometer and Clock INTRODUCTION Thank you for selecting this Wireless Rain Gauge. This device
Ambient Weather WS-26 Indoor Thermo-Hygrometer with Daily Min/Max Display User Manual
 Ambient Weather WS-26 Indoor Thermo-Hygrometer with Daily Min/Max Display User Manual Table of Contents 1 Introduction... 2 2 Getting Started... 2 Parts List... 2 3 Display Console Layout... 3 4 Display
Model: Slimline-RF. 1 Slimline Series
 Model: Slimline-RF Model: Slimline-RF 1 Slimline Series Table of Contents Product Image 1 Holiday Programming 22 Table of Contents What is a Programmable Room Thermostat? 2 3-4 Setting the Hot Water Switching
Installation, Start-Up, and Operating Instructions
 Installation, Start-Up, and Operating Instructions CONTENTS Page SAFETY CONSIDERATIONS...1 GENERAL...1 INSTALLATION...1-5 Install Batteries...1 Select Transmitter Location (Optional)...1 Mount Transmitter
Twin Bell Digital Clock
 Twin Bell Digital Clock Model: V50-500 Instruction Manual PLEASE READ THIS INSTRUCTION MANUAL CAREFULLY BEFORE USE AND KEEP IT FOR FUTURE REFERENCE. SPECIFICATIONS... 1 SAFETY INSTRUCTIONS... 2 FUNCTIONS...
TB8220U Commercial Programmable Thermostat OWNER S GUIDE
 TB8220U Commercial Programmable Thermostat OWNER S GUIDE 63-2643 Contents Features... 3 Main Screen Selections... 4 Programming Heating and Cooling Schedule... 6 Operating the Thermostat... 10 Replacing
Owner s Manual. Digital Thermostat
 Model Air Conditioning & Heating Heat Pump 5+2 Day Programmable Digital Thermostat Control up to 2-Heat & 1-Cool Battery or System Powered Backlit Digital Display Auxiliary Heat Indicator Fahrenheit or
Ambient Weather WS-28 Indoor/Outdoor Thermometer with Daily Min/Max Display User Manual
 Ambient Weather WS-28 Indoor/Outdoor Thermometer with Daily Min/Max Display User Manual Table of Contents 1 Introduction... 2 2 Getting Started... 2 2.1 Parts List... 2 3 Display Console Layout... 3 4
5+2 DAY. OWNER S MANUAL Venstar Inc. 05/08
 Digital Thermostat residential THERMOSTAT 5+2 DAY PROGRAMMABLE up to 1-heat & 1-cool PUMP Stages: 1-Heat, 1-Cool Battery or System Powered Back-Lit Digital Display Fahrenheit or Celsius Service Filter
1 For All Programmable Digital Thermostat. Meets Residential California Title 24
 OWNER'S MANUAL P/N P374-1100FM 1 For All Programmable Digital Thermostat 72 74 Am I2:00 AUTO 70 unts Flush to the Wall 7 Day Programmable 4 Time Periods per Day Auto Changeover Large, Easy To Read Display
Atomic Digital Office Clock
 Atomic Digital Office Clock Model: C89 Instructional Manual DC: 0 Table of Contents LCD Features... Custom Display Modes... Setup... Atomic Time Signal... Settings: Language, Time, Date, etc.... Set Alarm
Owner s Manual. Part Number 33CS250-RC
 CONTENTS Page GENERAL... 1 CONFIGURATION... 1-4 Transmitter Display... 1 Transmitter Indicator... 1 Transmitter Front Panel Buttons... 1 Set Clock... 2 Programming Thermostat Schedules... 3 OPERATION...5
programmable control model installation and setup guide M /11/ Hunter Fan Company
 programmable control model 99107 installation and setup guide installation Prior to installation, download the app to ensure phone compatibility: Visit your app store and search simpleconnect to find the
1126 Series Ceiling Mount PIR Motion Detector
 Installation Sheet 1126 Series Ceiling Mount PIR Motion Detector Description The 1126 Series PIR (Passive Infrared) Motion Detectors are a compact wireless PIR. The 1126 Series offer 360, Wide Angle, or
DT8050A DUAL TEC Motion Sensor with Anti-Mask - Installation Instructions
 DT8050A DUAL TEC Motion Sensor with Anti-Mask - Installation Instructions QUICK LINKS Mounting Location Guidelines Open the Sensor Mount the Sensor Sensor Components and Settings Wire the Sensor Wiring
Wireless Color Weather Station
 Wireless Color Weather Station For online video support: http://bit.ly/laxtechtalk Model: M84282 DC: 071117 Table of Contents Button Function Explanation... Setup... Settings Menu... Fahrenheit Celsius...
INSTALLATION MANUAL. Need Help? This manual covers the following models: T915. Power Type. Thermostat Applications Guide. Page.
 INSTALLATION MANUAL This manual covers the following models: T915 Thermostat Applications Guide Des cription Gas or Oil Heat Electric Furnace Heat Pump (No Aux. or Emergency Heat) Heat Pump (with Aux.
Wireless Rain Gauge with Indoor Temperature
 TABLE OF CONTENTS INTRODUCTION 3 PRODUCT OVERVIEW 4 7 BEFORE YOU BEGIN 9 BATTERY INSTALLATION 10 Wireless Rain Gauge with Indoor Temperature LOW BATTERY WARNING 11 HOW TO USE THE TABLE STAND 11 GETTING
INSTRUCTIONS FOR. Wireless Refrigerator Freezer Thermometer (#10378)
") CONTENTS Unpacking Instructions... 2 Package Contents... 2 Product Registration... 2 Features & Benefits: Sensors... 2 Features & Benefits: Display... 3 Setup... 4 Install or Replace Batteries... 4 Temperature
CONTENTS Unpacking Instructions... 2 Package Contents... 2 Product Registration... 2 Features & Benefits: Sensors... 2 Features & Benefits: Display... 3 Setup... 4 Install or Replace Batteries... 4 Temperature
DIGITAL ATOMIC WALL CLOCK
 DIGITAL ATOMIC WALL CLOCK Model: 513-149 Instruction Manual DC: 111915 Table of Contents INITIAL SETUP... 2 LCD FEATURES... 3 BUTTONS (back view)... 3 SET TIME, DATE, ETC.... 3 FAHRENHEIT/CELCIUS TEMPERATURE
Atomic Digital Clock with Temperature and Moon Phase
 Atomic Digital Clock with Temperature and Moon Phase For online video support: http://bit.ly/laxtechtalk Model: 513-1417AL D.C. 122016 Protected under U.S. Patents: 5,978,738 6,076,044 RE43903 Setup Power
Installation Instructions
 Installation Instructions S E C U R I T Y S Y S T E M Please refer to the System Installation Manual for information on limitations regarding product use and function and information on the limitations
Model: Av2 Quick Setup Guide DC: Atomic Projection Alarm Clock
 BUTTONS Model: 616-146Av2 Quick Setup Guide DC: 111815 Atomic Projection Alarm Clock Snooze/Backlight Time, Alarm with Snooze Projection Arm Rotates 180 Indoor Temperature + Trends Moon Phase + Calendar
Owner s Manual. Model 8800 Universal Communicating Thermostat. Includes Operating Instructions and Warranty Information
 Model 8800 Universal Communicating Thermostat Owner s Manual Includes Operating Instructions and Warranty Information READ AND SAVE THESE INSTRUCTIONS 61000762A 8800 Tstat Owners.indd 1 3/28/11 4:19:57
Smart Controller EMME ROOM-BY-ROOM. User Manual
 Smart Controller EMME ROOM-BY-ROOM User Manual Welcome! Your new Smart Controller is a climate-control breakthrough! Smart Controllers are your key to ultimate comfort, and they are easy to use. In conjunction
Atomic Digital Wall Clock
 Model: BBB87269 Instruction Manual DC:102015 Atomic Digital Wall Clock Table of Contents Welcome... Get Started... Button Functions... Settings: Time, Date, etc.... Time Zone Settings and 12/24 Hour Time...
ShockLink. Important Product Information.
 EN ShockLink Important Product Information www.laerdal.com English ShockLink Important Information Warnings and Cautions A Warning states a condition, hazard, or unsafe practice that can result in serious
IMPORTANT SAFETY INSTRUCTIONS
 WARNING TO PREVENT FIRE OR SHOCK HAZARD, DO NOT USE THIS PLUG WITH AN EXTENSION CORD, RECEPTACLE OR OTHER OUTLET UNLESS THE BLADES CAN BE FULLY INSERTED TO PREVENT BLADE EXPOSURE. TO PREVENT FIRE OR SHOCK
Ambient Weather RC-8461 ClearView Jumbo Atomic Digital Wall Clock with Temperature and Humidity User Manual
 Ambient Weather RC-8461 ClearView Jumbo Atomic Digital Wall Clock with Temperature and Humidity User Manual Table of Contents 1. Introduction... 1 2. Getting Started... 2 2.1 Product Features... 2 2.2
Honeywell Temperature & Humidity Sensor with LCD
 Honeywell Temperature & Humidity Sensor with LCD TABLE OF CONTENTS INTRODUCTION 3 PRODUCT OVERVIEW 4 BEFORE YOU BEGIN 5 BATTERY INSTALLATION 7 LOW BATTERY WARNING 7 PLACEMENT OF THE REMOTE SENSOR 7 GETTING
Ambient Weather WS-09 8-Channel Wireless Refrigerator/Freezer Thermometer User Manual
 Ambient Weather WS-09 8-Channel Wireless Refrigerator/Freezer Thermometer User Manual Table of Contents 1. Introduction... 2 2.Getting Started... 2 2.1 Parts List... 2 2.2 Probe Thermometer Sensor Set
Ambient Weather WS Channel Wireless Thermometer with Min/Max Display User Manual
 Ambient Weather WS-0802 8-Channel Wireless Thermometer with Min/Max Display User Manual Table of Contents 1 Introduction... 1 2 Getting Started... 3 2.1 Parts List... 3 2.2 Thermometer Sensor Set Up...