OFF GRID PROFESSIONAL GAS RANGE UGP-30E OF1 UGP-36E OF1 OWNER S GUIDE. Read and save these instructions. serial number:
|
|
|
- Kristin Holt
- 5 years ago
- Views:
Transcription


1 OFF GRID PROFESSIONAL GAS RANGE UGP-30E OF1 UGP-36E OF1 OWNER S GUIDE Read and save these instructions serial number: MAY 2015


2 TB 30E & 36E MODELS OFF GRID GAS RANGE LPG & NG CONVERTIBLE Installation and Owner s Manual This manual contains information for: Important Safeguards Installation Use and Care Certain ranges come equipped with special features. Determine from a study of your range which of the instructions given in this booklet pertain to your range. This booklet gives valuable instructions covering the installation, adjustment and use of your range. How to Obtain Service and/or Parts When your range does not operate in accordance with the instructions in the manual, you should contact the dealer in your immediate vicinity for service. Or, the purchaser may contact the service organization noted on the warranty. Important TO THE OWNER OF THE RANGE: Retain this owner s manual for future reference. TO THE INSTALLER: Leave this owner s manual with the range. Read and Save These Instructions The installation of the appliance must conform with local codes ANSI Z21.1a-2010, in the absence of local national Fuel Gas Code, ANSI Z233.1, and in Canada B149.2 Propane Storage and Handling Code


3 MANUFACTURED AND CERTIFIED BY Unique Gas Products Ltd 2245 Wyecroft Road Oakville, Ontario Canada L6L 5L7 Ph: Toll Free: Fax:
4 Table of Contents Contents Welcome & Congratulations Pages 1 thru 7 Dimensions and Clearances Pages 8 thru 12 Installation Instructions Pages 13 thru 17 First use of your new Range and Oven Pages 18 thru 19 Cooktop Use Pages 20 thru 25 Operation of Range Pages 26 thru 29 Care and Cleaning the Range Pages 29 thru 32 Removing or Replacing the Oven Door Pages 33 thru 34 How to Gain Access to the Battery Page 35 Troubleshooting Guide Pages 36 thru 38 Wiring Diagrams Pages 39 thru 40 Parts List and Diagrams Pages 41 thru 46 Warranty Page 47
5 Welcome & Congratulations C ongratulations on your purchase of a UNIQUE Elite range!. We are very proud of our products and are completely committed to providing you with the best service possible. Your satisfaction is our #1 priority. Please read this manual very carefully. It contains valuable information on how to properly maintain your new Unique gas range. We know you will enjoy your new range and Thank You for choosing Unique! We hope you will consider us for future purchases. PLEASE READ AND SAVE THESE INSTRUCTIONS This manual provides specific operation instructions for your model. Use your range only as instructed in this manual. These instructions are not meant to cover every possible condition and situation that may occur. Common sense and caution must be practiced when installing, operating and maintaining the appliance Record in the space provided below the Model No. and Serial No. of this appliance. These numbers are found on the serial plate located at the back of the appliance near the gas inlet connection. Model No. Type Number Serial No. Purchase Date Record these numbers for future use. IMPORTANT: Keep a copy of your bill of sale. The date on the bill establishes the warranty period should service be required. If service is performed, it is in your best interest to obtain and keep all receipts. PLEASE DO THIS NOW! The PRODUCT REGISTRATION CARD should be filled in completely, signed and returned. This information will register your product and help us to serve you quickly in the future if necessary.. 1
6 READ ALL IMPORTANT SAFEGUARDS AND ALL INSTRUCTIONS BEFORE USING THE APPLIANCE. If you smell gas Open Windows Don t touch electrical switches Extinguish any open flame Immediately call your gas supplier FOR YOU SAFETY Keep appliance area clear and free from combustible materials gasoline and other flammable vapors and liquids. Warnings Destroy the carton and plastic bags after the range is unpacked. Children should not use packaging material for play. Cartons covered with rugs, bedspreads, or plastic sheets can become air-tight chambers. Remove all staples from the carton. Staples can cause severe cuts and destroy finishes if they come in contact with other appliances or furniture. Be safety conscious. The preparation of food in an oven requires temperatures that could cause severe burns. Before using this new appliance, carefully read and follow all instructions. The California Safe Drinking Water and Toxic Enforcement Act of 1986 (Proposition 65) requires the Governor of California to publish a list of substances known to the State of California to cause cancer or reproductive harm. In addition, businesses must warn customers of potential exposure to such substances. Users of this appliance are hereby warned that the burning of gas can result in low level exposure to some of the listed substances, including formaldehyde, benzene, soot and carbon monoxide. This is caused primarily from the incomplete combustion of natural gas or LP fuel. Properly adjusted burners will minimize incomplete combustion. Exposure to these substances can also be minimized by properly venting the burners by opening a window or using a ventilating hood or fan. 2
7 Notice: Never keep pet birds in the kitchen. Birds have a very sensitive respiratory system. Fumes released during cooking oil, fat, margarine or overheated non-stick cookware may be harmful or fatal to birds. PROPER INSTALLATION: Be sure your appliance is properly installed and grounded by a qualified technician in accordance with the National Fuel Gas Code ANSI Z223.1-latest edition, and the National Electrical Code ANSI/NFPA No. 70-latest edition. Install only per installation instructions provided in the literature package for this range. Be sure leveling legs are in place at the bottom corners of the range. If necessary, raise or lower the leveling legs at the base of the range by turning clockwise or counterclockwise to insure a level range. Ask your dealer to recommend a qualified technician and an authorized repair service. Have the technician familiarize you with the locations of the manual gas shut off valve and gas meter in the event it is necessary to shut off gas supply to the unit during an emergency. The following situations may cause serious bodily harm, death or property damage. TO REDUCE THE RISK OF TIPPING OF THE RANGE, THE RANGE MUST BE SECURED BY A PROPERLY INSTALLED ANTI-TIP BRACKET PROVIDED WITH THE RANGE. TO CHECK IF THE DEVICE IS INSTALLED AND ENGAGED PROPERLY, CAREFULLY TIP THE RANGE FORWARD. THE ANTI-TIP DEVICE SHOULD ENGAGE AND PREVENT THE RANGE FROM TIPPING OVER. REFER TO THE INSTALLATION INSTRUCTIONS PACKAGED WITH THE ANTI-TIP BRACKET FOR PROPER ANTI-TIP BRACKET INSTALLATION. Never leave children alone or unattended in the area where an appliance is in use. They should never be allowed to sit or stand on any part of the appliance. Never leave the oven door open when the range is unattended. Do not store items of interest to children in the cabinets above a range or on the backguard of a range. Children climbing on the range to reach the items could be seriously injured. Do not allow children to climb or play around the range. The weight of a child on an open oven door may cause the range to tip, resulting in serious burns or other injury. IMPORTANT: Observe all governing codes and ordinances. Do not obstruct flow of combustion and ventilation air. 3
8 USER SERVICING: Do not repair or replace any part of the appliance unless specifically recommended in this owner s guide. All other servicing should be done only by a qualified technician. This will reduce the risk of personal injury and damage to the range. Storage in or on appliance: Flammable materials should not be stored in an oven, near surface burners or in the broiler section. This includes paper, plastic and cloth items, such as cookbooks, plastic ware and towels, as well as flammable liquids. Do not use the oven for storage. Do not store explosives, such as aerosol cans, on or near the range. Remove the oven door from any unused range if it is to be stored or discarded. Stepping, leaning or sitting on the doors or broiler section of this range can result in serious injuries and cause damage to the range. The following situations could cause bodily injury or property damage. DO NOT TOUCH SURFACE BURNERS, AREAS NEAR THESE BURNERS, OVEN BURNERS OR INTERIOR SURFACES OF THE OVEN. Both surface burners and oven burners may be hot even though the flame is not visible. Areas near surface burners may become hot enough to cause burns. During and after use, do not touch, or let clothing or other flammable materials touch these areas until they have had sufficient time to cool. Among these areas are the range, surfaces facing the range, the oven vent openings and surfaces near these openings, oven door and windows. NEVER use this appliance as a space heater to heat or warm the room. Doing so may result in carbon monoxide poisoning and overheating of the oven. Wear proper apparel. Loose fitting or hanging garments should never be worn while using the appliance. Do not let clothing or other flammable materials contact surface burners or interior surfaces of the oven until they have had sufficient time to cool. Never modify or alter the construction of the range. Do not remove leveling legs, panels, wire covers, anti-tip brackets or any other permanent part of the product. When heating fat or grease, watch it closely. Fat or grease may catch fire if allowed to become too hot. 4
9 Do not use water or flour on grease fires. Smother the fire with a pan lid, baking soda or use a dry chemical or foam-type extinguisher. Operation of the Surface Burners. When the burners are operated for the first time, a small amount of smoke may be generated due to tape residue or manufacturing lubrication. THIS IS NOT DANGEROUS. Operate the burners for about five minutes to rid the burners of this material before cooking. Use only dry potholders. Wet or damp potholders on hot surfaces could result in burns from steam. Do not let the potholder touch hot heating areas. Do not use a towel or other bulky cloth instead of a potholder. Use proper flame size. Adjust flame size so it does not extend beyond the edge of the cookware. The use of undersized cookware will expose a portion of the burner flame and may result in severe burns or direct contact and ignition of clothing. Also, proper relationship of cookware to burner will improve efficiency. NEVER cover any slots, holes or passages in the oven bottom or cover an entire rack with materials such as aluminum foil. Doing so blocks air flow through the oven and may cause carbon monoxide poisoning. Aluminum foil linings may also trap heat, causing a fire hazard. Refer to the cleaning section of this manual for more information on the use of aluminum foil. Placement of oven racks: Always place an oven rack in the desired location while the oven is cool. If a rack must be moved when the oven is hot, use potholders and grasp the rack with both hands to reposition. Do not let potholders contact hot oven walls. Remove all cookware from the rack before moving. Do not heat unopened food containers. Build-up of pressure may cause the container to burst and result in injury. Keep the oven vent duct unobstructed. The oven vent is located along the bottom of the back guard. Touching the surfaces in the vent area when the oven is being operated may cause severe burns. Also, do not place plastic or heat-sensitive items on or near the oven vents. These items could melt or ignite. The range requires fresh air for proper burner combustion. Do not block the flow of air around the base or beneath the lower front panel of the range. Use care when opening oven door: Stand to the side of the oven when opening the oven door. Slowly open the door to allow hot air or steam to escape before removing or replacing food. Know which knob controls each burner. Place a pan of food on the burner before turning it on, and turn the burner off before removing the pan. Always turn to the full 5
10 LITE position when igniting top burners. Then adjust the flame size so it does not extend beyond the edge of the cookware. Cookware handles should be turned inward and not extend over adjacent surface burners. To reduce the risk of burns, ignition of flammable materials, and spillage due to unintentional contact with the cookware, the handle of a cookware should be positioned so that it is turned inward, and does not extend over adjacent surface burners. Never leave the surface burners unattended. Boilovers may cause smoking, greasy spillovers may catch fire or a pan which has boiled dry may melt. Do not place hands between the spring tension hinge and the oven door frame when you are removing the oven door. You could pinch your fingers. Allow parts to cool to room temperature before touching or removing them from the range. When a surface burner is first turned off, the burner and grate are hot enough to cause burns. Clean the range regularly to keep all parts free of fat or grease which could catch fire. Pay particular attention to the area underneath each surface burner. Exhaust fan ventilating hoods and grease filters should be clean. Do not allow fat or grease to accumulate. Greasy deposits in the fan could catch fire. Refer to the hood manufacturer s instructions for cleaning. Do not use a cyclonic range hood with this product. Some range hoods circulate air by blowing downward toward the range top then drawing the air back up into the hood. This creates a cyclonic air wash that is designed for electric ranges only. A cyclonic hood may cause the burners of a gas range to operate improperly. Glazed cookware: Only certain types of glass, glass/ceramic, ceramic, earthenware, or other glazed cookware are suitable for rangetop service without breaking, due to the sudden change in temperature. Check the manufacturer s recommendations for rangetop use. Do not place plastic salt and pepper shakers, spoon holders or plastic wrappings on top of the range. These items could melt or ignite. Potholders, towels or wooden spoons could catch fire if placed too close to the flame. Do not use a wok equipped with a metal ring that extends beyond the burner. Because this ring traps heat, the burner and grate could be damaged. Also, the burner may not work properly, creating a carbon monoxide level above current health standards. Do not clean the oven door gasket. The door gasket is essential for a good seal. Care should be taken not to rub, damage or move the gasket. 6

11 Flexible Connectors: If the gas range/oven is connected to a gas supply with a metal flexible connector, move the range/oven with CAUTION for service or cleaning. Flexible connectors are not intended for repeated bending. Do not allow cleaners to make contact with flexible connectors. The connector and its fittings are designed for use only on the original installation and are not to be reused for another appliance or at another location. Connectors must comply with ANSI Z It s good practice for each household to have an appropriate fire extinguisher for use in the event of a house fire. 7
12 Dimensions and Clearances All units must be installed in accordance to minimum rear and side wall clearance and clearances extended vertically above the cook top, specifics relating to minimum clearances are stated on the serial plate located at the back of the appliance near the gas inlet connection. ANY OPENINGS IN THE WALL BEHIND THE UNIT AND IN THE FLOOR UNDER THE UNIT MUST BE SEALED. Note. Due to potential hazards it is recommended that storage cabinets NOT be installed above the cooking surface. IN THE EVENT OVERHEAD CABINETS ARE INSTALLED, THE MAXIMUM DEPTH OF CABINETS INSTALLED ABOVE COOKING TOPS SHOULD BE 13. UGP 30E Specs The range may be installed flush to the rear wall. You may install a non-combustible material on the rear wall above the range and up to the vent hood. It is not necessary to install non-combustible materials behind the range below the height of the counter top. The minimum distance from the side of the range above the counter top to combustible sidewalls must be at least 10 inches. 8
13 9
14 UGP 36E Specs ` 10
15 The bottom of the hood should be a minimum of 30 to 36 above the counter top. This would typically result in the bottom of the hood being 66 to 72 above the floor. These dimensions provide safe and efficient operation of the hood. 11
16 UGP 30E and 36E Cut-out Specs 12

17 To reduce the risk of tipping the appliance by abnormal usage or improper door loading, the appliance must be secured by properly installing the anti-tip device packed with the appliance. To check if the device is installed and engaged properly, carefully tip the range forward. The anti-tip device should engage and prevent the range from tipping over. If this range is removed for any reason, (eg. service or cleaning), it must be replaced as outlined before placing the range back in operation. Levelling a Free-Standing Range All free-standing ranges must be level to obtain proper cooking results. The leveling legs should be screwed into the corner brackets. Place pan or measuring cup partially filled with water or a level on the oven rack. Adjust the leveling legs until the range is level. The top of the aside panels should be level with the counter top. 13
18 GAS CONNECTIONS (All Units) NOTICE TO MASSACHUSETTS APPLIANCE DEALERS: Be sure this document is included in all gas range appliances sold to consumers in the State of Massachusetts. NOTICE: Massachusetts law requires the following: Appliances must be installed by a licensed plumber or gas fitter. Appliances must be connected with a three (3) foot (36 maximum length) flexible gas connector and A T handle type manual gas valve in the gas supply line to the appliance. Have the dealer where you purchase your new range install it or have him recommend a qualified installer. Installation must conform with local codes. In the absence of local codes, the installation must conform with the National Fuel Gas Code, ANSI Z223.1-Latest Edition in the U.S.A. or the CAN/CGA B149.1 or.2 Installation Codes in Canada. The range should be connected to the supply line with 1/2-inch black iron pipe or a certified flexible type range connector. To prevent gas leaks, put an approved sealing compound, which is resistant to liquefied petroleum gases, on all threaded connections. Important: Do not apply pressure directly to the range manifold pipe when tightening supply connections. The manifold pipe should be held securely at the pressure regulator to prevent twisting. Hold the pressure regulator with a wrench during the tightening of the connection, or the manifold pipe may be twisted and split, and cause a dangerous leak. The installation of ranges designed for manufactured (mobile) home installation must conform with the Manufactured Construction and Safety, Title 24 CFR, Part 3280, [formerly the Federal standard for Mobile Home Construction and Safety, Title 24, HUD (Part 280)] in the U.S.A. or C.S.A. Standard CAN/CGA Z in Canada or, when such standards are not applicable with local codes. The installation of ranges designed for recreational vehicle installation must conform to state or other codes and in the absence of such codes with the standard for recreational vehicles ANSI A in the U.S.A. or CAN/CGA Z in Canada. The installation of appliances designed for recreational park trailers must conform to recreational park trailers, ANSI A Note: Check all piping connections in the unit for leaks. Never use an open flame to check for gas leaks using a soap solution with at recommend ratio of 75% water, 25% dish washing soap. It s possible for connections made at the factory to leak, due to vibration encountered in transportation. Make certain you have checked them all, and repair any connections that leak. 14
19 The appliance and its individual shut-off valve must be disconnected from the gas supply piping system during any pressure testing of that system at test pressures in excess of ½ psig. The appliance must be isolated from the gas supply piping system by closing its individual manual shut-off valve during any pressure testing of the gas supply piping system at test pressures equal to or less than 1/2 psig. Installation Gas line shut-off valve To reduce the possibility of gas leaks, apply Teflon tape or a thread compound approved for use with LP or Natural gases to all threaded connections. Connect a ½ threaded pipe to the units regulator located at the back right of the unit. We suggest using a ½ female to 3/8 male flare adaptor on the end of the ½ threaded pipe. Use a flexible appliance connector to connect your gas supply to the appliance. A 3 foot length is recommended for ease of installation but other lengths are acceptable. Never use an old connector when installing a new range. Check for leaks using a leak detector or soapy water with a recommended ratio of 75% water, 25% dish washing soap It is the responsibility of the installer to make certain that the range is properly adjusted at the time of installation. Situations caused by improper adjustments or improper installation are not covered under the warranty. Any expenses incurred due to such situations will not be paid by the manufacturer of the appliance. Connecting gas to range This range is designed to operate at a pressure of 4 of water column on natural gas (NG) or 10 of water column on propane gas (LPG). Make sure you are supplying your range with the type of gas for which it is designed. This range comes equipped from the factory equipped for use with LPG (propane). This range is convertible for use on natural gas (NG) also. (Natural gas 15
20 orifices included in the packaging). When using this on NG gas, conversion must be made by a qualified NG installer before attempting to operate the range on that gas For correct operation, the pressure of natural gas supplied to the regulator should be between 4 and 5 of water column. For LP gas, the pressure supplied must be between 10 and 12 of water column. When checking for correct operation of the regulator, the inlet pressure must be at least 1 more than the operating -manifold- pressure as given above. The pressure regulator located at the back of the range manifold must remain in the supply line regardless of whether natural or LP gas is being used. Regulator is only good for ½ psi (14 w.c.) so test pressure must not exceed ½ psi. Shut off the main gas supply valve before removing the old range and leave it off until the new hook-up has been completed. Don t forget to relight the pilot on other gas appliances when you turn the gas back on. Because hard piping restricts movement of the range, the use of a CSA certified flexible metal appliance connector is recommended unless local codes require a hardpiped connection. Never reuse an old connector when installing a new range. If the hard piping method is used, you must carefully align the pipe; the range cannot be moved after the connection is made. To prevent gas leaks, use pipe joint compound resistant to LP or NG gases (depending on set up) on all male -external- pipe threads. 1. In an easily accessible location, install a service manual gas shut off valve. Be sure everyone operating the range knows where and how to shut off the gas supply to the range. 2. When all connections have been made, be sure all range controls are in the off position and turn on the main gas supply valve. Check for gas leaks by using a soap and water solution. If a gas leak is present, shut off gas immediately, tighten all connections, and retest for leaks. 3. Any opening in the wall behind the appliance and in the floor under the appliance shall be sealed. 16
21 After installation: 1. Check ignition of cooktop burners. 2. Check ignition of oven burner. 3. Check ignition of broil burner 4. Check ignition of griddle burner (36E model only) 5. Check for gas leaks at all gas connections (using a gas detector, never a flame). 17
22 FIRST USE OF YOUR NEW RANGE & OVEN When using the appliance for the first time, the oven and broiler burners should be turned on to burn off the manufacturing oils. Conditioning the oven: Conditioning will burn off any manufacturing residues and ensure that you get the best results right from the start. 1. Insert all the shelves. See Positioning the shelves for instructions. 2. Turn on the ventilation hood above your range on high. 3. Heat the empty oven at the highest temperature for: 30 minutes using BAKE 30 minutes using BROIL There will be a distinctive smell while you are conditioning the oven. This is normal, but make sure the kitchen is well ventilated during the conditioning. 4. Once cooled, wipe out the oven with a damp cloth and mild detergent, and dry thoroughly. Positioning the shelves: Both the shelf racks (inside the oven) and oven shelves have safety stops at their front to prevent them from sliding out of the oven when pulled forward, and at their back to prevent the shelves from hitting the back wall of the oven. 18

23 Inserting the shelves: 1. Hold both sides of the shelf firmly to keep it horizontal, with the front edge of the shelf closest to you. 2. Insert the back edge of the shelf into the slots on the shelf racks. 3. Lift the front edge of the shelf about 15 upwards, until the safety stops on the back of the shelf clears the safety stops on the shelf racks. 4. Gently lower the shelf to horizontal and slide it all the way into the oven. 5. Repeat these steps for the remaining shelves. 19


24 COOKTOP USE Cooktop Burner Operation Never leave the cooktop unattended when in use. Boil over causes smoking and greasy spills that may ignite. Take care when deep-frying. Oil or fat can overheat and/or ignite very quickly, particularly on a high setting. Make sure that all burner parts are properly in place. Incorrectly or incompletely assembled burners may produce dangerous flames. See Replacing the Burner Parts in Care and Cleaning on page 30. Keep the burners clean. After a spill or boil over, make sure you clean the affected burners before using them again. Food residue may clog the igniter and the notches of the flame spreader, stopping the burner from functioning correctly. See Care and Cleaning for instructions. The top burner flame size should be adjusted so that is does not extend beyond the edge of the cooking utensil. As a matter of safety, it's recommended that you comply with these instructions. A high flame on a surface burner is both inefficient and unsafe. The flame should always be adjusted so that it is no larger than the bottom of the pan. Fluctuations in flame size could be caused by pressure variations, improperly positioned burners, damage or debris. Surface Burner Ignition To light the top burners, push and turn the appropriate control knob counter clockwise to the HI position. You will hear a clicking noise - the sound of the electric spark igniting the burner. Once burner ignition has been achieved, turn the burner control knob to adjust the desired heat setting. When one burner is turned to the HI position, the burner igniters will spark. Do not attempt to disassemble or clean around any burner while another burner is on. Do not touch any burner cap, burner base or igniter while the igniters are sparking. 20
25 Note: If the gas does not ignite within four seconds, turn off the valve and allow at least five minutes for any gas to dissipate. In the event the electronic ignition system fails, the top burners and oven pilots can be lit by holding a lighted match near the burner head and turning the appropriate top burner knob to HI positon. Simmer and Boil A smaller flame setting will give the best simmer results. Small flames offer precise cooking performance for delicate foods, keeping food warm, melting chocolate or butter and for cooking that needs low heat for a long period of time. A larger flame setting provides the maximum heat that is available on your range. This setting should be used for higher temperature cooking such as stir fries, boiling water or cooking pasta. Top Burner Height 21
26 Cooktop Surface To prevent the cooktop from discoloring or staining, clean cooktop after each use, and wipe up acidic or sugary spills as soon as the cooktop has cooled. The sealed burners of your range are not sealed to your cooktop and are designed to be removed. Boil overs or spills will not seep underneath the cooktop. The burners should be cleaned after each use. Burner Grates The grates must be properly positioned before cooking. Improper installation of the grates may result in scratches on the cooktop and/or poor combustion. Oven Cooking Guidelines Important: Do not block the ducts on the rear of the range when using the oven. It is important that there is a continuous flow of hot air from the oven and fresh air into the oven burner. Avoid touching the vent opening or nearby surfaces during oven or broiler operation--they may become hot. Keep oven door closed when using oven (bake or broil modes). Never use aluminum foil to cover the oven shelves or to line the floor of the oven. This can trap heat, irreversibly damaging the enamel and may even cause fire. Do not place water, ice, or any cookware or tray directly on the oven floor, as this will irreversibly damage the enamel. Do not cover the slotted grid of the broil/roast pan with aluminum foil. This will catch grease and could catch fire. Do not use plastic wrap or wax paper in the oven. To ensure food safety, do not leave food in the oven for longer than two hours before and after cooking or defrosting. This is to avoid contamination by bacteria that could cause food poisoning. Take particular care during warmer weather. According to the United Sates Department of Agriculture, DO NOT hold foods at temperatures between 40ºF to 140ºF more than 2 hours. Cooking raw foods below 275ºF is not recommended. Never cover any slots, holes or passages in the oven bottom or cover an entire rack with materials such as aluminum foil. Doing so blocks air flow through the oven and may cause carbon monoxide poisoning. Aluminum foil lining may also trap heat, causing a fire hazard. 22
27 Oven Function Natural Airflow Bake occurs when heat is transferred into the oven from the bake burners in the bottom of the oven cavity. Heat is then circulated by natural airflow. This is a traditional bake setting. Broiler The upper broiler burner is located at the top of the oven. This burner sears the outside of broiled foods and sealing in juices. Defrosting - Oven Function To thaw uncooked frozen food, set the oven temperature to F. Once thawed, cook the food immediately and do not refreeze. Prevent drips and spills from thawing food by ensuring that defrosting food is tightly wrapped in foil or is placed in oven-proof cookware. Broiler Operation Broiling is a method of cooking tender cuts of meat directly under the broiler in the oven. Due to the high heat, it is normal and necessary for some smoke to be present during broiling, and therefore it is recommended to keep the oven door closed to maintain flavor, temperature and efficiency. When opening the oven door to check on the broiling process, do so as quickly as possible in order to preserve the cooking temperature and to prevent the control panel from the escaping heat. For best results, it is recommended to use both a broil/roast pan and roasting rack. The rack helps to reduce smoking and splatter and promotes a uniform crust on the food by letting grease drip into the bottom of the pan, away from intense heat. To prevent food sticking to the rack during cooking, spray the rack with a light coating of non-stick cooking spray before placing food on it. Broiler Operation - Preheating Preheating is suggested when searing rare steaks. To preheat, turn the OVEN selector knob to the BROIL position. Wait for the broiler burner to become hot, approximately 2 minutes, and then place food beneath the broiler. Preheating is not necessary when broiling meat to well-done. 23
28 To Broil When broiling, the heat radiates downward from the oven broiler for even coverage. When broiling, use a roast pan with rack to allow fat and juices to drip down, away from the high heat of the oven broiler. DO NOT cover the roasting rack with foil, as the collected drippings could smoke or catch fire. 1. Place a rack on a roasting pan and place the food on the rack. To prevent food sticking to the rack during cooking, spray the grid with a light coating of non-stick cooking spray before placing food on it. 2. Arrange the interior oven shelves according to your recipe and place the broiler rack and pan assembly on the shelf. To assure even broiling, center the broiler pan and position directly under the broil burner. If preheating the broil burner first, position the broiler pan after the broil burner is preheated (see Broiler Operation - Preheating instructions above). 3. Move selector switch to broil, turn Broil selector knob to High Flame/Ignition to operate. The broil indicator will remain on until the selector knob is turned to the off position or the temperature control cycles off. Broil one side until food is browned; then turn and broil the other side to desired doneness. Season and serve. For safety, always pull the rack out to the stop position before turning or removing food. For best results, it is recommended to use both a broil/roast pan and roasting rack, the rack helps to reduce smoking and splatter and promotes a uniform crust on the food by letting grease drip into the bottom of the pan, away from intense heat. To prevent food sticking to the rack during cooking, spray the rack with a light coating of non-stick cooking spray before placing food on it. Broiler Guidelines 1. Choose a suitable shelf position. To ensure that meat is cooked through rather than just browned on the outside, broil thick pieces of meat and poultry on shelf positions 2 or 3. Use shelf position 4 for thinner items that need less cooking time like steaks, chops, or hamburger patties. 2. When finishing off meals by browning the top under the broiler, use metal or glass-ceramic cookware. Do not use heatproof glass or earthenware as these materials cannot withstand the intense heat of the broiler. 3. To assure even cooking, center the pan and rack in the center of the oven, so that it is directly under the broiler. 24
29 UGP36E Griddle Operation Before using the griddle for the first time, clean it thoroughly with warm, soapy water to remove dust and any remaining manufacturing residue. Rinse with clean water and wipe dry with a clean, lint-free cloth. Make sure that the grease trap is properly installed under the front edge of the griddle to neatly catch excess cooking oils and food residue. Use the stainless steel cover to keep your griddle clean and dust free between uses. Please note that the cover must be removed before turning the griddle on. Griddle Cooking Guidelines: Push and turn the griddle control knob counter-clockwise to the preferred cooking temperature. Preheat the griddle for minutes. Butter or cooking oil should be added to the griddle surface to ensure a non-stick surface for efficient cooking. The surface of the griddle is hot after use. Please allow sufficient time for the griddle to cool prior to cleaning. Once cool, clean your griddle by scraping remaining cooking oils and residue into the grease trap. Remove the grease trap and the clean it thoroughly with warm, soapy water. Clean the griddle surface with warm, soapy water, rinse with clean water and wipe the griddle and grease trap dry with a clean, lint-free cloth. 25

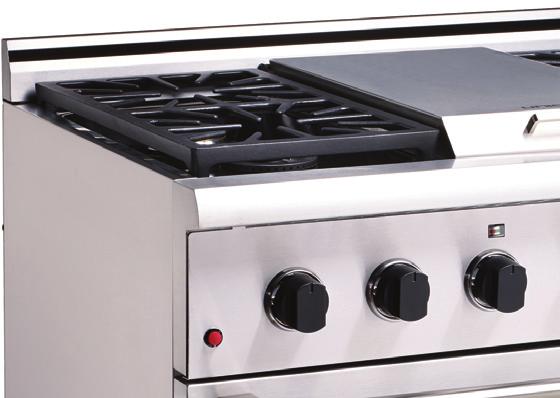
30 OPERATION OF RANGE UGP30E Control Panel UGP36E Control Panel with Griddle Control Panel Legend Off Off High Flame/Ignition Burner Position Broil Burner Bake Burner Bake/Broil Toggle Switch Oven Light Griddle 26
31 Lighting the Top Burners/Griddle 1. To obtain a flame more easily, light the burner before placing a cooking utensil on the burner grate. 2. Decide which burner you re igniting first using the screened diagram below the burner knob. The black dot indicates the position of the burner you re igniting. 3. To light a burner, press the burner knob in and turn counter clockwise to high flame/ignition position. You will hear the electronic ignition clicking as you continue to hold the knob down until the flame lights. Once the burner is lit, hold in for a few extra seconds to warm up the thermocouple so the electromagnet in the burner valve stays in the open position once you release. 4. After lighting the flame, turn the control knob to adjust the flame size as required. 5. If your lighting the griddle follow the same process, but watch the flame indicator above the knob go from the red into the green. Lighting the Oven/Broiler 1. Using the toggle switch, either select bake or broil burner. 2. Depending on how long the gas line run is, it may take a while to light the oven pilot. It is suggested that you light a top burner first to ensure the gas is at the valve. 3. Push in on oven or broiler knob, you will hear the electronic ignition. Hold until the oven or broiler pilot lights. Once lit, count to 10 then release. It should now stay lit; if not, repeat. You can tell when the bake or broil pilot is lit by viewing the flame indicator below the symbol. 4. Once the oven or broiler pilot has been lit, lightly press in the oven or broiler control knob and turn counter clockwise to the desired temperature setting. If you press the knob in too far during the ignition process, the knob will not turn. Gently let up on the knob, and the thermostat shaft will release its safety key to let you rotate the control. 5. When finished cooking, you may turn the oven or broiler control knob back to the OFF position. This will turn off the main oven or broiler burner and the pilot. Note: If you are using the oven or broiler for the first time, or if the oven or broiler has not been used in several days, it may take multiple attempts to successfully light. If the ignitor pilot will not stay lit after 5 attempts, contact an authorized service technician. 27
32 If the oven or broiler pilot does not ignite and maintain the flame, check the following: 1. The pilot burner has gone out. Relight the oven or broiler pilot 2. The pilot will not keep the flame safety probe heated. Adjust the size of the pilot flame or the thermocouple connection at the thermostat may need to be tightened. 3. The flame safety probe may not be properly located. Locate the probe directly over the pilot burner. The end of the flame safety probe must be very close to the side of the burner right in front of the flame ports. 4. The pilot burner is not in its proper position. Make sure the rear of the burner is seated on the injector elbow and the front is bolted onto the burner support. 5. The spark electrode is defective. Contact an authorized service technician If the batteries have grown weak and you need to use the oven or broiler before you are able to replace with fresh batteries, the oven or broiler can be lit manually. Hot Oven Restart If you turn off the oven but then decide to turn it back on before it has cooled to room temperature, the burner may not light properly. This is due to the thermostat still sensing heated oven and not allowing the maximum gas flow rate into the burner. After the burner lights, you may adjust the oven control to the desired temperature. It is essential to maintain the gas pressure constantly at 10 inches water column pressure for ranges set for Propane (LP) Gas; and 4'' water column pressure for ranges set for Natural Gas (NG) to get proper pilot performance. Note: Burner rates specified on the rating plate of your range apply for elevations up to 2,000 feet above sea level. For locations where altitudes are higher than 2,000 feet above sea level the b.t.u. rated input should be reduced four percent for each 1,000 feet higher than 2,000 feet above sea level. If this adjustment is necessary, you should contact a qualified serviceman. DO NOT ATTEMPT TO SERVICE THE RANGE YOURSELF. MOISTURE: Moisture can have the same effect on the oven ignitor as the pilot flame. If sparking does not occur when the oven thermostat knob is turned on during the initial attempt to use or after several days of non-use, it COULD BE the result of moisture build-up in the ceramic sleeve of the oven electrode. This may happen in areas with high humidity, or if food having high water content is cooked. This moisture can be driven out of the ignitor by lighting the pilot and operating the oven for a few minutes. 28
33 NEVER LEAVE THE CONTROL KNOBS IN ANY POSITION OTHER THAN "OFF" IF THE IGNITORS OR BURNERS AREN'T WORKING PROPERLY. If the oven is working, to determine if moisture was the problem, wait a few minutes and attempt to light the oven by turning the oven control dial on. If sparking occurs at the oven electrode to ignite the oven pilot, and within sixty seconds ignites the oven burner, then moisture build-up was the problem. If the oven burner doesn't ignite within 60 seconds, turn the oven control off and call the serviceman.. Make certain the oven is cool when manually lighting oven or broiler pilot. CARE & CLEANING THE RANGE Cleaning guidelines Read the IMPORTANT SAFETY INSTRUCTIONS on page 2 and these CARE AND CLEANING guidelines before you start cleaning your range. See the pages following for instructions on removing and replacing different parts of the range for cleaning and maintenance. To help you identify parts, see the range diagrams on pages Before cleaning or removing any part, make sure that all settings on the range and oven are set to OFF. Make sure all parts of the range and ovenware cool to the touch. If you need to handle a warm or hot part of the range or oven (e.g. an oven shelf or a range grate) be sure to wear oven mitts and take extreme care to avoid burns or injury. Do not use aerosol cleaners until the range has completely cooled. The propellant substance in these cleaners could catch fire in the presence of heat. Do not let grease or food residue accumulate anywhere in or on the range. This will make future cleaning more difficult and may present a fire hazard. 29
34 Do not use any abrasive or harsh cleaners, cloths, scouring pads or steel wool on the exterior or interior of the range/oven. These will scratch and damage the appearance Do not use a steam cleaner to clean any part of the range or oven. Do not perform any cleaning or maintenance on parts not specifically listed in the chart below. If in doubt, contact Customer Care. Do not lift the black grill and griddle frames off the cooktop. Burner and Burner Caps Check that the burner is turned OFF and allow it to cool. Lift off the burner cap. Use a stiff nylon brush or straight-ended paperclip to clear the notches of the burner. Wash them with a mild detergent in hot water, rinse, and dry. Replace the burner cap correctly. Cooktop Surface Clean the cooktop surface with a solution of mild detergent and warm water. Do not use harsh or abrasive cleaning agents, waxes, polishes, or commercial cooktop cleaners to clean the cooktop. Treat stubborn, burnt-on grease and residue with the same solution of mild detergent and hot water - let it sit a few minutes and then wipe clean. To protect the appliance finish, only use a sponge, soft cloth, fibrous or plastic brush, and nylon pad for cleaning. Allow all components to dry thoroughly before using the cooktop. Control Panel, Door Handles, Control Housing Clean the control panel, door handles and control housing with a solution of mild detergent and warm water. Do not use harsh or abrasive cleaning agents, waxes, polishes, or commercial cooktop cleaners as they could damage the finish or printing. Treat stubborn grease and residue with the same solution of mild detergent and hot water - let it sit a few minutes and then wipe clean. To protect the appliance finish, only use a sponge, soft cloth, fibrous or plastic brush, and nylon pad for cleaning. Dry all components thoroughly before using the cooktop. 30
35 Oven Side Racks and Oven Shelves: Clean the oven side racks and oven shelves with a solution of mild detergent and warm water. To remove stubborn baked-on grease, apply soap and water, let it sit a few minutes and then scrub with a dampened, soap-filled, non-metal pad or brush, and wipe clean. Apply a chrome cleaner with a damp sponge or cloth following manufacturer instructions. Dry all components thoroughly before using the cooktop. Bake and Broil Burners Do not clean these parts. They self-clean during normal use. Porcelain Surfaces Clean the cooktop surface with a solution of mild detergent and warm water. Do not use harsh or abrasive cleaning agents, waxes, polishes, or commercial cooktop/oven cleaners to clean the cooktop. Treat stubborn, burnt-on grease and residue with the same solution of mild detergent and hot water - let it sit a few minutes and then wipe clean. To protect the appliance finish, only use a sponge, soft cloth, fibrous or plastic brush, and nylon pad for cleaning. Allow all components to dry thoroughly before using the cooktop. Oven Window Clean all glass surfaces with a solution of mild detergent and hot water. Use a mild glass cleaner to remove fingerprints or smears. Dry completely with a soft, lint-free cloth. Oven Door Gasket Take extreme care if you must clean or handle the oven door gasket, as the gasket is essential for a tight seal to ensure correct operating temperature. Any rubbing, scratching or displacement could damage the seal. If you need to remove any grease or residue from the gasket, proceed as follows: 1. Dampen a sponge with clean hot water. 2. Gently wipe off any residue with a blotting motion. Do not rub. 31
36 3. Blot the area dry with a clean, soft towel and allow to fully dry before using the oven. Stainless Steel Surfaces Clean stainless steel surfaces with a solution of mild detergent and hot water. Wipe away any remaining residue with a clean, damp cloth. Do not use any cleaning product containing chlorine bleach. Do not use harsh or abrasive cleaning agents or steel wool pads as these will damage the surface Replacing the burner parts: When replacing the burners, make sure that the two locating pins on the bottom of the brass flame spreader are properly aligned with the locating pin holes on the top of the simmer ring. Incorrect alignment will produce a potentially dangerous flame and poor burner performance. Replacing the oven light bulbs To replace either of the oven light bulbs, release the glass cover on the lamp holder, and then replace the old bulb with a new bulb. 32

37 REMOVING OR REPLACING THE OVEN DOOR Do not lift the oven door by its handle. Doing so may damage the handle or the door. Before removing the door, make sure you have a flat, protected surface nearby on which to rest the oven door. Take care when lifting or moving the oven door; it is heavy! To remove the oven door, proceed as follows: 1. Open the oven door fully. 2. Open the levers fully on both sides of the door. 3. Hold the oven door firmly on both sides and close it approximately halfway. 4. Disengage the hinges and gently pull door free. Place it flat on a protected surface. 33

38 To replace the oven door, proceed as follows: 1. Hold the door firmly in both hands. 2. Holding the oven door at approximately half-way open, insert the hinge tongues into the slots, making sure that the notches on both sides drop into place as shown. 3. Open the door fully. 4. Fully close the levers on the left and right hinges as shown, then fully close the door. 34
39 HOW TO GAIN ACCESS TO THE BATTERY COMPARTMENT Gaining access to the battery compartment: 1. Locate the kick plate at the front bottom of the range 2. The kick plate is clipped into place- simply lift up slightly and pull outwards. 3. Pull away the kick plate. You now have access to the battery compartment How to change the 9V volt batteries for oven lights and spark ignition 1. Locate the battery holder which is fastened to the bottom right side of the range. There are 2 x 9v batteries for the oven light and 2 x 9v batteries for the spark ignitions. 2. Remove 9v volt batteries 3. Ensure you replace with an Eveready or Duracell brand batteries, this will ensure a stronger spark and reduce the amount of times you will have to replace the batteries. 35
40 Troubleshooting Guide - UGP Elite 30E & 36E Off Grid Symptom Possible Cause Solution BURNERS WILL NOT LIGHT. Burner parts or igniters may be wet, dirty or misaligned. Check that the burner parts are clean, dry and correctly assembled. Check that the igniters are clean and dry. FLAMES DO NOT BURN ALL AROUND THE BURNER CAP. BURNER FLAMES ARE VERY LARGE AND YELLOW. Burner parts may be dirty or misaligned. Burner bezel ports are clogged. Burner ports or burner caps are not positioned properly. Cooktop is being operated with the wrong type of gas. Regulator is not installed, is faulty, or is set for the wrong type of gas. See Care and Cleaning instructions. Clean burner bezel ring ports with straightened paper clip, needle, or wire. Remove and carefully re install burner bezel and caps. Ensure that the type of cooktop matches the gas supply. Check installation, replace regulator, or set regulator for proper gas. IGNITERS ARE SPARKING BUT BURNERS ARE NOT IGNITING. Gas shut off valve is in the OFF position. Turn shut off valve to the ON position. 36

41 Symptom Possible Cause Solution BURNER FLAME GOES OUT AT LOW SETTING. Low gas pressure. Contact gas company. Air intake holes around burners are obstructed. Remove obstruction from air intake holes. TOP BURNER WILL NOT STAY LIT THE FLAMES HAVE SUDDENLY GONE OUT. Failed thermocouple A draft or spill has extinguished the flame. Replace thermocouple Turn the burners off, cleaning the burners and sump area. See Care and Cleaning for instructions. Once clean, reignite top burners. NO IGNITION SPARK THE OVEN DOESN T WORK (NO HEATING). ONE OF THE OVEN LIGHTS DOES NOT COME ON, BUT THE OVEN WORKS. Dead batteries or ignition module failed. No gas supply The light bulb is loose. The light bulb has blown. Replace batteries with new batteries and attempt ignition. If there is still no spark ignition, the cooktop burners can still be used. To light them: 1.) Holding a lit match to the flame spreader, push in on the control knob and turn counter clockwise to LIGHT. 2.) When the flame is burning all the way around the burner, you may adjust the heat. The gas supply to the house may not be working or there may be an outage. Contact your local gas supplier. See instructions for Replacing the oven light bulb in section Care and Cleaning. 37
PROFESSIONAL GAS RANGETOP. User Manual & Owner s Guide. Read and save these instructions
 PROFESSIONAL GAS RANGETOP User Manual & Owner s Guide Read and save these instructions PROFESSIONAL GAS RANGETOP NG & LPG CONVERTIBLE Installation and Owner s Manual This manual contains information for:
ON-GRID/OFF GRID GAS COOKTOP (LPG & NG convertible) INSTALLATION AND OWNERS MANUAL UGP-36 CT (90.2 cm) READ AND SAVE THESE INSTRUCTIONS
 INSTALLATION AND OWNERS MANUAL UGP-36 CT (90.2 cm) READ AND SAVE THESE INSTRUCTIONS") UGP-24 CT1 23.25 (59.1 cm) UGP-30 CT1 30 (76.2 cm) ON-GRID/OFF GRID GAS COOKTOP (LPG & NG convertible) INSTALLATION AND OWNERS MANUAL UGP-36 CT1 35.5 (90.2 cm) READ AND SAVE THESE INSTRUCTIONS JAN. 2015
UGP-24 CT1 23.25 (59.1 cm) UGP-30 CT1 30 (76.2 cm) ON-GRID/OFF GRID GAS COOKTOP (LPG & NG convertible) INSTALLATION AND OWNERS MANUAL UGP-36 CT1 35.5 (90.2 cm) READ AND SAVE THESE INSTRUCTIONS JAN. 2015
READ AND SAVE THESE INSTRUCTIONS
 UGP-20G OF1 20 (50.8 cm) CLASSIC GAS RANGE (LPG & NG convertible) INSTALLATION AND OWNER S MANUAL SERIAL NUMBER: READ AND SAVE THESE INSTRUCTIONS AUG17V2 UNIQUE 20G CLASSIC MODEL OFF GRID GAS RANGE LPG
Read and Save These Instructions
 MODELS ON/OFF GRID GAS COOKTOP LPG & NG CONVERTIBLE Installation and Owners Manual This manual contains information for: Important Safeguards Installation Use and Care Certain cooktops come equipped with
INSTALLATION AND OWNERS MANUAL HGC3002ST 30 READ AND SAVE THESE INSTRUCTIONS
 NATURAL GAS COOKTOP (LPG convertible) HGC2402ST 23.6'' INSTALLATION AND OWNERS MANUAL HGC3002ST 30 HGC3602ST 35.4'' SERIAL NUMBER: READ AND SAVE THESE INSTRUCTIONS Hallman Industries Do not obstructing
READ AND SAVE THESE INSTRUCTIONS
 UGP-30G OF1 30 (76.2 cm) CLASSIC GAS RANGE (LPG & NG convertible) INSTALLATION AND OWNERS MANUAL SERIAL NUMBER: READ AND SAVE THESE INSTRUCTIONS APRIL 2015 UNIQUE 30G CLASSIC MODEL OFF GRID GAS RANGE LPG
NOTE: THIS APPLIANCE MUST BE INSTALLED SOLELY AND EXCLUSIVELY BY A QUALIFIED TECHNICIAN.
 Table of Contents 1. IMPORTANT SAFETY INSTRUCTIONS... 4 2. DESCRIPTION OF CONTROLS... 6 3. USING THE COOKTOP... 7 3.1 Ignition with safety device... 7 3.2 Practical advices to use the burners... 8 3.3
GAS COOKTOP INSTALLATION INSTRUCTIONS BEFORE YOU BEGIN. IMPORTANT Save these instructions for local electrical inspector s use.
 GAS COOKTOP INSTALLATION INSTRUCTIONS Please read this guide thoroughly before installation. To contact LG Electronics, 24 hours a day, 7 days a week: 1-800-243-0000 (U.S.A.) 1-888-542-2623 (Canada) Or
ELECTRIC RANGE USER INSTRUCTIONS
 ELECTRIC RANGE USER INSTRUCTIONS THANK YOU for purchasing this high-quality product. If you should experience a problem not covered in TROUBLESHOOTING, please contact the dealer from whom you purchased
GAS STAINLESS COOKTOPS
 GAS STAINLESS COOKTOPS CG604D & CG905D models CG604DCG905D USER GUIDE HK SG Contents 1 EN Safety and warnings 2 Introduction 5 Using your cooktop 6 Cooking guidelines and cookware 8 Care and cleaning
LP GAS PIZZA OVEN USER MANUAL
 LP GAS PIZZA OVEN USER MANUAL To reduce the risk of fire, burn hazard or other injury, read the USER MANUAL carefully and completely before using this appliance FOR OUTDOOR USE ONLY Before Cleaning, make
GAS COOKTOP INSTALLATION INSTRUCTIONS
 INSTALLATION AND SERVICE MUST BE PERFORMED BY A QUALIFIED INSTALLER. IMPORTANT: SAVE FOR LOCAL ELECTRICAL INSPECTOR'S USE. READ AND SAVE THESE INSTRUCTIONS FOR FUTURE REFERENCE. WARNING If the information
All Models HRG PROFESSIONAL GAS RANGE
 All Models HRG PROFESSIONAL GAS RANGE Contents Table of Contents 1. WARNINGS... 3 2. WELCOME...4 3. BEFORE YOU START...5 4. SAFETY AND WARNINGS...6 SAFETY SYMBOLS...6 ELECTRICAL SHOCK HAZARD... 7 TIPPING
USER MANUAL Gas Countertop Charbroilers
 Gas Countertop Charbroilers REVISED 2/209 382799 LAVA BRIQUETTE MODELS: 35CLCPG5NL, 35CLCPG24NL, 35CLCPG36NL, 35CLCPG48NL, 35CLCPG60NL, 35CLCPG72NL Congratulations on your purchase of Cooking Performance
Duro Corporation. Gas Range Manual for Installation, Care & Maintenance NXRPRO 3051 NXRPRO3651 NXRPRO4851
 Duro Corporation Gas Range Manual for Installation, Care & Maintenance NXRPRO 3051 NXRPRO3651 NXRPRO4851 1 Thank you for purchasing your NXRPRO indoor range. We appreciate your business and we recommend
Gas Range. Read and Save These Instructions. This manual contains information for: Important Safeguards Installation Use and Care NOTES
 NOTES This manual contains information for: Important Safeguards Installation Use and Care Certain ranges come equipped with special features. Determine from a study of your range which of the instructions
Gas Cooktop Installation, User and Service Instructions GMS 955.1
 Gas Cooktop Installation, User and Service Instructions GMS 955.1 IMPORTANT: SAVE FOR LOCAL ELECTRICAL INSPECTOR S USE. READ AND SAVE THESE INSTRUCTIONS FOR FUTURE REFERENCE. OBSERVE ALL FEDERAL, STATE
Installation / Assembly
 Cabinet Cut-out Dimensions...4 Gas Requirements and Connection...5 Leak Testing Procedure....6 LP Gas...7 Natural Gas...9 Installing Side Burner with a Grill...10 Save these instructions! Copyright 2009-2010
Owner s Guide Installation & Operation
 Owner s Guide Installation & Operation Hot Top HHT Series Hestan Commercial Corporation 3375 E. La Palma Ave Anaheim, CA 92806 (888) 905-7463 RETAIN THIS MANUAL FOR FUTURE REFERENCE P/N 002130 REV 1 IMPORTANT
Use & Care. All about the. of your Cooktop TABLE OF CONTENTS. USA Canada
 All about the Use & Care of your Cooktop TABLE OF CONTENTS Welcome & Congratulations... Care & Cleaning (Cleaning Chart)...8 Important Safety Instructions... Care & Cleaning...8 Before Setting Surface
Use & Care Guide 30 & 36 Dual Fuel Ranges
 Use & Care Guide 30 & 36 Dual Fuel Ranges 318 203 954 (0704) Rev. A 2 Finding Information MAKE A RECORD FOR FUTURE USE Brand Purchase Date Model Number Serial Number NOTE The serial and model numbers may
Professional Gas Range User Manual
 Professional Gas Range User Manual I Thank you for purchasing your indoor range. We appreciate your business and we recommend that you read this entire User s Manual before operating your new appliance
30" GAS RANGE INSTALLATION INSTRUCTIONS (For Models with Sealed Top Burners)
") INSTALLATION AND SERVICE MUST BE PERFORMED BY A QUALIFIED INSTALLER. IMPORTANT: SAVE FOR LOCAL ELECTRICAL INSPECTOR'S USE. READ AND SAVE THESE INSTRUCTIONS FOR FUTURE REFERENCE. If the information in this
INSTALLATION AND SERVICE MUST BE PERFORMED BY A QUALIFIED INSTALLER. IMPORTANT: SAVE FOR LOCAL ELECTRICAL INSPECTOR'S USE. READ AND SAVE THESE INSTRUCTIONS FOR FUTURE REFERENCE. If the information in this
user manual Model #: BLZ-WVH-42
 user manual Model #: BLZ-WVH-42 ii Table of Contents Table of Contents 1 Safety Notice III-V 2 Diagrams 1-3 Hood Dimensions............ 1 Control Panel.............. 2 Clearance............... 3 3 Installation
Installation Instructions Dual Fuel Ranges
 Installation Instructions Dual Fuel Ranges E30DF74EPS E36DF76EPS E48DF76EPS 5995447082 2 Safety IMPORTANT SAFETY INSTRUCTIONS Safety Precautions Do not attempt to install or operate your unit until you
COOKTOP USER MANUAL & INSTALLATION INSTRUCTIONS
 COOKTOP USER MANUAL & INSTALLATION INSTRUCTIONS ANCONA ELITE 30 & 34 GAS COOKTOPS IMPORTANT SAFETY INSTRUCTIONS Carefully read the following important information regarding installation safety and maintenance.
USE AND CARE MANUAL GAS COOKTOP MODELS: CTG304D, CTG305D, CTG365D
 USE AND CARE MANUAL GAS COOKTOP MODELS: CTG304D, CTG305D, CTG365D IMPORTANT: Before beginning use please read these instructions completely and carefully. INSTALLER: Leave this owner s manual with the
IMPORTANT: SAVE THESE INSTRUCTIONS.
 FREE STANDING RANGE GAS AND ELECTRIC APPLIANCES EUROCHEF USA inc. MOD.: VEFSGG30SS MOD.: VEFSGG31SS INSTRUCTION GUIDE INSTALLATION AND MAINTENANCE IMPORTANT: SAVE THESE INSTRUCTIONS. IMPORTANT SAFETY INSTRUCTIONS
Use & Care Guide 36 Gas Range
 Use & Care Guide 36 Gas Range 318 203 967 (1006) Rev. A 2 Finding Information Make a Record for Future use Brand Purchase Date Model Number Serial Number Note The serial and model numbers may be found
Use & Care Guide Gas Cooktop
 Use & Care Guide Gas Cooktop 318 203 659 (0907) Rev. A 2 Finding Information Make a Record for Future use Brand Purchase Date Model Number Serial Number Note The serial plate is located under the burner
Duro Corporation. Gas Range Manual for Installation, Care & Maintenance
 Duro Corporation Gas Range Manual for Installation, Care & Maintenance BX3031 BX3062 DRGB4801 1 Thank you for purchasing your NXR indoor range. We appreciate your business and we recommend that you read
Operating Instructions for the KM 410 Electric Grill
 Operating Instructions for the KM 410 Electric Grill To prevent accidents and machine damage, ]ö read the Operating Manual before installation or use. M.-Nr. 05 060 910 Contents Contents Description of
USER GUIDE. Built-in oven NZ AU. HWO60S4 single models
 USER GUIDE Built-in oven HWO60S4 single models NZ AU CONTENTS Safety and warnings 2 Oven, clock and timer controls Models with analogue 120 timer 4 Models with six-button clock 5 Models with touch control
Owner s Guide Installation & Operation
 Owner s Guide Installation & Operation Char Broiler HCH Series Hestan Commercial Corporation 3375 E. La Palma Ave Anaheim, CA 92806 (888) 905-7463 RETAIN THIS MANUAL FOR FUTURE REFERENCE P/N 002134 REV
INSTALLATION INSTRUCTIONS FOR FREESTANDING DUAL FUEL
 INSTALLATION AND SERVICE MUST BE PERFORMED BY A QUALIFIED INSTALLER. IMPORTANT: SAVE FOR LOCAL ELECTRICAL INSPECTOR'S USE. READ AND SAVE THESE INSTRUCTIONS FOR FUTURE REFERENCE. If the information in this
SAFE DRINKING WATER AND TOXIC ENFORCEMENT ACT
 Installation instructions for your new Spacemaker Laundry WSM2780 Gas Before you begin Read these instructions completely and carefully. IMPORTANT OBSERVE ALL GOVERNING CODES AND ORDINANCES. Note to Installer
LRG. Professional Gas Range User Manual
 LRG Professional Gas Range User Manual Thank you for purchasing your LRG indoor range. We appreciate your business and we recommend that you read the entire User s Manual before operating your new appliance
Using it in an enclosed space can kill you.
 38 X 56 GAS FIRE PIT - OWNER S MANUAL Carlisle Chat Fire Table Base Model # 00GBC7 (6877B) Fits 6877A Carlisle Chat Fire Table Top For Propane and *Natural Gas (*See Page 7) Certified to CSA International
Gas-on-glass cooktop. User guide. CG603D, CG604D, & CG905D models NZ AU
 Gas-on-glass cooktop CG603D, CG604D, & CG905D models User guide NZ AU Contents 1 Introduction 4 Using your cooktop 6 Cooking guidelines and cookware 8 Care and cleaning 9 Troubleshooting 13 Warranty and
Gourmet Freestanding Range Gas Cooktop Electric Oven
 Gourmet Freestanding Range Gas Cooktop Electric Oven User Manual & Installation Instructions IMPORTANT SAFETY INSTRUCTIONS Carefully read the important information regarding installation, safety and maintenance.
Use & Care. Gas Range. All about the. of your TABLE OF CONTENTS
 All about the Use & Care of your Gas Range TABLE OF CONTENTS Product Record and Registration.............. 2 Important Safety Instructions................. 3 Before Setting Surface Controls...............
- WHAT TO DO IF YOU SMELL GAS
 QUICK GUIDE Gas Ranges Thank You!... for your purchase of a GE Brand appliance. Register Your Appliance: Register your new appliance online at your convenience! www.geappliances.com/service_and_support/register/
NATURAL GAS CONVERSION KIT
 NATURAL GAS CONVERSION KIT Model # 498425 For use with Char-Broil RED Series Grills Only. FOR OUTDOOR USE ONLY This Natural Gas Conversion Kit can be used ONLY with Dual Fuel grills. WARNING CALIFORNIA
All Models HRD PROFESSIONAL DUAL FUEL RANGE
 All Models HRD PROFESSIONAL DUAL FUEL RANGE Safety and Warnings Table of Contents 1. Warnings... 4 2. Welcome... 6 3. Before You Start... 7 4. Safety and Warnings... 8 Safety Symbols... 8 Electrical Shock
Use & Care. All about the. of your Cooktop TABLE OF CONTENTS. Important Safety Instructions...3 Care & Cleaning...10
 All about the Use & Care of your Cooktop TABLE OF CONTENTS Welcome & Congratulations...2 Care & Cleaning (Cleaning Chart)...9 Important Safety Instructions...3 Care & Cleaning...10 Surface Cooking...6
user manual Model #: BLZ-HOOD
 user manual Model #: BLZ-HOOD ii Table of Contents Table of Contents 1 Saftey Notice III-V 2 Diagrams 1-3 Hood Dimensions............ 1 Control Panel.............. 2 Clearance............... 3 3 Installation
Owner s Guide Installation & Operation
 Owner s Guide Installation & Operation Fryer HFR Series Hestan Commercial Corporation 3375 E. La Palma Ave Anaheim, CA 92806 (888) 905-7463 RETAIN THIS MANUAL FOR FUTURE REFERENCE P/N 002137 REV 1 IMPORTANT
Use and Care Guide. KITCHENAID Electric Built-In Cooktop
 Use and Care Guide Table of Contents...2 A Note to You...2 Cooktop Safety...3 Getting to Know Your Cooktop...5 Using Your Cooktop...6 Caring for Your Cooktop...9 Troubleshooting...14 Requesting Assistance
Use and Care Guide For assistance or service in Canada, see page 15. KITCHENAID Professional Gas Cooktop MODEL KGCP467H
 Use and Care Guide Table of Contents...2 A Note to You...2 Cooktop Safety...3 Parts and Features...5 Using Your Cooktop...6 Using the surface burners..5 Characteristics of cookware materials...8 Caring
USER GUIDE NZ AU GB IE
 GAS COOKTOP CG604DX & CG905DX models USER GUIDE NZ AU GB IE CONTENTS Safety and warnings 2 Introduction 7 Using your cooktop 8 Cooking guidelines and cookware 10 Care and cleaning 11 Troubleshooting 15
OWNERS MANUAL RON-36, RON-27, RON-24
 OWNERS MANUAL For Outdoor Use Only Installation, Operation, Maintenance Instructions And Parts List Models: RON-36, RON-27, RON-24 Royal Range of California, Inc. 3245 Corridor Drive, Eastvale, CA 91752
Viking Use & Care Manual
 Viking Use & Care Manual Viking Range Corporation 111 Front Street Greenwood, Mississippi 38930 USA (662) 455-1200 For product information call 1-888-VIKING1 (845-4641) or visit the Viking Web site at
Viking Installation Guide
 Viking Installation Guide Viking Range Corporation 111 Front Street Greenwood, Mississippi 38930 USA (662) 455-1200 For product information, call 1-888-VIKING1 (845-4641) or visit the Viking web site at
INSTALLATION GUIDE Dual Fuel Ranges
 INSTALLATION GUIDE Dual Fuel Ranges Contents Wolf Dual Fuel Ranges......................... 3 Safety Instructions............................ 4 Dual Fuel Range Specifications.................. 5 Dual Fuel
Electrical Double Oven
 0 0 0 Electrical Double Oven Operating & Installation Instructions -Please keep for future reference AE66DCW AE66DCA AE66DCSS Important - Please read these instructions fully before using These instructions
DESIGN CLASS FUNCTION
 PROFESSIONAL QUALITY COOKING EQUIPMENT INSTALLATION MANUAL FOR PERFORMER SLIDE-IN COOK TOPS MODEL NUMBERS: AROBSCT-424, AROBSCT-242GD, AROBSCT-24X2GR, AROBSCT-430, AROBSCT-636, AROBSCT-436GD, AROBSCT-436GR,
Models KECS161 KECS Table of Contents...2
 ELECTRIC COOKTOP Use & Care Guide For questions about features, operation/performance, parts accessories or service, call: 1-800-422-1230 or visit our website at... www.kitchenaid.com. Table of Contents...2
DESIGN CLASS FUNCTION
 PROFESSIONAL QUALITY COOKING EQUIPMENT INSTALLATION MANUAL FOR MEDALLION DUAL FUEL RANGES MODEL NUMBERS: ARR-304DF, ARR-366DF, ARR-364GDDF, ARR-364GRDF, ARR-486GDDF, ARR-486GRDF, ARR-4822GDDF, ARR-484X2GRDF,
PRO SERIES GAS FRYERS OWNER S MANUAL
 PRO SERIES GAS FRYERS OWNER S MANUAL MODELS: PF-1 PRO-FRYER, PF2 DUAL PRO-FRYER REVISED OCTOBER, 2009 *PLEASE RETAIN FOR FUTURE REFERENCE This appliance has been tested according to ANSI Z83.116-2009/CSA1.86-2009.
GAS WALL OVEN. Model: SGWO30SS OWNER S MANUAL. with INSTALLATION and MAINTENANCE INSTRUCTIONS
 GAS WALL OVEN Model: SGWO30SS OWNER S MANUAL with INSTALLATION and MAINTENANCE INSTRUCTIONS BEFORE USE, PLEASE READ AND FOLLOW ALL SAFETY RULES AND OPERATING INSTRUCTIONS. Write Serial Number here: FELIX
Installation Guide. 5 Series VGC and VGSU Built-In Gas Cooktops
 Installation Guide 5 Series VGC and VGSU Built-In Gas Cooktops Table of Contents Warnings & Important Safety Instructions 3 Dimensions VGC Cooktops 6 Specifications VGC Cooktops 7 Dimensions VGSU Cooktops
CTSG GAS SEALED BURNER COOKTOP Use & Care Guide
 CTSG GAS SEALED BURNER COOKTOP Use & Care Guide To the installer: Please leave this instruction book with the cooktop. To the consumer: Please read and keep this book for future reference. P/N 11484.00
USE AND CARE GUIDE WARNING WARNING WARNING WARNING
 USE AND CARE GUIDE Item No.: HF11501AA USE PROPANE GAS ONLY! -Do not store or use gasoline or other flammable vapors in the vicinity of this or any other appliance. - Service must be performed by a qualified
INSTALLATION & OPERATION MANUAL GAS CHARBROILERS
 INSTALLATION & OPERATION MANUAL GAS CHARBROILERS MODELS VCCB25 VCCB36 VCCB47 VCCB60 VCCB72 VCCB47 SCB25 SCB36 SCB47 SCB60 SCB72 SCB47 ITW Food Equipment Group, LLC 3600 North Point Blvd. Baltimore, MD
Welcome & Congratulations
 Welcome & Congratulations Questions? 1-800-944-9044 (United States) 1-866-729-5199 (Canada) Please attach sales receipt here for future reference. Congratulations on your purchase of a new range! At Electrolux
ULTRA-MAX GAS RADIANT CHARBROILER. ULTRA-MAX GAS LAVA ROCK CHARBROILER MODELS 8024CBB, 8036CBB, 8048CBB, 8060CBB, and 8072CBB
 Star Manufacturing International Inc. 10 Sunnen Drive St. Louis, MO 63143 Phone: (314) 678-6303 Fax: (314) 781-2714 Installation and Operating Instructions 2M-Z20327 Rev. A 10/05/15 ULTRA-MAX GAS RADIANT
Use & Care Guide Gas Cooktop
 Use & Care Guide Gas Cooktop 318 203 667 Rev. A (1002) 2 Finding Information Make a Record for Future use Brand Purchase Date Model Number Serial Number Note: The serial plate is located under the burner
Free-Standing Gas Range
 NX58F5500SS NX58F5500SB NX58F5500SW NX58F5300SS Free-Standing Gas Range installation manual This manual is made with 100 % recycled paper. imagine the possibilities ENGLISH Thank you for purchasing this
Owner s Manual STOVES. MODELS 620 Kitchenaire. 621 Kitchenaire 711S
 Owner s Manual STOVES MODELS 620 Kitchenaire 621 Kitchenaire 711S CONTENTS 2 Introduction 2 Unpacking 2 Installation 2 Electrical Installation 3 Safety Advice 3 Control Panels 4 The Oven 5 Solid Plates
Gas and Dual Fuel Ranges
 QUICK GUIDE Gas and Dual Fuel Ranges Thank You!... for your purchase of a GE Brand appliance. Register Your Appliance: Register your new appliance online at your convenience! www.geappliances.com/service_and_support/register/
Operator s Manual CAYENNE GAS COUNTERTOP CHAR BROILER ENGLISH
 NGLISH CAYNN GAS COUNTRTOP CHAR BROILR Thank you for purchasing this Vollrath Counter Top Cooking quipment. Before operating the equipment, read and familiarize yourself with the following operating and
Free-Standing Gas Range
 Free-Standing Gas Range installation manual This manual is made with 100 % recycled paper. imagine the possibilities ENGLISH Thank you for purchasing this Samsung product. To receive more complete service,
INSTALLATION AND OPERATION MANUAL GAS SKILLETS MODELS: GTS-30 GTS-40
 INSTALLATION AND OPERATION MANUAL GAS SKILLETS MODELS: GTS-30 GTS-40 CROWN FOOD SERVICE EQUIPMENT LTD. 70 OAKDALE ROAD, DOWNSVIEW, (TORONTO), ONTARIO, CANADA, M3N 1V9 TELEPHONE: (416) 746-2358, FAX: (416)
Use & Care Manual. Outdoor Grill with Electronic Ignition. Assembly Instructions Included. 26" Stainless Steel. Welcome/Product Registration...
 Use & Care Manual Assembly Instructions Included 26" Stainless Steel Outdoor Grill with Electronic Ignition Welcome/Product Registration... 2 General Safety Instructions... 3 Grill Features and Components...
INSTALLATION INSTRUCTIONS
 INSTALLATION INSTRUCTIONS PROFESSIONAL RANGE MODELS 36 DUAL FUEL, CONVECTION, SELF CLEAN WITH OPEN BURNERS** 36 NATURAL GAS MODELS *TN325-7BW *TN325-7W **THESE MODELS ARE FIELD CONVERITBLE FOR LP/PROPANE
Use & Care. All about the. of your Warmer Drawer TABLE OF CONTENTS. USA Canada
 All about the Use & Care of your Warmer Drawer TABLE OF CONTENTS Welcome & Congratulations...2 Care & Cleaning (Cleaning Chart)...7 Important Safety Instructions...3 Care & Cleaning...8 Before Setting
Installation Instructions
 WARNING! INSTALLATION SAFETY INSTRUCTIONS Read these instructions completely and carefully. Improper installation, adjustment, alteration, service or maintenance can cause injury or property damage. Refer
INSTALLATION MANUAL. Rangetops. RNB Heritage Classic Platinum
 INSTALLATION MANUAL Rangetops RNB Heritage Classic Platinum 1 BLUESTAR INSTALLATION INSTRUCTIONS FOR RANGETOPS MODELS RNB, Heritage Classic, Platinum THIS APPLIANCE WAS DESIGNED FOR EASE OF INSTALLATION
user manual Model #: BLZ-WVH-42
 user manual Model #: BLZ-WVH-42 ii Table of Contents Table of Contents 1 Safety Notice III-V 2 Diagrams 1-3 Hood Dimensions............ 1 Control Panel.............. 2 Clearance............... 3 3 Installation
INSTALLATION MANUAL. Double Electric Wall Oven
 INSTALLATION MANUAL Double Electric Wall Oven 799258 BLUESTAR INSTALLATION INSTRUCTIONS FOR THE RESIDENTIAL ALL ELECTRIC WALL OVEN FOR THE HOME MODELS DEWO THIS APPLIANCE WAS DESIGNED FOR EASE OF INSTALLATION
Multi-Function Cooktop
 INSTALLATION GUIDE Multi-Function Cooktop Contents Wolf Multi-Function Cooktop.................... 3 Multi-Function Cooktop Specifications............ 4 Multi-Function Cooktop Installation...............
Professional Dual Fuel Convection Range User Manual
 Professional Dual Fuel Convection Range User Manual Model: HRD3001U HRD3002U HRD3004U HRD3031U HRD3088U HRD3604U HRD3605U HRD3606U HRD3618U HRD3620U HRD4801U HRD4802U HRD4803U HRD4804U HRD4806U HRD3031U-A
Installation Instructions Preference. Cooktop. Models: SGM304, SGM365, SGM466. Part No Rev. K
 Installation Instructions Preference Cooktop Models: SGM304, SGM365, SGM466 Part No. 65141 Rev. K Table of Contents Important Safety Instructions... 1 Important Information About Safety Instructions...
Natural Gas Conversion Instruction for
 WARNING For Outdoor Use Only (outside any enclosure) Natural Gas Conversion Instruction for OUTDOOR 4-BURNER STAINLESS STEEL ISLAND GRILL WARNING. Improper installation, adjustment, alteration, service
TABLE OF CONTENTS. Setting Oven Controls Care and Cleaning Before You Call Warranty Rev A (May 2018)
") TABLE OF CONTENTS Product Record and Registration.............. 2 Important Safety Instructions................. 3 Cooking Recommendations.................. 9 Before Setting Surface Controls..............
TABLE OF CONTENTS Product Record and Registration.............. 2 Important Safety Instructions................. 3 Cooking Recommendations.................. 9 Before Setting Surface Controls..............
R-RCM & R-RSB SERIES
 R-RCM & R-RSB SERIES CHEESEMELTER & SALAMANDER BROILERS INSTALLATION - OPERATION - MAINTENANCE CHEESEMELTERS R-RCM-24 R-RCM-36 R-RCM-48 R-RCM-60 SALAMANDERS R-RSB-24 R-RSB-36 R-RSB-48 Telephone: (802)
GE Appliances. Cooktop. Built-In Electric. Owner s Manual JP326 JP626. Part No. 164D3333P116 Pub. No CG
 GE Appliances Cooktop Built-In Electric Owner s Manual JP326 JP626 Part No. 164D3333P116 Pub. No. 49-8880 2-98 CG Troubleshooting Tips Care and Cleaning Operating Instructions Safety Instructions Safety
Operating and Installation Instructions
 Operating and Installation Instructions Gas Cooktop KM 391 To prevent accidents and machine damage, read the Operating Manual before installation or use. UV M.-Nr. 06 073 600 WARNING: If the information
Viking Installation Guide
 Viking Installation Guide Viking Range Corporation Front Street Greenwood, Mississippi 38930 USA (66) 455-00 For product information, visit the Viking Web site at vikingrange.com Professional Built-In
SAFETY PRECAUTIONS 1 11/09 EOPI 33643
 Use and Care of your new AGA Gas Fired Range Models: GC Open Flue Range (2 Oven) GC Direct Vent Range (2 Oven) GE Open Flue Range (4 Oven) GE Direct Vent Range (4 Oven) For U.S. and Canadian Markets NOTE:
STAR-MAX GAS GRIDDLES MODELS 615MA 624MA 636MA 648MA 615TA 624TA 636TA 648TA 624TSPA 636TSPA 648TSPA
 Star Manufacturing International Inc. 10 Sunnen Drive St. Louis, MO 63143 Phone: (314) 781-2777 Fax: (314) 781-3636 Installation and Operating Instructions 2M-Z1351 Rev. B 4/23/04 STAR-MAX GAS GRIDDLES
INSTALLER: LEAVE THESE INSTRUCTIONS WITH THE APPLIANCE INSTALLATION MANUAL. 'Gas 30-inch Wide Free-standingRange
 INSTALLER: LEAVE THESE INSTRUCTIONS WITH THE APPLIANCE INSTALLATION MANUAL 'Gas 30-inch Wide Free-standingRange PLEASE KEEP THIS MANUAL FOR FUTURE REFERENCE THE MANUAL IS INTENDED TO ASSIST IN THE INITIAL
Range. Gas. ES100 Control with Gas Venturi Burners and Broiler Drawer. Questions? (United States) (Canada) Welcome...
 (Canada) Welcome...") Gas Range ES100 Control with Gas Venturi Burners and Broiler Drawer Welcome... 2 Important Safety Instructions...2-4 Features at a Glance... 5 Setting Surface Controls...6 Before Setting Ovens Controls...7
Gas Range ES100 Control with Gas Venturi Burners and Broiler Drawer Welcome... 2 Important Safety Instructions...2-4 Features at a Glance... 5 Setting Surface Controls...6 Before Setting Ovens Controls...7
Use & Care. All about the. of your Range TABLE OF CONTENTS. Major Appliance Warranty...40
 All about the Use & Care of your Range TABLE OF CONTENTS Welcome & Congratulations...2 Before Setting Oven Controls...14 Important Safety Instructions...3 Setting Oven Controls...15 Grounding Instructions...6
TRI-STAR INC SOUTH STANDARD AVENUE, SANTA ANA, CA Ph: Fax: MODEL #. OWNER S MANUAL
 TRI-STAR INC 2205 SOUTH STANDARD AVENUE, SANTA ANA, CA 92707 Ph: 714 424 9380 Fax: 714 424 9385 MODEL #. OWNER S MANUAL INSTALLATION OPERATION MAINTENANCE All equipments manufactured by Tri-star Inc. for
Multifunction Cooktop Use & Care Guide
 Multifunction Cooktop Use & Care Guide MULTIFUNCTION COOKTOP Contents 4 Safety Precautions 6 Multifunction Cooktop Features 7 Multifunction Cooktop Operation 9 Care Recommendations 10 Troubleshooting 11
Use & Care Guide Gas Cooktop
 Use & Care Guide Gas Cooktop 318 200 665 Rev. B (0609) 2 Finding Information MAKE A RECORD FOR FUTURE USE Brand Purchase Date Model Number Serial Number NOTE The serial plate is located under the burner
STAR-MAX PROPANE GAS GRIDDLE
 Star Manufacturing International Inc. 10 Sunnen Drive St. Louis, MO 63143 Phone: (314) 781-2777 Fax: (314) 781-3636 Installation and Operating Instructions 2M-Z3793 Rev. B 3/28/03 STAR-MAX PROPANE GAS
Thank You!... for your purchase of a GE Brand appliance.
 Quick Guide Gas Ranges Thank You!... for your purchase of a GE Brand appliance. Register Your Appliance: Register your new appliance online at your convenience! www.geappliances.com/service_and_support/register/
GPC PASTA PRO INSTALLATION & USER OPERATION MANUAL
 GPC-14/18/20 GPC PASTA PRO INSTALLATION & USER OPERATION MANUAL GPC-18 shown with optional rinse station. NOTICE! After installation of your equipment, immediately contact your local gas supplier to obtain