Patterson Fan Manual. Operating, Installation & Parts Manual (OIPM) Patterson Fan Company, Inc Blythewood, SC
|
|
|
- Claire Henry
- 5 years ago
- Views:
Transcription


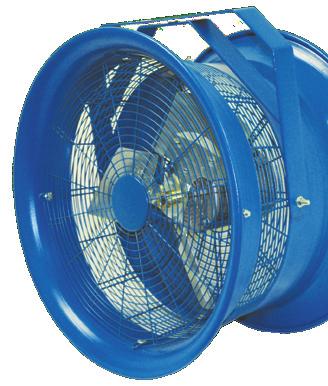

1 Patterson Fan Manual Operating, Installation & Parts Manual (OIPM)
2 Contents Page Assembly Instructions 3-10 Maintenance Instructions Trouble Shooting 15 See Other Patterson Manuals: Patterson Wiring Diagrams Manual Patterson Parts Manual Patterson Fan Spec Manual

 5/8 washers.")
3 YM Yoke Mount Assembly Instructions Note: There are many acceptable methods for hanging a Patterson Yoke Mount fan. The most important things to remember are that the yoke must be securely connected to a solid structure and that all materials used to hang the yoke and fan must be rated for this type of rigging and workload. Below is what we consider to be the simplest method of fan suspension. Feel free to improvise, but please use caution and good judgment. 1. Secure the U Shaped Yoke to the object from which you intend to mount the fan. Use a 5/8 bolt, a 5/8 nut and (2) 5/8 washers. Tighten the nut onto the bolt using a 5/16 bolt end wrench and ratchet with 5/16 socket The factory assembled fan head fits inside of the U shaped yoke, the threaded studs on each side of the fan fit through the predrilled holes on the U shaped yoke. Secure the factory assembled fan head to the U shaped yoke with the supplied nuts. Mount the factory assembled fan head so that the motor capacitor is in up position. If safety cable installation is desired (recommended), use a length of chain or cable to secure the fan to a solid surface and attach to the fan. Make sure cable or chain is rated for the weight and purpose of securing the fan.


4 PS Portable Stroller Mount Assembly Instructions Note: There are many applications for the Patterson Portable Stroller Fan. Use care when selecting locations for the fan. Do not place the fan on a sloped surface. Do not use if the finger guards are missing or are damaged or not fitting properly. Do not use if the cord or connector has exposed wires or is damaged in any way Place the portable base on a flat surface. Secure the U shaped yoke to the portable base by inserting the 5/8 bolt through the center hole in the yoke and through the hole in the pedestal base arm. Place the 5/8 nut on the 5/8 bolt and tighten securely. Carefully mount the factory assembled fan with mounting studs through the holes in the uprights of the U shaped yoke with the motor capacitor is in up position. Secure the fan to the yoke with the factory supplied nuts. Note: Due to continual product improvement, items are subject to change without notice.

5 PB Portable Base Mount Assembly Instructions 34 Fan Only Note: There are many applications for the Patterson Portable Base 34 fan. Use care when selecting locations for the fan. Do not place the fan on a sloped surface. Do not use if the finger guards are missing or damaged or not fitted properly. Do not use if the cord or connector has exposed wires or is damaged in any way. 1. If you ordered the 6ALG2, fan head and the 6ALG9, portable base together on the same pu chase order they will be shipped assembled together from the factory. 2. If you ordered these separately begin mounting the fan head to the probable base by first securing the separate PB telescoping upright arms to the fan head stud bolt on either side of the fan housing leaving them loose for free swinging. 3. After attaching the upright arms to the fan head (loosely) using a fork lift to pickup the fan head maneuver the fan head directly over the portable base and slowly lower until the upright telescoping arms slip into the fixed uprights of the portable base. 4. Inserted arm should measure total height from floor keeping fan level between the two uprights some tapping with block of wood and hammer may be necessary. 5. Tighten nuts on stud bolts connecting the upright arms to the fan head housing. Note: Due to continual product improvement, items are subject to change without notice.


6 TC Truck Cooler Assembly Instructions Note: Important things to remember are that the wall mount should be a solid structure able to support the weight of the fan safely and that the fan should not be at a height that will cause employees to bump their heads. Ideally, the fan should be mounted to blow into the back of the truck down the top corner of either side of the trailer Secure the wall bracket and arm to the solid surface where you will hang the fan. A structurally secure solid wall or beam is best. Secure the U shaped yoke to the arm of the wall bracket. Use the 5/8 bolt and 5/8 nut supplied. Tighten the nut onto teh bolt using a 5/16 box end wrench and ratchet with a 5/16 socket. For clearance reasons, the U shaped yoke must open down. The fan head fits inside the U shaped yoke, the threaded studs on each siide of the fan fits through the predrilled holes on the U shaped yoke. Secure the fan head to the U shaped yoke with the supplied nuts. Mount the fan head so that the motor capacitor is in up position. Note: Due to continual product improvement, items are subject to change without notice.


 Place a level on the part.")


7 CW Column Wall Mount Assembly Instructions Note: The most important thing to remember is that if the fan is at a level near people, it should be equipped with OSHA approved Patterson finger guards. Please contact your factory sales representative to order Secure Part A of the wall bracket to the solid surface from which you will hang the fan. There is a single mounting hole on the short end of the part. Secure part A using a wall anchor, etc. (Wall anchor not included.) Place a level on the part. Position part B under part A as shown and situate part B in such a way so that part A becomes level. Mark part B for the hole. Attach part B using the appropriate wall anchor, (not included). Secure the U shaped yoke to the wall bracket using the supplied 5/8 bolt and nut. If you plan to add an oscillator, mount the yoke so that it opens up. The bolt must go through all three pieces. Check for level and stability. The factory assembled fan head fits inside of the U shaped yoke. Secure the fan head to the yoke with the supplied nuts. Mount the fan head so the motor capacitor is in up position. Note: Due to continual product improvement, items are subject to change without notice.

8 CW Column Wall Mount Assembly Instructions 34 Only Note: The 6ALG2 fan head is equipped with OSHA compliant finger guards. Mount the fan at desired height making sure the fan is not in the headway of personnel preferably out of reach. These fans are powerful and should not be mounted too close to personnel at work stations. 1. See yoke mount instruction for yoke to fan assembly. 2. Assemble the column wall bracket as follows. Secure Part A (horizontal bottom strut) to the solid surface from which you will hang the fan either a wall or column using appropriate wall anchor (not included). This Part A has a wall mount bracket with a 4 hole pattern for mounting to surface. 3. Secure Part B to the wall allowing the bolt hole to lineup where the fan yoke will be bolted to the column wall bracket. The fan head and yoke are suspended below the column wall bracket allowing full 360 rotation left and right. 4. Secure the U shaped yoke to the end of the column wall bracket where Part A and Part B converge using the bolt supplied. The yoke allows a 30+- degree tilt toward the floor for directing air throw as desired. 5. Safety cable is mandatory. Use a length of chain of cable to secure the fan to a solid surface and attach the fan. Make sure cable or chain is rated for the weight and purpose.
 at the 6:00 position in rear flange. Holes should be drilled just behind the bead of the fan housing.")
 get the factory assembled fan head to the point where you plan to suspend it. You will need three lengths of chain, three connectors, hardware for chains and bolt cutters.")

9 HV Ceiling Suspended Assembly Instructions 90 X 2 X Facing outlet of fan, drill 2-5/16 diameter holes (1/2 for 34 fan) one at 10 and one at 2:00 position in front flange. Facing the inlet side of fan, drill 1-5/16 diameter hole (1/2 for 24 fans) at the 6:00 position in rear flange. Holes should be drilled just behind the bead of the fan housing. Attach two eyebolts to holes in top front of fan. Attach third eyebolt to back rear hole in fan. By means of a mechanical lift (cherry picker, scissor lift, etc.) get the factory assembled fan head to the point where you plan to suspend it. You will need three lengths of chain, three connectors, hardware for chains and bolt cutters. Secure two lengths of chain to the beam or girder number 1 about two times the distance apart that the fan will hang down (see diagram). The third length of chain should be centered between the two front lengths of chain and attached to beam number 2. Attach the chains to the beams using your preferred method. Connect the lengths of chain to the eyebolts on the factory assembled fan head using the chain connectors. Rough focus the fan on your target while on the mechanical lift. Get a co-worker to stand at the target mark. Make sure the power is turned off. Have someone plug the fan in. Let the fan run for approximately 30 seconds (to get up to speed and settle itself down). With someone on the floor, someone at the fan, and someone at the power, focus the fan. DO NOT ATTEMPT TO ADJUST THE FAN WHILE IT IS RUNNING! Note: Due to continual product improvement, Remove excess chain with bolt cutters. items are subject to change without notice.
10 Yoke Yoke Mount Assembly Instructions 34 Only Note: There are many acceptable methods for hanging a Patterson Yoke Mount 34 fan. The most important things to remember are that the yoke must be securely connected to a solid structure and that all materials use to hang the yoke and fan must be rated for this type of rigging and workload. Below is what we consider to be the simplest method of fan suspension. Feel free to improvise, but please use caution and good judgment. 1. Assemble the yoke connecting side A with Side B to the stud bolts of the fan housing. The factory assembled fan head fits inside the U shapped yoke, the threaded studs on each side of the fan fit through the predrilled holes on the U shaped yoke. Secure the fan head to the yoke with the supplied nuts. 2. Assemble side A and side B of the yoke and connect with supplied bolt. 3. Safety cable is mandatory. Use a length of chain of cable to secure the fan to a solid surface and attach the fan. Make sure cable or chain is rated for the weight and purpose. Note: Due to continual product improvement, items are subject to change without notice.
11 End of Assembly Instructions


12 Please read carefully before assemble, install, operate or maintain any Patterson Fan Product. Protect yourself and others by observing all safety information. Failure to comply with assmebly instructions, national electric codes and OSHA codes, could result in personal injury and/or property damage. Retain instructions for future reference.
13 Caution Please read carefully before assemble, install, operate or maintain any Patterson Fan Product. Protect yourself and others by observing all safety information. Failure to comply with instructions could result in personal injury and/or property damage. Retain instructions for future reference Disconnect power source before installing or servicing. Failure to disconnect power source can result in fire, shock or serious injury. Patterson products should be installed and serviced by qualified technicians only. Follow all local electrical and safety codes, as well as the National Electric Code (NEC) and the Occupational Safety and Health Act (OSHA) in the United States. The unit should be installed, protected and fused in accordance with latest issue of the National Electrical Code, MEMA Standard Publication No. MG2 and local codes. Motor must be securely and adequately grounded. This can be accomplished by wiring with a ground, metal-clad raceway system, using a separate ground wire connected to the bare metal of the motor frame, or other suitable means. Always disconnect power source before working on or near a motor or its connected load. Lock open position and tag to prevent unexpected application of power. In accordance with OSHA requirements. Guarding is required if unit is mounted less than 7 feet above floor or where workers have access. Keep hands and clothing away from moving parts. Be careful when touching the exterior of an operating motor; it may be hot enough to cause injury. This condition is normal if operated at a rated load and voltage and built to operate at higher temperatures. Protect power cable from coming into contact with sharp objects. Do not tangle power cable and never allow cable to come in contact with oil, grease, hot surfaces or chemicals. Make certain that the power source confirms to requirements of your equipment. Single Phase Motors The factory assembled fan head is equipped with a 12 foot long cord and connector. To turn on fan, plut it in; to turn off fan, unplug it. Three Phase Motors A cord and connector is not supplied with three phase motors. These fans will need to be fitted with an appropriate cord and connector or hard wired directly to a power source. It the fan is supplied with finger guards, the rear finger guard will need to be partially removed to access the motors internal wiring. Remove all but one of the self-tapping screws and place them in a safe place. You will use them again. Rotate the guards around on the single self-tapping screw. Wire the fan. Replace the guard using the saved self tapping screws. When looking at the front of the fan, the blade should be turning clockwise. It it does not, eth electrical connection wires may need to be reversed. If reversing the wires does not work, contact your factory representative.
14 Maintenance & Operating Instructions All Patterson Fans are designed to be virtually maintenance free, but routine cleaning and inspection should be performed on a regular basis. Clean the fan of all dust, dirt and grease. Regular cleaning will keep the fan operating safely at optimal performance levels. Oh an annual basis, we recommend that you inspect the following: Tightness of the blade Cracking of the blade around rivets, spider, and hub Integrity of motor mounts and welds Tightness of the safety finer/hand guards Tightness of bolts of mounting brackets Security of attachment to wall or other structureal member Security of the safety chain If you find any problems as a result of routine inspection or have any questions about assemly or operating instructions, consult the trouble shooting guide in the OIPM manual or call factory sales representative at For all parts contact. direct at For additional copies of the OIPM manual go to under HIgh Velocity Fans, Operating Instructions and Part Manual.
15 Trouble Shooting Instructions Warning: Electrical shock hazard, serious injury or death may occur, disconnect from electrical supply before servicing these products. Fan system: The head consist of four major parts: Housing, Guards, Motor and Blade. See trouble shooting array. PROBLEM CHECK SOLUTION Fan won t run and makes no sound. Fan motor won t run and makes humming sound. Breaker trips or fuse blows when fan is started. Motor overheating and shutting off. Restarting several minutes later. Power cord, extension cord, circuit breaker. Connections in motor junction box. Connections on motor capacitor. Connections in motor junction box. Confirm free rotation of the blade. Connections on motor capacitor. Connections on motor capacitor. Blade rotation. Motor voltage connections match power source voltage. Inspect motor barrel for damage. Extension cord too small. Inlet air obstructed. Motor voltage connections match power source voltage. Reconnect power, extension cord or reset breaker. Verify connections, match motor data plate. Reattach any loose connections. Verify connection with motor data plate. Shift blade on motor shaft. Reattach any loose connections. Replace motor. Reattach any loose connections. Shift blade on motor shaft. Check source voltage. Replace motor. Replace with heavier cord. Provide additional inlet clearance. Check source voltage. Replace motor. **For warranty issues call Patrick Finnegan at Patterson Fan
PATTERSON FAN MANUAL. Operating, Installation & Parts Manual (OIPM) Patterson Fan Company, Inc Blythewood, SC
 Patterson Fan Company, Inc Blythewood, SC") PATTERSON FAN MANUAL Operating, Installation & Parts Manual (OIPM) Patterson Fan Company, Inc Blythewood, SC 29016 www.pattersonfan.com 800.768.3985 Contents Page Assembly Instructions 3-10 Maintenance
PATTERSON FAN MANUAL Operating, Installation & Parts Manual (OIPM) Patterson Fan Company, Inc Blythewood, SC 29016 www.pattersonfan.com 800.768.3985 Contents Page Assembly Instructions 3-10 Maintenance
User s Manual and Operating Instructions
 User s Manual and Operating Instructions Model Numbers: PT-18W-DDF-A, PT-20F-DDF-A, PT-20S-DDF, PT-24O-DDF, PT-24-DDF, PT-24-DDF-F, PT-30-DDF, PT-30P-DDF-A, PT-30P-DDF-AF READ AND SAVE THESE INSTRUCTIONS
Ceiling Fan Installation Instructions
 OWNER S MANUAL Ceiling Fan Installation Instructions Total fan weight For 3TF24XX Series Fans READ AND SAVE THESE INSTRUCTIONS QUALITY CEILING FANS Installation 1. 2. 3. 4. 5. 6. 7. 8. 9. 10. 11. 12. 13.
Panel Fan Series Operators Manual (Galvanized and Polymer)
") Panel Fan Series Operators Manual (Galvanized and Polymer) 52" Belt Drive, Galvanized Panel Fan with Three Wing Blade IMPORTANT: READ AND SAVE THESE INSTRUCTIONS Read all instructions carefully before
Panel Fan Series Operators Manual (Galvanized and Polymer) 52" Belt Drive, Galvanized Panel Fan with Three Wing Blade IMPORTANT: READ AND SAVE THESE INSTRUCTIONS Read all instructions carefully before
ProStar Ceiling Fan PS52. Installation Instructions Instrucciones de instalación Instructions d installation
 ProStar Ceiling Fan PS52 Installation Instructions Instrucciones de instalación Instructions d installation Read and Save These Safety Precautions. Turn off electricity at main switch before wiring or
User s Manual and Operating Instructions
 User s Manual and Operating Instructions Model Numbers: CL-30P-DDF, CL-20F-DDF, CL-24O-DDF, CL-30-DDF READ AND SAVE THESE INSTRUCTIONS IMPORTANT: Read and understand all of the directions in this manual
SWP. (Models SWP08 through SWP20) IMPORTANT! Read before proceeding! OPERATION & MAINTENANCE MANUAL
 IMPORTANT! Read before proceeding! OPERATION & MAINTENANCE MANUAL") SWP (Models SWP08 through SWP20) OPERATION & MAINTENANCE MANUAL IMPORTANT! Read before proceeding! Read carefully before attempting to assemble, install, operate or maintain the product described. Protect
SWP (Models SWP08 through SWP20) OPERATION & MAINTENANCE MANUAL IMPORTANT! Read before proceeding! Read carefully before attempting to assemble, install, operate or maintain the product described. Protect
PANEL FAN SERIES OPERATORS MANUAL (Galvanized and Polymer)
") PANEL FAN SERIES OPERATORS MANUAL (Galvanized and Polymer) Galvanized Panel Fan IMPORTANT: READ AND SAVE THESE INSTRUCTIONS Read all instructions carefully before attempting to assemble, install, operate
PANEL FAN SERIES OPERATORS MANUAL (Galvanized and Polymer) Galvanized Panel Fan IMPORTANT: READ AND SAVE THESE INSTRUCTIONS Read all instructions carefully before attempting to assemble, install, operate
5COM52XXD Series Fan. Owner s Guide and Installation Manual. UL Model NO. : 5COM52XXD
 Owner s Guide and Installation Manual 5COM52XXD Series Fan UL Model NO. : 5COM52XXD Attach sales receipt to this card and retain as your proof of purchase DATE OF PURCHASE: MODEL NUMBER: RETAILER NAME:
THE MONTICELLO CEILING FAN INSTALLATION INSTRUCTIONS
 THE MONTICELLO CEILING FAN INSTALLATION INSTRUCTIONS Please read and save these instructions These instructions are to be used in the installation of the following QUORUM INTERNATIONAL fans... The Monticello
5LCM52XX Series Fan. Owner s Guide and Installation Manual. UL Model NO. : AC-552AL
 Owner s Guide and Installation Manual 5LCM52XX Series Fan UL Model NO. : AC-552AL Attach sales receipt to this card and retain as your proof of purchase DATE OF PURCHASE: MODEL NUMBER: RETAILER NAME: RETAILER
5YK60XXX Series Fan. Owner s Guide and Installation Manual. CUL Model NO. : 5YK60XXX
 Owner s Guide and Installation Manual 5YK60XXX Series Fan CUL Model NO. : 5YK60XXX Attach sales receipt to this card and retain as your proof of purchase DATE OF PURCHASE: MODEL NUMBER: RETAILER NAME:
TILGHMAN CEILING FAN. LISTED For Damp Location E ITEM # MODEL #WCK52LMW5N WCK52NWZ5N. Español p. 20 ATTACH YOUR RECEIPT HERE
 ITEM #0294980 0294981 TILGHMAN CEILING FAN Harbor Breeze is a registered trademark of LF, LLC. All Rights Reserved. MODEL #WCK52LMW5N WCK52NWZ5N Español p. 20 ATTACH YOUR RECEIPT HERE Serial Number Purchase
1. SAFETY RULES WARNING WARNING. 8. Avoid placing objects in the path of the blades.
 1 1. SAFETY RULES 1. To reduce the risk of electric shock, insure electricity has been turned off at the circuit breaker or fuse box before beginning. 2. All wiring must be in accordance with the National
3MNLR72XXD Series Fan. Owner s Guide and Installation Manual. UL Model NO. : 3MNLR72
 Owner s Guide and Installation Manual 3MNLR72XXD Series Fan UL Model NO. : 3MNLR72 Attach sales receipt to this card and retain as your proof of purchase DATE OF PURCHASE: MODEL NUMBER: RETAILER NAME:
Model No: 56DFH-L HS-1289-C. Cover for non-light option
 Owner s Manual Starfire Model No: 56DFH-L HS-1289-C Cover for non-light option These instructions contain 5 pages: Page 1: Foreword Page 2: Unpack and inspect parts contained, and pre-installation notes
INSTALLATION, OPERATION, AND MAINTENANCE MANUAL
 INSTALLATION, OPERATION, AND MAINTENANCE MANUAL TUBE AXIAL FANS BTA, WTA, HTA, DDA The purpose of this manual is to aid in the proper installation and operation of the fans. These instructions are intended
OWNERS MANUAL FOR MEC 300E ATA
 OWNERS MANUAL FOR MEC 300E ATA PLEASE READ AND FULLY UNDERSTAND THE INSTRUCTIONS PRIOR TO SETTING OR TUNING THE MACHINE. CAUTION: ANY MEC CLAY TARGET MACHINE MUST BE IN THE DISARMED STATE WITH THE BATTERY
ST. KITTS CEILING FAN
 ITEM #0845047 ST. KITTS CEILING FAN MODEL #40829 Questions, problems or missing parts? Before returning this item to your retailer, call our customer service department at 1-800-643-0067, Monday - Thursday,
CEILING FAN OWNER S MANUAL
 CEILING FAN OWNER S MANUAL VERA CRUZ 5/04 GENERAL INSTALLATION & OPERATION INSTRUCTIONS IMPORTANT SAFEGUARDS: 1. To ensure the success of the installation, be sure to read the instructions and review the
DATE OF PURCHASE: RETAILER NAME: MODEL NUMBER: RETAILER ADDRESS:
 Owner s Guide and Installation Manual 3TF24XX Series Fan UL Model No. : AC-536 Attach sales receipt to this card and retain as your proof of purchase DATE OF PURCHASE: RETAILER NAME: MODEL NUMBER: RETAILER
5CO52XX Series Fan UL Model No. : 5CO52. Owner s Guide and Installation Manual. Attach sales receipt to this card and retain as your proof of purchase
 Owner s Guide and Installation Manual 5CO52XX Series Fan UL Model No. : 5CO52 Attach sales receipt to this card and retain as your proof of purchase DATE OF PURCHASE: RETAILER NAME: MODEL NUMBER: RETAILER
Ceiling Fan Installation Instructions
 OWNER S MANUAL Ceiling Fan Installation Instructions Total fan weight For 5SKR52XXD Series Fans READ AND SAVE THESE INSTRUCTIONS QUALITY CEILING FANS Installation SAFETY TIPS WARNING: TO REDUCE THE RISK
Sunburst. Instruction Manual. Includes our new Wall Control System. A Kichler Décor ceiling fan
 Includes our new Wall Control System Sunburst A Kichler Décor ceiling fan Kichler Lighting 7711 East Pleasant Valley Road P.O. Box 318010 Cleveland, Ohio 44131-8010 Customer Service 866.558.5706 8:30 AM
Owner s Guide and Installation Manual
 For Your Records and Warranty Assistance For reference, also attach your receipt or a copy of your receipt to the manual. Model Name Type 2A Models Owner s Guide and Installation Manual Model No. Date
CEILING FAN OWNER S MANUAL
 CEILING FAN OWNER S MANUAL LX SERIES 5/04 WARNING: Read and follow these instructions carefully and be mindful of all warnings shown throughout. GENERAL INSTALLATION & OPERATION INSTRUCTIONS IMPORTANT
3HP MOBILE CYCLONE DUST COLLECTOR MANUAL FILTER CLEANING MANUAL
 3HP MOBILE CYCLONE DUST COLLECTOR MANUAL FILTER CLEANING MANUAL LAGUNA TOOLS 2072 Alton Parkway Irvine, California 92606 Ph: 800.234.1976 www.lagunatools.com 2018, Laguna Tools, Inc. LAGUNA and the LAGUNA
52 StarkkTM. Instruction Manual. A Kichler Select ceiling fan
 52 StarkkTM A Kichler Select ceiling fan Kichler Lighting 7711 East Pleasant Valley Road P.O. Box 318010 Cleveland, Ohio 44131-8010 Customer Service 866.558.5706 8:30 AM to 5:00 PM EST, Monday - Friday
52 CEILING FAN READ AND SAVE THESE INSTRUCTIONS FAN RATING AC 120V.
 Irene 52 CEILING FAN READ AND SAVE THESE INSTRUCTIONS FAN RATING AC 120V. 60Hz TABLE OF CONTENTS Tools and Materials Required... 1 Package Contents... 1 Safety Rules... 2 Mounting Options... 3 Hanging
Installation and Operation Manual For Hunter Ceiling Fans
 Installation and Operation Manual For Hunter Ceiling Fans 1 2 CONGRATULATIONS! Your new Hunter ceiling fan is an addition to your home or office that will provide comfort and performance for many years.
52 DorsetTM. Instruction Manual. Basic Function Wall Control System Included. A Kichler Decor ceiling fan
 Basic Function Wall Control System Included 52 DorsetTM II A Kichler Decor ceiling fan Kichler Lighting 7711 East Pleasant Valley Road P.O. Box 318010 Cleveland, Ohio 44131-8010 Customer Service 866.558.5706
Quartzone. Infrared Quartz Tube & Metal Sheathed Electric Heaters. Owner s Manual. File E COMFORT HEATERS for INDOOR* and OUTDOOR** USE
 Quartzone Infrared Quartz Tube & Metal Sheathed Electric Heaters Owner s Manual File E97759 COMFORT S for INDOOR* and OUTDOOR** USE *Excluding Residences ** With Quartz Elements and when mounted Underneath
FitchTM. Instruction Manual. Includes our Basic Function CoolTouch TM Control System Looks permanent, but goes wherever you go!
 Includes our Basic Function CoolTouch TM Control System Looks permanent, but goes wherever you go! FitchTM A Kichler Décor ceiling fan U.S. Patent Pending Kichler Lighting 7711 East Pleasant Valley Road
60" Tulle PatioTM. Instruction Manual. A Kichler Select ceiling fan
 60" Tulle PatioTM A Kichler Select ceiling fan cul Certified for Wet Location Kichler Lighting 7711 East Pleasant Valley Road P.O. Box 318010 Cleveland, Ohio 44131-8010 Customer Service 866.558.5706 8:30
Installation & Maintenance Instructions
 B2451 & B2452 Series Wall Heaters SPECIFICATIONS MODEL VOLTS HZ AMPS WATTS BTUH B2451 120 60 12.5 1500 5120 B2452 240 60 8.3 2000 6826 208 60 7.2 1500 5120 DIMENSIONS OVERALL Height - 14 1/4 Width - 11
Ceiling Fan Installation Instructions
 OWNER S MANUAL Ceiling Fan Installation Instructions For 5SH54XXD-L Series Fans READ AND SAVE THESE INSTRUCTIONS Total fan weight with light kit 1. 2. 3. 4. 5. 6. 7. 8. 9. 10. 11. 12. 13. 14. 15. 16. 17.
Owner s Guide and Installation Manual
 For Your Records and Warranty Assistance For reference, also attach your receipt or a copy of your receipt to the manual. Model Name Type 2A Models Owner s Guide and Installation Manual Model No. Date
CEILING FAN OWNER S MANUAL
 CEILING FAN OWNER S MANUAL 5/03 I/O THE INDOOR/OUTDOOR FAN WARNING: Read and follow these instructions carefully and be mindful of all warnings shown throughout. GENERAL INSTALLATION & OPERATION INSTRUCTIONS
#ADENCE4- $ESIGNED )NCLUDES #OOL4OUCH4- +ICHLER )NSTRUCTION #USTOMER KHA
NCLUDES #OOL4OUCH4- +ICHLER )NSTRUCTION #USTOMER KHA") KHA9090108 1 1. SAFETY RULES 1. To reduce the risk of electric shock, insure electricity has been turned off at the circuit breaker or fuse box before beginning. 2. All wiring must be in accordance with
KHA9090108 1 1. SAFETY RULES 1. To reduce the risk of electric shock, insure electricity has been turned off at the circuit breaker or fuse box before beginning. 2. All wiring must be in accordance with
CEILING FAN OWNER'S MANUAL
 Style that revolves around you. CEILING FAN OWNER'S MANUAL CIARA 12/14 WARNING: Read and follow these instructions carefully and be mindful of all warnings shown throughout. GENERAL INSTALLATION & OPERATION
CEILING FAN OWNER'S MANUAL
 Style that revolves around you. CEILING FAN OWNER'S MANUAL QUATRO 10/09 WARNING: Read and follow these instructions carefully and be mindful of all warnings shown throughout. GENERAL INSTALLATION & OPERATION
Owner s Guide and Installation Manual
 For Your Records and Warranty Assistance For reference, also attach your receipt or a copy of your receipt to the manual. Model Name Type 8 Models Owner s Guide and Installation Manual Model No. Catalog
Operating Instructions & Parts Manual Models 99533, 99532
 Operating Instructions & Parts Manual Models 99533, 99532 2 Please read and save these instructions. Read carefully before attempting to assemble, install, operate or maintain the product described. Protect
CoolTouch TM control system
 READ AND SAVE THESE INSTRUCTIONS CoolTouch TM control system 3R200, 3R400, 3W500 U.S. Patent Pending CAUTION: This control system was designed to operate and work with a specific Kichler Ceiling Fan ONLY.
Owner s Guide and Installation Manual
 Tribeca Owner s Guide and Installation Manual English Form# M6001-01 20120416 2012 Casablanca Fan Co. Welcome Your new Casablanca ceiling fan is an addition to your home or office that will provide comfort
ARMITAGE CEILING FAN ITEM # MODEL #CC52WW5L. Español p. 17 ATTACH YOUR RECEIPT HERE. Purchase Date
 ITEM #0807426 ARMITAGE CEILING FAN MODEL #CC52WW5L Harbor Breeze is a registered trademark of LF, LLC. All Rights Reserved. Español p. 17 ATTACH YOUR RECEIPT HERE Purchase Date 4009654 Questions, problems,
Orrin. Instruction Manual. Includes our new CoolTouch TM Control System Looks permanent, but goes wherever you go! U.S.
 Includes our new CoolTouch TM Control System Looks permanent, but goes wherever you go! U.S. Patent Pending Orrin A Kichler Select ceiling fan Kichler Lighting 7711 East Pleasant Valley Road P.O. Box 318010
Hatteras BayTM. Patio. Instruction Manual. Includes our new CoolTouch TM Control System Looks permanent, but goes wherever you go! U.S.
 Hatteras BayTM Patio A Kichler Décor ceiling fan Designed to coordinate with a popular Kichler Lighting collection. Includes our new CoolTouch TM Control System Looks permanent, but goes wherever you go!
MAYFIELD CEILING FAN LISTED E ITEM # MODEL #BTH44ABZC5C BTH44BNK5C Español p. 20 ATTACH YOUR RECEIPT HERE.
 Harbor Breeze is a registered trademark of LF, LLC. All Rights Reserved. ITEM #0331094 0331096 MAYFIELD CEILING FAN MODEL #BTH44ABZC5C BTH44BNK5C Español p. 20 ATTACH YOUR RECEIPT HERE Serial Number Purchase
LED. 60 StarkkTM. Instruction Manual. A Kichler Select ceiling fan
 60 StarkkTM LED A Kichler Select ceiling fan Kichler Lighting 7711 East Pleasant Valley Road P.O. Box 318010 Cleveland, Ohio 44131-8010 Customer Service 866.558.5706 8:30 AM to 5:00 PM EST, Monday - Friday
42 Kevlar. Instruction Manual. Kichler Lighting 7711 East Pleasant Valley Road P.O. Box Cleveland, Ohio
 42 Kevlar Kichler Lighting 7711 East Pleasant Valley Road P.O. Box 318010 Cleveland, Ohio 44131-8010 Customer Service 866.558.5706 8:30 AM to 5:00 PM EST, Monday - Friday Instruction Manual 1 1. SAFETY
3VNR52/42XXD Series Fan. Owner s Guide and Installation Manual. UL Model NO. : 3VNR52XXD / 3VNR42XXD
 Owner s Guide and Installation Manual 3VNR52/42XXD Series Fan UL Model NO. : 3VNR52XXD / 3VNR42XXD Attach sales receipt to this card and retain as your proof of purchase DATE OF PURCHASE: MODEL NUMBER:
IMPORTANT SAFETY INFORMATION:
 Owner s Manual Model CUH05B31T IMPORTANT SAFETY INFORMATION: Always read this manual first before attempting to install or use this heater. For your safety, always comply with all warnings and safety instructions
TOUCHDOWN 48 CEILING FAN
 TOUCHDOWN 48 CEILING FAN MODEL #50205 Español p. 20 Questions, problems, missing parts? Before returning to your retailer, call our customer service department at 1-877-361-3883, Monday - Thursday, 8 am
3MAVR60XX Series Fan. Owner s Guide and Installation Manual. UL Model NO. : 3MAVR60XX
 Owner s Guide and Installation Manual 3MAVR60XX Series Fan UL Model NO. : 3MAVR60XX Attach sales receipt to this card and retain as your proof of purchase DATE OF PURCHASE: MODEL NUMBER: RETAILER NAME:
Operation and Maintenance Manual 120V/60HZ
 Operation and Maintenance Manual 120V/60HZ GLACIER CS5-16-VD CS5-16-VD-TB CS5-18-VD CS5-18-VD-TB AVALANCHE CS6-36-1D CS6-36-VD BLIZZARD CS6-50-VD Operation & Maintenance Manual 60HZ Models Table of Contents:
Select. Sutter PlaceTM. Instruction Manual. A Kichler Select ceiling fan
 Sutter PlaceTM A Kichler ceiling fan Kichler Lighting 7711 East Pleasant Valley Road P.O. Box 318010 Cleveland, Ohio 44131-8010 Customer Service 866.558.5706 8:30 AM to 5:00 PM EST, Monday - Friday Instruction
harborbreezeoutlet.com
 Harbor Breeze is a registered trademark of LF, LLC. All Rights Reserved. ATTACH YOUR RECEIPT HERE Serial Number Purchase Date ITEM #0373684 BUILDER S SERIES CEILING FAN MODEL #40016 Español p. 18 Questions,
Panel Fan Series Operators Manual (Galvanized and Polymer)
") Panel Fan Series Operators Manual (Galvanized and Polymer) Galvanized Panel Fan with Three Wing Blade IMPORTANT: READ AND SAVE THESE INSTRUCTIONS Read all instructions carefully before attempting to assemble,
Panel Fan Series Operators Manual (Galvanized and Polymer) Galvanized Panel Fan with Three Wing Blade IMPORTANT: READ AND SAVE THESE INSTRUCTIONS Read all instructions carefully before attempting to assemble,
CEILING FAN OWNER'S MANUAL
 Style that revolves around you. CEILING FAN OWNER'S MANUAL Hover with DC motor 12/14 WARNING: Read and follow these instructions carefully and be mindful of all warnings shown throughout. GENERAL INSTALLATION
READ AND SAVE THESE INSTRUCTIONS
 READ AND SAVE THESE INSTRUCTIONS CEILING FAN INSTALLATION AND OPERATION INSTRUCTION FAN RATING AC 120V. 60Hz UL LISTED MODEL: AC-552OD WEIGHT OF FAN: 6.82 KGS 1. TOOLS AND MATERIALS REQUIRED Philips screw
HI Industrial Utility Heater HI Soleus Air International
 HI1-50-03 Industrial Utility Heater HI1-50-03 2010 Soleus Air International Thank you for choosing a Soleus Air Utility Heater. This owner s manual will provide you with valuable information necessary
72 ONYX XL FLAT PANEL ELECTRIC FIREPLACE
 72 ONYX XL FLAT PANEL ELECTRIC FIREPLACE Model Numbers: 80005 OWNER S MANUAL WARNING Read and understand this entire owner s manual, including all safety information, before plugging in or using this product.
Installation Guide. For Models: E-MLV36BNK4LK1 E-MLV36ESP4LK1 E-MLV36WW4LK1 READ THESE INSTRUCTIONS AND AND SAVE THEM FOR FUTURE USE
 READ THESE INSTRUCTIONS AND AND SAVE THEM FOR FUTURE USE Federal regulations require ceiling fans with light kits manufactured or imported after January 1, 2009, to limit total wattage consumed by the
ValkyrieTM. Instruction Manual. Includes our new CoolTouch TM 6 Speed DC Control System Looks permanent, but goes wherever you go! U.S.
 ValkyrieTM A Kichler Décor ceiling fan Designed to coordinate with a popular Kichler Lighting collection. Includes our new CoolTouch TM 6 Speed DC Control System Looks permanent, but goes wherever you
5WF42XX Series Fan UL Model No. : AC-542OD. Owner s Guide and Installation Manual
 Owner s Guide and Installation Manual 5WF42XX Series Fan UL Model No. : AC-542OD Attach sales receipt to this card and retain as your proof of purchase DATE OF PURCHASE: RETAILER NAME: MODEL NUMBER: RETAILER
installation and operation manual for Hunter Ceiling Fans
 For Your Records and Warranty Assistance Model Name: Catalog/Model No.: Serial No.: Date Purchased: Where Purchased: For reference also attach your receipt or a copy of your receipt to the manual. installation
SUTTON 52 CEILING FAN
 SUTTON 52 CEILING FAN MODELS #50188, 50189, 50190 Español p. 19 Questions, problems, missing parts? Before returning to your retailer, call our customer service department at 1-877-361-3883, Monday - Thursday,
Owner s Guide and Installation Manual
 For Your Records and Warranty Assistance For reference, also attach your receipt or a copy of your receipt to the manual. Model Name Type 2 Models Owner s Guide and Installation Manual Model No. Date Purchased
User Manual Box Exhaust Fan Series (Belt Drive)
") User Manual Box Exhaust Fan Series (Belt Drive) 36" Box Exhaust Fan with Three Wing Blade Box with Aluminum Shutter 54" Box with Cone 800-779-3267 sales@schaeferfan.com www.schaeferfan.com 2013 Schaefer
User Manual Box Exhaust Fan Series (Belt Drive) 36" Box Exhaust Fan with Three Wing Blade Box with Aluminum Shutter 54" Box with Cone 800-779-3267 sales@schaeferfan.com www.schaeferfan.com 2013 Schaefer
3DIR52XXD Series Fan. Owner s Guide and Installation Manual. UL Model NO. : 3DIR52XXD
 Owner s Guide and Installation Manual 3DIR52XXD Series Fan UL Model NO. : 3DIR52XXD Attach sales receipt to this card and retain as your proof of purchase DATE OF PURCHASE: MODEL NUMBER: RETAILER NAME:
CEILING FAN OWNER'S MANUAL
 CEILING FAN OWNER'S MANUAL READ AND SAVE THESE INSTRUCTIONS MODEL: 52-854-5RV-234 52-854-5RV-CH 52-854-5RV- FAN RATING AC 120V. 60Hz CUL LISTED MODEL : AG-962MC 1. TOOLS AND MATERIALS REQUIRED Philips
ChicagoTM. Instruction Manual. Includes our new CoolTouch TM Control System Looks permanent, but goes wherever you go! U.S.
 Includes our new CoolTouch TM Control System Looks permanent, but goes wherever you go! U.S. Patent Pending ChicagoTM A Kichler Decor ceiling fan Kichler Lighting 7711 East Pleasant Valley Road P.O. Box
5DI52XXD/5DI52XXD-L Series Fan UL Model No. : 5DI52. Owner s Guide and Installation Manual
 Owner s Guide and Installation Manual 5DI52XXD/5DI52XXD-L Series Fan UL Model No. : 5DI52 Attach sales receipt to this card and retain as your proof of purchase DATE OF PURCHASE: RETAILER NAME: MODEL NUMBER:
EBAC MODEL WM150 INDUSTRIAL DEHUMIDIFIER OWNER S MANUAL
 EBAC MODEL WM150 INDUSTRIAL DEHUMIDIFIER OWNER S MANUAL WM150 OWNERS MANUAL Page 1 of 9 INTRODUCTION Designed for a wide range of applications, the WM150 is a rugged, industrial unit, which utilizes an
5AZR56XX Series Fan. Owner s Guide and Installation Manual. UL Model NO. : 5AZR56XX
 Owner s Guide and Installation Manual 5AZR56XX Series Fan UL Model NO. : 5AZR56XX Attach sales receipt to this card and retain as your proof of purchase DATE OF PURCHASE: MODEL NUMBER: RETAILER NAME: RETAILER
7165 Dust Collector Owner s Manual
 7165 Dust Collector Owner s Manual Oliver Machinery M-7165 12/2016 Seattle, WA Copyright 2003-2017 info@olivermachinery.net www.olivermachinery.net CONTENTS IMPORTANT SAFETY RULES----------------------------------------------------------------
The Extraordinaire OWNER S MANUAL. Orbital Ceiling Fan. Model No. OF110** READ AND SAVE THESE INSTRUCTIONS. Net Weight 14.5 lbs. or 6.59 kg.
 The Extraordinaire Orbital Fan WARNING: Support Directly From Building Structure Net Weight 14.5 lbs. or 6.59 kg. Model No. OF110** OWNER S MANUAL READ AND SAVE THESE INSTRUCTIONS Important Safety Instructions
Installation Guide. For Models: E-DCF52BNK5C3 E-DCF52FBZ5C3 E-DCF52MWW5C3 READ THESE INSTRUCTIONS AND SAVE THEM FOR FUTURE USE
 READ THESE INSTRUCTIONS AND SAVE THEM FOR FUTURE USE Federal regulations require ceiling fans with light kits manufactured or imported after January 1, 2009, to limit total wattage consumed by the light
92 RAILWAY ST. SEAFORTH, ONTARIO CANADA, N0K 1W0 TEL: ABSOLUTE AIR INSTALLATION MANUAL
 92 RAILWAY ST. SEAFORTH, ONTARIO CANADA, N0K 1W0 TEL: 519-527- 2198 ABSOLUTE AIR INSTALLATION MANUAL 2014-04-10 PAGE 1 OF 18 REV 3 TABLE OF CONTENTS 1 INSTALLATION GUIDELINES FOR ABSOLUTE AIR FAN... 3
High Power Range Hood
 High Power Range Hood Pictured Model: CW500 Installation and Operating Instructions Please read all instructions before installing and operating. All wiring and installation must be in accordance with
DAGNY LK. Ceiling Mounted Rotational Fan READ AND SAVE THESE INSTRUCTIONS. FAN RATING AC 110V~60Hz
 DAGNY LK Ceiling Mounted Rotational Fan READ AND SAVE THESE INSTRUCTIONS FAN RATING AC 110V~60Hz Please do not use any electric or battery powered tools in the assembly and installation of this or any
Ceiling Fan Installation Instructions
 Owner s Manual Ceiling Fan Installation Instructions Total fan weigh with light For 5AYR54 Series Fans READ AND SAVE THESE INSTRUCTIONS Quality Ceiling fans 1. 2. 3. 4. 5. 6. 7. 8. 9. 10. 11. 12. 13. 14.
CEILING FAN OWNER S MANUAL
 Style that revolves around you. CEILING FAN OWNER S MANUAL Total fan weight *53 lbs. WEXFORD 11/05 WARNING: Read and follow these instructions carefully and be mindful of all warnings shown throughout.
DATE OF PURCHASE: RETAILER NAME: MODEL NUMBER: RETAILER ADDRESS:
 Owner s Guide and Installation Manual 5PR52XX Series Fan UL Model No. : AC-552 Attach sales receipt to this card and retain as your proof of purchase DATE OF PURCHASE: RETAILER NAME: MODEL NUMBER: RETAILER
Operation and Maintenance Manual GLACIER TALL BASE CS5-16-VD-TB CS5-18-VD-TB2 120V/60HZ
 Operation and Maintenance Manual GLACIER TALL BASE CS5-16-VD-TB CS5-18-VD-TB2 120V/60HZ Operation & Maintenance Manual Table of Contents: 1.0 Introduction 1 2.0 Unpacking your COOL- SPACE 1 3.0 Set-up
1. SAFETY RULES. 1. To reduce the risk of electric shock, insure electricity has been turned off at the circuit breaker or fuse box before beginning.
 Kichler Basics 403 1 1. SAFETY RULES 1. To reduce the risk of electric shock, insure electricity has been turned off at the circuit breaker or fuse box before beginning. 2. All wiring must be in accordance
THE BARCLAY HUGGER CEILING FAN INSTALLATION INSTRUCTIONS
 THE BARCLAY HUGGER CEILING FAN INSTALLATION INSTRUCTIONS Please read and save these instructions These instructions are to be used in the installation of the following QUORUM INTERNATIONAL fans... The
2HP MOBILE CYCLONE DUST COLLECTOR MANUAL
 HP MOBILE CYCLONE DUST COLLECTOR MANUAL MANUAL FILTER CLEANING LAGUNA TOOLS 07 Alton Parkway Irvine, California 9606 Ph: 800.3.976 www.lagunatools.com 08, Laguna Tools, Inc. LAGUNA and the LAGUNA Logo
IMPORTANT SAFETY RULES
 1 IMPORTANT SAFETY RULES Wood working can be dangerous if safe and proper operating procedures are not followed. As with all machinery, there are certain hazards involved with the operation of the product.
CEILING FAN OWNER'S MANUAL
 Style that revolves around you. CEILING FAN OWNER'S MANUAL Vail with DC motor 10/15 WARNING: Read and follow these instructions carefully and be mindful of all warnings shown throughout. GENERAL INSTALLATION
Electric Garage Heater
 Electric Garage Heater G73 OWNERS MANUAL Read and save these instructions. A Name You Can Trust Trust has to be earned and we will earn yours. Customer happiness is the focus of our business. 2 From the
C-IV 60 CEILING FAN READ AND SAVE THESE INSTRUCTIONS. FAN RATING AC 120V. 60Hz
 C-IV 60 CEILING FAN READ AND SAVE THESE INSTRUCTIONS FAN RATING AC 120V. 60Hz Please do not use any electric or battery powered tools in the assembly and installation of this or any Matthews Fan Company
5GFR52XXD Series Fan. Owner s Guide and Installation Manual. UL Model NO. : 5GFR52XXD
 Owner s Guide and Installation Manual 5GFR52XXD Series Fan UL Model NO. : 5GFR52XXD Attach sales receipt to this card and retain as your proof of purchase DATE OF PURCHASE: MODEL NUMBER: RETAILER NAME:
5HP CYCLONE DUST COLLECTOR MANUAL
 5HP CYCLONE DUST COLLECTOR MANUAL LAGUNA TOOLS 2072 Alton Parkway Irvine, California 92606 Ph: 800.234.1976 www.lagunatools.com 2018, Laguna Tools, Inc. LAGUNA and the LAGUNA Logo are the registered trademarks
Installation Manual PS-225 & PS-275
 Installation Manual PS-225 & PS-275 Table of Contents Pre-Uncrating Checklist... 1 Verifying System Requirements... 2 Verifying System Direction... 2 Verifying the Electrical Requirements... 2 Removal
installation and operation manual for Hunter Ceiling Fans
 For Your Records and Warranty Assistance Model Name: Catalog/Model No.: Serial No.: Date Purchased: Where Purchased: For reference also attach your receipt or a copy of your receipt to the manual. installation
60" Hatteras BayTM. Patio. Instruction Manual. Includes our new Wall Control System. A Kichler Décor ceiling fan
 Includes our new Wall Control System 60" Hatteras BayTM Patio A Kichler Décor ceiling fan Kichler Lighting 7711 East Pleasant Valley Road P.O. Box 318010 Cleveland, Ohio 44131-8010 Customer Service 866.558.5706
CEILING FAN OWNER'S MANUAL
 CEILING FAN OWNER'S MANUAL READ AND SAVE THESE INSTRUCTIONS MODELS: 52-ECM-5RV-13 52-ECM-5RV- 52-ECM-5RV-SN FAN RATING AC 120V. 60Hz CUL LISTED MODEL : AC-552 1. TOOLS AND MATERIALS REQUIRED Philips screwdriver
1. SAFETY RULES. 8. Avoid placing objects in the path of the blades.
 1 1. SAFETY RULES 1. To reduce the risk of electric shock, insure electricity has been turned off at the circuit breaker or fuse box before beginning. 2. All wiring must be in accordance with the National