CONTENTS Important Safety Instructions Technical Specification Appliance Overview Installation
|
|
|
- Merilyn Rice
- 5 years ago
- Views:
Transcription
1
2 CONTENTS Important Safety Instructions General Safety Intended Use Children s Safety... 4 Technical Specification... 5 Appliance Overview... 6 Installation Removing Transport Bolts Appropriate Installation Location Connecting Water Supply Connecting to the Drain Adjusting the Feet Electrical Connection Electrical Requirements Transportation of the Appliance Preparation Laundry Wash Symbols Preparing Laundry for Washing Preparing Laundry for Drying Energy Saving Tips Initial Use Correct Load Capacity Loading The Laundry Using Detergent and Softener Tips for Efficient Washing Operating Instructions Control Panel Preparing the Machine Program Selection Main Programs Additional Functions Time Display Delay Loading Door Lock Child Lock Reload Temperature Selection Spin Speed Selection Changing Speed and Temperature Cancelling the Program End Sound Signal Excess Foam Removal Load Balancing System Program and Consumption Table Cleaning and Maintenance Cleaning Detergent Drawer Cleaning Loading Door and Drum Cleaning Body and Panel Cleaning Water Intake Filters Draining and Cleaning the Pump Troubleshooting Guide Error Display Codes Disposal Information
3 IMPORTANT SAFETY INSTRUCTIONS Read and follow all of the instructions even if you feel you are familiar with the product, and find a place to keep this manual handy for future reference. General Safety When using electrical appliances, basic safety precautions should always be followed: Always have the installation and repairs carried out by a qualified electrician. Incorrect installation or inadequate repairs may result in a major source of danger for the user and invalidate the warranty. Do not operate the appliance with a damaged cord or plug, after it malfunctions or has been dropped or damaged in any way. Check the voltage of the appliance matches the household voltage, which is located on the rating label. Place the appliance on a rigid, flat and level surface. Never place the appliance on a carpet-covered floor. Otherwise, lack of airflow beneath the machine will cause electrical parts to overheat. This will cause problems with your appliance. The water supply and draining hoses must be securely fastened and remain undamaged. Otherwise, there is the risk of water leakage. Only install the appliance with the hose provided. This appliance is not intended for use by persons (including children) with reduced physical, sensory or mental capabilities, or lack of experience and knowledge. Cleaning and user maintenance shall not be made by children Keep the appliance and its cord out of reach of children. Children shall not play with the appliance. Before using the appliance ensure that all packaging materials and transit bolts are removed, keep the transit bolts in a safe place in case you move in the future. Never open the loading door or remove the filter while there is still water in the drum. Otherwise, risk of flooding and injury from hot water will occur. Do not force open the locked loading door. The loading door will be ready to open approximately two minutes after the washing cycle comes to an end. In case of forcing the loading door to open, the door and the lock mechanism may get damaged. Unplug the appliance when not in use. Never touch the plug with wet hands! Never unplug by pulling on the cable, always pull out by gripping the plug. Do not lean or put any weight on the open door of the appliance. Use detergents, softeners and supplements suitable for automatic washing machines only. Follow the instructions on the garment tags and on the detergent packaging. The appliance must be unplugged during installation, maintenance, cleaning and repairing procedures. Use of an extension cord is not recommended with this appliance. Do not install the appliance in bath rooms, wet rooms or similar rooms. Do not store explosive substances such as aerosol cans with a flammable propellant near the appliance. Remove all objects from pockets before use, especially lighters, matches and sharp items, as these may damage both the machine and the clothes inside. 3
4 Intended Use This appliance has been designed for domestic use. It is not suitable for commercial use and it must not be used out of its intended use The appliance must only be used for washing, rinsing and drying of garments that are marked accordingly. Check the label of clothing to ensure that each item can be put through drying process. The final part of a washer dryer cycle is a cool down cycle, to ensure that the items are not damaged. Never stop a washer dryer before the end of the drying cycle unless all items are quickly removed and ventilated. This machine is not suitable for washing or drying carpets and rugs. Children s Safety Packaging materials are dangerous to children. Keep packaging materials in a safe place away from reach of children. The door may become extremely hot during operation; ensure that children and animals are kept away from the appliance. Keep detergents out of reach of children. Before each use, check that the drum of the appliance is empty. Do not let children tamper with the appliance. Use child lock to prevent children from intervening with the appliance. WARNING: The appliance is heavy and care is needed when unpacking and moving it. Get extra help and only hold the appliance by the casing never hold by the door or detergent drawer. 4
5 TECHNICAL SPECIFICATION Trade Mark Model Name Energy Efficiency Class - A (most efficient) to G (least efficient) Statesman XD0806W B Energy Consumption Washing, spinning and drying kwh 6.48 Washing and spinning only kwh 1.2 Drying only kwh 5.28 Washing Performance Class - A (most efficient) to G (least efficient) Spin Efficiency Class - A (most efficient) to G (least efficient) A B Residual moisture % 53 Maximum spin speed rpm 1400 Capacity Washing kg 8 Drying kg 6 Water Consumption Washing, spinning and drying l 104 Washing and spinning only l 56 Program time for complete operating cycle (60 C cotton washing and dry cotton drying for rated washing capacity) Washing, spinning and drying min 370 Washing and spinning only min 292 Programs to which the information on the label and the sheet relate Wash Cotton 60 C + 40 C +1400rpm Dry Cotton Dry + Spin Estimated annual consumption for a 4-person household, always using the dryer (200 cycles) Energy consumption kwh/year 1296 Water consumption l Estimated annual consumption for a 4-person household, never using the dryer (200 cycles) Energy consumption kwh/year 240 Water consumption l Power consumption in power off mode W 0.5 Power consumption in power left-on mode W 1 Remaining moisture content dependent on program selected after drying % -3 ~ +3 Other Water supply pressure (MPa) Noise emission (db) Minimum Maximum Wash Spin Dry Dimensions (h*w*d) (mm) 850*595*470 Net Weight (kg) 64 Gross Weight (kg) 67 Package Weight (kg) 3 Rated Power (W) Voltage (V) Frequency (Hz) Built-In 2050W V 50Hz No [1] Energy Consumption based on 220 standard washing cycles for cotton program at 60 C and 40 C at full load, and the consumption of the low-power modes. Actual energy consumption will depend on how the appliance is used. [2] Water consumption based on 220 standard washing cycles for cotton program at 60 C and 40 C at full load. Actual water consumption will depend on how the appliance is used. [3] Standard 60 C cotton and 40 C program is the standard washing program to which the information in the label and the fiche relates and this program is suitable to clean normally soiled cotton laundry and that this is the most efficient program in terms of combined energy and water consumption. IMPORTANT NOTE: Technical specifications may be changed without prior notice to improve the quality of the product. 5
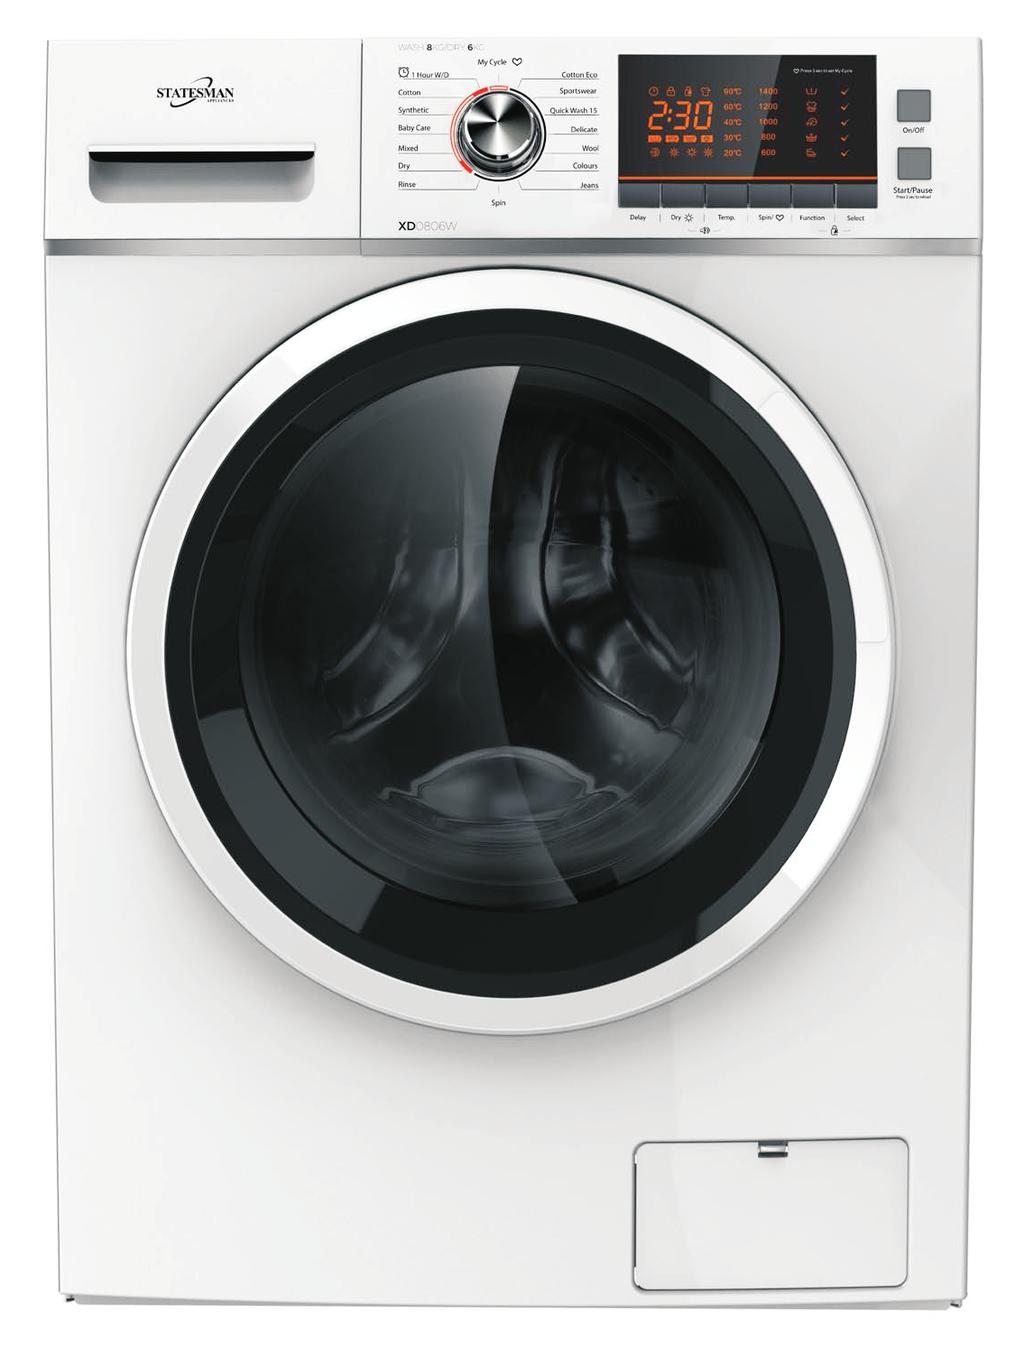
6 APPLIANCE OVERVIEW Top Cover Water Supply Hose Control Panel Detergent Drawer Power Supply Cord Drum Door Filter Drain Hose Accessories Transport Hole Plug Supply Hose Cold Water Owner s Manual 6
7 INSTALLATION Refer to the nearest Authorised Service Agent for installation of the product. To make the product ready for use, review the information in this user manual and make sure that the electricity, tap water supply and water drainage systems are appropriate before calling the Authorised Service Agent. If they are not, call a qualified technician and plumber to have any necessary arrangements carried out. Note: Make sure that the water inlet and discharge hoses, as well as the power cable are not folded, pinched or crushed while pushing the product into its place after installation or cleaning procedures. WARNING: Manufacturer shall not be held liable for damages that may arise from procedures carried out by unauthorised persons. WARNING: Prior to installation, visually check if the product has any defects on it. If so, do not have it installed. Damaged products cause risks for your safety. WARNING: Packaging materials are dangerous to children. Keep packaging materials in a safe place away from reach of the children. Removing transportation bolts Before using this washing machine, the transportation bolts must be removed from the back of the machine. Loosen all bolts with a suitable spanner until they rotate freely. Remove transportation safety bolts by turning them gently. Attach the plastic hole plugs supplied into the holes on the rear panel Keep the transportation safety bolts in a safe place to reuse if the washing machine needs to be moved again in the future. Note: Never move the product without the transportation safety bolts properly fixed in place! Appropriate installation location Place the machine on a rigid floor. Do not place it on a long pile rug or similar surfaces. Place the product on a solid and flat floor that has sufficient load carrying capacity! Do not place the product on the power cable. Do not install the product in places where temperature may fall below 0 C. Connecting water supply The water supply pressure required to run the product is between 0.5 to 10 bars ( MPa). It is necessary to have litres of water flowing from the fully open tap in one minute to have your machine run smoothly. Attach a pressure reducing valve if water pressure is higher. WARNING: This washing machine has a single water inlet for cold water only. It should not be connected to the hot water tap. In such a case the laundry will get damaged or the product will switch to protection mode and will not operate. WARNING: Do not use old or used water inlet hoses on the new product. It may cause stains on your laundry. Connect the inlet hose supplied to the cold Water Inlet Valve Water Supply Hose water inlet on the back of the appliance Tighten all hose nuts by hand. Never use a tool when tightening the nuts. 7
8 Open the taps completely after making the hose connection to check for water leaks at the connection points. If any leaks occur, turn off the tap and remove the nut. Retighten the nut carefully after checking the seal. To prevent water leakages and damages caused by them, keep the taps closed when the machine is not in use. Connecting to the drain Drain hose shall be attached to a stand pipe or sink waste, do not connect to surface water drains. The hose should be attached to a height of at least 60 cm, and 100cm at most. Max. 100cm Min. 60cm To prevent flowing of dirty water back into the machine and to allow for easy discharge, do not immerse the hose end into the dirty water or do not drive it in the drain more than 15 cm. If it is too long, cut it short. WARNING: Your house will be flooded if the hose comes out of its housing during water discharge. Moreover, there is risk of scalding due to high washing temperatures! To prevent such situations and to ensure smooth water intake and discharge of the machine, fix the end of the discharge hose tightly so that it cannot come out. Adjusting the feet In order to ensure that the product operates more silently and vibration free, it must stand level and balanced on its feet. Balance the machine by adjusting the feet. Otherwise, the product may move from its place and cause crushing and vibration problems. Loosen the lock nuts on the feet by hand or by using a suitable spanner Adjust the feet until the product stands level and balanced. Tighten all lock nuts again by using a suitable spanner. Raise Lower 8
9 Electrical connection Connect the product to a grounded outlet protected by a 13A fuse. The manufacturer shall not be liable for any damages that will arise when the product is used without grounding in accordance with the local regulations. Connection must comply with national regulations. Power cable plug must be within easy reach after installation. If the current value of the fuse or breaker in the house is less than 13 Amps, have a qualified electrician install a 13 Amp fuse. The voltage specified in the Technical specifications section must be equal to your mains voltage. Do not make connections via extension cables WARNING: Damaged power cables must be replaced by the Authorised Service Agents. Electrical requirements Before you insert the plug into the wall socket make sure that the voltage and the frequency shown in the rating label corresponds to your electricity supply. We recommend that this appliance be connected to the mains supply via a suitable switched and fused socket in a readily accessible position. Should the mains lead of the appliance become damaged or need replacing at any time, it must be replaced by a special purpose made mains lead which can only be obtained from an Authorised Service Agent. WARNING: This appliance must be earthed If the fitted moulded plug is not suitable for your socket, then the plug should be cut off and an appropriate plug fitted. Destroy the old plug, which is cut off as a plug with a bared cord could cause a shock hazard if inserted into a socket elsewhere in the house. The moulded plug on this appliance incorporates a 13A fuse. Should the fuse need to be replaced an ASTA approved BS1362 fuse of the same rating must be used. Do not forget to refit the fuse cover. In the event of losing the fuse cover, the plug must not be used until a replacement fuse cover has been fitted. Colour of the replacement fuse cover must be the same colour as that visible on the pin face of the plug. Fuse covers are available from any good electrical store. IMPORTANT Fitting a different plug As the colours of the wires in the mains lead of this appliance may not correspond with the coloured markings identifying the terminals on your plug, proceed as follows: 1. Connect the green - yellow or green (earth) wire to the terminal in the plug marked E or with the symbol f or coloured green and yellow or green. 2. Connect the blue (neutral) wire to the terminal in the plug marked N or coloured black. 3. Connect the brown (live) wire to the terminal in the plug marked L or coloured red. With the alternative plugs a 13A fuse must be fitted either in the plug or adaptor or in the main fuse box. If in doubt contact a qualified electrician. 9
10 Transportation of the appliance Unplug the product before transporting it. Remove water drain and water supply connections. Drain all water that has remained in the product. See Cleaning and Maintenance section. Install transportation safety bolts in the reverse order of removal procedure. See Removing the transportation bolts section. Note: Never move the product without the transportation safety bolts properly fixed in place! 10

11 PREPARATION You should always sort laundry according to type of fabric, colour, and degree of soiling and allowable water temperature. Always obey the instructions given on the garment tags. Laundry Wash Symbols 11
12 Preparing laundry for washing Laundry items with metal attachments such as underwired bras, belt buckles or metal buttons will damage the machine. Remove the metal pieces or wash the clothes by putting them in a laundry bag or pillow case. Take out all substances in the pockets such as coins, pens and paper clips, and turn pockets inside out and brush. Such objects may damage the product or cause noise problem. Put small size clothes such as infant s socks and nylon stockings in a laundry bag or pillow case. Place curtains in without compressing them. Remove curtain attachment items. Fasten zippers, sew loose buttons and mend rips and tears. Wash machine washable or hand washable labelled products only with an appropriate program. Do not wash colours and whites together. New, dark coloured cottons release a lot of dye. Wash them separately. Tough stains must be treated properly before washing. If unsure, check with a dry cleaner. Use only dyes/colour changers and limescale removers suitable for machine wash. Always follow the instructions on the package. Wash trousers and delicate laundry turned inside out. When washing a single item which is large/heavy, such as wadded jacket or jeans; it may cause unbalance within the drum. It is suggested to add one or two more items of clothing to the load, so that the spinning cycle will operate smoothly. Preparing laundry for drying Always check the labels of any items that are to be dried. Only dry items that are suitable for tumble drying. Before drying, spin at the optimum speed for the type of fabric. A spin speed of more than 1000 rpm is recommended for cotton, and a spin speed of more than 800 rpm is recommended for easy-care textiles. Items such as foam rubber, shower caps, waterproof textiles, and clothes or pillows fitted with foam rubber pads should not be dried in the machine. Do not dry unwashed items in the appliance Any items that have come into contact with substances such as cooking oil, acetone, alcohol, petrol, kerosene, turpentine, waxes or wax removers should be washed at a high temperature with an extra amount of detergent before being dried in the appliance. Do not iron laundry immediately after drying. It is recommended to evenly distribute any residual moisture first by rolling the garments up. For maximum drying performance, items such as quilts, terry cloths and other large textiles should be dried separately. Do not exceed the maximum load Energy saving tips The following information will help you use the product in an ecological and energy-efficient manner. Operate the product in the highest capacity allowed by the programme you have selected, but do not overload; see, Programme and Consumption Table. Always follow the instructions on the detergent packaging. Wash slightly soiled laundry at low temperatures. Use faster programmes for small quantities of lightly soiled laundry. Do not use prewash and high temperatures for laundry that is not heavily soiled or stained. If you plan to tumble dry your laundry, select the highest spin speed recommended during washing process. Do not use detergent in excess of the amount recommended on the detergent package. 12
13 Initial Use Before starting to use the product, make sure that all preparations are made in accordance with the instructions in sections Important Safety Instructions and Installation. To prepare the product for washing laundry, perform the following initial use sequence: Place detergent in compartment II of drawer Select 60 C Cotton ECO Wash Press On/Off button Press Start/Pause button Allow program to complete The appliance is now ready for first wash load. Note: Some water might have remained in the appliance due to the quality control processes in the production. It is not harmful for the product. Correct Load Capacity The maximum load capacity depends on the type of laundry, the degree of soiling and the washing program desired. The machine automatically adjusts the amount of water according to the weight of the loaded laundry. WARNING: Follow the information in the Program and Consumption Table. When overloaded, machine s washing performance will drop. Moreover, noise and vibration problems may occur. Loading the laundry Open the loading door. Place laundry items loosely into the machine. Push the loading door to close until you hear a locking sound. Ensure that no items are caught in the door. Note: The loading door is locked while a program is running. This model has an electronic interlock that unlocks once the water has drained from the appliance and the drum has stopped moving. Using detergent and softener Note: When using detergent, softener, starch, fabric dye, bleach or limescale remover, read the manufacturer s instructions on the package carefully and follow the suggested dosage values. Use a measuring cup if available. The detergent drawer of your washing machine consists of three different compartments: I: Pre-detergent or washing powder II: Main detergent (washing powder or liquid) Note: If using powder, swing the liquid gate out of the way and lock to the side of the compartment, to allow powder to dispense clearly. :Fabric softener Each of these laundry additives are dispensed automatically at the relevant time during the washing Programme. Do not close the drawer too fast after putting in the laundry additives as this may cause the additives be dispensed early, creating unsatisfactory washing results and fabric damage. Pull out the drawer. Add pre-detergent or washing powder into compartment I (when necessary). Add the detergent into compartment II (either powder or liquid detergent). Add fabric softener into compartment (when necessary). 13
14 Tips for efficient washing Clothes Light colours and whites (Recommended temperature range based on soiling level: 40-90ºC) Colours Dark colours Delicates/Woolens/ Silks (Recommended temperature range based on soiling level: cold-40ºc) (Recommended temperature range based on soiling level: cold-40ºc) (Recommended temperature range based on soiling level: cold-30ºc) Soiling Level Heavily Soiled (difficult stains such as grass, coffee, fruits and blood.) Normally Soiled (For example, stains caused by body on collars and cuffs) It may be necessary to pre-treat the stains or perform prewash. Powder and liquid detergents recommended for whites can be used at dosages recommended for heavily soiled clothes. It is recommended to use powder detergents to clean clay and soil stains and the stains that are sensitive to bleaches. Powder and liquid detergents recommended for whites can be used at dosages recommended for normally soiled clothes. Powder and liquid detergents recommended for colours can be used at dosages recommended for heavily soiled clothes. It is recommended to use powder detergents to clean clay and soil stains and the stains that are sensitive to bleaches. Use detergents without bleach. Powder and liquid detergents recommended for colours can be used at dosages recommended for normally soiled clothes. Use detergents without bleach. Liquid detergents suitable for colours and dark colours can be used at dosages recommended for heavily soiled clothes. Liquid detergents suitable for colours and dark colours can be used at dosages recommended for normally soiled clothes. Prefer liquid detergents produced for delicate clothes. Woolen and silk clothes must be washed with special woolen detergents. Prefer liquid detergents produced for delicate clothes. Woolen and silk clothes must be washed with special woolen detergents. Lightly Soiled (No visible stains exist.) Powder and liquid detergents recommended for whites can be used at dosages recommended for lightly soiled clothes. Powder and liquid detergents recommended for colours can be used at dosages recommended for lightly soiled clothes. Use detergents without bleach. Liquid detergents suitable for colours and dark colours can be used at dosages recommended for lightly soiled clothes. Prefer liquid detergents produced for delicate clothes. Woolen and silk clothes must be washed with special woolen detergents. 14

15 s s
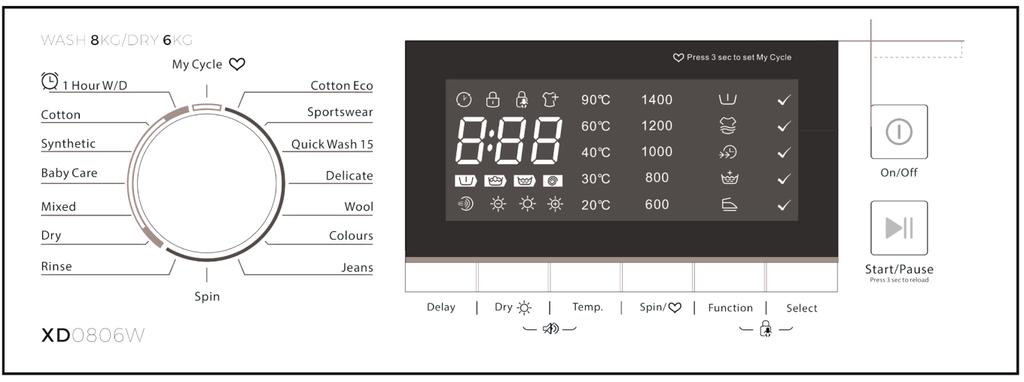
16 Preparing the appliance Make sure that the hoses are connected tightly. Plug in your machine. Turn the tap on completely. Place the laundry in the machine. Add detergent and fabric softener. Program selection Select the program suitable for the type, quantity and soiling degree of the laundry in accordance with the garment tag, Program and Consumption Table and the temperature table below. 90 C 60 C 40 C- 30 C Cold Heavily soiled white cottons and linens. (coffee table covers, tableclothes, towels, bed sheets, etc.) Normally soiled, coloured, fade proof linens, cottons or synthetic clothes (shirt, nightgown, pajamas, etc.) and lightly soiled white linens (underwear, etc.) Blended laundry including delicate textile (veil curtains, etc.), synthetics and woolens. Programs in the orange section of the dial are compatible with the automatic drying cycles. Please see the Program and Consumption Table for details on which programs are compatible. To use appliance as a washing machine Step One: Select the desired program with the Program Selection dial. Step Two: Check default temperature of selected program. You can reduce temperature if required by pressing the Temp. button Step Three: Check the default Speed of the selected program. You can reduce the speed if required by pressing the Speed button. Step Four: Press the Start/Pause button to start the wash program. To use appliance as a tumble dryer Step One: Select Dry program with the Program Selection dial. Step Two: Press the Dry button repeatedly to select the required dry level. Step Three: Press the Start/Pause button to start the dry program. To use appliance as a washer dryer Step One: Select the desired program with the Program Selection dial. Step Two: Check default temperature of selected program. You can reduce temperature if required by pressing the Temp. button Step Three: Check the default Speed of the selected program. You can reduce the speed if required by pressing the Speed button. Step Four: Press the Dry button repeatedly to select the required dry level. Step Five: Press the Start/Pause button to start the wash and dry program. Note: Programs are limited with the highest spin speed appropriate for that particular type of fabric Note: When selecting a program, always consider the type of fabric, colour and degree of soiling and permissible water temperature. Note: Always select the lowest required temperature. Higher temperature means higher power consumption. 16
 on a cold temperature.")

17 Main programs Depending on the type of fabric, use the following main programs. Cotton ECO Use this program, which is much more sensitive to environment and natural resources, to wash your lightly soiled and unstained cotton laundry (max. 2 kg) on a cold temperature. Sportswear Use this program to wash textiles made of microfibers. This program is designed to remove dirt whilst optimally preserving the technical features of the garments. Quick Wash 15 Use this program to wash a small amount of lightly soiled cotton clothes in 15 minutes. Delicates Use this program to wash your delicate clothes. It washes laundry with a very gentle washing action so as not to damage clothes. Wool Use this program to wash your woollen clothes and garments that bear not machine- washable tags and for which hand wash is recommended. It washes laundry with a very gentle washing action and low spin cycle so not to damage clothes. Note: Use appropriate detergents for woollens. Colours Use this program when washing brightly coloured fabrics. This program is designed to protect the colours and maintain their vibrancy over time. Jeans This cycle is designed specifically for the washing of jeans and other articles made from denim. Spin Use this program if you wish to spin the laundry, if any water is held within the drum, the machine will automatically drain before spinning. Rinse Use this program if you wish to rinse your laundry, after the rinse cycle is complete, the spin cycle will automatically run. Dry This function is for the drying of clothes. The drying time will be dependent on the load size and type of fabrics within the load. Press the Dry button continuously to choose the dry level: Extra Dry: For larger items such as towels, bathrobes or bulkier loads, this function will lengthen the drying time. Normal Dry: The standard drying procedure, the drying time is dependent on the load size and fabrics in the load. Gentle Dry: This function does not fully dry the clothes and has a short time duration. Air Dry: Dries the clothes without heat, this function is useful for removing odours from garments. 17
18 Mixed Use this program to wash your cotton and synthetic clothes together without sorting them. Baby Care Use this program to wash baby laundry, and the laundry that belongs to allergic persons. Longer heating time and an additional rinsing step provide a higher level of hygiene Synthetics Use this program to wash your synthetic clothes (shirts, blouses, synthetic/cotton blends, etc.). It washes with a gentle action and has a shorter washing cycle compared to the Cottons program. For curtains and veils/tulle, use the Synthetics 40 C program with prewash function selected. As their meshed texture causes excessive foaming, wash the veils/tulle by putting little amount of detergent into the main wash compartment. Do not put detergent in the prewash compartment. Cotton Use this program for your cotton laundry (such as bed sheets, duvet and pillowcase sets, towels, bathrobes, underwear, etc.). Your laundry will be washed with vigorous washing action for a longer washing cycle. 1 Hour W/D For small synthetic garments or shirts, no larger than 1 kg. This cycle is for washing and drying a couple of items very quickly the duration of the program is 1 hour. Note: Large items such as jeans or towels are not suitable for this cycle. They will increase the time duration of the program and affect the moisture content of the load. My Cycle Create your own wash cycle. Press and hold Spin/ Note: The default My Cycle program is cotton. button for 3 seconds to set My Cycle program. Additional Functions Time Display Remaining time to complete the program appears on the control panel display while the program is running. Note: Program time may differ from the values in the Program and Consumption Table depending on the water pressure, water hardness and temperature, ambient temperature, amount and the type of laundry, auxiliary functions selected and the changes at the mains voltage. Delay With the Delayed Start function the start-up of the program may be delayed up to 24 hours. How to set the delay function: Select desired program. Press the Delay button to choose the desired time delay Press Start/Pause button to commence the delay operation. How to cancel the delay function: If you want to cancel the delay function prior to the start of the wash cycle, press the delay button until 0 H is showing on the display panel. If the program has already started, press the On/Off button. Note: If there is any break in the power supply while the machine is operating (i.e. Power cut or tripped switch) a special memory stores the selected program and when the power is reinstated, the machine will resume from where it has stopped. 18
19 Loading door lock There is a locking system on the loading door of the washing machine that prevents opening the door in cases when the water level is unsuitable. The Door Locked symbol appears on the control panel when the loading door is locked. Do not force to open the loading door in this stage. This symbol will disappear when the program is complete and the door is ready to open. Child Lock Use the Child Lock function to prevent children from tampering with the machine. Thus you can avoid any changes in a running program. Note: You can switch the machine on and off by pressing the On/Off button when the Child Lock is active. When you switch on the machine again, program will resume from where it has stopped. How to set the Child Lock: Press and hold Function button and Select button for 3 seconds after program has been started. The buzzer will beep to indicate that Child Lock has been activated Note: All functions apart from On/Off are now locked How to Cancel Child Lock: Press and hold Function button and Select button for 3 seconds The buzzer will beep to indicate that Child Lock has been deactivated Note: Child Lock will remain set even after the program has finished. Note: If there is any break in the power supply (i.e. Power cut or tripped switch) or if the appliance is switched off at the mains whilst child lock is activated. When the power is restored, the child lock will no longer be activated. Reload When the program has started, the laundry can be reloaded or taken out as required. Press and hold the Start/Pause button for 3 seconds Wait until the drum has stopped its rotation and the door is unlocked Remove clothes from the drum and reload as required Close the door again fully and press the Start/Pause button Note: Do not use the reload function when the water level is above the edge of the inner tub, or the program is set to the highest temperature. Note: The door will only open to allow reload if the water is below a safe door opening level, or the wash temperature is suitable for the user. Temperature Selection Whenever a program is selected, the maximum temperature for the selected program appears on the temperature indicator. To decrease the temperature, press the Temperature Adjustment button. Temperature decreases with increments of 10 until cold wash option appears on the display. Speed Wash Use this function to decrease the washing time of the cycle for lightly soiled garments. Suitable for a couple of small items. This is not recommended for heavily soiled clothing. Pre Wash Select Pre Wash for heavily soiled laundry. Not using the Pre Wash will save energy, water, detergent and time. 19
20 Extra Wash Use this function for heavily soiled clothes; it will increase the washing time and the intensity of the wash. Not using this function will save energy, water, detergent and time. Extra Rinse This function enables the machine to perform another rinse cycle in addition to the one already made after the main wash. Thus, the risk for sensitive skins (babies, allergic skins, etc.) to be effected by the minimal detergent remnants on the laundry can be reduced. Anti-Crease This function can be used to reduce the wrinkles of the garments. The machine will tumble intermittently after the cycle has ended, to prevent wrinkles and creases forming in clothes. Spin Speed Selection Whenever a program is selected, the recommended spin speed of the selected program is displayed on the spin speed indicator. To decrease the spin speed, press the Spin Adjustment button. Spin speed decreases gradually. Changing the speed and temperature settings of a program Depending on the step the program has reached, you may cancel or activate the additional auxiliary functions; Pre Wash or Extra Rinse. You may also change the speed and temperature settings. Note: The Start/Pause button must be pressed in order to cancel or add functions. Functions may not be cancelled if they have already begun. Cancelling the program Press the Start/Pause button Press the On/Off button to turn appliance off Press the On/Off button to turn appliance back on again Note: If you want to open the loading door after you have cancelled the program but it is not possible to open the loading door since the water level in the machine is above the loading door opening, then turn the Program Selection dial to Drain program and discharge the water in the machine. End Sound Signal The machine will beep to indicate End of program to alert you that your washing is now ready to be unloaded from the machine. How to deactivate the End Sound Signal: Press and hold both the Dry button and Temp. button for 3 seconds The buzzer will beep to indicate that End sound signal has been deactivated How to activate the End Sound Signal: Press and hold both the Dry and Temp. button for 3 seconds The buzzer will beep to indicate that End sound signal has been reactivated Excess Foam Removal - Auto Function This will occur when there is excessive detergent detected in the drum, which could affect the wash and rinse cycles. This procedure will automatically check foam content and will remove any excessive foam by performing addition rinse cycle. Note: This may result in slightly longer program duration time. 20
21 Load Balancing System - Auto Function Before every spin cycle, to avoid excessive vibrations before every spin and to distribute the load in a uniform manner, the drum rotates continuously at a speed that is slightly greater than the washing rotation speed. If, after several attempts, the load is not balanced correctly, the machine spins at a reduced spin speed. if the load is excessively unbalanced, the appliance performs the distribution process instead of spinning. To encourage improved load distribution and balance, we recommend small and large garments are mixed in the load. 21
22 PROGRAM AND CONSUMPTION TABLE Detergent Compartment Program Variable Temp C Max Load (kg) Water Consumption (l) Energy Consumption (kwh) Variable Speed (rpm) Variable Time (H) Compartment I Compartment II Softener Compartment Delay Extra Rinse Pre Wash Speed Wash Extra Wash Anti-Crease Cotton ECO 40/ /600/800/ 1000/1200/1400 4:38/4:52 Sportswear Cold/20/ 30/ /600/800/ 1000/1200/1400 0:44/0:45/0:45/ 0:45 Quick Wash 15 Cold/20/ 30/ /600/800 0:15/0:19/0:20/ 0:25 Delicates Cold/20/ /600 0:48/0:49/0:50 Wool Cold/20/ 30/ /600/800 0:59/0:59/1:00/ 1:07 Colours Cold/20/ /600/800/ 1000/1200 1:10/1:11/1:14 Jeans Cold/20/ 30/40/ 60/ /600/800/ 1000/1200 1:30/1:32/1:35/ 1:40/1:45/2:05 Spin -- N/A 0 50 Rinse Dry /600/800/ 1000/1200/1400 0/600/800/ 1000/1200/1400 0/600/800/ 1000/1200/1400 0:12 0:20 3:08 Mixed Cold/20/ 30/40/ 60/ /600/800/ 1000/1200/1400 1:11/1:11/1:12/ 1:13/1:16/1:26 Baby Care Cold/20/ 30/ /600/800/ 1000/1200 1:18/1:19/1:20/ 1:27 Synthetics Cold/20/ 30/40/ /600/800/ 1000/1200 1:21/1:21/1:23/ 1:40/1:42 Cotton Cold/20/ 30/40/ 60/ /600/800/ 1000/1200/1400 2:20/2:20/2:30/ 2:40/2:45/2:50 1 Hour W/D :59 The energy class is B Energy test program: Cotton 60 Speed: the highest speed Other as the default Half load 8Kg machine: 4Kg. Standard 60 C cotton program is the standard washing program and Dry Only is the standard drying program, to which the information in the label and the fiche relates, and they are suitable to clean normally soiled cotton laundry and that they are the most efficient programmes in terms of combined energy and water consumptions for washing that type of cotton laundry, that the actual water temperature may differ from the declared cycle temperature. Key Optional Compulsory Program compatible with auto dry function 22
23 CLEANING AND MAINTENANCE Cleaning the appliance at regular intervals can decrease the amount of common problems, as well as extending the service life of the machine. Cleaning the detergent drawer How to remove powder residue, which has built up in the detergent drawer Open the detergent drawer and press down on the arrow located on the Fabric softener compartment, to remove the drawer, pull towards you firmly. Wash the drawer and the siphon with plenty of lukewarm water in a washbasin. Wear protective gloves or use an appropriate brush to avoid touching the residues in the drawer when cleaning. Clean the inside of the hole where the drawer sits thoroughly and remove any powder build up. Replace the drawer into its housing after cleaning, checking that the siphon is in its original location. Note: If more than a normal amount of softener and liquid detergent mixture starts to remain in the softener compartment, the siphon must be cleaned. Cleaning the loading door and drum Residues of softener, detergent and dirt may accumulate in your machine over time and may cause unpleasant odours and washing complaints. To avoid this you should run the following wash sequence to clean the drum and door: Select Cottons Intensive wash program at 90 C and select Extra Rinse function as well. Add max. 100 g of anti-limescale powder into detergent compartment II. If the anti-limescale is in tablet form, put only one tablet into compartment II Dry the inside of the bellow with a clean piece of cloth after the program has come to an end. Note: It is recommended to repeat drum-cleaning process every 2 months Note: Only use anti-limescale suitable for washing machines. After every washing make sure that no foreign objects are left in the drum. If the holes on the bellow shown in the figure are blocked, clean the holes using a toothpick. Note: Foreign metal substances will cause rust stains in the drum. Clean the stains on the drum surface by using cleaning agents for stainless steel. WARNING: Never use steel wool or wire wool. Cleaning the body and control panel Wipe the body of the machine with soapy water or non-corrosive mild gel detergents as necessary, and dry with a soft cloth. Use only a soft and damp cloth to clean the control panel. 23
24 Cleaning the water intake filters There is a filter at the end of each water intake valve at the rear of the machine and also at the end of each water intake hose where they are connected to the tap. These filters prevent foreign substances and dirt in the water to enter the washing machine. Filters should be cleaned regularly as they do get dirty. Unplug the machine to cut off the supply power. Close the taps. Remove the nuts of the water intake hoses to access the filters on the water intake valves. Clean them with an appropriate brush. If the filters are too dirty, take them out by means of pliers and clean them. Take out the filters on the flat ends of the water intake hose together with the gaskets and clean thoroughly under running water. Replace the gaskets and filters carefully in their places and tighten the hose nuts by hand. Draining remaining water and cleaning the pump filter The filter system in your machine prevents solid items such as buttons, coins and fabric fibres clogging the pump impeller during discharge of washing water. Thus, the water will be discharged without any problem and the service life of the pump will extend. If the machine fails to drain water, the pump filter is clogged. It is recommended that you clean the Filter every 3 months or whenever it is clogged. Water must be drained off first to clean the pump filter. Note: It is also recommended to run a rinse program after a few drying cycles, in order to flush away any fabric fibres from the drum. In addition, prior to transporting the machine (e.g., when moving to another house) and in case of freezing of the water, water may have to be drained completely. WARNING: Foreign substances left in the pump filter may damage your machine or may cause a noise problem. WARNING: Temperature of the water inside the machine may rise up to 90 C. To avoid burning risk, filter must only be cleaned after the water in the machine cools down. In order to clean the dirty filter and discharge the water: Unplug the machine to cut off the supply power. Remove the cover lid at the bottom of the washing machine. Place a large bowl in front of the filter to catch the water. Slowly turn the filter anti-clockwise until water starts to flow. Fill the flowing water into the bowl you have placed in front of the filter. Always keep a piece of cloth handy to absorb any spilled water. When the water inside the machine has finished draining, remove the filter completely. Clean any residues inside the filter as well as fibres, if any, around the pump impeller region. Re-install the filter and close the lid tightly. 24
25 TROUBLESHOOTING If you are having problems with your appliance, please use our troubleshooting guide below. If you are unable to resolve the issue using this guide please ring our Customer Service Department on Please have the model code and purchase information available. Problem Reason Solution Machine does not work. There is water in the new machine. Machine does not fill with water. Machine does not drain water. Machine vibrates or makes noise. Water leakage No Water can be seen in the machine during washing Mains plug is not plugged in or is loose Fuse has blown or is defective. Socket is defective. Water inlet tap closed. Power button has not been pressed. Start/Pause button has been pressed Delay feature has been activated. Some water might have remained in the appliance due to the quality control processes in the production. Tap is turned off. Water inlet hose is bent. Water inlet filter is clogged. Loading door may be open. Water drain hose might be clogged or twisted. Pump filter is clogged. Fabric fibres have built up in the pump filter after a few drying cycles Machine might be standing unbalanced. A hard substance might have entered into the pump filter. Transportation safety bolts are not removed. Laundry quantity in the machine might be too little. Machine might be overloaded with laundry. Machine might be leaning on a rigid item. Inlet hose leaking. Drain hose leaking. The water level is not visible from outside of the washing machine. Insert mains plug. Check fuse, replace if necessary. Electrical Mains malfunctions must be carried out by a qualified electrician Open water inlet tap. Press the Power button. Check that the appliance hasn t been paused Check to see if the delay feature has been activated. This is completely normal and is the result of tests performed at the factory Turn on the taps. Flatten the hose. Clean the filter. Close the door. Clean or flatten the hose. Clean the pump filter. Run a rinse program on the appliance to flush out any fabric fibres from the drum and pump filter Adjust the feet to level the machine. Clean the pump filter. Remove the transportation safety bolts. Add more laundry to the machine. Take out some of the laundry from the machine or distribute the load by hand to balance it homogenously in the machine. Make sure that the machine is not leaning on anything. Clean filter and tighten the inlet hose. Check that the drain hose is not blocked. Clean filter and tighten the drain hose, if problem persists contact a qualified plumber. This is not a failure. 25
26 TROUBLESHOOTING (CONTINUED) Problem Reason Solution Loading door cannot be opened. Machine is not washing properly. Washing takes longer time than specified in the manual. Machine does not switch to spinning step. Buttons on the machine are not working. The machine fills with water whilst draining. Machine is not drying properly Door lock is activated because of the water level in the machine. Machine is heating up the water or it is at the spinning cycle. Drum has been overloaded. Incorrect programme has been selected. Detergent is left on garments. Water pressure is low. Number of rinses and/or amount of rinse water might have increased. Excessive foam might have occurred and automatic foam absorption system might have been activated due to too much detergent usage. There might be unbalanced load in the machine. The machine will not spin if water is not drained completely. Excessive foam might have occurred and automatic foam absorption system might have been activated due to too much detergent usage. Child lock has been activated. Check the drain hose height. Drum has been overloaded. Incorrect programme has been selected. Fabric fibres have built up in the appliance after a few drying cycles Drain the water by running the Spin program. Wait until the program completes. Remove some of the garments, always check pockets etc. before washing. Check that the correct programme has been selected. Too much detergent was added or drum was overloaded with garments. Machine waits until it has taken in adequate amount of water to prevent poor washing quality due to the decreased amount of water. Therefore, the washing time extends. Machine increases the amount of rinse water when good rinsing is needed and adds an extra rinsing step if necessary. Use recommended amount of detergent. Automatic unbalanced load detection system might be activated due to the unbalanced distribution of the laundry in the drum. Check the filter and the draining hose. Use recommended amount of detergent. Deactivate child lock Ensure drain hose is between 60cm 100cm from the floor. Remove some of the garments, always check pockets etc. before washing. Thicker fabrics will take much longer to dry - refer to the program guide for information on load sizes and fabric types. Check that the correct programme has been selected. Run a rinse program on the appliance to flush out any fabric fibres from the drum 26

27 ERROR DISPLAY CODES Display Error Code Fault Reason Solution E30 E10 E21 E12 Door lock problem Water injecting problem while washing Drain problem while washing Water overflow Door is not closed properly. Restart after the door is closed. Please call Statesman Customer Service if error persists Tap is not opened or water flows too slowly. Inlet valve filter is blocked. Inlet pipe is twisted. If water is not supplied Open the tap or wait till the water supply becomes normal. Check inlet valve filter. Straighten the water pipe Check the other taps in the room. Please call Statesman Customer Service if error persists Outlet hose is blocked or twisted Drain pump is blocked Wash and straighten outlet hose. Wash drain pump filter Please call Statesman Customer Service if error persists Water has not been drained Select Spin cycle, then restart the machine. Please call Statesman Customer Service if error persists Please call Statesman Customer Service if you encounter any other problems DISPOSAL The European Directive 2012/19/EU on Waste Electrical and Electronic Equipment (WEEE), requires that old household electrical appliances must not be disposed of in normal unsorted municipal waste. Old appliances must be collected separately in order to optimise the recovery and recycling of the materials they contain and reduce the impact on human health and the environment. The crossed out wheeled bin symbol on the product reminds you of your obligation, that when you dispose of the appliance it must be separately collected. Consumers should contact their local authority or retailer for information concerning the correct disposal of their old appliance. 27
XR510W 5KG 1000RPM WASHING MACHINE XR612W 6KG 1200RPM WASHING MACHINE. Instruction Manual
 XR510W 5KG 1000RPM WASHING MACHINE XR612W 6KG 1200RPM WASHING MACHINE Instruction Manual Serial number: Please read these instructions carefully before use and retain for future reference. Before switching
Washing Machine User manual
 Washing Machine User manual LWI842 Please read this user manual first! Dear Customer, Thank you for prefering a Blomberg product. We hope that you get the best results from your product which has been
Washing Machine. User s Manual WMB M+ Document Number / (14:12)
") Washing Machine User s Manual WMB 71001 M+ Document Number 2820524209 / 21-08-14.(14:12) This product was manufactured using the latest technology in environmentally friendly conditions. 1 Important instructions
Washing Machine User s Manual WMB 71001 M+ Document Number 2820524209 / 21-08-14.(14:12) This product was manufactured using the latest technology in environmentally friendly conditions. 1 Important instructions
Washing Machine User's Manual
 WI1573 Washing Machine User's Manual Document Number 2820524087/ 22-05-14.(17:28) Please read this user manual first! Dear Customer, Thank you for prefering an Beko product. We hope that you get the best
Washing Machine User's Manual
 WMP 511W WMP 511S Washing Machine User's Manual Document Number 2820523557 / 05-06-13.(10:03) 1 Important instructions for safety and environment This section contains safety instructions that will help
Washing Machine User Manual
 Washing Machine User Manual EV 7102 EN Document Number= 2820524450 / 14-10-15.(16:19) 1 Important instructions for safety and environment This section contains safety instructions that will help protect
Washer. User Manual. Model No.: FW816B615. *Before operating the appliance, please read this manual and all the safety
 Washer User Manual Model No.: FW816B615 *Before operating the appliance, please read this manual and all the safety instructions thoroughly and retain it for future reference. CONTENT PAGE SAFETY INSTRUCTION
Washing Machine WF 7141 N
 Washing Machine WF 7141 N 1 Warnings General Safety Never place your machine on a carpet covered floor. Otherwise, lack of airflow from below of your machine may cause electrical parts to overheat. This
Automatic washing machine WM 6111 W
 Automatic washing machine WM 6111 W Please read this user manual first! Dear Customer, We hope that you get the best results from the product which has been manufactured in state-of-the-art plants and
Washing Machine WNF 8441 AE20. User s Manual
 Washing Machine WNF 8441 AE20 User s Manual Document Number 2820523538/ 04-06-13.(14:43) Please read this user manual first! Dear Customer, Thank you for prefering an Blomberg product. We hope that you
Washing Machine LWF27441W. User s Manual. Document Number / (10:04)
") Washing Machine LWF27441W User s Manual Document Number 2820524634/ 04-05-15.(10:04) Please read this user manual first! Dear Customer, Thank you for preferring a Blomberg product. We hope that you get
Washing Machine LWF27441W User s Manual Document Number 2820524634/ 04-05-15.(10:04) Please read this user manual first! Dear Customer, Thank you for preferring a Blomberg product. We hope that you get
Washing Machine WNF User Manual
 Washing Machine WNF 6221 User Manual Please read this user manual first! Dear Customer, We hope that you get the best results from the product which has been manufactured in state-of-the-art plants and
DAW 376. Document Number _EN / (16:38)
") DAW 376 Document Number 2820525179_EN / 03-12-15.(16:38) Please read this user manual first! Dear Customer, Thank you for choosing a Defy washing machine. We hope that you get the best results from your
DAW 376 Document Number 2820525179_EN / 03-12-15.(16:38) Please read this user manual first! Dear Customer, Thank you for choosing a Defy washing machine. We hope that you get the best results from your
Washing Machine User Manual
 Washing Machine User Manual WMB 81243LW EN Document Number= 2820524659/ 30-11-15.(14:26) Please read this user manual first! Dear Customer, Thank you for prefering a Beko product. We hope that you get
The user manual will help you use your machine in a fast and safe way.
 WMC126W Please read this user manual first! Dear Customer, We hope that you get the best results from the product which has been manufactured in state-of-the-art plants and passed through a strict quality
Integrated Washing Machine
 Integrated Washing Machine HJA8501 HJA8511 User & installation Guide Built-In Appliances Dear Customer, Congratulations on your choice of washing machine which has been designed to give you excellent service.
Washing Machine User Manual
 Washing Machine User Manual WM 62125W EN Document Number= 2820524686 / 30-11-15.(16:26) This product was manufactured using the latest technology in environmentally friendly conditions. 1 Important instructions
Washing Machine User's Manual
 WMX 73120 B Washing Machine User's Manual Numéro de document 2820524933/ 28-04-14.(21:00) Please read this user manual first! Dear Customer, Thank you for prefering a Beko product. We hope that you get
4 Selecting a Program and Operating Your Machine
 4 Selecting a Program and Operating Your Machine Control panel Figure 1 1 2 3 4 5 6 7 8 1 - Spin Speed Adjustment button 2 - Display 3 - Temperature Adjustment button 4 - Programme Selection knob 5 - On
Washing Machine. Users Manual
 DAW371 DAW372 Washing Machine Users Manual Record in the space below the listed information for future reference. The serial number is on the serial label located on the inside of the door of the washing
Washing Machine User Manual
 Washing Machine User Manual WTG820M1W EN Document Number= 2302061184_EN / 02-05-17.(12:06) This product was manufactured using the latest technology in environmentally friendly conditions. 1 General safety
Washing Machine PW3608N PW3610N
 Washing Machine PW3608N PW3610N Please read the manual before using the product and please take good care of it. 1Warnings General Safety Never place your machine on a carpet covered floor. Otherwise,
User manual. Washing machine ZWQ 6120 ZWQ 6100
 EN User manual Washing machine ZWQ 6120 ZWQ 6100 Product description 1 1. The control panel 2. Lid handle 3. Adjustable levelling feet 2 3 The control panel 1 2 3 4 5 6 1. Programme selector 2. Pushbuttons
washing machine contents
 washing machine contents WARNINGS SPECIFICATIONS INSTALLATION AND ASSEMBLY USING THE APPLIANCE. PRACTICAL TIPS MAINTENANCE AND CLEANING SAFETY AND TROUBLESHOOTING ENVIRONMENTAL WARNINGS 4 5 6 10 20 22
Washing Machine User Manual
 Washing Machine User Manual WY 74242W EN Document Number= 2820524664/ 01-12-15.(12:29) Please read this user manual first! Dear Customer, Thank you for prefering a Beko product. We hope that you get the
GB User manual. Washing machine ZWQ 5130
 GB User manual 2 Washing machine ZWQ 5100 ZWQ 5101 ZWQ 5130 Product description 1 1. The control panel 2. Lid handle 3. Adjustable levelling feet 2 3 The control panel 1 2 3 4 5 6 1. Programme selector
Automatic washing machine WMB LR
 Automatic washing machine WMB 91442 LR Please read this user manual first! Dear Customer, We hope that you get the best results from the product which has been manufactured in state-of-the-art plants and
User manual. Washing Machine ZWP 581 ZWQ 5102 ZWQ 5103 ZWQ 5122
 EN User manual Washing Machine ZWP 58 ZWQ 502 ZWQ 503 ZWQ 522 Contents Safety information 2 Product description _ 3 How to run a wash cycle? 4 Daily use _ 5 Washing programmes 6 Care and cleaning 8 Safety
Automatic washing machine WM 6143 S WM 6133 W WM 6143 W WM 6133 S
 Automatic washing machine WM 6143 S WM 6133 W WM 6143 W WM 6133 S Please read this user manual first! Dear Customer, We hope that you get the best results from the product which has been manufactured in
GETTING STARTED? EASY.
 User Manual GETTING STARTED? EASY. ZWF 71440W EN User Manual Washing Machine SAFETY INFORMATION Before the installation and use of the appliance, carefully read the supplied instructions. The manufacturer
The user manual will help you use your machine in a fast and safe way.
 WASH 512W Please read this user manual first! Dear Customer, We hope that you get the best results from the product which has been manufactured in state-of-the-art plants and passed through a strict quality
User Manual. Tumble Dryer ZDC8202P
 EN User Manual Tumble Dryer ZDC80P Contents Safety information Safety instructions 3 Product Description 4 Control Panel 5 Programme table 5 Options 6 Settings 7 Before First Use 8 Daily Use 8 Hints and
CONTENTS QUICK REFERENCE GUIDE INSTRUCTIONS FOR USE PROGRAMME CHART BOOKLET
 CONTENTS QUICK REFERENCE GUIDE PROGRAMME CHART PREPARING THE LAUNDRY SELECTING A PROGRAMME AND OPTIONS STARTING AND COMPLETING A PROGRAMME CHANGING A PROGRAMME INTERRUPTING A PROGRAMME DAILY MAINTENANCE
Washing Machine User Manual WJ842443W
 Washing Machine User Manual WJ842443W EN Document Number= 2820526964/ 26-07-18.(15:15) Please read these instructions first before using your appliance Dear Customer, Thank you for choosing a Beko appliance.
Automatic washing machine WMP652W
 Automatic washing machine WMP652W Please read this user manual first! Dear Customer, We hope that you get the best results from the product which has been manufactured in state-of-the-art plants and passed
Washing Machine WMI 7462 W20. User Manual
 Washing Machine WMI 7462 W20 User Manual Please read this user manual first! Dear Customer, We hope that you get the best results from the product which has been manufactured in state-of-the-art plants
MACHINE OPERATION. Additional information (including troubleshooting and service) can be found in the individual chapters of the Instructions for Use.
 can be found in the individual chapters of the Instructions for Use.") MACHINE OPERATION Additional information (including troubleshooting and service) can be found in the individual chapters of the Instructions for Use. Sort laundry according to care symbols Do not tumble
MACHINE OPERATION Additional information (including troubleshooting and service) can be found in the individual chapters of the Instructions for Use. Sort laundry according to care symbols Do not tumble
User manual. Washing machine ZWQ 590 SO ZWQ 585 SO ZWQ 580 SO ZWQ 575 SO ZWQ 570 SO
 EN User manual Washing machine ZWQ 590 SO ZWQ 585 SO ZWQ 580 SO ZWQ 575 SO ZWQ 570 SO Product description 1 The control panel 2 Lid handle 3 Filter access cover 4 Adjustable levelling feet Control panel
Washing Machine User Manual WTG620M2W
 Washing Machine User Manual WTG620M2W EN Document Number= 2820525985_EN/ 23-05-17.(18:21) Please read this user manual first! Dear Customer, Thank you for prefering a Beko product. We hope that you get
Washing Machine User Manual
 Washing Machine User Manual WM 94145W EN Document Number= 2820524739/30-11-15.(17:17) Please read this user manual first! Dear ustomer, Thank you for prefering an Beko product. We hope that you get the
MACHINE OPERATION. Additional information (including troubleshooting and service) can be found in the individual chapters of the Instructions for use.
 can be found in the individual chapters of the Instructions for use.") MACHINE OPERATION Additional information (including troubleshooting and service) can be found in the individual chapters of the Instructions for use. Sort laundry according to care symbols Do not tumble
MACHINE OPERATION Additional information (including troubleshooting and service) can be found in the individual chapters of the Instructions for use. Sort laundry according to care symbols Do not tumble
User Manual. Washing Machine ZWF 91483WH ZWF 91483WR
 EN User Manual Washing Machine ZWF 91483WH ZWF 91483WR Contents Safety information 2 Safety instructions 3 Product description 4 Control panel 5 Programme Chart 6 Consumption values 7 Options 8 Settings
MACHINE OPERATION. Additional information (including troubleshooting and service) can be found in the individual chapters of the Instructions for Use.
 can be found in the individual chapters of the Instructions for Use.") MACHINE OPERATION Additional information (including troubleshooting and service) can be found in the individual chapters of the Instructions for Use. Sort laundry according to care symbols Do not tumble
MACHINE OPERATION Additional information (including troubleshooting and service) can be found in the individual chapters of the Instructions for Use. Sort laundry according to care symbols Do not tumble
WASHER EXTRACTOR M XQG60-A508K
 WASHER EXTRACTOR 4160980M XQG60-A508K It is essential to read this manual carefully before it is installed and used for the first time. 9 12 14 15 Correct use Read and understand thoroughly these safety
MACHINE OPERATION. Additional information (including troubleshooting and service) can be found in the individual chapters of the Instructions for Use.
 can be found in the individual chapters of the Instructions for Use.") MACHINE OPERATION Additional information (including troubleshooting and service) can be found in the individual chapters of the Instructions for Use. Sort laundry according to care symbols Do not tumble
MACHINE OPERATION Additional information (including troubleshooting and service) can be found in the individual chapters of the Instructions for Use. Sort laundry according to care symbols Do not tumble
Automatic Fully Integrated Washing Machine WMI 61241
 Automatic Fully Integrated Washing Machine WMI 61241 Please read this manual first! Dear Customer, We hope that your product which has been manufactured in modern facilities and passed through a strict
Dear Customer, We wish that this product, manufactured at modern facilities with total quality notions, will deliver you the best performance.
 Dear Customer, We wish that this product, manufactured at modern facilities with total quality notions, will deliver you the best performance. In order to guarantee this, please read this instruction manual
Washing Machine User's Manual
 Washing Machine User's Manual 5063 FE 5064 FE Please read this user manual first! Dear Customer, We hope that you get the best results from the product which has been manufactured in state-of-the-art plants
Washing Machine User Manual WTG841B1W
 Washing Machine User Manual WTG841B1W EN Document Number= 2820525972_EN/ 22-05-17.(11:44) Please read this user manual first! Dear Customer, Thank you for prefering a Beko product. We hope that you get
Washing Machine BWL5
 Washing Machine BWL5 1 Important safety instructions This section contains safety instructions that will help protect from risk of personal injury or property damage. Failure to follow these instructions
MACHINE OPERATION. Additional information (including troubleshooting and service) can be found in the individual chapters of the Instructions for use.
 can be found in the individual chapters of the Instructions for use.") MACHINE OPERATION Additional information (including troubleshooting and service) can be found in the individual chapters of the Instructions for use. Sort laundry according to care symbols Do not tumble
MACHINE OPERATION Additional information (including troubleshooting and service) can be found in the individual chapters of the Instructions for use. Sort laundry according to care symbols Do not tumble
GETTING STARTED? EASY.
 User Manual GETTING STARTED? EASY. ZWF 81240W ZWF 81440W EN User Manual Washing Machine SAFETY INFORMATION Before the installation and use of the appliance, carefully read the supplied instructions. The
GETTING STARTED? EASY.
 User Manual GETTING STARTED? EASY. ZDH8333PZ EN User Manual Tumble Dryer SAFETY INFORMATION Before the installation and use of the appliance, carefully read the supplied instructions. The manufacturer
Washing Machine User Manual WIX765450
 Washing Machine User Manual WIX765450 EN Document Number= 2820526051_EN/ 29-07-17.(10:52) Please read this user manual first! Dear Customer, Thank you for prefering a Beko product. We hope that you get
Washing machine 5060 T 5080 T 5080 Ç 5100 Ç 5100 ÇS 5120 T
 Washing machine 5060 T 5080 T 5080 Ç 5100 Ç 5100 ÇS 5120 T Please read this manual first! Dear Customer, We hope that your product which has been manufactured in modern facilities and passed through a
Machine operation. Additional information (including troubleshooting and service) can be found in the individual sections of the Instructions For Use.
 can be found in the individual sections of the Instructions For Use.") Machine operation Additional information (including troubleshooting and service) can be found in the individual sections of the Instructions For Use. Sort laundry according to care symbols Do not tumble
Machine operation Additional information (including troubleshooting and service) can be found in the individual sections of the Instructions For Use. Sort laundry according to care symbols Do not tumble
MACHINE OPERATION. Additional information (including troubleshooting and service) can be found in the individual chapters of the Instructions for use.
 can be found in the individual chapters of the Instructions for use.") MACHINE OPERATION Additional information (including troubleshooting and service) can be found in the individual chapters of the Instructions for use. Sort laundry according to care symbols Do not tumble
MACHINE OPERATION Additional information (including troubleshooting and service) can be found in the individual chapters of the Instructions for use. Sort laundry according to care symbols Do not tumble
Washing Machine User Manual
 Washing Machine User Manual WTV 8634 XS0 EN Document Number= 2820525375_EN/05-03-16.(8:51) Dear Customer, Please read this user manual first! Thank you for preferring a Beko product. We hope that you get
Washing Machine User's Manual
 Washing Machine User's Manual 6104 HS 6084 H Please read this user manual first! Dear Customer, We hope that you get the best results from the product which has been manufactured in state-of-the-art plants
DAILY REFERENCE GUIDE
 DAILY REFERENCE GUIDE EN THANK YOU FOR BUYING A WHIRLPOOL PRODUCT. In order to receive comprehensive service and support, please register your appliance at www.whirlpool.eu/register Before using the appliance,
Automatic Fully Integrated Washing Machine WMI WMI 71441
 Automatic Fully Integrated Washing Machine WMI 71641 WMI 71441 Please read this user manual first! Dear Customer, We hope that you get the best results from the product which has been manufactured in state-of-the-art
User manual. Washing Machine ZWG 6148K
 EN User manual Washing Machine ZWG 6148K Contents Safety information 2 Safety instructions 3 Environment concerns 4 Product description _ 5 Control panel _ 6 Washing programmes 6 Consumption values _ 7
Washing Machine User s Manual WMY 7046 LB2
 Washing Machine User s Manual WMY 7046 LB2 Document Number 2820524400/ 25-12-14.(11:15) This product was manufactured using the latest technology in environmentally friendly conditions. 1 General safety
User manual. Washing Machine ZWG K
 EN User manual Washing Machine ZWG 71202 K Contents Safety information 2 Safety instructions 3 Environment concerns 4 Product description _ 5 Control panel _ 6 Washing programmes 7 Consumption values _
Washing Machine WF 8101-A
 Washing Machine WF 8101-A THE BEAUTY OF SIMPLICITY USER MANUAL 1 Important safety instructions This section contains safety instructions that will help protect from risk of personal injury or property
Washing Machine User Manual
 Washing Machine User Manual WMB 61222W EN Document Number=2820524665/01-12-15.(14:58) Please read this user manual first! Dear ustomer, Thank you for prefering an Beko product. We hope that you get the
WTL S WTL S. Washing Machine User s Manual
 WTL 10019 S WTL 11019 S Washing Machine User s Manual Please read this user manual first! Dear Customer, Thank you for prefering an Beko product. We hope that you get the best results from your product
10kg Washing Machine
 Instruction Manual 10kg Washing Machine L1014WM17 L1014WM17_IB.indd 1 26/07/2017 11:31 L1014WM17_IB.indd 2 26/07/2017 11:31 Contents Safety Warnings... 4 Unpacking... 6 Removing the Transit Bolts... 7
GETTING STARTED? EASY.
 User Manual GETTING STARTED? EASY. ZWD 71460 W ZWD 71463 W EN User Manual Washer Dryer SAFETY INFORMATION Before the installation and use of the appliance, carefully read the supplied instructions. The
Washing Machine User Manual
 Washing Machine User Manual WMI 71641 WMI 71441 EN Document Number= 2820521336/27-12-16.(12:05) Please read this user manual first! Dear ustomer, Thank you for prefering an Beko product. We hope that you
INSTRUCTION MANUAL 6KG WASHING MACHINE C610WM16. C610WM16_IB.indd 1 29/01/ :27
 INSTRUCTION MANUAL 6KG WASHING MACHINE C610WM16 C610WM16_IB.indd 1 29/01/2016 12:27 Contents Unpacking... 5 Installing Your Washing Machine... 6 Choosing the Right Location for Your Washing Machine...
Washing Machine User Manual
 Washing Machine User Manual WDA 91440W EN Document Number= 2820523469 / 24-08-15.(15:30) Please read this manual first! Dear Customer, Thank you for preferring a Beko product. We hope that you get the
Washing Machine User Manual
 Washing Machine User Manual WDA 105614 EN Document Number= 2820524451 / 14-09-15.(17:11) This product was manufactured using the latest technology in environmentally friendly conditions. 1 Important instructions
Instruction Manual. 6kg Washing Machine L612WM15/L612WMS15. L612WM15/S15_IB.indd 1 10/08/ :00
 Instruction Manual 6kg Washing Machine L612WM15/L612WMS15 L612WM15/S15_IB.indd 1 10/08/2015 13:00 Contents Safety Warnings... 3 Unpacking... 5 Moving and Installing... 6 Removing the Transit Bolts... 6
User Manual Washing Machine L FL
 EN User Manual Washing Machine L 62270 FL 2 www.aeg.com CONTENTS 1. SAFETY INFORMATION...3 2. SAFETY INSTRUCTIONS... 4 3. PRODUCT DESCRIPTION... 6 4. CONTROL PANEL...7 5. PROGRAMMES... 8 6. CONSUMPTION
Washing. Preparation. Contents
 Your washing machine Congratulations you have opted for a modern, high-quality domestic appliance manufactured by Bosch. The washing machine is distinguished by its economical water- and energy consumption.
Washing Machine User Manual WTB841R2W
 Washing Machine User Manual WTB841R2W EN Document Number= 2820525983_EN/ 24-07-17.(15:27) Please read this user manual first! Dear Customer, Thank you for prefering a Beko product. We hope that you get
Automatic washing machine WM5101W
 Automatic washing machine WM5101W Please read this manual first! Dear Customer, We hope that your product which has been manufactured in modern facilities and passed through a strict quality control procedure
Washing Machine User manual
 Washing Machine User manual LWF28442G 1 General safety instructions While there is still water inside This section includes security the product, never open the instructions which may help prevent loading
WASHING MACHINE INSTRUCTION MANUAL
 WM105V WM105VB WM105VS WASHING MACHINE INSTRUCTION MANUAL Please read this instruction manual carefully before you use this product CONTENTS SECTION 1: BEFORE USE Safety warnings Recommendations SECTION
Washing. Detergent drawer with compartments I, II, Drum. Control panel. Washing machine door. Service flap for detergent solution pump. Select Start.
 Your washing machine Congratulations You have opted for a modern, high-quality domestic appliance manufactured by Bosch. This washing machine is distinguished by its economical water and energy consumption.
Automatic washing machine WMB91242LC WMB91242LB
 Automatic washing machine WMB91242L WMB91242LB Please read this user manual first! Dear ustomer, We hope that you get the best results from the product which has been manufactured in state-of-the-art plants
It is essential to read this manual carefully before it is installed and used for the first time. EFL6KWH
 It is essential to read this manual carefully before it is installed and used for the first time. EFL6KWH This washing machine conforms to current safety requirements. Inappropriate use can, however, lead
GETTING STARTED? EASY.
 User Manual GETTING STARTED? EASY. ZWD 91683 NW EN User Manual Washer Dryer SAFETY INFORMATION Before the installation and use of the appliance, carefully read the supplied instructions. The manufacturer
WE 170 P. EN User Manual Washing Machine. CAUTION: Read the instructions before using the appliance. Original Instructions.
 WE 170 P EN User Manual Washing Machine CAUTION: Read the instructions before using the appliance. Original Instructions. 2 www.electrolux.com CONTENTS 1. SAFETY INFORMATION... 2 2. PRODUCT DESCRIPTION...
WTL 6019 P. Washing Machine User s Manual
 WTL 6019 P Washing Machine User s Manual Please read this user manual first! Dear Customer, Thank you for prefering an product. We hope that you get the best results from your product which has been manufactured
WASHING MACHINE INSTRUCTION MANUAL
 WM126V WM126VS WM 126VB WASHING MACHINE INSTRUCTION MANUAL Please read this instruction manual carefully before you use this product CONTENTS SECTION 1: BEFORE USE Safety warnings Recommendations SECTION
User Manual Washer Dryer L76680WD
 EN User Manual Washer Dryer L76680WD 2 www.aeg.com CONTENTS 1. SAFETY INFORMATION...3 2. SAFETY INSTRUCTIONS... 5 3. PRODUCT DESCRIPTION... 7 4. CONTROL PANEL...8 5. PROGRAMMES... 10 6. CONSUMPTION VALUES...14
GETTING STARTED? EASY.
 User Manual GETTING STARTED? EASY. ZWD 71460 NW EN User Manual Washer Dryer SAFETY INFORMATION Before the installation and use of the appliance, carefully read the supplied instructions. The manufacturer
Washing. Preparation. Washing. Contents
 Your washing machine Congratulations you have opted for a modern, high-quality domestic appliance manufactured by Bosch. The washing machine is distinguished by its economical water- and energy consumption.
Washer-Dryer User s Manual
 Washer-Dryer User s Manual WDA914401W EN Document Number= 2820524992 / 30-11-15.(16:53) Please read this manual first! Dear Customer, Thank you for preferring a Beko product. We hope that you get the best
User Manual Washer Dryer L WD
 EN User Manual Washer Dryer L 77695 WD 2 www.aeg.com CONTENTS 1. SAFETY INFORMATION...3 2. SAFETY INSTRUCTIONS... 5 3. PRODUCT DESCRIPTION... 7 4. CONTROL PANEL...8 5. PROGRAMMES... 10 6. CONSUMPTION VALUES...14
Washing Machine. User manual WTL W = 2 64
 Washing Machine User manual WTL 70019 W = 2 64 Please read this user manual first! Dear Customer, Thank you for prefering an product. We hope that you get the best results from your product which has been
WDA 8514 H. Washer-Dryer. User s Manual. Document Number / (10:38)
") WDA 8514 H Washer-Dryer User s Manual Document Number 2820523746 / 20-02-14.(10:38) Please read this manual first! Dear Customer, Thank you for preferring a Beko product. We hope that you get the best
WDA 8514 H Washer-Dryer User s Manual Document Number 2820523746 / 20-02-14.(10:38) Please read this manual first! Dear Customer, Thank you for preferring a Beko product. We hope that you get the best
WASHING DRYER COMBO MODEL: EWDC-F0806IN(WH) Owner s Manual Please read this manual carefully before operating your set.
 Owner s Manual Please read this manual carefully before operating your set.") WASHING DRYER COMBO MODEL: EWDC-F0806IN(WH) Owner s Manual Please read this manual carefully before operating your set. Retain it for future reference. Record model number and serial number of the set.
WASHING DRYER COMBO MODEL: EWDC-F0806IN(WH) Owner s Manual Please read this manual carefully before operating your set. Retain it for future reference. Record model number and serial number of the set.
Washer Dryer JLWD User Manual
 Washer Dryer JLWD 1613 User Manual Contents Safety information 4 Children and vulnerable people safety 4 General Safety 5 Safety instructions 7 Installation 7 Electrical Connection 7 Water Connection 7
Integrated Washing Machine
 Integrated Washing Machine HJA8501 HJA8511 User & installation Guide Built-In Appliances Dear Customer, Congratulations on your choice of washing machine which has been designed to give you excellent service.
Washing Machine User s Manual
 BWP9 Washing Machine User s Manual Document Number 282052xxxx/ 03-08-15.(16:47) 1 Important instructions for safety and environment This section contains safety instructions that will help protect from
Washing Machine User s Manual
 Washing Machine User s Manual WMY 81283 LMB2 EN Document Number= 2820523929_EN/ 17-12-16.(13:04) This product was manufactured using the latest technology in environmentally friendly conditions. 1 General
Washing Machine User s Manual
 Washing Machine User s Manual 5063 F 5063 FY Please read this manual first! Dear Customer, We hope that your product which has been manufactured in modern facilities and passed through a strict quality