Grand and Twin Grand Medallion 52oz. Instruction Manual Models #2948, #2960, #2961, #2972, #2973 Domestic, Export
|
|
|
- Baldric Henderson
- 5 years ago
- Views:
Transcription


1 Part No Grand and Twin 52oz. Instruction Manual Models #2948, #2960, #2961, #2972, #2973 Domestic, Export Cincinnati, OH USA
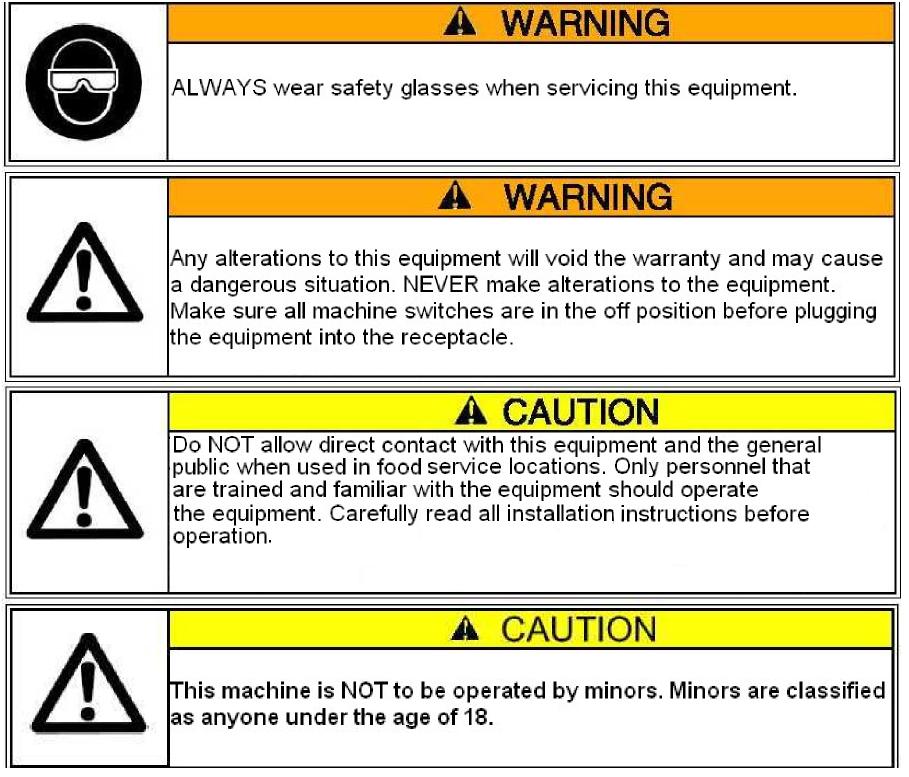
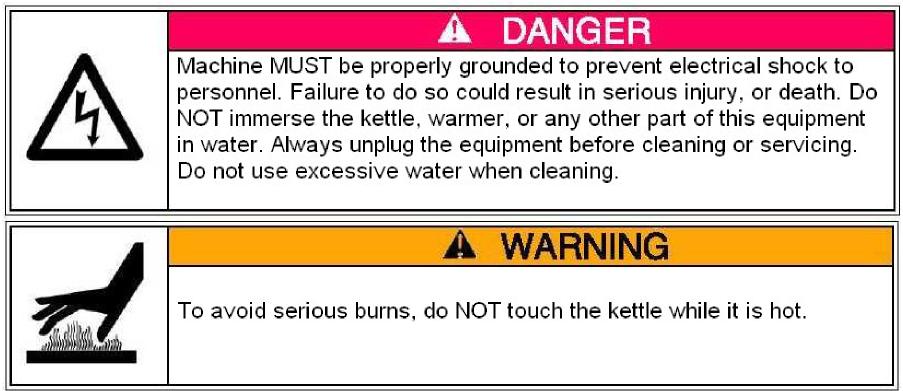
2 SAFETY PRECAUTIONS
 along with the instruction manual.")

3 Installation Instructions Note: Make sure to have all employees watch the Popper Set-Up Video, and read instruction manual thoroughly, before operating this machine. The video is located inside the corn bin, (Drawer in the base of the popper) along with the instruction manual. Checking Shipment Unpack all cartons and check thoroughly for any damage that may have occurred during transit. Damage claims should be filed immediately with the transportation company. Domestic models only: 120v/208v or 120v/240v 60 Hz. A 50 amp 4 wire wall receptacle is shipped with each machine (two with a Twin cabinet.) This receptacle will accept the attachment plug on the popper and must be used. Your electrician must furnish sufficient current for proper operation of your machine. We recommend this popper be on a dedicated and circuit protected line. (note: The Medallion uses both hot to neutral legs, 120v. The machine does not use the 208v or 240v, hot to hot connection. Export models only: 230V, 50 Hz, 2 Phase. Your electrician must furnish sufficient voltage levels, and current for proper operation of your machine. We recommend this popper be on a dedicated and circuit protected line. The Medallion uses two hot to neutral legs, 230V. The machine does not use the 380V, hot to hot connection. The machine is equipped with a 16 amp, 5 prong plug. One hot prong of the plug is not used. Note: If equipped, fire suppression components are in accordance with ANSUL R-102 specifications. The Fire Suppression System is shipped empty; the machine will not operate until the System is charged and inspected by a local ANSUL Representative. System charging is not performed by Gold Medal Products. Support: Contact Gold Medal Products Technical Support with any questions regarding the Fire Suppression System. 3

4 Final Preparations The popcorn machine was adjusted, inspected, and tested before it left the factory. Connect the clear oil line from the pump to the aluminum line from the popper with the supplied hose clamp. Connect the 6 pin connector from the popper to the receptacle on the oil pump. Both Bucket pump (2114E or 2114XE) and Bag-in-a-Box pump (2257 or 2257EX) have the same receptacle. Follow the instructions provided in the oil pump manual to set the oil delivery amount. The proper amount of oil for the 52oz. Medallion is between 13oz. to 17oz. To check for proper amount of oil, and assure oil is liquid, dispense a shot into a measuring cup. 4
5 Operating Instructions Controls And Their Functions Light Switch Operates on all the lights, interior and dome, on your popcorn machine. Warmer Switch Operates the forced air popcorn crisping system. Kettle Heat Switch Operates the heating elements in the popping kettle by supplying power to the Big Eye electronic temperature control. *On machines with a ventilation control circuit, the exhaust blower operates with the kettle heat switch. Kettle Motor And Exhaust Switch Operates both the kettle agitator motor, and the exhaust blower. Oil System Master Switch Sends power to the oil pump. (Either the Bucket Pump or Bag-in-a-Box models) The warmer/blower on the oil pump is activated, as well as the heated line kits (If provided / purchased separately). The warmer/blower on the oil pump will keep coconut popping oil liquid if the doors on the base are kept closed. It may be desirable to keep this switch on at night, if you have problems keeping the coconut oil liquid. Coconut oil will congeal at temperatures below approximately 76º F [24º C]. Red Oil Dispense Momentary Switch When pushed, will dispense the pre-set amount of oil into the kettle. Yellow Light & Audible Signal Alerts the operator to: (Load/Dump Indicator) 1. Load the corn and oil or 2. Dump the popped corn from the kettle or 3. Turn off the kettle heat switch if they are done popping corn Pass Thru Switches (If Equipped) Has double switches for the kettle heat, motor, and oil on the front side and the operator side of popper. Flexi-Pop Switch (If Equipped) Changes energy to kettle for the load switch from 52 oz to 32 oz. It will automatically adjust the oil amount on the 2257D (2257DX export) and 2114ED (2114XD export) model of oil pump. The Green light & larger cup are for the 52 oz and the blue light and smaller cup are for the 32 oz. Salt-Sweet Switch (If Equipped) Changes the temperature to a lower setting for the sweet option. 5
6 Popping Corn (Standard) 1. Turn on all Switches (Except Flexi-Pop and Salt-Sweet if equipped.) 2. When popping with coconut oil, be sure the oil is liquid. Dispense oil into a measuring cup first (should be between 13 oz. to 17 oz.), and then use that oil for the first popping cycle. 3. When the kettle is ready (about 5-8 minutes), the Yellow Light and Audible Signal will turn on. Lift the kettle lid and pour in 52 oz. of corn (use the supplied corn cup) and 4 tablespoons (1/4 cup) of Flavacol. Close lid. 4. Press the RED oil pump button. The proper amount of oil is pumped into the kettle. The Light and Signal will turn off. 5. When the popcorn has completed popping, the Light and Signal will turn on. Dump the Popcorn NOTE: The signal To Dump was factory set based on our popcorn and oil. If the signal occurs before or after the popping has stopped, the signal timing must be adjusted as described on page On the final kettle of corn, turn the KETTLE HEAT switch off, just as the lids are forced open by the popping corn. This saves electricity, and helps eliminate smoke and odor after you have stopped popping. Popping Corn (Flexi-Pop - If Equipped)* 1. Turn on all Switches (Except Salt-Sweet if equipped.) 2. When popping with coconut oil, be sure the oil is liquid. Dispense oil into a measuring cup first (should be between 8 oz. to 10.5 oz.), and then use that oil for the first popping cycle. 3. When the kettle is ready (about 5-8 minutes), the Yellow Light and Audible Signal will turn on. Lift the kettle lid and pour in 32 oz. of corn (use the supplied smaller corn cup) and 2 tablespoons (29.6 cc) of Flavacol. Close lid. 4. Press the RED oil pump button. The proper amount of oil is pumped into the kettle. The Light and Signal will turn off. 5. When the popcorn has completed popping, the Light and Signal will turn on. Dump the Popcorn. NOTE: The signal To Dump was factory set based on our popcorn and oil. If the signal occurs before or after the popping has stopped, the signal timing must be adjusted as described on page On the final kettle of corn, turn the KETTLE HEAT switch off, just as the lids are forced open by the popping corn. This saves electricity, and helps eliminate smoke and odor after you have stopped popping. 6
7 Popping Corn (Sweet - If Equipped)* 1. Turn on all Switches (Except Flexi-Pop if equipped.) 2. When popping with coconut oil, be sure the oil is liquid. Dispense oil into a measuring cup first (should be between 13 oz. to 17 oz.), and then use that oil for the first popping cycle. 3. When the kettle is ready (about 5-8 minutes), the Yellow Light and Audible Signal will turn on. Lift the kettle lid and pour in 52 oz. of corn (use the supplied corn cup.) Close lid. Wait approximately seconds, then add 26 oz. of Glaze Pop or Sugar. When using sugar, we recommend the use of Compound S to help keep the kettle clean. 4. Press the RED oil pump button. The proper amount of oil is pumped into the kettle. The Light and Signal will turn off. 5. When the popcorn has completed popping, the Light and Signal will turn on. Dump the Popcorn. NOTE: The signal To Dump was factory set based on our popcorn and oil. If the signal occurs before or after the popping has stopped, the signal timing must be adjusted as described on page On the final kettle of corn, turn the KETTLE HEAT switch off, just as the lids are forced open by the popping corn. This saves electricity, and helps eliminate smoke and odor after you have stopped popping. Remember: If the Yellow Load - Dump light is turned on and the Signal is sounding one of the following actions should be taken: 1. Load the corn and oil or 2. Dump the popped corn from the kettle or 3. Turn off the kettle heat switch if you are done popping corn When you are finished popping, make sure KETTLE HEAT and KETTLE MOTOR switches are turned OFF. NEVER LEAVE THE HEAT ON WHEN YOU ARE NOT POPPING! 7

8 Setting the Amount of Popping Oil with a Gold Medal BIB System In March 2003, we introduced the model 2257 and 2257EX with the E-Z Set control. Note: Bag-In-A-Box units are manufactured with a single bag connector. For a Daisy chain connection be sure to connect the bag connectors as shown in the picture to the left. The dead-leg connector (With only one hose connected to it) must be installed on the top box. With this system, it is not necessary to set a timer. To adjust the oil amount, follow these instructions: Holding down the RED Oil Dispense push button (on the popper) while turning on the Oil System Master switch (on the popper), and continuing to hold the RED Oil Dispense button in for 5 seconds, puts the unit in the program mode. When in the program mode press and release the oil Dispense switch to start the oil flowing. When the correct amount of oil has been dispensed into the measuring cup, push the oil Dispense switch again to stop the oil flow. The oil amount can be topped off by pushing the oil Dispense switch on/off as many times as needed to finalize the oil amount. Turning the Oil System Master switch off and then back on puts the unit in the regular mode. The unit will now dispense the programmed amount of oil when the oil Dispense switch is pushed. The oil light will light only when the oil pump is on. You will need to perform this procedure with the oil lines full of oil. Otherwise, you are setting both the amount of oil that goes in the kettle and the amount of oil required to fill the lines. Just fill the lines using the process above, then reset the amount as described above. NOTES: Model 2257D and 2257DX has the capability of remembering two different settings for poppers with the Salt/Sweet option or Flexi-Pop option. - For Salt/Sweet models, just put the switch in the salt position, and set the oil amount as described above. Then put the switch in the sweet position and repeat the setting procedure. The pump will remember both settings. - For Flexi-Pop models, just put the Load switch in one position, 32oz. for example, then set the oil amount. Then put the load switch in the other position, 18oz. for example. And repeat the setting procedure. - Model 2457S is the heated line option for the 2257 and 2257EX pump. The Pass-thru connector (With two hoses connected to it) must be installed on the bottom box. 8


 Be sure to double check to ensure that the box is mounted in the correct dispensing orientation. You may encounter boxes with no clear markings to indicate dispensing orientation.")
9 Preventing and Troubleshooting Oil Delivery Issues It may occur at times that the Bag-In-Box oil pumping system does not deliver oil to the kettle, or delivers it in incorrect amounts. This section is intended to list the most common causes of these problems, and the procedures necessary to prevent and, if necessary, correct them. Oil Temperature Coconut oil becomes a solid at temperatures above the average room temperature. For this reason, it is necessary to ensure that the oil has been permitted to come to working temperature before attempting to pump it through the system. If the machine has not been used for several days, the oil master switch should be turned on the night before it is expected that the machine will be used. For machines which are in daily use, even if not round the clock, leave the oil master switch on at all times, and keep the base cabinet doors closed, to prevent the oil from becoming solid. Bag-In-Box Mounting Because the bag s dispensing connector is offset toward the bottom of the box, to permit free oil flow and complete emptying of the oil from the bag, the box should never be mounted upside down. Most boxes supplied will be clearly marked as to which side should be up during dispensing. (Note that in some cases the box is intended to be stored with one side up, but to be turned and used in dispensing with the other side up.) Be sure to double check to ensure that the box is mounted in the correct dispensing orientation. You may encounter boxes with no clear markings to indicate dispensing orientation. A reliable guide in this case (and also for those boxes which are marked), is the direction that the top side flap of the corrugated box is folded. When the box is properly mounted for dispensing, the top side flap will fold down from the top edge of the box, so that if one were to attempt to separate the flap it would be necessary to pull up from the bottom edge. See the illustrations below. This edge is seamless. The side flap folds down from this edge. TOP TOP The bottom of the side flap can be seen to be open, not seamless, Top Side Flap Front Side Flap NOTE The Bag-In-Box oil pumping system is NOT designed to function when the bag has been removed from the box. Service results in such a situation are unpredictable. Do not attempt to operate the system with a bag which has been removed from the box. Looking at the box from the bottom, the front and rear side flaps can be seen folded along the side of the box toward the middle, and the outer, top side flap folded down to cover them. 9 Rear Side Flap


10 Bag and Hose Connector Issues There are two different types of dispensing nozzles employed on the Bag-In-Box oils, as well as two different types of connectors installed on the oil pumping system hoses which connect to the bag s dispensing nozzles. The particular combination of connectors in your system will determine the appropriate method for connecting the Bag-In-Box oil bag to the system hosing. These combinations will be illustrated and explained in the following section. Bag Dispensing Nozzle Blue Insert Bag dispensing Nozzle White Insert Blue Insert Bag Nozzle with Blue/White Hose Connector 1. With the blue collar on the hose connector retracted toward crosspiece, slide hose connector shell onto bag nozzle. 2. Holding the bag nozzle behind the flange, slide the blue collar forward to lock the hose connector onto the bag nozzle. White Insert Bag Nozzle with Blue/White Hose Connector 3. Connector shown with shell correctly engaged and collar forward in lock position. 4. Place fingers behind flange and use thumbs to slide the crosspiece forward into the nozzle. Oil flow is initiated. 1. With the blue collar on the hose connector retracted toward crosspiece, slide hose connector shell onto bag nozzle. 2. Holding the bag connector, slide the blue collar forward to lock the hose connector onto the bag nozzle. 10


11 Blue Insert Bag Nozzle with Gray Hose Connector 3. Connector shown with shell correctly engaged and collar forward in lock position. Oil flow commences. Do not slide crosspiece forward. 1. Grasp the bag nozzle and slide the gray hose connector on from the side. White Insert Bag Nozzle with Gray Hose Connector 2. With the hose connector in place, place fingers behind flange on connector and press plunger forward to lock. 3. Connector shown with shell correctly engaged and plunger forward in lock position. Oil flow commences. 1. Grasp the bag nozzle and slide the gray hose connector on from the side. 2. With the hose connector in place, place fingers behind flange on connector and press plunger forward to lock. 3. Connector shown with shell correctly engaged and plunger forward in lock position. Since the White Insert Bag Nozzle is not designed to work with the insert pressed forward, this configuration may or may not work. If it does not, remove the gray hose connector and order the blue hose connector from Gold Medal. NOTE: If the oil does not flow after engaging plunger on gray hose connector, or if the crosspiece is inadvertently pushed forward when using the blue hose connector with the white insert nozzle, the nozzle center slider insert will be left pushed back into the bag, as shown above left. To correct this, place fingers behind nozzle as shown above right. You will feel the center slider protruding slightly into the bag. Holding the nozzle body from the front, press the slider from the back side of the nozzle until it snaps outward into its correct position. The nozzle is now ready to be used with a blue hose connector. 11


12 Cleaning Instructions Daily: Clean the Kettle 1. Under no circumstances should the kettle be removed from the machine for cleaning, nor should excessive water be used to wipe down the kettle lead-in cord. Severe kettle damage will result. 2. As you pop corn, wipe the kettle with a clean cloth. It is easy to keep the outside clean when the kettle is warm and the oil is not baked on. CAUTION: The hot kettle will cause burns if you touch it with your hand. Allow the kettle to cool for at least 1 hour before attempting to clean. 3. Every night, mix Heat n Kleen solution (Gold Medal item number 2095) - 2 tablespoons per gallon of water. Do not use the entire gallon at once. Only use enough to fill the kettle a ½ deep. Turn on the kettle heat. When the water starts to boil, turn off the heat and let it work overnight. 4. The next morning, dump the solution into a bucket and wipe the inside of the kettle with a cloth. 5. A CLEAN-IN-PLACE hook is located behind the operator side kettle support arm. Just tilt the kettle to the dump position, and swing the hook into position to hold the kettle in the dumped position. This feature will safely enable you to clean the kettle, without removing it from the machine. CLEAN-IN-PLACE Hook (NOTE: Color added for clarity of illustration purposes only.) Clean the Popcorn Machine 1. Wipe the stainless steel parts with a clean cloth and cleaner designed for stainless steel. Do not use oven cleaners, as they will damage parts of the machine. 2. Remove and clean the 1 st stage mesh filter. Cover removal not required. Clean filter in warm soapy water. 3. Ammonia cleaners will damage the plastic doors. Use only non-ammonia cleaners, such as Gold Medal s Watchdog Glass Cleaner item number

 with warm/soapy water allow to air dry overnight, then reinstall. Item No. Part No.")
13 WEEKLY: Clean the filters in the popcorn machine 1. Loosen the 2 screws (no tools required), on the filter cover plate on the ceiling inside the popper. Remove the cover, the bag and mesh filters. Clean the bag filter and the mesh filters in warm soapy water. Let dry overnight and reinstall. CAUTION: Keeping the filters clean is important to let the exhaust system do its job. 2. Check the condition of the clear oil lines and tighten or replace as required. 3. Clean the foam filter on the warmer cover (see pg 23 ) with warm/soapy water allow to air dry overnight, then reinstall. Item No. Part No. Description Metal mesh filter Oil Mist Bag Filter Filter Pack (Includes all three filters) 13


14 MAINTENANCE INSTRUCTIONS


15 Electronic Temperature Control Operation The control temperature jumper is factory set, and stops power to the kettle when the thermocouple reaches the setpoint. On the Medallion machine, this is also the ideal point to dump the popped corn out of the kettle. On the first start-up this is also the ideal time to load the corn and oil. Therefore if the kettle heat switch is turned on and the buzzer is sounding one of the following actions should be taken: Load the corn and oil or Dump the popped corn from the kettle or Turn off the kettle heat switch if you are done popping corn Adjustment of Electronic Control The Medallion machine has an electronic kettle control with 2 thermocouples, one for control and one for limit. There are no mechanical thermostats in this kettle. There are (4) factory adjustments on the control: 1. Control temperature do not adjust. 2. Signal to dump If you want the signal to dump to be a little sooner or later you can adjust the potentiometer marked kettle dump. CW is sooner, CCW is later. 3. The patented overshoot circuit is tuned for the kettle, do not adjust this potentiometer. 4. The audible signal to dump has three options; full volume, half volume, no sound (just the yellow light). Adjustments are by jumper positions. We ship with the signal at full volume. It does not matter which TC goes to A or B. It does matter that the yellow leads go to the positive terminals. Remove this jumper for no sound Remove this jumper for lower volume The control temperature jumper is set to the correct value at the factory DO NOT ADJUST Yellow Red Yellow Red The overshoot value is set at the factory DO NOT ADJUST This is the Kettle Dump adjustment, and is factory set to signal when the kettle is ready to dump. Turning CW will signal sooner, CCW will signal later. If you need to adjust, make very small adjustments. Hot Lead is at L1, Neutral lead at L2. 15
16 Troubleshooting Long Popping Cycles If your pop cycle is longer than 4 minutes, it can be the result of several things: A. Low Voltage - If the machine is operated on low voltage, this could cause the kettle not to reach the proper operating temperature. Voltage for each leg, with kettle turned on, must be at least 110v. (Domestic models) B. Inadequate Supply Lines - Inadequately sized electrical supply lines, in addition to being a fire hazard, would also prevent the kettle from reaching the proper operating temperature. Check with a qualified electrician. C. Inferior Corn - Inferior quality corn would result in longer popping cycles. Use only top quality hybrid popcorn from reputable suppliers. Even then, if you let your corn pick up moisture or dry out, your popping cycles will be slow. Kettle Does Not Heat Before you go any further, make sure the kettle lead-in cord is plugged in, and that circuit breakers are not tripped. Make sure all electrical connections are tight. A. Kettle Heat Switch - Check the voltage to and from the KETTLE HEAT switch, and if the switch is defective replace it. B. Control - A defective thermocouple lead will cause the kettle not to heat. Check for good connections from the kettle to the control. C. Power Relays Check to see if the two power relays operate. Both relays should operate with the kettle heat switch on. If the relays do not both operate, look at the status of the LED s on the heat control PCB. Green LED on power is going to the heat control (kettle heat switch is on) Probe LED on one or both thermocouples are open or not properly connected to the heat control board. Limit LED on normal operation. The limit power relay should be picked up. Heat LED on normal operation. (If the kettle temperature is at or above set point, LED will be off) The heat power relay should be picked up Alarm LED off normal operation. The LED turns on when the kettle reaches the set dump temperature. Motor Will Not Turn Agitator WARNING! If the kettle agitator shaft is not rotating, do not pop corn. Adjust the clearance between the kettle bottom and the stir blade to 1/32. (use a dime) Loosen the set screw in the collars above and below the crossbar and adjust the agitator shaft as necessary. Then re-tighten the set screws in the collars. Oil Pump Does Not Deliver Oil To Kettle If the pump is operating but oil is not dispensed, the oil may be solid in the oil lines. If the pump is not operating see the pump manual for instructions. 16
17 ORDERING SPARE PARTS * Always speak to a Gold Medal Products Technical Service Advisor before ordering any parts to help ensure accuracy for your product. Included diagrams may not be the latest information. 1. Identify the needed part by checking it against the photos, illustrations, and/or parts list. 2. When ordering, please include part number, part name, and quantity needed. 3. Please include your model name, serial number, and date of manufacture (located on the machine nameplate) with your order. 4. Address all parts orders to: Parts Department Gold Medal Products Co Medallion Drive Cincinnati, Ohio Or, place orders by phone or online: (800) (513) Fax: (513) info@gmpopcorn.com Web Page:
 82719 Sign Glass with Graphics (72\" Base) 3 82109 Light Ballast (48\" & 60\" Base) 82414 Light Ballast - Export")
18 Dome Assembly, Fluorescent Light Item Part No. Description Light Tube Holder Sign Glass with Graphics (48" & 60" Base) Sign Glass with Graphics (72" Base) Light Ballast (48" & 60" Base) Light Ballast - Export (48" & 60" Base) Light Ballast (72" Base) Starter (48" & 60" Base) Light Tube Holder for Starter Molded Plug 18

19 Dome Assembly, LED/Neon Light Item Part No. Description Molded Plug Volt Power Supply Power Supply Bracket Assy Clear Sign Cover (included with 67524) LED Sign Assembly Sign Brackets (x2) 19


20 Dome Assembly, LED Item Part No. Description Popcorn Sign w/graphics V/25W Power Supply Molded Plug LED Strip (x3) 20
 8-32x1/2\" 4 74146 Hinge Nut (2/Hinge) 8-32 5 41350 Male Hinge Short Right 6 41354 Female Hinge Right")
 5/16-18 14 70023 Swivel Caster w/o Lock Item Part No.")
 5/16-18 14 70023 Swivel Caster w/o Lock 15 82017 Left Door w/o Facing Strip 16 82020 Right Door w/facing Strip")
21 1, 2, 3, , 2, 3, 4 5, , , 12, , 12, 13 Item Part No. Description Male Hinge Short Left Female Hinge Left Hinge Screw (2/Hinge) 8-32x1/2" Hinge Nut (2/Hinge) Male Hinge Short Right Female Hinge Right Flush Mount Handle Right Door w/o Facing Strip Snap Bushing Left Door w/facing Strip NSF Swivel Caster w/lock (Door Side) Caster Screw (4/Caster) 5/16-18x1/2" Caster Nut (4/Caster) 5/ Swivel Caster w/o Lock Item Part No. Description Male Hinge Short Left Female Hinge Left Hinge Screw (2/Hinge) 8-32x1/2" Hinge Nut (2/Hinge) Male Hinge Short Right Female Hinge Right Flush Mount Handle Right Door w/o Facing Strip Snap Bushing Left Door w/facing Strip NSF Swivel Caster w/lock (Door Side) Caster Screw (4/Caster) 5/16-18x1/2" Caster Nut (4/Caster) 5/ Swivel Caster w/o Lock Left Door w/o Facing Strip Right Door w/facing Strip 1, 2, 3, 4 5, , 12, Item Part No. Description Male Hinge Short Left Female Hinge Left Hinge Screw (2/Hinge) 8-32x1/2" Hinge Nut (2/Hinge) Male Hinge Short Right Female Hinge Right Flush Mount Handle Right Door w/o Facing Strip Snap Bushing Left Door w/facing Strip NSF Swivel Caster w/lock (Door Side) Caster Screw (4/Caster) 5/16-18x1/2" Caster Nut (4/Caster) 5/ Swivel Caster w/o Lock Left Door w/o Facing Strip Right Door w/facing Strip


22 Interior Base Components Back Panel 48 Cabinet P/N Cabinet P/N Cabinet P/N Cabinet P/N Item Part No. Description Snap Bushing Magnet #8-32x3/8" Screw Acorn Nut Corn Bin Assy Handle Old Maid Pan Lid Corn Bin Corn Bin Retainer Assy Drawer Slide - Right Hand Drawer Slide - Left Hand Door Catch Bracket Magnet Spacer (Installed April 2012 & Later) #8-32x3/4" Phil Flat M/S Zinc ,3, ,
 4 62158 Blower Cover 5 61128 800 Watt Tubular Element* 61135 800")

23 Warmer Exterior / Interior Parts Complete Assembly Available (Domestic) 69204EX (Export) Item Part No. Description Diffuser Cover Filter Retainer Filter (Pack of 5 Filters) Blower Cover Watt Tubular Element* Watt Tubular Element* (Export) Thermostat Mounting Bracket Thermostat Blower Motor, 115V 50/ Blower Motor (Export) * WARNING: This Element will be covered. For proper operation, you MUST remove the cover and clean underneath the element every 3 4 months. Be sure the machine is off and the power is disconnected before cleaning. 23
 4 41380 Spur Gear 5 41432 Gear Block Assy 6 48907 Hanger Arm Assy 7 41979 175")
24 Cabinet Interior Ceiling Components, Single Kettle , Item Part No. Description Magnetic Catch Hanger Arm Assy w/clean-in-place Latch Set Screw x 3/16 (x2) Spur Gear Gear Block Assy Hanger Arm Assy Watt Heat Lamp (x2) 41979EX 175 Watt Heat Lamp (x2) (Export) Oil Mist Filter * Layer Grease Filter (x2) * Filter Cover Assy Item Part No. Description Knob Set Screw x 1" Kettle Retainer Clean-In-Place Latch Shock Absorber Pin (Not Shown) Spring (Not Shown) 24
 46110 Motor Capacitator 10 uf (White-Franklin Motor) 4 89087 Transient Filter 5 41449R Kettle Drive Motor (Domestic) 41500R Kettle Drive Motor (Export) 6 41640 8W Foil")
25 Motor Plate Assembly For Relays See Pg For Switches - See Pg Item Part No. Description Lamp Holder Wire Harness Motor Capacitator 7.5 uf (Black-Bison Motor) Motor Capacitator 10 uf (White-Franklin Motor) Transient Filter R Kettle Drive Motor (Domestic) 41500R Kettle Drive Motor (Export) W Foil Element (Domestic) 41640EX 8W Foil Element (Export) Aluminum Oil Tubing (sold by the ft.) Kettle Shunt Trip Breaker (Domestic) Kettle Shunt Trip Breaker (Export) Circuit Breaker, 15A (Domestic) Circuit Breaker, 10A (Export) Temperature Control Board Axial Fan (Domestic) Axial Fan (Export) Item Part No. Description Exhaust Blower (Domestic) Exhaust Blower (Export) Thermocouple Extension 25


 8 48907 Hanger Arm Assy 9 41250 5-Layer Grease Filter (x2)* 10")

26 Cabinet Interior Ceiling Components, Dual Kettle 2 1 Left Right 3 4, , Item Part No. Description Magnetic Catch Hanger Arm Assy w/clean-in-place Latch Hanger Arm Assy w/clean-in-place Latch Spur Gear Set Screw x 3/16 (x2) Gear Block Assy Watt Heat Lamp (x4) 41979EX 175 Watt Heat Lamp - Export (x4) Hanger Arm Assy Layer Grease Filter (x2)* Oil Mist Filter* Hanger Arm Assy Filter Cover Assy Knob Set Screw x 1" Kettle Retainer Clean-in-Place Latch Shock Absorber Pin (Not Shown) Spring (Not Shown) 26
 2 41001 Temperature Control Board 3 47047 Lamp Holder 4 41449R Kettle Drive Motor 41500R Kettle Drive Motor (Export) 5 62845 Double Blower")
27 Motor Plate Assembly Dual Kettle Models For Relays See Pg For Switches See Pg. 28 Item Part No. Description Axial Fan Axial Fan (Export) Temperature Control Board Lamp Holder R Kettle Drive Motor 41500R Kettle Drive Motor (Export) Double Blower Exhaust 62845EX Double Blower Exhaust (Export) CB Bracket Circuit Breaker, 15A (Domestic) Circuit Breaker, 10A (Export) Kettle Shunt Trip Breaker (Domestic) Kettle Shunt Trip Breaker (Export) 6 27
 5 42798 Lighted Rocker")
28 Parts Switches and Lights 1, , Item Part No. Description Salt / Sweet Switch Switch Cover - for Salt / Sweet Switch only Oil Momentary Green Pilot Light 48660EX Green Pilot Light (Export) Lighted Rocker Switch Load/Dump Pilot Light - Amber 55039EX Load/Dump Pilot Light - Amber (Export) On/On Rocker Switch - Pass-thru models only** Position Rocker Switch - Flexi-Pop models only Switch, Rocker SPDT * - Salt/Sweet only 28


29 Parts Relays Item Part No. Description Relay/30A/DPST/120V Coil/Domestic 55219EX Relay/30A/DPST/240V Coil/Export Relay/30A/DPDT/120V Coil/Domestic Flexi-Pop Relay/30A/DPST-NO/120V Coil/4 Terminals/Domestic 48590EX Relay/30A/DPST-NO/120V Coil/4 Terminals/Export Relay/30A/DPDT/120V Coil/6 Terminals/Domestic 48645EX Relay/30A/DPDT/120V Coil/6 Terminals/Export Contactor IEC/220V Coil/Export Contactor IEC/40A/120V Coil/Domestic Contactor IEC/32A/120V Coil/Domestic Relay/30A/DPDT/240V Coil/Export 8 Ventilation Control Components V Models Only Item Part No. Description Timer Relay Socket Pin Timer Socket Relay 29

 4 12611 Button Head Screw 5/16-18x½ LH 5 67926")


30 Top Hat Kettle Assembly 1 2, 3, , , Lid & Agitator Complete 48961HT Item Part No. Description Oil Tube w/funnel Spur Gear Set Screw (x2) Button Head Screw 5/16-18x½ LH Magnet Holder Assy Top Hat Block (x2) Crossbar Fastener w/shoulder Crossbar Fastener Fixed Rear Lid Front Lid Assy Shaft Collar (x2) Set Screw Agitator Assy HT Crossbar Assy Crossbar Bushings (x2) 30


31 Standard Lid and Agitator Assy. 1 2, 3 4, 5, , 8, Lid and Agitator Assy Complete P/N Item Part No. Description Oil Funnel Button Head Screw Needle Bearing Spur Gear Woodruff Key Set Screw x 3/16 (x2) Shaft Collar (x2) Set Screw 1/4-20 x 3/ Cross Bar Bushing (x2)* HT Cross Bar Cross Bar Fastener Front Lid Cross Bar Fastener w/shoulder Rear Lid Agitator Weld Assy. 31
32 Kettle Shell Components , 4, Item Part No. Description Kettle Weld Assy ½" Split Collar (x2) Kettle Shell - RH Dump - Single/RH Dual L Kettle Shell - LH Dump - LH on Dual P Kettle Shell - Dual Handles* Junction Box Gasket w/cutout Junction Box Assy Ceramic Terminal Block Junction Box Gasket w/o Cutout Junction Box Cover Plastic Dump Handle 32
 2 50190 Nut Retainer (x24) 3 48651 120V - 1050W Heat Element (Domestic) 48651EX 1050W, Tubular Element (Export) 4 68780 Element Clamp (x8) 5 48968 Heat")
33 Parts Kettle Bottom 1, Item Part No. Description ¼-20 Hex Jam Nut (x24) Nut Retainer (x24) V W Heat Element (Domestic) 48651EX 1050W, Tubular Element (Export) Element Clamp (x8) Heat Transfer Plate Kettle Gasket V W Heat Element (Domestic) 48650EX 1800W, Tubular Element (Export) V W Heat Element (Domestic) V W Heat Element (Export) 33
34 Single Kettle, Electrical Schematic 34
35 Single Kettle, Pass Thru 35
36 Single Kettle, Flexi-Pop 36
37 Single Kettle, Fire Suppression 37
38 Twin Kettle, Right Side 38
39 Twin Kettle, Left Side 39
40 Twin Kettle Pass Thru, Right Side 40
41 Twin Kettle Pass Thru, Left Side 41
42 Twin Kettle Vent Control, Right Side 42
43 Twin Kettle Vent Control, Left Side 43
44 Twin Kettle Fire Suppression, Right Side 44
45 Twin Kettle Fire Suppression, Left Side 45
46 WARRANTY WE WARRANT to the original purchaser the Gold Medal equipment sold by us to be free from defects in material or workmanship under normal use and service. Our obligation under this warranty shall be limited to the repair or replacement of any defective part for a period of six (6) months from the date of sale to the Original Purchaser with regard to labor and two (2) years with regard to parts and does not cover damage to the equipment caused by accident, alteration, improper use, voltage, abuse, or failure to follow instructions. THIS WARRANTY IS IN LIEU OF ALL OTHER WARRANTIES EXPRESSED OR IMPLIED, AND OF ALL OTHER OBLIGATIONS OR LIABILITIES ON OUR PART, INCLUDING THE IMPLIED WARRANTY OF MERCHANTIBILITY. THERE ARE NO WARRANTIES WHICH EXTEND BEYOND THE DESCRIPTION ON THE FACE HEREOF. We neither assume, nor authorize any other person to assume for us, any other obligation or liability in connection with the sale of said GOLD MEDAL equipment or any part thereof. The term Original Purchaser as used in this warranty shall be deemed to mean that person, firm, association, or corporation who was billed by the GOLD MEDAL PRODUCTS COMPANY, or their authorized distributor for the equipment. THIS WARRANTY HAS NO EFFECT AND IS VOID UNLESS THE ORIGINAL PURCHASER FIRST CALLS GOLD MEDAL PRODUCTS COMPANY AT TO DISCUSS WITH OUR SERVICE REPRESENTATIVE THE EQUIPMENT PROBLEM, AND, IF NECESSARY, FOR INSTRUCTIONS CONCERNING THE REPAIR OR REPLACEMENT OF PARTS. GOLD MEDAL PRODUCTS COMPANY Medallion Drive Cincinnati, Ohio USA Phone: Fax: The text, descriptions, graphics and other material in this publication are the proprietary and exclusive property of Gold Medal Products Company and shall not be used, copied, reproduced, reprinted or published in any fashion, including website display, without its express written consent.
!"" #$% "!&' ( ( ) *
 *") !"" #$% "!&' (( ) * Part No. 69915 Revised: December 2008 MACHO POP Instruction Manual Models 2553 & 2554 Cincinnati, OH 45241-4807 USA SAFETY PRECAUTIONS MACHO POP 2 MODELS: 2553 & 2554 INSTALLATION INSTRUCTIONS
!"" #$% "!&' (( ) * Part No. 69915 Revised: December 2008 MACHO POP Instruction Manual Models 2553 & 2554 Cincinnati, OH 45241-4807 USA SAFETY PRECAUTIONS MACHO POP 2 MODELS: 2553 & 2554 INSTALLATION INSTRUCTIONS
CORNADO POPPING UNIT 36 & 48 oz. Domestic Units Instruction Manual
 Part No. 83014 Revised: April 2005 CORNADO POPPING UNIT Instruction Manual Cincinnati, OH 45241-4807 USA SAFETY PRECAUTIONS INSTALLATION INSTRUCTIONS Domestic Cornado Popping Unit CHECKING SHIPMENT Unpack
Citation Models #2001, 2001ST, 2001BN Instruction Manual
 Models #2001, 2001ST, 2001BN Instruction Manual Part No. 67861 Revised: February 2009 Cincinnati, OH 45241-4807 USA SAFETY PRECAUTIONS 2 Forward This manual covers the 16oz. Popcorn Machine, model number
Econo-16 Models 2024EX, 2024STX 16oz. Popcorn Machine Instruction Manual
 Econo-16 Models 2024EX, 2024STX 16oz. Popcorn Machine Instruction Manual Part No. 67833EX Revised: July 2008 Operator Side Customer Side Cincinnati, OH 45241-4807 USA Table of Contents I. Safety Precautions.
Cincinnati, OH USA
 Part No. 69915 Revised: September 2009 MACHO POP Instruction Manual Models 2553 & 2554 & 2554C Cincinnati, OH 45241-4807 USA SAFETY PRECAUTIONS MACHO POP 2 MODELS: 2553, 2554, & 2554C INSTALLATION INSTRUCTIONS
Bag-In-A-Box Oil System Instruction Manual Model #2257EX & 2257DX For Export Bag-In-Box Pumps Made After March 2003
 Part No. 79431EX Revised: February 2009 Bag-In-A-Box Oil System Instruction Manual Model #2257EX & 2257DX For Export Bag-In-Box Pumps Made After March 2003 Shown Here with Optional 2457S Heated Line Kit.
DISCOVERY Instruction Manual Model #2556
 Part No. 69922 Revised May 2002 DISCOVERY Instruction Manual Model #2556 Cincinnati, OH 45241-4807 USA www.gmpopcorn.com Safety Precautions 2 INSTALLATION INSTRUCTIONS Inspection of Shipment: Unpack the
Pro Pop 12/14 oz. Unimaxx Model 2214ST Instruction Manual (2214ST shown, see next page for other models covered)
") Part No. 67834 Revised: July 2008 Pro Pop 12/14 oz. Unimaxx Model 2214ST Instruction Manual (2214ST shown, see next page for other models covered) Operator Side Customer Side Cincinnati, OH 45241-4807
Part No. 67834 Revised: July 2008 Pro Pop 12/14 oz. Unimaxx Model 2214ST Instruction Manual (2214ST shown, see next page for other models covered) Operator Side Customer Side Cincinnati, OH 45241-4807
!"" #$% "!&' ( ( ) *
 *") !"" #$% "!&' (( ) * Part No. 59410 Revised: April 2005 FUN POP 8 OZ. POPPER Instruction Manual Model #2408 Shown here on Model #2689CR Cart (Optional) Cincinnati, OH 45241-4807 USA SAFETY PRECAUTIONS Popcorn
!"" #$% "!&' (( ) * Part No. 59410 Revised: April 2005 FUN POP 8 OZ. POPPER Instruction Manual Model #2408 Shown here on Model #2689CR Cart (Optional) Cincinnati, OH 45241-4807 USA SAFETY PRECAUTIONS Popcorn
 WARNING!! The attached Gold Medal Manual is for reference only and is not intended for any other purpose. The information contained in these on line manuals is subject to change at any time. Improvements
#2389, 2389EX, 2389JX
 Part No. 47690 LiL Max Instruction Manual Model #2389, 2389EX, 2389JX Cincinnati, OH 45241-4807 USA SAFETY PRECAUTIONS Installation Instructions Lil Max 8 Oz. Popcorn Machine Inspection of Shipment: Unpack
Grand and Twin Grand Medallion 52oz. Instruction Manual Models #2948, #2960, #2961, #2972, #2973 Domestic, Export
 Part No. 48992 Grand and Twin 52oz. Instruction Manual Models #2948, #2960, #2961, #2972, #2973 Domestic, Export Cincinnati, OH 45241-4807 USA SAFETY PRECAUTIONS DANGER Machine must be properly grounded
MACHO POP Instruction Manual Model 2554EX, 2554BCX
 Instruction Manual Model 2554EX, 2554BCX Part No. 69915EX Issued 10/2004 Cincinnati, OH 45241-4807 USA www.gmpopcorn.com SAFETY PRECAUTIONS 2 MODEL 2554EX, BCX Inspection of Shipment: INSTALLATION INSTRUCTIONS
Part No EX Revised: January Super Pop Maxx. Instruction Manual Model 2600EX
 Part No. 17384EX Revised: January 2009 Super Pop Maxx Instruction Manual Model 2600EX SAFETY PRECAUTIONS 2 Forward This manual covers the 16oz. Super Pop Maxx Popcorn Machine, model number 2600EX. Installation
6 oz. Kettle Poppers With / Love My Popper Kettle Popcorn Machine Instruction Manual Models: 1871,2660,2661
 Part No. 49217 Revised: June 2004 With / Love My Popper Kettle Popcorn Machine Instruction Manual Models: 1871,2660,2661 Cincinnati, OH 45241-4807 USA SAFETY PRECAUTIONS 2 Models: 1871,2660,2661 INSTALLATION
Popcorn Machine Instruction Manual Model #2551EX
 Part No. 49793EX Revised January 2004 Popcorn Machine Instruction Manual Model #2551EX Cincinnati, OH 45214-2089 USA. SAFETY PRECAUTIONS INSTALLATION INSTRUCTIONS SETUP Remove all packing material and
Antique Deluxe 60 Special Popcorn Machine Instruction Manual Model #2660GT
 Part No. 49397 Revised: October 2008 Antique Deluxe 60 Special Popcorn Machine Instruction Manual Model #2660GT Cincinnati, OH 45241-4807 USA SAFETY PRECAUTIONS INSTALLATION INSTRUCTIONS Popcorn Machines
Part No Revised: January Pop Maxx. Instruction Manual Models: 2552, 2552KC, and 2552LS
 Part No. 49749 Revised: January 2009 Pop Maxx Instruction Manual Models: 2552, 2552KC, and 2552LS SAFETY PRECAUTIONS Forward This manual covers the 12/14 oz. Pop Maxx Popcorn Machine, model number 2552,
 WARNING!! The attached Gold Medal Manual is for reference only and is not intended for any other purpose. The information contained in these on line manuals is subject to change at any time. Improvements
Warmer Cabinet Instruction Manual Model # 5581, 5581EX. Part No
 Warmer Cabinet Instruction Manual Model # 5581, 5581EX Part No. 74797 SAFETY PRECAUTIONS INSTALLATION INSTRUCTIONS Inspection of Shipment: Unpack all cartons and check thoroughly for any damage that may
Instruction Manual. Fun Pop 4oz Popper
 Instruction Manual Fun Pop 4oz Popper 0700 Medallion Drive, Cincinnati, Ohio 4524-4807 USA Part No. 59406 SAFETY PRECAUTIONS Page 2 INSTALLATION INSTRUCTIONS Inspection of Shipment Unpack all cartons and
Master Pop. Instruction Manual. Cincinnati, OH USA. Model No. 2451, 2451EX. Part No.49659
 Part No.49659 Master Pop Instruction Manual Cincinnati, OH 4524-4807 USA SAFETY PRECAUTIONS http://www.gmpopcorn.com Page 2 INSTALLATION AND OPERATING INSTRUCTIONS CHECKING SHIPMENT Unpack all cartons
Econo Pop. Instruction Manual Model #2115 and Model #2121. Cincinnati, OH USA. Part No Revised June 1996
 Econo Pop Instruction Manual Model #2115 and Model #2121 Part No. 77598 Revised June 1996 Cincinnati, OH 45241-4807 USA SAFETY PRECAUTIONS OPERATING INSTRUCTIONS ECONO-POP POPCORN MACHINE MODELS Domestic
Model 2016, 2025, 2025BN, 2025ST Staging Cabinets Instruction Manual
 Model, 2025BN, 2025ST Staging Cabinets Instruction Manual Part No 53021 Revised: March 2010 Cincinnati, OH 45241-4807 USA SAFETY PRECAUTIONS Staging Cabinet Installation Instructions Inspection of Shipment:
6 Oz. Twin Pop. Popcorn Machine Instruction Manual Model #2666EX. Cincinnati, OH USA. Part No EX Revised June 1996
 Popcorn Machine Instruction Manual Model #2666EX Part No. 16169EX Revised June 1996 Cincinnati, OH 45214-2089 USA SAFETY PRECAUTIONS This equipment is designed and sold for commercial use only. This equipment
2454 RETRO POP Popcorn Machine Instruction Manual Model #2454
 2454 RETRO POP Popcorn Machine Instruction Manual Model #2454 Part No. 59415 Revised: June 2005 Cincinnati, OH 45241-4807 USA SAFETY PRECAUTIONS Popcorn Machines INSTALLATION INSTRUCTIONS INSTALLATION
Cincinnati, OH USA
 Part No 53021EX Revised: March 2010 Model 2016EX, 2025EX, 2025STX Staging Cabinets Instruction Manual Cincinnati, OH 45241-4807 USA SAFETY PRECAUTIONS Staging Cabinet Installation Instructions Inspection
MEDALLION 52oz. Instruction Manual Models #2948, #2960, #2972, #2961, #2973 Domestic, Export, Japan
 Part No. 48992 Revised November 2007 MEDALLION 52oz. Instruction Manual Models #2948, #2960, #2972, #2961, #2973 Domestic, Export, Japan Cincinnati, OH 45241-4807 USA Safety Precautions MEDALLION 2 MODEL
P-60 and 60 Special. Popcorn Machine Instruction Manual Model #1866, #2085, #2086 and #2656. Cincinnati, OH USA
 Part No. 49064 Revised: March 2004 P-60 and 60 Special Popcorn Machine Instruction Manual Model #1866, #2085, #2086 and #2656 Models #1866 and #2086 Models #2085 and #2656 Cincinnati, OH 45241-4807 USA
52 oz. MEDALLION POP CLEAN POPPER Instruction Manual Models #2911, 2948, 2960, 2972
 Part No. 62760 Revised July 2009 52 oz. MEDALLION POP CLEAN POPPER Instruction Manual Models #2911, 2948, 2960, 2972 Downdraft Updraft Cincinnati, OH 45241-4807 USA SAFETY PRECAUTIONS Domestic - 120/208V
DROP IN POPCORN WARMERS
 Part No. 39407 DROP IN POPCORN WARMERS Instruction Manual Models #2343EX,2343EXJ, 2344EX, 2344EXJ, 2345EX, 2345EXJ, 2445EX SAFETY PRECAUTIONS Installation Instructions Inspection of Shipment: Unpack all
Instruction Manual. Super 88
 Instruction Manual Super 88 10700 Medallion Drive, Cincinnati, Ohio 45241-4807 USA Part No. 49555 SAFETY PRECAUTIONS DANGER Machine must be properly grounded to prevent electrical shock to personnel. Failure
Instruction Manual. Discovery
 Instruction Manual Discovery 10700 Medallion Drive, Cincinnati, Ohio 45241-4807 USA Part No. 69922 SAFETY PRECAUTIONS Page 2 INSTALLATION INSTRUCTIONS Inspection of Shipment After unpacking, check thoroughly
Gay 90 s Whiz Bang. Instruction Manual Model #2014EX. Cincinnati, OH USA. Part No EX Revised June 1996
 Gay 90 s Whiz Bang Instruction Manual Model #2014EX Part No. 47700EX Revised June 1996 Cincinnati, OH 45241-4807 USA SAFETY PRECAUTIONS This equipment is designed and sold for commercial use only. This
!"" #$% "!&' ( ( ) *
 *") !"" #$% "!&' (( ) * Master Pop 6 Oz. Popper Popcorn Machine Instruction Manual Models #2450, #2450D Part No. 49659 Revised April 2002 Cincinnati, OH 45241-4807 USA. SAFETY PRECAUTIONS 2 ALL MODELS #2450
!"" #$% "!&' (( ) * Master Pop 6 Oz. Popper Popcorn Machine Instruction Manual Models #2450, #2450D Part No. 49659 Revised April 2002 Cincinnati, OH 45241-4807 USA. SAFETY PRECAUTIONS 2 ALL MODELS #2450
Self Serve Poppers. Instruction Manual All Export Models. Cincinnati, OH USA. Part No EX Revised June 1996
 Self Serve Poppers Instruction Manual All Export Models Part No. 77599EX Revised June 1996 Cincinnati, OH 45241-4807 USA SAFETY PRECAUTIONS This equipment is designed and sold for commercial use only.
Instruction Manual. Astro Pop 16oz
 Instruction Manual Astro Pop 6oz 0700 Medallion Drive, Cincinnati, Ohio 4524-4807 USA Part No. 4474 SAFETY PRECAUTIONS DANGER Machine must be properly grounded to prevent electrical shock to personnel.
Film-Tech. The information contained in this Adobe Acrobat pdf file is provided at your own risk and good judgment.
 Film-Tech The information contained in this Adobe Acrobat pdf file is provided at your own risk and good judgment. These manuals are designed to facilitate the exchange of information related to cinema
Part No Revised Nov Lil Max. Instruction Manual Model #2389, 2389EX
 Part No. 47690 Revised Nov. 2003 Lil Max Instruction Manual Model #2389, 2389EX SAFETY PRECAUTIONS Inspection of Shipment: Unpack the shipping container and thoroughly inspect the machine for any damage
KARMEL KING Instruction Manual Models: 2620 & 2621 (240 Volt) 2630 & 2631 (208 Volt) Part No Revised: February 2009
 2630 & 2631 (208 Volt) Part No Revised: February 2009") KARMEL KING Instruction Manual Models: 2620 & 2621 (240 Volt) 2630 & 2631 (208 Volt) Part No. 18736 Revised: February 2009 SAFETY PRECAUTIONS Mark 10, Karmel King (20 Gallon), and 2622 Rolling Truck Left
KARMEL KING Instruction Manual Models: 2620 & 2621 (240 Volt) 2630 & 2631 (208 Volt) Part No. 18736 Revised: February 2009 SAFETY PRECAUTIONS Mark 10, Karmel King (20 Gallon), and 2622 Rolling Truck Left
Instruction Manual Models: 2552, 2552KC, and 2552LS
 Part No. 49749 Instruction Manual Models: 2552, 2552KC, and 2552LS SAFETY PRECAUTIONS DANGER Machine must be properly grounded to prevent electrical shock to personnel. Failure to do so could result in
Film-Tech. The information contained in this Adobe Acrobat pdf file is provided at your own risk and good judgment.
 Film-Tech The information contained in this Adobe Acrobat pdf file is provided at your own risk and good judgment. These manuals are designed to facilitate the exchange of information related to cinema
Part No DELUXE CITATION. Instruction Manual. Domestic Series 2102 and 2102E Export Series 2102EX and 2102XE. Cincinnati, OH USA
 Part No.47664 DELUXE CITATION Instruction Manual Domestic Series 2102 and 2102E Export Series 2102EX and 2102XE Cincinnati, OH 45241-4807 USA SAFETY PRECAUTIONS DANGER Machine must be properly grounded
Countertop Baker Unit Instruction Manual Model #5020, #5020E, #5020ET, #5023
 Countertop Baker Unit Instruction Manual Model #5020, #5020E, #5020ET, #5023 Part No.76098 Cincinnati, OH 45241-4807 USA SAFETY PRECAUTIONS Installation Instructions Inspection of Shipment: Unpack all
Part No Revised January 30, 2007 SAFETY PRECAUTIONS
 DUAL ZONE STAGING CABINET Instruction Manual Part No. 44406 Revised January 30, 2007 SAFETY PRECAUTIONS SAFETY PRECAUTIONS INTRODUCTION This manual covers the model #2856. The unit is designed to provide
concessionstands.com Instruction Manual Pop-A-Lot Model No. 2007, 2007BN, 2007ST, 2007EX, 2007STX
 Instruction Manual 0700 Medallion Drive, Cincinnati, Ohio 454-4807 USA 0000 SAFETY PRECAUTIONS Page INSTALLATION INSTRUCTIONS Inspection of Shipment After unpacking, check thoroughly for any damage which
!"" #$% "!&' ( ( ) *
 *") !"" #$% "!&' (( ) * Part No. 49749 Revised: October 2004 Pop Maxx Instruction Manual Model #2552, #2552C, 2552UW, #2552EX, #2552XJ SAFETY PRECAUTIONS Pop Maxx 12/14 Oz. Popcorn Machine 2 Forward Pop Maxx
!"" #$% "!&' (( ) * Part No. 49749 Revised: October 2004 Pop Maxx Instruction Manual Model #2552, #2552C, 2552UW, #2552EX, #2552XJ SAFETY PRECAUTIONS Pop Maxx 12/14 Oz. Popcorn Machine 2 Forward Pop Maxx
Model 2016, 2025, 2025BN, 2025ST Staging Cabinets Instruction Manual
 Model, 2025BN, 2025ST Staging Cabinets Instruction Manual Part No 53021 Cincinnati, OH 45241-4807 USA SAFETY PRECAUTIONS DANGER Machine must be properly grounded to prevent electrical shock to personnel.
Film-Tech. The information contained in this Adobe Acrobat pdf file is provided at your own risk and good judgment.
 Film-Tech The information contained in this Adobe Acrobat pdf file is provided at your own risk and good judgment. These manuals are designed to facilitate the exchange of information related to cinema
Part No Revised April Pop Maxx. Instruction Manual Model #2552, #2552C, #2552EX, #2552XJ
 Part No. 49749 Revised April 2002 Pop Maxx Instruction Manual Model #2552, #2552C, #2552EX, #2552XJ Safety Precautions Pop Maxx 12/14 Oz. Popcorn Machine 2 Forward Pop Maxx 12/14 Oz. Popcorn Machine This
Bag-In-A-Box Oil Pump System
 Bag-In-A-Box Oil Pump System Instruction Manual Model #2245 and Model #2246 Part No. 79212 Revised June 1996 Cincinnati, OH 45241-4807 USA SAFETY PRECAUTIONS This equipment is designed and sold for commercial
Instruction Manual. Bucket Oil Pump
 Instruction Manual Bucket Oil Pump 10700 Medallion Drive, Cincinnati, Ohio 45241-4807 USA 2016 Gold Medal Products Co. Part No. 79064E SAFETY PRECAUTIONS DANGER Machine must be properly grounded to prevent
Instruction Manual. Master Pop
 Instruction Manual Master Pop Model No. 2451 10700 Medallion Drive, Cincinnati, Ohio 45241-4807 USA SAFETY PRECAUTIONS DANGER Machine must be properly grounded to prevent electrical shock to personnel.
Your electrician must furnish sufficient voltage levels, and current for proper operation of your machine. We recommend this machine be on a
 Table of Contents I. Safety Precautions..3 II. Installation Instructions...4 III. Operating Instructions..5 IV. Maintenance and Cleaning Instructions..... 6-7 V. System Parts Location Guide..8-11 VI. Ordering
Film-Tech. The information contained in this Adobe Acrobat pdf file is provided at your own risk and good judgment.
 Film-Tech The information contained in this Adobe Acrobat pdf file is provided at your own risk and good judgment. These manuals are designed to facilitate the exchange of information related to cinema
HOT DOG STEAMER Instruction Manual Models: 8007 & 8012
 Part No. 87202 Revised: November 2005 HOT DOG STEAMER Instruction Manual Models: 8007 & 8012 Model # 8012 Shown Cincinnati, OH 45241-4807 USA SAFETY PRECAUTIONS 2 Model# 8007 & 8012 INSTALLATION INSTRUCTIONS
Instruction Manual. Astro Staging Cabinet
 Instruction Manual Astro Staging Cabinet 10700 Medallion Drive, Cincinnati, Ohio 45241-4807 USA 2017 Gold Medal Products Co. Part No. 40269 SAFETY PRECAUTIONS DANGER Machine must be properly grounded to
Cincinnati, OH USA
 Heated Portion Pack Display Case Instruction Manual Model #5580BV1, Model #5588 and Model #5581 Part No. 74797 Revised April 2000 Cincinnati, OH 45241-4807 USA e-mail: goldme19@eos.net www.gmpopcorn.com
Part No Revised November 2004 DESIGNER SERIES NACHO CABINETS Instruction Manual Model #5513
 Part No. 74312 Revised November 2004 DESIGNER SERIES NACHO CABINETS Instruction Manual Model #5513 SAFETY PRECAUTIONS Nacho Cabinets 2 FORWARD This manual covers the model #5513 nacho display cabinet.
Instruction Manual. Portion Cup Cheese Warmer
 Instruction Manual Portion Cup Cheese Warmer Model No. 5581-00-100, 5581-01-100, and 5581-00-101 10700 Medallion Drive, Cincinnati, Ohio 45241-4807 USA 2017 Gold Medal Products Co. Part No. 74797 SAFETY
Cincinnati, OH USA
 Heated Portion Pack Display Case Instruction Manual Model #5580BV1, Model #5588 and Model #5581 Part No. 74797 Revised April 2000 Cincinnati, OH 45241-4807 USA e-mail: goldme19@eos.net www.gmpopcorn.com
Instruction Manual. PopMaxx 12/14 oz. Popper
 Instruction Manual PopMaxx 12/14 oz. Popper Model No. 2552, 2552KC 10700 Medallion Drive, Cincinnati, Ohio 45241-4807 USA 2016 Gold Medal Products Co. Part No. 49749 SAFETY PRECAUTIONS DANGER Machine must
Large Combo Warmer Instruction Manual Model #2206
 Part No. 40208 Revised June 1997 Large Combo Warmer Instruction Manual Model #2206 Cincinnati, OH 45241-4807 USA SAFETY PRECAUTIONS CHECKING SHIPMENT The popcorn machine is shipped in a corrugated carton.
Film-Tech. The information contained in this Adobe Acrobat pdf file is provided at your own risk and good judgment.
 Film-Tech The information contained in this Adobe Acrobat pdf file is provided at your own risk and good judgment. These manuals are designed to facilitate the exchange of information related to cinema
Part No Revised: October 2004 BUN WARMER. Instruction Manual. Models:8018,8019,8117,8219,8170
 BUN WARMER Instruction Manual Models:8018,8019,8117,8219,8170 Part No. 87794 Revised: October 2004 SAFETY PRECAUTIONS INSTALLATION INSTRUCTIONS Checking Shipment Unpack carton and check thoroughly for
Cheese Display Case. Instruction Manual Model #5580BV2 and Model #5580BV3 Model #5582 and Model #5583. Cincinnati, OH USA.
 Instruction Manual Model #5580BV2 and Model #5580BV3 Model #5582 and Model #5583 Part No. 38475 Revised June 1996 Model #5582 Model #5583 Cincinnati, OH 45241-4807 USA SAFETY PRECAUTIONS This equipment
Instruction Manual. Cheese Warmer with Pump
 Instruction Manual Cheese Warmer with Pump 10700 Medallion Drive, Cincinnati, Ohio 45241-4807 USA 2013 Gold Medal Products Co. Part No. 38298 SAFETY PRECAUTIONS Page 2 INSTALLATION INSTRUCTIONS Inspection
Instruction Manual. Part No Revised September 2004
 5554 Instruction Manual Part No. 39792 Revised September 2004 SAFETY PRECAUTIONS INSTALLATION FORWARD This manual covers the model # 5554 PIZZA OVEN. You can be very proud of your 5554 PIZZA OVEN. In addition
Portion Bag Cheese Warmer
 Instruction Manual Model #5599 Part No. 38580 Revised Feb. 2001 Cincinnati, OH 45241-4807 USA SAFETY PRECAUTIONS This equipment is designed and sold for commercial use only. This equipment is not to be
Instruction Manual. Econo 8 Popcorn Machine
 Instruction Manual Econo 8 Popcorn Machine Model No.: 2388, 2388-00-002 10700 Medallion Drive, Cincinnati, Ohio 45241-4807 USA 2017 Gold Medal Products Co. Part No. 69022 SAFETY PRECAUTIONS DANGER Machine
5300, 5300CH, 5300EX, 5300FN
 Part No. 36060 Revised APRIL 2008 5300, 5300CH, 5300EX, 5300FN Instruction Manual SAFETY PRECAUTIONS FORWARD This manual covers the model # 5300, 5300FN, 5300CH & 5300EX NACHO CHEESE DISPENSER. You can
Instruction Manual. Antique Deluxe 60 Special
 Instruction Manual Antique Deluxe 60 Special Model No. 2660GT, 2660GTSV, 2660GV Model 2660GT Model 2660GTSV Model 2660GV 10700 Medallion Drive, Cincinnati, Ohio 45241-4807 USA 2016 Gold Medal Products
Part No Revised December 2002 DESIGNER SERIES NACHO CABINETS Instruction Manual Model #5510, 5511 AND 5512
 Part No. 74271 Revised December 2002 DESIGNER SERIES NACHO CABINETS Instruction Manual Model #5510, 5511 AND 5512 Safety Precautions 2 FORWARD This manual covers the all models #5510, #5511 and #5512 nacho
Part No Revised: June TS1 TOASTER SYSTEM Instruction Manual Models # 5700 AND # 5700SF
 Part No. 44162 Revised: June 2006 TS1 TOASTER SYSTEM Instruction Manual Models # 5700 AND # 5700SF SAFETY PRECAUTIONS 2 TOASTER SYSTEM INSTALLATION CHECKING SHIPMENT Unpack the unit from the shipping container
Instruction Manual. 36 in. and 42 in. Popcorn Staging Cabinets
 Instruction Manual 36 in. and 42 in. Popcorn Staging Cabinets Model Series 2856 and 2855 42 in. Model 2855-00-000 36 in. Model 2856-00-000 10700 Medallion Drive, Cincinnati, Ohio 45241-4807 USA 2016 Gold
Instruction Manual. Nacho Cheese Dispenser and Warmer
 Instruction Manual Nacho Cheese Dispenser and Warmer 10700 Medallion Drive, Cincinnati, Ohio 45241-4807 USA 2013 Gold Medal Products Co. Part No. 36060 SAFETY PRECAUTIONS Page 2 INSTALLATION INSTRUCTIONS
Instruction Manual. Cheddar Easy All-In-One Cheese Corn Shop
 Instruction Manual Cheddar Easy All-In-One Cheese Corn Shop Model No. 2703-00-000 10700 Medallion Drive, Cincinnati, Ohio 45241-4807 USA 2017 Gold Medal Products Co. Part No. 110028 SAFETY PRECAUTIONS
Floss Machines Instruction Manual Models #3017, #3017SS, 3024, and #3077 For Machines Manufactured after July 2007
 Part No. 42131 Floss Machines Instruction Manual For Machines Manufactured after July 2007 Cincinnati, OH 45241-4807 USA Installation Instructions Inspection of Shipment: Unpack all cartons and check
Instruction Manual. Fun Pop 4 oz. Popper
 Instruction Manual Fun Pop 4 oz. Popper Model 2404MD Model 2404 10700 Medallion Drive, Cincinnati, Ohio 45241-4807 USA 2016 Gold Medal Products Co. Part No. 59406 SAFETY PRECAUTIONS DANGER Machine must
Instruction Manual. Double Candy Apple Cooker
 Instruction Manual Double Candy Apple Cooker Model No. 4416 10700 Medallion Drive, Cincinnati, Ohio 45241-4807 USA 2014 Gold Medal Products Co. Part No. 46841 SAFETY PRECAUTIONS DANGER Machine must be
Condiment Warmer. Instruction Manual Models #2252EX & #2253EX. Cincinnati, OH USA. Model #2252EX. Model #2253EX
 Condiment Warmer Instruction Manual Models #2252EX & #2253EX Part No. 38187EX Revised June 1996 Model #2252EX Model #2253EX Cincinnati, OH 45241-4807 USA SAFETY PRECAUTIONS This equipment is designed and
Instruction Manual. Combo Pralinator/Corn Treat
 Instruction Manual Combo Pralinator/Corn Treat Model No. 282EL/ER, 282XL/XR 0700 Medallion Drive, Cincinnati, Ohio 4524-4807 USA Part No. 63894 Model No. 282EL/ER, 282XL/XR SAFETY PRECAUTIONS Page 2 Model
Hot Dog Roller Grills
 Part No. 87630 Hot Dog Roller Grills Model No. 8022, 8022PE, 8023, 8023SL, 8023PE, 8024, 8024PE, 8024SL, 8025, 8025SL Cincinnati, OH 45241-4807 USA SAFETY PRECAUTIONS DANGER Machine must be properly grounded
Instruction Manual. Table Top Steamer Cart
 Instruction Manual Table Top Steamer Cart 10700 Medallion Drive, Cincinnati, Ohio 45241-4807 USA 2015 Gold Medal Products Co. Part No. 88586 SAFETY PRECAUTIONS DANGER Machine must be properly grounded
Dogeroo & Super Dogeroo
 Dogeroo & Super Dogeroo Instruction Manual Model #8002EX and #8003EX Part No. 87154EX Revised June 1996 Cincinnati, OH 45241-4807 USA SAFETY PRECAUTIONS This equipment is designed and sold for commercial
Part No Revised November / Instruction Manual Model #8150 AND #8151
 Part No. 88359 Revised November 2003 8150 / 8151 Instruction Manual Model #8150 AND #8151 SAFETY PRECAUTIONS 8150 AND 8151 INSTALLATION FORWARD This manual covers the model # 8150 and 8151 front loading
Floss Machine Instruction Manual Model #3024
 Part No. 42543 Revised: May 2004 Floss Machine Instruction Manual Model #3024 Cincinnati, OH 45241-4807 USA Safety Precautions Floss Machines 2 INTRODUCTION Your Floss Machine warranty is described on
Film-Tech. The information contained in this Adobe Acrobat pdf file is provided at your own risk and good judgment.
 Film-Tech The information contained in this Adobe Acrobat pdf file is provided at your own risk and good judgment. These manuals are designed to facilitate the exchange of information related to cinema
!"" #$% "!&' ( ( ) *
 *") !"" #$% "!&' (( ) * Instruction Manual Models #2180, #2182, #2182H, #2191, #2193, #2195, #2196, #2197 & #2198 Part No. 38043 Revised June 1996 Model #2191 Model #2195 Cincinnati, OH 45241-4807 USA SAFETY
!"" #$% "!&' (( ) * Instruction Manual Models #2180, #2182, #2182H, #2191, #2193, #2195, #2196, #2197 & #2198 Part No. 38043 Revised June 1996 Model #2191 Model #2195 Cincinnati, OH 45241-4807 USA SAFETY
Floss Machine Instruction Manual Model #3017, #3017SS AND #3077
 Part No. 42131 Revised: May 2004 Floss Machine Instruction Manual Model #3017, #3017SS AND #3077 Econo-Floss Floss-Maxx Cincinnati, OH 45241-4807 USA INTRODUCTION Your Floss Machine warranty is described
Instruction Manual. Popcorn Topping Dispenser
 Instruction Manual Popcorn Topping Dispenser Model Series 2396-00-100 (101, 110, 111, and 140) Pedestal Assembly for Models without Remote. Rack Assembly shown for Single Pedestal Models. 10700 Medallion
Instruction Manual. Dogeroo, Super Dogeroo, and Mini Dogeroo
 Instruction Manual Dogeroo, Super Dogeroo, and Mini Dogeroo Model No. 8102, 8103, 8108 10700 Medallion Drive, Cincinnati, Ohio 45241-4807 USA Part No. 87793 SAFETY PRECAUTIONS Page 2 INSTALLATION INSTRUCTIONS
Instruction Manual. Macho Pop
 Instruction Manual Macho Pop 10700 Medallion Drive, Cincinnati, Ohio 45241-4807 USA 2016 Gold Medal Products Co. Part No. 110057 SAFETY PRECAUTIONS DANGER Machine must be properly grounded to prevent electrical
Instruction Manual. Super Pop Maxx 16 oz. Poppers
 Instruction Manual Super Pop Maxx 16 oz. Poppers Model No. 2600, 2600A, 2600-00-003, and 2600-00-000 10700 Medallion Drive, Cincinnati, Ohio 45241-4807 USA 2017 Gold Medal Products Co. Part No. 17384 SAFETY
X-15 Floss Machine Instruction Manual 3015A
 Part No. 69016 X-15 Floss Machine Instruction Manual 3015A Cincinnati, OH 45241-4807 USA Installation Instructions Model 3015A Inspection of Shipment: Unpack all cartons and check thoroughly for any damage
Dogeroo & Super Dogeroo
 Dogeroo & Super Dogeroo Instruction Manual Model #8102, #8102FC, #8103 and #8104 Part No. 87793 Revised Oct. 1998 Cincinnati, OH 45241-4807 USA SAFETY PRECAUTIONS OPERATING INSTRUCTIONS SPECIFICATIONS
Instruction Manual. Spiral Slicer
 Instruction Manual Spiral Slicer Model No. 5280-00-100 10700 Medallion Drive, Cincinnati, Ohio 45241-4807 USA 2017 Gold Medal Products Co. Part No. 82876 Table of Contents... 1 SAFETY PRECAUTIONS... 3
Roller Dog. Instruction Manual Model #8023, Model #8024 and Model #8025. Cincinnati, OH USA. Model #8024. Model #8025
 Roller Dog Instruction Manual Model #8023, Model #8024 and Model #8025 Part No. 67141 Revised June 1996 Model #8024 Model #8025 Cincinnati, OH 45241-4807 USA SAFETY PRECAUTIONS This equipment is designed
Cornado Popping Plant
 Popping Plant Instruction Manual All Models Part No. 82412 Revised June 1996 Cincinnati, OH 45241-4807 USA SAFETY PRECAUTIONS MACHINE SPECIFICATIONS Model Kettle Cabinet Dimensions Model Description Number
Instruction Manual. Mid-Sized Poppers
 Instruction Manual Mid-Sized Poppers Model Series: 2131, 2147, 2152, 2452 Model 2147 Model 2131 Model 2152 Model 2452 10700 Medallion Drive, Cincinnati, Ohio 45241-4807 USA 2017 Gold Medal Products Co.