Operating instructions
|
|
|
- Gwendoline Davis
- 6 years ago
- Views:
Transcription

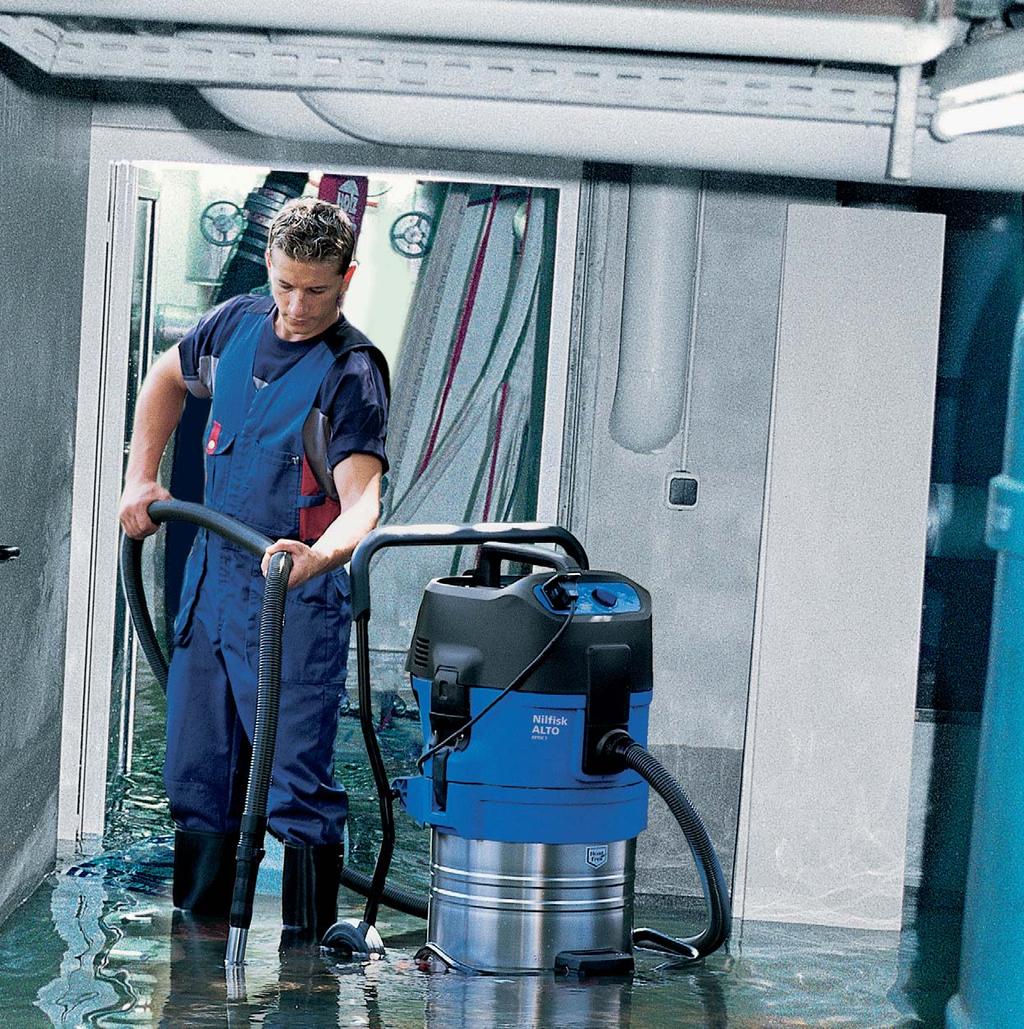
1 Operating instructions ATTIX 3, ATTIX 5, ATTIX 7 ATTIX 2 GALLON ATTIX 9 GALLON C
2 3 9 auto ATTIX ATTIX auto 8 0 ATTIX auto
3 Important safety instructions Symbols used to mark instructions Before using the vacuum cleaner, always read the operating instructions and keep them readily available. This symbol is used to mark safety instructions that must be observed to prevent damage to persons. This symbol is used to mark safety instructions that must be observed to prevent damage to the vacuum cleaner and its performance. This symbol indicates tips and instructions to simplify work and to ensure safe operation. For your own safety Only allow the vacuum cleaner to be used by persons who have been trained in its use and who have been explicitly authorized to use it. This appliance is not intended for use by persons (including children) with reduced physical, sensory or mental capabilities, or lack of experience and knowledge. Children shall be supervised to make sure that they do not play with the appliance. The use of the vacuum cleaner is subject to valid national regulations. Besides the operating instructions and the binding accident prevention regulations valid in the country of use, observe recognized regulations for safety and proper use. Do not use any unsafe work techniques. Transport Before transporting the dirt tank, close all the locks. Do not tilt the cleaner if there is liquid in the dirt tank. Do use a crane hook to lift the cleaner. Purpose and intended use Precautions and safety regulations when using the vacuum cleaner The vacuum cleaners described in this operating manual are suitable for commercial use, e.g. in hotels, schools, hospitals, factories, shops, offices and rental businesses. The following materials should not be picked up by the vacuum cleaner: Before start-up Inspect power cord regularly to detect signs of damage, e.g. cracks or ageing. hazardous dust hot materials (burning cigarettes, hot ash, etc.) flammable, explosive, aggressive liquids (e.g. petrol, solvents, acids, alkalis, etc.) flammable, explosive dust (e.g. magnesium or aluminium dust, etc.) If the power cord is damaged, it must be replaced by Alto-Service or an electrician to avoid danger before use of the vacuum cleaner is continued. )
4 Use only the type of power cord specified in the operating manual. Do not damage the power cord (e.g. by moving over it or pulling or crushing it). Disconnect the power cord by pulling the plug only (do not pull or tug the power cord). Inspect the vacuum cleaners to ensure that they are in proper condition. Plugs and couplings in power cords must at least have splash protection. Never use the vacuum cleaner if the filter element is damaged. Picking up liquids If foam develops or liquid emerges, stop work immediately and empty the dirt tank. Regularly clean the built in float ) or level indicator hose to limit the water level ) and check that they are not damaged. See section 5 for information on handling liquids and (hazardous) dust. Electrical components Check the rated voltage of the vacuum cleaner before connecting it to the mains supply system. Ensure that the voltage shown on the rating plate corresponds to the voltage of the local mains power supply. If you are using an extension cord, use only those specified by the manufacturer or higher quality ones (see section 9.4 Technical data ). It is recommended that the vacuum cleaner should be connected via a residual current circuit breaker. This stops the supply of electricity if the leakage current to earth exceeds 30 ma for 30 ms or it has an earth tester circuit. When using an extension lead, check the minimum cross-sections of the cable: Cable length Cross section m <6 A <25 A up to 20 m ø.5mm² ø2.5mm² 20 to 50 m ø2.5mm² ø4.0mm² Arrange the electrical parts (sockets, plugs and couplings) and lay down the extension lead so that the protection class is maintained. Never spray water on to the upper section of the vacuum cleaner. Danger for persons, risk or short-circuiting. Observe the latest edition of the IEC regulations. Tool socket Maintenance, cleaning and repair Use the socket on the vacuum cleaner for the purpose defined in the operating instructions only. Before plugging an appliance into the appliance socket:. Switch off the vacuum cleaner. Only carry out maintenance work described in the operating instructions. 2. Switch off the appliance to be connected. CAUTION! Follow the operating instructions and safety instructions for appliances connected to the power tool socket. Always pull out the mains plug before cleaning and maintenance of the vacuum cleaner. 2 )
5 Accessories and spare parts Use only the brushes supplied with the vacuum cleaner or specified in the operating manual. The use of other brushes can adversely affect safety. Use only original Alto accessories and spare parts (see section 9.5). The use of other parts can adversely affect safety. 2 Description 2. Purpose When used properly, the industrial vacuum cleaners described in these instructions 2.2 Operating elements See fold-out page at front of these operating instructions. Handle 2 Suction pipe support 3 Accessory holder 4 Applicance switch with suction power control ) 5 Retaining clamp 6 Dirt tank 7 Grip to empty tank ) are suitable for sucking up dry, non-fl ammable, non-hazardous dusts and li quids. 8 Inlet fitting 9 Appliance socket ) 0 Cable hook Operating knob for filter cleaning ) 2 Connection for compressed air supply ) 3 Connection for pneumatic tool ) 4 Tank locks ) 5 Castor with brake 3 Before starting 3. Assembling the vacuum cleaner On delivery some of the accessories are lying in the tank and must be removed before the vacuum cleaner is used for the first time. Remove the upper section of the vacuum cleaner: The mains plug should not yet be inserted into a socket.. The mains plug should not yet be inserted into a socket. 2. Open the retaining clamps () and remove upper section of the cleaner. 3. Take the accessories ) out of the dirt tank and the packaging. 4. Place a filter bag into the tank as described in the instructions (printed on the fi lter bag). IMPORTANT! Press the filter bag con nec tion fi rmly on to the inlet fi tting. 5. Fit the upper section of the cleaner (do not damage the fi lter bag) and close the retaining clamps. NOTE! Ensure that the retaining clamps fi t properly. 6. Fit the suction tube fastener ) about 20 cm from the edge of the lower extension tube as shown in the figure. ) 3
6 4 Operation 4. Connections 4.. Connecting the suction hose. Connect the suction hose Electrical connection The operating voltage shown on the rating plate must corres pond to the voltage of the mains power supply.. Ensure that the cleaner is switched off. 2. Insert the power cord into a properly installed and fused socket with earthing contact Connecting electrical appliances ) Before switching the switch to position auto, ensure that the tool connected to the appliance socket is switched off. To comply with regulations, only approved dust producing tools should be connected. The maximum power consumption of the connected electrical appliance is stated in section 9.4 "Technical data".. Connect the electrical appliance to the appliance socket ) on the control panel Connecting pneumatic tools ) Before switching the switch to position auto, ensure that the tool connected to the appliance socket is switched off. Operating pressure of the pneumatic tool is stated in section 9.4 "Technical data".. Connect the pneumatic tool to the upper quick coupling ) on the control panel. 2. Connect the compressed air supply to the lower push-in nipple ). 4.2 Switching on the vacuum cleaner 4.2. Switch position "I". Turn the switch to position "I". The vacuum cleaner motor starts Switch position "auto" ) Before switching the switch to position auto, ensure that the tool connected to the appliance socket is switched off.. Turn the switch to position "auto" ). The vacuum cleaner motor starts when the connected power tool/pneumatic tool is switched on. 2. When the power tool is switched off, the vacuum cleaner continues to run for a short moment so that any dust in the suction hose is conveyed to the fi lter bag. 4 )
7 4.2.3 Setting suction power ) The motor speed and the suction power can be varied with the suction power control ). This allows precise adaptation of the suction power for different cleaning tasks. 4.3 Cleaning the filter element 4.3. Cleaning the filter element (Push&Clean System) ) 0 auto I 2 x3 If suction performance drops. Push & Clean Filter Cleaning System. Set the suction power to maximum. 2. Close the nozzles or suction hose opening with the palm of your hand. 3. Press the button to start filter cleaning three times. The resulting stream of air removes attached dust from the slats of the filter elements Cleaning the filter element (Automatic Filter Cleaning System) ) 0 sec. To ensure that suction performance is always at its best, the filter element is automatically cleaned during operation. We recommend complete cleaning if the filter element becomes extremely dirty.. Switch off the vacuum cleaner 2. Close the nozzles or suction hose opening with the palm of your hand. 3. Turn the switch to position I and let the cleaner operate for approx. 0 seconds with the suction hose opening closed. 5 Applications and techniques 5. Techniques If used correctly, additional accessories, suction nozzles and suction hoses can enhance the cleaning action and reduce the cleaning effort. Effective cleaning is achieved if you follow just a few guidelines in combination with your own practical experience in special fi elds. Here are some basic tips. ) 5
8 5.. Picking up dry sub - stances CAUTION! Do not pick up flammable substances. Before picking up dry substances, always ensure that a fi lter bag is inserted in the tank (see section 9.5 "Accessories" for order number). Disposal of the picked up material is then simple and hygienic. After picking up liquids, the fi lter element is wet. A damp fi lter element clogs more quickly when dry substances are picked up. For this reason the fi lter element should be washed and dried or replaced by a dry element before dry substances are picked up Picking up liquids CAUTION! Do not pick up flammable liquids. Before liquids are picked up, always remove the filter bag/ waste bag and check that the float ) or the water level limit ) works properly. (See section and Replacing the filter element.) The use of a separate fi lter element or filter screen is recommended. If foam appears, stop work immediately and empty the tank. To reduce the amount of foam, use foam killer Alto Foam Stop (see section 9.5 "Accessories" for order number). 6 After finishing work 6. Switching the vacuum cleaner off and storage ATTIX 5 ATTIX 2 GALLON ATTIX 3 ATTIX 7 ATTIX 9 GALLON. Switch off the vacuum cleaner and pull the mains plug out of the socket. 2. Wind up the power cord and hang it on the handle. 3. Empty the tank and clean the vacuum cleaner. 4. After picking up liquids: Store the upper section of the cleaner separately so that the fi lter element can dry. 5. Store the cleaner in a dry room where it is protected from unauthorized use. 6 )
9 7 Maintenance 7. Maintenance plan After finishing work As required 7.2. Replacing the waste bag Replacing the filter bag Emptying dirt tank (ATTIX 3 / ATTIX 5 / 2 GAL) Emptying dirt tank (ATTIX 7 / 9 GAL) Replacing filter element (Push&Clean System) ) Replacing filter element (Automatic Filter Cleaning System) ) 7.2 Maintenance work 7.2. Replacing the waste bag 2. Open the retaining clamps and remove the upper section of the cleaner from the dirt tank. 2. Carefully remove the waste bag connection () from the inlet fitting. 3. Close the waste bag connection with the slide (2). 4. Close the waste bag using the cable binder (3). 5. Dispose of the dirt in accordance with legal regulations. 6. Insert a new waste bag into the cleaned tank as described in the instructions enclosed. 3 Press the waste bag connection of the new waste bag firmly on to the inlet fitting. Press the filter bag connection of the new filter bag firmly on to the inlet fitting Replacing the filter bag. Open the retaining clamps and remove the upper section of the cleaner from the dirt tank. 2. Carefully remove the filter bag connection from the inlet fitting. 3. Close the filter bag connection with the slide. 4. Dispose of the filter bag in accordance with legal regulations. 5. Place a new filter bag into the cleaned tank as described in the instructions (printed on the filter bag). ) 7
10 7.2.3 Emptying dirt tank (ATTIX 3 / 5 / 2 GALLON) Emptying the dirt tank (ATTIX 7/9 GALLON). Remove the upper section of the cleaner from the dirt tank. 2. Hold the dirt tank at the grip underneath the tank and tip out the dirt. 3. Dispose of the dirt in accordance with legal regulations. 4. Clean the rim of the tank before fi tting the upper section of cleaner. Before reinserting the suction hose: 5. Clean the inlet fi tting and hose collar. 3 2 To empty the dirt tank after picking up liquids: remove the intermediate ring as a proper seal is only ensured during suction. After emptying the tank: clean the rim of the tank and the seals in the intermediate ring and the upper section of cleaner before refitting them. If the seal or groove is dirty or damaged, the suction performance will be reduced. Before reinserting the suction hose: clean the inlet fitting and hose collar Remove the upper section of cleaner from the dirt tank. 2. Open the retaining clamps () and remove the intermediate ring (2) from the tank. 3. Pull the lever in the handle (3) upwards and tilt the tank. 4. Tip out the collected dirt. 5. Dispose of the dirt in accordance with legal regulations. or:. Open the tank locks (4). 2. Use the handles (5) to lift the tank out of the frame. 4. Tip out the collected dirt. 5. Place the empty tank in the frame and close the locks (4). 6. Dispose of the dirt in accordance with legal regulations Replacing filter element (Push&Clean System) ) 3 2. Remove the upper section of the cleaner from the dirt tank and deposit with the fi lter element facing upwards. Do not place the upper section of the cleaner on the guard (). 2. Turn the fi lter holder anticlockwise (2) and remove it (3). 3. Carefully remove the fi lter element. 8 )
11 Clean the fi lter seal (4). Check it for damage and replace if necessary. 5. Check antistatic clamp (5) for damage and have it replaced by Alto Service if necessary. 6. Check the fl oater (6) for proper operation: When you turn the fi lter holder, the fl oater should move back and forth easily. 7. Fit a new fi lter element. 8. Fit the fi lter holder and turn it clockwise to secure it. 9. Dispose of the used fi lter element in accordance with legal regulations. Never use the vacuum clean er without a filter Replacing filter element (Automatic Filter Cleaning System) ) Open the retaining clamps and remove the upper section of the cleaner from the dirt tank. Lay the upper section of the cleaner down with the filter element facing upwards. Do not place the upper section of the cleaner on the guard () and do not damage the filter element. 2. Open the bar handle (2) and remove it. 3. Remove the filter holder (3). 4. Carefully remove the filter element. 5. Clean the filter seal (4). Check it for damage and replace it if necessary. 6. Check the antistatic clamp (5) for damage and have it replaced by Alto Service if necessary. 7. Check that the control flap (6) for filter cleaning works properly. The control flap should move back and forwards easily. ) 9
12 7 8. Clean the level hose (7). 9. Fit a new filter element. 0. Fit the filter holder. Ensure that it is in the correct position.. Fit bar and close bar handle. 2. Dispose of the used filter element in accordance with legal regulations. Never use the vacuum cleaner without a filter. 8 Troubleshooting Fault Cause Remedy Motor does not start > Fuse of the mains socket has Connect mains fuse. blown. Motor does not run in automatic mode > Overload protection switch has tripped. Switch off the vacuum cleaner and allow it to cool for approx. 5 minutes. If the cleaner cannot be started again, contact the Alto service department. > Self-acting carbon brush is Have carbon brushes changed worn ) by Alto Service. > Power tool/pneumatic tool is defective or not connected properly. > The power rating of the electrical tool is too low. Reduced suction power > Suction power selected with suction power control is too low. No suction power during wet cleaning The vacuum cleaner switches off during wet cleaning Check that the power tool works or that the plug is inserted correctly. Note that minimum power rating is P>40W Set suction power in accordance with section Setting suction power. > Clogged suction hose/nozzle. Clean suction hose/nozzle > Filter bag is full. See section Replacing filter bag. > Filter element is clogged. See section 4.5 Cleaning filter element and Replacing filter element. > Automatic Filter Cleaning System only: Contact Alto Service Defective cleaning mechanism > Tank is full. (Float has closed the suction opening). Switch off the cleaner. Empty the tank. > Tank is full. Switch off the cleaner. Empty the tank. Voltage fluctuations > Impedance of power supply is too high. Connect the cleaner to another socket closer to the fuse box. Voltage fluctuations over 7% should not occur if the impedance at the transfer point is )
13 9 Further information 9. Recycling the vacuum cleaner Make the old cleaner unusable immediately.. Unplug the cleaner and cut the power cord. Do not discard of electrical appliances with household waste. As specified in European Directive 2002/96/EC on old electrical and electronic appliances, used electrical goods must be collected separately and recycled ecologically. Contact your local authorities or your nearest dealer for further information. 9.2 Guarantee Our general conditions of business are applicable with regard to the guarantee. Subject to change as a result of technical advances. 9.3 Tests and approvals Electrical tests must be performed in accordance with the provisions of safety regulations (VBG4) and to DIN VDE 070 Part and Part 3. In ac cordance with DIN VDE 0702 these tests must be performed at regular intervals and after repairs or modifi cations. The vacuum cleaner has been approved in accordance with IEC/EN )
14 9.4 Technical data ATTIX 3 / 5 / 7 ATTIX 2 GALLON ATTIX 2 GALLON RDF EC 2 GALLON AS/E ATTIX 2 GALLON RDFD 2 GALLON AS/PE ATTIX 9 GALLON 9 GALLON AS/PE2 EU CH, DK GB230/240V GB 0V AU, NZ 230/240V US 20 V Voltage V / / Mains frequency Hz 50/ Fuse A Power consumption W (HP) (.4) 840 (.) 940 (.3) 040 (.4) Connected load for appliance socket W (HP) (0.8) 500 (0.7) 400 (0.5) Total connected load W (HP) (.4) 440 (.9) ATTIX ATTIX ATTIX MOBIL / / ATTIX 2 GALLON 2 GALLON RDF EC 2 GALLON AS/E 2 GALLON RDFD 2 GALLON AS/PE ATTIX 75-0 / / 76-2 XC 79-2 ATTIX 9 GAL 9 GAL AS/PE2 Volume flow (air) l/min (cfm) 3600 (27) Negative pressure (93) Pa (in) (93) (water lift) (00) 2) (93) Sound pressure level at a distance of m, EN db(a) 62 ± 2 60 ± 2 64 ± 2 Operating noise db(a) 59 ± 2 57 ± 2 Vibration ISO 5349 m/s² 2,5 Power cord: Length m (ft) (GB) 7.5 (25) Power cord: Type H05RR-F 2x0.75 H05RR-F 3x.5 H05RR-F 3x0,75 SJTW-A AWG 8/3 4) H05RR-F 3x.5 H05RR-F 3x.5 ) SJTW-A AWG 4/3 H07BQ-F 3x2.5 SJTW-A AWG 4/3 Protection class II I Type of protection (splash water protected) IP X4 Radio interference level EN Tank volume l (gal) (2) 70 (9) Width mm (in) (9) 580 (23) Depth mm (in) (20) 605 (24) Height mm (in) (26) 970 (38) Weight kg (lb) 0 4 / 6 ) 25 / 27 3) (56/60) ) ATTIX 560-2/-3, ATTIX 2 GALLON RDFD, ATTIX 2 GALLON AS/PE 3) ATTIX 76-2 XC / 9 GALLON AS/PE2 2) ATTIX ) ATTIX 2 GALLON 9.5 Accessories Description ATTIX 3 ATTIX 5 2 GAL 2 GAL RDF Order No. ATTIX 560-2/-3 2 GAL RDFD 2 GAL AS/PE EC2 GAL AS/E ATTIX 75 9 GAL ATTIX 76 9 GAL AS/ PE2 ATTIX 79 Filter bag(5 pcs.) Waste bag (5 pcs.) Filter element (ZA) (ZA) (ZA) Cloth insert filter Description Order No. ATTIX 3 / 5 / 7 Filter screen 5475 Alto FoamStop (6 x l) )
15 9.6 EC conformity declaration EC conformity declaration Product: Vacuum cleaner for wet and dry operation Type: ATTIX / 360- / ATTIX / 550- MOBIL / ATTIX / / ATTIX 75-0 / 75- / 75-2 /76-2 XC / 79-2 The design of the unit corre sponds to the following pertinent regulations: EC Machine Directive 2006/42/EC EC EMC Directive 2004/08/EC RoHS Directive 20/65/EC Applied harmonised standards: EN 200-, EN EN EN EN 5504-, EN , EN Applied national standards and technical specifications: Name and address of the person autho rised to compile the technical file: DIN EN DIN EN Anton Sørensen General Manager, Technical Operations EAPC Nilfi sk-advance A/S Sognevej 25 DK-2605 Brøndby Identity and signature of the person empowered to draw up the declaration on behalf of the manufacturer: Anton Sørensen General Manager, Technical Operations EAPC Nilfi sk-advance A/S Sognevej 25 DK-2605 Brøndby Place and date of the declaration: Hadsund, ) 3
16 HEAD QUARTER DENMARK Nilfi sk-advance A/S Sognevej 25 DK-2605 Brøndby Tel.: (+45) sk-advance.com SALES COMPANIES ARGENTINA Nilfi sk-advance srl. Herrera 855, 6 fl oor, Of. A-604 ZC 293 Ciudad Autónoma de Buenos Aires Argentina sk-alto.com AUSTRALIA Nilfi sk-alto Unit, 3 Bessemer Street Blacktown NSW 248 Australia sk-alto.com.au AUSTRIA Nilfi sk-alto Geschäftsbereich der Nilfisk-Advance GmbH Metzgerstraße 68 A-50 Bergheim/Salzburg sk-alto.at BELGIUM Nilfi sk-advance NV/SA Riverside Business Park Boulevard Internationalelaan 55 Bâtiment C3/C4 Gebouw Bruxelles 070 Brussel sk.be CHILE Nilfi sk-advance S.A. San Alfonso 462, Santiago sk.com CHINA Nilfi sk-advance Cleaning Equipment (Shanghai) Co Ltd. No. 489, Yindu Road Xinzhuang Industrial Park Shanghai sk.cn CZECH REPUBLIC Nilfi sk-advance s.r.o. Do Certous VGP Park Horní Pocernice, Budova H2 CZ Praha 9 sk.cz DENMARK Nilfi sk-alto Danmark Industrivej Hadsund, DK sk-alto.dk FINLAND Nilfi sk-advance OY Ab Koskelontie 23E Espoo, FI sk.fi FRANCE Nilfi sk-advance SAS Division ALTO BP Courtaboeuf Cedex GERMANY Nilfi sk-alto eine Marke der Nilfi sk-advance GmbH Guido-Oberdorfer-Straße Bellenberg sk-alto.de GREECE Nilfi sk-advance A.E. 8, Thoukididou Str. Argiroupoli,Athens, GR sk.gr HOLLAND Nilfi sk-advance B.V. Versterkerstraat AN ALMERE HONG KONG Nilfi sk-advance Ltd. 200 HK Worsted Mills Ind l Bldg Wo Tong Tsui St. Hong Kong, Kwai Chung, N.T. HUNGARY Nilfi sk-advance Kereskedelmi Kft. H-230 Szigetszentmiklós-Lakihegy II. Rákóczi Ferenc út 0. INDIA Nilfi sk-advance India Limited Pramukh Plaza, B Wing, 4th fl oor, Unit No. 403 Cardinal Gracious Road, Chakala Andheri (East), Mumbai IRELAND Nilfi sk-advance Stokes Place St. Stephen s Green Dublin 2, Ireland ITALY Nilfi sk-advance S.p.A. Strada Comunale Della Braglia, 8 Guardamiglio, Lombardia, I JAPAN Nilfi sk-advance Inc Kita-Shinyokohama Kouhoku-Ku Yokohama KOREA NIlfi sk-advance Korea 47-4, Kumwon B/D 2F, Gunja-Dong, Gwangjin-Gu, Seoul MALAYSIA Nilfi sk-advance Sdn Bhd SD 33, Jalan KIP 0 Taman Perindustrian KIP Sri Damansara Kuala Lumpur Malaysia MEXICO Nilfi sk Advance de Mexico S. de R.L. de C.V. Agustin M. Chavez, PB-004 Col. Centro Ciudad Santa Fe C.P. 020 México, D.F. NEW ZEALAND Nilfi sk-advance NZ Ltd Danish House 6 Rockridge Avenue Penrose Auckland NZ 35 NORWAY Nilfi sk-advance AS Bjørnerudvejen 24 Oslo, N PERU Nilfi sk-advance S.A.C. Calle Boulevard 62, Of. 703, Lima 33- Perú Lima POLAND Nilfi sk-advance Sp. z.o.o ul. 3-go Maja 8, Bud. B4 Pruszków, PL PORTUGAL Nilfi sk-advance, Lda. Sintra Business Park Zona Industrial Da Abrunheira Edificio, o A Sintra, P RUSSIA Nilfi sk-advance LLC Vyatskaya str. 27, bld. 7, st fl oor Moscow, sk.ru SOUTH AFRICA WAP South Africa (Pty) Ltd 2 Newton Street 620 Spartan, Kempton Park SINGAPORE Den-Sin 22 Tuas Avenue 2 Singapore sk.com SPAIN Nilfi sk-advance, S.A. Torre D Ara Passeig del Rengle, 5 Plta.0ª Mataró, E sk.es SWEDEN Nilfi sk-advance AB Taljegårdsgatan Mölndal Website: sk-alto.se SWITZERLAND NA Sondergger AG Nilfi sk-alto Generalvertretung Mühlestrasse 0 CH-900 Herisau sk-alto.ch TAIWAN Nilfi sk-advance Ltd. Taiwan Branch (H.K.) No. 5, Wan Fang Road, Taipei sk-advance.com.tw THAILAND Nilfi sk-advance Co. Ltd. 89 Soi Chokechai-Ruammitr Viphavadee-Rangsit Road Jomphol, Jatuchak Bangkok sk.com TURKEY Nilfi sk-advance Prof. Tem. Ek. Tic. A.S. Serifali Mh. Bayraktar Bulv. Sehit Sk. No:7 Ümraniye, Istanbul sk.com.tr UNITED KINGDOM Nilfi sk-alto Bowerbank Way, Gilwilly Industrial Estate Penrith, Cumbria GB-CA 9BQ sk-alto.co.uk UNITED ARAB EMIRATES Nilfi sk-advance Middle East Branch SAIF-Zone, P. O. Box Sharjah sk.com USA Nilfi sk-advance st Ave. North Plymouth MN sk-alto.us Nilfi sk-advance, Inc. Industrial Vacuum Division 740 Hemlock Road, Suite 00 Morgantown, PA sk-alto.us VIETNAM Nilfi sk-advance Co., Ltd. No.5 Doc Ngu Str. Lieu Giai Ward Ba Dinh Dist. Hanoi sk.com
AERO 20 AERO ENGLISH - Operating Instructions
 www.nilfisk-alto.com AERO 20 AERO 25 302002328-2008-05-21 ENGLISH - Operating Instructions Important safety instructions Before using the vacuum cleaner, always read the operating instructions and keep
IVB 3-M/5-M/7-M. Operating Instructions Betriebsanleitung Notice d utilisation Gebruiksaanwijzing Istruzioni sull uso Driftsinstruks Bruksanvisning
 auto auto auto auto auto IVB -M/-M/7-M Operating Instructions Betriebsanleitung Notice d utilisation Gebruiksaanwijzing Istruzioni sull uso Driftsinstruks Bruksanvisning Driftsvejledning Käyttöohje Navodilo
Operating instructions POSEIDON 2
 Operating instructions POSEIDON 2 128330683 b Instruktionsbog... 3-16 Instruksjonsbok... 17-31 Instruktionsbok... 32-46 Käyttöohje... 47-61 Instruction manual... 62-75 Betriebsanleitung... 76-92 Manuel
Operating instructions POSEIDON PE
 Operating instructions POSEIDON PE 106169306 b EN-DE-FR-NL-ES-DA-NO-SV-FI Copyright 2014 Nilfisk-ALTO User manual... 3-17 Betriebsanleitung... 18-34 Manuel d instructions... 35-51 Gebruikershandleiding...
Operating instructions
 Operating instructions TTIX 30 / PC / XC TTIX 40 / PC / XC TTIX 50 / PC / XC TTIX 50-21 PC EC 107400397 E TTIX 30-40-50 TTIX 30 9 8 7 1 2 3 6 5 4 TTIX 50 TTIX 40 TTIX 30-40-50 Contents 1 Important safety
Operating instructions RAMIRENT ATTIX 30 / PC / XC ATTIX 40 / PC / XC ATTIX 50 / PC / XC ATTIX PC EC E
 Operating instructions TTIX 30 / PC / XC TTIX 40 / PC / XC TTIX 50 / PC / XC TTIX 50-21 PC EC RMIRENT 107400397 E TTIX 30-40-50 9 8 7 6 5 4 TTIX 40 TTIX 30 1 2 3 TTIX 50 RMIRENT Contents 1 Important safety
AERO 21 AERO 21 INOX A
 Operating instructions AERO 21 AERO 21 INOX 107407182 A Operating instructions... 1 Bedienungsanweisungen... 8 Instructions de fonctionnement... 16 Gebruiksaanwijzingen... 24 Istruzioni per l uso... 2
GM 80P - GM 80P LC Instructions for use
 GM 80P - GM 80P LC Instructions for use 107418517 A (06. 2017) Hose connection Power cord Diffuser 1 2 3 Plastic hose and plastic tube Suction power regulation Rubber or plastic hose with curved steel
GD 1000 Instructions for use
 GD 000 Instructions for use 074836 B (03. 08) . Unpacking. Dust bag replacement 03 3. Filter cleaning 04 4. HEPA - GD 00, GDS 00. Unpacking, Auspacken, Déballage.. Dust bag replacement, Staubbeutel auswechseln,
C / C / C C X-TRA (C NZ) C / C X-TRA, C / C X-TRA. Instructions for use
 C / C X-TRA, C / C X-TRA. Instructions for use") C 100.7 / C 105.7 / C 110.7 C 110.7 X-TRA (C 110.7 NZ) C 120.7 / C 120.7 X-TRA, C 125.7 / C 125.7 X-TRA Instructions for use EN 02.2018 The instruction consists of 3 parts. Part 1:3 Safety Instructions.
C 100.7 / C 105.7 / C 110.7 C 110.7 X-TRA (C 110.7 NZ) C 120.7 / C 120.7 X-TRA, C 125.7 / C 125.7 X-TRA Instructions for use EN 02.2018 The instruction consists of 3 parts. Part 1:3 Safety Instructions.
Elite - Instructions for use
 Elite - Instructions for use 11.2017 EN Safety Instructions Before first use of the machine, this instruction manual must be read through carefully. Save instructions for later use. WRNING! Do not use
Operating instructions TRUCK BOOSTER
 Operating instructions TRUCK BOOSTER 107319140 j English...3-29 Deutsch...30-56 Français...57-83 Nederlands...84-110 Español... 111-137 Italiano...139-165 Pyccкий...166-192 Polski...193-220 Magyar...221-248
VL500 - Instructions for use
 VL500 - Instructions for use 107405529 H (09. 2016) ... 6... 14... 22... 30... 38... 46... 53... 60... 67... 74... 82... 90... 98... 106...113... 120... 128... 135... 143... 151... 159... 167... 175...
ATTIX 791-2M/B C
 675 C auto auto 4 5 6 7 6 8 7 9 Contents Important safety instructions Description Before start-up 4 Operation 5 Applications and techniques 6 After finishing work 7 Maintenance 8 Troubleshooting 9 Further
Operating instructions AUTO BOOSTER
 Operating instructions AUTO BOOSTER 107319253 b (03.2014) EN-DE-FR-NL-ES-IT-DA-NO-SVFI-PL-CS-HU Operating Instructions... 3-31 Betriebsanleitung... 32-60 Notice d utilisation... 61-90 Gebruiksaanwijzing...
MC DE, MC PE, MC PE PLUS - Instructions for use
 - Instructions for use 106169306 c (09.2015) EN-DE-FR-NL-ES-DA-NO-SV-FI User manual... 3-17 Betriebsanleitung... 18-33 Manuel d instructions... 34-48 Gebruikershandleiding... 49-64 Manuale di istruzioni...
User Manual GV25 GV35 GV702. Company information: Original instructions GV12066 (1)
") User Manual Original instructions GV25 GV35 GV702 Company information: www.vipercleaning.eu info-eu@vipercleaning.com GV12066 (1) 2012-04-10 USER MANUAL ENGLISH TABLE OF CONTENTS Introduction... 4 Manual
User Manual Original instructions GV25 GV35 GV702 Company information: www.vipercleaning.eu info-eu@vipercleaning.com GV12066 (1) 2012-04-10 USER MANUAL ENGLISH TABLE OF CONTENTS Introduction... 4 Manual
VP600 - Instructions for use
 - Instructions for use 107407797 D (04. 2016) Operating instructions... 6 Bedienungsanweisungen... 12 Instructions de fonctionnement... 18 Gebruiksaanwijzingen... 25 Istruzioni per l uso... 32 Bruksanvisning...
HydroDry. Instructions For Use and Parts List. Nilfisk Model /00 revised 10/04 Form No
 HydroDry Instructions For Use and Parts List Nilfisk Model 56259042 8/00 revised 10/04 Form No. 56041506 IMPORTANT SAFETY INSTRUCTIONS This machine is only suitable for commercial use, for example in hotels,
GD 5 - GD 10 Instructions for use
 GD 5 - GD 10 Instructions for use 107417937 B (02. 2018) 2 Operating instructions... 8 Bedienungsanweisungen... 13 Instructions de fonctionnement... 18 Gebruiksaanwijzingen... 24 Istruzioni per l uso...
Vacuum cleaner Instruction manual
 CSR Tools & Consumables Triniti 3, Level 5 39 Delhi Road North Ryde NSW 23 Australia http://www.csr.com.au Vacuum cleaner Instruction manual IMPORTANT: Read and understand all instructions before using.
FF-SR Series. FF-SR25933 Two-hand Safety Control Module FF-SR25933
 Two-hand Safety Control Module FF-SR Series FEATURES Complies with the Machinery Directive 98/37/EC and UL 508 Type III C per EN 574, Category 4 per EN 954-1 Inputs for two dual-contact pushbuttons 0,5
Multi 20 Multi 30. User manual e ( )
") Multi 20 Multi 30 User manual 107402134 e (11.2013) Copyright 2013 Nilfisk-Advance A/S Multi English...6-9 Deutsch...10-13 Français...14-17 Español...18-21 Português...22-25 Italiano...26-29 Nederlands...30-33
Multi 20 Multi 30 User manual 107402134 e (11.2013) Copyright 2013 Nilfisk-Advance A/S Multi English...6-9 Deutsch...10-13 Français...14-17 Español...18-21 Português...22-25 Italiano...26-29 Nederlands...30-33
C.A.V. Operator's Manual. CLARKE-AMERICAN Vacuum 15 Gallon READ THIS BOOK
 Operator's Manual C.A.V.A.V.. 15 CLARKE-AMERICAN Vacuum 15 Gallon READ THIS BOOK This book has important information for the use and safe operation of this machine. Failure to read this book prior to operating
STT 3000 Series STT250 /150 Surge Protection Device Specifications
 STT 3000 Series STT250 /150 Surge Protection Device Specifications Part Number: 46188660-501 EN2I-6061 June 2011 Introduction This device is designed to give the Smart Temperature Transmitter maximum protection
Nilfisk Smart. User Manual c ( ) EN-DA-NO-SV-FI-DE-FR-NL-IT-ES-PT-EL- TR-CS-HU-PL-HR-SL-SK-LV-LT-ET-RU-ZH
 EN-DA-NO-SV-FI-DE-FR-NL-IT-ES-PT-EL- TR-CS-HU-PL-HR-SL-SK-LV-LT-ET-RU-ZH") Nilfisk Smart User Manual 107412814 c (11.2016) EN-DA-NO-SV-FI-DE-FR-NL-IT-ES-PT-EL- TR-CS-HU-PL-HR-SL-SK-LV-LT-ET-RU-ZH EN DA NO SV FI DE FR NL IT ES PT EL TR CS HU PL HR SL SK LV LT ET RU ZH User Manual...
Nilfisk Smart User Manual 107412814 c (11.2016) EN-DA-NO-SV-FI-DE-FR-NL-IT-ES-PT-EL- TR-CS-HU-PL-HR-SL-SK-LV-LT-ET-RU-ZH EN DA NO SV FI DE FR NL IT ES PT EL TR CS HU PL HR SL SK LV LT ET RU ZH User Manual...
Electronic Service Manuals
 Electronic Service Manuals This electronic document is provided as a service to our customers. We do not create the contents of the information contained in this document. Should you have detailed questions
EN NL ES PT PL
 17-03-2005 Nilfisk-ALTO C 100.1 EN NL ES PT PL Instruction manual... 3-12 Gebruikershandleiding... 13-22 Manual de Instrucciones... 23-33 Manual de Instruções... 34-43 Instrukcja obsługi... 44-54 Index
ATTIX 30 / BATT / PC / XC ATTIX 40 / PC / XC ATTIX 50 / PC / XC. Operating Instructions. Downloaded from manuals search engine
 TTIX 30 / BTT / PC / XC TTIX 40 / PC / XC TTIX 50 / PC / XC Operating Instructions um_attix30-40-50-std_en_2008-08-01 TTIX 30-40-50 TTIX 30 9 8 7 1 2 3 6 5 4 TTIX 50 TTIX 40 TTIX 30-40-50 Contents 1 Important
Type 2 safety light curtain Type 2 according to the IEC/EN parts 1 and 2 Compact profile: 31 x 32 mm 30 mm resolution for hand detection Wide r
 Type 2 safety light curtain FF-SLD Series FEATURES Active Optoelectronic Protective Device compliant with the requirements of the IEC/EN 61496-parts 1 and 2 European Norms 30 mm resolution for hand detection
MH 1C - MH 2C - MH 2M - Instructions for use
 1 300 100 0 F C CUT OUT 0 85 30 105 40 175 1% 2% 3% 4% 50120 MH 1C - MH 2C - MH 2M - Instructions for use 60 140 210 90 80 195 70 160 107145403 E (08. 2015) 1 2 3 4 5 6 7 8 9 0 10 F C 85 30 105 40 50120
ATTIX 40-0M PC TYPE 22 Instructions for use
 TTIX 40-0M PC TYPE 22 Instructions for use 107400339 D (06. 2017) TTIX 40-0M PC TYPE 22 Contents 1 Important safety instructions 2 Description 3 Before starting the cleaner 4 Control / Operation 5 pplications
DESCRIPTION FEATURES WARNINGS APPLICATIONS
 FEATURES Long mechanical life Single Pole Double Throw Power switching loads to Amp. Wide range of actuators and terminal design High precision with good repeatability High vibration and shock resistance
Ireland Australia New Zealand
 www.blackanddecker.co.uk 2 1 3 4 UK Ireland Australia New Zealand 1 4 1 A B 5 6 C D 7 8 9 10 11 E 2 F 2 3 G H 12 12 13 13 I 3 J K 3 Intended use Your Black & Decker Dustbuster auto car vacuum cleaner has
Classic Classic 110.1
 Classic 100.1 Classic 110.1 User Manual Printed in China Copyright 2007 Gerni Index 1 Safety precautions and warnings...3 2 Description...5 3 Before you start using your pressure washer...6 4 Operating
Operating Instructions
 WD 3 Premium Operating Instructions Before first use of the unit read these operating instructions and act in accordance with them. English 5 59658050 (08/15) 10 11 12 13 14 15 16 2 3 4 Contents General
MC 4M. Operating instructions C ( )
") MC 4M Operating instructions 107145556 C (03.2015) 1 Symbols used to mark instructions WARNING & Safety instructions in these operating instructions which must be observed to prevent risks to persons are
MC 4M Operating instructions 107145556 C (03.2015) 1 Symbols used to mark instructions WARNING & Safety instructions in these operating instructions which must be observed to prevent risks to persons are
Beckhoff short profile
 Beckhoff short profile Beckhoff implements open automation systems based on PC Control technology The product range covers Industrial PCs, I/O and Fieldbus Components, Drive Technology and automation software
Super Super Super Works Super Super Works
 Super 130.3 Super 135.3 Super 145.3 Works Super 150.3 Super 160.3 Works User Guide (07.2018) The instruction consists of 4 parts. Part 1:3 Safety Instructions. Part 2:3 User Guide. Part 3:3 Troubleshooting,
Instruction Manual. Seco. Dry-running Rotary Vane Vacuum Pumps SV 1003 D, SV 1005 D
 Instruction Manual Seco Dry-running Rotary Vane Vacuum Pumps SV 1003 D, SV 1005 D Busch Vyroba CZ s.r.o. Svárovská 620, CZ 460 01, Liberec 11 Czech Republic 0870140843/A0002_en / Original instructions
A WMIA Partner of the Year Winner S-Series Enclosureless Dust Collector
 A WMIA Partner of the Year Winner S-Series Enclosureless Dust Collector Nederman S-Series BR-11112-0323 The S-Series up to 5,000 CFM Suitable for collection of many different types of dust including wood,
High vacuum guide FOR PRE-SEPARATORS AND CYCLONES
 High vacuum guide FOR PRE-SEPARATORS AND CYCLONES High vacum guide for pre-separators and cyclones System description Nederman Pre-separation and Vacuum Transportation Systems pre-separate and discharge
Press Release. Short profile Beckhoff. Short profile February 2009 Page 1 of 6
 Page 1 of 6 Short profile Beckhoff Beckhoff implements open automation systems based on PC Control technology. The product range covers Industrial PCs, I/O and Fieldbus Components, Drive Technology and
COMBIFAB F Fan The flexible fan for dust extraction systems in all industries
 COMBIFAB F Fan The flexible fan for dust extraction systems in all industries Combifab F Fan Our Combifab F range of fans consists of four different fans solving all kinds of dust extraction applications
LAVASTOVIGLIE DISHWASHER LAVE-VAISSELLE GESCHIRRSPÜLER VAATWASSER LAVAVAJILLAS MÁQUINA DE LAVAR LOUÇA ΠΛΥΝΤΗΡΙΟ ΠΙΑΤΩΝ BULASIK MAKINASI
 MANUALE D USO INSTRUCTION MANUAL NOTICE D UTILISATION GEBRAUCHSANWEISUNG GEBRUIKSAANWIJZING MANUAL DE USO MANUAL DE INSTRUÇÕES ENTOIXIZOMENO ΠΛYNTHPIO ΠIATΩN KULLANIM KLAVUZU LAVASTOVIGLIE DISHWASHER LAVE-VAISSELLE
WET & DRY GARAGE VAC 20L CAPACITY WATT 1.5M MOTOR TANK STEEL HOSE KP702 ON BOARD ACCESSORY STORAGE SUCTION STAINLESS
 WET & DRY GARAGE VAC 20L CAPACITY 1.5M SUCTION HOSE STAINLESS STEEL TANK ON BOARD ACCESSORY STORAGE 1250 WATT MOTOR KP702 Table of Contents 20L WET & DRY GARAGE VAC Know Your Product...1 Vacuum Safety
MV 2. Operating Instructions. Before first use of the unit read these operating instructions and act in accordance with them.
 MV 2 Operating Instructions Before first use of the unit read these operating instructions and act in accordance with them. www.kaercher.com/register-and-win 59651870 11/13 2 12 3 Contents General notes..................5
Instruction Manual. Mink. Claw Vacuum Pumps MM 1324 AV, MM 1202 AV, MM 1252 AV, MM 1322 AV US Version
 Instruction Manual Mink Claw Vacuum Pumps MM 1324 AV, MM 1202 AV, MM 1252 AV, MM 1322 AV US Version Busch Manufacturing LLC 516 Viking Drive Virginia Beach, VA 23452 USA 0870207808/-_en / Original instructions
VHC200 AIRPOWERED VACUUM CLEANER OPERATOR MANUAL
 AIRPOWERED VACUUM CLEANER OPERATOR MANUAL Clemas & Co. Unit 5 Ashchurch Business Centre, Alexandra Way, Tewkesbury, Gloucestershire, GL20 8NB. Tel: 01684 850777 Fax: 01684 850707 Email: info@clemas.co.uk
Operating Instructions
 Operating Instructions BA-003 Read and understand this manual before use. Keep this manual for future reference. CONFORMS TO UL STD.No.1017 Certified to CSA STD C22.2 No.243-10 For questions or concerns
Instruction Manual PB 0003 D. Rotary Vane Vacuum Pumps. Busch Produktions GmbH Schauinslandstraße 1, Maulburg Germany
 Instruction Manual R5 Rotary Vane Vacuum Pumps PB 0003 D Busch Produktions GmbH Schauinslandstraße 1, 79689 Maulburg Germany 0870167899/A0001_en / Original instructions / Modifications reserved 10/10/2017
LAVASTOVIGLIE DISHWASHER LAVE-VAISSELLE GESCHIRRSPÜLER VAATWASSER LAVAVAJILLAS MÁQUINA DE LAVAR LOUÇA ΠΛΥΝΤΗΡΙΟ ΠΙΑΤΩΝ BULASIK MAKINASI
 MANUALE D USO INSTRUCTION MANUAL NOTICE D UTILISATION GEBRAUCHSANWEISUNG GEBRUIKSAANWIJZING MANUAL DE USO MANUAL DE INSTRUÇÕES ENTOIXIZOMENO ΠΛYNTHPIO ΠIATΩN KULLANIM KLAVUZU LAVASTOVIGLIE DISHWASHER LAVE-VAISSELLE
Get Cleaning... What s your Vax s model number? User Guide. Carpet Washer Vax Careline: AU: NZ:
 User Guide Vax Careline: AU: 1300 361 505 NZ: 0800 800 900 Carpet Washer Get Cleaning... What s your Vax s model number? W8 W8 W0 W0 W0 W W W W W What s your serial number? (Located on the base of the
Ireland. Australia. New Zealand
 UK Ireland Australia New Zealand 11 9 10 10 11 A B 12 13 C D 15 14 16 17 F 2 Intended use Your Black & Decker Dustbuster auto car vacuum cleaner has been designed for light dry vacuum cleaning purposes.the
DUST EXTRACTOR INSTRUCTION MANUAL. 550W (3/4 HP) INDUCTION MOTOR 1850W AUTOMATIC POWER OUTLET 65L COLLECTION BAG ø100mm X 2.
 INDUCTION MOTOR 1850W AUTOMATIC POWER OUTLET 65L COLLECTION BAG ø100mm X 2.") KNOW YOUR PRODUCT DUST EXTRACTOR 550W (3/4 HP) INDUCTION MOTOR 1850W AUTOMATIC POWER OUTLET 65L COLLECTION BAG ø100mm X 2.5M SUCTION HOSE INSTRUCTION MANUAL WARNING: Read all safety warnings and all instructions.
KNOW YOUR PRODUCT DUST EXTRACTOR 550W (3/4 HP) INDUCTION MOTOR 1850W AUTOMATIC POWER OUTLET 65L COLLECTION BAG ø100mm X 2.5M SUCTION HOSE INSTRUCTION MANUAL WARNING: Read all safety warnings and all instructions.
AV1210 AV1260
 www.blackanddecker.com AV1210 AV1260 1 2 Copyright Black & Decker 2 1 3 4 4 A B 5 6 1 C D 8 9 10 7 E F 3 2 11 3 G H 12 13 I J 12 13 K 4 3 L ENGLISH Dustbuster auto AV1210/AV1260 Thank you for choosing
DS English... 5 Français Español CONSUMO DE ENERGIA. 1. En Operación: 287,82 Wh 2. En Modo de Espera: N/A Modelo: DS 5.
 DS 5.600 English.... 5 Français... 11 Español... 17 CONSUMO DE ENERGIA 1. En Operación: 287,82 Wh 2. En Modo de Espera: N/A Modelo: DS 5.600 59634180 (04/12) 2 3 4 Dear Customer, Please read and comply
OPTIMYST WALL ENGINE OMWFC20 RTOPW20 PEM20
 OPTIMYST WALL ENGINE OMWFC20 RTOPW20 PEM20 08/51462/0 Issue 5 The product complies with the European Safety Standards EN60335-2-30 and the European Standard Electromagnetic Compatibility (EMC) EN55014,
Manusa Automatic. Doors. Safety beyond the Standard. EN16005 Power operated pedestrian doorsets. Safety in use. Requirements and test methods.
 Manusa Automatic Doors. Safety beyond the Standard. Visual guide of Standard compliance in Manusa automatic sliding doors. Power operated pedestrian doorsets. Safety in use. Requirements and test methods.
Get Cleaning... What s your Vax s model number? User Guide. Carpet Washer. Vax Careline: AU: NZ: VCWRS700
 Carpet Washer User Guide Vax Careline: AU: 1300 361 505 NZ: 0800 800 900 Get Cleaning... What s your Vax s model number? V C W R S 7 0 0 What s your serial number? (Located on the base of the machine)
K 5.80 M ( ) Caution! Do not use the unit without first having read the operating instructions.
 Caution! Do not use the unit without first having read the operating instructions.") K 5.80 M 5.960-830 (2004330-04-03) Caution! Do not use the unit without first having read the operating instructions. Contents Short instructions... 2 Assembly... 3 Safety Notes... 4 Before first use...
K 5.80 M 5.960-830 (2004330-04-03) Caution! Do not use the unit without first having read the operating instructions. Contents Short instructions... 2 Assembly... 3 Safety Notes... 4 Before first use...
MV 4 MV 4 Premium. Operating Instructions. Before first use of the unit read these operating instructions and act in accordance with them.
 MV 4 MV 4 Premium Operating Instructions Before first use of the unit read these operating instructions and act in accordance with them. www.kaercher.com/register-and-win 59651790 10/13 3 4 2 5 6 7 1 8
Premium freezers combining functionality, elegance and energy efficiency
 Premor Premium freezers combining functionality, elegance and energy efficiency High capacity Attractive and full product visibility Available with natural refrigerant Higher sales comes as a standard
CVC 370 WV 370 WVT 370 WV 380 WV 470. Owner Instructions. Original Instructions Warning! Read instructions before using the machine.
 are H Care ecare HomeCare HomeC CVC 370 WV 370 WVT 370 WV 380 WV 470 Owner Instructions Original Instructions Warning! Read instructions before using the machine www.numatic.com Kit A21A / AA12 Kit A21A
Instruction Manual. Mink. Claw Vacuum Pumps MM 1402 AV, MM 1502 AV. Busch Produktions GmbH Schauinslandstraße 1, Maulburg Germany
 Instruction Manual Mink Claw Vacuum Pumps MM 1402 AV, MM 1502 AV Busch Produktions GmbH Schauinslandstraße 1, 79689 Maulburg Germany 0870156906/A0000_en / Original instructions / Modifications reserved
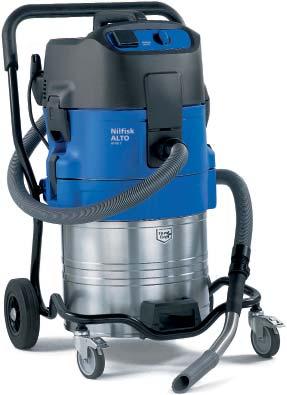
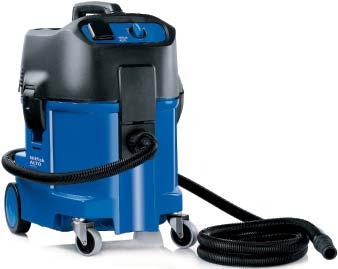
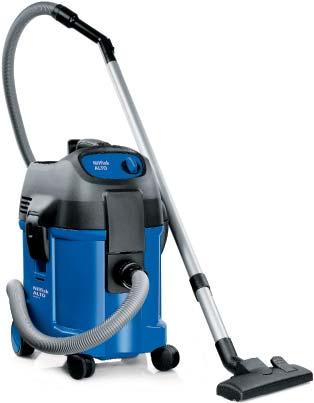
The ATTIX Wet & Dry series are the latest in the Nilfisk-ALTO quality evolution
 The Wet & Dry series are the latest in the Nilfisk-ALTO quality evolution The Nilfisk-ALTO series offers so much, that it is easy to find the right machine for your task Model: 79-2 Long life 763-2 ED
Ireland. Australia. New Zealand
 UK Ireland Australia New Zealand 2 3 4 5 Intended use Your Black & Decker vacuum cleaner has been designed to vacuum dry substances. This product is intended for household use only. Safety instructions
TRITON 800 PE TRITON 1000 PE POSEIDON 1100 PE POSEIDON 1200 PE PLUS
 03-05-2005 TRITON 800 PE TRITON 1000 PE POSEIDON 1100 PE POSEIDON 1200 PE PLUS DA EN FR DE NL Instruktionsbog... 3-24 Instruction Manual... 25-46 Manuel d instructions... 47-68 Betriebsanleitung... 69-90
Contact Details. Please note that some of the contact details on this PDF document may not be current.
 Contact Details Please note that some of the contact details on this PDF document may not be current. Please use the following details if you need to contact us: Telephone: 0844 879 3588 Email: customer.services@gdcgroup.co.uk
AERO 21 AERO 21 INOX C
 Operating instructions AERO 21 AERO 21 INOX 107407182 C Operating instructions... 1 Bedienungsanweisungen... 8 Instructions de fonctionnement... 15 Gebruiksaanwijzingen... 22 Istruzioni per l uso... 29
Sip Vacuum Cleaner 1400/35 Wet & Dry
 Please dispose of packaging for the product in a responsible manner. It is suitable for recycling. Help to protect the environment, take the packaging to the local amenity tip and place into the appropriate
Due to continual improvement in design or otherwise, the product you purchase may differ slightly from the illustration in this book.
 Kambrook - Australia Building 2, Port Air Industrial Estate 1A Hale Street Botany NSW 2019 Australia Customer Service Line 1300 139 798 Customer Service Fax 1800 621 337 www.kambrook.com.au Kambrook -
Accuracy counts! Sensors with analog output
 Accuracy counts! Sensors with analog output Company Contrinex is a leading international high-tech sensor company with headquarters in Switzerland. Contrinex offers quality and highly innovative sensing
OAKHURST, AUBERRY OKT20, AUB20
 OAKHURST, AUBERRY OKT20, AUB20 08/51707/0 Issue 7 The product complies with the European Safety Standards EN60335-2-30 and the European Standard Electromagnetic Compatibility (EMC) EN55014, EN60555-2 and
Specifications. Vacuum motor power consumption(w/hp) 1200 / 1.6. Exhaust water pump power consumption(w/hp 800 / 1.1
 1200 / 1.6. Exhaust water pump power consumption(w/hp 800 / 1.1") Specifications Rated voltage (V) AC 110-120V or 220-240V / 50-60Hz Vacuum motor power consumption(w/hp) 1200 / 1.6 Exhaust water pump power consumption(w/hp 800 / 1.1 Exhaust water pump flow (GPH/LPH)
Specifications Rated voltage (V) AC 110-120V or 220-240V / 50-60Hz Vacuum motor power consumption(w/hp) 1200 / 1.6 Exhaust water pump power consumption(w/hp 800 / 1.1 Exhaust water pump flow (GPH/LPH)
STANDARD T6 (200 C) SENSOR CABLE RANGE
 SENSOR CABLE RANGE") STANDARD T6 (200 C) SENSOR CABLE RANGE for the Automotive Industry TE AUTOMOTIVE /// PRODUCT SHEET STANDARD T6 (200 C) SENSOR CABLE RANGE for the Automotive Industry High-performance automotive wire In
STANDARD T6 (200 C) SENSOR CABLE RANGE for the Automotive Industry TE AUTOMOTIVE /// PRODUCT SHEET STANDARD T6 (200 C) SENSOR CABLE RANGE for the Automotive Industry High-performance automotive wire In
Classic Classic 125.2
 Why compromise Classic 120.2 Classic 125.2 User Guide 128303306 b Classic 120.2 Classic 125.2 Printed in China Copyright 2011 Gerni Index 1 Safety precautions and warnings...3 2 Description...5 3 Before
Vortex compact 3L Nr / -6000
 Vortex compact 3L Nr. 2924-5000 / -6000 Bedienungsanleitung Instruction manual Mode d emploi Istruzioni per l uso Instrucciones de servicio Инструкция по эксплуатации 操作说明书 取扱説明書 사용설명서 21-6583 30102017
Schedule of Accreditation issued by United Kingdom Accreditation Service 2 Pine Trees, Chertsey Lane, Staines-upon-Thames, TW18 3HR, UK
 2 Pine Trees, Chertsey Lane, Staines-upon-Thames, TW18 3HR, UK Accredited to ISO/IEC 17021-1:2015 to provide quality 4th Floor Vivo Building 30 Stamford Street SE1 9LQ United Kingdom Contact: Mr D P Koek
K Operating Instructions. Before first use of the unit read these operating instructions and act in accordance with them.
 K 1.100 Operating Instructions Before first use of the unit read these operating instructions and act in accordance with them. www.kaercher.com/register-and-win 59651430 (10/13) Contents General information..............
Instruction Manual. Rotary Vane Vacuum Pumps KB 0010 E, KB 0016 E KC 0010 E, KC 0016 E
 Instruction Manual R5 Rotary Vane Vacuum Pumps KB 0010 E, KB 0016 E KC 0010 E, KC 0016 E Busch Vyroba CZ s.r.o. Svárovská 620, CZ 460 01, Liberec 11 Czech Republic 0870169526/A0001_en / Original instructions
NEPTUNE 5-46 PE NEPTUNE 5-54 PE NEPTUNE 7-61 PE NEPTUNE 5-85 PE
 /DE Operating Instructions...1-19 Betriebsanleitung...20-38 Notice d utilisation...39-57 Gebruiksaanwijzing...58-76 Istruzioni sull uso...77-95 Bruksanvisning... 96-114 Bruksanvisning... 115-133 Brugsvejledning...134-152
Owner Instructions HVR Warning! Read instructions before using the machine
 Owner Instructions Warning! Read instructions before using the machine HVR 240-11 www.numatic.com Kit AS-1 Assembly 1 2 3 4 5 6 Using your machine Start Power on light + + + Low Low High 1 2 Cleaning the
Combivac Operating Instructions Combivac
 Combivac 17-36 Operating Instructions Combivac General Table of contents General...2 Table of contents...2 Information about the operating instructions...3 Liability...3 Notices in the operating instructions...3
WET & DRY VACUUM CLEANERS
 WET & DRY VACUUM CLEANERS MODEL NO: CCVAC20SS, CVAC25SS & CVAC30SSR PART NO: 6471105, 6471110 & 6471120 OPERATING & MAINTENANCE INSTRUCTIONS GC0114 INTRODUCTION Thank you for selecting this VAC KING Vacuum
Electronically controlled instantaneous water heater. DEX: C models. Instructions for the user
 Electronically controlled instantaneous water heater DEX: 27930-50 C models Instructions for the user For 50 ºC models, the appliance delivers water not exceeding 50 ºC in accordance with AS3498. MADE
K M. Operating Instructions. Before first use of the unit read these operating instructions and act in accordance with them
 K 2.900 M Operating Instructions Before first use of the unit read these operating instructions and act in accordance with them. 5.962-499.0 (01/09) Contents General information 2 Safety instructions 3
POSITIONERS CONTROLS ELECTRO-PNEUMATIC INTELLIGENCE FOR DOUBLE & SINGLE ACTING PNEUMATIC ACTUATORS SERIES 6A. The High Performance Company CELEBRATING
 POSITIONERS ELECTRO-PNEUMATIC INTELLIGENCE CONTROLS SERIES 6A FOR DOUBLE & SINGLE ACTING PNEUMATIC ACTUATORS CELEBRATING The High Performance Company Y E A R S INTELLIGENCE Series 6A Intelligent Electro-Pneumatic
B INSTRUCTIONS FOR USE
 107403575 B INSTRUCTIONS FOR USE VU500 12 INCH SMU US VU500 15 INCH SMU US Contents 1 Important safety instructions...03 1.1 Symbols used to mark instructions...03 1.2 Warnings...03 1.3 Grounding instructions...04
Ireland. Australia. New Zealand
 UK Ireland Australia New Zealand 2 3 4 5 Intended use Your Black & Decker vacuum cleaner has been designed to vacuum dry substances. This product is intended for household use only. Safety instructions
MOCCA CUBIC AUS/NZ. 08/53066/0 Issue 2
 MOCCA CUBIC AUS/NZ 08/53066/0 Issue 2 The product complies with the European Safety Standards EN60335-2-30 and the European Standard Electromagnetic Compatibility (EMC) EN55014, EN60555-2 and EN60555-3
For more information on Tarkett go to
 Granit SD Toro SC STATIC CONTROL HOMOGENEOUS FLOORINGS VINYL iq Granit SD for static dissipation (10 6 R 10 8 Ω) iq Toro SC for static conductivity (5x10 4 R 10 6 Ω) Unique conductive iq PUR iq Unique
VC VC English
 VC 125-6 VC 125-9 English 1 Information about the documentation 1.1 About this documentation Read this documentation before initial operation or use. This is a prerequisite for safe, trouble-free handling
Owner Instructions Original Instructions Warning! Read instructions before using the machine
 ECO Vac PPR 00- PPR 370- Owner Instructions Original Instructions Warning! Read instructions before using the machine www.numatic.com Kit - AS 607360 60008 60008 6045 6007 6046 6040 604 6089 604 6044 Assembly
Wet/Dry Vacuum Kit
 Wet/Dry Vacuum Kit 54-0011-6 Owner ' s Manual Toll-Free Helpline: 1-866-JOBMATE (562-6283) Version 3.3 Table of Contents SECTION Page Specifications...2 Safety Warnings... 3 Location of Parts..... 5 General
AutoM Click to go to the page. AutoM Auto Shaker Filter
 AutoM.0111.4 Click to go to the page AutoM Auto Shaker Filter The Auto M (500-6,500 CFM) Suitable for various applications that generate light to medium volumes of dry dust ATEX Compliant Applications:
WET & DRY VACUUM 1500W 30L WARRANTY INSTRUCTION MANUAL SPECIFICATIONS. ozito.com.au VWD-1530 WHAT S IN THE BOX
 WHAT S IN THE BOX WET & DRY VACUUM 1500W 30L INSTRUCTION MANUAL SPECIFICATIONS Mains Voltage: Input Power: Suction Power Max.: Tank Capacity: IP Rating: Product weight: ozito.com.au 230 240V ~ 50Hz 1500W
JVP Owner Instructions. Original Instructions Warning! Read instructions before using the machine.
 are H Care ecare HomeCare HomeC JVP 80- Owner Instructions Original Instructions Warning! Read instructions before using the machine www.numatic.com Kit AH 6004 604 6040 6044 6004 6045 6005 6046 6089 604
Ultima Pet Plus Instruction Manual
 Ultima Pet Plus Instruction Manual U6011 IMPORTANT SAFETY INSTRUCTIONS IMPORTANT SAFETY INSTRUCTIONS READ ALL INSTRUCTIONS BEFORE USING (THIS APPLIANCE) When using an electrical appliance basic precautions
Instruction Manual. Rotary Vane Vacuum Pumps RA 0063 F, RA 0100 F. Busch Produktions GmbH Schauinslandstraße 1, Maulburg Germany
 Instruction Manual R5 Rotary Vane Vacuum Pumps RA 0063 F, RA 0100 F Busch Produktions GmbH Schauinslandstraße 1, 79689 Maulburg Germany 0870155464/A0002_en / Original instructions / Modifications reserved