GRUNDFOS INSTRUCTIONS MAGNA1. Installation and operating instructions
|
|
|
- Rodney Hill
- 6 years ago
- Views:
Transcription

1 GRUNDFOS INSTRUCTIONS MAGNA1 Installation and operating instructions
2 English (US) English (US) Installation and operating instructions Original installation and operating instructions. CONTENTS Page 1. Limited warranty 2 2. Symbols used in this document 3 3. General information Applications Pumped liquids Operating conditions Frost protection Insulating shells Non-return valve Wiring diagram Nameplate Tools 6 4. Mechanical installation Lifting the pump Installing the pump Positioning Control box positions Changing the control box position 9 5. Electrical installation Supply voltage Connection to the power supply First start-up Settings Control panel Elements on the control panel Grundfos Eye Light fields indicating the pump setting Overview of settings Pump setting Selection of control mode Fault finding Grundfos Eye operating status Resetting of fault indications Technical data Disposal 19 Prior to installation, read these installation and operating instructions. Installation and operation must comply with local regulations and accepted codes of good practice. 1. Limited warranty Products manufactured by GRUNDFOS PUMPS CORPORATION (Grundfos) are warranted to the original user only to be free of defects in material and workmanship for a period of 24 months from date of installation, but not more than 30 months from date of manufacture. Grundfos' liability under this warranty shall be limited to repairing or replacing at Grundfos' option, without charge, F.O.B. Grundfos' factory or authorized service station, any product of Grundfos' manufacture. Grundfos will not be liable for any costs of removal, installation, transportation, or any other charges which may arise in connection with a warranty claim. Products which are sold but not manufactured by Grundfos are subject to the warranty provided by the manufacturer of said products and not by Grundfos' warranty. Grundfos will not be liable for damage or wear to products caused by abnormal operating conditions, accident, abuse, misuse, unauthorized alteration or repair, or if the product was not installed in accordance with Grundfos' printed installation and operating instructions. To obtain service under this warranty, the defective product must be returned to the distributor or dealer of Grundfos' products from which it was purchased together with proof of purchase and installation date, failure date, and supporting installation data. Unless otherwise provided, the distributor or dealer will contact Grundfos or an authorized service station for instructions. Any defective product to be returned to Grundfos or a service station must be sent freight prepaid; documentation supporting the warranty claim and/or a Return Material Authorization must be included if so instructed. GRUNDFOS WILL NOT BE LIABLE FOR ANY INCIDENTAL OR CONSEQUENTIAL DAMAGES, LOSSES, OR EXPENSES ARISING FROM INSTALLATION, USE, OR ANY OTHER CAUSES. THERE ARE NO EXPRESS OR IMPLIED WARRANTIES, INCLUDING MERCHANTABILITY OR FITNESS FOR A PARTICULAR PURPOSE, WHICH EXTEND BEYOND THOSE WARRANTIES DESCRIBED OR REFERRED TO ABOVE. Some jurisdictions do not allow the exclusion or limitation of incidental or consequential damages and some jurisdictions do not allow limit actions on how long implied warranties may last. Therefore, the above limitations or exclusions may not apply to you. This warranty gives you specific legal rights and you may also have other rights which vary from jurisdiction to jurisdiction. The use of this product requires experience with and knowledge of the product. Persons with reduced physical, sensory or mental capabilities must not use this product, unless they are under supervision or have been instructed in the use of the product by a person responsible for their safety. Children must not use or play with this product. 2

3 2. Symbols used in this document Caution Note If these safety instructions are not observed, it may result in personal injury. If these instructions are not observed, it may lead to electric shock with consequent risk of serious personal injury or death. The surface of the product may be so hot that it may cause burns or personal injury. Risk of dropping objects which may cause personal injury. Escaping vapor involves the risk of personal injury. If these safety instructions are not observed, it may result in malfunction or damage to the equipment. Notes or instructions that make the job easier and ensure safe operation. 3. General information 3.2 Pumped liquids The pump is suitable for thin, clean, non-aggressive and nonexplosive liquids, not containing solid particles or fibers that may attack the pump mechanically or chemically. In heating systems, the water should meet the requirements of accepted standards on water quality in heating systems Glycol The pump can be used for pumping water/glycol mixtures up to 50 %. Example of a water/ethylene glycol mixture: Maximum viscosity: 50 cst ~ 50 % water / 50 % ethylene glycol mixture at +14 F (-10 C). The pump has a power-limiting function that protects against overload. The pumping of glycol mixtures will affect the max. curve and reduce the performance, depending on the water/ethylene glycol mixture and the liquid temperature. To prevent the ethylene glycol mixture from degrading, avoid temperatures exceeding the rated liquid temperature and minimize the operating time at high temperatures. It is important to clean and flush the system before the ethylene glycol mixture is added. To prevent corrosion or lime precipitation, check and maintain the ethylene glycol mixture regularly. If further dilution of the supplied ethylene glycol is required, follow the glycol supplier's instructions. Note Additives with a density and/or kinematic viscosity higher than those/that of water will reduce the hydraulic performance. Do not use the pump for flammable liquids, such as diesel oil and gasoline. English (US) The Grundfos MAGNA1 is a complete range of circulator pumps with integrated controller enabling adjustment of pump performance to the actual system requirements. In many systems, this will reduce the power consumption considerably, reduce noise from thermostatic radiator valves and similar fittings and improve the control of the system. The desired head can be set on the pump control panel. Do not use the pump for aggressive liquids, such as acids and seawater. 3.1 Applications The Grundfos MAGNA1 is designed for circulating liquids in the following systems: heating systems air-conditioning and cooling systems. The pump can also be used in the following systems: ground source heat pump systems solar-heating systems. Max. 95 % RH Enclosure Type 2 TM Fig. 1 Pumped liquids (flanged version) 3

) it is required to apply a silicon sealant to the internal contours of the shell in order to eliminate any air gaps and prevent")
4 English (US) 3.3 Operating conditions Min./Max F to 230 F (-10 C to +110 C) psi (12 bar) +32 to +104 F 3 (0 to +40 C) 4 < 43 db(a) Fig. 2 Operating conditions TM Insulating shells Insulating shells are available for single-head pumps only. Note The heat loss from the pump and pipework can be reduced by insulating the pump housing and the pipework. See fig. 3. Insulating shbells for pumps in heating systems are supplied with the pump. For pumps in air-conditioning and cooling systems (down to 14 F (-10 C)) it is required to apply a silicon sealant to the internal contours of the shell in order to eliminate any air gaps and prevent condensation between the insulation shell and pump housing. Alternatively, the pump can also be insulated manually in accordance with standard insulating requirements for heating and cooling systems. The fitting of insulation shells will increase the pump dimensions. Note Limit the heat loss from the pump housing and pipework. Pumps are factory-fitted with insulating shells. Remove the insulating shells before installing the pump Liquid temperature See fig. 2, pos. 1. Continuously: +14 to +230 F (-10 to +110 C) System pressure See fig. 2, pos. 2. The maximum permissible system pressure is stated on the pump nameplate. See fig Ambient temperature See fig. 2, pos to +104 F (0 to +40 C). The control box is air-cooled. Therefore, it is important that the maximum permissible ambient temperature is not exceeded during operation. During transport: -40 to F (-40 to +70 C) Sound pressure level See fig. 2, pos. 4. The sound pressure level of the pump is lower than 43 db(a) Approvals Conforms to ANSI/UL Standard 778. Certified to CAN/CSA Standard C22.2 No The protective earth (ground) symbol identifies any terminal which is intended for connection to an external conductor for protection against electric shock in case of a fault, or the terminal of a protective earth (ground) electrode. Fig. 3 Fitting insulating shells to the pump 3.6 Non-return valve If a non-return valve is fitted in the pipe system (fig. 4), it must be ensured that the set minimum discharge pressure of the pump is always higher than the closing pressure of the valve. This is especially important in proportional-pressure control mode (reduced head at low flow). The closing pressure of a single non-return valve is accounted for in the pump settings as the minimum head delivered is 5 ft (1.5 m). TM Frost protection Caution If the pump is not used during periods of frost, necessary steps must be taken to prevent frost bursts. TM Note Additives with a density and/or kinematic viscosity higher than those/that of water will reduce the hydraulic performance. Fig. 4 Non-return valve 4
5 3.7 Wiring diagram Caution All cables must be connected in accordance with local regulations For models 32-XX English (US) External switch GFCI Fuse (min. 10 A, time lag) TM Fig. 5 Example of terminal connection, 1 x 230 V ± 10 %, 50/60 Hz For models 40-XX, 50-XX, 65-XX, 80-XX, 100-XX External switch GFCI Fuse (min. 10 A, time lag) TM Fig. 6 Example of terminal connection, 1 x 230 V ± 10 %, 50/60 Hz, PE 5
6 English (US) 3.8 Nameplate The pump nameplate provides the following information: TYPE 2 BOITIER DE TYPE 2 PSI THERMALLY PROTECTED Nonsubmersible Pump For use with maximum 230 F water RISK OF ELECTRIC SHOCK. DE-ENERGIZE EQUIPMENT BEFORE REMOVAL OF COVER & SERVICING. FOR SUPPLY CONNECTION USE COPPER WIRE SUITABLE FOR 90 C OR EQUIVALENT. THIS PUMP HAS NOT BEEN INVESTIGATED FOR USE IN SWIMMING POOL OR MARINE AREAS. TO REDUCE THE RISK OF ELECTRIC SHOCK, SEE INSTRUCTION MANUAL FOR PROPER INSTALLATION; ACCEPTABLE FOR INDOOR USE ONLY. RISQUE DE CHOC ELECTRIQUE. HORS DES EQUIPEMENT AVANT ENLEVEMENT DE LA COUVERTURE ET D ENTRENTIEN. POUR LE RECCORDEMENT D ALIMENTATION, EMPLOYEZ DES FILS QUI RESISTENT AU MOINS A 90 C UTILISEZ UNIQUEMENT DES CONDUCTEURS DE CUIVRE. POUR RE DUIRE LES RISQUES DE CHOC E LECTRIQUE, CONSULTES LE MANUEL D INSTRUCTIONS Contains FCC ID: OG3-RADIOM01-2G4 POUR UNE INSTALLATION CORRECTE. EMPLOYER UNIQUEMENT A L INTERIEUR. TM Tools 1.2 x x 3.5 TX Fig. 7 Example of nameplate Pos. Description 1 Product name 2 Model 3 Production code (year and week) 4 Serial number 5 Product number 6 Enclosure type 7 Energy Efficiency Index (EEI) 8 Part (according to EEI) 9 TF-class 10 Minimum current [A] 11 Maximum current [A] 12 Minimum power [W] 13 Maximum power [W] 14 Maximum pressure 15 Voltage [V] and frequency [Hz] 16 QR (Quick Response) code 17 Approvals (nameplate) 18 Assembled in USA Fig. 8 Recommended tools Pos. Tool Size 1 Screwdriver, straight slot 1.2 x 8.0 mm 2 Screwdriver, straight slot 0.6 x 3.5 mm 3 Screwdriver, torx bit TX20 4 Hexagon key 5.0 mm 5 Open-end wrench Depending on size 6 Wire cutter 7 Pipe wrench TM
 4.")


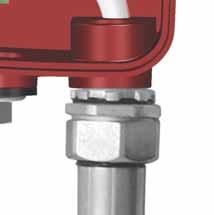
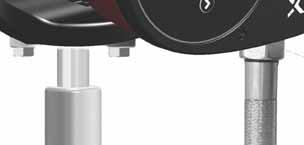
7 4. Mechanical installation 4.3 Positioning Always install the pump with horizontal motor shaft. Pump installed correctly in a vertical pipe. See fig. 9, pos. A. Pump installed correctly in a horizontal pipe. See fig. 9, pos. B. Do not install the pump with vertical motor shaft. See fig. 9, pos. C and D. English (US) 4.1 Lifting the pump A B Observe local regulations setting limits for manual lifting or handling. Always lift directly on the pump head or the cooling fins when handling the pump. For large pumps, it may be necessary to use lifting equipment. C D 4.2 Installing the pump The MAGNA1 is designed for indoor installation. The pump may be suspended direct in the pipes, provided that the pipework can support the pump. To ensure adequate cooling of motor and electronics, observe the following requirements: Position the pump in such a way that sufficient cooling is ensured. The ambient temperature must not exceed +104 F (+40 C). Fig. 9 Pump installed with horizontal motor shaft TM Step Action Illustration 1 Arrows on the pump housing indicate the liquid flow direction through the pump. The liquid flow direction can be horizontal or vertical, depending on the control box position. TM Mount the pump with gaskets in the pipework. TM Flanged version: Fit bolts and nuts. Use the right size of bolts according to system pressure. TM


8 English (US) 4.4 Control box positions To ensure adequate cooling, the control box must be in horizontal position with the Grundfos logo in vertical position. See fig. 10. Fig. 10 Pump with control box in horizontal position If the pump head is removed before the pump is installed in the pipework, pay special attention when fitting the pump head to the pump housing: 1. Gently lower the pump head with rotor shaft and impeller into the pump housing. 2. Make sure that the contact face of the pump housing and that of the pump head are in contact before the clamp is tightened. See fig. 11. TM TM TM TM TM Fig. 11 Fitting the pump head to the pump housing 8


9 4.5 Changing the control box position The warning symbol on the clamp holding the pump head and pump housing together indicates that there is a risk of personal injury. See specific warnings below. When loosening the clamp, do not drop the pump head. Risk of escaping vapor. Step Action Illustration a Loosen the screw in the clamp holding the pump head and pump housing together. : If the screw is loosened too much, the pump head will be completely disconnected from the pump housing. Carefully rotate the pump head to the desired position. If the pump head is stuck, loosen it with a light blow of a rubber mallet. Place the control box in horizontal position so that the Grundfos logo is in vertical position. The motor shaft must be horizontal. Due to the drain hole in the stator housing, position the gap of the clamp as shown in step 4a, 4b, 4c, or 4d. Flanged single-head pump. Position the clamp so that the gap points towards the arrow. It can be in position 3 or 9 o'clock. TM TM TM TM TM TM Step Action Illustration 4b 4c 4d 5 6 Caution Flanged single-head pump. Note: The gap of the clamp can also be in position 6 o'clock for the following pump sizes: MAGNA1 65-XX MAGNA1 80-XX MAGNA1 100-XX. Twin-head pump. Position the clamps so that the gaps point towards the arrows. They can be in position 3 or 9 o'clock. Threaded single-head pump. The gap of the clamp can be in position 3, 6, 9 or 12 o'clock. Fit and tighten the screw holding the clamp to: 6 ± 0.7 ft-lbs (8 ± 1 Nm). Note: Do not retighten the screw if condensed water is dripping from the clamp. Fit the insulating shells. Note: For air conditioning and cooling systems, a silicone sealant must be applied inside the insulation shell to eliminate all air gaps and prevent condensation between the pump housing and insulation shell. Alternatively, the pump may be insulated manually in accordance with standard insulation practices for cooling applications. If insulating the pump manually, do not insulate the control box or cover the control panel. TM TM TM TM TM TM TM English (US) Fig. 12 Insulation of pump housing and pipework 9
10 English (US) 5. Electrical installation Carry out the electrical connection and protection according to local regulations. Check that the supply voltage and frequency correspond to the values stated on the nameplate. Switch off the power supply before making connections. Never make any connections in the pump control box unless the power supply has been switched off for at least 5 minutes. The pump must be connected to an external mains switch with a contact separation of at least 1/8 inch (3 mm) in each pole. The ground terminal of the pump must be earth ground. Grounding or neutralization can be used for protection against indirect contact. If the pump is connected to an electric installation where a Ground Fault Circuit Interrupter (GFCI) is used as additional protection, this circuit interrupter must trip out when ground fault currents with DC content (pulsating DC) occur. If rigid conduit is to be used, the hub must be connected to the conduit system before it is connected to the terminal box of the pump. The pump must be connected to an external mains switch. The pump requires no external motor protection. The motor incorporates thermal protection against slow overloading and blocking (IEC 34-11: TP 211). When switched on via the power supply, the pump will start pumping after approximately 5 seconds. Note The number of starts and stops via the power supply must not exceed four times per hour. 5.1 Supply voltage Check nameplate voltage. 1 x 115 V ± 10 %, 50/60 Hz, PE. 1 x V ± 10 %, 50/60 Hz, PE. See pump nameplate for rated supply voltage The voltage tolerances are intended for mains voltage variations. They should not be used for running pumps at other voltages than those stated on the nameplate. 10


")


 N (L2)")


 0.")
 (7")


11 5.2 Connection to the power supply Models 32-XX Step Action Illustration Step Action Illustration English (US) 1 2 Remove the front cover from the control box. Locate the power supply plug inside the control box. L (L1) N (L2) TM TM Insert the supply plug into the power receptacle on the PCB. TM Connect the conduit and feed the power cable through the control box. TM TM TM Tighten the conduit and refit the front cover in. (7 mm) 0.79 in. (20 mm) 0.28 in. (7 mm) 1.0 in. (25 mm) Min in. (7 mm) Max 4 Strip the wires as illustrated and connect the conductors to the power supply plug. TM TM TM TM


12 English (US) Models 40-XX, 50-XX, 65-XX, 80-XX, 100-XX Step Action Illustration Remove the front cover from the control box. Note: Do not remove the screws from the cover. Locate the power supply plug and conduit adapter in the box supplied with the pump. Connect the conduit adapter to the control box. TM TM Step Action Illustration 6 7 Connect the cable conductors to the power supply plug. L - L or L1 Ground - Ground N - N or L2 Insert the power supply plug into the male plug in the pump control box. TM TM TM Pull the power supply cable through the conduit adapter. TM Strip the cable conductors as illustrated. TM Tighten the conduit adapter. Refit the front cover. TM
 Step Action Illustration 1 Switch on the power supply to the pump.")
13 6. First start-up Do not start the pump until the system has been filled with liquid and vented. Furthermore, the required minimum inlet pressure must be available at the pump inlet. See section 13. Technical data. The system cannot be vented through the pump. The pump is self-venting. English (US) Step Action Illustration 1 Switch on the power supply to the pump. Note: When switched on, the pump will start after approximately 5 seconds. TM Control panel at first start-up. TM The pump has been factoryset to the intermediate proportional-pressure curve. Select the control mode according to the system application. TM


14 English (US) 7. Settings 8. Control panel At high liquid temperatures, the pump housing may be very hot. In that case, only touch the control panel. 8.1 Elements on the control panel Note If the pump impeller is rotated, for example when filling the pump with water, sufficient energy can be generated to light up the control panel even if the power supply has been switched off. 8.3 Light fields indicating the pump setting The pump has nine optional performance settings which can be selected with the push-button. See fig. 13, pos. 2 and 3. The pump setting is indicated by nine light fields in the display. Fig. 14 Factory setting TM Number of button presses Active light fields Description 2 0 Intermediate proportional-pressure curve, referred to as PP2 3 Fig. 13 Control panel The control panel on the pump comprises the following elements: TM Highest proportionalpressure curve, referred to as PP3 Lowest constantpressure curve, referred to as CP1 Intermediate constantpressure curve, referred to as CP2 Pos. 1 2 Description Grundfos Eye operating status. See section 8.2 Grundfos Eye. Eight light fields indicating the pump setting. See section 8.3 Light fields indicating the pump setting. 4 5 Highest constantpressure curve, referred to as CP3 Constant curve/constant speed III 3 Push-button for selection of pump setting. 8.2 Grundfos Eye 6 Constant curve/constant speed II The Grundfos Eye is on when the power supply has been switched on. See fig. 13, pos. 1. The Grundfos Eye is an indicator light providing information about the actual pump status. The indicator light will flash in different sequences and provide information about the following: power on/off pump alarms. The function of the Grundfos Eye is described in section 12.1 Grundfos Eye operating status. 7 8 Constant curve/constant speed I Lowest proportionalpressure curve, referred to as PP1 Note Faults preventing the pump from operating properly (for example blocked rotor) are indicated by the Grundfos Eye. See section 12.1 Grundfos Eye operating status. If a fault is indicated, correct the fault and reset the pump by switching the power supply off and on. 14
15 9. Overview of settings English (US) H PP3 CP3 PP2 CP2 PP1 CP1 I II III Q TM Fig. 15 Pump setting in relation to pump performance Setting Pump curve Function PP1 PP2 PP3 CP1 CP2 CP3 III II I Lowest proportionalpressure curve Intermediate proportional-pressure curve Highest proportionalpressure curve Lowest constant-pressure curve Intermediate constantpressure curve Highest constantpressure curve Speed III Speed II Speed I The duty point of the pump will move up or down on the lowest proportional-pressure curve, depending on the heat demand. See fig. 15. The head (pressure) is reduced at falling heat demand and increased at rising heat demand. The duty point of the pump will move up or down on the intermediate proportional-pressure curve, depending on the heat demand. See fig. 15. The head (pressure) is reduced at falling heat demand and increased at rising heat demand. The duty point of the pump will move up or down on the highest proportional-pressure curve, depending on the heat demand. See fig. 15. The head (pressure) is reduced at falling heat demand and increased at rising heat demand. The duty point of the pump will move out or in on the lowest constant-pressure curve, depending on the heat demand in the system. See fig. 15. The head (pressure) is kept constant, irrespective of the heat demand. The duty point of the pump will move out or in on the intermediate constant-pressure curve, depending on the heat demand in the system. See fig. 15. The head (pressure) is kept constant, irrespective of the heat demand. The duty point of the pump will move out or in on the highest constant-pressure curve, depending on the heat demand in the system. See fig. 15. The head (pressure) is kept constant, irrespective of the heat demand. The pump runs on a constant curve which means that it runs at a constant speed. In speed III, the pump is set to run on the max. curve under all operating conditions. See fig. 15. Quick venting of the pump can be obtained by setting the pump to speed III for a short period. The pump runs on a constant curve which means that it runs at a constant speed. In speed II, the pump is set to run on the intermediate curve under all operating conditions. See fig. 15. The pump runs on a constant curve which means that it runs at a constant speed. In speed I, the pump is set to run on the min. curve under all operating conditions. See fig
16 English (US) 10. Pump setting H Constant curve/constant speed (I, II or III) At constant-curve/constant-speed operation, the pump runs at a constant speed, independent of the actual flow demand in the system. The pump performance follows the selected performance curve, I, II or III. See fig. 19 where II has been selected. See section 11. Selection of control mode for further information. H Fig. 16 Selection of pump setting for system type Factory setting: Intermediate proportional-pressure curve, referred to as PP2. Proportional-pressure curve (PP1, PP2 or PP3) Proportional-pressure control adjusts the pump performance to the actual heat demand in the system, but the pump performance follows the selected performance curve, PP1, PP2 or PP3. See fig. 17 where PP2 has been selected. See section 11. Selection of control mode for further information. Q TM Fig. 19 Three constant-curve/constant-speed settings The selection of the right constant-curve/constant-speed setting depends on the characteristics of the heating system in question. Q TM H PP3 PP2 Q PP1 TM Fig. 17 Three proportional-pressure curves/settings The selection of the right proportional-pressure setting depends on the characteristics of the heating system in question and the actual heat demand. Constant-pressure curve (CP1, CP2 or CP3) Constant-pressure control adjusts the pump performance to the actual heat demand in the system, but the pump performance follows the selected performance curve, CP1, CP2 or CP3. See fig. 18 where CP1 has been selected. See section 11. Selection of control mode for further information. H CP3 CP2 Q CP1 TM Fig. 18 Three constant-pressure curves/settings The selection of the right constant-pressure setting depends on the characteristics of the heating system in question and the actual heat demand. 16
17 11. Selection of control mode System application In systems with relatively large pressure losses in the distribution pipes and in air-conditioning and cooling systems. Two-pipe heating systems with thermostatic valves and very long distribution pipes strongly throttled pipe balancing valves differential-pressure regulators large pressure losses in those parts of the system through which the total quantity of water flows (for example boiler, heat exchanger and distribution pipe up to the first branching). Primary circuit pumps in systems with large pressure losses in the primary circuit. Air-conditioning systems with heat exchangers (fan coils) cooling ceilings cooling surfaces. In systems with relatively small pressure losses in the distribution pipes. Two-pipe heating systems with thermostatic valves and dimensioned for natural circulation small pressure losses in those parts of the system through which the total quantity of water flows (for example boiler, heat exchanger and distribution pipe up to the first branching) or modified to a high differential temperature between flow pipe and return pipe (for example district heating). Underfloor heating systems with thermostatic valves. One-pipe heating systems with thermostatic valves or pipe balancing valves. Primary circuit pumps in systems with small pressure losses in the primary circuit. The pump can also be set to operate according to the max. or min. curve, like an uncontrolled pump: The max. curve mode can be used in periods in which a maximum flow is required. This operating mode is for instance suitable for hot-water priority. The min. curve mode can be used in periods in which a minimum flow is required. This operating mode is for instance suitable for manual night setback. Select this control mode Proportional pressure H Q H H Constant pressure Constant curve Q Q English (US) 17
18 English (US) 12. Fault finding Before dismantling the pump, drain the system or close the isolating valve on either side of the pump. The pumped liquid may be scalding hot and under high pressure Grundfos Eye operating status Grundfos Eye Indication Cause No lights on. Power off. Pump not running. Two opposite green indicator lights running in the direction of rotation of the pump. Power on. Pump running. Two opposite red indicator lights flashing simultaneously. Alarm. Pump stopped Resetting of fault indications A fault indication can be reset in one of the following ways: When the fault cause has been eliminated, the pump will revert to normal duty. If the fault disappears by itself, the fault indication will automatically be reset. Fault Automatic reset and restart? Corrective actions Other pumps or sources force flow through the pump even if the pump is stopped. There will be light in the display even if the power supply has been switched off. Yes Check the system for defective non-return valves and replace, if necessary. Check the system for correct position of non-return valves, etc. Supply voltage to the pump too low. Yes Check that the power supply is within the specified range. The pump is blocked. No water at the pump inlet or the water contains too much air. No No Dismantle the pump, and remove any foreign matter or impurities preventing the pump from rotating. Prime and vent the pump before a new start-up. Check that the pump is operating correctly. If not, replace the pump, or call GRUNDFOS SERVICE for assistance. Internal fault in the pump electronics. Yes Replace the pump, or call GRUNDFOS SERVICE for assistance. Supply voltage to the pump too high. Yes Check that the power supply is within the specified range. Caution If the power supply cable is damaged, it must be replaced by the manufacturer, the manufacturer's service partner or a similarly qualified person. 18
19 13. Technical data Supply voltage See pump nameplate for rated supply voltage: 1 x 115 V ± 10 %, 50/60 Hz, PE. 1 x V ± 10 %, 50/60 Hz, PE. Motor protection The pump requires no external motor protection. Enclosure class Enclosure Type 2. Insulation class F. Relative air humidity Maximum 95 %. Ambient temperature +32 to +104 F (0 to +40 C). During transport: -40 to 158 F (-40 to +70 C). Temperature class TF110 (EN ). Liquid temperature Continuously: +14 to +230 F (-10 to +110 C). System pressure The maximum permissible system pressure is stated on the pump nameplate: 175 psi (12 bar). Minimum inlet pressure The following relative minimum inlet pressure must be available at the pump inlet during operation to avoid cavitation noise and damage to the pump bearings. The relative minimum inlet pressures apply to pumps installed up to 984 ft (300 m), above sea level. For altitudes above 984 ft (300 m), the required relative inlet pressure must be increased by psi / 0.01 bar / MPa per 328 ft (100 m) altitude. The MAGNA1 pump is only approved for an altitude of 6561 ft (2000 m) above sea level. EMC (electromagnetic compatibility) EN :2006, EN :1998, EN :2008 and EN :2006. Sound pressure level The sound pressure level of the pump is lower than 43 db(a). Leakage current The pump mains filter will cause a discharge current to earth during operation. I leakage < 3.5 ma. Power factor The MAGNA1 has built-in PFC (Power Factor Correction) which gives a cos φ from 0.98 to 0.99, i.e. very close to Disposal This product has been designed with focus on the disposal and recycling of materials. The following average disposal values apply to all variants of Grundfos MAGNA1 pumps: 85 % recycling 10 % incineration 5 % depositing. This product or parts of it must be disposed of in an environmentally sound way according to local regulations. Subject to alterations. English (US) Liquid temperature Single-head pumps DN +167 F (+75 C) +203 F (+95 C) Inlet pressure [psi] / [bar] / [MPa] +230 F (+110 C) 32-60/ / 0.10 / / 0.35/ / 1.0 / / 0.10 / / 0.50 / / 1.0 / / / 0.10 / / 0.50 / / 1.0 / / 0.10 / / 0.40 / / 1.0 / / 0.70 / / 1.20 / / 1.7 / / 0.70 / / 1.20 / / 1.7 / / 0.70 / / 1.20 / / 1.7 / / 0.50 / / 1.00 / / 1.5 / / 0.70 / / 1.20 / / 1.7 / 0.17 Note The actual inlet pressure plus pump pressure against a closed valve must be lower than the maximum permissible system pressure. 19
20 20
21 GRUNDFOS Kansas City West 118th Terrace Olathe, Kansas Phone: (913) Fax: (913) GRUNDFOS Canada 2941 Brighton Road Oakville, Ontario L6H 6C9 Canada Phone: Telefax: GRUNDFOS México Boulevard TLC No. 15 Parque Industrial Stiva Aeropuerto C.P Apodaca, N.L. México Phone: Fax: Grundfos companies
22 L-MAG-TL ECM: The name Grundfos, the Grundfos logo, and be think innovate are registered trademarks owned by Grundfos Holding A/S or Grundfos A/S, Denmark. All rights reserved worldwide. Copyright Grundfos Holding A/S
GRUNDFOS INSTRUCTIONS. Sololift2 C-3. Installation and operating instructions
 GRUNDFOS INSTRUCTIONS Sololift2 C-3 Installation and operating instructions English (US) English (US) Installation and operating instructions Original installation and operating instructions. CONTENTS
GRUNDFOS INSTRUCTIONS CMBE. Installation and operating instructions. Drinking Water System Component NSF / ANSI 61 NSF / ANSI 372
 GRUNDFOS INSTRUCTIONS CMBE Installation and operating instructions Drinking Water System Component NSF / ANSI 61 NSF / ANSI 372 English (US) English (US) Installation and operating instructions Original
LiqTec, V GRUNDFOS INSTRUCTIONS
 GRUNDFOS INSTRUCTIONS LiqTec, 80-130 V Installation and operating instructions Notice d installation et d entretien Instrucciones de instalación y funcionamiento LIMITED WARRANTY Products manufactured
Comfort Series Instant Hot Water System
 GRUNDFOS INSTRUCTIONS Installation and Operation Comfort Series Instant Hot Water System ANSI/NSF61 and IAPMO listed Shipment Inspection page 1. Pre-Installation Checklist page 1. Pump Mounting page 2.
GRUNDFOS DATA BOOKLET UPS2. Circulator pumps. 50/60 Hz
 GRUNDFOS DATA BOOKLET UPS2 Circulator pumps 50/60 Hz UPS2 Table of contents 1. Product introduction 3 Type key.................................................................................... 3 Performance
GRUNDFOS INSTRUCTIONS UPZCP-3, 4, 6. Multi-zone pump control. Installation and operating instructions
 GRUDFOS ISTRUTIOS UPZP-3, 4, 6 Multi-zone pump control Installation and operating instructions English (US) English (US) Installation and operating instructions Original installation and operating instructions.
COMPASS HIGH-EFFICIENCY WET-ROTOR CIRCULATORS
 COMPASS HIGH-EFFICIENCY WET-ROTOR CIRCULATORS INSTALLATION AND OPERATING INSTRUCTIONS File No: 10.895 Date: march 8, 014 Supersedes: 10.895 Date: december 10, 013 1.0 Symbols used in this document 1.0
MORE DEMAND. than a pump. grundfos MAGNA3
 grundfos MAGNA3 DEMAND MORE than a pump Full range of intelligent, high-efficiency circulators for heating, cooling, ground source heat pump systems and domestic hot water applications More than a pump
LS Condensate Removal Pump Installation, Operation and Service Instructions
 Bell & Gossett Instruction Manual 6-71-075-115 LS Condensate Removal Pump Installation, Operation and Service Instructions INSTALLER: PLEASE LEAVE THIS MANUAL FOR THE OWNER S USE. WARNING: This safety
GRUNDFOS DATA BOOKLET MAGNA3. Circulator pumps 60 Hz
 GRUNDFOS DATA BOOKLET Circulator pumps 60 z Table of contents 1. Product introduction 3 Features and benefits 3 Applications 3 2. Performance range 4 4 D single-head operation 5 D twin-head operation 6
1 Declaration of conformity
 ENERGY SAVING 1 Declaration of conformity We Taco Italia S.r.l. declare under our sole responsibility that the family of products ENERGY SAVING to which this declaration relates are in conformity with
MORE DEMAND THAN A PUMP GRUNDFOS MAGNA3
 GRUNDFOS MAGNA3 DEMAND MORE TAN A PUMP Full range of intelligent, high-efficiency circulators for heating, cooling, ground source heat pump systems and domestic hot water applications MORE TAN A PUMP IF
GRUNDFOS DATA BOOKLET. Grundfos COMFORT. Circulator pumps. 50/60 Hz
 GRUNDFOS DATA BOOKLET Circulator pumps 50/60 Hz 2 Product range 2. Product range UP(S) COMFORT, 50/60 Hz Pump type 24-hour timer Supplied with Dimensions Accessories Data sheet Thermostat Isolating valve
GRUNDFOS PRODUCT GUIDE MAGNA. UPE Series 2000 circulator pumps
 GRUNDFOS PRODUCT GUIDE UPE Series 2000 circulator pumps Contents Mission Product data Features and benefits Applications 5 eating systems 5 Pumped liquids 5 Type key 6 Performance range, 6 Product range
XT Series Thermostats
 ISO 9001 Explosion-Proof & Moisture Resistant XT Series Thermostats Installation, Operation, & Maintenance Instructions XTWA Thermostat XTWL Thermostat XTB Thermostat Part No.MI133.Rev.2.00 Date of Issue:
FLCH4R Garage and Utility Electric Heater
 FLCH4R Garage and Utility Electric Heater Installation, Operation & Maintenance Instructions Model No. Volts Amps Watts BTU/HR Phase High Low High Low High Low Min Fuse Size* FLCH4R 208 17.3 8.66 3600
Laing Thermotech. Autocirc The Instant Hot Water Pump Models E1-BCANCT1W-06 and E1-BCANRT1W. Installation & Operating Manual
 Installation & Operating Manual Please read this manual carefully before attempting to install, operate or maintain the product described. Failure to comply with the information provided in this manual
HORIZONTAL MULTISTAGE CENTRIFUGAL PUMP
 HORIZONTAL MULTISTAGE CENTRIFUGAL PUMP WWPPCHLFT260 Instructions WWPPCHLFT260_Horizontal Multistage Centrifugal Pump_IB.indd 1 READ THIS MANUAL CAREFULL BEFORE INSTALL, START THE PUMP 1. Suction 2. Plug
AHW AHW(S) Hot water circulator pump INSTALLATION AND OPERATING INSTRUCTIONS HIGH-EFFICIENCY BLDC-MOTOR CIRCULATORS
 Hot water circulator pump INSTALLATION AND OPERATING INSTRUCTIONS HIGH-EFFICIENCY BLDC-MOTOR CIRCULATORS") AHW AHW(S) Hot water circulator pump INSTALLATION AND OPERATING INSTRUCTIONS HIGH-EFFICIENCY BLDC-MOTOR CIRCULATORS EC Declaration of Conformity Declare that machinery described: AHW,AHW(S) Hot water circulator
AHW AHW(S) Hot water circulator pump INSTALLATION AND OPERATING INSTRUCTIONS HIGH-EFFICIENCY BLDC-MOTOR CIRCULATORS EC Declaration of Conformity Declare that machinery described: AHW,AHW(S) Hot water circulator
HKF 8180 Operating instructions
 Operating instructions EN Version 1.0en /Edition 05/2013 Contents 1 Important basic information... 3 1.1 Limitation of liability... 3 1.2 Operator's responsibilities... 3 1.3 Documentation... 3 1.3.1 Content
SOLARHOT. SuperVox. Description / Applications System Overview. Installation/ Owner s Manual
 SOLARHOT SuperVox Installation/ Owner s Manual Description / Applications System Overview The SOLARHOT SuperVox solar thermal glycol system. The SuperVox allows for easy installation of large solar water
INSTRUCTION MANUAL HS-229G
 INSTRUCTION MANUAL HS-229G 510977 STEP 1 - Where to Install the Thermostatic Steam Trap Determine where to install the thermostatic steam trap based on the following information. a. The trap should be
AC6 & AC8 HORIZONTAL SERIES Sealed Metallic Centrifugal Pumps Installation and Maintenance Instructions
 AC6 & AC8 HORIZONTAL SERIES Sealed Metallic Centrifugal Pumps Installation and Maintenance Instructions ASSEMBLY PUMPS WITH MOTORS 1. No assembly required. Unpack the pump and motor and examine for any
TURBO Fiberglass Cone Fan and Grill Fan 48'' Belt Drive. Installation & Operator s Instruction Manual
 TURBO Fiberglass Cone Fan and Grill Fan 48'' Belt Drive Installation & Operator s Instruction Manual July 1998 MV1383B Chore-Time TURBO TM Fan Extended Warranty Chore-Time Equipment warrants new TURBO
WKS 4000 SERIES (USA only) --INSTALLATION INSTRUCTIONS--
 --INSTALLATION INSTRUCTIONS--") 8610 Production Avenue San Diego, California 92121 (858) 566-7465 Fax (858) 566-1943 WKS 4000 SERIES (USA only) --INSTALLATION INSTRUCTIONS-- Thank you for choosing a BREEZAIRE cooling unit. We believe
8610 Production Avenue San Diego, California 92121 (858) 566-7465 Fax (858) 566-1943 WKS 4000 SERIES (USA only) --INSTALLATION INSTRUCTIONS-- Thank you for choosing a BREEZAIRE cooling unit. We believe
TQ Series. Electronic Control Pump Instruction Manual. 50Hz. ISO 9001 Certified Walrus Pump Co., Ltd.
 TQ Series Electronic Control Pump Instruction Manual 50Hz ISO 9001 Certified Walrus Pump Co., Ltd. EC Declaration of Conformity Manufacturer: Walrus Pump Co., Ltd. Address: No. 83-14, Dapiantou, Sanjhih
OCH-SSE series Direct Wired Units Indoor * and Outdoor Comfort Heaters
 TPI Corporation P.O. Box 4973 Johnson City, TN 37601 www.tpicorp.com OCH-SSE series Direct Wired Units Indoor * and Outdoor Comfort Heaters *EXCLUDING RESIDENCES IMPORTANT SAFETY INFORMATION INSIDE possible
FSW300 Series Flow Switch
 . FSW300 Series Flow Switch - 2 - Series FSW300 Series FSW300 Table of contents page 0 About this operating manual... 4 1 Device description... 5 1.1 Intended use... 5 1.1.1 Reed contact - Switching of
SPA BLOWER OWNER'S MANUAL XXXX, XXXX, XXXX, XXXX, XXXX, XXXX fax
 SPA BLOWER OWNER'S MANUAL 80015-XXXX, 80016-XXXX, 80017-XXXX, 80018-XXXX, 80019-XXXX, 80020-XXXX fax 888.610.3839 2015 323300-015 6/15 THIS PAGE INTENTIONALLY LEFT BLANK. 2 Operating Instructions and Parts
1592P01. for liquids in piping DN max. DC 48 V, 1 A, 20 W
 594 59P0 Flow switch for liquids in piping DN 0 00. QE90 Contact load / switching capacity: Nominal pressure PN5 Manual setting of contact type (NO / NC) Housing IP 65 / safety class II Maintenance free
Operating Guide. Termix Compact 28 VX-FI / HWP / HWS. 1.0 Table of Contents. 1.0 Table of Contents
 1.0 Table of Contents 1.0 Table of Contents... 1........................................................................ 2 2.0 Functional description... 3 3.0 Safety notes... 4 3.1 Safety Notes general............................................
USER S MANUAL. Heat Recovery Ventilator. Vents Brig HRV 200 Vents Brig HRV 300
 USER S MANUAL Heat Recovery Ventilator Vents Brig HRV 200 Vents Brig HRV 300 2 Brig HRV 200 (300) CONTENT Introduction... 3 Application... 3 Delivery set... 3 Unit designation key... 4 Basic unit dimensions...
USER S MANUAL BUCKET FAN SERIES BUCKET FAN WHISPER SERIES
 USER S MANUAL BUCKET FAN SERIES BUCKET FAN WHISPER SERIES Bucket Fan 420 Bucket Fan 1055 Bucket Fan 1460 420 1055 1460 2 Bucket Fan CONTENT INTRODUCTION 3 USE 3 WHAT S INCLUDED IN THE BOX 3 DESIGNATION
UP/UPS-B/UPN Hot Water Service Circulators
 UP/UPS-B/UPN Hot Water Service Circulators Visions & Values It is the Vision of the Company to achieve our Corporate Mission by providing quality and innovative products and services that give our customers
Controlled Energy Corp. 340 Mad River Park Waitsfield, VT TOLL FREE
 Controlled Energy Corp. 340 Mad River Park Waitsfield, VT 05673 TOLL FREE 866-330-2729 www.controlledenergy.com/tech Important Safety Instructions When using this electrical equipment, basic safety precautions
grundfos commercial building Grundfos Plumbing Solutions
 grundfos commercial building Grundfos Plumbing Solutions wastewater submersible pumps Common Uses: Sump water ejection, wastewater ejection with high content of fibers and stormwater ejection. sump water
Whynter Portable Ice Maker 33 lb capacity - White
 Whynter Portable Ice Maker 33 lb capacity - White Model # : IMC-330WS INSTRUCTION MANUAL Congratulations on your new Whynter product. To ensure proper operation, please read this Instruction Manual carefully
Instructions for installation and use English. More documents on: H B /09
 TM Instructions for installation and use English EN More documents on: www.zodiac-poolcare.com H0538700.B - 2015/09 Read this manual carefully before installing, maintaining or repairing this appliance!
GRUNDFOS INSTRUCTIONS LCD 108. Installation and operating instructions
 GRUNDFOS INSTRUCTIONS LCD 08 Installation and operating instructions Installation and operating instructions Original installation and operating instructions CONTENTS Page. Symbols used in this document.
INSTALLATION, OPERATION AND MAINTENANCE
 INLINE HEATER INSTALLATION, OPERATION AND MAINTENANCE MODELS: ILS SERIES 1.5kW 120V SINGLE PHASE BEFORE YOU BEGIN CHECK ALL ELECTRICAL CONNECTIONS TO ALL COMPONENTS WITHIN THE HEATER FOR TIGHTNESS. CONNECTIONS
GRUNDFOS DATA BOOKLET. Hydro Multi-S. Grundfos booster systems with two or three CM, CMV or CR pumps. 50 Hz
 GRUNDFOS DATA BOOKLET Grundfos booster systems with two or three CM, CMV or CR pumps 50 Hz Table of contents 1. Product introduction 3 2. Performance range 4 with CM pumps 4 with CMV pumps 4 with CR pumps
Astro 2 circulator models. Installation and operating instructions
 Astro 2 circulator models Installation and File No: 10.89 Date: august 05, 2013 Supersedes: 10.89 Date: june 26, 2013 contents 1.0 Introduction 4 2.0 Installing 4 2.1 Terminal box 4 2.2 Electrical wiring
36 & 48 E-Z Cone Fan. Installation & Operator s Instruction Manual (Direct Drive)
") 36 & 48 E-Z Cone Fan Installation & Operator s Instruction Manual (Direct Drive) September 1997 MV1433C Chore-Time Warranty Chore-Time Equipment warrants each new product manufactured by it to be free
36 & 48 E-Z Cone Fan Installation & Operator s Instruction Manual (Direct Drive) September 1997 MV1433C Chore-Time Warranty Chore-Time Equipment warrants each new product manufactured by it to be free
LS Condensate Removal Pump INSTRUCTION MANUAL REVISION A
 LS Condensate Removal Pump INSTRUCTION MANUAL 6-71-075-115 REVISION A CAUTION: Combustible liquids may not be pumped! The condensate pump may not be run dry, as this can destroy the bearings in a very
Prime Chiller Modular Upgradable Chiller
 Prime Chiller Modular Upgradable Chiller Instructions for Models Single Stage Thermostat #2604, 2606 Dual Stage Thermostat #2614, 2616 Single Stage Thermostat w/ TXV #2626, 2627 Warning and Safety Instructions...
IMPORTANT SAFETY INSTRUCTIONS EC-AG1-25 EC-AG1, EC-AG2 SAVE THESE INSTRUCTIONS.
 IMPORTANT SAFETY INSTRUCTIONS 2 1. Read and Follow All Instructions 2. Read this manual completely before attempting installation. 3. All permanent electrical connections should be made by a qualified
Mini Tank water heater Electric undersink Water heaters GL GL 4 - GL 6+
 Mini Tank water heater Electric undersink Water heaters GL 2.5 - GL 4 - GL 6+ IMPORTANT SAFETY INSTRUCTIONS WARNING When using electrical appliances, safety precautions to reduce the risk of fire, electric
1592P01. for liquids in piping DN
 1 594 1592P01 Flow switch for liquids in piping DN 20 200. QVE1901 Contact load / switching capacity: max. AC 230 V, 1 A, 26 VA max. DC 48 V, 1 A, 20 W Nominal pressure PN25 Manual setting of contact type
OIL FREE HEATER RADIATEUR SANS HUILE CALEFACTOR SIN ACEITE AQUECEDOR SEM ÓLEO
 OIL FREE HEATER RADIATEUR SANS HUILE CALEFACTOR SIN ACEITE AQUECEDOR SEM ÓLEO MODEL/MODÉLE/MODELO: BOF1500 INSTRUCTION MANUAL MANUEL D INSTRUCTIONS MANUAL DE INSTRUCCIONES MANUAL DE INSTRUÇÕES PLEASE ENGLISH
Owner s Manual Phoenix Aquadry TX 200
 4201 Lien Rd. Madison, WI 53704 Owner s Manual Phoenix Aquadry TX 200 Installation, Operation & Service Instructions Read and Save These Instructions The Phoenix Aquadry TX 200, like the TX 80, can be
Quest PowerHeat HFC 100 Pro
 Quest PowerHeat HFC 100 Pro Installation, Operation and Maintenance Instructions Read and Save These Instructions This manual is provided to acquaint you with the portable fan coil so that installation,
SAFETY ALERT SYMBOLS SAFETY PRECAUTIONS
 SAFETY ALERT SYMBOLS Read and follow all safety information carefully. The signal words used in this manual are selected as shown below and based on an assessment of the degree of potential injury or damage
English. Your Model Number is: HD1500 IMPORTANT
 Your Model Number is: HD1500 IMPORTANT Attention Valued Customer: The serial number of your machine and date of purchase is necessary information to facilitate warranty claims and the ordering of replacement
CONSUMER SERVICES TECHNICAL EDUCATION GROUP PRESENTS
 CONSUMER SERVICES TECHNICAL EDUCATION GROUP PRESENTS L-71 SinkSpa JETTED SINK Model LJD1306L JOB AID Part No. 8178201 FORWARD This Whirlpool Job Aid, SinkSpa Jetted Sink, (Part No. 8178201), provides the
FES - Series Portable Electric Heaters. YES - Series Suspended Electric Heaters CONTENTS
 FOSTORIA INDUSTRIES, INC. A DIVISION OF FES - Series Portable Electric Heaters YES - Series Suspended Electric Heaters (FES-1524-3E shown) IMPORTANT SAFETY INFORMATION INSIDE Serious injury or death possible.
CPL Series Pedestal Convection Heater
 Installation Instructions and RENEWAL PARTS IDENTIFICATION CPL Series Pedestal Convection Heater MODEL CPLAS (H=5-1/2, D=3 ) CAT. LENGTH WATTS/ TOTAL AMPERAGE NO.* L Ft. WATTS 120V 208V 240V 277V 2125
Beacon 800 Gas Monitor Operator s Manual
 Beacon 800 Gas Monitor Operator s Manual Part Number: 71-0037RK Revision: F Released: 4/18/17 www.rkiinstruments.com Product Warranty RKI Instruments, Inc. warrants gas alarm equipment sold by us to be
Brasch Hazardous Location Unit Heaters
 Brasch Hazardous Location Unit Heaters BHUH Features Designed for rugged industrial applications in hazardous locations where the possibility of explosion or fire exists due to the presence of certain
KC22/32 SERIES Sealless Non-Metallic Centrifugal Pumps Installation and Maintenance Instructions
 KC22/32 SERIES Sealless Non-Metallic Centrifugal Pumps Installation and Maintenance Instructions ASSEMBLY Unpack pump from carton and check for shipping damage. WARNING: Magnetic field hazard. This pump
Spa Control System OWNER S MANUAL
 LIMITED WARRANTY ONE YEAR LIMITED WARRANTY: UNITED SPAS, INC. warrants, to the original purchaser, the Spa Equipment against defects in materials or workmanship for a period of one year from date of purchase.
High-Velocity Floor Fan
 High-Velocity Floor Fan Owner s Manual WARNING: Read carefully and understand all ASSEMBLY AND OPERATION INSTRUCTIONS before operating. Failure to follow the safety rules and other basic safety precautions
Instruction Sheet 00 Variable Speed Delta T (00-VDT)
") Instruction Sheet 00 Variable Speed Delta T (00-VDT) 102-359 SUPERSEDES: January 1, 2010 EFFECTIVE: May 1, 2010 Plant ID# 001-3927 The Variable Speed Delta T 00 Cartridge Circulator (00-VDT) is a microprocessor-based
Instruction Sheet 00 Variable Speed Delta T (00-VDT) 102-359 SUPERSEDES: January 1, 2010 EFFECTIVE: May 1, 2010 Plant ID# 001-3927 The Variable Speed Delta T 00 Cartridge Circulator (00-VDT) is a microprocessor-based
User Guide. Fixed Flow Pumps FOR SUBMERSIBLE OR INLINE USE FOR PUMP MODELS # # # # # # # # #728333
 User Guide Fixed Flow Pumps FOR SUBMERSIBLE OR INLINE USE 100 #728492 1056 #728320 FOR PUMP MODELS 185 264 396 633 #728300 #728305 #728310 #728315 1267 #728325 1584 #728330 2245 #728333 Fixed Flow Pumps
SUNCOURT INSTALLATION INSTRUCTIONS RADON FAN MODEL: RDKO4, RDK04-3, RDN04 & RDN04-3
 SUNCOURT INSTALLATION INSTRUCTIONS RADON FAN MODEL: RDKO4, RDK04-3, RDN04 & RDN04-3 READ THESE INSTRUCTIONS BEFORE PLANNING YOUR INSTALLATION PLEASE READ AND SAVE THESE INSTRUCTIONS: DO NOT CONNECT POWER
CU 300. Installation and operating instructions GRUNDFOS INSTRUCTIONS
 GRUNDFOS STRUCTIONS CU 300 Installation and operating instructions No contact Overvoltage Undervoltage Dry running Speed reduction Overtemperature Overload Sensor alarm Other languages www.grundfos.com/cu300-manual
Installation & Maintenance Instructions
 Portable High Temperature Blower Attention: Do not operate this heater in explosive areas. Installation & Maintenance Instructions Dear Owner, Congratulations! Thank you for purchasing this new heater
GRUNDFOS PLUMBING & HVAC PRODUCTS
 GRUNDFOS PLUMBING & HVAC PRODUCTS SERIES UP CIRCULATORS GRUNDFOS CIRCULATORS FOR HEATING AND HOT WATER RECIRCULATION Quiet, maintenance-free performance Stainless steel construction, corrosion resistant
CR20-07 A-F-A-E-HQQE 3x400/ HZ
 GRUNDFOS DATA BOOKLET CR2-7 A-F-A-E-HQQE 3x4/69 5 HZ Grundfos pump 965513 Thank you for your interest in our products. Please contact us for more information, or visit our website https://www.lenntech.com/grundfos/crfam/965513/cr-2-7-a-f-a-e-hqqe.html
Pump assembly Instruction manual
 Instruction manual EN Version 2.0 /Release 06/2012 Table of content 1 Key background information...3 1.1 Limitation of liability...3 1.2 Responsibilities of the operator...3 1.3 Documentation...3 1.3.1
Republic Blowers. Ring Blower Side Channel Blower Regenerative Owner s Manual
 Ring Blower Side Channel Blower Regenerative Blower Systems www.republicsales.com Revised 7.08 2006 Sales & Manufacturing Regenerative Blowers Criteria Use Criteria Use only clean, dry air. Do not use
K Series (Model A) Fan Forced Wall Heaters
 Fan Forced Wall Heaters") (400mm) 15-3/4" (35mm) 1-3/8" (95mm) 3-3/4" K Series (Model A) Fan Forced Wall Heaters (485mm) 19-1/8" (463mm) 18-1/4" FILE #E21609 Installation & Maintenance Instructions Dear Owner, Congratulations Thank
(400mm) 15-3/4" (35mm) 1-3/8" (95mm) 3-3/4" K Series (Model A) Fan Forced Wall Heaters (485mm) 19-1/8" (463mm) 18-1/4" FILE #E21609 Installation & Maintenance Instructions Dear Owner, Congratulations Thank
IMPORTANT SAFETY INFORMATION:
 Owner s Manual Model CUH05B31T IMPORTANT SAFETY INFORMATION: Always read this manual first before attempting to install or use this heater. For your safety, always comply with all warnings and safety instructions
Grundfos is pleased to announce the sales release of many exciting new products.
 GRUNDFOS BULLETIN Title: Sales Release Announcement Bulletin Number: DB-219-9-1 To: Grundfos Partners January 9, 219 Dear Partners, Grundfos is pleased to announce the sales release of many exciting new
Pump WaterVISE, FloVISE
 General information It is important that this manual is read carefully by the user and the installer in order to ensure proper functioning and lifespan of the pump. Pahlen pumps are manufactured in accordance
Friwa Compact. Operating instructions EN
 Operating instructions EN Version 1.1 / Edition 09/2013 Contents 1 Key background information... 3 1.1 Limitation of liability... 3 1.2 Responsibilities of the operator... 3 1.3 Documentation... 3 1.3.1
Corn Flame Energy Corn Stove Model 3000
 Corn Flame Energy Corn Stove Model 3000 Installation and Operation Guide Read thoroughly before starting installation Save this manual for future reference SAFETY NOTICE If this stove is not properly installed,
HIGH EFFICIENCY CIRCULATOR INSTRUCTION, INSTALLATION, MAINTENANCE AND REPAIR MANUAL
 1070-AP SERIES HIGH EFFICIENCY CIRCULATOR INSTRUCTION, INSTALLATION, MAINTENANCE AND REPAIR MANUAL NOTE! To the installer: Please make sure you provide this manual to the owner of the equip ment or to
Installation, Operation & Service Manual
 Installation, Operation & Service Manual WARNING Improper installation, adjustment, alteration, service or maintenance can result in death, injury or property damage. Read the Installation, Operation and
CHUGGER PUMP Chugger Max Models
 CHUGGER PUMP Chugger Max Models CHUGGER PUMP is a home brew beer pump designed to transfer hot and cold liquids between brewing vessels. FDA Compliant Materials. Components are UL Recognized. Note: NOT
Hawkins 44 in Ceiling Fan Owner s Manual. Hawkins Ventilador de Techo de 1,12 m Manual del Propietario
 117 391 Hawkins 44 in Ceiling Fan Owner s Manual Hawkins Ventilador de Techo de 1,12 m Manual del Propietario 44 Hawkins Ceiling Fan by Hampton Bay Thank you for purchasing our ceiling fan. This product
Flow Factor ~
 Flow Factor ~ 216-765-4231 The DHC-E series is tested and certified by WQA against NSF/ANSI 372 for lead free compliance. STIEBEL ELTRON Inc. 17 West Street West Hatfield MA 01088 Tel. 413-247-3380 Fax
Three Phase Simplex. Installation (937) Installation Instructions and Operation/Troubleshooting Manual. Installation of Floats.
 Installation Instructions and Operation/Troubleshooting Manual. Installation of Floats.") Three Phase Simplex Installation Instructions and Operation/Troubleshooting Manual This control panel must be installed and serviced by a licensed electrician in accordance with the National Electric Code
Three Phase Simplex Installation Instructions and Operation/Troubleshooting Manual This control panel must be installed and serviced by a licensed electrician in accordance with the National Electric Code
MODEL HS115-3, HS115-4 & HS115-5 WIRING DIAGRAM ADDENDUM
 TJERNLUND PRODUCTS, INC. 1601 Ninth Street White Bear Lake, MN 55110-6794 PHONE (800) 255-4208 (651) 426-2993 FAX (651) 426-9547 Visit our web site www.tjernlund.com MODEL HS115-3, HS115-4 & HS115-5 WIRING
Installation, operating and servicing instructions
 English 57-115 - 144-1 - 259 Installation, operating and servicing instructions ITALIA EN 1 ITALIA English INDEX WARnINGS 3 Who should read these instructions 3 Symbols 3 Recommendations 3 Importants notes
Installation and operating instructions. E.2 Series high efficiency circulator
 Installation and operating instructions E.2 Series high efficiency circulator File No: 10.84 Date: august 16, 2012 Supersedes: 10.84 Date: july 20, 2010 contents 1.0 Operating limits 4 2.0 Electrical
OPERATORS MANUAL FOR Mi-T-M CORONA DISCHARGE OZONE GENERATORS
 OPERATORS MANUAL FOR Mi-T-M CORONA DISCHARGE OZONE GENERATORS CAUTION RISK OF INJURY! READ MANUAL BEFORE OPERATING! This manual is an important part of the Corona Discharge Ozone Generator and must remain
Installation and Operating Instructions for Davey BF Series Pressure Booster Systems with Flow Switch Control
 DAVEY WATER PRODUCTS LIMITED WARRANTY 1. The guarantee period commences on the date of original purchase of the equipment. Evidence of this date of original purchase must be provided when claiming repairs
Hardwired Electric Garage Heater
 Hardwired Electric Garage Heater G73 OWNERS MANUAL Read and save these instructions. 2 Trust has to be earned, and we will earn yours. Customer happiness is the focus of our business. From the factory
Please Read and Save These Instructions.
 Page 1 of 8 RadonAway Ward Hill, MA. GP500 Fan Installation Instructions Please Read and Save These Instructions. DO NOT CONNECT POWER SUPPLY UNTIL FAN IS COMPLETELY INSTALLED. MAKE SURE ELECTRICAL SERVICE
Instruction Leaflet. Read instructions before operating. Retain for future reference.
 pure indoor living 16-inch (40cm) Stand FAN MODEL: BSF1614 Series Instruction Leaflet Read instructions before operating. Retain for future reference. Questions? Comments? Call 1-800-253-2764 in North
HI Industrial Utility Heater HI Soleus Air International
 HI1-50-03 Industrial Utility Heater HI1-50-03 2010 Soleus Air International Thank you for choosing a Soleus Air Utility Heater. This owner s manual will provide you with valuable information necessary
VT SERIES VERTICAL TOASTER OPERATOR S MANUAL TABLE OF CONTENTS
 VT SERIES VERTICAL TOASTER OPERATOR S MANUAL This equipment chapter is to be inserted in the Equipment Manual MANUFACTURED EXCLUSIVELY FOR McDONALD S BY FRYMASTER, L.L.C. P.O. BOX 51000 SHREVEPORT, LOUISIANA
Series Automatic Hand Dryer. Operating Instructions for the User & Installation Instructions for the Licensed Installer
 GALAXY TM Series Automatic Hand Dryer Operating Instructions for the User & Installation Instructions for the Licensed Installer THIS MANUAL MUST BE READ CAREFULLY BEFORE ATTEMPTING TO INSTALL THE GALAXY
SAFETY ALERT SYMBOLS SAFETY PRECAUTIONS
 SAFETY ALERT SYMBOLS Read and follow all safety information carefully. The signal words used in this manual are selected as shown below and based on an assessment of the degree of potential injury or damage
Operator s Manual. Model G17-EU (International) Disinfection Soak Station for Hysteroscopes, Cystoscopes and ENT scopes
 Disinfection Soak Station for Hysteroscopes, Cystoscopes and ENT scopes") Model G17-EU (International) Disinfection Soak Station for Hysteroscopes, Cystoscopes and ENT scopes Operator s Manual CIVCO Medical Solutions 102 First Street South Kalona, IA 52247 USA Tel: 1-800-445-6741
Model G17-EU (International) Disinfection Soak Station for Hysteroscopes, Cystoscopes and ENT scopes Operator s Manual CIVCO Medical Solutions 102 First Street South Kalona, IA 52247 USA Tel: 1-800-445-6741
WATLOW IND. WATROD Flange Heater Installation & Maintenance Manual I&M NUMBER: Page: 1 Date:6/11/2008 Rev: 2.00
 I&M NUMBER: 316-42-8-1 Page: 1 _ Pre Installation Check to make sure that heater received is the same as that ordered. Elements may come in contact with each other during shipment. Minor adjustments to
AIC Brazed Plate Heat Exchanger Operating and Instruction Manual
 AIC Brazed Plate Heat Exchanger Operating and Instruction Manual Advanced Industrial Components Page 1 of 8 Customer Service Call: 1-888-738-1350 1.0 Installation 1.1 Mounting/support unit: a) On a shelf
Instructions for the fan motor control system, SILVER C
 Instructions for the fan motor control system, SILVER C 1. General The motor control system is used for controlling the type EC, 0.41-10 kw fan motors in the SILVER C units. The motor control system is
Ultra Clean LAMBTON CONVEYOR LIMITED. Installation and Operation Manual ONE SOURCE ONE SOLUTION
 Ultra Clean Installation and Operation Manual LAMBTON CONVEYOR LIMITED ONE SOURCE 1 Contents Warranty... 4 Section 1. Safety... 5 Section 2. Decals... 8 Section 3. Product Information... 9 Ultra Clean
Electric Garage Heater
 Electric Garage Heater G73 OWNERS MANUAL Read and save these instructions. A Name You Can Trust Trust has to be earned and we will earn yours. Customer happiness is the focus of our business. 2 From the