Induction Cooktop. Installation and Operation Manual IN8200E INL8200E INB8200E INLB8200E IN8400E INL8400E INB8400E INLB8400E. For use in GB & IE
|
|
|
- Lorin Rich
- 5 years ago
- Views:
Transcription


1 Installation and Operation Manual Induction Cooktop IN8200E INL8200E INB8200E INLB8200E IN8400E INL8400E INB8400E INLB8400E Date Purchased Serial Number Dealer Service Provider 1 For use in GB & IE
2 MANUFACTURED BY Moffat Limited Rolleston 7675 New Zealand INTERNATIONAL CONTACTS AUSTRALIA Moffat Pty Limited E.Mail: Main Office: (tel): 61 (03) (fax): 61 ( Service: (tel): Spares: (tel): Customer Service: (tel): (fax): CANADA Serve Canada Web: E.Mail: Sales: Service: (tel): (Toll Free) (tel): (Toll Free) NEW ZEALAND Moffat Limited Web: E.Mail: Main Office: (tel): UNITED KINGDOM Blue Seal Web: E.Mail: Sales: (tel): (fax): Spares: (tel): (fax): Service: (tel): (fax): UNITED STATES Moffat Web: Sales: Service: (tel): (Toll Free) (tel): (fax): (tel): (Toll Free) (tel): (fax): REST OF WORLD Moffat Limited Web: E.Mail: export@moffat.co.nz The reproduction or copying of any part of this manual by any means whatsoever is strictly forbidden unless authorized previously in writing by the manufacturer. In line with policy to continually develop and improve its products, Moffat Ltd. reserves the right to change the specifications and design without prior notice. Copyright Moffat Ltd. November 2014.
3 Contents Waldorf Electric Cooktops IN(L)(B)8200E IN(L)(B)8400E Induction Cooktop. Induction Cooktop. Introduction... 2 Specification... 4 Model Numbers Covered in this Specification General Technical Data Electrical Supply Requirements Electrical Connection Dimensions... 6 Installation... 7 Installation Requirements Unpacking Location Clearances Assembly Electrical Connection Commissioning Operation Operation Guide Description of Controls Operating the Cooktops Cleaning and Maintenance General After Each Use Daily Cleaning Weekly Cleaning Monthly Filter Cleaning Periodic Maintenance Fault Finding Error Codes General Fault Messages (E1) Wiring Schematics Replacement Parts List... 18
4 Introduction We are confident that you will be delighted with your WALDORF INDUCTION COOKTOP, and it will become a most valued appliance in your commercial kitchen. To ensure you receive the utmost benefit from your new WALDORF Appliance, there are two important things you can do. Firstly: Please read the instruction book carefully and follow the directions given. The time taken will be well spent. Secondly: If you are unsure of any aspect of the installation, instructions or performance of your appliance, contact your WALDORF dealer promptly. In many cases a phone call could answer your question. CE Only: These instructions are only valid if the country code appears on the appliance. If the code does not appear on the appliance, refer to the supplier of this appliance to obtain the technical instructions for adapting the appliance to the conditions for use in that country. WARNING: INDUCTION HEAT SOURCE CARE MUST BE TAKEN TO ENSURE THAT THE SPLASHBACK AND SURROUNDING AREAS ARE KEPT FREE OF METALLIC OBJECTS. WARNING: IMPROPER INSTALLATION, ADJUSTMENT, ALTERATION, SERVICE OR MAINTENANCE CAN CAUSE PROPERTY DAMAGE, INJURY OR DEATH. READ THE INSTALLATION, OPERATING AND MAINTENANCE INSTRUCTIONS THOROUGHLY BEFORE INSTALLING OR SERVICING THIS APPLIANCE. WARNING: GREAT CARE MUST BE TAKEN BY THE OPERATOR TO USE THE EQUIPMENT SAFELY TO GUARD IT AGAINST RISK OF FIRE. THE APPLIANCE MUST NOT BE LEFT ON UNATTENDED. IT IS RECOMMENDED THAT A REGULAR INSPECTION IS MADE BY A COMPETENT SERVICEMAN TO ENSURE CORRECT AND SAFE OPERATION OF YOUR APPLIANCE IS MAINTAINED. DO NOT STORE OR USE GASOLINE OR OTHER FLAMMABLE VAPOURS OR LIQUIDS IN THE VICINITY OF THIS OR ANY OTHER APPLIANCE. DO NOT SPRAY AEROSOLS IN THE VICINITY OF THIS APPLIANCE WHILE IT IS IN OPERATION. CAUTION: This appliance is; For professional use and is only to be used by suitably qualified / trained persons. Only service persons trained or recommended by the manufacturer are to carry out installation, servicing and repair operations. Components having adjustments protected (e.g. paint sealed) by the manufacturer should not be adjusted by the user / operator. 2
5 Introduction Safety Information: For your safety, please pay attention to the following symbols marked on the appliance. RISK OF ELECTRIC SHOCK. NO USER SERVICEABLE PARTS INSIDE. QUALIFIED SERVICE PERSON ACCESS ONLY. DISCONNECT FROM POWER BEFORE SERVICING. NONIONISING ELECTROMAGNETIC RADIATION QUALIFIED SERVICE PERSON ACCESS ONLY. DISCONNECT FROM POWER BEFORE SERVICING. Please Note the Following Points: Do Not placed metallic objects such as kitchen utensils, cutlery etc, on the Cooktop surface within the cooking zones as they could become hot. Take care when operating the appliance, as rings, watches and similar objects worn by the user could get hot when in close proximity to the Cooktop surface. Only use pans of the type and size suitable for induction cooking. NOTE: Users with Heart Pacemakers fitted should consult with their doctor or the manufacturer before using this appliance. Operation: Never insert objects into the Induction Unit. Inside are highly dangerous voltages. Do Not damage the Generator Inductors, e.g. with pointed / sharp objects as this may lead to electric shock. This Induction Unit is only for commercial cooking and for indoor use. It is only to be used with induction capable cookware. Any other use may result in unexpected hazards. Only use Induction Capable Cookware with a base of at least 120 mm diameter. Do not place metal objects, e.g. kitchen utensils, cutlery, tools, jewelry etc, on the cooking surface as they will quickly heat up if the appliance is turned On. Beware that when using the induction unit, personal items such as rings, watches and similar objects could get hot when in close proximity to the cooking zone. Do Not place Aluminium Foil on the cooking zone. Do Not use the ceramic glass surface as a work top. Do not damage the cooking surface. If the cooking surface shows visible signs of cracking, the appliance must be immediately disconnected from the mains supply. Switch Off the cooking zone after use. Do not rely on the Pan Detection Mode. Personnel: Employees, visitors and contract personnel must be informed of the potential hazards for persons with pacemakers or metal implants. These persons must consult their doctor or the appliance manufacturer. Maintenance and Repair: Maintenance and repair work is only to be undertaken by service persons trained or recommended by the manufacturer. Disconnect the electrical supply before removing the Induction Unit. Defective or damaged Induction Units are not to be installed, these should be returned to the manufacturer for repair. For safety reasons, only used recommended original spare parts and accessories. Dispose of appliance in accordance with national and regional regulations. Emergency: Immediately switch Off appliance and disconnect from the mains supply. Fire: Burning appliances should only be extinguished with a Carbon Dioxide (CO 2 ) extinguisher. Never use water or powder type extinguishers. 3
6 Specifications Model Numbers Covered in this Specification IN[1]8200E IN[1]8400E Induction Cooktop (450 wide) 2 Induction Heat Zones. Induction Cooktop (900 wide) 4 Induction Heat Zones. NOTE: [1]: Model Options; Standard Models. L Low Back Models. B Bold Front. LB Low Back and Bold Front. General A commercial heavy duty, high efficiency Induction Cooktop for modular kitchens, constructed in easy clean stainless steel external finish. It has a high option Cooktop arrangement with either 2 or 4 Induction Heat Zone option. Can be supplied with either Standard or Low Back Option and is available on industrial adjustable feet or with rear roller assembly. Induction generators are the result of intensive research and development work. In addition to their high safety standard, they offer easy operation, the latest technology and maximum convenience for: Boiling. Roasting. Keeping Food Warm. Flambéing. Grilling. The pan bottom is heated directly with a minimum of energy loss, without having to heat a hotplate needlessly. The food is heated more rapidly, allowing set meals to be prepared in a shorter time, with greater convenience and efficiency. A pan detection feature ensures that no energy is flowing when there is no pan (eliminating any fire hazard). A temperature sensor monitors the pan to prevent the pan boiling dry (no liquid in the pan), and switches Off the cooking zone immediately in the event of over heating. Maximum efficiency is only obtained when induction capable pans and pots are used. Technical Data Minimal Pan Diameter 120 mm. Relative Humidity 10% to 90% Noncondensing. Ambient Temperature: Operation Storage 0 C to 40 C. 20 C to 70 C. Supply Voltage: According to the Technical Data Plate. Voltage Tolerance: 10% to 6%. Supply Frequency: 50 or 60 Hz. Operating Frequency: 18 to 22 khz. 4
7 Specifications Electrical Supply Requirements Model Power Supply Total Power Amps Voltage Type Frequency Input L1 L2 L3 IN8200E Vac 3PE 50 / 60 Hz 10 kw IN8400E Vac 3PE 50 / 60 Hz 20 kw Electrical Connection WARNING: THIS APPLIANCE MUST BE EARTHED. IF THE SUPPLY CORD IS DAMAGED, IT MUST BE REPLACED BY A SUITABLY QUALIFIED PERSON IN ORDER TO AVOID A HAZARD. The electrical supply connection point is located at the rear of the appliance, approximately 130 mm from the right hand side and 48 mm from the rear of the appliance and 614 mm from the floor. When connecting a this electric appliance to the mains supply, ensure that the following is carried out: An isolating switch is fitted within 2 m of the appliance, but not on the appliance and in such a position that the user does not have to reach across the cooking surface. Supply cord shall be oilresistant, sheathed flexible cable and not lighter than ordinary polychloroprene or other equivalent synthetic elastomer sheathed cord (as per AS/NZS 3191 part or IEC 60245IEC57) e.g. HO5 RNF Type. The branch supply line shall be individually overload protected to the correct current rating and the supply cord shall be protected against any mechanical or thermal damage. A grommet is fitted around the wiring entry hole into the appliance. All wiring connections must be tight. Refer to the appropriate wiring standards for the size of cable that is to be supplied to an appliance for the current drawn on that line. 5


8 Dimensions Dimensions IN(L)8200E IN(L)8400E 6
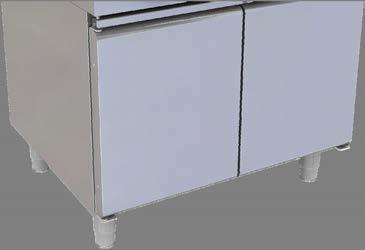
9 Installation Installation Requirements NOTE: It is most important that this Induction Cooktop is installed correctly and that operation is correct before use. Installation shall comply with local electrical and health and safety requirements. Waldorf Induction Cooktops are designed to provide years of satisfactory service, and correct installation is essential to achieve the best performance, efficiency and troublefree operation. This appliance must be installed in accordance with National installation codes and in addition, in accordance with relevant National / Local codes covering gas and fire safety. Australia / New Zealand AS/NZS 3000 Wiring Rules. United Kingdom: BS 7671 Requirements for Electrical Installations. Installations must be carried out by qualified persons only. Failure to install equipment to the relevant codes and manufacturer s specifications shown in this section will void the warranty. Components having adjustments protected (e.g. paint sealed) by manufacturer, are only to be adjusted by an authorised service agent. They are not to be adjusted by the installation person. Unpacking Remove all packaging and transit protection from the appliance including all protective plastic coating from the exterior stainless steel panels. Check equipment and parts for damage. Report any damage immediately to the carrier and distributor. Report any deficiencies to the distributor who supplied the appliance. Check that the available electrical supply is correct to that shown on the Rating Plate attached to the underside of the R/H side, front Induction Cooktop lower trim. Location 1. Installation must include adequate clearance and ventilation. 2. Position the appliance in its approximate working position. 3. The legs must always be fitted. Ensure that the legs are securely attached. Clearances Combustible Surface Non Combustible Surface Left / Right Hand Side 50mm 0mm Rear 50mm 0mm NOTE: Only noncombustible materials can be used in close proximity to this appliance. 7
10 Installation Assembly This model is delivered completely assembled. Ensure that the adjustable feet are securely attached. CAUTION: This appliance is for professional use and is only to be used by qualified persons. Only qualified service persons are to carry out installation and servicing of this appliance. NOTE: This appliance is fitted with adjustable feet to enable the appliance to be positioned securely and level. This should be carried out on completion of the electrical connection. Rear Roller Kit For installation details, refer to the instructions supplied with the kit. Electrical Connection WARNING: THIS APPLIANCE MUST BE EARTHED. IF THE SUPPLY CORD IS DAMAGED, IT MUST BE REPLACED BY A SUITABLY QUALIFIED PERSON IN ORDER TO AVOID A HAZARD. NOTE: ALL ELECTRICAL CONNECTIONS MUST ONLY BE CARRIED OUT BY A QUALIFIED SERVICE PERSON. Each appliance should be connected to an adequately protected power supply and isolation switch mounted adjacent to, but not behind the appliance. This switch must be clearly marked and readily accessible in case of fire. 1. Check that the electricity supply is correct as shown on the Rating Plate. Refer to the 'Dimensions Section for rating plate locations for the different model types. 2. The supply terminal connections are located at the rear of the the appliance. Refer to Electrical Connections in the Specifications section of the manual. 3. Bring the supply cable up through the compression type gland provided on the rear of the main electrical switchgear panel. 4. Connect the mains supply to L1, L2 and L3 connections as required. Refer to the 'Electrical Supply Requirements' section. 5. Connect earth conductors to earth stud. 6. For all connections ensure that conductors are secure and appropriately terminated. 7. Tighten the cable gland to secure against tension on the cable. NOTE: This appliance must be earthed. Fixed wiring installations must incorporate an allpole disconnection switch. 8. Correctly locate the appliance into its final operating position and using a spirit level, adjust the legs so that the appliance is level and at the correct height. 9. Connect the power supply to the appliance. 10. Check that the electrical supply is as shown in Specifications section. 8
11 Installation Commissioning The following commissioning checks must be carried out before the Induction Cooktop is handed over for use, to ensure that the unit operates correctly and the operator(s) understand the correct operating procedure. 1. Before leaving the new installation, check the following functions in accordance with the operating instructions specified in the Operation section of this manual. Check the current draw and loading for the equipment. Refer specification section for correct electrical requirements. Check that all the connections are correct and that all cover panels have been refitted. After everything is connected, perform the following function check: a. Ensure that any cooking pots are removed from the cooking zone. b. Adjust the cooking level to Zero. c. Switch On the mains supply. d. The Green and Red Indicator lamps must not illuminate or flash. e. Increase the cooking level to any number. f. The Green Indicator lamp must blink regularly every second (Pan Detecting Mode). On the display, Pan Detection Symbol U must blink (Pan Detecting Mode). g. No Fault must occur. Red Indicator lamp must not illuminate. h. Place a water filled induction pan (minimum of 120 mm diameter) on the cooking zone. i. The Green Indicator lamp must be On continuously. j. Adjust power to Maximum. k. After a few seconds, the fan must turn On. WARNING: DO NOT HEAT EMPTY PANS WITHOUT SUPERVISION. ALWAYS PLACE PANS IN THE CENTRE OF AN INDUCTOR ZONE. PANS SHOULD NOT BE HEATED UP TO MORE THAN 300 C (570 F). If an error occurs, refer to the Fault Finding section of this manual. Ensure that this instruction manual is left with the appliance. Ensure that all the relevant details and contacts have been added to the front of this manual. 2. Ensure that the operator has been instructed in the areas of correct operation and shutdown procedure for the appliance. 3. This manual must be kept by the owner for future reference and as a record of Date of Purchase, Date of Installation and Serial Number of Unit recorded and kept with this manual. (These details can be found on the Rating Plate attached to the inner R/H side panel. Refer to the Dimensions section for rating plate location). NOTE: If for some reason it is not possible to get the unit to operate correctly, turn off the electrical power supply and contact a qualified service person. The supplier of this unit will be able to recommend a suitable person. Make sure that the electrical supply is turned off before any service or maintenance work is carried out. 9
 by the manufacturer should not be adjusted by the user / operator.")
12 Operation Operation Guide CAUTION: This appliance is for professional use and is only to be used by qualified persons. Only qualified service persons are to carry out installation and servicing operations. Components having adjustments protected (e.g. paint sealed) by the manufacturer should not be adjusted by the user / operator. 1. Waldorf appliances have been designed to provide simplicity of operation. 2. Improper operation is therefore almost impossible, however bad operation practices can reduce the life of the appliance and produce a poor quality product. To use this appliance correctly please read the following sections carefully. Description of Controls (Model IN8200E Shown) HILO Temperature Control Knob (Rear Hob) Fault Lamp (Red) Pan Detection / Power On Lamp (Green) HI / LO Temperature Control Knob Used to select hob required and to adjust the temperature setting for individual Hobs. Pan Detection / Power On Lamp (Green) Illuminates and remains On when a selected hob is turned On and has a pan on the hob. If the hob is turned On without a pan on the hob, the lamp will commence flashing until a pan is placed on the selected hob. Also used with the Fault Lamp to display Generator Faults, refer to Error Code Pattern in the Fault Finding section. Fault Lamp (Red) Illuminates and remains On when a fault is detected. The red fault lamp will remain On until the fault is rectified. Refer to Error Code Pattern in the Fault Finding section. 10
13 Operation Operating the Cooktop WARNING: INDUCTION HEAT SOURCE CARE MUST BE TAKEN TO ENSURE THAT THE SPLASHBACK AND SURROUNDING AREAS ARE KEPT FREE OF METALLIC OBJECTS. Before Operating this Appliance Please Note the Following Points: Metallic objects such as kitchen utensils, cutlery etc. shall not be placed on the Cooktop surface within the cooking zones as they could become hot. Take care when operating the appliance, as rings, watches and similar objects worn by the user could get hot when in close proximity to the Cooktop surface. Only use pans of the type and size recommended by the manufacturer. NOTE: Users with Heart Pacemakers fitted should consult with their doctor or the manufacturer before using this appliance. The controls for the hobs may be set at any position between high and low to provide the desire level of heating. An individual green neon for each hob, will glow when the hob is On with a pan present and extinguish when the hob is turned Off. Start cooking at the highest setting, and change to a lower setting when the desired temperature is reached. 1. Turn power On at the mains power supply. 2. Place cooking pan onto the hob to be used, ensuring that there is liquid in the pan. 3. Turn the control knob to the desired temperature. The Green indicator lamp will illuminate and stay On. NOTE: If the control knob is turned On without a pan being on the hob, the green indicator lamp will commence flashing until a pan is placed on the hob. 4. On completion of cooking, turn Off the control knob and remove the pan, the green indicator light will extinguish. NOTE: If the Red Fault Lamp Illuminates and remains On, a fault has been detected. The red fault lamp will remain On until the fault is rectified. The Green indicator light will commence flashing. Refer to Error Code Pattern in the Fault Finding section. DO NOT use the appliance until the fault is rectified. 11
14 Cleaning and Maintenance CAUTION: Always turn off the electrical power supply at the mains supply before cleaning. This appliance is not water proof. Do not use water jet spray to clean interior or exterior of this appliance. General Clean the Induction Cooktop regularly. A clean appliance looks better, will last longer and will perform better. Carbonised grease on the surface will hinder the transfer of heat from the cooking surface to the food. This will result in loss of cooking efficiency. DO NOT use water on the induction hob while this item is still hot as warping and cracking may occur. Allow the hob to cool down before cleaning. NOTE: DO NOT use abrasive detergents, strong solvents or caustic detergents as they could corrode or damage the induction hob. To keep your Induction Cooktop clean and operating at peak efficiency, follow the procedures shown below: After Each Use 1. Clean the Induction Cooktop hob area with a plastic or wooden scraper tool to remove any food debris. 2. Wipe down with a damp cloth lightly moistened with a solution of mild detergent and water. Dry the Cooktop hob area thoroughly with a dry cloth and polish with a soft dry cloth. Daily Cleaning 1. Thoroughly clean the splash back, the interior and exterior surfaces of the Induction Cooktop with hot water, a detergent solution and a soft scrubbing brush. 2. Clean the Control Panel with a damp cloth lightly moistened with a solution of mild detergent and water. Dry the control panel thoroughly with a dry cloth and polish with a soft dry cloth. 3. Any carbon deposits should be removed using a plastic or wooden scraper tool followed by wiping with a cloth moistened in a solution of hot water and detergent to prevent accumulation of food deposits. 4. Dry the Induction Cooktop thoroughly with a dry cloth and polish with a soft dry cloth. 12

15 Cleaning and Maintenance Weekly Cleaning NOTE: If the Induction Cooktop usage is very high, we recommend that the weekly cleaning procedure is carried out on a more frequent basis. Ensure that protective gloves are worn during the cleaning process. DO NOT use harsh abrasive detergents, strong solvents or caustic detergents as they will damage the Induction Cooktop. Induction Cooktop Cooking Area a. Clean the Induction Cooktop area with a soft cloth and a mild detergent and hot water solution. b. Baked on deposits may require the use of a plastic or wooden scraper and a good quality glass cleaner. Always apply cleaner when the appliance is cold. Stainless Steel Surfaces a. Clean the exterior surfaces of the Induction Cooktop with hot water, a mild detergent solution and a soft scrubbing brush. Note that the control knobs are a push fit onto the control spindles and can be removed to allow cleaning of the front control panel. b. Baked on deposits or discolouration may require a good quality stainless steel cleaner or stainless steel wool. Always apply cleaner when the appliance is cold and rub in the direction of the grain. c. Dry all components thoroughly with a dry cloth and polish with a soft dry cloth. Monthly Filter Cleaning NOTE: If the Induction Cooktop usage is very high, we recommend that the grease filter monthly cleaning procedure is carried out on a more frequent basis. Once a month, the grease filter should be removed and cleaned. a. Open the Induction Cooktop door and remove the securing screws. Remove the filter. b. Grease Filters can be cleaned by immersing in detergent and hot water and finally rinsing in hot water. c. Allow the grease filter to dry before refitting. Grease Filter Periodic Maintenance To achieve the best results, cleaning must be regular and thorough and all controls and mechanical parts checked and adjusted periodically by a competent serviceman. If any small faults occur, have them attended to promptly. Don't wait until they cause a complete breakdown. It is recommended that the appliance is serviced every 6 months. 13
16 Fault Finding Fault Finding This section provides an easy reference guide to the more common problems that may occur during the operation of your appliance. The fault finding guide in this section is intended to help you correct, or at least accurately diagnose problems with your equipment. Although this section covers the most common problems reported, you may encounter a problem not covered in this section. In such instances, please contact your local authorised service agent who will make every effort to help you identify and resolve the problem. Please note that the service agent will require the following information: The Model Trade Name and the Serial Number of the Appliance. (both can be found on the Technical Data Plate located on the appliance. Fault Possible Cause Remedy Insufficient heating of the cooking zone. Continuous heating of the cooking zone at maximum power. Empty cooking zone starts operating. Unsuitable pan material. Knob switch faulty. Pan detection sensor faulty. Use only approved pans. Check / Replace the knob switch. Call the service provider. Replace / repair generator. Call the service provider. Small metal objects are heated. Pan detection sensor faulty. Replace / repair generator. Call the service provider. No heating of cooking zone. Pan bottom diameter is less than 120 mm. Generator defective. Use suitable pan size. Replace / repair generator. Call the service provider. Appliance not working. Mains fuse or supply interrupted. Check fuses / mains connection. Fuses blow when switching on appliance. Short circuit in generator. Replace / repair generator. Call the service provider. 14

17 Fault Finding Error Code Pattern There are the following error types: Generator Errors (E1). Generator Errors are faults detected by the generator and on analogue controls, the faults can be detected according to the duration and frequency of the green light blinking. The green lamp lights, one long flash and then short regular flashes. The number of these short flashes refers to the error number. This pattern will repeat constantly. Generator Fault Messages (E1) Error No. Type of Error Cause Corrective Action E1 01 Hardware overcurrent Unsuitable pan material Wrong or defective coil Use suitable pan material Check Coil E1 02 No inductor current Inductor connection failure Connect the Inductor correctly E1 03 IGBT Temperature too high Air routes blocked Fan clogged Temperature sensor of IGBT defective Clear air routes Check fan and clean Check fan rotation E1 04 Cooking zone temperature too high or too low Pan empty Temperature Sensor faulty Remove pan, switch Off and wait a few minutes until cooking field has cooled down Replace Temperature Sensor Power Board faulty Replace Generator E1 05 Control Unit failure E1 06 Internal temperature too high E1 07 Coil temperature E1 08 Mains phase failure Defective wiring or Control Unit Control Unit faulty Air routes blocked Fan clogged, temperature sensor defect Exterior heat sources too close Coil temperature too high Temperature Sensor faulty Breakdown of mains phase or mains power fluctuation Check wiring harness to unit, or replace Control Unit Replace the Control Unit Clear air routes Clean fan Move appliance or heat sources Remove pan, switch Off and wait a few minutes until cooking field has cooled down Replace Temperature Sensor Check mains supply E1 13 Mains connection error Mains voltage is too high or too low Check mains connection E1 14 Mains adaptor error Mains voltage is too high or too low Check mains connection E1 15 Empty pan protection Mains error Empty pan Defective Coil Temperature Sensor Switch Off the main power switch and wait a few seconds and switch power back On Remove pan, switch Off and wait a few minutes until cooking field has cooled down Replace Coil Temperature Sensor 15
18 out2 out1 ln Wiring Schematic Wiring Schematic IN(L)8200E Induction Cooktop. POTENTIOMETER NEONS L1 L2 L3 B C L2 CONTROL B Poti Lamps gn rt CONTROL C Poti Lamps gn rt MAINS CONNECTION v 3PE COM N/C MICROSWITCH COIL COIL?W?F PU PU?F?W Digital I/O Digital I/O out2 out1 ln MICROSWITCH CONNECTION L1 INDUCTION GENERATOR B C?W?F PU NEONS POTENTIOMETER?W?F PU COIL AND COIL TEMPERATURE SENSOR CONNECTION DETAIL CONTROL PANEL CONTROL A Poti Lamps gn rt TYPICAL CONTROL CONNECTION DETAIL PEL
19 out2 out1 ln Wiring Schematic Wiring Schematic IN(L)8400E Induction Cooktop. 3 A B C D Digital I/O CONTROL B MAINS CONNECTION v 3PE COIL COIL COIL COIL?W?F PU PU?F?W PU?F?W PU?F?W CONTROL D CONTROL C CONTROL A Poti Lamps Poti Lamps Poti Lamps Poti Lamps gn rt gn rt gn rt gn rt 1 L1 COM INDUCTION GENERATOR MICROSWITCH Digital I/O out2 out1 ln POTENTIOMETER NEONS MICROSWITCH CONNECTION A B?W?F PU?W?F PU TYPICAL COIL AND COIL TEMPERATURE SENSOR CONNECTION DETAIL CONTROL A Poti Lamps POTENTIOMETER NEONS gn rt TYPICAL CONTROL CONNECTION DETAIL POTENTIOMETER NEONS POTENTIOMETER NEONS CONTROL PANEL 1 COM N/C MICROSWITCH L1 N/C L2 L3 L2 PE L
20 Replacement Parts List Replacement Parts List IMPORTANT: Only genuine authorized replacement parts should be used for the servicing and repair of this appliance. The instructions supplied with the parts should be followed when replacing components. For further information and servicing instructions, contact your nearest authorized service branch (contact details are as shown on the reverse of the front cover of this manual). When ordering replacement parts, please quote the part number and the description as listed below. If the part required is not listed below, request the part by description and quote model number and serial number which is shown on the rating plate Induction Glass Induction Glass Induction Generator Vario Quad 2 Tray Induction Generator Vario Quad 4 Tray Induction Coil Tray 2 Zone Induction Control Rotary Switch Assembly (Includes LED s) Potentiometer with Switch Knob Waldorf 6 mm, HI4321LO Microswitch Leg 150 mm (Flush Stud) Rear Roller Assy Induction Air Filter Thumb Screw (for Filter) Magnetic Door Catch LED Red LED Green. 18
21
INSTALLATION AND OPERATION MANUAL ELECTRIC GRIDDLE EP514 EP516 EP518. For use in GB & IE
 INSTALLATION AND OPERATION MANUAL ELECTRIC GRIDDLE EP5 EP56 EP58 For use in GB & IE 35- MANUFACTURED BY Moffat Limited Rolleston 65 New Zealand INTERNATIONAL CONTACTS AUSTRALIA Moffat Pty Limited Web:
Electric Griddle GPL8600E GPL8900E GPL8120E GP8600E GP8900E GP8120E. Installation and Operation Manual. For use in GB & IE
 Installation and Operation Manual Electric Griddle GP8600E GP800E GP80E GPL8600E GPL800E GPL80E Date Purchased Serial Number Dealer Service Provider For use in GB & IE 350-3 MANUFACTURED BY Moffat Limited
INSTALLATION AND OPERATION MANUAL ELECTRIC COOKTOP E512 E514 E516. For use in GB & IE
 INSTALLATION AND OPERATION MANUAL ELECTRIC COOKTOP E512 E514 E516 For use in GB & IE 229356-6 MANUFACTURED BY Moffat Limited Rolleston 7675 New Zealand INTERNATIONAL CONTACTS AUSTRALIA Moffat Pty Limited
Electric Cooktop. Series. Installation and Operation Manual
 Installation and Operation Manual Electric Cooktop Series RN8200E RNL8200E RNB8200E RNLB8200E RN8400E RNL8400E RNB8400E RNLB8400E RN8600E RNL8600E RNB8600E RNLB8600E Date Purchased Serial Number Dealer
Electric Pasta Cooker
 Installation and Operation Manual Electric Pasta Cooker PC8140E PCB8140E PC8140E-7 PCB8140E-7 PCL8140E PCLB8140E PCL8140E-7 PCLB8140E-7 Date Purchased Serial Number Dealer Service Provider For use in GB
Gas Cooktops (450mm Wide Hobs)
") Installation and Operation Manual Gas Cooktops (450mm Wide Hobs) Series RN8450G RNL8450G RNB8450G RNLB8450G RN8900G RNL8900G RNB8900G RNLB8900G Date Purchased Serial Number Dealer Service Provider For
Installation and Operation Manual Gas Cooktops (450mm Wide Hobs) Series RN8450G RNL8450G RNB8450G RNLB8450G RN8900G RNL8900G RNB8900G RNLB8900G Date Purchased Serial Number Dealer Service Provider For
CSP6 - Gas Stock Pot INSTALLATION AND OPERATION MANUAL
 CSP6 - Gas Stock Pot INSTALLATION AND OPERATION MANUAL 240897-1 Moffat Limited Rolleston 7675 New Zealand AUSTRALIA Moffat Pty Limited E.Mail: vsales@moffat.com.au Main Office: (tel): +61 (03) 9518 3888
INSTALLATION AND OPERATION MANUAL GAS GRIDDLE TOASTER G55T. For use in GB & IE
 INSTALLATION AND OPERATION MANUAL GAS GRIDDLE TOASTER G55T For use in GB & IE 228001-7 MANUFACTURED BY Moffat Limited Christchurch New Zealand INTERNATIONAL CONTACTS AUSTRALIA Moffat Pty Limited Web: www.moffat.com.au
Gas Range Static Oven
 Installation and Operation Manual Gas Range Static Oven Series RN8910G RNL8910G RNB8910G RNLB8910G Date Purchased Serial Number Dealer Service Provider 1 For use in GB & IE 232779-8 MANUFACTURED BY Moffat
Installation and Operation Manual. Gas Salamander SN8200G SN8200GB. Date Purchased. Serial Number. Dealer. Service Provider
 Installation and Operation Manual Gas Salamander SN8200G SN8200GB Date Purchased Serial Number Dealer Service Provider 232460-6 MANUFACTURED BY Moffat Limited Christchurch New Zealand INTERNATIONAL CONTACTS
Gas Griddle Toaster. Model CT6 INSTALLATION AND OPERATION MANUAL
 Gas Griddle Toaster Model CT6 INSTALLATION AND OPERATION MANUAL 228009-6 MANUFACTURED BY Moffat Limited Christchurch New Zealand INTERNATIONAL CONTACTS AUSTRALIA Moffat Pty Limited E.Mail: vsales@moffat.com.au
Gas Range Electric Static/Convection Ovens
 Installation and Operation Manual Gas Range Electric Static/Convection Ovens RN8910GE RN8910GEC RNL8910GE RNL8910GEC Date Purchased Serial Number Dealer Service Provider For use in GB & IE 232781-8 MANUFACTURED
Installation and Operation Manual. Gas Target Top. Date Purchased. Serial Number. Dealer. Service Provider. For use in GB & IE
 Installation and Operation Manual Gas Target Top RN8100G RNL8100G RNB8100G RNLB8100G Date Purchased Serial Number Dealer Service Provider For use in GB & IE 228092-20 MANUFACTURED BY Moffat Limited Rolleston
GAS GRIDDLE GP514 GP516 GP518
 INSTALLATION AND OPERATION MANUAL GAS GRIDDLE GP514 GP516 GP518 232422-10 MANUFACTURED BY Moffat Limited Christchurch New Zealand INTERNATIONAL CONTACTS AUSTRALIA Moffat Pty Limited Web: www.moffat.com.au
Installation and Operation Manual. Gas Bratt Pan. Date Purchased. Serial Number. Dealer. Service Provider. For use in GB & IE
 Installation and Operation Manual Gas Bratt Pan BP8080G BP8080GE BP8120G BP8120GE BPL8080G BPL8080GE BPL8120G BPL8120GE Date Purchased Serial Number Dealer Service Provider For use in GB & IE 228688-16
Installation and Operation Manual. Gas Griddle Toaster. Date Purchased. Serial Number. Dealer. Service Provider. For use in GB & IE
 Installation and Operation Manual Gas Griddle Toaster GT8600G GTL8600G GTB8600G GTLB8600G Date Purchased Serial Number Dealer Service Provider For use in GB & IE 228002-16 MANUFACTURED BY Moffat Limited
Gas Salamander. Model CS9 INSTALLATION AND OPERATION MANUAL. For use in GB & IE
 Gas Salamander Model CS9 INSTALLATION AND OPERATION MANUAL For use in GB & IE 230628-7 MANUFACTURED BY Moffat Limited Christchurch New Zealand INTERNATIONAL CONTACTS AUSTRALIA Moffat Pty Limited Web: www.moffat.com.au
GAS TARGET TOP / STATIC OVEN RANGE
 INSTALLATION AND OPERATION MANUAL GAS TARGET TOP / STATIC OVEN RANGE G570 232426-8 MANUFACTURED BY Moffat Limited Christchurch New Zealand INTERNATIONAL CONTACTS AUSTRALIA Moffat Pty Limited E.Mail: vsales@moffat.com.au
Gas Target Top Range Static Oven
 Installation and Operation Manual Gas Target Top Range Static Oven RN8110G RNB8110G RNL8110G RNLB8110G Date Purchased Serial Number Dealer Service Provider 1 For use in GB & IE 228682-14 MANUFACTURED BY
INSTALLATION AND OPERATION MANUAL GAS CHARGRILL G592 G593 G594 G596 G598. For use in GB, IE & DK
 ` INSTALLATION AND OPERATION MANUAL GAS CHARGRILL G592 G593 G594 G596 G598 For use in GB, IE & DK 228593-24 MANUFACTURED BY Moffat Limited Rolleston 7675 New Zealand INTERNATIONAL CONTACTS AUSTRALIA Moffat
INSTALLATION AND OPERATION MANUAL GAS SALAMANDER G91 G91B. For use in GB & IE
 INSTALLATION AND OPERATION MANUAL GAS SALAMANDER G91 G91B For use in GB & IE 231920-8 MANUFACTURED BY Moffat Limited Christchurch New Zealand INTERNATIONAL CONTACTS AUSTRALIA Moffat Pty Limited Web: www.moffat.com.au
GAS RANGE STATIC OVEN
 INSTALLATION AND OPERATION MANUAL GAS RANGE STATIC OVEN G504 G528 For use in GB, IE & DK 230103-15 MANUFACTURED BY Moffat Limited Rolleston 7675 New Zealand INTERNATIONAL CONTACTS AUSTRALIA Moffat Pty
Installation, Operating and Servicing Instructions
 Installation, Operating and Servicing Instructions Opus 700 Electric Induction Hobs OE7013, OE7014 Please make a note of your product details for future use: Date Purchased: Model Number: Serial Number:
GAS GRIDDLE GP513 GP514 GP516 GP518
 INSTALLATION AND OPERATION MANUAL GAS GRIDDLE GP513 GP514 GP516 GP518 For use in GB & IE 229284-18 MANUFACTURED BY Moffat Limited Rolleston 7675 New Zealand INTERNATIONAL CONTACTS AUSTRALIA Moffat Pty
30DSERIES E32D4. (Digital Operation) Installation and Operation Manual
 Installation and Operation Manual") 30DSERIES E32D4 (Digital Operation) Installation and Operation Manual 234781-12 MANUFACTURED BY Moffat Limited Christchurch New Zealand INTERNATIONAL CONTACTS AUSTRALIA Moffat Pty Limited Web: www.moffat.com.au
30DSERIES E32D4 (Digital Operation) Installation and Operation Manual 234781-12 MANUFACTURED BY Moffat Limited Christchurch New Zealand INTERNATIONAL CONTACTS AUSTRALIA Moffat Pty Limited Web: www.moffat.com.au
Installation, Operating and Servicing Instructions
 Installation, Operating and Servicing Instructions Countertop Induction Hobs IH21, IH3, IH42 Please make a note of your product details for future use: Date Purchased: Model Number: Serial Number: Dealer:
INSTALLATION AND OPERATION MANUAL GAS SALAMANDER G91 G91B. For use in GB & IE
 om INSTALLATION AND OPERATION MANUAL GAS SALAMANDER G91 G91B For use in GB & IE 231920-11 MANUFACTURED BY Moffat Limited Rolleston 7675 New Zealand INTERNATIONAL CONTACTS AUSTRALIA Moffat Pty Limited Web:
Gas Cooktops. Installation and Operation Manual
 Installation and Operation Manual Gas Cooktops Series RN8200G RNL8200G RNB8200G RNLB8200G RN8400G RNL8400G RNB8400G RNLB8400G RN8600G RNL8600G RNB8600G RNLB8600G RN8800G RNL8800G RNB8800G RNLB8800G Date
Gas Griddle GPL8450G GPL8600G GPL8900G GPL8120G GP8450G GP8600G GP8900G GP8120G. Installation and Operation Manual. 1 For use in GB & IE
 Installation and Operation Manual Gas Griddle GP8450G GP8600G GP8900G GP8120G GPL8450G GPL8600G GPL8900G GPL8120G Date Purchased Serial Number Dealer Service Provider 1 For use in GB & IE 228676-24 MANUFACTURED
GAS TARGET TOP / STATIC OVEN RANGE
 INSTALLATION AND OPERATION MANUAL GAS TARGET TOP / STATIC OVEN RANGE G570 For use in GB & IE 230096-8 MANUFACTURED BY Moffat Limited Christchurch New Zealand INTERNATIONAL CONTACTS AUSTRALIA Moffat Pty
Gas Cooktops. Models: C6 (600mm) C9 (900mm) INSTALLATION AND OPERATION MANUAL. For use in GB & IE
 C9 (900mm) INSTALLATION AND OPERATION MANUAL. For use in GB & IE") Gas Cooktops Models: C6 (600mm) C9 (900mm) INSTALLATION AND OPERATION MANUAL For use in GB & IE 230635-7 MANUFACTURED BY Moffat Limited Christchurch New Zealand INTERNATIONAL BRANCHES AUSTRALIA Moffat
Gas Cooktops Models: C6 (600mm) C9 (900mm) INSTALLATION AND OPERATION MANUAL For use in GB & IE 230635-7 MANUFACTURED BY Moffat Limited Christchurch New Zealand INTERNATIONAL BRANCHES AUSTRALIA Moffat
GAS GRIDDLE RANGES ELECTRIC OVEN
 INSTALLATION AND OPERATION MANUAL GAS GRIDDLE RANGES ELECTRIC OVEN GPE506 GPE56 GPE508 GPE58 For use in GB & IE 230112-16 MANUFACTURED BY Moffat Limited Rolleston 7675 New Zealand INTERNATIONAL CONTACTS
Gas Range Static Oven
 Installation and Operation Manual Gas Range Static Oven Series RN8510G RN8610G RN8810G RNL8510G RNL8610G RNL8810G RNB8510G RNB8610G RNB8810G RNLB8510G RNLB8610G RNLB8810G Date Purchased Serial Number Dealer
Gas Ranges Electric Static/Convection Oven
 Installation and Operation Manual Gas Ranges Electric Static/Convection Oven RN8510GE/GEC RN8610GE/GEC RN8810GE/GEC RNL8510GE/GEC RNL8610GE/GEC RNL8810GE/GEC Date Purchased Serial Number Dealer Service
GAS TARGET TOP RANGE/ CONVECTION OVEN
 INSTALLATION AND OPERATION MANUAL GAS TARGET TOP RANGE/ CONVECTION OVEN G576 232427-8 MANUFACTURED BY Moffat Limited Christchurch New Zealand INTERNATIONAL CONTACTS AUSTRALIA Moffat Pty Limited E.Mail:
Electric Deep Fryer FNL8127E/EE FNL8224E/EE. Installation and Operation Manual. For use in GB & IE Date Purchased. Serial Number.
 Installation and Operation Manual Electric Deep Fryer FNL8127E/EE FNL8224E/EE Date Purchased Serial Number Dealer Service Provider For use in GB & IE 236002-2 MANUFACTURED BY Moffat Limited Christchurch
Gas Range Convection Oven
 Installation and Operation Manual Gas Range Convection Oven RN8510GC RN8610GC RN8810GC RNL8510GC RNL8610GC RNL8810GC Date Purchased Serial Number Dealer Service Provider For use in GB, IE & DK 228680-23
TURBOFAN E25T. Equipment Operation Manual. McDonald s. Moffat Pty Limited 740 Springvale Rd Mulgrave, VIC, 3170, AUSTRALIA
 TURBOFAN E25T Equipment Operation Manual This equipment chapter is to be inserted in the appropriate section of the Equipment Manual. Manufactured exclusively for McDonald s By Moffat Pty Limited 740 Springvale
GAS STATIC OVEN RANGES
 INSTALLATION AND OPERATION MANUAL GAS STATIC OVEN RANGES G504 G528 232428-3 MANUFACTURED BY Moffat Limited Christchurch New Zealand INTERNATIONAL CONTACTS AUSTRALIA Moffat Pty Limited E.Mail: vsales@moffat.com.au
E74 E76 E78 HOT FOOD DISPLAYS
 E74 E76 E78 HOT FOOD DISPLAYS -1- MANUFACTURED BY Moffat Limited PO Box 10001 Christchurch New Zealand Ph: (03) 389 1007 Fax: (03) 389 1276 WORLD-WIDE BRANCHES UNITED KINGDOM Blue Seal Units 6-7, Mount
OWNER S MANUAL INSTRUCTIONS, INSTALLATION, OPERATION, MAINTENANCE RHPE & RTGE SERIES (ELECTRIC COUNTERTOPS) RETAIN THIS MANUAL FOR FUTURE REFERENCES.
 RETAIN THIS MANUAL FOR FUTURE REFERENCES.") 3245 Corridor Drive, Eastvale, CA 91752 800.769.2414 951.360.1600 951.360.7500 (Fax) OWNER S MANUAL INSTRUCTIONS, INSTALLATION, OPERATION, MAINTENANCE RHPE & RTGE SERIES (ELECTRIC COUNTERTOPS) FOR YOUR
3245 Corridor Drive, Eastvale, CA 91752 800.769.2414 951.360.1600 951.360.7500 (Fax) OWNER S MANUAL INSTRUCTIONS, INSTALLATION, OPERATION, MAINTENANCE RHPE & RTGE SERIES (ELECTRIC COUNTERTOPS) FOR YOUR
INSTALLATION AND OPERATION MANUAL 'VEE-RAY' GAS FRYERS GT60HPO
 INSTALLATION AND OPERATION MANUAL 'VEE-RAY' GAS FRYERS GT60HPO 229280-13 MANUFACTURED BY Moffat Limited Rolleston 7675 New Zealand INTERNATIONAL CONTACTS AUSTRALIA Moffat Pty Limited E.Mail: vsales@moffat.com.au
400mm Gas Fryer. Model CF4 INSTALLATION AND OPERATION MANUAL. For use in GB & IE
 400mm Gas Fryer Model CF4 INSTALLATION AND OPERATION MANUAL For use in GB & IE 230114-9 MANUFACTURED BY Moffat Limited Christchurch New Zealand INTERNATIONAL CONTACTS AUSTRALIA Moffat Pty Limited E.Mail:
User Manual. 60 cm Knob control 4 zone ceramic cooktop
 User Manual HHC601 60 cm Knob control 4 zone ceramic cooktop OTE: This User Instruction Manual contains important information, including safety & installation points, which will enable you to get the most
E603 E604 ELECTRIC FRYERS
 E603 E604 ELECTRIC FRYERS 16191-20 MANUFACTURED BY Moffat Limited Christchurch New Zealand INTERNATIONAL CONTACTS AUSTRALIA Moffat Pty Limited E.Mail: vsales@moffat.com.au Main Office: (tel): +61 (03)
Electric Deep Fryer FN8127E FN8127EE FN8127E21 FN8127EE21 FN8224E FN8224EE FNL8127E FNL8127EE FNL8127E21 FNL8127EE21 FNL8224E FNL8224EE
 Installation and Operation Manual Electric Deep Fryer FN8127E FN8127EE FN8127E21 FN8127EE21 FN8224E FN8224EE FNL8127E FNL8127EE FNL8127E21 FNL8127EE21 FNL8224E FNL8224EE Date Purchased Serial Number Dealer
Induction Cooktop User's manual
 Induction Cooktop User's manual EN Prior to using this appliance, please read the user's manual thoroughly, even in cases, when one has already familiarised themselves with previous use of similar types
OWNERS MANUAL ELECTRIC STOVES
 OWNERS MANUAL ELECTRIC STOVES Electrolux Home Products 1. READ these instructions carefully before installing and operating the oven. Keep them for further reference. 2. Record in the space below the MODEL
Induction Cooktop User's manual
 User's manual Prior to using this appliance, please read the user's manual thoroughly, even in cases, when one has already familiarised themselves with previous use of similar types of products. Use the
WOK-LINE INDUCTION RANGES. Installation and Operation Manual
 WOK-LINE INDUCTION RANGES Wok-Line TYPE: 3500, 5000 Accessories Wok pan Installation and Operation Manual S/N: Rev.: 2.0 Dear Customer, Congratulations on deciding to choose a Metos appliance for your
User and Installation Instructions. Opus 700 Electric Salamander Grill OE7304 IS318 ECN3011
 User and Installation Instructions Opus 700 Electric Salamander Grill OE7304 IS318 ECN3011 USER / INSTALLATION INSTRUCTIONS Please read the following carefully before using this appliance. Warnings and
BACE cm ceramic electric cooktop GECE cm ceramic electric cooktop
 BACE9004 90cm ceramic electric cooktop GECE9004 90cm ceramic electric cooktop 1 BHI609 60cm Front touch control induction zone hob 2 User Manual for your BACE9004 GECE9004 90 cm Front touch control 4 radiant
BASE-LINE INDUCTION RANGES. Installation and Operation Manual
 BASE-LINE INDUCTION RANGES Base-Line TYPE: 2500, 3500, 5000, 5000D Installation and Operation Manual S/N: Rev.: 2.0 Dear Customer, Congratulations on deciding to choose a Metos appliance for your kitchen
Installation, Operating and Servicing Instructions
 Installation, Operating and Servicing Instructions Opus 800 Electric Oven Ranges OE8015 Please make a note of your product details for future use: Date Purchased: Model Number: Serial Number: Dealer: IS
Owner s Manual STOVES. MODELS 620 Kitchenaire. 621 Kitchenaire 711S
 Owner s Manual STOVES MODELS 620 Kitchenaire 621 Kitchenaire 711S CONTENTS 2 Introduction 2 Unpacking 2 Installation 2 Electrical Installation 3 Safety Advice 3 Control Panels 4 The Oven 5 Solid Plates
design inspired innovation
 design inspired innovation CERAMIC COOKTOPS INSTALLATION INSTRUCTIONS RECTANGULAR CERAMIC COOKTOPS THE BENCH CUTOUT should be made as per the diagram. The bottom must be left open to allow access for both
Popcorn Warmer Cabinet
 Popcorn Warmer Cabinet Copyright July 2016 Future Products Group Limited. All rights reserved. No part of this publication may be reproduced, stored in a retrieval system, or transmitted in any form or
Thor Gas Griddle Installation and Operation Instructions
 Thor Gas Griddle Installation and Operation Instructions Model:,,, IMPORTANT FOR FUTURE REFERENCE Please complete this information and retain this manual for the life of the equipment. For Warranty Service
MEDIUM DUTY ELECTRIC FRYER OWNER S MANUAL. Click here for. Parts List. Manual Part No: MD Electric Fryer - 1 Manual Rev No: 1
 MEDIUM DUTY ELECTRIC FRYER OWNER S MANUAL Click here for Parts List Manual Part No: 930155-01 MD Electric Fryer - 1 Model No. Product Description Rev. Date Electric Fryers MLE30F-F 300 Fryer 2 09/03/00
Installation, Operating and Servicing Instructions
 Installation, Operating and Servicing Instructions Opus 700 Electric Oven Ranges OE7008, OE7010 Please make a note of your product details for future use: Date Purchased: Model Number: Serial Number: Dealer:
PLATE DISPENSER MODEL NUMBERS MPN10000 MPN10500 MPN20000 MPN20500
 V PLATE DISPENSER MODEL NUMBERS MPN10000 MPN10500 MPN20000 MPN20500 Thank you for buying a Victor Unit. We hope and expect that you will get many years of satisfactory use from your purchase. In order
INSTRUCTIONS FOR USE
 -1- INSTRUCTIONS FOR USE INDUCTION COOKERS Base-Line Fajita Heater SH/BA 3500 FH -2- CONTENT 1 General remarks...3 1.1 Description of danger signs...3 1.2 Purpose of induction cookers...4 2 Description
Thor Gas Char-Broiler Installation and Operation Instructions
 Thor Gas Char-Broiler Installation and Operation Instructions Model:,,, IMPORTANT FOR FUTURE REFERENCE Please complete this information and retain this manual for the life of the equipment. For Warranty
Built in Electric Ceramic Hob. Instruction Manual
 Built in Electric Ceramic Hob Instruction Manual Model number: RHEH1 Opening times: Monday - Friday 8am 6pm & Saturday 9am 1pm or visit us at Contents Safety Instructions 3-4 Before using the appliance
USER MANUAL 300 // CERAMIC HOB - KNOB TCK30
 USER MANUAL 300 // CERAMIC HOB - KNOB TCK30 IMPORTANT // Please ensure that you read through this user manual prior to installation and use. This manual contains important information to ensure optimal
CARIBBEAN REFRIGERATED TOPPERS
 V CARIBBEAN REFRIGERATED TOPPERS MODEL NUMBERS CTREF11 CTREF15 BTOREF1 BTOREF2 BTOREF3 BTOREF4 CTS Thank you for buying a Victor Unit. We hope and expect that you will get many years of satisfactory use
the Quick Cook Instruction Book - LIC400
 the Quick Cook Instruction Book - LIC400 LIC400_ANZ_IB_B17.indd 1 BREVILLE RECOMMENDS SAFETY FIRST At Breville we are very safety conscious. We design and manufacture consumer products with the safety
RETAIL MERCHANDISING UNITS
 V RETAIL MERCHANDISING UNITS AMBIENT MAGH2W MAGH3W MAGH4W MODEL NUMBERS MAGH2 MAGH3 MAGH4 MAGL2W MAGL3W MAGL4W MAGL2 MAGL3 MAGL4 HEATED MHPL2W MHPL3W MHPL4W MODEL NUMBERS MHPL2 MHPL3 MHPL4 MHBM2 MHBM3
INSTALLATION AND OPERATION MANUAL TURBO CONVECTION OVEN TCO85
 INSTALLATION AND OPERATION MANUAL TURBO CONVECTION OVEN TCO85 TCO85 Convection Oven Manual Page 1 Revision: 13 Jan 11 WARNINGS IMPROPER INSTALLATION, USE, SERVICE OR MAINTENANCE CAN CAUSE INJURY OR DEATH.
Copyright September 2018 Future Products Group Limited. All rights reserved.
 Ambient Cabinets Copyright September 2018 Future Products Group Limited. All rights reserved. No part of this publication may be reproduced, stored in a retrieval system, or transmitted in any form or
400mm Gas Fryer. Model FF18
 400mm Gas Fryer Model FF18 INSTALLATION AND OPERATION MANUAL 236859-6 MANUFACTURED BY Moffat Limited Rolleston 7675 New Zealand INTERNATIONAL CONTACTS AUSTRALIA Moffat Pty Limited E.Mail: vsales@moffat.com.au
Installation, Operating and Servicing Instructions. Opus 700 Electric Salamander Grill OE7304
 Installation, Operating and Servicing Instructions Opus 700 Electric Salamander Grill OE7304 Please make a note of your product details for future use: Date Purchased: Model Number: Serial Number: Dealer:
GECE cm touch control ceramic hob. GECE cm touch control ceramic hob
 GECE6004 60cm touch control ceramic hob GECE7004 70cm touch control ceramic hob Dear Customer, Congratulations on purchasing your new product from Think Appliances. To register your parts and labour warranty
INSTALLATION AND OPERATION MANUAL GAS COOKTOP. Series G512 G514 G516 G
 INSTALLATION AND OPERATION MANUAL GAS COOKTOP Series G512 G514 G516 G518 232423-5 MANUFACTURED BY Moffat Limited PO Box 10001 Christchurch New Zealand Ph: (03) 389 1007 Fax: (03) 389 1276 WORLD-WIDE BRANCHES
Installation, Operating and Servicing Instructions. Silverlink 600 Electric Pasta Boilers PB33, PB66
 Installation, Operating and Servicing Instructions Silverlink 600 Electric Pasta Boilers PB33, PB66 Please make a note of your product details for future use: Date Purchased: Model Number: Serial Number:
Installation, Operating and Servicing Instructions
 Installation, Operating and Servicing Instructions Opus 700 Electric Pasta Boiler OE7701, OE7702 Please make a note of your product details for future use: Date Purchased: Model Number: Serial Number:
30L Mini Oven with Twin Hotplates. Model: MA0080MO READ AND FOLLOW THESE INSTRUCTIONS. RETAIN FOR FUTURE REFERENCE
 30L Mini Oven with Twin Hotplates Model: MA0080MO READ AND FOLLOW THESE INSTRUCTIONS. RETAIN FOR FUTURE REFERENCE Electrical Safety and You Before using this appliance please read and fully understand
Built-in Conventional Oven
 Built-in Conventional Oven LAM3204 User & Installation Guide using this manual Thank you for choosing LAMONA Built - In Oven. This user Manual contains important information on safety and instructions
600mm Electric Cooktop with Solid Elements
 600mm Electric Cooktop with Solid Elements Model: ACS6SE2 ICS6SE3 Installation and Operation Manual Congratulations on choosing one our appliances, we hope you have many reliable years of use from this
HEAVY DUTY RANGE BAIN MARIES & HOTCUPBOARDS (ELECTRIC)
") V HEAVY DUTY RANGE BAIN MARIES & HOTCUPBOARDS (ELECTRIC) MODEL NUMBERS SCEP12 SCEP16 SCEP19 SCEP22 SCDD12 SCDD16 SCDD19 SCDD22 PEER12 PEER16 PEER19 PEER22 PEDD12 PEDD16 PEDD19 PEDD22 PEER12T PEER16T PEER19T
V HEAVY DUTY RANGE BAIN MARIES & HOTCUPBOARDS (ELECTRIC) MODEL NUMBERS SCEP12 SCEP16 SCEP19 SCEP22 SCDD12 SCDD16 SCDD19 SCDD22 PEER12 PEER16 PEER19 PEER22 PEDD12 PEDD16 PEDD19 PEDD22 PEER12T PEER16T PEER19T
Features. Control Panel. Exhaust Vent Power Cord. Ceramic Plate. Control Panel. Power Mode Indicator. Power / Temperature and Timer Display
 Induction Cooker Please read the operation manual carefully before using and keep this in a safe place for future reference. Some illustration in this manual may not match actual product, they are for
BANQUETLINE. Thank you for buying a Victor Unit. We hope and expect that you will get many years of satisfactory use from your purchase.
 V BANQUETLINE MODEL NUMBERS BL30H1 BL50H1(S) BL70H1 BL100H1 BL100H2(M) BL100HCF2 BL200H2 BL200H4 Thank you for buying a Victor Unit. We hope and expect that you will get many years of satisfactory use
User Instruction Manual
 User Instruction Manual Counter Top Convection Oven Please read and keep these instructions These instructions cover the Burco counter top convection oven model CTCO01, SKU 444440542 CTCO01 SKU 444440542
Installation, Operation, and Maintenance Manual RTE14S & RTE14S-2. For the Taco Bell "Rethermalizer" Model Numbers
 Installation, Operation, and Maintenance Manual For the Taco Bell "Rethermalizer" Model Numbers RTE14S & RTE14S-2 NOTICES There are three different types of notices that you should be familiar with, a
Installation, Operating and Servicing Instructions
 Installation, Operating and Servicing Instructions Wall Mounted Water Boiler WMB3F/B,WMB3F/W Please make a note of your product details for future use: Date Purchased: Model Number: Serial Number: Dealer:
Micro-Computer Induction Cooktop SR-1885SS
 Micro-Computer Induction Cooktop SR-1885SS INSTRUCTION MANUAL Thank you for your purchase. Please read thoroughly before initial use and keep in a safe place for future reference. INDEX Important safeguards....
Optimax Refrigerated Retail Merchandisers
 V Optimax Refrigerated Retail Merchandisers MODEL NUMBERS RMR65E RMR100E RMR130E RMR65S RMR100S RMR130S RMR65SW RMR100SW RMR130SW Assisted service 650 wide Assisted service 1000 wide Assisted service 1300
Installation and Operation Manual. Gas Pasta Cooker. Date Purchased. Serial Number. Dealer. Service Provider. For use in GB & IE
 Installation and Operation Manual Gas Pasta Cooker PC8140G PCL8140G Date Purchased Serial Number Dealer Service Provider For use in GB & IE 230008-10 MANUFACTURED BY Moffat Limited PO Box 10001 Christchurch
OE7008 & OE7010 Electric Oven Ranges
 OE7008 & OE700 Electric Oven Ranges USER, INSTALLATION AND SERVICING INSTRUCTIONS For use in G & IE IS97 ECN9 Dear Customer, Thank you for purchasing this Lincat product. This is just one of over 00 different
ELECTRIC WATER BOILER
 JJ3 ELECTRIC WATER BOILER OWNER S MANUAL Click here for Parts List Manual Part No: 930150-01 Electric Water Boiler - 1 Model No. Product Description Rev. Date Jackson Junior Boiler JJ3 Jackson Junior Boiler
GAS RANGE STATIC OVEN
 INSTALLATION AND OPERATION MANUAL GAS RANGE STATIC OVEN G505 G506 G508 232429-3 MANUFACTURED BY Moffat Limited PO Box 10001 Christchurch New Zealand Ph: (03) 389 1007 Fax: (03) 389 1276 WORLD-WIDE BRANCHES
INSTALLATION AND OPERATION MANUAL
 INSTALLATION AND OPERATION MANUAL GARLAND INDUCTION SINGLE, DUAL AND WOK TABLE TOP UNITS, MODELS: GIU2.5, GIU3.5, GIU5.0, GIU3.5 DUAL, GIU5.0 DUAL, GIWOK3.5 & GIWOK5.0 SANITATION 86037 C LISTED CM FOR
INSTRUCTION MANUAL. UBES60SS2 60cm 4 Solid plate electric hob
 INSTRUCTION MANUAL UBES60SS2 60cm 4 Solid plate electric hob NOTE: This User Instruction Manual contains important information, including safety & installation points, which will enable you to get the
INSTALLATION GUIDE / USER GUIDE GB IE
 BUILT-IN OVEN OB60 double oven under bench models INSTALLATION GUIDE / USER GUIDE GB IE Contents 1 Safety and warnings 2 Installation instructions 6 Using your oven for the first time 14 Clock and timer
Optimax Refrigerated Retail Merchandisers
 V Optimax Refrigerated Retail Merchandisers MODEL NUMBERS RMR65E/SMR65ECT RMR100E/SMR100ECT RMR130E/SMR130ECT RMR65S RMR100S RMR130S RMR65SW RMR100SW RMR130SW RMR65SP RMR100SP RMR130SP Assisted service
Professional Warming Drawer and Warming Drawer Cabinet
 Professional Warming Drawer and Warming Drawer Cabinet Care & Use/Installation Instructions Models: (C)VQEWD5300SS (C)VQEWD5420SS IMPORTANT SAFETY INSTRUCTIONS WARNING: Read this manual carefully and completely
Ambient Cabinets Curved Format
 Ambient Cabinets Curved Format Copyright September 2018 Future Products Group Limited. All rights reserved. No part of this publication may be reproduced, stored in a retrieval system, or transmitted in
IMPORTANT SAFETY INFORMATION
 319252GB.fm Page 11 Wednesday, September 3, 28 4:5 PM IMPORTANT SAFETY INFORMATION This manual contains important information regarding safety, the use and maintenance of your new hob. Read the manual
Owner s Guide Installation & Operation
 Owner s Guide Installation & Operation Hot Top HHT Series Hestan Commercial Corporation 3375 E. La Palma Ave Anaheim, CA 92806 (888) 905-7463 RETAIN THIS MANUAL FOR FUTURE REFERENCE P/N 002130 REV 1 IMPORTANT
STAR-MAX PROPANE GAS GRIDDLE
 Star Manufacturing International Inc. 10 Sunnen Drive St. Louis, MO 63143 Phone: (314) 781-2777 Fax: (314) 781-3636 Installation and Operating Instructions 2M-Z3793 Rev. B 3/28/03 STAR-MAX PROPANE GAS