INSTALLATION INSTRUCTION Ver
|
|
|
- Brianna Benson
- 6 years ago
- Views:
Transcription


1 ispring Reverse Osmosis Water Filter Systems INSTALLATION INSTRUCTION Ver Copyright ISPRING WATER SYSTEMS, LLC. All rights reserved.
2 Please keep this owner s manual for future reference. It includes the information on how to properly operate and maintain your ispring Reverse Osmosis water filtration system. TABLE OF CONTENT BEFORE INSTALLATION... 2 Inspect the package... 2 Recommended tools list... 2 Operating conditions... 2 Components Identification... 3 Installation Tips... 4 How to use Quick-Connect fitting... 4 To connect:... 4 To disconnect:... 4 How to use Compression fitting with brass Nut, Collar, and tube Insert... 5 How to drill a hole on sink or counter-top... 5 Installation Steps... 7 Step 1: Install Feed Water Adapter (AFW)... 7 Step 2: Install Drinking Water Faucet... 7 Step 3: Install Drain Saddle... 8 Step 4: Install the Vertical Filters: Stages 1, 2, and Step 5: Install Tank Shut-off Valve (TSV)... 8 Step 6: Install Reverse Osmosis Membrane... 9 Step 7: Tubing Hook up (model specific sub-steps are marked with * )... 9 Step 8: System Start Up (model specific sub-steps are marked with * ) SYSTEM MAINTENANCE Stages 1 3 pre-filters: Replace every 6 12 months, or sooner if water flow gets slow How to change in-housing cartridges in 1st 3rd pre-filter stages Stage 4 RO membrane: Replace every 2 3 years or sooner if TDS level starts increasing How to change reverse osmosis membrane Stage 5 T33 fine carbon: Replace every 12 months How to change inline cartridges in 5th 7th stages O-rings: Replace every 3 years or sooner if leak happens at O-ring Extra Installation UV Lamp (part# ispring UVB11) and Ice maker kit (part# isrping ICEK) (678) sales@ispringfilter.com Page 1

3 Thank you for choosing the ispring Reverse Osmosis Water Filtration System. It was built from quality components, and has earned WQA GOLD SEAL certification against NSF/ANSI STANDARD 58 for performance and material safety. Please check the attached ispring RO Systems WQA Gold Seal Certification for details. BEFORE INSTALLATION Inspect the package Please open the box, and take all the components and tool kit out. Inspect them to ensure that nothing is damaged during shipping. If any part is cracked or broken, please immediately contact ispring Customer Support for replacement. Identify and get familiar with the components. Recommended tools list Variable speed drill with two bits: ¼ (for drilling a hole on PVC drain pipe), ½ hollow diamond (for drilling a hole on countertop for drinking faucet) 5/8, 9/16 open-end wrench, or adjustable wrench, pliers Phillips screwdriver Scissors or utility knife Operating conditions Maximum water pressure: 80 psi, or pressure regulator (part no. APR70) is required if there is high water pressure or water hammer) Minimum water pressure: 40 psi, or booster pump is needed to improve RO efficiency Water temperature: F (4-37 C) (This RO system is NOT designed for HOT water) Maximum TDS: 750 ppm Install this RO system in a location where it is safe from hot/cold weather and direct sunlight. Avoid hitting, falling, or dragging as they may cause cracks and leaks. (678) sales@ispringfilter.com Page 2


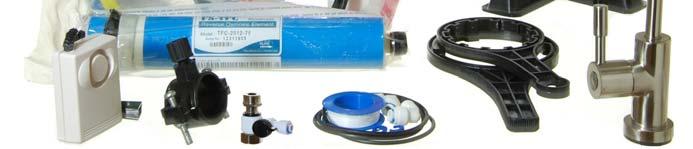
4 Components Identification RO machine head (membrane not yet installed) 3 Pre-filter housings and cartridges Storage tank Drinking faucet with installation kit Feed Water Adapter (AFW) 4-color tubing set Drain saddle ¼ Tank valve Housing wrenches Teflon tape Spare Housing O-rings x 3, Elbow Fitting x 2, Lock Clips Water Detector (optional) (678) sales@ispringfilter.com Page 3


5 Installation Tips How to use Quick-Connect fitting Figure 1 To connect: 1. See Figure 1. Check and cut the tubing end squarely and cleanly with utility knife or scissors. 2. Make a mark at the end of tubing. The lengh is about ½ inch, the depth of the fitting body. 3. Fully insert the tubing until the mark is about to disappear. This ensures that it is sealed by the O-ring near the bottom. Figure 2 Figure 3 To disconnect: 1. See Figure 2 and 3. Remove the blue Lock Clip. 2. With two fingers PUSHING IN and PRESSING DOWN the Lock Sleeve to eliminate the Gap that the blue Lock Clip occupied, pull the tubing out. (Pressing down the Lock Sleeve releases the spring-loaded steel teeth that grab the tubing inside the fitting body). (678) sales@ispringfilter.com Page 4

6 How to use Compression fitting with brass Nut, Collar, and tube Insert Compression fitting is used to connect the PVC tubing to the threaded metal inlet with a tapered open end, such as the refrigerator water inlet, drinking faucet water inlet, etc. Figure 4 1. Slide the Nut, Collar onto the end of tubing 2. Fully insert the Insert into the open end of tubing 3. Slide the Collar to be close to Insert and fit into the tapered open end of the thread matal inlet. 4. Screw on the Nut and tight it up. The Nut compresses the plastic Collar onto the tapered matal surface and creates a water seal between them while the Insert hardens the tubing. How to drill a hole on sink or counter-top 1. It s highly recommended to watch the YouTube video How To Drill Faucet Holes. 2. Choose a half inch Diamond Core Bit for granite, and a titanium drill bit for steel. Do NOT use a hammer drill on nature stone, glass, and ceramic. 3. An indent should be made with a punch on steel before drilling to help guide the bit. 4. Use caution when drilling on a Porcelain sink, as it could be easily chipped. Set drill speed on slow. Press the bit downward firmly until breaking through the slippery surface. 5. Use coolant to disperse heat. Choose water for granite, and oil for steel. Use the Water Suction Cup to hold coolant inside and prevent the drill bit from slipping. 6. Starting at slowest speed, hold the drill firmly and vertically and prevent the drill bit from slipping on the counter. 7. Once breaking through the smooth surface, swirl the drill a little to apply pressure in a circle evenly. 8. Be patient and deliberate. It can take minutes to drill through one inch. (678) sales@ispringfilter.com Page 5

7 Sample Installation Figure 5 A. Source water from Feed Water Adapter B. Source water to water inlet next to 1st stage C. Waste water from Flow Restrictor D. Waste water to Drain Saddle E. RO water from Automatic Shut-off Valve F. RO water to Storage Tank G. RO water from 5th stage H. RO water to Drinking Faucet An Ice Maker Kit (part# ispring ICEK) can be purchased separately to feed RO water to refrigerator and get crystal clear ice cubes and great tasting water at ease. It could make Drinking Water Faucet not absolutely necessary. Figure 6 (678) sales@ispringfilter.com Page 6
 1.1 See Figure 5.")
 pipe from CWSV. 1.2 (Refer to AFW user manual). Check O-ring inside AFW female end, and twist it onto CWSV.")
.")
8 Installation Steps Before you begin installation, it is highly recommended that you watch the video ispring reverse osmosis installation on YouTube. Note: Steps 1 7 are independent, and can be performed in any order. Step 1: Install Feed Water Adapter (AFW) 1.1 See Figure 5. Turn off the Cold Water Line via the Cold Water Supply Valve (CWSV) under the sink. Open the kitchen faucet to release pressure and make sure water has stopped before proceeding to the next step. Get a towel or bucket to catch any water drips. Disconnect Kitchen Faucet Connector (KFC) pipe from CWSV. 1.2 (Refer to AFW user manual). Check O-ring inside AFW female end, and twist it onto CWSV. Tighten it up using wrench or pliers. 1.3 Twist KFC onto the male end of AFW. Turn the handle of AFW to cross (OFF) position. Turn on CWSV slowly, check and fix any leaks. 1.4 Connect the 1/4 RED tubing to AFW. Step 2: Install Drinking Water Faucet 2.1 If your kitchen sink does not have an existing ½ hole, you will have to drill one. (Refer to How to drill a Hole on Sink or Counter-top). Wipe clean and dry the area. (Contact us for larger front plate and washer if the hole is too big to cover). 2.2 Remove blue protection film from the front plate, slip it on the faucet thread, and slip on the black rubber washer. Insert the faucet thread portion into the hole. Optional plumber glue or sealer could be used. 2.3 Under the sink, tighten the back rubber washer, lock washer with nut. 2.4 (Refer to How to use compression fitting). Slip the compression fitting nut and collar on the BLUE tubing, push the insert into the tubing, insert it into the faucet end, and tighten up the nut. Pull the tubing to check if it is secure. Figure 7 (678) sales@ispringfilter.com Page 7


9 Step 3: Install Drain Saddle 3.1 Choose a spot on the drain pipe that is convenient for installing the drain saddle and tubing. Horizontal pipe is recommended to minimize the dripping sound. 3.2 Drill a 1 /4 hole on the drain pipe; paste the black sticky pad around the hole. 3.3 Cut the BLACK tubing end a bit to make a 45 degree angle. Slip the plastic nut and front plate on the tubing. Insert the tubing into the 1 / 4 hole on the drain pipe, install the back plate and tighten two screws with hex nuts while the tubing remains in the hole. 3.4 Tighten the nut on the Drain Saddle by hand. Pull the tubing to check if it is secure. Step 4: Install the Vertical Filters: Stages 1, 2, and Make sure that the O-ring is seated inside the groove on top of the filter housing. (Figure 10). Food-grade silicon jelly may be used to help the O-ring stay in place and seal better. 4.2 Filter cartridges are preserved in shrink wrap. Note the direction sign on the sticker before removing the wrap (GAC stage). 4.3 When placing the filter cartridge into its housing, make Figure 12 sure it is centered and the knob protruding from the bottom of the housing fits in the central hole of the filter. 4.4 Screw the housing, with filters attached, onto the housing caps (caps are pre-assembled on the machine head). The cap also has a center knob which should be inserted into the center hole of the filter cartridge. Twist the housing on in a clockwise direction by hand, and then use a housing wrench to tighten it up for about 1/4 1/2 turn. Do not over tighten. This can cause leaks and make it difficult to unscrew the housing when replacing filters. 4.5 Follow the steps to install the GAC and CTO filters. *Note* the second stage GAC is the only filter that must go in a certain direction. Make sure that the end with the rubber washer faces up, thereby attaching to the housing cap. Step 5: Install Tank Shut-off Valve (TSV) 5.1 Wrap turns of Teflon tape clockwise (looking from top) onto the metal thread at the top of the tank. 5.2 Screw (clockwise) the Tank Shut-off Valve on and tighten up by hand. Do not over tighten. 5.3 Connect the YELLOW tubing onto the Quick-Fitting of TSV. (678) sales@ispringfilter.com Page 8


10 Step 6: Install Reverse Osmosis Membrane Figure 8 Figure Open the membrane housing screw cap. First, you will need to disconnect the white 1 / 4 tubing from the Inlet quick-fitting on the membrane housing cap (refer to How to Use Quick-Fitting section), and then unscrew (counter-clockwise) the cap. A thick rubber band can be slipped on the housing body for a stronger hand hold. 6.2 Remove the membrane from its sealed bag. Follow the flow direction sign on the membrane, and firmly insert the membrane into the housing with the smaller end that has two black O-rings heads first until the bigger end is even with the housing opening. See Figure Before twisting the housing cap back on, check that the O-ring is evenly snagged on the membrane housing (cap does NOT have O-ring). Hang tight and tighten up for about 1 /4 1 /2 turns using a small plastic housing wrench, but do not over tighten. DO NOT reconnect the tubing to inlet on cap at this point (will do it in system start up). Step 7: Tubing Hook up (model specific sub-steps are marked with * ) 7.1 See Figure 5 and Figure 10 RCC7P & RCC7 TOP VIEW, note connection points A-B, C-D, E-F, and G-H. (678) sales@ispringfilter.com Page 9
11 Figure Facing the ispring logo up front, the pre-filter 1st stage is located on the right hand side. Connect the RED tubing Feed Water Adapter (AFW) (point A) to the elbow fitting (point B). 7.3 Connect the Flow Restrictor (point C), which is a 3-inch long cylinder with a FLOW sign laying beside the membrane housing, to the Drain Saddle (point D) with the BLACK tubing. 7.4 On the right side of the Post Carbon Filter (FT15 5 th stage), connect the Tee-fitting (point E) and the Tank Valve (point F) with the YELLOW tubing. 7.5 * Model without UV/AK/DI: at left end of FT15, insert the BLUE tubing (links to RO faucet) into the elbow fitting. * Model with UV/AK/DI: RO water flows out of point G at FT15 and flows into the left end of next stage. So the BLUE tubing (links to RO faucet) should be connected at the final end of the last stage, which could be the UV/AK/DI filter. 7.6 Connect the other end of the BLUE tubing to the RO faucet (refer to How to use compression fitting). 7.7 You may organize the tubings, but make sure to leave enough length so the filter system can be moved freely in and out of the cabinet when replacing filters. 7.8 You may hang the system using two 10 x 1-1/4 Phillips Flat Wood Screws. This will make replacing filter cartridges easier. Step 8: System Start Up (model specific sub-steps are marked with * ) * If your model has a UV stage, do not plug in power until the system is fully flushed 8.1 Make sure that all tubings are not kinked. Turn Tank Shut-off Valve OFF (cross). Prepare a bath towel to catch any water leak. 8.2 To avoid the residual carbon in the first three stages from getting into the RO membrane, the tubing to the inlet of the RO membrane housing cap was left disconnected. Flush the first three stages into a bucket until the water turns clear, and re-connect the tubing to the RO membrane. (You may do this whenever you change the first three stages). 8.3 Turn on (inline) Feed Water Adapter valve (AFW), and then slowly turn on the Cold Water Supply Valve (CWSV) and check for leaks. The top 3 causes of leaks are 1) the tubing was not fully inserted into the quick-connect fitting. 2) the O-ring was not in place or kinked. 3) the Housing/Cap was not tightened up or off threads. 8.4 * Plug in booster pump power if your model has one. 8.5 Within 5 minutes, RO water should start dripping. Let it run for at least 10 minutes. This flushes the system except the tank. Water is black due to loose carbon from new carbon filters (step 8.2 could be taken to expedite the flush). It will turn clear with some air bubble. (678) sales@ispringfilter.com Page 10
12 8.6 Shut off the RO Drinking Faucet. Turn on the Tank Shut-off Valve. Wait for the tank to be filled up. It may take 1.5 hours in warm summer or 3 hours in cold winter to fill up a 3.2 gallon tank with about 2.5 gallons holding capacity. 8.7 After two hours, turn on the RO Drinking Faucet to flush out all the water in the tank. DO NOT use the first tank of water. The water out of the faucet should be a much stronger stream since the water pressure was built up to psi when being filled up. When the water flow changes back to a trickle, it means the tank is empty. 8.8 * Plug in the UV power and observe if the RO faucet turns the UV on/off through the Flow Sensor Switch. 8.9 The reverse osmosis membrane is the key part for the effective reduction of total dissolved solids (TDS) and that product water shall be tested periodically to verify that the system is performing properly. If the TDS of the source water is 100ppm, the RO water should be less than 10ppm (Rejection rate >90%) Check for leaks daily for the first two weeks after installation. Furthermore, a bucket can be put under the system in case of any leaks, and a Flood Alarm can be used together for better protection. Congratulations! You have successfully installed the ispring Reverse Osmosis Water Filtration System! Start enjoying the cleanest water right from your tap! (678) sales@ispringfilter.com Page 11


13 SYSTEM MAINTENANCE This RO system is designed with ease of use and low maintenance in mind. If you change the filter cartridges as suggested below, and check TDS level periodically, the system will work properly for many years. Note: stage 6 or 7 only exists in certain models. For a filter pack supply, visit 123Filter.com or Google Model replacement filter online, in which Model is the model number of the system, e.g. RCC7 Stages 1 3 pre-filters: Replace every 6 12 months, or sooner if water flow gets slow. The frequency depends on the source water quality and water usage. They could last longer in city water, and shorter in well water. Different areas have good or bad water. Some customers reported they had to replace the 1st stage every 1-3 months when they saw through the clear housing where heavy sediments and particles turned the white cartridge into dark brown. Some customers reported they could replace them every 12 months. To protect the RO membrane in the 4th stage, it is required to replace the pre-filters at least every 12 months. How to change in-housing cartridges in 1st 3rd pre-filter stages 1. Shut off the water supply valve and tank valve, open the faucet to depressurize. Place a bucket or towel under the unit to catch water spills. 2. If there is enough room under the sink and filter system is hung on wall, it could be easier to twist the filter housing off without taking the unit off the wall. Otherwise, it could be easier to pull the system out, lay it down and work towards the housing bottom. Please be careful with tubing connections when pulling the system out. 3. Twist off the filter housing in a counter-clockwise direction when looking from the bottom. Use a housing wrench (the bigger one) if necessary. 4. Refer to Installation Step 1.1 to install a new vertical filter cartridges and twist the housings back on. Remember not to over tighten or it will be hard to open next time. (678) sales@ispringfilter.com Page 12
. How to change reverse osmosis membrane Figure 11 Figure 12 1.")
14 Stage 4 RO membrane: Replace every 2 3 years or sooner if TDS level starts increasing. Check the TDS level at least once a month to monitor the system performance. The rejection rate should be above 90% (NSF/ASIN STANDARD 58 for RO water filter). How to change reverse osmosis membrane Figure 11 Figure Reverse osmosis membrane usually last about 2 3 years, depending on the source water quality and the replacement schedule of the three pre-filters. 2. To ensure system performance and water purity, filter cartridges must be replaced on schedule. Use the TDS meter periodically to check water purity 3. Shut off the water supply valve and tank valve, open the faucet to depressurize 4. Place a bucket or towel under the unit to catch water spills. 5. Remove the tubing from the inlet fitting on the membrane housing cap. Use a housing wrench or by hand to twist off the housing cap in a counter-clockwise direction looking from inlet. 6. Pull out the old membrane. Use scissors or pliers to apply leverage if necessary. 7. Clean the housing using hot water and optional scent-free dish soap. Rinse thoroughly. Cut open the small end of the sealed bag of a new RO membrane, hold the new membrane with the bag, and insert it into housing without touching the membane with your bare hand, which may contaminate it. 8. Check the O-ring on the open end of the membrane housing. It is recommended to replace it every 3 years to prevent leaks. 9. Twist the membrane housing cap back on by hand. Use a wrench for a final ¼ turn if necessary. DO NOT over tighten. Stage 5 T33 fine carbon: Replace every 12 months Unscrew the elbow fittings on both ends, put them on the new cartridge, and use new Teflon if necessary. How to change inline cartridges in 5th 7th stages 1. Please note that the 5th - 7th stages (model specific) have directions and each end may have a different kind of fitting. 2. Disconnect the tubing from the Quick-Connect fitting, unscrew the fitting, unwrap a new cartridge, replace the Teflon tape on the fitting threads if necessary, follow the sign on the label to screw the correct fitting on each end, and reconnect the tubing. O-rings: Replace every 3 years or sooner if leak happens at O-ring. The package comes with 3 spare O-rings for the pre-filter housing, and 1 spare O-ring for the membrane housing. Please save them with this manual. (678) sales@ispringfilter.com Page 13

 can be purchased separately to feed RO water to a refrigerator and get crystal clear ice cubes and great tasting water.")
15 Extra Installation UV Lamp (part# ispring UVB11) and Ice maker kit (part# isrping ICEK) Figure 13 Flow Sensor Switch for UV lamp The models with a UV stage have a U letter in model number, such as RCC7U, RCCAK-UV, RCC1UP-AK. The UV module comes pre-installed on the models with UV. It should function out of the box. The photos above are for a better understanding about how the components are assembled and work together. The Ice Maker Kit (model#: ispring ICEK) can be purchased separately to feed RO water to a refrigerator and get crystal clear ice cubes and great tasting water. It would make a Drinking Water Faucet not absolutely necessary. (678) sales@ispringfilter.com Page 14
TANKLESS REVERSE OSMOSIS SYSTEMS USER S MANUAL
 Water Systems, LLC www.123filter.com Email: sales@123filter.com TANKLESS REVERSE OSMOSIS SYSTEMS USER S MANUAL Model #RCB4T ABOUT THE SYSTEM Reverse Osmosis process is a separation process. Tap water enters
ULTIMATE REVERSE OSMOSIS SYSTEM
 ULTIMATE REVERSE OSMOSIS SYSTEM INSTALLATION INSTRUCTION & OWNER S MANUAL Ver 3.1 All Rights Reserved APEC Water Systems Please keep this Owner s Manual for future reference. It contains useful information
Tap Master Artesian Hydro Gardener Series Installation & Service Manual
 Perfect Water Technologies 7 Tips for an Easy and Successful Installation 1. Keep it simple - there are 3 connections to make, and the tubing is color coded. 2. Have plenty of time, light, space, and towels
Alkaline RO System INSTALLATION MANUAL
 Alkaline RO System INSTALLATION MANUAL 1-800-992-8876 Customer Support Disclaimer All rights reserved. All material published on this site by Express Water Inc., including all portions of the website,
OWNER S MANUAL AND INSTALLATION GUIDE PLEASE READ THIS MANUAL CAREFULLY BEFORE ATTEMPTING INSTALLATION
 ClearChoice Economy Under Sink Drinking Water System OWNER S MANUAL AND INSTALLATION GUIDE PLEASE READ THIS MANUAL CAREFULLY BEFORE ATTEMPTING INSTALLATION Congratulations on the purchase of your ClearChoice
APEX Water Filters MODEL RO 5. Treat your body to pure goodness with Apex filtered water INSTRUCTION MANUAL. pure water in every drop
 APEX Water Filters pure water in every drop MODEL RO 5 INSTRUCTION MANUAL Treat your body to pure goodness with Apex filtered water A Water supply adapter valve B Cold water shut-off valve C Hot water
2-Stage Under Counter Filtration System Model: WP-2 LCV
 INSTALLATION, OPERATION AND MAINTENANCE MANUAL Save manual for future reference 2-Stage Under Counter Filtration System Model: WP-2 LCV IMPORTANT If you are unsure about installing your WATTS water filter,
USER S MANUAL. For use with the following systems: Flow Diagram for 5, 6 or 7-Stage Reverse Osmosis Water Systems (no pump)
") USER S MANUAL Version 2013-1 For use with the following systems: Residential Units (no pump) Residential Units with Booster Pump Commercial Units (with Booster Pump) RCC7, RCC7D, RCC7U, RCC7AK, RCC7AKUV
USER S MANUAL Version 2013-1 For use with the following systems: Residential Units (no pump) Residential Units with Booster Pump Commercial Units (with Booster Pump) RCC7, RCC7D, RCC7U, RCC7AK, RCC7AKUV
INSTALLATION & SERVICE MANUAL
 INSTALLATION & SERVICE MANUAL Countertop Reverse Osmosis Systems Series CT CT-315 CT-315TFC CT-445 CT-445P CT-D425 CT-D425P CT-550UP 3 STAGE CTA RO SYSTEM 3 STAGE TFC RO SYSTEM 4 STAGE TFC RO SYSTEM 4
WATER FILTRATION SYSTEM (USF3) OWNER S MANUAL
 OWNER S MANUAL") WATER FILTRATION SYSTEM (USF3) OWNER S MANUAL 1 INTRODUCTION Congratulations on choosing Permatech to improve the quality of your water. You will immediately begin to notice the numerous benefits of having
WATER FILTRATION SYSTEM (USF3) OWNER S MANUAL 1 INTRODUCTION Congratulations on choosing Permatech to improve the quality of your water. You will immediately begin to notice the numerous benefits of having
Installation and Operation Manual
 How To Install, Operate and Maintain Your Reverse Osmosis System FILTER CARTRIDGE CONFIGURATION MAY BE SUBJECT TO CHANGE. 475 PRO SERIES 475BP PRO SERIES INSTALLERS: PLEASE READ ALL INSTRUCTIONS BEFORE
INSTALLATION & SERVICE MANUAL
 INSTALLATION & SERVICE MANUAL Countertop Reverse Osmosis Systems Series CT System Tested and Certified by WQA against NSF/ANSI Standard 58 for the reduction of Arsenic, Barium, Cadmium, Copper, Cyst, Hexavalent
Installation & Service Guide
 Reverse Osmosis Ontario Soft Water.ca Kitchener, Canada 519-579-0500 Installation & Service Guide Pentair 75 gpd Encapsulated Membrane System Standard System 75gpd Membrane Your New Reverse Osmosis System
ispring Whole House Water Filter Systems USER S MANUAL
 ispring Whole House Water Filter Systems USER S MANUAL Version 2014-5 Introduction Congratulations on your purchase of the ispring Whole House Water Filter system. Featuring a three-stage filtration process,
PRF-RO Pentair Reverse Osmosis System Installation and Maintenance Manual SAFETY GUIDES THE BASIC REVERSE OSMOSIS SYSTEM. Tools and Materials Required
 PRF-RO Pentair Reverse Osmosis System Installation and Maintenance Manual SAFETY GUIDES Read and follow all steps and guides carefully before installing and using your reverse osmosis system. Do not use
475 PRO SERIES Reverse Osmosis System Installation & Operation Manual
 PLEASE READ ALL INSTRUCTIONS BEFORE INSTALLING AND USING THIS SYSTEM 475 PRO SERIES Reverse Osmosis System Installation & Operation Manual Model STAGE 1 STAGE 2 STAGE 3 STAGE 4 OUTPUT 475 SEDIMENT CARBON
Reverse Osmosis Filter Change Guide
 Reverse Osmosis Filter Change Guide Written by 602abcWATER Start Here Con irm Your ilter order. Open your packages and confirm that you have received all the correct filters. If you are missing or sent
MKTF CRO-Series 5-Stage Reverse Osmosis System Installation and Maintenance Manual
 MKTF - 215 CRO-Series 5-Stage Reverse Osmosis System Installation and Maintenance Manual Please fill out the following information at the time of installation. Save for future reference. Model: Date Code:
Reverse Osmosis Install Guide
 Reverse Osmosis Install Guide Written by 602abcWATER Start Here Step 1 Con irm All Product Components Open your packages and con irm that you have received all the correct components. If you are missing
Installation and Operation Manual
 How To Install, Operate and Maintain Your Reverse Osmosis System INSTALLERS: PLEASE READ ALL INSTRUCTIONS BEFORE IN- STALLING AND USING THIS SYSTEM. IT IS RECOMMENDED TO WAIT UNTIL THE ENTIRE SYSTEM IS
Installation Instructions for:
 Installation Instructions for: Home II Reverse Osmosis System Home II Reverse Osmosis System COMBO Installation Instructions Pre-amble. This Aquasafe Reverse Osmosis System has been specifically designed
Owner s Manual AQ-RO-BASE. Aquasana OptimH2O Drinking Water System Reverse Osmosis Filtration Technology
 Owner s Manual AQ-RO-BASE Aquasana Drinking Water System Reverse Osmosis Filtration Technology Welcome to the Aquasana experience. You are about to enjoy clean, clear water and the peace of mind that comes
WATER FILTRATION SYSTEM (RO5) OWNER S MANUAL
 OWNER S MANUAL") WATER FILTRATION SYSTEM (RO5) OWNER S MANUAL 1 INTRODUCTION Congratulations on choosing Permatech to improve the quality of your water. You will immediately notice the numerous benefits of having quality
WATER FILTRATION SYSTEM (RO5) OWNER S MANUAL 1 INTRODUCTION Congratulations on choosing Permatech to improve the quality of your water. You will immediately notice the numerous benefits of having quality
WATER FILTRATION SYSTEM (RO6) OWNER S MANUAL
 OWNER S MANUAL") WATER FILTRATION SYSTEM (RO6) OWNER S MANUAL 1 INTRODUCTION Congratulations on choosing Permatech to improve the quality of your water. You will immediately notice the numerous benefits of having quality
WATER FILTRATION SYSTEM (RO6) OWNER S MANUAL 1 INTRODUCTION Congratulations on choosing Permatech to improve the quality of your water. You will immediately notice the numerous benefits of having quality
3-STAGE WATER FILTRATION SYSTEM. INSTALLATION INSTRUCTION & OWNER S MANUAL Ver 1.5
 3-STAGE WATER FILTRATION SYSTEM INSTALLATION INSTRUCTION & OWNER S MANUAL Ver 1.5 www.freedrinkingwater.com All Rights Reserved APEC Water Systems Please keep this Owner s Manual for future reference.
Installation and Operation Manual
 Installation and Operation Manual Canature North America Inc. How To Install, Operate and Maintain Your Reverse Osmosis System FILTER CARTRIDGE CONFIGURATION MAY BE SUBJECT TO CHANGE. 475 PRO SERIES 475BP
1 P a g e. G4 Counter Top OPERATION MANUAL
 1 P a g e G4 Counter Top OPERATION MANUAL Table of Contents Introduction. 3 Receiving....4 Description Model G3 & G4...5/6 Water Production Flow Chart...7 Positioning the Cooler...8 Water Cooler Connections..9
Installation Instructions for:
 Installation Instructions for: Maximus II Reverse Osmosis System with Remineralization Maximus II Reverse Osmosis System COMBO with Remineralization Installation Instructions Pre-amble. This Aquasafe Reverse
3-STAGE WATER FILTRATION SYSTEM INSTALLATION INSTRUCTION & OWNER S MANUAL
 3-STAGE WATER FILTRATION SYSTEM INSTALLATION INSTRUCTION & OWNER S MANUAL Ver 1.2 All Rights Reserved APEC Water Systems Please keep this Owner s Manual for future reference. It contains useful information
GROWMAX WATER Perfect Water for Plants and Gardens
 GROWMAX WATER Perfect Water for Plants and Gardens WATER SYSTEMS FOR HYDROPONICS AND GARDENING GROWMAX 3000 Ultra-Pure Reverse Osmosis Water System Up to 3000 L/D of Pure Water Don't forget to register
Owner s Manual AQ-RO-3. Aquasana OptimH2O Drinking Water System. Reverse Osmosis plus Claryum Filtration Technology
 Owner s Manual AQ-RO-3 Aquasana OptimHO Drinking Water System Reverse Osmosis plus Claryum Filtration Technology Welcome to the Aquasana experience. You are about to enjoy clean, clear water and the peace
REVERSE OSMOSIS WATER FILTRATION SYSTEM MODEL PB-TLRO4H50T INSTRUCTION MANUAL
 REVERSE OSMOSIS WATER FILTRATION SYSTEM MODEL PB-TLRO4H50T INSTRUCTION MANUAL Pure Blue H20, LLC 13813 Monroes Business Park Tampa, FL 33635 USA www.pureblueh2o.com (844) 787-3148 (844) PURE-1-4-U 2015.02.25
IMPORTANT! ank You! Model: Twist-In 100 GPD, 3-Stage RO Unit. Installation, Operation & Maintenance Guide
 Twist-In 00 GPD, 3-Stage RO Unit WARNING: Please read carefully before proceeding with installation. Your failure to follow any attached instructions and operating parameters may lead to the product s
Aquaversa. Installation Guide
 Aquaversa Installation Guide About the Aquaversa Drinking Water System The Multipure Aquaversa Drinking Water System (MP750) is designed for use on the countertop next to the sink, below the sink, or inline
Table of Contents. List of Figures
 1 P a g e Table of Contents Introduction. 3 Receiving....4 Description Model G3 & G4...5/6 Water Production Flow Chart...7 Positioning the Cooler...8 Water Cooler Connections..9 Feed Water Connection....10
by Water Purification Supplies
 REVERSE OSMOSIS PURIFIER With Booster Pump by Water Purification Supplies Member, Water Quality Association Read these instructions carefully before using the purifier. Retain these instructions in safe
WATERSHIELIJrM REVERSE OSMOSIS INSTALLA TION MANUAL ~ ~ ~ ~ ~ l ~ TO INSURE THIS PRODUCT AND THE INSTALLATION THEREOF. ~ ~ ~ ~ ~
 WATERSHIELIJrM REVERSE OSMOSIS SYSTEM INSTALLA TION MANUAL p 1 ~ -~ I IMPORTANT I ITHIS REVERSE OSMOSIS SYSTEM WAS SOLD IN KIT FORM. IT HAS ~ INOT BEEN PRESSURE TESTED IN ANY WAY. UPON INSTALLATION IT
Home Master Reverse Osmosis System Installation & Service Manual
 Perfect Water Technologies 10 Tips for an Easy and Successful Installation 1. Keep it simple - there are 4 connections to make, and the tubing is color coded. VIDEO INSTRUCTIONS ARE AVAILABLE ONLINE (6
Home Master Reverse Osmosis System Installation & Service Manual
 Perfect Water Technologies Home Master Reverse Osmosis System Installation & Service Manual Home Master Standard RO Home Master Artesian Full Contact Home Master IRON Home Master UV Home Master ULTRA Home
US Water American Revolution 5-Stage RO System The ONLY RO system on the market that is totally American made!
 US Water American Revolution 5-Stage RO System The ONLY RO system on the market that is totally American made! MEMBRANE POST CARBON PRE SEDIMENT TUBING FAUCET AND MOUNTING KIT FILTER WRENCH DRAIN SADDLE
Parasitic Cysts - Cryptosporidium and Giardia, Chemicals, Heavy Metals, Dissolved Salts, Offensive Tastes and Odours, Sediment, Dirt,
 Aqua-Pure is a market leader in water filtration. In addition to our comprehensive range of Domestic Water Purifiers, we design and manufacture an extensive commercial and industrial range of purification
Model #: PT3000T36-GOLD
 Good Water Warehouse Inc. 1700 E Walnut Ave Fullerton CA 92831 (714) 441-2893 (714) 441-0525 FAX Reverse Osmosis System Installation & Service Guide Model #: PT3000T36-GOLD Do not use with water that is
Installation Instructions Residential Reverse Osmosis Drinking Water System
 Your Reverse Osmosis System has been tested to ensure it will operate correctly. The following periodic maintenance is recommended so your system will provide years of trouble-free service: Replacement
Tap Master Series Reverse Osmosis System Installation & Service Manual
 Perfect Water Technologies 10 Tips for an Easy and Successful Installation 1. Keep it simple - there are 4 connections to make, and the tubing is color coded. VIDEO INSTRUCTIONS ARE AVAILABLE ONLINE (6
Owners Manual FOR REVERSE OSMOSIS SYSTEMS MODEL ET6500 (P/N )
") Owners Manual FOR REVERSE OSMOSIS SYSTEMS MODEL ET6500 (P/N 10-02-1330) Includes: Installation and Service Procedures, Specifications and Operation Guidelines 07\15 RO Manual A TABLE OF CONTENTS Introduction
Owners Manual FOR REVERSE OSMOSIS SYSTEMS MODEL ET6500 (P/N 10-02-1330) Includes: Installation and Service Procedures, Specifications and Operation Guidelines 07\15 RO Manual A TABLE OF CONTENTS Introduction
AquaLiv Water System - Usage & Installation Instructions
 AquaLiv Water System - Usage & Installation Instructions Congratulations on your purchase of an AquaLiv Water System the most complete and comprehensive water purification and enhancement system available
Installing the Turbo Floor Model System
 Installing the Turbo Floor Model System Location 1. Locate as close as possible to water supply source. 2. Locate as close as possible to a three-prong grounding receptacle. 3. Locate the System on a smooth
KITCHEN FAUCET COS-KF222C
 KITCHEN FAUCET COS-KF222C USER S MANUAL & INSTALLATION GUIDE Thank You Thank you for your purchase. We know that you have many brands and products to choose from and we are honored to know that you have
IMPORTANT! ank You! Model: Twist-In 100 GPD 4-Stage RO/DI Unit. Installation, Operation & Maintenance Guide
 Model: 54037 Twist-In 00 GPD 4-Stage RO/DI Unit WARNING: Please read carefully before proceeding with installation. Your failure to follow any attached instructions and operating parameters may lead to
Installation & Service Manual. Reverse Osmosis Drinking Water Systems 75 GPD with Fully Automatic Noiseless Booster Pump
 Installation & Service Manual Reverse Osmosis Drinking Water Systems 75 GPD with Fully Automatic Noiseless Booster Pump Distributed by: Serial # Please read this entire service guide prior to beginning
WM-450-PT WM-900-PT Commercial Wall Mounted Reverse Osmosis
 WM-450-PT WM-900-PT Commercial Wall Mounted Reverse Osmosis Installation And Service Manual Watts Pure Water 1725 W. Williams Dr. C-20., Phoenix, Arizona 85027 Phone: 888-774-7405 Fax: 602-588-0356 www.wattspurewater.com
Electrical cable Water supply tube Fittings for tube Coupler Teflon tape. Hole saw min. 2½" bit
 Installation Parts and Tools Parts not Provided Electrical cable Water supply tube Fittings for tube Coupler Teflon tape Air gap Wire nuts for 6-gauge wiring Hose clamp ⅞" UL approved strain relief Electrical
Multipure. Drinking Water Systems. Installation, Operation and Maintenance Manual. Multipure Aqua RO System
 Multipure Drinking Water Systems Installation, Operation and Maintenance Manual Multipure Aqua RO System Warning Please read manual carefully before proceeding with installation. Your failure to follow
AQUA ONE. Reverse Osmosis System Model ARO5000. Installation and Service Guide PLEASE READ THIS MANUAL CAREFULLY BEFORE ATTEMPTING INSTALLATION
 AQUA ONE Reverse Osmosis System Model ARO5000 Congratulations on your purchase of the most sophisticated water purifier system available! Installation and Service Guide PLEASE READ THIS MANUAL CAREFULLY
PRO-RO 6-Stage Reverse Osmosis System
 PRO-RO 6-Stage Reverse Osmosis System Rev: 1016 Introduction to the PRO-RO Congratulations on your purchase of the PRO-RO six stage reverse osmosis system. The PRO-RO features a four-stage prefilter,
MODEL FW-2000 OPERATION MANUAL
 MODEL FW-2000 OPERATION MANUAL 1 P a g e Table of Contents Introduction...pg.3 Receiving..pg.4 Description Model H2O- 2000....pg.5 Operation. pg.6,7 Drain Container Operation. p.g.8 Cup Dispenser Operation.p.g.9
IMPACT HEALTH SOLUTIONS. Installation & Service Guide
 IMPACT HEALTH SOLUTIONS Reverse Osmosis Drinking Water System With Energy Resonance Technology Installation & Service Guide DEALER INFORMATION IMPACT@KINGSLEY.CO.ZA 083 691 4045 021 853 3696 CONGRATULATIONS
REVERSE OSMOSIS DRINKING WATER SYSTEM
 REVERSE OSMOSIS DRINKING WATER SYSTEM 10/10 1 2 Introduction To The Sierra Congratulations on your purchase of the Nimbus Sierra reverse osmosis system. When properly maintained, this system will provide
Drinking Water Purification Systems
 supersedes 200695Cx-2i&o SEAGULL IV X-2KB and X-2KF Drinking Water Purification Systems SEAGULL IV X-2KB SEAGULL IV X-2KF INSTALLATION AND PRODUCT USE GUIDE INSTALLATION INSTRUCTIONS NOTE: Read instructions
5-Stage Reverse Osmosis System
 5-Stage Reverse Osmosis System 41840 McAlby Court, Suite A Murrieta, CA 92562 800-451-9343, FAX 951-894-2801 www.nimbuswater.com 02/09 1 Introduction to the WaterMaker Five Congratulations on your purchase
Installation Instructions. For the 18 Built-In Dishwasher and Front Color Panels
 Installation Instructions For the 18 Built-In Dishwasher and Front Color Panels Printed in USA 154232102 Before You Begin DO NOT INSTALL DISHWASHER UNTIL YOU HAVE READ ALL INSTRUCTIONS. FOR YOUR SAFETY,
RYLE WIDESPREAD FAUCET INSTALLATION
 SKU(s): 934429, 934421 RYLE WIDESPREAD FAUCET INSTALLATION BEFORE YOU BEGIN We recommend consulting a professional if you are unfamiliar with installing plumbing fixtures. Signature Hardware accepts no
WATER DISPENSER INSTALLATION GUIDE
 WATER INSTALLATION GUIDE Before you begin: Your dispenser has two lines attached to it. The HOUSE WATER LINE attaches to your house s water supply. The REFRIGERATOR WATER LINE attaches to your refrigerator
User Instructions. Visit us at us at RB5, RB10, RB15 Maple Sap Buckets
 Responsible Use and Liability Disclaimer User Instructions The products offered by The RO Bucket LLC are intended for use by individuals who have become knowledgeable regarding the reverse osmosis process
INSTALLATION MANUAL CRS-3
 INSTALLATION MANUAL CRS-3 12630 US 33 N. Churubusco, IN 46723 Ph. (260)693-1972 Fax (260)693-0602 www.sterlingwatertreatment.com 1 TABLE OF CONTENTS: SECTION I. SECTION II. INTRODUCTION...3 SPECIFICATIONS...3
- Do not Discard these instructions; please save them for later use/reference.
 Customer Support: Tel: 1-347-492-4014 Email: info@pureeffectfilters.com www.pureeffectfilters.com Thank you, and Congratulations on your purchase of The PureEffect TM ULTRA-UC-DISINFECT Water Filtration
Advanced Two-Stage Drinking Water Filter
 OWNER'S MANUAL E L I T E Advanced Two-Stage Drinking Water Filter MODEL NO. 625.385010 Caution: Read and follow all safety rules and operating instructions before first use of this product. Questions?
TABLE OF CONTENT WARNING: READ ENTIRE MANUAL. FAILURE TO FOLLOW ALL GUIDES AND RULES COULD CAUSE PERSONAL INJURY OR PROPERTY DAMAGE.
 TABLE OF CONTENT I. COMPONENTS AND TOOLS IDENTIFICATION... 3 II. PRE-INSTALLATION... 3 System Location... 4 Site Preparation... 4 Unit Preparation... 4 III. INSTALLATION INSTRUCTIONS... 4 Faucet Installation...
Reverse Osmosis System OWNERS MANUAL
 APS Water Services Corporation Quick Change, Twist & Loc Reverse Osmosis System OWNERS MANUAL Installation, Operation & Maintenance Sold By : APS Water Services Corp 818-786-0600 NOTE: Please read through
HydroCycle Vertical Aeroponic Systems
 HydroCycle Vertical Aeroponic Systems 2018 Growers Supply All Rights Reserved. Reproduction is prohibited without permission. *Actual system may differ from system shown. 113593 8' Vertical System (44
Puratek Aquarium Reverse Osmosis Installation and Maintenance Manual
 Puratek Aquarium Reverse Osmosis Installation and Maintenance Manual Thank You for your purchase of a Puratek System by Vertex Aquaristik. With proper installation and maintenance, this system will provide
How To: PREPARATION REPLACE A KITCHEN SINK
 Skill Level: INTERMEDIATE Give these projects a try if you're a confident DIYer with a good working knowledge of a variety of tools. They can take a day or more to complete. If you can build a birdhouse
Owners Manual. For Reverse Osmosis Systems MODEL ET4000 ET5000 P/N
 Owners Manual For Reverse Osmosis Systems MODEL ET4000 ET5000 P/N -30-0 -320-0 Includes: Installation and Service Procedures, Specifications and Operation Guidelines A TAE OF CONTENTS Introduction... 2
INSTALLATION INSTRUCTIONS
 Please read carefully and retain for future reference. CONTENTS 1. Important Information 2. Included Parts 3. Filter Head Assembly Instructions 4. Installation Instructions 4.1. Auxiliary Tap Connection
1 P a g e MODEL G5CT COUNTER TOP OPERATION MANUAL
 1 P a g e MODEL G5CT COUNTER TOP OPERATION MANUAL Table of Contents Introduction...pg.3 Receiving..pg.4 Description Model G5CT Counter Top.......pg.5 Operation. pg.6,7 Positioning the Cooler....pg.8 Water
TARVER SINGLE HOLE FAUCET INSTALLATION
 SKU(s): 931525, 934571 BEFORE YOU BEGIN We recommend consulting a professional if you are unfamiliar with installing plumbing fixtures. Signature Hardware accepts no liability for any damage to the faucet,
Parts & Material Included
 O² Hydro Well System Installation, Use & Care Guide Parts & Material Included 1. Funnel 11. Drain Line 21. Air Head 2. Media Tank Distributer Tube 12. Air Release 22. Drain Fitting 3. Air Tank Distributer
INSTALLATION AND OPERATIONS MANUAL
 MODEL 6001 REVERSE OSMOSIS High Purity Water Production System THREE STAGE Filtration for the reduction of: Organic Matter Total Dissolved Solids (TDS) Suspended Solids Chemical Contaminants Bad Taste
BROEG SINGLE HOLE FAUCET INSTALLATION
 SKU(s): 931283 BEFORE YOU BEGIN We recommend consulting a professional if you are unfamiliar with installing plumbing fixtures. Signature Hardware accepts no liability for any damage to the faucet, plumbing,sink,
Installation Instructions
 GE Consumer & Industrial Appliances Installation Instructions Junction Box Cover Within this user bag, you will find a junction box cover and a #10 hex head screw used to attach the junction box cover
Things you might need for the installation: vessel sink, plumber's putty(home depot), liquid nails(home depot), Bucket silicone caulk(home depot),
, liquid nails(home depot), Bucket silicone caulk(home depot),") Things you might need for the installation: vessel sink, plumber's putty(home depot), liquid nails(home depot), Bucket silicone caulk(home depot), Putty knife Plumber's putty Pipe wrench Channel-lock pliers
Things you might need for the installation: vessel sink, plumber's putty(home depot), liquid nails(home depot), Bucket silicone caulk(home depot), Putty knife Plumber's putty Pipe wrench Channel-lock pliers
Clean Water Made Easy. CWS Time Clock Softener Installation & Start Up Guide. Questions?
 Clean Water Made Easy www.cleanwaterstore.com CWS Time Clock Softener Installation & Start Up Guide Thank you for purchasing a Clean Water System! With proper installation and a little routine maintenance
General System Layout Sketch
 General System Layout Sketch EZ-37 Solar Panels PV panel Glycol Fill Valve Expansion Tank ` 1 Introduction This document describes how to install a Heliatos GH type solar water heating system. These systems
SERIES OWNER MANUAL DP1000(B) Please read this manual carefully prior to operating your Drinkpod. Retain for future reference.
 Please read this manual carefully prior to operating your Drinkpod. Retain for future reference.") 1000 SERIES DP1000(B) OWNER MANUAL Please read this manual carefully prior to operating your Drinkpod. Retain for future reference. Safety caution & usage Temperature Please use the product in a dry place
1000 SERIES DP1000(B) OWNER MANUAL Please read this manual carefully prior to operating your Drinkpod. Retain for future reference. Safety caution & usage Temperature Please use the product in a dry place
LUDGATE SINGLE HOLE FAUCET INSTALLATION
 SKU(s): 931522 BEFORE YOU BEGIN We recommend consulting a professional if you are unfamiliar with installing plumbing fixtures. Signature Hardware accepts no liability for any damage to the faucet, plumbing,sink,
Dimensions: 39 1/2" w x 22" D x 35.5 H. kk25 installation. Things you might need for the installation: vessel sink,
 Things you might need for the installation: vessel sink, plumber's putty(home depot), liquid nails(home depot), Bucket silicone caulk(home depot), Putty knife Plumber's putty Pipe wrench Channel-lock pliers
Installation Instructions
 Installation Instructions SELECTRONIC Hard-Wired AC Powered ICU Lavatory Proximity Faucet PRODUCT NUMBER 0. Certified to comply with ASME A..M 0 American Standard M 0. ICU Faucet shown Installed on American
One Less Thing to Forget...
 Installation Guide One Less Thing to Forget... Sign up now for cartridge auto-renew and save 10%! Stop stressing about when to purchase your next nuvoh2o replacement cartridge. Sign up for our auto-renew
DWSB-TFC-50 DWSB-50-PUMP
 INSTALLATION MANUAL DWSB-TFC-50 DWSB-50-PUMP 12630 US 33 N. Churubusco, IN 46723 Ph. (260)693-1972 Fax (260)693-0602 www.sterlingwatertreatment.com 1 TABLE OF CONTENTS: SECTION I. SECTION II. INTRODUCTION...3
Installation Guide Europa
 Installation Guide Europa One Less Thing to Forget... Sign up now for cartridge auto-renew and save 10%! Stop stressing about when to purchase your next nuvoh2o replacement cartridge. Sign up for our auto-renew
Top Control Dishwasher
 INSTALLATION GUIDE Top Control Dishwasher NS-DWH2BS8/NS-DWH2SS8/NS-DWR2BS8/NS-DWR2WH8/NS-DWR2SS8 Before using your new product, please read these instructions to prevent any damage. Contents Introduction......................................................................................................
PolyMax H2-24 Dutch Bucket System
 11234 PolyMax H2-24 Dutch Bucket System *Actual system may differ. PolyMax Dutch Buckets Versatile PolyMax Dutch Buckets are ideal for both small- and large-scale hydroponic growing. 2017 FarmTek All Rights
R.O. DRINKING WATER SYSTEM
 R.O. DRINKING WATER SYSTEM INSTALLATION, OPERATION & SERVICE MANUAL IMPORTANT NOTICES: This reverse osmosis system contains replaceable treatment components critical for effective performance. It is the
The Coffee Professor Reverse Osmosis System Model Genesis Cafe
 The Coffee Professor Reverse Osmosis System Model Genesis Cafe Congratulations on your purchase of the most advanced water purifier system available! Installation and Service Guide PLEASE READ THIS MANUAL
INSTALLATION. Glass Panel Doors (select models) CAUTION
 CAUTION") Location Do not install refrigerator near oven, radiator or other heat source. If not possible, shield refrigerator with cabinet material. Do not install where temperature falls below 55 F (13 C) or rises
Location Do not install refrigerator near oven, radiator or other heat source. If not possible, shield refrigerator with cabinet material. Do not install where temperature falls below 55 F (13 C) or rises
kk21 installation Kk21-WF21 Things you might need for the installation: vessel sink,
 Kk21-WF21 Things you might need for the installation: vessel sink, plumber's putty(home depot), liquid nails(home depot), Bucket silicone caulk(home depot), Putty knife Plumber's putty Pipe wrench Channel-lock
Aplos Single Handle Basin Bathroom Faucet
 INSTALLATION MANUAL Aplos Single Handle Basin Bathroom Faucet KEF-15301 www.kraususa.com I toll free: 1.800.775.0703 I 2014-2015 Kraus USA Inc. I REV. August 16, 2016 Thank you for your purchase We would
PIPE DREAMS 96. Aeroponic Garden IMPORTANT:
 1 WARNING: BEFORE PUTTING WATER PUMP INTO OPERATION FILL UP NUTRIENT TANK TO TOP OF PUMP. THE PUMP MUST NEVER RUN DRY OTHERWISE, WARRANTY WILL BE DECLINED. READ FILLING INSTRUCTIONS BEFORE USE. Welcome
PWC-500/1000/1010/1500
 SERVICE MANUAL for by Vertex Model PWC-500/1000/1010/1500 P/N man-7008 Table of Contents 1. Introduction 2. Cooler Set-up 3. Remove Top Cover 4. Remove/Replace Float 5. Remove/Replace Hot Tank 6. Faucet
J-PRO V 230V Dual Voltage Hydrogen Peroxide Pump Installation & Start-Up Guide
 J-PRO-22 110V 230V Dual Voltage Hydrogen Peroxide Pump Installation & Start-Up Guide Thank you for purchasing a Clean Water System! With proper installation and a little routine maintenance, your system