JetFlush C40 & C90 Power flushing unit
|
|
|
- Emory Sims
- 6 years ago
- Views:
Transcription


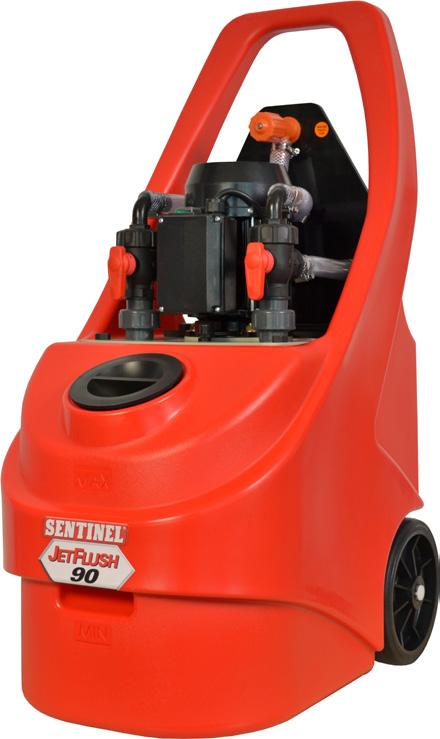

1 JetFlush C40 & C90 Power flushing unit Instruction manual
2 2
3 JETFLUSH C40 & C90 CONTENTS Section A - Introduction Technical Data 4 Safety Precautions 4 Contents of each JetFlush flushing kit 4 Section B - Using the JetFlush pump for Power Flushing Introduction 5 System Inspection and Preparation 5 Location and Connection of the JetFlush Pump 6 Hose Connections to the Flushing Pump 7 Initial Flushing Procedure (water only) 8 Chemical Flushing Procedure - Sentinel X400 9 Inhibitor and Corrosion Protection 10 Upon Completion 10 Quick Guide to Power Flushing 11 Radiator Valve Settings 12 Power Flushing Survey and Check List Power Flush Monitoring Form 15 Section C - Parts List and Diagram Parts List and Descriptions Parts Diagram 21 3

4 INTRODUCTION TECHNICAL DATA PRODUCT NAME SENTINEL C40 FLUSHING UNIT SENTINEL C90 FLUSHING UNIT Pump Type Positive drive centrifugal Positive drive centrifugal Motor 0.50 HP, 120v 0.75 HP, 120v Degree of protection IP54 IP54 Motor rating Continuous Continuous Temperature range 32 F to 165 F 32 F to 165 F Dimensions W: D: H: W: D: H: 35 Tank capacity (to filler cap) 10.3 gallons 15 gallons Weight (without hoses) 37.5 pounds 50 pounds A 6 amp fuse should be fitted in the plug top. A GFI Protected Outlet should be used. SAFETY PRECAUTIONS WARNING! This Jetflush machine must only be used by qualified professional plumbing and heating contractors, installers, and service technicians. Read all instructions, including this manual and all other information shipped with the Jetflush unit, before using and operating. Perform steps in the order given. Failure to comply could result in severe personal injury, death or substantial property damage. Precautions should be taken to ensure a safe working environment. Take care when lifting large or heavy items. Regularly check power leads for wear or damage, use with a residual circuit breaker. When handling chemicals wear suitable protective clothing, gloves and goggles. Use in a well ventilated area. Contractor should check local regulations regarding the deposal of any waste products from the system. CONTENTS OF EACH JETFLUSH KIT Each kit comprises the following: JetFlush power flushing pump. Set of 2 x 16.5 foot (5m) flow and return hoses. 1 x 26 foot (8m) dump hose. 1 x 10 foot (3m) overflow hose. 2 x 1.5 foot (0.5m) circulation pump adaptor hoses. The listed hoses are supplied in a plastic storage crate. 4
5 USING THE JETFLUSH PUMP FOR POWER FLUSHING INTRODUCTION JetFlush pumps are designed to power flush heating systems with minimal dismantling, by circulating water and flushing chemicals at high velocity, and then purging the dirty water from the system with a high flow of fresh, clean, water. Radiators may be individually flushed without removing or disconnecting them from the system. Pumps with 120 volt motors are single phase, for use on a standard domestic supply. A six amp fuse should be fitted in the plug top. We recommend the use of a Ground Fault Interrupt (GFI) for extra protection. SYSTEM INSPECTION AND PREPARATION 1. Turn on heating system in order to identify problem flow areas, cold radiators, or those with cold spots, etc. Switch off system. 2. Note how many turns are required to shut off radiator and lock shield valves so that settings may be re-instated after flushing to avoid system balancing. Use a copy of the chart provided to record the number of turns. Open all (both sides of radiator) valves fully. 3. Set any thermostatic radiator valves to the fully open position. Remove the heads and check that the plunger pin moves freely. Check that diverter or zone valves are in the fully open position, setting manually if necessary. 4. If check valve is present, this must be by-passed or bridged to allow the flow reversing action to be used. It may be possible to dissemble the check valve, and remove internal components. 5. Tie up the ball cock or turn off the mains water supply by another means. 6. Drain enough water from the system to empty the feed & expansion (F&E) tank. This can be drained into the JetFlush tank if it has been connected (connection details are in the next section). 7. With vented systems, it is necessary to cap off, or loop together, the expansion and cold feed pipes in order to avoid the flushing pump filling and overflowing the expansion tank. NOTE 1: This will only be effective when the F&E pipes are not close coupled, or connected via an air separator, and may not remove deposits which have hardened over a long period of time. NOTE 2: The looping connection may be made with any sturdy flexible tubing, but should incorporate a valve in the loop to close the circuit when flushing individual radiators. Capping or looping the F&E pipes are only temporary measures, which must be removed after the flushing process. ENGINEER S TIP: Don t drain water from the system to lower the water level in the F&E tank until after the flushing pump has been connected into the system. Tie up the F&E tank ballcock or otherwise turn off the cold water feed, and return to the flushing pump. Open both the isolating valves, without switching on the electric motor. The head of water in the house means that heating system water will run down the flow and return hoses and into the tank. Let the water run until the tank is half full, and close both isolating valves. You should now have emptied the F&E tank sufficiently to carry out the necessary valving or capping off of the cold feed. NOTE: If there is a large amount of sludge or slime present in the F&E tank it must be cleaned manually and not drained into the system. Depending on the configuration of the heating system looping the feed and expansion pipes together may enable these pipes to be flushed during the cleansing process, which can be beneficial when the cold feed pipe contains corrosion deposits. 5


6 USING THE JETFLUSH PUMP FOR POWER FLUSHING LOCATION AND CONNECTION OF THE FLUSHING PUMP The connection point for the flushing pump may vary depending on the system to be cleaned, and the availability of suitable connection points. Make sure the supplied gaskets are installed in the hoses when connecting them to the machine and/or the system. However the optimum location is via the central heating circulation pump, using the special hoses supplied to connect across the pump unions. drain point, and near to a convenient mains water supply, such as a bathroom or kitchen. The cold water supply for a washing machine or dish-washing machine is a convenient source when a mixer tap makes connection of a hose difficult. The normal precautions during work on any heating system should be taken, and it is prudent to place the pump on a waterproof groundsheet or drip tray. Generally the unit should be located in a room with a suitable 6


7 USING THE JETFLUSH PUMP FOR POWER FLUSHING HOSE CONNECTIONS TO THE FLUSHING PUMP 1a. Ensure that both valves are in the closed position (i.e. the valve handles are horizontal). 1b. The pump has two 16 feet flow and return hoses, fitted with 3/4 US NPT thread brass hose connectors at the outboard end and 3/4 BSP fittings at the inboard end. The inboard end of both flow and return hoses should be screwed onto the corresponding ¾ brass nipples on rear of the hose support plate. The other ends of these hoses will be connected into the heating system. 1c. Connect the overflow hose connector to the 3/4 BSP (British Standard Parallel) male overflow fitting on the rear of the pump tank, and lead to a suitable drain point. 1d. Connect the 25 foot dump hose to the brass nipple on the reverse of the hose support plate, and lead the hose to a toilet pan or drain pipe gully leading to a foul sewer. 1e. Connect a mains water supply hose to the male US Garden Hose Tap thread on the rear of the hose support plate. Fill the tank with water to 4 inches above the minimum liquid level, and then close the water inlet valve. 1f. Plug in the pump to a suitable electricity supply fitted with an RCD adapter. 2. Hose connection to the system Connect the flow and return hoses of the pump to the system at the selected point. This may be either: 2b. Across the tails of a radiator (having drained and disconnected the radiator) using appropriate 1/2 or 3/4 BSP adaptors to connect to the valves. The radiator valves should be closed to isolate the flushing pump from the system until power flushing is commenced. This is likely to be the least effective method due to the restrictive effect that valves (particularly thermostatic) may have on the flow rate. The above method is generally used on a combination boiler system. 2c. Across the flow and return connections at the boiler, isolating the boiler itself. This is the preferred method when flushing a heating system prior to installing a new boiler, as corrosion debris may be purged from the heating system before the new boiler is attached. This is important with all modern boilers, particularly so if the new boiler incorporates a plate type heat exchanger with complex and narrow water passages. 2a. Across the pump flanges left once the circulating pump has been removed. The circulating pump isolating valves should be closed to isolate the flushing pump from the system until power flushing is started. 7

8 USING THE JETFLUSH PUMP FOR POWER FLUSHING INITIAL FLUSHING PROCEDURE (WATER ONLY STAGE, BEFORE ADDITION OF CHEMICALS) Note: In the following procedure, the pump is first used to loosen and mobilize loose silt and debris, before forcibly expelling it together with the existing heavily contaminated system water. This rids the system of as much debris and sludge at an early stage, before establishing full, chemically treated circulation through the flushing pump. By removing loose corrosion products from the system before addition of any chemical, the full effect of the chemical is available to disturb, loosen, and dissolve more stubborn accumulations of debris. 1. Leave the pump tank cap loose, or on by no more than one turn if water splashes during the flushing / descaling (to allow gas to escape). 2. Check that both valves are closed (horizontal). Open the isolating valves between flushing pump and heating system and switch on pump immediately. Ensure that liquid level in tank remains at least 4 (10 cm) above the minimum mark, adding more water if necessary. 3. Allow the flushing pump to run for ten minutes, reversing the direction of flow regularly. If there is sludge and debris in the system, the water returning into the tank will be heavily discolored as the high flow rate picks up looser debris. 4. Check all hoses and connections for leaks. 5. The pump has the ability to dump dirty water when the flow is in either direction. Change the pump into dumping mode as follows, remembering that the flow reverser is constructed so that the direction in which the lever points also indicates the direction of flow. 5a. Operate the flow reverser lever so that the water is flowing through the heating system in the same direction as it is during normal heating operation. 5b. Rotate the valve on the return side through 180 so that the dump label is clearly visible. By doing this, system water is diverted to waste down the dump hose, instead of returning back into the tank. The liquid level in the tank will immediately begin to fall. 5c.The mains water inlet supply (orange tap) should now be turned on and adjusted so that the volume of incoming water compensates for that being forced out of the system to waste. Continue dumping until the waste water runs relatively clear. Ensure that the water level in the tank remains at least 4 (10 cm) above the minimum mark at all times. Note: If the mains water cannot keep up with the dump speed (i.e. the unit begins to empty) simply stop dumping until the tank fills up. 6. Once the water remains reasonably clear, restore circulation by rotating the valve back through 180 into re-circulation mode. 7. Check that the liquid level in the tank remains 4 (10cm) above the minimum mark. Add more water if necessary. Vent all radiators to ensure that there are no air pockets. Use a cloth to absorb any liquid expelled, as the system water may be discolored and likely to stain. 8. The flushing chemical may now be added. Leave the pump tank cap loose, or on by no more than one turn, during the flushing / descaling. 8
9 USING THE JETFLUSH PUMP FOR POWER FLUSHING CHEMICAL FLUSHING PROCEDURE USING X400 problematic radiators. This ensures that the strongest concentration of chemical is directed at the worst areas of the system. 10. Open the valves on the next radiator, and repeat the procedure. 1. Switch on the JetFlush pump. 2. During the re-circulating water through the pump and the heating system, slowly add 1 quart of X400 to the JetFlush tank, sufficient for radiator system, (unless it was added on a prior visit), and ensure thorough distribution around the system. (X400 concentrate tube is sufficient for upto 25 gallons of system water. X400 liquid is dosed at a rate of at least 1% of system volume). 3. Switch on the boiler, if fitted, and in safe working order. Allow the system water to reach 122 F (50 C), and then switch boiler off. (122 F) NOTE: Even boiler thermostat setting no.1 could exceed. 122 F (50 C) 4. Circulate throughout the complete system for half to one hour, reversing the flow direction regularly, and monitoring the system for leaks. 5. Close off all radiators (one valve only), and allow the full flow to go through the coil in the cylinder (if present in the system). 6. Reverse the flow regularly. 7. Divert the full flow to the radiator circuit, in preparation to putting the full flow of the pump through each radiator in turn. 8. Fully open both valves of the nearest radiator, on the ground floor, to the flushing pump. 9. Flush this radiator, reversing the flow regularly, until all cold spots have disappeared, and the temperature across the radiator is consistent. Close the radiator valves. Note: If your initial system check identified cold or partially blocked radiators, commence the individual radiator flushing procedure with the worst radiator first, progressing to less 11. Work through the rest of the radiators in turn, so that you have flushed every radiator individually, including upstairs radiators. 12. When you have flushed the last radiator, and it has an even temperature across the surface, switch the pump into dumping mode, as previously. 13. With only this radiator open, and the pump set to dump, run until the water leaving the dump hose is completely clear. Now operate the flow reverser and change the valves to dump in the opposite direction until clear. When dump water is clear, close radiator valve. 14. Go back to the previous radiator that you had flushed, ensure both valves are open, and repeat the dumping procedure on this one radiator, alternating the direction of flow in each direction as you dump. Close radiator valve. 15. Work your way back around the house in the opposite direction to previously, until you have carried out the dumping process on every radiator individually. 16. Now with the pump still set to dump direct the flow through the cylinder coil until it runs clear. Dump in the other direction until clear. 17. If you have a TDS meter (Total Dissolved Solids) it is useful to test the water at this stage. The reading should be compared with a mains water sample reading, and the dumping process continued until both readings are within 5-10% of each other. 18. Return the flushing pump into normal re-circulation mode, re-open all radiator valves, and the cylinder coil, and move to page B.10 for instructions on adding the inhibitor using the Jetflush. 19. NOTE: When using X400, there is no requirement to neutralize after the flushing process. 9

10 USING THE JETFLUSH PUMP FOR POWER FLUSHING INHIBITION AND CORROSION PROTECTION IMPORTANT 1. The system is now full of fresh, clean water, a good quality corrosion inhibitor, such as Sentinel X100, must be added to the system water to prevent further corrosion and scaling. The inhibitor may be added to the system by using the JetFlush pump as follows: 2. Briefly open a dump valve to lower the water level in the tank to just above the minimum level, close the dump valve. Add the X100 inhibitor into the tank. Allow circulation through the system for ten minutes, isolate the flushing pump from the heating system, and switch off. 3. If the system is vented, the residual water in the JetFlush tank, which will contain a small quantity of inhibitor, may be poured into a bucket and added to the F&E tank after this has been cleaned. Note: In a pressurised system the inhibitor may be injected into the system using an injector, which will avoid wasting any inhibitor left in the tank. UPON COMPLETION 1. Restore system to normal, restoring radiator balance valves to original settings, removing any temporary isolating valves or caps on the expansion and cold feed pipes, and restoring non return valves to normal operation if necessary. 2. Before re-connecting the feed & expansion tank, it should be thoroughly cleaned, removing all traces of dirty water and sludge, and disinfected if necessary. 10
11 USING THE JETFLUSH PUMP FOR POWER FLUSHING QUICK GUIDE TO POWER FLUSHING Quick Guide to Power Flushing with a JetFlush Pump 1. If system is vented, cap off the cold feed and expansion pipe. 2. Couple JetFlush pump into system. Connect dump, water inlet and overflow hoses to JetFlush pump. 3. Open all radiator valves and set zone valves to manual position, for full flow throughout system. 4. Switch on JetFlush pump and circulate for 10 minutes, reversing flow regularly. 5. Start dumping. Adjust inlet water to ensure tank water level remains constant. Allow to run until dump water is clear. 6. Set JetFlush into circulation mode, with full flow through whole system (all radiator valves open). 7. Pour selected flushing chemical into JetFlush tank. 8. If possible, switch on boiler to heat water to 50º C (approximately 122º F). 9. Continue circulation through wide open system for 15 minutes, reversing flow regularly. 10. Shut off all radiator valves except for one radiator. Allow full flow through this one radiator for 5 minutes, reversing flow regularly. 11. Shut off first radiator, and move to second. Work around system, putting full flow through each radiator in turn. 12. After circulating through last radiator, switch to dumping on that one radiator, until water runs clear. 13. Operate flow reverser and appropriate valves to dump with water flow in opposite direction, until water runs clear. 14. Open up previous radiator, and dump on that until water runs clear. Work around system in reverse, dumping through each radiator in turn. 15. Restore circulation through JetFlush pump and complete heating system (all radiator valves open). 16. Commence final dump procedure, with all radiators wide open. Allow to run until dump water is clear. 17. Test that dump water is neutral, with ph paper and add x100 corrosion inhibitor to JetFlush tank. 18. Circulate for 10 minutes before disconnecting JetFlush, restoring system to normal operation, and bleeding radiators. 11
12 USING THE JETFLUSH PUMP FOR POWER FLUSHING RADIATOR VALVE SETTINGS Use a photo-copy of this chart to note the radiator valve settings before commencing to power flush the system, so that the heating system can easily be re-instated afterwards, avoiding the need to rebalance the system. 12
13 USING THE JETFLUSH PUMP FOR POWER FLUSHING POWER FLUSHING SURVEY AND CHECK LIST Copper 1/2 inch / 3/4 inch (CONT. NEXT PAGE) 13
14 USING THE JETFLUSH PUMP FOR POWER FLUSHING POWER FLUSHING SURVEY AND CHECK LIST (CONT.) 14
15 USING THE JETFLUSH PUMP FOR POWER FLUSHING POWER FLUSH MONITORING FORM 15
16 PARTS LIST AND DIAGRAM JETFLUSH C90 PRODUCT CODE NUMBER ON DIAGRAM PART DESCRIPTION H04012KA H04012KB H09002L11K H09002L22K H03002B H03002F H19002D11 H19002D22 H01502C H030HJ07 H030HJ08 H030HJ09 H03002A H03006 H03007 H A H01507K H09001K H04013KA H09002K H04013KC H03023 H09005K H09004K H04016K H04017K H03012K H04018KA H04018KB H04018KC H04018KD H04018KE H04018KF H04018KG C40/C90 Electric motor fan cover C40/C90 Electric motor fan C90 Motor 110v C90 Motor 220v C30 Motor bearings (pair) Electric motor switch box C90 Capacitor, 110v C90 Capacitor, 220v On/Off switch for motor 8mm Brass Nut M8 x 40 Brass Bolt Brass Washer 8 x 17 C40 Motor shaft circlip C40 White arnite washer O ring for C40 Driveshaft / FR Paddle O ring for rotor/impellor 12mm PP Bolt C90 Flange & Body C40/C90 Flange C90 Drop tube only C40/C90 Rotor housing 3/4 female/female elbow from volute C90 Shaft sleeve C90 Rotor/Impellor O ring for rotor/impellor cover C40/C90 C40/C90 High temp rotor cover 10mm PP Bolt Flow reverser handle/lever Flow reverser paddle Flow reverser body Flow reverser top plate O ring for flow reverser top plate 3/4 BSP PP Threaded Nipple 45mm 3/4 BSP PP Threaded Nipple 40mm 16
17 PARTS LIST AND DIAGRAM JETFLUSH C90 PRODUCT CODE NUMBER ON DIAGRAM PART DESCRIPTION MI022 H04019K H030F11 H090F04 H09006K H04005 H09007K H09008K H09009K H09010K H04025K H04026K H030F50 H030F63 H030F64 HH013X30 HH2229 HH019X30 H04023K H09011K H090F01 H090F03 H030HJ06 H190F16 H030F13 H030F13A# H030F36 H030F16D H030F65 H090F06 H090F10 HHCF9FR HHCF9WI HHCF9DH M6 x 30 ST/ST Socket Cap Head Screw 3/4 BSP Union 3/4 male/female PP elbow 3/4 male x 19mm PP Hose adaptor C90 Tank C90 Tank Cap C90 ST/ST Axle C90 wheels (each) Circlip (7/ mm) for axle inner Circlip (20mm) for axle outer 1 male/female PP elbow 1 female x 3/4 male PP reducing bush 3/4 male x 1/2 female PP reducing bush 13 ampere plug 110v Plug Yellow hose 13mm ID per metre Clear hose 22mm ID per metre Clear hose 19mm ID per metre 3/4 BSP PP Threaded Nipple 35mm C90 hose support bracket 3/4 Single Union L Port Valve 3/4 male x 20mm PP 90degree hose adaptor 3/4 male x 20mm Y piece twin barb hose adaptor 3/4 x 19mm Water Inlet Tap 12-22mm Wormdrive Clip 16-25mm Wormdrive Clip 3/4 Cream Washer 20mm Hose L (for water inlet) 5 ampere fuse 3/4 female x 3/4 male Brass Adaptor 3/4 female x 13mm Brass Hose Adaptor 5mtr Supply & Return Hose set 8mtr Water Inlet Hose 8mtr Dump Hose 17
18 PARTS LIST AND DIAGRAM JETFLUSH C90 PRODUCT CODE NUMBER ON DIAGRAM PART DESCRIPTION HHCF9OH H090F07 H030F69 H190F15 H09012K JETFLUSH C mtr Overflow Hose 3/4 female x 19mm Brass Hose Adaptor 3/4 female x 19mm PP Hose Adaptor 3/4 male x 25mm PP Hose Adaptor PP Herbie Clip HC-N-BK-PP JF90 Instruction manual PRODUCT CODE NUMBER ON DIAGRAM PART DESCRIPTION H04012KA H04012KB H04002L11K H04002L22K H03002B H03002F H03002D11 H03002D22 H01502C H030HJ07 H030HJ08 H030HJ09 H03002A H03006 H03007 H A H01507K H04013K H04013KA H04013KB H04013KC H03023 H04014K H04015K H04016K H04017K C40/C90 electric motor fan cover C40/C90 electric motor fan C40 Motor 110v C40 Motor 220v Motor bearings (pair) Electric motor switch box Capacitor, 110v Capacitor, 220v On/Off switch for motor 8mm Brass Nut M8 x 40 Brass Bolt Brass Washer 8 x 17 C40 Motor shaft circlip C40 White arnite washer O ring for C40 Driveshaft / FR Paddle O ring for rotor/impellor 12mm PP Bolt C40 Flange & Body C40/C90 Flange C40 Drop tube only C40 Rotor housing 3/4 female/female elbow from volute C40 Shaft sleeve C40 Rotor/Impellor O ring for rotor/impellor cover C40/C90 C40/C90 rotor cover 18
19 PARTS LIST AND DIAGRAM JETFLUSH C40 PRODUCT CODE NUMBER ON DIAGRAM PART DESCRIPTION H03012K H04018KA H04018KB H04018KC H04018KD H04018KE H04018KF H04018KG MI022 H04019K H030F04 H030F11 H090F04 H04020K H04021K H04022K H030F63 H030F64 HH013X30 HH016X30 HH019X30 H04023K H04024K H04025K H04026K H090F01 H090F03 H030HJ06 H190F16 H030F13A# H030F13 H030F36 H030F16D H030F mm PP Bolt Flow reverser handle/lever Flow reverser paddle Flow reverser body Flow reverser top plate O ring for flow reverser top plate 3/4 BSP PP Threaded Nipple 45mm 3/4 BSP PP Threaded Nipple 40mm M6 x 30 ST/ST Socket Cap Head Screw 3/4 BSP Union 3/4 male x 16mm PP hose adaptor 3/4 male/female PP elbow 3/4 male x 19mm PP Hose adaptor C40 Tank C40 Tank Cap Pair of wheels with axle 13amp Plug 110v Plug Yellow hose 13mm ID per metre Clear hose 16mm ID per metre Clear hose 19mm ID per metre 3/4 BSP PP Threaded Nipple 35mm C40 hose support bracket 1 male/female PP elbow 1 female x 3/4 male PP reducing bush 3/4 Single Union L Port Valve 3/4 male x 20mm PP 90deg hose adaptor 3/4 male x 20mm Y piece twin barb hose adaptor 3/4 x 19mm Water Inlet Tap 16-25mm Wormdrive Clip 12-22mm Wormdrive Clip 3/4 Cream Washer 20mm Hose L (for water inlet) 5 ampere fuse 19
20 PARTS LIST AND DIAGRAM JETFLUSH C40 PRODUCT CODE NUMBER ON DIAGRAM PART DESCRIPTION H090F06 H030F03 HHCF3FR HHCF3WI HHCF3DH HHCF3OH H030F47 H030F50 H090F10 H04028K /4 female x 3/4 male Brass Adaptor 3/4 f x 16mm Brass hose adaptor 5mtr Supply & Return Hose s 8mtr Water Inlet Hose 8mtr Dump Hose 3mtr Overflow Hose 3/4 female x 16mm PP Hose Adaptor 3/4 male x 1/2 female PP reducing bush 3/4 female x 13mm Brass Hose Adaptor PP Herbie Clip HC-L-BK-PP JF40 Instruction Manual 20
21 PARTS LIST AND DIAGRAM 21
22 Sentinel Performance Solutions Limited 7650 Daresbury Park, Daresbury, Warrington, Cheshire WA4 4BS T F For Service or Parts Order Through: Douglas Products and Packaging 1550 E Old State Route 210, Liberty, MO T F
Please take time to carefully read through these guidelines before using your Kamco pump.
 The Kamco CLEARFLOW CF90 : QUANTUM pump is a purpose built unit for Power Flushing central heating systems, designed to cure circulation and boiler noise problems caused by the accumulation of sludge,
Please take time to carefully read through these guidelines before using your Kamco pump.
 The Kamco CLEARFLOW CF190 / CF230 DDV pumps are purpose built units for Power Flushing central heating systems, designed to cure circulation and boiler noise problems caused by the accumulation of sludge,
Please take time to carefully read through these guidelines before using your Kamco pump.
 The Kamco CLEARFLOW CF30 CLASSIC pump is a purpose built unit for Power Flushing central heating systems, designed to cure circulation and boiler noise problems caused by the accumulation of sludge, corrosion
RHO-FLUSH 1000, RHO-MAG & RHO-HAMMER Operating & Maintenance Instructions
 RHO-FLUSH 1000, RHO-MAG & RHO-HAMMER Operating & Maintenance Instructions The Rhomar Water RHO-FLUSH 1000 pump is a purpose built unit for Power Flushing central heating systems, designed to cure circulation
Jetflush 4 Instruction Manual
 The Sentinel range of water treatment products for domestic central heating systems. GE Water & Process Technologies Jetflush 4 Instruction Manual Foundry Lane, Widnes, Cheshire WA8 8UD. Tel: 0151 420
USER MANUAL PLEASE READ THROUGH ALL INSTRUCTIONS BEFORE USE ANY FURTHER QUESTIONS PLEASE CALL OUR TECHNICAL HELP LINE:
 USER MANUAL PLEASE READ THROUGH ALL INSTRUCTIONS BEFORE USE ANY FURTHER QUESTIONS PLEASE CALL OUR TECHNICAL HELP LINE: 0870 428 0075 CONTENTS Page 2 - Unpacking Page 3 - Heating system preparation and
PARTS MANUAL. American Dish Service MODEL: 5-AG-S ADS LOW TEMPERATURE DISHWASHER EFFECTIVE: JULY, 2013 C 4/08
 EFFECTIVE: JULY, 2013 ADS LOW TEMPERATURE DISHWASHER MODEL: PARTS MANUAL 900 Blake Street Edwardsville, Kansas 66111 (913)422-3700 C 4/08 The American Dish Service part numbers contained in this publication
EFFECTIVE: MAY, American Dish Service ADS MODEL: ASQ GLASSWASHER PARTS MANUAL. 900 Blake Street Edwardsville, Kansas (913) /08
 /08") EFFECTIVE: MAY, 2014 American Dish Service ADS MODEL: ASQ GLASSWASHER PARTS MANUAL 900 Blake Street Edwardsville, Kansas 66111 (913)422-3700 05/08 The American Dish Service part numbers contained in this
EFFECTIVE: MAY, 2014 American Dish Service ADS MODEL: ASQ GLASSWASHER PARTS MANUAL 900 Blake Street Edwardsville, Kansas 66111 (913)422-3700 05/08 The American Dish Service part numbers contained in this
UNIVERSAL 750 PRE-MIX DISPENSER
 Anoka, MN. 0 - Telephone -00--00 Facsimile -00--0 MODEL NO. xxx xxx Universal 0 of Control Code A Manual Part No. 00 -- Revised: -- ªIMI Cornelius Co., - Anoka, MN. 0 - Telephone -00--00 Facsimile -00--0
OPERATING INSTRUCTIONS MANUAL (Please retain for future reference) FVO-200 INDIRECT FIRED SPACE HEATERS
 FVO-200 INDIRECT FIRED SPACE HEATERS") OPERATING INSTRUCTIONS MANUAL (Please retain for future reference) For FVO-200 INDIRECT FIRED SPACE HEATERS CERTIFIED FOR USE IN CANADA AND U.S.A. As per CSA B140.8 Portable Oil Fired Heaters / CSA B140.02003
OPERATING INSTRUCTIONS MANUAL (Please retain for future reference) For FVO-200 INDIRECT FIRED SPACE HEATERS CERTIFIED FOR USE IN CANADA AND U.S.A. As per CSA B140.8 Portable Oil Fired Heaters / CSA B140.02003
A HEATER KIT With Diesel Engine Connection Fittings
 A-12142 HEATER KIT With Diesel Engine Connection Fittings Figure 1 (General Layout and Parts I.D.) Page 1 of 6 Read these instructions and identify all components. Please retain these instructions for
SEALED THERMAL STORE
 ISSUE 3 0717 INSTALLATION AND USER GUIDE ENERGYMANAGER SEALED THERMAL STORE ADVANCE APPLIANCES LTD PLEASE RETAIN AND ENSURE SERVICE RECORDS ARE KEPT UP TO DATE. SCHEMATIC DIAGRAM OF ENERYMANAGER THERMAL
COOLING SYSTEM 1. Section V CONTENTS DATA AND SPECIFICATIONS. Page. Fluid Fan Drive (Silent Flite) 3. Water Pump 4. Radiator 5
 3. Water Pump 4. Radiator 5") Section V COOLING SYSTEM CONTENTS Fluid Fan Drive (Silent Flite) 3 Water Pump 4 Radiator 5 Water Temperature Gauge 6 Thermostat 7 Radiator Pressure Cap 7 Service Diagnosis 7 DATA AND SPECIFICATIONS COOLING
Section V COOLING SYSTEM CONTENTS Fluid Fan Drive (Silent Flite) 3 Water Pump 4 Radiator 5 Water Temperature Gauge 6 Thermostat 7 Radiator Pressure Cap 7 Service Diagnosis 7 DATA AND SPECIFICATIONS COOLING
JOHN DEERE GATOR HPX/XUV 2 PASSENGER HEATER INSTALLATION INSTRUCTIONS (p/n: 9PH20S30)
") P. 1 of 12 JOHN DEERE GATOR HPX/XUV 2 PASSENGER HEATER INSTALLATION INSTRUCTIONS (p/n: 9PH20S30) Item: Qty: Description: 1 2 1 x 1 x 5/8 Tee Fitting 2 2 Plastic Snap-in Hose Grommet 3 4 1-1/2" Hose Clamps
P. 1 of 12 JOHN DEERE GATOR HPX/XUV 2 PASSENGER HEATER INSTALLATION INSTRUCTIONS (p/n: 9PH20S30) Item: Qty: Description: 1 2 1 x 1 x 5/8 Tee Fitting 2 2 Plastic Snap-in Hose Grommet 3 4 1-1/2" Hose Clamps
SUBMERSIBLE DIRTY WATER PUMP
 SUBMERSIBLE DIRTY WATER PUMP MODEL NO: DWP100A, DWP150A, DWP200A PART NO: 7230098, 7230099, 7230100 OPERATION & MAINTENANCE INSTRUCTIONS ORIGINAL INSTRUCTIONS LS1117 - ISS 2 INTRODUCTION Thank you for
120V CAUTION: DO NOT OPERATE MACHINE UNTIL YOU HAVE READ ALL SECTIONS OF THIS INSTRUCTION MANUAL IMPROPER USE OF THE MACHINE WILL VOID THE WARRANTY
 KING COBRA 1200 120V INFORMATION & OPERATING INSTRUCTIONS CAUTION: DO NOT OPERATE MACHINE UNTIL YOU HAVE READ ALL SECTIONS OF THIS INSTRUCTION MANUAL IMPROPER USE OF THE MACHINE WILL VOID THE WARRANTY
ALTAIR II CONVECTION STEAM COOKER PARTS AND SERVICE MANUAL
 ALTAIR II CONVECTION STEAM COOKER PARTS AND SERVICE MANUAL EFFECTIVE MAY, 0 Superseding All Previous Parts Lists. The Company reserves the right to make substitution in the event that items specified are
BMW E36 Thermostat Removal And Coolant Flush
 BMW E36 Thermostat Removal And Coolant Flush Disclaimer: The cooling system is critical to the proper operation of your car. Failure to properly install all of the components of the cooling system could
OPERATING INSTRUCTIONS MANUAL (Please retain for future reference) FVO-200 INDIRECT FIRED SPACE HEATERS
 FVO-200 INDIRECT FIRED SPACE HEATERS") OPERATING INSTRUCTIONS MANUAL (Please retain for future reference) For FVO-200 INDIRECT FIRED SPACE HEATERS CERTIFIED FOR USE IN CANADA AND U.S.A. As per CSA B140.8 Portable Oil Fired Heaters / CSA B140.02003
OPERATING INSTRUCTIONS MANUAL (Please retain for future reference) For FVO-200 INDIRECT FIRED SPACE HEATERS CERTIFIED FOR USE IN CANADA AND U.S.A. As per CSA B140.8 Portable Oil Fired Heaters / CSA B140.02003
MEIKO Undercounter Dish and Glass Washing Machine. Spare Parts List 208V/230V 1/3-PHASE 60 HZ
 MEIKO Undercounter Dish and Glass Washing Machine Spare Parts List FV40.G 08V/0V /-PHASE 60 HZ Rev.. Updated: 0-8-04 CONTENTS. WASH PUMP PAGE. WASH SYSTEM PAGE. BOOSTER PUMP PAGE 7. SOLENOID / FILL VALVE
TT /97 WARNING WARNING WARNING INSTALLATION INSTRUCTIONS
 TT-116 2/97 INSTALLATION INSTRUCTIONS Original Issue Date: 2/97 Model: 900/1000 kw Market: Industrial Subject: Block Heater Kits PA-28648, PA-28648-SD The block heater kit heats engine coolant, making
Installation and servicing instructions
 Installation and servicing instructions Installation MagnaClean Professional is suitable for all central heating systems and can be fitted anywhere on the main circuit. However, in order to achieve the
Parenzo Range. Basin Mixer, Bath Filler & Bath Shower Mixer. Assembly instructions
 Parenzo Range Basin Mixer, Bath Filler & Bath Shower Mixer Assembly instructions We have designed these products with your enjoyment in mind. To ensure that they work to their full potential, they need
NON-SUBMERSIBLE WATER PUMP
 NON-SUBMERSIBLE WATER PUMP MODEL NO: CEB103 PART NO: 7230327 OPERATION & MAINTENANCE INSTRUCTIONS LS0114 INTRODUCTION Thank you for purchasing this CLARKE Water Pump, which is a general purpose pump, suitable
Eliminator TotalGuard Installation Manual
 Eliminator TotalGuard Installation Manual Central Heating Filter Version 2 January 2016 IMPORTANT Please retain these instructions for reference during servicing Page 1 Eliminator TotalGuard Instructions
Table of Contents. FETCO, and Driven To Pioneer Innovation are trademarks or trade names of Food Equipment Technologies Company.
 www.fetco.com Hot Water Dispensers User s Guide Maritime Versions Rated IP44 Table of Contents Contact Information... 2 Specifications... 2 Dimensions... 3 Installation... 4 Operating Instructions...6
INSTALLATION INSTRUCTIONS GEO PRIME TANK. (Patent Pending) GPC
 GPC") INSTALLATION INSTRUCTIONS GEO PRIME TANK (Patent Pending) GPC Table of Contents General Description 2 Installation 3 Flushing and Purging 5 Initial Start up 7 Adding or Checking Fluid 8 Replacing a Pump
INSTALLATION INSTRUCTIONS GEO PRIME TANK (Patent Pending) GPC Table of Contents General Description 2 Installation 3 Flushing and Purging 5 Initial Start up 7 Adding or Checking Fluid 8 Replacing a Pump
SAFETY OPERATION & MAINTENANCE MANUAL X-405 CARPET EXTRACTOR This unit is intended for commercial use.
 SAFETY OPERATION & MAINTENANCE MANUAL X-405 CARPET EXTRACTOR This unit is intended for commercial use. READ AND FOLLOW ALL INSTRUCTIONS, WARNINGS AND CAUTIONS BEFORE USING THIS EXTRACTOR Address: 777 South
PARTS MANUAL. American Dish Service ADS LOW-WATER DISHWASHER MODELS: L3DW / L3DWC EFFECTIVE: MAY, 2008
 EFFECTIVE: MAY, 2008 ADS LOW-WATER DISHWASHER MODELS: L3DW / L3DWC PARTS MANUAL 900 Blake Street Edwardsville, Kansas 66111 (913)422-3700 05/08 The part numbers contained in this publication are replacement
L A signature series TA T N E RE O, A L L A T S IN
 signature series COMMERCIAL STEAM GENERATORS INSTALLATION, OPERATION AND MAINTENANCE MANUAL INSTALLATION MANUAL COMMERCIAL STEAM GENERATOR SIGNATURE SERIES (SS) INTRODUCTION Steam Sauna manufactures steam
OPERATING INSTRUCTIONS MANUAL (Please retain for future reference) FVO-400 INDIRECT FIRED SPACE HEATERS
 FVO-400 INDIRECT FIRED SPACE HEATERS") OPERATING INSTRUCTIONS MANUAL (Please retain for future reference) For FVO-400 INDIRECT FIRED SPACE HEATERS CERTIFIED FOR USE IN CANADA AND U.S.A. As per CSA B140.8 Portable Oil Fired Heaters / CSA B140.02003
OPERATING INSTRUCTIONS MANUAL (Please retain for future reference) For FVO-400 INDIRECT FIRED SPACE HEATERS CERTIFIED FOR USE IN CANADA AND U.S.A. As per CSA B140.8 Portable Oil Fired Heaters / CSA B140.02003
Lime Buster III. Model LB-300P IMS # (CIC1-LB300P) INSTRUCTION MANUAL
 INSTRUCTION MANUAL") Lime Buster III Model LB-300P IMS # 110226 (CIC1-LB300P) INSTRUCTION MANUAL October, 2007 IMS Company 10373 Stafford Road Chagrin Falls, OH 44023-5296 Telephone: (440) 543-1615 Fax: (440) 543-1069 Email:
Lime Buster III Model LB-300P IMS # 110226 (CIC1-LB300P) INSTRUCTION MANUAL October, 2007 IMS Company 10373 Stafford Road Chagrin Falls, OH 44023-5296 Telephone: (440) 543-1615 Fax: (440) 543-1069 Email:
General System Layout Sketch
 General System Layout Sketch EZ-37 Solar Panels PV panel Glycol Fill Valve Expansion Tank ` 1 Introduction This document describes how to install a Heliatos GH type solar water heating system. These systems
OPERATION & MAINTENANCE INSTRUCTIONS
 SUBMERSIBLE PUMPS MODEL NO: PSV3A, PSV4A, PSSV2A & PVP11A PART NO: 7236042, 7236044, 7236050 & 7236060 OPERATION & MAINTENANCE INSTRUCTIONS ORIGINAL INSTRUCTIONS GC07/17 iss 4 INTRODUCTION Thank you for
OPERATING AND MAINTENANCE MANUAL FOR PLATE HEAT EXCHANGER INDIRECT FIRED WATER HEATER. Electric Heater Company Base Model "BWXP"
 OPERATING AND MAINTENANCE MANUAL FOR PLATE HEAT EXCHANGER INDIRECT FIRED WATER HEATER Electric Heater Company Base Model "BWXP" HUBBELL ELECTRIC HEATER COMPANY P.O. BOX 288 STRATFORD, CT 06615 PHONE: (203)
INSTALLATION INSTRUCTIONS John Deere One Series; 1023E, 1025R and 1026R Models A HEATER KIT. Figure 1 (General Layout and Parts I.D.
 A-11978 HEATER KIT Figure 1 (General Layout and Parts I.D.) Read these instructions and identify all components. Please retain these instructions for future reference and parts ordering information. Refer
SAFETY PRECAUTIONS. 2) Before operating machine: - Make sure all safety devices are in place and operate properly.
 Before operating machine: - Make sure all safety devices are in place and operate properly.") TABLE OF CONTENTS Machine Components Safety Precautions Machine Set Up Machine Operation Machine Maintenance & Storage Troubleshooting Technical Specifications Parts Lists Wiring Diagram 1 2 3 3-4 5 6
TABLE OF CONTENTS Machine Components Safety Precautions Machine Set Up Machine Operation Machine Maintenance & Storage Troubleshooting Technical Specifications Parts Lists Wiring Diagram 1 2 3 3-4 5 6
CalMag Heating Pack Installation Instructions
 Calming troubled waters CalMag Heating Pack Installation Instructions Heating Filter Corrosion Inhibitor Scale Inhibitor (if applicable) Cleanser Acidic Neutraliser CalMag HF2 Filter Installation Instructions
An ibuy Stores Company
 REVISED STARTING SERIAL NO. 060604 PARTS MANUAL Model SK-4 4 DOWNCUT CONCRETE/ASPHALT WALK BEHIND SAWS SKU NO. MODEL POWER OPTION 45400D SK4-9H HONDA ENGINE 9 HP GX0 45600D SK4-H HONDA ENGINE HP GX40 4800D
Chapter 3 Cooling, heating and ventilation systems
 3 1 Chapter 3 Cooling, heating and ventilation systems Contents Antifreeze mixture..............................see Chapter 1 Cooling fan assembly - testing, removal and refitting.............8 Cooling
Model: FT110 Dishwasher
 PARTS MANUAL HOBART FOOD EQUIPMENT CO., LTD Model: FT110 Dishwasher HOBART FOOD EQUIPMENT CO., LTD 2003-07-10 Table of Contents Page Description 2 Panels, Upper chamber and Tank 4 Control Box 6 Control
Manual / Handbuch Spare parts list / Ersatzteilliste
 Manual / Handbuch Spare parts list / Ersatzteilliste Equipment Imp.-Exp. GmbH Zitterpappelweg 9 D - 22391 Hamburg Tel.: + 49 40 60009468-0 Fax: + 49 40 536 75 01 E - M a i l : i n f o @ w e s c o - n a
CEMENT MIXER MODEL NO: CCM134L OPERATION & MAINTENANCE INSTRUCTIONS PART NO: GC0514
 CEMENT MIXER MODEL NO: CCM134L PART NO: 3400862 OPERATION & MAINTENANCE INSTRUCTIONS GC0514 INTRODUCTION Thank you for purchasing this CLARKE Cement Mixer. Before attempting to use this product, please
INSTALLATION & TECHNICAL MANUAL
 The COMET Range of Boilers the ultimate solution for central heating INSTALLATION & TECHNICAL MANUAL If you require any further assistance: Telephone: 01698 820533 Fax: 01698 825697 E-mail: info@electric-heatingcompany.co.uk
Thermostatic bar mixer valve with adjustable head Installation guide
 Bar valve Thermostatic bar mixer valve with adjustable head Installation guide Index Introduction p.3 - Safety information p.3 - Product specification p.3 Connection to supplies p.3 - Flushing p.4 - Filters
Hoffman Specialty Watchman Series WC & WCS Condensate Units Replacement Parts PART LISTS DN0436C
 Hoffman Specialty Watchman Series WC & WCS Condensate Units Replacement Parts PART LISTS DN06C PARTS LIST DN06 Index How To Use This Parts List.............................. Identifying Your Watchman Unit..........................-
HOTSPOT. Two Gallon Pump Up Spotter OPERATING & MAINTENANCE
 HOTSPOT Two Gallon Pump Up Spotter INTRODUCTION OPERATING & MAINTENANCE INSTRUCTIONS This operator s book has important information for the use and safe operation of this machine. Read this book carefully
Roto-Jet I & II Tube Cleaning Systems
 Roto-Jet I & II Tube Cleaning Systems Tube Size Tube Section Deposit Thickness of Deposit Deposit Flush 0.312 to 2.000 Straight Soft, guy, Light (7.9 to 50.8) ID Curved or organic Medium Dry Elliott Tool
Description Model Weil-McLain part number. Vent Termination Kit for 3" Stainless Steel All
 Replacement parts Figure 96 Miscellaneous parts Description Model Weil-McLain part number Vent Termination Kit for 3" PVC All 383-500-397 Vent Termination Kit for 3" Stainless Steel All 382-200-430 Vent
As part of the V.I.P. family, you are entitled to the best protection by one of the most comprehensive warranties in the industry.
 CONGRATULATIONS on your purchase of a Viper product, and welcome to the V.I.P. family. We appreciate your business and will do everything in our power to keep you happy with your purchase for many years
MOUNTING INSTRUCTIONS
 A-12093 JDX 2014 HEATER KIT With Gas Engine Connection Fittings 2014 and Newer ROPS Cabs A-12098 (Kit A-12092, Diesel Engine Connection Fittings are sold separately for diesel models) 12VDC, 2-Speed, 15,000
INSTALLATION & TECHNICAL MANUAL
 The FUSION Range of Boilers INSTALLATION & TECHNICAL MANUAL If you require any further assistance: Telephone: 01698 820533 Fax: 01698 825697 E-mail: info@electric-heatingcompany.co.uk Or visit our website
PARTS MANUAL. American Dish Service ADS CONVEYOR DISHWASHER MODELS: ADC-44 L-R/R-L EFFECTIVE: SEPTEMBER 1, 2001
 EFFECTIVE: SEPTEMBER 1, 2001 ADS CONVEYOR DISHWASHER MODELS: ADC-44 L-R/R-L PARTS MANUAL 900 Blake Street Edwardsville, Kansas 66111 (913)422-3700 211-0044L-R / 212-0044R-L ADC-44 Conveyor Dishwasher 2
PARTS MANUAL. American Dish Service. ADS HIGH TEMP SINGLE RACK DISHMACHINE MODELS: HT-25 5 WIRE 110 Volt Control System
 EFFECTIVE: MAY 1, 2018 ADS HIGH TEMP SINGLE RACK DISHMACHINE MODELS: 5 WIRE 110 Volt Control System PARTS MANUAL 900 Blake Street Edwardsville, Kansas 66111 (913)-422-3700 C 05/2018 The American Dish Service
Twin & Triple Exposed Thermostatic Shower Valve Installation & Operating Guide
 Twin & Triple Exposed Thermostatic Shower Valve Installation & Operating Guide Please leave this installation & user guide with the end user CONTENTS 1. Important information 1 2. Cleaning & Aftercare
Clean Water Made Easy. CWS Time Clock Softener Installation & Start Up Guide. Questions?
 Clean Water Made Easy www.cleanwaterstore.com CWS Time Clock Softener Installation & Start Up Guide Thank you for purchasing a Clean Water System! With proper installation and a little routine maintenance
PRO 2000i LOW LEVEL DEPOSITOR
 DEPOSITORS AND AUTOMATED CAKE PRODUCTION SYSTEMS PRO 2000i LOW LEVEL DEPOSITOR OPERATION AND SPARE PARTS MANUAL Serial No. PR2L- (Please quote this number when ordering spares, and making service calls)
TERMINATOR 120V CAUTION: DO NOT OPERATE MACHINE UNTIL YOU HAVE READ ALL SECTIONS OF THIS INSTRUCTION MANUAL
 TERMINATOR 120V INFORMATION & OPERATING INSTRUCTIONS CAUTION: DO NOT OPERATE MACHINE UNTIL YOU HAVE READ ALL SECTIONS OF THIS INSTRUCTION MANUAL 56041962 IMPROPER USE OF THE MACHINE WILL VOID THE WARRANTY
Replacement parts. WM97+ gas-fired water boiler Boiler Manual. OBTAIN PARTS ONLY THROUGH WEIL-McLAIN THE BOILER CONTAINS CERAMIC FIBER MATERIALS
 Replacement parts Figure 92 Propane conversion kits and instructions Boiler model DO NOT SERVICE THE BOILER WITHOUT A WM97+ MAINTENANCE KIT AVAILABLE The WM97+ maintenance kit includes components that
Kamco. Issue: March 2008 Section C FAQ about Power Flushing Page C.1 SECTION C FREQUENTLY ASKED QUESTIONS ABOUT POWER FLUSHING
 SECTION C FREQUENTLY ASKED QUESTIONS ABOUT POWER FLUSHING Q. How long does it take to power flush a system thoroughly? A. It will vary from house to house, but generally about four to five hours for a
CBT LW MAINTENANCE GUIDE
 CBT LW MAINTENANCE GUIDE PICTOGRAMS Each Signifier displayed here is specific to this User Manual. Menu Previous Advance Note Tip Example Powder Feeder Mixing Bowl Weigh Scale CBP Tanks Control Panel PSD
INSTALLATION INSTRUCTION
 INSTALLATION INSTRUCTION Thermostatic Mixer Shower System NOTICE The instruction manual includes part lists, installation instructions, usage of thermostatic and suitable inlet system. Make sure the installation
INSTALLATION, OPERATION AND MAINTENANCE MANUAL FOR COMMERCIAL INDIRECT POWERED WATER HEATER
 INSTALLATION, OPERATION AND MAINTENANCE MANUAL FOR COMMERCIAL INDIRECT POWERED WATER HEATER ELECTRIC HEATER COMPANY BASE MODEL T Edition 0 HUBBELL ELECTRIC HEATER COMPANY P.O. BOX 88 STRATFORD, CT 0665
Before using your machine, you must familiarize yourself with all of its components.
 USE AND MAINTENANCE MANUAL FOR THE FOAMTEC 1800 NOTE: As with all electrical equipment, care and attention must be exercised at all times during its use, in addition to ensure that routine and preventative
PARTS MANUAL. American Dish Service ADS HIGH TEMP SINGLE RACK DISHMACHINE MODEL: HT Blake Street Edwardsville, Kansas (913)
") EFFECTIVE: MAY, 2014 ADS HIGH TEMP SINGLE RACK DISHMACHINE MODEL: PARTS MANUAL 900 Blake Street Edwardsville, Kansas 66111 (913)-422-3700 05/08 The American Dish Service part numbers contained in this
EFFECTIVE: MAY, 2014 ADS HIGH TEMP SINGLE RACK DISHMACHINE MODEL: PARTS MANUAL 900 Blake Street Edwardsville, Kansas 66111 (913)-422-3700 05/08 The American Dish Service part numbers contained in this
ECOJET EJ-10E & EJ-7E ELECTRIC CONVECTION STEAMER W/TWIN GENERATORS PARTS AND SERVICE MANUAL
 ECOJET EJ-10E & EJ-7E ELECTRIC CONVECTION STEAMER W/TWIN GENERATORS PARTS AND SERVICE MANUAL EFFECTIVE JULY 31, 2014 Superseding All Previous Parts Lists. The Company reserves the right to make substitution
ADVANTAGE-100H-SC EXTRACTOR
 ADVANTAGE-100H-SC EXTRACTOR 120V INFORMATION & OPERATING INSTRUCTIONS CAUTION: DO NOT OPERATE MACHINE UNTIL YOU HAVE READ ALL SECTIONS OF THIS INSTRUCTION MANUAL IMPROPER USE OF THE MACHINE WILL VOID THE
Cascade Premier and Elite Premier Bathing Systems with Aqua-Aire Installation / Assembly Instructions
 Cascade Premier and Elite Premier Bathing Systems with Aqua-Aire Installation / Assembly Instructions Premier Elite Premier PENNER PATIENT CARE, INC Box 523 / 102 Grant St. Aurora, NE 68818 360745P Revision
BAXI BOSTON ALL MODELS FLOOR STANDING OPEN FLUE (OF) CENTRAL HEATING BOILERS INSTALLATION AND SERVICING INSTRUCTIONS. GAS TYPE G20 (Natural Gas)
 CENTRAL HEATING BOILERS INSTALLATION AND SERVICING INSTRUCTIONS. GAS TYPE G20 (Natural Gas)") BAXI BOSTON ALL MODELS FLOOR STANDING OPEN FLUE (OF) CENTRAL HEATING BOILERS INSTALLATION AND SERVICING INSTRUCTIONS GAS TYPE G20 (Natural Gas) BAXI BOSTON 80 OF G.C. No 41 077 65 BAXI BOSTON 70 OF G.C.
BAXI BOSTON ALL MODELS FLOOR STANDING OPEN FLUE (OF) CENTRAL HEATING BOILERS INSTALLATION AND SERVICING INSTRUCTIONS GAS TYPE G20 (Natural Gas) BAXI BOSTON 80 OF G.C. No 41 077 65 BAXI BOSTON 70 OF G.C.
M07. Wunda Premium Manifold. Before you start: Check the contents THE BRAND YOU CAN TRUST
 Before you start: Check the manifold box contents against the list below. Check the contents 1. 2 x Manifold end blanks 2. 2 x Manual air vent & drain cocks 3. 2x Adjustable mounting brackets 4. Manifold
MIRAI EXTRACTOR 100V DO NOT OPERATE MACHINE UNTIL YOU HAVE READ ALL SECTIONS OF THESE INSTRUCTIONS IMPROPER USE OF THE MACHINE WILL VOID THE WARRANTY
 MIRAI EXTRACTOR 100V LOCATOR 1 2 3 4 MODE VAC 1 VAC 2 PUMP BYPASS INFORMATION & OPERATING INSTRUCTIONS DO NOT OPERATE MACHINE UNTIL YOU HAVE READ ALL SECTIONS OF THESE INSTRUCTIONS IMPROPER USE OF THE
OPERATOR'S MANUAL. IMPORTANT: READ OPERATOR'S MANUAL CAREFULLY Please fill out & return your warranty card! DP80405
 CARBON SPOT 30 EXTRACTOR OPERATOR'S MANUAL IMPORTANT: READ OPERATOR'S MANUAL CAREFULLY Please fill out & return your warranty card! DP80405 Diamond Products www.diamondproductsus.com Printed in the U.S.A.
CPC-180-ABNAB. 180 litres, 535mm x 1550mm high
 6 8 9 10 1 3 7 2 4 11 13 17 5 28 21 20 19 18 30 Wiring Pandora Heat Bank. 100kW Plate Heat Exchanger with 22mm Thermostatic Mixing Valve. Indirectly Heated. Cylinder Thermostat. Manually Filled store -
CATALOG OF REPLACEMENT PARTS
 CATALOG OF REPLACEMENT PARTS CE SERIES ELECTRIC COMBI OVENS ML-138010 ML-138011 ML-138012 ML-138013 ML-138016 ML-138017 ML-138014 ML-138015 ML-138018 ML-138019 CE6HD (Left) CE6HD (Right) CE10HD (Left)
MODEL CMA-180UC PARTS MANUAL Rev 1.18
 MODEL CMA-180UC PARTS MANUAL Rev 1.18 CMA DISHMACHINES 12700 KNOTT AVENUE GARDEN GROVE, CALIFORNIA 92841 800-854-6417 FAX 714-895-2141 wwwcmadishmachines.com TABLE OF CONTENTS MODEL CMA-180UC 1. PARTS
Welcome! Today s topic: Small Home Repairs. November 14, 2015
 Welcome! Today s topic: Small Home Repairs November 14, 2015 Small Home Repairs Course Presented by Monique Johnson Environmental Green Solutions, LLC Objective Educate homeowners on basic technical skills
AGITATOR V DO NOT OPERATE THE MACHINE UNTIL YOU HAVE READ ALL SECTIONS OF THESE INSTRUCTIONS IMPROPER USE OF THE MACHINE WILL VOID THE WARRANTY
 AGITATOR 20 120V INFORMATION & OPERATING INSTRUCTIONS DO NOT OPERATE THE MACHINE UNTIL YOU HAVE READ ALL SECTIONS OF THESE INSTRUCTIONS IMPROPER USE OF THE MACHINE WILL VOID THE WARRANTY 1. Always use
DOUBLE O-RING GEO-PRIME TANK Non-Pressurized Flow Center System INSTALLATION INSTRUCTIONS. Model: DORGPT-1 NOTE:
 INSTALLATION INSTRUCTIONS DOUBLE O-RING GEO-PRIME TANK Non-Pressurized Flow Center System Model: DORGPT-1 NOTE: This guide provides the installer with instructions specific to the Bard Double O-Ring Geo-Prime
SAFETY OPERATION & MAINTENANCE MANUAL X-612 CARPET EXTRACTOR
 SAFETY OPERATION & MAINTENANCE MANUAL X-612 CARPET EXTRACTOR W/PARTS LIST This unit is intended for commercial use. READ AND FOLLOW ALL INSTRUCTIONS, WARNINGS AND CAUTIONS BEFORE USING THIS EXTRACTOR Address:
INSTALLATION INSTRUCTIONS OWNERS GUIDE & WARRANTY STATEMENT
 315050B APR 2018 INSTALLATION INSTRUCTIONS OWNERS GUIDE & WARRANTY STATEMENT RHEEM ELECTRIC DAIRY HOT WATER HEATER Congratulations for choosing a Rheem Water Heater It is important that you take a few
CARVER CASCADE 2 & CASCADE 2 GE CARAVAN WATER HEATER INSTALLATION INSTRUCTIONS LEAVE THESE INSTRUCTIONS WITH THE USER
 CARVER - CASCADE 2 & CASCADE 2 GE CARAVAN WATER HEATER INSTALLATION INSTRUCTIONS LEAVE THESE INSTRUCTIONS WITH THE USER 1:0 SPECIFICATIONS Water capacity Water connections Water supply 9 litres (2 gallons)
1-866-PENNERS
 Cascade Premier and Elite Premier Bathing Systems with Aqua-Aire Installation / Assembly Instructions Premier Elite Premier PENNER PATIENT CARE, INC Box 523 / 102 Grant St. Aurora, NE 68818 360745P Revision
Alpha CombiMax 350 and 600
 Installation and Servicing Instructions Alpha CombiMax 350 and 600 Unvented Hot Water Store for use with the Alpha 240/280 Range of Gas Fired Combination Boilers For Technical help or for Service call...
Unvented Calorifier Range. Operating and Maintenance Manual. For Models & 500
 Unvented Calorifier Range. Operating and Maintenance Manual. For Models 125 300 & 500 Telephone 08456 448802 Fax 08456 448803 Emial info@mhgheating.co.uk Web www.mhgheating.co.uk TABLE OF CONTENTS. Section
SUBMERSIBLE WATER PUMP. Model Nos. CSE1 - CSE1A - CSE2 - CSE2A CSD3- -CSD3A CSV1A - CSV2 - CSV2A - CSW1A OPERATING & MAINTENANCE INSTRUCTIONS
 1117 SUBMERSIBLE WATER PUMP Model Nos. CSE1 - CSE1A - CSE2 - CSE2A CSD3- -CSD3A CSV1A - CSV2 - CSV2A - CSW1A OPERATING & MAINTENANCE INSTRUCTIONS GUARANTEE This product is guaranteed against faults in
Hodge Clemco Ltd. MJC Mini Cartridge Filters Owners Manual. TSOM 556 Date of issue 13/07/04. Hodge Clemco Ltd
 1 MJC Mini Cartridge Filters Owners Manual TSOM 556 Date of Issue: 13.07.04 Orgreave Drive, Sheffield South Yorkshire. S13 9NR Tel:0114 254 0600 Fax: 0114 2540250 Email:sales@hodgeclemco.co.uk www.hodgeclemco.co.uk
HD 5/11 C Plus. Automatic pressure cut-off. Pump technology
 HD 5/11 C Plus Compact cold-water high pressure cleaner. With its compact dimensions, robust construction and greatest possible manoeuvrability, this unit is a credit to the compact class. 1 Automatic
900 Quadrant Steam Shower Cabin with 6 Body Jets
 Product Specification Working Pressure 1.5 to 4 bar Pressure MUST be balanced Dimensions 2250 H x 900 D x 900 W Door Opening 480mm Steam Generator 2.8Kw Fuse size: 13 amp fuse spur 900 Quadrant Steam Shower
Kinetico 2060f OD Sulfur Guard Installation Instructions
 SAFETY GUIDELINES Read all steps, guides, and rules carefully before installing and using the Kinetico 2060f OD Sulfur Guard. Check your local building and sanitation codes for installation compliance.
CATALOG OF REPLACEMENT PARTS HSROG SERIES SINGLE RACK OVEN. A product of HOBART CORPORATION 701 S. RIDGE AVENUE TROY, OHIO
 CATALOG OF REPLACEMENT PARTS HSROG SERIES SINGLE RACK OVEN HSROG ML-111148 A product of HOBART CORPORATION 701 S. RIDGE AVENUE TROY, OHIO 45374-0001 FORM 43003 (June 2001) HOT SECTION 26 OVEN TOP SECTION
CLEAN WATER PUMP. MODEL No: Hippo4A OPERATION & MAINTENANCE INSTRUCTIONS. Part No:
 CLEAN WATER PUMP MODEL No: Hippo4A Part No: 7230535 OPERATION & MAINTENANCE INSTRUCTIONS 0807 INTRODUCTION Thank you for purchasing this CLARKE clean water pump. This highly efficient pump is designed
Nilfisk Inc Winnetka Avenue North Minneapolis, MN REV.03( ) VF80189
 VF80189") Nilfisk Inc. 9435 Winnetka Avenue North Minneapolis, MN 55445 www.usviper.com REV.03(05-) VF8089 SAFETY PRECAUTIONS This machine is intended for commercial use. It is constructed for use in an indoor
Nilfisk Inc. 9435 Winnetka Avenue North Minneapolis, MN 55445 www.usviper.com REV.03(05-) VF8089 SAFETY PRECAUTIONS This machine is intended for commercial use. It is constructed for use in an indoor
Operators manual Slim/B Water heater
 Operators manual Slim/B Water heater Isotemp Slim water heater has been designed and produced to ensure that your water heater will give long and trouble free operation for many years. It is important,
PRESSURE-SIDE CHEMICAL INDUCTOR
 INSTALLATION INSTRUCTIONS PRESSURE-SIDE CHEMICAL INDUCTOR FOR TA00 & TA550 SPRAYER TANKS Alliance Product Group P.O. Box 357 Kalida, OH 45853 PH: 49-53-3 FAX: 49-53-468 www.allianceag.com 40909 GENERAL
Washer-Extractor Cabinet Freestanding
 Washer-Extractor Cabinet Freestanding Refer to Page 3 for Model Numbers Parts CFD22C_D0055 www.comlaundry.com Part No. D0055R3 April 2011 Table of Contents Title Page Parts Ordering Information... 2 Nameplate
Series 1140 and 1141 Temperature Regulators
 Hoffman Specialty Installation & Maintenance Instructions HS-504(E) Series 1140 and 1141 Temperature Regulators! CAUTION FOLLOW ALL INSTALLATION AND OPERATING INSTRUCTIONS. TURN OFF WATER OR STEAM BEFORE
S M Illust.No. Part Name DENSO P/N Manu. P/N QTY I/C Start End Remarks
 096000-7780 TOYOTA Parts List Page 1 0 PUMP ASSY, INJECTI 096000-7780 22100-17141 01 1 HOUSING SUB-ASSY, 096110-0292 22101-54260 01 2 HEAD SUB-ASSY, DIS 096400-1320 22140-17140 01 3 COMPENSATOR SUB-AS
Model Nos CBM100SS, 130SS, 250SS, 240 & 240E CPE100P, 100TF, 120 & 130SS HANDY PUMP 2 OPERATING & MAINTENANCE INSTRUCTIONS 0406
 Model Nos CBM100SS, 130SS, 250SS, 240 & 240E CPE100P, 100TF, 120 & 130SS HANDY PUMP 2 OPERATING & MAINTENANCE INSTRUCTIONS 0406 CONTENTS Safety Precautions... 3 Electrical Connections... 4 Water Connections...
INSTALLATION MANUAL. Ecoline Geo RI HP PLEASE LEAVE THIS MANUAL WITH THE OSO UNIT AFTER INSTALLATION
 PLEASE LEAVE THIS MANUAL WITH THE OSO UNIT AFTER INSTALLATION Ecoline Geo RI HP INSTALLATION MANUAL The Ecoline GEO is an indirect unvented cylinder designed and approved for use with a heat pump. The
Drain Cleaning Machine K-39
 Drain Cleaning Machine K- 0 A- AUTOFEED Cable Chuck Pan Head Screw #0 - () Chuck Adapter Nose Piece Spiral Ring () Hand Grip Sleeve Clamp Springs () See Service Notes 0 Spacer Clips () Gasket Drum Front