CS150 OWNER S MANUAL DISCRIMINATOR METAL DETECTOR
|
|
|
- Daniel Price
- 6 years ago
- Views:
Transcription

1 OWNER S MANUAL DISCRIMINATOR METAL DETECTOR
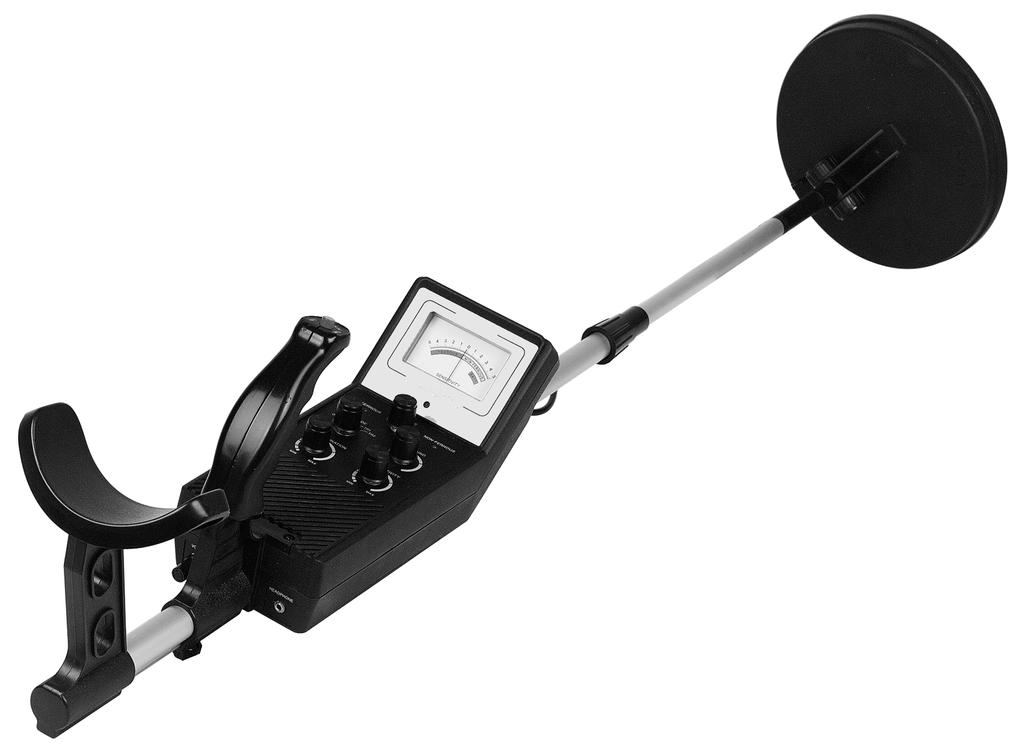
2 FEATURES ==================================================== With your Discriminator Metal Detector, you can hunt for coins, relics, jewellery, gold and silver just about anywhere. The Discriminator Metal Detector is versatile and easy to use. The detector s features include : Headphone Jack - lets you connect headphones (not supplied) to the detector. Vu-meter and Pointer - shows the probable type of metal being detected. A separate vu-meter display lets you know when it is time to replace the batteries. Three-Tone Audio Discriminator - sounds distinctive tones for different types of metals, to make target identification easier. Waterproof Search Coil - lets you use the detector s search coil even if you must put it under water. Note : The search coil is waterproof, but the control housing is not. Adjustable Stem - lets you adjust the detector s length for comfortable use. Note : Your metal detector requires three 9-volt alkaline batteries (not supplied). TREASURE HUNTER S CODE OF ETHICS All treasure hunters might be judged by the example you set. Here are a few basic rules you should follow while using your detector. Always get permission before searching any site. Respect the rights and property of others. Observe all national, state, and local laws while treasure hunting. Never destroy historical or archaeological treasures. If you are not sure about an object you have found, contact a museum or historical society in your area. Leave the land and vegetation as it was. Fill in any holes you dig. Only use your detector in safe areas. Dispose of any junk you find, in approved areas. Do not leave it for the next treasure hunter to find. 1
3 PREPARATION ==================================================== ASSEMBLING THE DETECTOR Assembling your detector is easy and requires no special tools. Just follow these steps. 1. Turn the stem s lock nut clockwise until it loosens. Lock nut 2. Lengthen or shorten the stem so when you stand upright with the detector in your hand, the search coil is level with the ground and about 1/2 to 2 inches (1 to 5cm) above it with your arm relaxed at your side. 3. Turn the stem s lock nut anticlockwise to lock it in place. 2
4 4. Unscrew the knob on the search coil and remove the knobs and connector. Insert the stem and align the holes on the search coil bracket and the stem. Push the connector through the holes and tighten the knob. 5. Wind the search coil cable around the stem. Leave enough slack in the cable to let you adjust the search coil when you are hunting on uneven ground. Search coil Search coil Cable 6. Insert the search coil s plug into the search coil jack on the detector s control housing. Be sure the pins on the plug align with the holes in the jack. Search coil Jack Search coil Plug Caution : The search coil s plug fits into the connector in only one way. Do not force the plug or you could damage it. To disconnect the search coil s cable from the detector, grasp the plug and pull it out of the connector. Never pull on the cable. 7. Loosen the knob at the search coil s end, then adjust the search coil to the desired angle. (The search coil should be parallel with the ground). Tighten the knob just enough to keep the search coil from rotating or wobbling. 3
5 Caution : Do not overtighten the search coil or use tools such as pliers to tighten it. 8. Loosen the knob at the base of the handle, insert the arm support, and tighten the knob. INSTALLING THE BATTERIES You need three 9-volt alkaline batteries to power your detector. Cautions : Use only fresh batteries of the required size and recommended type. Do not mix old and new batteries, different types of batteries (standard, alkaline or rechargeable batteries of different capacities). 1. If the detector is on, turn MODE to OFF. 4
6 2. Press the right battery compartment cover s tab and slide the cover off in the direction of the arrow. 3. Place a 9-volt battery into the battery compartment on top of the ribbon, matching the polarity symbols (+ and -) marked inside. 4. Replace the right battery compartment cover. 5. Press the left battery compartment cover s tab and slide the cover off in the direction of the arrow. 6. Place two 9-volt batteries into the battery compartment on top of the ribbons, matching the polarity symbols (+ and -) marked. 7. Replace the left battery compartment cover. 5
7 Cautions : Always remove old or weak batteries ; batteries can leak chemicals that can destroy electronic parts. If you do not plan on using the detector for a week or more, remove the batteries. Dispose of old batteries promptly and properly. You can extend battery life by using headphones, which require less power than the built-in speaker. See "Using Headphones". Testing the Batteries If the detector does not turn on, has weak volume, will not tune properly, has erratic operation or drifts, test the battery power. Set MODE to VLF (very low frequency). To test the batteries in the left battery compartment, set BATT TEST to B1. To test the batteries in the right battery compartment, set BATT TEST to B2. If the pointer on the vu-meter is within the BATT scale s green area, the batteries have enough power. If the pointer is not within the green area, replace the batteries. 6 Battery Test Area
8 ADJUSTING THE METER With MODE set to OFF, use a screwdriver to adjust the alignment control until the pointer lines up with 0 on the scale. Scale Pointer Center Point Alignment Control USING HEADPHONES You can connect a pair of stereo headphones (not supplied) to the detector so that you can listen to it privately. Using headphones also saves battery power and makes it easier to identify subtle changes in the sounds you hear for better detection results. To connect headphones to the detector, insert the headphones 1/8-inch plug into the HEADPHONE jack on the side of the control housing. The detector s internal speaker disconnects when you connect headphones. 7
9 Listening Safely To protect your hearing, follow these guidelines when you use headphones. Set the volume to the lowest setting before you begin listening. After you begin listening, adjust the volume to a comfortable level. Do not listen at extremely high volume levels. Extended high-volume listening can lead to permanent loss of hearing. Once you set the volume, do not increase it. Over time, your ears adapt to the volume level, so a volume level that does not cause discomfort might still damage your hearing. Traffic Safety Do not wear headphones while operating your detector near high-traffic areas. Even though some headphones are designed to let you hear some outside sounds when listening at normal volume levels, they still can present a traffic hazard. 8
10 OPERATION ==================================================== Your Velleman Discriminator Metal Detector distinguishes between ferrous and non-ferrous metals. Ferrous metals contain iron, while non-ferrous metals such as gold, silver, copper, platinum, aluminium, lead and zinc do not. When the detector senses a metallic object, the meter reading changes, the NON-FERROUS or FERROUS indicator turns on or off, and the detector sounds one of three tones. The actual reaction depends on which metal is detected. The higher the tone pitch, the stronger the detection. PREPARING THE DETECTOR Turning On the Detector 1. Set BATT TEST to OPERATE. 2. Hold the detector in a comfortable position, then rotate MODE to the desired position. Set it to VLF to test battery power and adjust TUNE and GROUND. (See "Tuning the Detector" and "Adjusting GROUND"). Set it to TR1 to detect extreme differences in metals, such as between in metals, such as between iron and gold. The difference between iron and gold shows on the meter (iron in the ferrous section, gold in the non-ferrous section). Set it to TR2 to detect finer distinctions between metals, for example between aluminium and gold (see "Adjusting DISCRIMINATION"). 9
11 Turning the Detector TUNE fine-tunes the balance between the detector s receiver and transmitter circuitry to provide consistent pointer and tone indications. Follow these steps to set TUNE. 1. Rotate VOLUME to the 10 o clock position. 2. Set MODE to VLF. 3. Set GROUND, DISCRIMINATION and SENSITIVITY to mid-range. 4. Hold the search coil at least 1 foot (30cm) away from the ground and any metal object, hold down the red button on the handle and slowly rotate TUNE until the vu-meter pointer rests at or near 0. As you search, you can fine-tune the detector using other controls (see "Fine- Tuning the Detector"). Note : Press the red button on the handle at any time during operation to automatically return the pointer to the centre of the vu-meter. 10
12 TESTING AND USING THE DETECTOR To learn how the detector reacts to different metals, you should test it before you use it the first time. You can test the detector indoors or outdoors. Indoor Testing 1. Remove any watches, rings, or other metal jewellery you are wearing, then place the detector on a wooden or plastic table. 2. Adjust the search coil s angle so the flat part faces the ceiling. Note : Never test the detector on a floor inside a building. Most buildings have metal of some kind in the floor, which might interfere with the objects you are testing or mask the signal completely. 3. Set MODE to TR1. 4. Move a sample of the material you want the detector to find (such as a gold ring or a coin) about 2 inches above the search coil. Notes : The search coil will not detect without motion. You must move the object since you are not sweeping with the detector at this time. If you are using a coin, the detector detects it more easily if you hold it so a flat side (not the edge) is parallel with the flat side of the search coil. If the detector detects the material, the NON-FERROUS and FERROUS indicators flash and the pointer moves to FERROUS or NON-FERROUS while the detector determines the type of metal it is detecting. If it detects nonferrous metal, it also sounds a tone. 11
13 If the detector does not detect the material, check the battery power and verify that the search coil is properly connected. Also, you might need to fine-tune the detector (see "Fine-Tuning the Detector"). Outdoor Testing and Use 1. Find an area on the ground outside where there is no metal. 2. Place a sample of the material you want the detector to find (such as a gold ring or a coin) on the ground. (If you are using a valuable metal such as gold to test the detector, mark the area where you place the item, to help you find it later. Do not place it in tall grass or weeds). 3. Set MODE to TR1. 4. While holding the search coil level and about 1-2 inches (2 to 5 cm) above the ground, slowly move the search coil over the area where you placed the sample, sweeping the search coil in a side-to-side motion. 12
14 Search Coil Sweeping Hints : Never sweep the search coil as if it were a pendulum. Raising the search coil while sweeping or at the end of a sweep causes false readings. Right Wrong Sweep slowly - hurrying makes you miss targets. If the detector detects the item, it sounds a tone and the pointer moves to the type of metal it found. When you detect metal, switch MODE TR1 to TR2 to determine the quality of the metal. If the detector does not detect the material, make sure you are moving he search coil correctly. Notes : The detector responds with a strong signal when it detects most valuable metal objects. If a signal does not repeat after you sweep the search coil over the target a few times, the target is probably junk metal. False signals can be caused by trashy ground, electrical interference or large irregular pieces of junk metal. False signals are usually broken or nonrepeatable. 5. Try finding other metal in the area. When you find a metal item, wait a few seconds after the tone stops before continuing, to allow the detector time to reset (or, press the red button on the handle to return the pointer to the centre of the vu-meter). 13
15 FINE-TUNING THE DETECTOR When you become familiar with how your detector works, you can fine-tune it to make it less sensitive to interference and more selective in what it finds. Adjusting SENSITIVITY To adjust the search coil s ability to detect objects at different depths in the soil, rotate SENSITIVITY between MIN and MAX. For maximum detection depth, leave SENSITIVITY set as high as possible. If the detector makes a "chattering" noise, decrease SENSITIVITY until the "chatter" stops. Adjusting GROUND Setting GROUND takes a little time, but is critical for accurate operation. GROUND tunes out false signals from mineralised soil. 14
16 Follow the steps to set GROUND. 1. Set MODE to VLF and lower the search coil to 1/2 to 2 inches (1 to 4cm) above the ground. 2. If the pointer swings to the right, turn GROUND to the left. If the pointer swings to the left, turn GROUND to the right. 3. Raise the search coil about 1 foot (30cm) from the ground and press the red button on the handle. The pointer returns to the centre. 4. Repeat Steps 1-3 until the pointer stays close to the centre each time you lower the search coil to the ground. After you set GROUND, the detector is set for the soil type of that particular site. Do not reset it until you use the detector at a different site. Adjusting DISCRIMINATION Discrimination is the detector s ability to differentiate between types of metal. The detector s DISCRIMINATION setting determines whether the detector will distinguish between different types of ferrous and non-ferrous metals. If MODE is set to TR2, start with DISCRIMINATION set to mid-range. While you use the detector, adjust DISCRIMINATION to the best position. As you set DISCRIMINATION higher, the detector becomes more sensitive to the differences between large aluminium and gold pieces, for example, but some small valuable pieces, such as coins and small rings, might be overlooked. As you set DISCRIMINATION to higher levels, the detector first does not detect small pieces of silver paper, then thick foil, and finally metal objects like pull tabs from aluminium cans. Note : Each time you use the detector in a different area, you must readjust DISCRIMINATION. Each search location presents new challenges. 15
17 FALSE SIGNALS Because your detector is extremely sensitive, trash-induced signals and other sources of interference might cause signals that seems confusing. The key to handling these types of signals is to dig for only those targets that emit a strong, repeatable signal. As you sweep the search coil back and forth over the ground, learn to recognise the difference between signals that occur at random and signals that are stable and repeatable. To reduce false signals when searching very trashy ground, only scan a small area at a time using slow, short overlapping sweeps. DETECTION HINTS No detector is 100 percent accurate. Various conditions influence metal detection. The detector s reaction depends on a number of things : The angle at which the object rests in the ground. The depth of the object. The amount of iron in the object. The size of the object. PINPOINTING A TARGET Accurately pinpointing a target makes digging it up easier. Accurate pinpointing takes practice, and we suggest you practice finding and digging up small metal objects on your own property before you search other locations. Sometimes, targets are difficult to accurately locate due to the sweep direction. Try changing your sweep direction to pinpoint a target. Follow these steps to pinpoint a target. 1. When the detector detects a buried target, continue sweeping the search coil over the target in a narrowing side-to-side motion. 2. Make a visual note of the exact spot on the ground where the detector beeps. 16
18 3. Stop the search coil directly over this spot on the ground. Then move the search coil straight forward away from you and straight back toward you a couple of times. Make a visual note of the exact spot on the ground where the detector beeps. 4. Repeat Steps 1-3 at a right-angle to the original searchline, making an "X" pattern. The target will be directly below the "X" at the point of the loudest response. Notes : If trash in an area is so heavy that you get false signals, slow your sweep and use shorter sweeps. Recently buried coins might not respond the same as coins buried for a long period of time because of oxidation. Some nails, nuts, bolts, and other iron objects (such as old bottle caps) oxidise and create a "halo" effect. A halo effect is caused by a mixture of natural elements in the ground and the oxidation created by different metals. Because of the metal mixtures, target signals might not be in a "fixed" position. This effect makes these objects very hard to detect accurately. (See "Fine-Tuning the Detector"). 17
19 TROUBLE SHOOTING ==================================================== If your detector is not working as it should, follow these suggestions to see if you can eliminate the problem. PROBLEM The detector displays or sounds false signals The display does not show the correct metal type when the detector finds a target. Or the detector sounds more than one type of tone when it finds a target. SUGGESTION The sensitivity might be set too high. Adjust SENSITIVITY. You might be sweeping the detector s search coil too fast or at the wrong angle. Sweep the search coil more slowly and hold the detector correctly. See "Testing and Using the Detector" and "Pinpointing a Target". The detector might sound a false signal if it detects heavily oxidised metals. Try pinpointing the target from several different angles (see "Pinpointing a Target"). If the detector does not display and sound the same signal each time, the target is probably heavily oxidised metal. There might be more than one target in the area you are searching. The target might be a type of metal that the detector does not recognise. If the target is heavily oxidised, the detector might not display the correct metal type. This is not a malfunction. The sensitivity might be set too high. Adjust SENSITIVITY. 18

20 CARE AND MAINTENANCE ==================================================== Handle the detector gently and carefully. Dropping it can damage circuit boards and cases and can cause the detector to not work properly. Use and store the detector only in normal temperature environments. Temperature extremes can shorten the life of electronic devices, damage batteries and distort or melt plastic parts. Keep the detector away from dust and dirt, which can cause premature wear of parts. Wipe the detector with a damp cloth occasionally to keep it looking new. Do not use harsh chemicals, cleaning solvents or strong detergents to clean the detector. Modifying or tampering with the detector s internal parts can cause a malfunction and might invalidate its warranty. The search coil supplied with the detector is waterproof and can be submerged in either fresh or salt water. However, do not let water enter the detector s control housing. After using the search coil in salt water, rinse it with fresh water to prevent corrosion of the metal parts. 19
Famous Trails Anaheim, California
 Famous Trails Anaheim, California Phone (714) 701-9671 Fax (714) 701-9672 Discriminator Metal Detector Owner s Manual Models MD7012 & MD3006 10211 PACIFIC MESA BLVD., SUITE 403 SAN DIEGO, CA 92121 858-558-3400/
Treasure Cove Metal Detector.
 Treasure Cove Metal Detector 1013 OWNER S MANUAL www.treasure-cove.com 805-658-2328 63-3013.fm Page 2 Wednesday, July 26, 2000 9:42 AM ˆ Contents Features... 3 Treasure Hunter s Code of Ethics... 3 Preparation...
Features TREASURE HUNTER S CODE OF ETHICS
 63-3013.fm Page 3 Wednesday, July 26, 2000 9:42 AM ˆ Features With your Famous Trails Metal Detector, you can hunt for coins, relics, jewelry, gold, and silver just about anywhere. The Metal Detector is
METAL DETECTOR MODEL NO: MD1000 OPERATION & MAINTENANCE INSTRUCTIONS PART NO: /08
 METAL DETECTOR MODEL NO: MD1000 PART NO: 4501200 OPERATION & MAINTENANCE INSTRUCTIONS 05/08 INTRODUCTION Thank you for purchasing this CLARKE Metal Detector. Before you try to use this product, read this
Master Edition Metal Detector
 Master Edition Metal Detector Three-Tone Audio Discrimination Distinctive tones for different types of metals Analog Meter Shows the probable type of metal being detected Auto Tune Tune your detector quickly
OWNER S MANUAL. Fortune Finder Platinum Edition TC-3020 GET THE LATEST UPDATED MANUAL FOR THIS PRODUCT BY VISITING US FREQUENTLY AT
 OWNER S MANUAL Fortune Finder Platinum Edition TC-3020 GET THE LATEST UPDATED MANUAL FOR THIS PRODUCT BY VISITING US FREQUENTLY AT WWW.TREASURE-COVE.COM Follow us or contact us on Facebook at Facebook.com/TreasureCoveUSA
Famous Trails Anaheim, California
 Famous Trails Anaheim, California Phone (714) 701-9671 Fax (714) 701-9672 Toll Free: (877) 97SCOPE www.famoustrails.com MD9100 Metal Detector OWNER S MANUAL 1 CONTENTS Features... 3 Preparation.. 4 Assembling
DM200 = CS200 METAL DETECTOR
 DM200 = CS200 METAL DETECTOR 1. Features & Applications Thank you for buying the DM200 metal detector. Read this manual carefully before bringing the device into service. With your DM200 metal detector,
D-50 Edition Metal Detector
 1 YEAR LIMITED WARRANTY Metal Detector WINBEST by BARSKA, as manufacturer, warrants this new product to be free of original defects in materials and/or workmanship for the length of time specified by this
The Professional Metal Detector OWNER S MANUAL
 The Professional Metal Detector OWNER S MANUAL 1 CONTENTS Features... 3 Preparation.. 4 Assembling the detector 4 Installing the batteries 5 Using headphones.. 5 Listening safely 6 Functions and indications..
Metal Detector T330BC
 Metal Detector T330BC IMPORTANT Installer and Users please note: These instructions should be read carefully and left with the user of the product for future reference. BEFORE USE You must inspect the
Pro-200 Edition Metal Detector
 1 YEAR LIMITED WARRANTY Metal Detector WINBEST by BARSKA, as manufacturer, warrants this new product to be free of original defects in materials and/or workmanship for the length of time specified by this
Sharp Edition Metal Detector
 Sharp Edition Metal Detector LCD Color Display Screen Probable type of metal, probable depth or the signal strength of metal target, operation models, and low battery indication Three Tone Audio Distinctive
CONTENT 1. INTRODUCTION 1.1 FEATURES OF YOUR DETECTOR 2. PARTS AND NAMES 3. PREPARATION 3.1 ASSEMBLING THE DETECTOR 3.2 INSTALLING BATTERIES
 CONTENT 1. INTRODUCTION 1.1 FEATURES OF YOUR DETECTOR 2. PARTS AND NAMES 3. PREPARATION 3.1 ASSEMBLING THE DETECTOR 3.2 INSTALLING BATTERIES 3.3 LOW BATTERY ALARM 3.4 USING HEADPHONES 4. FUNCTIONS AND
Owner s Manual GC-1029
 Underwater Metal Detector Owner s Manual GC-1029-1 - CONTENTS Features..... 3 Preparation.. 3 Assembly.. 3 Battery installation.... 4 Control Panel 5 Power switch and SENS control 5 DISC control.. 5 LED
OPERATING INSTRUCTIONS: FREEDOM 1 DETECTORS (Coin Commander and CDC)
") OPERATING INSTRUCTIONS: FREEDOM 1 DETECTORS (Coin Commander and CDC) The control panel of the Freedom 1 has three control knobs and a jack for the headphones. CONTROL FUNCTIONS Power/Detection Depth Control:
OPERATING INSTRUCTIONS: FREEDOM 1 DETECTORS (Coin Commander and CDC) The control panel of the Freedom 1 has three control knobs and a jack for the headphones. CONTROL FUNCTIONS Power/Detection Depth Control:
User Manual. Viking 6. Your detector is now ready for use. Getting Started. The VIKING 6. Metal Detectors.
 User Manual Viking 6 Thank you for your choice in purchasing a VIKING 6 Metal Detector. It is important that you read the following instructions carefully so that you obtain the maximum benefit and success
Owner s Manual ON OFF MODE SILVER/ COINS GOLD/ COINS/ PULLTABS SM GOLD/ IRON/ TRASH TARGET TARGET ID DEPTH SURFACE
 Owner s Manual SURFACE / SM TABLE OF CTENTS Assembly.................................3-4 Batteries...................................5 Quick-Start Demo..........................6-7 Basic Operation Powering
Operators Manual The Black Pearl
 Operators Manual The Black Pearl PIRATE DETECTORS LIMITED MANUFACTURER WARRANTY PIRATE DETECTORS warrants that each metal detector, search coil and accessory manufactured by PIRATE DETECTORS is protected
OWNER S MANUAL ACCESSORIES. Bounty Hunter Carry Bag Rugged double-stitched construction - CBAG-W
 ACCESSORIES Bounty Hunter Carry Bag Rugged double-stitched construction - CBAG-W Bounty Hunter Pouch & Digger Combo Pouch with 2 large pockets & 9 heavy duty digging tool. TP-KIT-W Stereo Headphones. Use
SILVER SABRE µmax OPERATOR INSTRUCTION MANUAL
 SILVER SABRE µmax OPERATOR INSTRUCTION MANUAL CONGRATULATIONS! Your new Tesoro Silver Sabre µmax metal detector is part of a new series of detectors designed to provide you with many happy hours of enjoyment
OPERATOR INSTRUCTION MANUAL
 MOST IMPORTANT- WHEN RETURNING UNIT FOR SERVICE 1. All units returned under warranty must be accompanied by copy of original dated invoice. Failure to do this will incure repair charges. 2. Please include
OPERATOR INSTRUCTION MANUAL
 MOST IMPORTANT- WHEN RETURNING UNIT FOR SERVICE 1. All units returned under warranty must be accompanied by copy of original dated invoice. Failure to do this will incure repair charges. 2. Please include
HAND HELD METAL DETECTOR
 HAND HELD METAL DETECTOR Model No.MD10 PART NO: 4500150 OPERATING & MAINTENANCE INSTRUCTIONS GC02/09 INTRODUCTION Thank you for purchasing this CLARKE Hand Held Metal Detector. Before attempting to use
FEATURES ON/OFF Button Pinpointing Tip 360 Side-Scan Area Exclusive Scraping Blade LED Flashlight Speaker Lanyard Attachment Loop Sealed Battery
 FEATURES ON/OFF Button Pinpointing Tip 360 Side-Scan Area Exclusive Scraping Blade LED Flashlight Speaker Lanyard Attachment Loop Sealed Battery Cover 2 Powering On Press and release the button () while
QUEST. metal detectors
 QUEST metal detectors 20 IN THE BOX ASSEMBLE QUICK START For the first time using. You need a philip screw driver to assemble the unit. Follow the steps illustrated and set a comfortable distance of the
A3G Green Rotary Laser SPECIAL EDITION INSTRUCTION MANUAL
 A3G Green Rotary Laser SPECIAL EDITION INSTRUCTION MANUAL SAFETY Please read this instruction manual before operating this product. Please store this instruction manual in the carry case for future reference.
ELECTRONIC THERMOMETER. Model NTS-912 User Manual CONTENTS
 ELECTRONIC THERMOMETER CONTTS Model NTS-912 User Manual Introduction... 2 Features... 2 Description Of Parts... 2 Installing And Replacing The Battery... 3 Display And Functions... 3 General Operation...
Pirate Metal detectors
 Pirate Metal detectors Professional metal detectors WORKING INSTRUCTIONS FOR THE METAL DETECTOR PIRATE DEEP HUNTER Characteristics Base technologies: Induction Balance (IB) Very Low Frequency (VLF) Base
Microwave/PIR Intrusion Detector with POPIT Interface ZX970
 Microwave/PIR Intrusion Detector with POPIT Interface ZX970 Installation Instructions 1.0 Specifications Input Power: 9 to 15 VDC, 6 ma nominal (35 ma with LED on) Zonex Current Draw: 500 ma Standby Power:
AP Air Ion Counter Instructions
 AP Air Ion Counter Instructions Standard 2 million ions/cm 3 version- The 6 m long ground cord should be used to connect the meter to earth ground for most types of measurements - - especially if you are
METAL DETECTORS CS440XD CS770XD CS1MX CS990XD CS1220XD OVER 40 YEARS OF KNOW-HOW
 METAL DETECTORS CS440XD CS770XD CS1MX CS990XD CS1220XD OVER 40 YEARS OF KNOW-HOW User-friendly and Affordable, proper metal detectors. - The CS440XD, CS770XD and CS1MX all feature the same simple, no nonsense
16 Stand Fan with Remote Control Model No: FS3-40R-30
 16 Stand Fan with Remote Control Model No: FS3-40R-30 FEATURES Remote Control 3 Speed Settings 4 Hour Auto-off Timer Oscillation LED Display Panel Adjustable Height Adjustable Tilt Head Whisper Quiet Operation
Whisper. Ultrasonic Leak Detector
 O P E R A T I N G M A N U A L Whisper Ultrasonic Leak Detector Declaration Of Conformity This is to certify that this equipment, designed and manufactured by INFICON Inc., Two Technology Place, East Syracuse,
installation and operation manual for Hunter Ceiling Fans
 For Your Records and Warranty Assistance Model Name: Catalog/Model No.: Serial No.: Date Purchased: Where Purchased: For reference also attach your receipt or a copy of your receipt to the manual. installation
DS9370-BEL. Installation Instructions TriTech Ceiling Mount PIR/Microwave Intrusion Detector
 DS970-BEL EN Installation Instructions TriTech Ceiling Mount PIR/Microwave Intrusion Detector DS970-BEL Installation Instructions.0 Installation Considerations.0 Installation Considerations Not suitable
Instruction Manual. Self-Leveling Combination Cross-Line Laser and Five-Beam Laser Dot Model No , &
 1622i_Manuals 12/14/16 12:52 PM Page 1 Self-Leveling Combination Cross-Line Laser and Five-Beam Laser Dot Model No. 40-6685, 40-6687 & 40-6688 Instruction Manual Congratulations on your choice of this
WIRELESS ALARM SYSTEM WITH TELEPHONE AUTO DIALER
 BAT.LOW AC WIRELESS ALARM SYSTEM WITH TELEPHONE AUTO DIALER THE SYSTEM THAT CALLS YOU! Our WIRELESS ALARM SYSTEM WITH TELEPHONE AUTO DIALER is designed to allow you to create your own security system.
HV2R ROTARY LASER INSTRUCTION MANUAL
 HV2R ROTARY LASER INSTRUCTION MANUAL SAFETY Read the following safety instructions before attempting to operate this product. Keep these instructions in a safe place or store in the carry case for future
Owner s Guide and Installation Manual
 Tribeca Owner s Guide and Installation Manual English Form# M6000-01 20120416 2012 Casablanca Fan Co. Welcome Your new Casablanca ceiling fan is an addition to your home or office that will provide comfort
Model VAL105 Digital Alarm Clock With Bedshaker Jack, Night Light, Variable Volume, Variable Tone.
 Model VAL105 Digital Alarm Clock With Bedshaker Jack, Night Light, Variable Volume, Variable Tone. The Vibralarm Digital alarm Clock allows the user to set Variable Loudness and Variable Tone for the audible
541D19 SERIES. Technical Manual. A Division of Aquion Partners L.P.
 541D19 SERIES Technical Manual A Division of Aquion Partners L.P. Table of Contents Introduction... Page 1 Technical Specifications... Page 2 Flow Diagrams... Page 3 Injector & Flow Control Selection Injector...
CEILING FAN OWNER'S MANUAL
 Distinctive Lighting and Ceiling Fans CEILING FAN OWNER'S MANUAL MODEL: 52CW2L5-GM 52CW2L5-OBB READ AND SAVE THESE INSTRUCTIONS FOR CEILING FAN PARTS AND SERVICE, CALL 1-877-902-5588 FAN RATING AC 120V.
H1R Red Rotary Laser INSTRUCTION MANUAL
 H1R Red Rotary Laser INSTRUCTION MANUAL SAFETY Please read this instruction manual before operating this product. Please store this instruction manual in the carry case for future reference. CAUTION: Class
18 INCHES, OSCILLATING STAND FAN
 To Buy: Contact Sylvane at 800-934-9194 or visit www.sylvane.com For Product Support: Contact Soleus Air at (888) 876-5387 18 INCHES, OSCILLATING STAND FAN OWNER S MANUAL Model # FSM-45 PLEASE READ AND
Thank you for purchasing this Contech product.
 pressure guage Please read these instructions before using. Thank you for purchasing this Contech product. What you will need: 9v Alkaline Cautionary Reminders Malfunctioning sprinklers carry an inherent
40cm Pedestal Fan with Remote Control
 Instruction Manual 40cm Pedestal Fan with Remote Control Model: HF40BRG READ AND SAVE THESE INSTRUCTIONS Please read and follow the instructions in this user manual even if you feel you are familiar with
Model C Electronic Nose Accelerant and Gas Detector Operation and Maintenance
 Model C Electronic Nose Accelerant and Gas Detector Operation and Maintenance www.graceindustries.com MCTM1012 October 2012 1 1. Cover 2. Table of Contents 3. Top View 4. Side View 5. Features & Benefits
Table of Contents. What to Expect with. Mounting Options. Tools Needed
 www.hunterfan.com Table of Contents What to Expect with Your Installation Congratulations on purchasing your new Hunter ceiling fan! It will provide comfort and performance in your home or office for many
LaceyTM. Instruction Manual. Includes our new CoolTouch TM 6 Speed DC Control System Looks permanent, but goes wherever you go! U.S.
 LaceyTM A Kichler Décor ceiling fan Designed to coordinate with a popular Kichler Lighting collection. Includes our new CoolTouch TM 6 Speed DC Control System Looks permanent, but goes wherever you go!
Model 850 Investigator s Aid Accelerant and Gas Detector Operation and Maintenance
 Model 850 Investigator s Aid Accelerant and Gas Detector Operation and Maintenance www.graceindustries.com M850TM1215 December 2015 1 1. Cover 2. Table of Contents 3. Top View 4. Features & Benefits 5.
Table of Contents What to Expect with. Tools Needed. Mounting Options. Wiring. Switch Housing.
 Table of Contents Congratulations on purchasing your new Hunter ceiling fan! It will provide comfort and performance in your home or office for many years. This installation and operation manual contains
ValkyrieTM. Instruction Manual. Includes our new CoolTouch TM 6 Speed DC Control System Looks permanent, but goes wherever you go! U.S.
 ValkyrieTM A Kichler Décor ceiling fan Designed to coordinate with a popular Kichler Lighting collection. Includes our new CoolTouch TM 6 Speed DC Control System Looks permanent, but goes wherever you
Here is what comes in your box:
 Here is what comes in your box: We recommend that you pull everything out of the box and lay it out. We have grouped the drawn components below with the hardware you ll need for those parts. The screws
Flipper Fidelity Williams / Bally WPC 95 Installation Instructions
 Flipper Fidelity Williams / Bally WPC 95 Installation Instructions Thank you for purchasing the Flipper Fidelity speaker kit for a Williams / Bally WPC 95 Pinball machine. Your system should include the
MODEL MR-720 FUNCTIONS AND CONTROLS SELF-POWERED AM/FM WEATHER BAND CLOCK RADIO
 FUNCTIONS AND CONTROLS MODEL MR-720 SELF-POWERED AM/FM WEATHER BAND CLOCK RADIO Please read this Instruction Manual carefully before using the unit and retain it for future reference 1. BAND SELECT SWITCH
CEILING SPEAKER SYSTEM
 INSTRUCTION MANUAL CEILING SPEAKER SYSTEM F-2852C TABLE OF CONTENTS 1. SAFETY PRECAUTIONS... 2 2. GENERAL DESCRIPTION... 3 3. FEATURES... 3 4. NOMENCLATURE AND DIMENSIONS... 4 5. INSTALLATION... 5 7. REPAINTING
CEILING SPEAKER SYSTEMS F-2352C
 INSTRUCTION MANUAL CEILING SPEAKER SYSTEMS F-2322C F-2352C F-2322C F-2352C TABLE OF CONTENTS 1. SAFETY PRECAUTIONS... 2 2. GENERAL DESCRIPTION... 3 3. FEATURES... 3 4. NOMENCLATURE AND DIMENSIONS... 4
Instruction Manual. Self-Leveling Rotary Laser Level Model No &
 3180H_Manuals 2/12/10 11:12 AM Page 1 Self-Leveling Rotary Laser Level Model No. 40-6527 & 40-6532 Instruction Manual Congratulations on your choice of this Self-Leveling Rotary Laser Level. We suggest
CLI Refrigerant Gas Leak Detector. User s Guide
 el-520 CLI20204 Refrigerant Gas Leak Detector User s Guide Congratulations on the purchase of the AccuTools el-520 Refrigerant Gas Leak Detector, the most technologically advanced of its kind. The el-520
Alpha In-Wall Speaker 10-Inch Carbon Fiber 300W Subwoofer
 Alpha In-Wall Speaker 10-Inch Carbon Fiber 300W Subwoofer P/N 30487 User's Manual CONTENTS SAFETY WARNINGS AND GUIDELINES... 3 INTRODUCTION... 4 FEATURES... 4 CUSTOMER SERVICE... 4 PACKAGE CONTENTS...
ACCESSORIES INCLUDED
 π H-3778 H-3779 PORTABLE AIR CONDITIONER 1-800-295-5510 uline.com ACCESSORIES INCLUDED Exhaust Hose x 1 Unit/Exhaust Adaptor A x 1 Window/Exhaust Adaptor B x 1 Foam Seal x 3 Window Sliding Kit x 1 ½" Screw
Orrin. Instruction Manual. Includes our new CoolTouch TM Control System Looks permanent, but goes wherever you go! U.S.
 Includes our new CoolTouch TM Control System Looks permanent, but goes wherever you go! U.S. Patent Pending Orrin A Kichler Select ceiling fan Kichler Lighting 7711 East Pleasant Valley Road P.O. Box 318010
TECHNICAL INFORMATION Super Scanner V Metal Detector Catalog No. MDWAND
 SIRCHIE Products Vehicles Training Copyright 2011 by SIRCHIE All Rights Reserved. TECHNICAL INFORMATION Super Scanner V Metal Detector Catalog No. MDWAND INTRODUCTION The Super Scanner V is a compact,
Stand Fan. English. Owner s Guide. Model F R
 Digital Oscillating Stand Fan Owner s Guide English Model F-7508 61302-01 R20151201 CONTENTS Safety Precautions... 3 Fused Plug... 4 Fan Assembly... 5 Operating Instructions... 6 Care and Maintenance...
Table of Contents. What to Expect with Your Installation. Tools Needed. Mounting Options. Ceiling Bracket. Wiring.
 www.hunterfan.com Table of Contents What to Expect with Your Installation Congratulations on purchasing your new Hunter ceiling fan! It will provide comfort and performance in your home or office for many
CEILING FAN OWNER'S MANUAL
 CEILING FAN OWNER'S MANUAL READ AND SAVE THESE INSTRUCTIONS MODEL: 52-771-5TK-13 52-771-5BW-SN 52-771-5WH-WH FAN RATING AC 120V. 60Hz CUL LISTED MODEL : AC-552A 1. TOOLS AND MATERIALS REQUIRED Philips
Installation and Operation Manual For Hunter Ceiling Fans
 Installation and Operation Manual For Hunter Ceiling Fans 1 2 CONGRATULATIONS! Your new Hunter ceiling fan is an addition to your home or office that will provide comfort and performance for many years.
Owner s Guide and Installation Manual Manual De Propietario
 Concert Breeze Owner s Guide and Installation Manual Manual De Propietario English Español Form# 45049-01 20090713 2009 Hunter Fan Co. For Your Records and Warranty Assistance For reference, also attach
FerronTM. Instruction Manual A Kichler Decor ceiling fan
 Includes our new CoolTouch TM 6 Speed DC Control System Looks permanent, but goes wherever you go! U.S. Patent Pending 300160 A Kichler Decor ceiling fan HIGH EFFICIENCY DC MOTOR FerronTM Kichler Lighting
National Warranty Line
 CEILING FAN MUST BE INSTALLED BY A LICENSED ELECTRICIAN (NO OTHER PERSONS SHOULD ATTEMPT TO INSTALL THIS FAN) *Electricians are recommended to tick off all items on the quick checklist and fill out their
Install Guide 8046 ENGLISH. Customer Support: or: visit our website Printed in China ON.
 . ON Install Guide 8046. ON ENGLISH Customer Support: 888-515-2585 or: visit our website www.ritetemp-thermostats.com Printed in China 1-405-049 Install Guide 8046 Caution To avoid electrical shock and
other ambient light sources. Before installation, make sure to read this instruction manual carefully for safe and effective product operation.
 BX-80N TM Read instructions completely before beginning installation. TM Optex presents a new concept,, which protects a building s exterior by detecting intruders before an entry is attempted. In addition
BATTERY BACK UP: CR2032
 Congratulations on your purchase of GLOBAL 360. This quality product is the answer for people with special needs for wake up providing the unique feature of an Auto Repeat Countdown Timer. BEFORE using
Amber In-wall & In-ceiling Speakers. P/Ns 24431, 24432, 24433, 24434, User's Manual
 Amber In-wall & In-ceiling Speakers P/Ns 24431, 24432, 24433, 24434, 24435 User's Manual CONTENTS SAFETY WARNINGS AND GUIDELINES... 3 INTRODUCTION... 4 FEATURES... 4 CUSTOMER SERVICE... 4 PACKAGE CONTENTS...
Suits all KPF849 models
 Kambrook - Australia Ground Floor, Suite 2, 170-180 Bourke Rd Alexandria NSW 2015, Australia Locked Bag 2000 Botany NSW 1455 Customer Service Line 1300 139 798 Customer Service Fax 1800 621 337 www.kambrook.com.au
Installation and Operation Manual For Hunter Ceiling Fans /16/2004
 Installation and Operation Manual For Hunter Ceiling Fans 1 2 CONGRATULATIONS! Your new Hunter ceiling fan is an addition to your home or office that will provide comfort and performance for many years.
ChicagoTM. Instruction Manual. Includes our new CoolTouch TM Control System Looks permanent, but goes wherever you go! U.S.
 Includes our new CoolTouch TM Control System Looks permanent, but goes wherever you go! U.S. Patent Pending ChicagoTM A Kichler Decor ceiling fan Kichler Lighting 7711 East Pleasant Valley Road P.O. Box
CEILING SPEAKER SYSTEM F-122C INSTRUCTION MANUAL TABLE OF CONTENTS 7. REPAINTING THE SPEAKER SAFETY PRECAUTIONS... 2
 INSTRUCTION MANUAL CEILING SPEAKER SYSTEM F-122C TABLE OF CONTENTS 1. SAFETY PRECAUTIONS... 2 2. GENERAL DESCRIPTION... 2 3. FEATURES... 3 4. NOMENCLATURE AND DIMENSIONS... 3 5. INSTALLATION... 4 6. REMOVING
Electrician Installation Manual Icon 52 inch (132cm) Ceiling Fan
 Ceiling Fan") NOTE: The Icon light fitting does not come standard, however it can be bought as an accessory item. CEILING FAN MUST BE INSTALLED BY A LICENSED ELECTRICIAN (NO OTHER PERSONS SHOULD ATTEMPT TO INSTALL THIS
NOTE: The Icon light fitting does not come standard, however it can be bought as an accessory item. CEILING FAN MUST BE INSTALLED BY A LICENSED ELECTRICIAN (NO OTHER PERSONS SHOULD ATTEMPT TO INSTALL THIS
CEILING FAN OWNER'S MANUAL
 CEILING FAN OWNER'S MANUAL READ AND SAVE THESE INSTRUCTIONS MODEL: 52-135-5WA-13 FAN RATING AC 120V. 60Hz CUL LISTED MODEL : AC-552OD 1. TOOLS AND MATERIALS REQUIRED Philips screw driver Blade screw driver
Instruction Manual. Self-Leveling Combination Cross-Line Laser and Five-Beam Laser Dot Model No &
 6339H_Manuals 10/24/12 12:56 PM Page 1 Self-Leveling Combination Cross-Line Laser and Five-Beam Laser Dot Model No. 40-6685 & 40-6687 Instruction Manual Congratulations on your choice of this Self-Leveling
USER MANUAL MINITRACER PORTABLE SNIFFER
 USER MANUAL MINITRACER PORTABLE SNIFFER CONTACT US PHONE/FAX Phone: 801.486.1015 Fax: 801.486.1032 ADDRESS FLUIDX Equipment, Inc. 139 W. 2260 S. Salt Lake City, UT 84115 www.fluidxinc.com SMT-07-1006 Rev
CEILING FAN OWNER'S MANUAL
 Style that revolves around you. CEILING FAN OWNER'S MANUAL QUATRO 10/09 WARNING: Read and follow these instructions carefully and be mindful of all warnings shown throughout. GENERAL INSTALLATION & OPERATION
120mm BULLSEYE 2 ELECTRONIC PINPOINTING PROBE DETECTION AREA HIGH INTENSITY LED LIGHT SENSITIVITY ADJUST KNOB ON BUTTON
 120mm BULLSEYE 2 ELECTRONIC PINPOINTING PROBE DETECTION AREA HIGH INTENSITY LED LIGHT SENSITIVITY ADJUST KNOB ON BUTTON Introduction White's 120mm probe length Bullseye is designed to be used as an aid
557X-558X Comfort Care & Cozy Comfort, Premier Recliner 567X-5680 XL Cozy Comfort & XL Cozy Comfort Swing-Arm, Premier Recliner
 Page 1 of 8 557X-558X Comfort Care & Cozy Comfort, Premier Recliner 567X-5680 XL Cozy Comfort & XL Cozy Comfort Swing-Arm, Premier Recliner CUSTOMER INSTRUCTIONS PLEASE READ AND FAMILIARIZE YOURSELF WITH
Install Guide Customer Support: or Visit our website
 Install Guide 8045 Customer Support: 888-515-2585 or Visit our website www.ritetemp-thermostats.com 312-014 Install Guide 8045 Caution To avoid electrical shock and to prevent damage heating system, and
H-10PM. Refrigerant Leak Detector
 H-10PM Refrigerant Leak Detector Congratulations! You have just purchased the most versatile, high performance service leak detector available in the industry today. It will detect refrigerants with a
Home & Yard Alert Long Range System Home & Yard Alert Extended Long Range System
 Home & Yard Alert Long Range System Home & Yard Alert Extended Long Range System USER MANUAL READ THIS ENTIRE MANUAL PRIOR TO INSTALLATION AND OPERATION We thank you for purchasing this Driveway Alert
Owner s Guide and Installation Manual
 For Your Records and Warranty Assistance For reference, also attach your receipt or a copy of your receipt to the manual. Model Name Type 2 Models Owner s Guide and Installation Manual Model No. Catalog
Table of Contents What to Expect with Your Installation. Top Housing. Ceiling Plate. Tools Needed.
 Table of Contents Congratulations on purchasing your new Hunter ceiling fan! It will provide comfort and performance in your home or office for many years. This installation and operation manual contains
Smoke Alarm User s Manual
 V-MUL-007-D(A0) Smoke Alarm User s Manual Please read and save this manual PHOTOELECTRIC SMOKE ALARM( HUSH FEATURE) MODEL: VST-S588H Class II Apparatus Photoelectric smoke alarms are generally more effective
IMPORTANT INSTRUCTIONS READ & SAVE
 5,000W/240V WALL / CEILING MOUNTED GARAGE HEATER WITH ELECTRONIC CONTROLLER AND REMOTE OWNER S MANUAL IMPORTANT INSTRUCTIONS READ & SAVE Model: PH-950NR PET OWNERS WARNING: The health of some small pets
REFRIGERANT LEAK DETECTOR
 REFRIGERANT LEAK DETECTOR LS790B OWNER S MANUAL U.S. PATENT 4,609,875, 5,264,833AND 5,371,467 GENERAL SPECIFICATIONS The LS790B is a perfect combination of advanced microprocessor driven circuitry and
BMW E36 Thermostat Removal And Coolant Flush
 BMW E36 Thermostat Removal And Coolant Flush Disclaimer: The cooling system is critical to the proper operation of your car. Failure to properly install all of the components of the cooling system could
60" Lyndon Patio. Instruction Manual Customer Service :30 AM to 5:00 PM EST, Monday - Friday A Kichler Decor ceiling fan
 60" Lyndon Patio TM 310140 A Kichler Decor ceiling fan Includes wall mount control system Kichler Lighting 7711 East Pleasant Valley Road P.O. Box 318010 Cleveland, Ohio 44131-8010 Instruction Manual Customer
What to Expect with Your Installation. Tools Needed. 30 inches PA G E. To register your fan, please visit: 11 PA G E
 Table of Contents Tools Needed Mounting Options 1.888.227.2178 Ceiling Bracket 30 inches To register your fan, please visit: www.casablancafanco.com/register Wiring 11 Troubleshooting??? 15 14 1 13 Operation,
. w. POWERHOUSE n MOTION DETECTOR MODEL PR511 OWNER S MANUAL
 8s. w POWERHOUSE n MOTION DETECTOR MODEL PR511 OWNER S MANUAL INTRODUCTION A QUICK LOOK AT YOUR MOTION DETECTOR Your X-10 POWERHOUSE TM Motion Detector gives your home a lived-in look when you are away,
OPERATING MANUAL. The Guardian Hand Held Security Metal Detector
 OPERATING MANUAL The Guardian Hand Held Security Metal Detector COMFORT GRIP OPERATOR DETECTION ALERTS Audio Alert High Pitch Sound Vibration Alert - Silent Operation LED Target Indicator - Red INTERFERENCE
Owner s Guide and Installation Manual
 Tribeca Owner s Guide and Installation Manual English Form# M6001-01 20120416 2012 Casablanca Fan Co. Welcome Your new Casablanca ceiling fan is an addition to your home or office that will provide comfort