BBQ SEAR BOX WARNING & INSTRUCTION BOOKLET MODELS: PGSEAR
|
|
|
- Caroline Carter
- 5 years ago
- Views:
Transcription

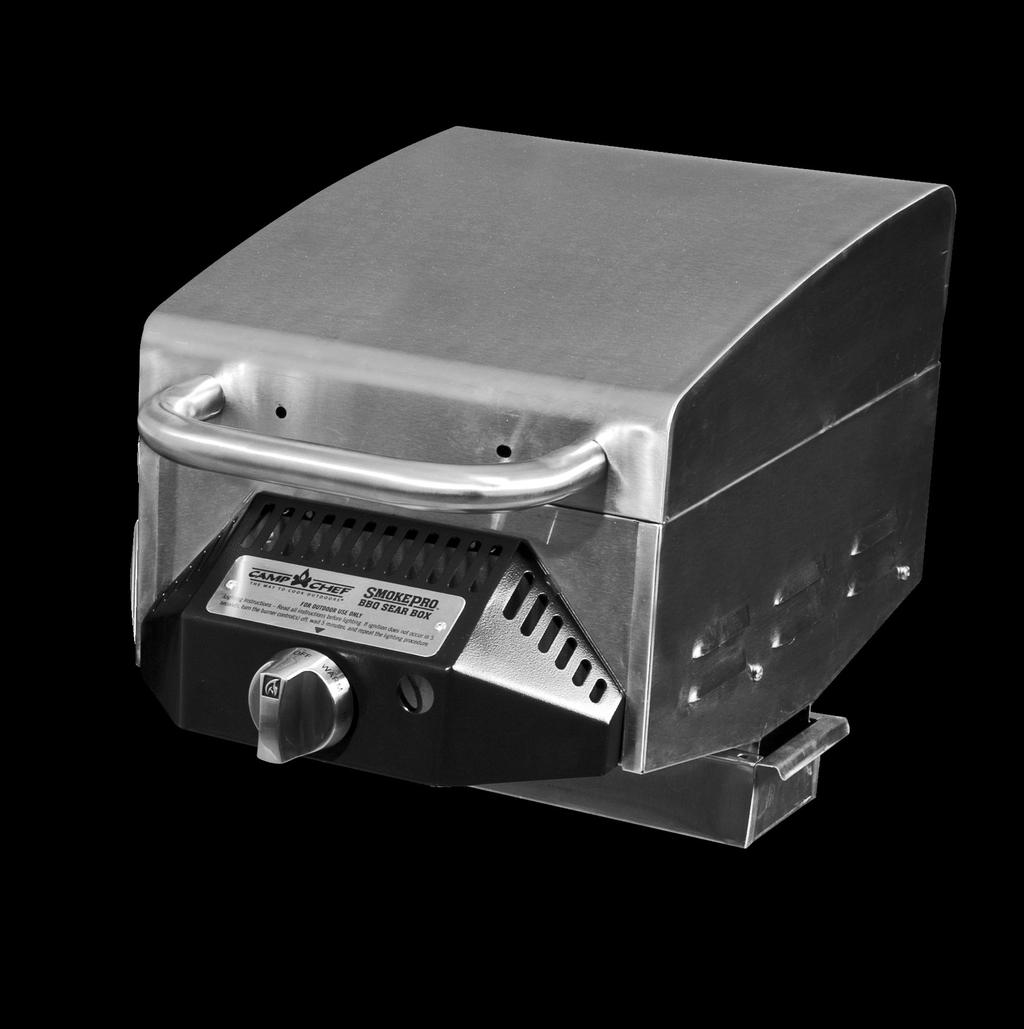

1 BBQ SEAR BOX & INSTRUCTION BOOKLET MODELS: PGSEAR
2 If you smell gas: 1. Shut off gas to the appliance at the tank. 2. Extinguish any open flame. 3. Open lid. 4. If odor continues, keep away from the appliance and immediately call your fire department. 1. DO NOT store or use gasoline or other flammable liquids or vapors in the vicinity of this or any other 2. An LP cylinder not connected for use shall not be stored in the vicinity of this or any other DANGER DO NOT store a spare LP gas cylinder under or near this Never fill the cylinder beyond 80% full. A fire causing death or serious injury may occur if the above is not followed exactly. Failure to follow these instructions could result in fire, explosion or burn hazard, which could cause property damage, personal injury or death. To installer or person assembling this appliance: Leave this manual with this appliance for future reference. To consumer: Keep this manual with this appliance for future reference. This instruction manual contains important information necessary for the proper assembly and safe use of this product. Read and follow all warnings and instructions before assembling and using this Do not discard this instruction manual This product contains chemicals, including lead in the brass of certain component parts, that are known to the State of California to cause cancer, and birth defects or other reproductive harm. Wash hands after handling. When used, this product emits fuel combustion chemicals that are known to the State of California to cause cancer, and birth defects or other reproductive harm. 1. Do NOT leave this appliance unattended while in use. The user must remain in the immediate area of the product and have a clear view of the product at all times during operation. 2. Keep children and pets away from burner at all times. 3. The use of alcohol, prescription or nonprescription drugs may impair your ability to properly assemble or safely operate this 4. For OUTDOOR use only. Do NOT use in a building, garage or any other enclosed area. Do NOT use in or on recreational vehicles or boats. NEVER use this appliance as a heater. 5. Do not operate appliance under ANY overhead construction. Keep a minimum clearance of 3 feet (1 m) from the sides, front and back of appliance to ANY construction. Keep the area clear of all combustible material and flammable liquids, including wood, dry plants and grass, brush, paper, and canvas. 6. Use ONLY on a level, stable non-combustible surface like bricks, concrete or dirt. Do NOT use this appliance on any surface that will burn or melt like wood, asphalt, vinyl, or plastic. 7. Keep the fuel supply hose away from any heated surfaces. 8. To prevent accidental fires, before using the appliance ensure that the hose is not damaged and all joints and connections are not leaking by turning on the cylinder valve, leave the burner valve closed, and apply a soapy solution to the joints and connections. If a continuous hissing sound is heard, or if the soapy solution bubbles, there is a leak. Do not use the appliance if there is a leak. Replace the faulty parts. 9. Extinguish all open flames before connecting the gas supply to the appliance and before checking for leaks. 10. Do NOT move the appliance when in use. Allow unit to cool to 115 F (45 C) before moving or storing. 11. This appliance will be hot during and after use. Use insulated oven mitts or gloves for protection from hot surfaces or splatter from cooking liquids. 12. In case there is a fire, call the local fire department or dial 911. Stay clear from flames. Do not attempt to extinguish an oil or grease fire with water. 13. This product is not intended for commercial use. 14. Always allow the appliance to cool before covering with the patio cover. 15. Never use charcoal or wood briquets in a gas grill. Flavoring chips must be contained in a metal smoking box to contain ash and prevent fires. 16. After cooking, allow grill and grease tray to cool off completely before removing. 17. Use gloves or oven mitts to hold grease tray when moving to avoid spilling hot grease. Use appliance only with LP (propane) gas and the regulator/valve assembly supplied with the Installation must conform with local codes, or in their absence with National Fuel Gas Code, NFPA 54/ANSI Z223.1, or Natural gas and proper installation code CSA B149.1 or propane and storage handling code B149.2 Handling and storage of LP cylinders must conform to LP Gas Code NFPA/ANSI 58. Appliance is not for use in or on recreational vehicle and/or boats. Do not modify this Modifications will result in a safety hazard. Questions regarding certification in other areas may be addressed to Apartment Dwellers: Check with management to learn the requirements and fire codes for using an LP Gas appliance at an apartment. If allowed, use outside on the ground floor with a 10 foot clearance from walls or rails. Do NOT use appliance on or under any apartment, condominium balcony or deck. Before opening LP tank valve, check the coupling nut for tightness. When appliance is not in use, turn off control knob and LP tank valve on supply cylinder. Never use LP tank if visibly rusted, damaged, or out of date. If you notice grease or other hot material dripping from appliance onto valve, hose or regulator, turn off gas supply at once. Determine the cause, correct, clean and inspect valve, hose and regulator before continuing. 2 3


3 Perform a leak test. The regulator may make a humming or whistling noise during operation. This will not affect the safety or use of the Clean and inspect the hose before each use of the If there is evidence of abrasion, wear, cuts or leaks, the hose must be replaced prior to the appliance being put into operation. See product sheet for hose & regulator information. Do not block holes in bottom or sides of Never operate appliance with LP tanks out of correct position specified in Assembly Instructions. Always close LP tank valve and remove coupling nut before moving LP tank form specified operating position. NEVER store a spare LP tank under or near appliance or in enclosed areas. NEVER fill the cylinder beyond 80% full. An overfilled spare LP tank is hazardous due to possible gas released from the safety relief valve. Failure to follow these instructions exactly could cause a fire resulting in death or serious injury. If you see, smell, or hear escaping gas, immediately get away from the LP tank/ appliance and call your fire department. All spare LP tanks must have safety caps installed on the LP tank outlet. LP Tank Removal, Transport and Storage Turn OFF all control knobs and LP tank valve. Turn coupling nut counterclockwise by hand only do not use tools to disconnect. Install safety cap onto LP tank valve. Always use cap and strap supplied with valve. Failure to use safety cap as directed may result in serious personal injury and/or property damage. A disconnected LP tank in storage or being transported must have a safety cap installed (as shown). Do not store an LP tank in enclosed spaces such as a carport garage, porch, covered patio or other building. Never leave an LP tank inside Safety Cap 4 a vehicle, which may become overheated by the sun. Do not store LP tanks in an area where children play. Storage of an appliance indoors is permissible only if the cylinder is disconnected and removed from the LP Tank The LP tank used with your appliance must meet the following requirements: Purchase LP tanks only with these required measurements: 12 (30.5cm) (diameter) x 18 (45.7cm) (tall) with 20 lb. (9 kg.) capacity maximum. Be constructed and marked in accordance with specifications for LP tank of the U.S. Department of Transportation (DOT) or the National Standard of Canada, CAN/CSA- B339, Cylinders, Spheres and Tubes for the Transportation of Dangerous Goods. The propane cylinder used with this appliance must include a collar to protect the cylinder valve. LP tank valve must have Type 1 outlet compatible with regulator or Safety relief valve. UL listed Overfill Protection Device (OPD). This OPD safety feature is identified by a unique triangular hand wheel. Use only tanks equipped with this type of valve. LP tank must be arranged for vapor withdrawal. LP (Liquefied Petroleum Gas) LP gas is non-toxic, odorless and colorless when produced. For Your Safety, LP gas has been given an odor (similar to rotten cabbage) so that it can be smelled. LP gas is highly flammable and may ignite unexpectedly when mixed with air. LP Tank Filling Use only licensed and experienced dealers. OPD Hand Wheel LP dealer must purge tanks before filling. Dealer should NEVER fill LP tank more than 80% of LP tank volume. Volume of propane in tanks will vary by temperature. A frosty regulator indicates gas overfill. Immediately close LP tank valve and call local LP gas dealer for assistance. Do not release liquid propane (LP) gas into the atmosphere. This is a hazardous practice. To remove gas from LP tank, contact an LP dealer or call a local fire department for assistance. Check the telephone directory under Gas companies for nearest certified LP dealers. LP Tank Exchange Many retailers that sell appliances offer you the option of replacing your empty LP tanks through an exchange service. Use only those reputable exchange companies that inspect, precision fill, test and certify their cylinders. Exchange your tank only for an OPD safety feature-equipped tank as described in the LP Tank section of this manual. Always keep new and exchanged LP tanks in upright position during use, transit or storage. Leak test new and exchanged LP tanks BEFORE connecting to LP Tank Leak Test Appliance must be leak checked outdoors in well-ventilated area, away from ignition sources such as gas fired or electrical appliances. During leak test, keep appliance away from open flames or sparks. For your Safety Leak test must be repeated each time LP tank is exchanged or refilled. Do not smoke during leak test. Do not use an open flame to check for gas leaks. Use a clean paintbrush and 50/50 soap and water solution. Use mild soap and water. Do not use household cleaning agents. Damage to gas train components can result. Brush soapy solution onto all weld seams and entire valve area. If growing bubbles appear, do not use or move the LP tank. Contact an LP gas supplier or your fire department. Installing The Lp Gas Cylinder Onto The Grill 1. Check that the cylinder valve is closed by turning the knob clockwise. 2. Hang the cylinder from the tank hook. TANK HOOK 3. Orient the cylinder such that the valve opening faces the left side of the grill, and so that the hose is not kinked or damaged. 4. Attach or detach regulator to the LP gas cylinder only when cylinder is at rest in the tank holder. 5. Remove the protective cap from LP tank valve. 5
 into LP tank valve. Hand tighten coupling nut, holding regulator in a straight line (C) with LP tank valve so as not to cross thread the connection.")


 to OFF. 2. Be sure regulator is tightly connected to LP tank. 3.")
4 Always use cap and strap supplied with valve. Do not use a POL transport plug (plastic part with external threads). It will defeat the safety feature of the valve. 6. Hold regulator, insert nipple (B) into LP tank valve. Hand tighten coupling nut, holding regulator in a straight line (C) with LP tank valve so as not to cross thread the connection. (B) Nipple has to be centered into the LP tank valve 6 (C) Hold coupling nut and regulator as shown for proper connection to LP tank valve 7. Turn the coupling nut clockwise to tighten to a full solid stop. The regulator will seal on the back-check feature in LP tank valve, resulting in some resistance. An additional one-half to three quarters turn is required to complete connection. Tighten by hand only do not use tools. NOTE: If you cannot complete connection, disconnect regulator and repeat steps 6 and 7. If you are still unable to complete the connection, do not use this regulator! Do not insert any foreign objects into the valve outlet. You may damage the valve and cause a leak. Leaking propane may result in explosion, fire, severe personal injury, or death. Never attempt to attach this appliance to the self-contained LP gas system of a camper or trailer or motor home. Appliance must be leak checked outdoors in well-ventilated area, away from ignition sources such as gas fired or electrical appliances. During leak test, keep appliance away from open flames or sparks. Leak Testing 1. Turn all control knob(s) to OFF. 2. Be sure regulator is tightly connected to LP tank. 3. Slowly open LP tank valve by turning hand wheel counter clockwise. If you hear a rushing sound, turn gas off immediately. There is a major leak at the connection. Correct the leak before proceeding. 4. Brush 50/50 soap and water solution onto indicated connections shown. 5. If growing bubbles appear, there is a leak. Close LP tank valve immediately and retighten connections. If leaks cannot be stopped, do not try to repair. Call for replacement parts. Order new parts by giving the serial number, model number and name of items needed to the Service Center at Always close LP tank valve after performing tank leak test by turning hand wheel clockwise. Do not use appliance until leak checked. If you cannot stop a gas leak, immediately close LP tank valve and call LP gas supplier or your fire department! Hose Check Before each use, check to see if hoses are cut or worn. Replace damaged hose assembly before using Use only valve/hose/regulator specified by manufacturer. See product sheet for hose & regulator information. Warning: Never operate the appliance without the grill grease cup installed under the Lighting Instructions Follow the instructions exactly. 1. Check that all burner control knobs and the cylinder valve are turned to the OFF position. 2. Turn on the fuel supply by rotating the cylinder valve knob counter-clockwise to full open. 3. DO NOT stand with head, body, or arms over the grill when lighting. Lighting The Main Burner 1. Make sure the control knob is in the OFF position. 2. Push and turn the control knob to the HIGH position. 3. If ignition does NOT occur in 5 seconds, turn control knob to OFF, wait 5 minutes to allow gas to dissipate and repeat lighting procedure. If burner does not ignite, wait 5 minutes, see Match Lighting the Main Burners section. 4. To turn off, turn the control knob clockwise until it locks in the OFF position. This does not turn off the gas flow from the cylinder. Note: If burner does not light or flame is too low, you may have spider or other insect blockage in burner. See Burner Assembly/Maintenance under Proper Care and Maintenance. Match Lighting The Main Burners 1. Turn the burner control knob to OFF. 2. Use a long nose lighter and place through lighting hole in the front of the grill to approximately 1/2 (1 to 2 cm) from the burner. Match Ignition Hole 3. Turn on the control knob to the HIGH position. The burner should light within 5 seconds. 4. If the burner does not light, turn the control knob to OFF and wait 5 minutes for gas to dissipate and repeat lighting procedure. 5. If the burner does not light within the first few attempts of match lighting, there is a problem with the gas supply. Turn off the gas at the burner and cylinder. DO NOT attempt to operate the grill until the problem is found and corrected. See Trouble Shooting section of this manual. Turning LP Cooker Off Turn knob to OFF position. Turn LP tank OFF by turning hand-wheel clockwise to a full stop. Burner Flame Check Light burner; rotate knob from HIGH to LOW. You should see a smaller flame in LOW position than seen on HIGH. Always check flame prior to each use. A blue flame with little or no yellow flame provides the best heat. Operating The Grill Never use Charcoal or Lighter Fluid inside your Gas Grill. Read and follow all warnings and instructions contained in the preceding sections of this manual. Breaking In Your Grill In manufacturing and preserving the components of your grill, oil residue may be present on the burner and cooking surfaces of your grill. Before cooking on your grill for the first time you should preheat it for 10 minutes on HIGH to burn off these residual oils. Preheating The Grill Prior to use, it is recommended that you preheat your grill. This ensures that the grilling surfaces 7
5 8 are at the desired temperatures to sear the food sugars when cooking. After lighting your grill, set the main burner control knobs to the HIGH position for 5 to 10 minutes. Controlling Flare-Ups Flare-ups are a part of cooking meats on a gas grill. This adds to the unique flavor of cooking on a gas grill. Excessive flare-ups can over-cook your food and cause a dangerous situation for you and your grill. Excessive flare-ups result from the build-up of grease in the bottom of your grill. If this should occur, DO NOT pour water onto the flames. This can cause the grease to splatter and could result in serious burns or bodily harm. To Minimize Flare-Ups Trim excess fat from meats prior to cooking. Cook meats with high fat contents (chicken or pork) on Low settings or indirectly. Ensure that your grill is on level ground and the grease is allowed to evacuate the grill through the drain hole in the bottom and into grease cup. Cleaning The Burner NOTE: Spiders and small insects can spin webs and build nests inside the burner. This especially occurs in late summer and fall before frost when spiders are most active. These nests can obstruct gas flow and cause a fire in and around the burner and orifice. Such a fire can cause operator injury and serious damage to the To help prevent a blockage and ensure full heat output, clean and inspect burner tube often (once or twice a month). NOTE: Water or air pressure will not normally clear a spider web. All cleaning and maintenance should only be done when the appliance is cool and with the fuel supply turned off at the LP cylinder. DO NOT clean any part in a self-cleaning oven. The extreme heat will damage the finish. Burner Assembly/Maintenance Although your burner is constructed of stainless steel, it may corrode as a result of the extreme heat and acids from cooking foods. Regularly inspect the burner for cracks, abnormal holes, and other signs of corrosion damage. If found, replace the burner. DO NOT obstruct the flow of combustion and ventilation air. Burner tubes can become blocked by spiders and other insects building their nests. Blocked burner tubes can prevent gas flow to the burners and could result in a burner tube fire or fire beneath the grill. To clean the Burner Assembly follow these instructions to clean and/or replace parts of burner assembly or if you have trouble igniting the grill. 1. Turn gas off at control knobs and LP cylinder tank valve. 2. Remove cooking grills and heat distribution plates. 3. Remove screw from the burner foot using a screwdriver. 4. Carefully lift the burner up and away from valve opening. 5. Use a narrow bottle brush or a stiff wire bent into a small hook to run through the burner tube and flame port several times. Debris Note: Wear eye protection when performing procedure Use compressed air to blow into burner tube and out the flame ports. Check each port to make sure air comes out each hole. 7. Wire brush entire outer surface of burner to remove food residue and dirt. 8. Check burner for damage, if any large cracks or holes are found replace burner. IMPORTANT: Burner opening must slide over valve nozzle. 9. Orient the burner CORRECTLY by positioning the burner opening onto the valve and installing the screw to secure the burner in place. 10. Replace screw on the burner and follow the Gas Leak Testing section of this manual. Relight burners to verify proper operation. 11. Replace heat distribution plates and cooking grills. Proper Care & Maintenance To protect your grill from excessive rust, the unit must be kept clean and covered at all times when not in use. Wash cooking grills and heat distribution plates with hot, soapy water, rinse well and dry. Lightly coat cooking grill with vegetable oil or vegetable oil spray. Clean inside and outside of grill by wiping off with a damp cloth. Apply a light coat of vegetable oil or vegetable oil spray to the interior surface to prevent rusting. The stainless steel exterior surface of your grill, can be cleaned with stainless steel cleaner. Never apply paint to the interior surface. Rust spots on the interior surface can be buffed, cleaned, then lightly coated with vegetable oil or vegetable oil spray to minimize rusting. Cleaning and Maintenance Correct care and maintenance will keep your appliance operating smoothly. Clean regularly as determined by the amount of use. NOTE: Clean the entire appliance each year and tighten all hardware on a regular basis (1-2 times a year or more depending on usage). Cleaning should be done where detergents won t harm patio, lawn, or the like. Cooking Grates When cool, wash your cast iron thoroughly with a non-citrus based soap and water. Be sure to rinse and dry completely. (Note: Soap can remove the seasoning of your cast iron if you don t restore it after cleaning.) Heat Distribution Plates Periodically, it may be necessary to inspect and clean the heat distribution plate to prevent excess grease build-up. When the grill is cold, remove the cooking grills. Inspect the heat distribution plates and replace if broken or damaged. Do not allow heat distribution plates to become damaged to the extent that they may fall through onto the burners. Replace the heat distribution plates and cooking grills and light the burners. Operate the grill on HIGH for 10 minutes to remove the excess grease. Suggested Cleaning Materials Mild dish washing liquid detergent Wire brush Nylon cleaning pad Hot water Paper clip Soft brass bristled brush Component Cleaning BURNER: Wire brush loose corrosion from burner exterior. Clean clogged gas port holes with an opened paper clip. Replace corroded or damaged burners that would emit excess gas. After the appliance has cooled, wipe areas where paint and finish have burned off to minimize rusting. 9
6 1. Remove Qty (2) bolts from drum as shown. PARTS LIST FINGER HOLE Propane Tank Bracket PGSEAR PARTS LIST FLAVOR SCREEN LID PGSEAR-1 M6 LOCK WASHER (2) M6 BOLT (2) LID HANDLE PGSEAR-2 BB30L HINGE (2) BB30L-5 CAST IRON GRILL (1) PGSEAR-3 #8-32 SCREW (4) #8-32 KEPSNUT (4) 2. Install the propane tank bracket as shown using existing hardware. 3. Remove cast iron grate, flavor screen, and heat deflector from the sear and set aside 4. Remove side shelf from grill. 5. Install sear as shown using the supplied hardware. FLAVOR SCREEN (1) PGSEAR-4 9. Install cast iron grate as shown. CAST IRON GRATE SEAR HEAT DEFLECTOR (1) PGSEAR-5 IGNITOR ELECTRODE (1) PGSEAR-7 BURNER (1) PGSEAR-6 M6 BOLT (6) LEVELING SCREW 10. I nstall handle as shown using the supplied hardware. 11. I nstall knob and tighten the set screw in the bottom with the allen wrench that is included. MANIFOLD COVER (1) PGSEAR-8 MANIFOLD BKT (2) PGSEAR-9 #8-32 SCREW (7) HANDLE TANK BKT (1) PGSEAR-14 M6 LOCK WASHER (2) VALVE (1) PGSEAR-15 M4 SCREW (2) KNOB (1) PGSEAR-11 LP REGULATOR (1) HRL 6. Level the sear using the leveling screw. (Note: Make sure the lid does not interfere with the rivets on the side of the grill.) 7. Install heat deflector as shown. M6 BOLT (2) MANIFOLD (1) PGSEAR-12 HEAT DEFLECTOR KNOB GREASE TRAY (1) PGSEAR PGSEAR Install flavor screen as shown with finger hole at the back. 11

7 12. Install grease tray. GREASE TRAY 13. Install hose and regulator. Fittings must be tightened using a wrench on both the hose and fitting on the LIMITED WARRANTY Camp Chef No-Hassle Warranty Here at Camp Chef we stand by our products and take pride in our customer service. Because of this, your new Camp Chef product comes with a No-Hassle Warranty. What does that mean? It means that if we did something wrong, we will make it right. We guarantee our products to be free from defect in all materials and workmanship (excluding paint and finish). We will replace defective parts so you can get back to enjoying your product as soon as possible. Required Maintenance: Clean your product after each use to maintain its finish and prolong its lifespan. Wipe away all grease and ashes. Keep metal products free of moisture, salts, acids and harsh fluctuations in temperature. Unfortunately, product paint and other finishes are not covered by this warranty. The exterior finish of the product will wear down over time. Coverage Details: Warranty does not cover normal wear of parts or damage caused by misuse, abuse, overheating and alteration. No alterations are covered in this warranty. Camp Chef is not responsible for any loss due to neglectful operation. Furthermore, this warranty does not cover damages caused by natural disasters such as earthquakes, hurricanes, tornadoes, floods, lightning, fires, etc. Upon the expiration of this warranty, all such liability will terminate. No other warranties are expressed or implied. Leak test must be performed before lighting the grill. Refer to leak test instructions for proper testing. Please keep all original sales receipts. Proof of purchase is required to obtain warranty services. Any parts or products returned without written authorization will be discarded without notice. To obtain warranty services submit a warranty request at warranty@campchef.com, or call Our Product Specialists are happy to help. Warranty applies to the contiguous U.S. states only. WARRANTY COVERAGE PERIODS Pellet Grills & Stoves Fire Pits Water Heaters Movie Screens All other items & accessories 90 days from purchase date Camp Chef is a registered trademark of Logan Outdoor Products N 75 W, Hyde Park, UT 84318, USA Made in China 0117_PGSEAR_Instructions
Fish Fry Set. Assembly, Use and Care Model For Outdoor Use Only. Tools required: Adjustable wrench
 For Outdoor Use Only Fish Fry Set Assembly, Use and Care Model 03101400 Tools required: Adjustable wrench To installer or person assembling this appliance: Leave this manual with this appliance for future
LP GAS PIZZA OVEN USER MANUAL
 LP GAS PIZZA OVEN USER MANUAL To reduce the risk of fire, burn hazard or other injury, read the USER MANUAL carefully and completely before using this appliance FOR OUTDOOR USE ONLY Before Cleaning, make
MODEL #: FP40 PROPANE FIRE PIT Warning & Instruction Booklet
 FP40 COVER (1) FP40-1 PARTS LIST Outdoor Decorative Gas Appliance. ANSI Z21.97-2010 Outdoor Gas Fireplaces. CR97-003 MODEL - FP40 FP29 THERMOCOUPLE (1) FP29LG-27 FP40 IGNITER COVER (1) FP40-3 IGNITER ELECTRODE
MODEL: CGG-306 Chef s Style Portable Tabletop Grill ASSEMBLY AND OPERATING INSTRUCTIONS
 MODEL: CGG-306 Chef s Style Portable Tabletop Grill ASSEMBLY AND OPERATING INSTRUCTIONS : FOR OUTDOOR USE ONLY m This instruction manual contains important information necessary for the proper assembly
Owner s Manual. FMI BRANDS INC th Avenue Surrey, B.C. Canada V3Z 3V7 Toll Free Fax Model number FMPPC2A
 Owner s Manual Model number FMPPC2A Series number 890 FMI BRANDS INC. 309-19133 26th Avenue Surrey, B.C. Canada V3Z 3V7 Toll Free 1-888-514-1663 Fax 1-888-797-9931 Owner & Safety Manual Model number FMPPC2A,
Turkey/Fish Fry Set. Assembly, Use and Care. For Outdoor Use Only. Tools required: Phillips screwdriver Adjustable wrench
 Turkey/Fish Fry Set Assembly, Use and Care For Outdoor Use Only Tools required: Phillips screwdriver Adjustable wrench To installer or person assembling this appliance: Leave this manual with this appliance
Owner s Manual. FMI BRANDS INC th Avenue Surrey, B.C. Canada V3Z 3V7 Toll Free Fax Model number FMPPC2F
 Owner s Manual Model number FMPPC2F Series number 863 D.863.000.V0 FMI BRANDS INC. 309-19133 26th Avenue Surrey, B.C. Canada V3Z 3V7 Toll Free 1-888-514-1663 Fax 1-888-797-9931 Owner & Safety Manual Model
INSTRUCTIONS FOR USE
 Volcano Collapsible Stove 20-200 and 20-300 Grills INSTRUCTIONS FOR USE For Outdoor Use Only IMPORTANT This instruction manual contains important information necessary for the proper assembly and safe
USER S MANUAL AND OPERATING INSTRUCTIONS
 Model # DGP350NP/DGP350NP-D USER S MANUAL AND OPERATING INSTRUCTIONS ANS Z21.58a CSA 1.6a-2008 Outdoor Cooking Gas Appliance Assembler/Installer: This manual contains important information necessary for
Owner s Manual. FMI BRANDS INC Avenue Surrey, B.C. Canada V3Z 3V7 Toll Free Fax Model number FMPPC2F
 Owner s Manual Model number FMPPC2F Series number 863 2017 FMI Brands Inc. Patent Pending D.863.000.V3 FMI BRANDS INC. 107 19052 26 Avenue Surrey, B.C. Canada V3Z 3V7 Toll Free 1-888-514-1663 Fax 1-888-797-9931
Tailgate Grill Model: SC SC-00 Instruction Manual
 Tailgate Grill Model: SC2000301-SC-00 Instruction Manual For Outdoor Use Only Tools needed for assembly and maintenance: Phillips Screwdriver & Adjustable Wrench (Not Included) This instruction manual
USE AND CARE GUIDE WARNING WARNING WARNING WARNING
 USE AND CARE GUIDE Item No.: HF11501AA USE PROPANE GAS ONLY! -Do not store or use gasoline or other flammable vapors in the vicinity of this or any other appliance. - Service must be performed by a qualified
DANGER WARNING CAUTION. Product Guide Model WARNING WARNING THIS GRILL IS FOR OUTDOOR USE ONLY.
 Product Guide Model 465620011 IMPORTANT: Fill out the product record information below. Serial Number See rating label on grill for serial number. Date Purchased If you smell gas: Estimated assembly time:
Owner s Manual OUTDOOR LIVING PERFECTED TONGA TORCH PORTABLE PROPANE
 Owner s Manual OUTDOOR LIVING PERFECTED LP Cylinder not included Model number FMTT-1000 FMI BRANDS INC. 107 19052 26th Avenue Surrey, B.C. Canada V3Z 3V7 Toll Free 1-888-514-1663 Fax 1-888-797-9931 Owner
Using it in an enclosed space can kill you.
 38 X 56 GAS FIRE PIT - OWNER S MANUAL Carlisle Chat Fire Table Base Model # 00GBC7 (6877B) Fits 6877A Carlisle Chat Fire Table Top For Propane and *Natural Gas (*See Page 7) Certified to CSA International
OIL-LESS TURKEY FRYER
 14101480 OIL-LESS TURKEY FRYER TABLE OF CONTENTS Product Record Information...1 For Your Safety...2 Safety Symbols...2 Installation Safety Precautions...2 Food Safety...3 Use and Care...3-6 Limited Warranty...7
CATALINA FIRE TABLE ASSEMBLY INSTRUCTIONS
 CATALINA FIRE TABLE ASSEMBLY INSTRUCTIONS CSA Model 98300 DRF01000 Installer: Leave these instructions with consumer. Consumer: Keep these instructions for future reference. DANGER If you smell gas: 1.
DANGER WARNING CAUTION. Product Guide Model WARNING. For support and to register your grill, please visit us at
 Product Guide Model 461111811 IMPORTANT: Fill out the product record information below. Serial Number See rating label on grill for serial number. Date Purchased For support and to register your grill,
Tabletop Gas Grill. WARNING FOR YOUR SAFETY:For Outdoor Use Only (outside any enclosure)
") Tabletop Gas Grill Model No. XG7-096-034-7 D E S IG N C E R D T IF IE WARNING FOR YOUR SAFETY:For Outdoor Use Only (outside any enclosure) DANGER If you smell gas -. Shut off gas to appliance. 2. Extinguish
Tabletop Gas Grill Model No. XG7-096-034-7 D E S IG N C E R D T IF IE WARNING FOR YOUR SAFETY:For Outdoor Use Only (outside any enclosure) DANGER If you smell gas -. Shut off gas to appliance. 2. Extinguish
OWNER S MANUAL FOR BARBECUE GAS GRILL
 OWNER S MANUAL FOR BARBECUE GAS GRILL Model: CBA-401-A IF A REPLACEMENT IS NECESSARY, PLEASE CONTACT EITHER OUR CUSTOMER SERVICE DEPARTMENT OR YOUR LOCAL DEALER. THE USE OF UNAUTHORISED PARTS CAN CREATE
USE AND CARE GUIDE PEDESTAL FIREBOWL
 DANGER If you smell gas: 1. Shut off gas to the appliance. 2. Extinguish any open flame. 3. If odor continues, keep away from the appliance and immediately call your gas supplier or fire department. WARNING
OUTDOOR RANGE OPERATION INSTRUCTIONS
 OUTDOOR RANGE OPERATION INSTRUCTIONS 554BP12KIT, 554BP30AL, 554BP30ALKIT, 554BP30SS, 554BP30SSKIT, 554BPHP17, 554BPRD13, 554BPRD21, 554BPSQ16, 554BPSS16, 554BPSQ212 06/2016 KEEP THIS MANUAL FOR FUTURE
Outdoor Propane Turkey Fryer
 Outdoor Propane Turkey Fryer Assembly, Use and Care Model: 085-3230-2 (TF2115701-MC-00) For Outdoor Use Only Tools required: Cross-head screwdriver / Adjustable wrench To installer or person assembling
OWNER S MANUAL. Woodard - LP Gas Outdoor Fireplace TABLE OF CONTENTS DANGER DANGER WARNING FOR YOUR SAFETY:
 OWNER S MANUAL Woodard - LP Gas Outdoor Fireplace For Outdoor Use ONLY (outside any enclosure) Do NOT Use For Cooking. If the information in this manual is not followed exactly, a fire or explosion may
ASSEMBLY INSTRUCTIONS HOODED GAS GRILL Model: UC-SBP
 ASSEMBLY INSTRUCTIONS HOODED GAS GRILL Model: UC-SBP FOR OUTDOOR USE ONLY PLEASE READ INSTRUCTIONS CAREFULLY BEFORE ASSEMBLY RETAIN THIS MANUAL FOR FUTURE REFERENCE WARNING Hazardous fire or explosion
Riaza Tablemount Fire Bowl. Item# Model# HYUTT DANGER If you smell gas: 1. Shut off gas to the appliance.
 Riaza Tablemount Fire Bowl Item# 50224 Model# HYUTT15001-2 DANGER If you smell gas: 1. Shut off gas to the appliance. 3. If odor continues, keep away from the appliance and immediately call WARNING Do
Pizza Oven with Stand
 Pizza Oven with Stand Cooks up to 3 pizzas at a time Use to cook a variety of food Easy clean vitreous enamel interior Model No. P0104 Powerful 22MJ/h stainless steel burner Viewing window and temperature
Owner s Manual. FMI BRANDS INC Avenue Surrey, B.C. Canada V3Z 3V7 Toll Free Fax Model number FMPPC2E-1
 Owner s Manual Model number FMPPC2E-1 Series number 401 FMI BRANDS INC. 107 19052 26 Avenue Surrey, B.C. Canada V3Z 3V7 Toll Free 1-888-514-1663 Fax 1-888-797-9931 Owner & Safety Manual Model number FMPPC2E-1,
Use & Care Manual ENGLISH 1-14 / FRANÇAIS / ESPAÑOL READ AND SAVE THESE INSTRUCTIONS
 ENGLISH 1-14 / FRANÇAIS 16-31 / ESPAÑOL 32-47 ALL -TERRAIN GRILLTM Use & Care Manual Safety...2 Operation...2 Ignition...8 Cooking...9 Maintenance...9 Transport and Storage...10 Warranty...12 Trouble Shooting...13
TERRACE AND PATIO HEATER
 TERRACE AND PATIO HEATER USER INSTALLATION AND OPERATION GUIDE INDEX General and specifications.1,2 Security and caution.. 3 Tools and accessories required 5 Assembly instructions 5-7 Operation (Lighting
USE & CARE GUIDE SINGLE SIDE BURNER MODEL BLZ-SB1(NG/LP) DOUBLE SIDE BURNER MODEL BLZ-SB2(NG/LP)
 DOUBLE SIDE BURNER MODEL BLZ-SB2(NG/LP)") USE & CARE GUIDE SINGLE SIDE BURNER MODEL BLZ-SB1(NG/LP) DOUBLE SIDE BURNER MODEL BLZ-SB2(NG/LP) DANGER - IF YOU SMELL GAS: I) Shut off the gas supply to the appliance at its source. 2) Extinguish any
USE & CARE GUIDE SINGLE SIDE BURNER MODEL BLZ-SB1(NG/LP) DOUBLE SIDE BURNER MODEL BLZ-SB2(NG/LP) DANGER - IF YOU SMELL GAS: I) Shut off the gas supply to the appliance at its source. 2) Extinguish any
Repeat procedures for other side.
 Repeat procedures for other side. ASSEMBLY INSTRUCTIONS Installer: Leave these instructions with consumer. Consumer: Keep these instructions for future reference. CSA Model 98900 Printed in China DANGER
TERRACE AND PATIO HEATER
 TERRACE AND PATIO HEATER USER INSTALLATION AND OPERATION GUIDE INDEX General and specifications.11 Security and caution.. 12, 13 Tools and accessories required 13 Assembly instructions 14,15 & 16 Verifying
Use & Care Manual. Outdoor Grill with Electronic Ignition. Assembly Instructions Included. 26" Stainless Steel. Welcome/Product Registration...
 Use & Care Manual Assembly Instructions Included 26" Stainless Steel Outdoor Grill with Electronic Ignition Welcome/Product Registration... 2 General Safety Instructions... 3 Grill Features and Components...
for Assembly, Operating & Maintenance of THIS GAS UTILITY STOVE IS DESIGNED FOR OUTDOOR USE ONLY.
 Owner s Manual for Assembly, Operating & Maintenance of Model A1TS/60 Gas Built-In Utility Stove www.bigjohngrills.com YOU MUST READ THIS OWNER S MANUAL BEFORE OPERATING YOUR GAS APPLIANCE. IF YOU SMELL
Installation / Assembly
 Cabinet Cut-out Dimensions...4 Gas Requirements and Connection...5 Leak Testing Procedure....6 LP Gas...7 Natural Gas...9 Installing Side Burner with a Grill...10 Save these instructions! Copyright 2009-2010
OVATION SERIES FIRE TABLES ASSEMBLY INSTRUCTIONS
 OVATION SERIES FIRE TABLES ASSEMBLY INSTRUCTIONS CSA Model98900 DRS02403 Installer: Leave these instructions with consumer. Consumer: Keep these instructions for future reference. DANGER If you smell gas:
35" Square Gas Fire Pit Model#SRGF11603B
 TM 35" Square Gas Fire Pit Model#SRGF11603B If you smell gas: 1. Shut off gas to the appliance. 2. Extinguish any open flame. 3. If odor continues, keep away from the appliance and immediately call your
CBO-750 HYBRID-R OVEN Instructions Manual
 CBO-750 HYBRID-R OVEN Instructions Manual ELECTRICAL DIAGRAM IS LOCATED BEHIND FRONT PANEL THIS OVEN MAY BE OPERATED OUTDOORS. ELECTRICAL DIAGRAMS ARE LOCATED BEHIND FRONT PANEL. KEEP THIS MANUAL FOR FUTURE
OWNERS MANUAL RON-36, RON-27, RON-24
 OWNERS MANUAL For Outdoor Use Only Installation, Operation, Maintenance Instructions And Parts List Models: RON-36, RON-27, RON-24 Royal Range of California, Inc. 3245 Corridor Drive, Eastvale, CA 91752
OWNER S MANUAL. Smoky Hill 5pc Gas Firepit Chat Set. Product Code: D71 M25973 UPC Code: Date of Purchase: / /
 OWNER S MANUAL Smoky Hill pc Gas Firepit Chat Set Product Code: D7 M97 UPC Code: 790079 Date of Purchase: / / PARTS LIST PART NO. ATTENTION: THIS PRODUCT IS NOT FOR COMMERCIAL USE INTENDED FOR RESIDENTIAL
ASSEMBLY INSTRUCTIONS
 ASSEMBLY INSTRUCTIONS Installer: Leave these instructions with consumer. Consumer: Keep these instructions for future reference. WARNING: If the information in this manual is not followed exactly, a fire
USE & CARE GUIDE SINGLE SIDE BURNER MODEL BLZ-SB1(NG/LP) DOUBLE SIDE BURNER MODEL BLZ-SB2(NG/LP)
 DOUBLE SIDE BURNER MODEL BLZ-SB2(NG/LP)") USE & CARE GUIDE SINGLE SIDE BURNER MODEL BLZ-SB1(NG/LP) DOUBLE SIDE BURNER MODEL BLZ-SB2(NG/LP) DANGER - IF YOU SMELL GAS: I) Shut off the gas supply to the appliance at its source. 2) Extinguish any
USE & CARE GUIDE SINGLE SIDE BURNER MODEL BLZ-SB1(NG/LP) DOUBLE SIDE BURNER MODEL BLZ-SB2(NG/LP) DANGER - IF YOU SMELL GAS: I) Shut off the gas supply to the appliance at its source. 2) Extinguish any
Quickchange. OWNER S MANUAL Model # VGK-GPAK-S1 GAS INSERT FOR S-SERIES KAMADO GRILLS ENGLISH
 GAS INSERT FOR S-SERIES KAMADO GRILLS ENGLISH OWNER S MANUAL Model # VGK-GPAK-S1 SAFETY INFORMATION PLEASE READ THE ENTIRE MANUAL BEFORE OPERATING YOUR VISION KAMADO GRILL. PLEASE KEEP THIS MANUAL FOR
Natural Gas Conversion Instruction for
 WARNING For Outdoor Use Only (outside any enclosure) Natural Gas Conversion Instruction for OUTDOOR 4-BURNER STAINLESS STEEL ISLAND GRILL WARNING. Improper installation, adjustment, alteration, service
Assembly Instructions & User s Manual
 Assembly Instructions & User s Manual 42 Rectangular Gas Fire Pit Item# FSMVPT5019 Model# SRGF11666 Please keep this instruction manual for future reference Warning: READ INSTRUCTION MANUAL BEFORE ATTEMPTING
PORTABLE GRIDDLE MODEL: CGG-501 ASSEMBLY AND OPERATING INSTRUCTIONS
 Outdoor Grilling Pro ducts PORTABLE GRIDDLE MODEL: CGG-501 ASSEMBLY AND OPERATING INSTRUCTIONS m WARNING: FOR OUTDOOR USE ONLY m This instruction manual contains important information necessary for the
ASSEMBLY INSTRUCTIONS
 ASSEMBLY INSTRUCTIONS CSA Model: 98910L Printed in China Installer: Leave these instructions with consumer. Consumer: Keep these instructions for future reference. WARNING: If the information in this manual
Owner s Manual. 36" Square Gas Fire Pit Model#SRGF11610 DANGER WARNING. WARNING: For Outdoor Use Only.
 TM 36" Square Gas Fire Pit Model#SRGF11610 DANGER If you smell gas: 1. Shut off gas to the appliance. 2. Extinguish any open flame. 3. If odor continues, keep away from the appliance and immediately call
Mai805 Island. Instruction Manual and Installation Instructions
 Mai805 Island Instruction Manual and Installation Instructions 1 2 Contents Warnings Before Lighting Instructions Safety Practices to Avoid Injury Parts List Assembly Instructions Electrical Warning Connecting
Stoneridge Fire Pit High Dining Table Assembly Instruction
 Stoneridge Fire Pit High Dining Table Assembly Instruction Item# L-DN1773SST-D-T WARNING: For Outdoor Use Only. DANGER If you smell gas: 1. Shut off gas to the appliance. 2. Extinguish any open flame.
BRONZE HSC PATIO HEATER. Call center for missing parts IMPORTANT DO NOT RETURN MODEL NO.: PG195H
 BRONZE HSC PATIO HEATER MODEL NO.: PG195H DANGER: If you smell gas: 1. Shut off gas to the appliance. 2. Extinguish any open flame. 3. If odor continues, keep away from the appliance and immediately call
Portable Gas Barbecue Grill
 MODEL# WARNING Improper installation, adjustment, alteration, service or maintenance can cause injury or property damage. Read the installation, operation and maintenance instructions thoroughly before
Patio Heater_ _V4_ENG.book Page 1 Tuesday, September 2, :00 AM. AmazonBasics Patio Heater B00LILH3V4 B00LILH47C B010VFKZEO
 Patio Heater_14-0979_V4_ENG.book Page 1 Tuesday, September 2, 2014 10:00 AM AmazonBasics Patio Heater B00LILH3V4 B00LILH47C B010VFKZEO Patio Heater_14-0979_V4_ENG.book Page 2 Tuesday, September 2, 2014
ASSEMBLY INSTRUCTIONS
 ASSEMBLY INSTRUCTIONS CSA Model 99000 ARL00100 Installer: Leave these instructions with consumer. Consumer: Keep these instructions for future reference. DANGER If you smell gas: 1. Shut off gas to the
Backyard BBQ Grill. Service Center: TG NG
 TG 1301 3003 NG 383545 Backyard BBQ Grill WARNING Improper installation, adjustment, alteration, service or maintenance can cause injury or property damage. Read the installation, operation and maintenance
Table Top Patio Heater
 Table Top Patio Heater INSTRUCTION MANUAL MODEL: HPS-B Certified by international recognized standards. The infra-red with heat wave outdoor heater. Variable control gas valve with electric push igniter.
Hanover Outdoor Furniture IMPORTANT. If you have any problems with this product (missing or damaged parts, assembly issues, etc.),
,") Hanover Outdoor Furniture IMPORTANT If you have any problems with this product (missing or damaged parts, assembly issues, etc.), PLEASE DO NOT RETURN TO THE RETAILER/STORE from where you purchased the
Hanover Outdoor Furniture IMPORTANT If you have any problems with this product (missing or damaged parts, assembly issues, etc.), PLEASE DO NOT RETURN TO THE RETAILER/STORE from where you purchased the
ASSEMBLY INSTRUCTIONS
 ASSEMBLY INSTRUCTIONS Installer: Leave these instructions with consumer. Consumer: Keep these instructions for future reference. CSA Model99000 BRH01000 DANGER If you smell gas: 1. Shut off gas to the
Assembly and Owner s Manual
 Assembly and Owner s Manual Gas Smoker 2505G 3405G 3405GW 3405BG 3005G 3405GT 3605G 3405BGW ASSEMBLER / INSTALLER: Leave these instructions with the consumer. CONSUMER / USER: Read all of these instructions
Model Number GSS2020 ( ) TER 48K BTU PRO 3+1 Burner Grill S/S
 TER 48K BTU PRO 3+1 Burner Grill S/S") Model Number GSS2020 (1401 3012) TER 48K BTU PRO 3+1 Burner Grill S/S SAVE THESE INSTRUCTIONS FOR FUTURE USE. IF YOU ARE ASSEMBLING THIS UNIT FOR SOMEONE ELSE, GIVE THIS MANUAL TO HIM OR HER FOR FUTURE
Model Number GSS2020 (1401 3012) TER 48K BTU PRO 3+1 Burner Grill S/S SAVE THESE INSTRUCTIONS FOR FUTURE USE. IF YOU ARE ASSEMBLING THIS UNIT FOR SOMEONE ELSE, GIVE THIS MANUAL TO HIM OR HER FOR FUTURE
Assembly Instructions & User s Manual Dual Sack Crawfish Boiler
 Assembly Instructions & User s Manual Dual Sack Crawfish Boiler FSOGBG4301 Please keep this instruction manual for future reference Customer Service: (888) 922-2336 7:00 am to 12:00 am Central Standard
CYLINDER NOT INCLUDED
 OPERATING INSTRUCTIONS AND OWNER S MANUAL Model # HS125NG / MH125LP / HS125LP READ INSTRUCTIONS CAREFULLY: Read and follow all instructions. Place instructions in a safe place for future reference. Do
PRO SERIES GAS FRYERS OWNER S MANUAL
 PRO SERIES GAS FRYERS OWNER S MANUAL MODELS: PF-1 PRO-FRYER, PF2 DUAL PRO-FRYER REVISED OCTOBER, 2009 *PLEASE RETAIN FOR FUTURE REFERENCE This appliance has been tested according to ANSI Z83.116-2009/CSA1.86-2009.
ASSEMBLY INSTRUCTIONS HOODED GAS GRILL Model: UC375SBPSS
 ASSEMBLY INSTRUCTIONS HOODED GAS GRILL Model: UC375SBPSS FOR OUTDOOR USE ONLY PLEASE READ INSTRUCTIONS CAREFULLY BEFORE ASSEMBLY RETAIN THIS MANUAL FOR FUTURE REFERENCE WARNING Hazardous fire or explosion
TERRACE AND PATIO HEATER HLB-2400/ 2650 SERIES
 TERRACE AND PATIO HEATER HLB-2400/ 2650 SERIES INSTALLATION AND OPERATION GUIDE INDEX General and specifications 1 Security and caution.. 1,2 Tools and accessories required 2 Assembly instructions 3 Verifying
5-Burner Split Lid LP Gas Grill
 DANGER Failure to follow these instructions could result in fire or explosion that could cause property damage, personal injury or death. ITEM# 5-Burner Split Lid LP Gas Grill DANGER DO NOT use Grill indoors
AmazonBasics Patio Heater B00LILH3V4 B00LILH47C B010VFKZEO
 AmazonBasics Patio Heater B00LILH3V4 B00LILH47C B010VFKZEO English......................5 2 Safety and compliance 3 4 English Instruction Manual English Patio Heater Contents Make sure that the package
Failure to follow these instructions could result in fire or explosion which could cause property damage, personal injury or death.
 Failure to follow these instructions could result in fire or explosion which could cause property damage, personal injury or death. For use with outdoor LP gas appliances ONLY! Not recommended for use
VEGA SPECIALIST BBQ SERIES
 VEGA SPECIALIST BBQ SERIES BQ8243 & BQ8262 Vitreous enamel hood and body Hood includes glass window and temperature gauge Sure-fire rotary ignition Timer Side burner Cast iron rail burners Cast iron grill
Specialist Deluxe Series II Built-In 4 & 6 Burner BBQ BQ8342B & BQ8362B
 Specialist Deluxe Series II Built-In 4 & 6 Burner BBQ BQ8342B & BQ8362B FEATURES Deluxe BBQ featuring vitreous enamel body and #304 stainless steel fascia #304 Stainless steel hood includes glass window
OPERATING INSTRUCTIONS AND OWNER S MANUAL
 MR HEATER STARTING SERIAL #: MHC1510000001 BASECAMP STARTING SERIAL #: MHC151100000001 OPERATING INSTRUCTIONS AND OWNER S MANUAL MODEL MR. HEATER MH4B READ INSTRUCTIONS CAREFULLY: Read and follow all instructions.
4-Burner LP Gas Grill
 MODEL# 4-Burner LP Gas Grill WARNING: Improper installation, adjustment, alteration, service or maintenance can cause injury or property damage. Read the installation, operation and maintenance instructions
User Manual No. 8 DANGER WARNING. WARNING: For Outdoor Use Only WARNING. Models: , OUTDOOR PATIO HEATER
 User Manual No. 8 Models: 97020, 970204 OUTDOOR PATIO HEATER DANGER FOR YOUR SAFETY If you smell gas:.shut off gas to the appliance. 2.Extinguish any open flame..if odor continues, keep away from the appliance
Dashley Outdoor Fire Table
 Dashley Outdoor Fire Table MODEL N0. 085-557-8 L-FT047PST-F ASSEMBLY INSTRUCTIONS Toll-free 888 670-6684 IMPORTANT: Please read this manual carefully before beginning assembly of this product. Keep this
Oil-less Fryer & Roaster Model number: TF RG ASSEMBLY & OPERATING INSTRUCTIONS
 Oil-less Fryer & Roaster Model number: TF2201802-RG ASSEMBLY & OPERATING INSTRUCTIONS Tools required (not included): Phillips screwdriver / Adjustable wrench For Outdoor Use Only (Tank Not Included) To
OWNER S MANUAL 36 GRIDDLE COOKING STATION MODEL #1554 ! WARNING! FOR OUTDOOR USE ONLY
 OWNER S MANUAL 36 GRIDDLE COOKING STATION MODEL #1554 FOR OUTDOOR USE ONLY! WARNING! Please read manual carefully before assembly Retain this manual for future reference North Atlantic LLC 1011 W 400 N
PAULIN PRODUCTS INDOOR HEATER
 PAULIN PRODUCTS INDOOR HEATER OWNER S MANUAL AND OPERATING INSTRUCTIONS May be used with a disposable 1 lb. propane cylinder: - for emergency indoor home heating - for indoor use in commercial enclosures,
STAINLESS STEEL AND PORCELAIN 5-BURNER GAS GRILL Model number: GR MM-00 ASSEMBLY & OPERATING INSTRUCTIONS
 STAINLESS STEEL AND PORCELAIN 5-BURNER GAS GRILL Model number: GR2210601-MM-00 ASSEMBLY & OPERATING INSTRUCTIONS For Outdoor Use Only This instruction manual contains important information necessary for
GAS-FIRED INFRARED OUTDOOR PATIO HEATER INSTALLATION, OPERATION MAINTENANCE INSTRUCTIONS
 GAS-FIRED INFRARED OUTDOOR PATIO HEATER INSTALLATION, OPERATION MAINTENANCE INSTRUCTIONS FOR MODEL PTH-03-3G TABLE OF CONTENTS PAGE IMPORTANT TOOLS & PARTS.. 2 PRECAUTIONS.. 3 ASSEMBLY INSTRUCTIONS. 4
Gas & Kamado Combo Grill
 Gas & Kamado Combo Grill Model Number: GR2150901-MM-00 Assembly and Operating Instructions For Outdoor Use Only This instruction manual contains important information necessary for the proper assembly
Outdoor Flame Heater
 Model Outdoor Flame Heater Owner s Manual Read these instructions before lighting this appliance. DANGER If you smell gas: 1. Shut off gas to the appliance. 2. Extinguish any open flame. 3. If odor continues,
Weekend Warrior LP Gas Grill
 TG 1301 3010 NG 936967 Weekend Warrior LP Gas Grill WARNING: Improper installation, adjustment, alteration, service or maintenance can cause injury or property damage. Read the installation, operation
OPERATING INSTRUCTIONS AND OWNERS MANUAL GAS-FIRED INFRA-RED TANK TOP HEATER
 OPERATING INSTRUCTIONS AND OWNERS MANUAL GAS-FIRED INFRA-RED TANK TOP HEATER Model # MH15TS MH30TS READ INSTRUCTIONS CAREFULLY: Read and follow all instructions. Place instructions in a safe place for
GAS PATIO HEATER WITH LED TABLE. Call center for missing parts IMPORTANT DO NOT RETURN MODEL NO.: PG188H
 GAS PATIO HEATER WITH LED TABLE MODEL NO.: PG188H DANGER: If you smell gas: 1. Shut off gas to the appliance. 2. Extinguish any open flame. 3. If odor continues, keep away from the appliance and immediately
Assembly & User Instructions Mirage 38,200Btu Heat Focusing Patio Heater
 Assembly & User Instructions Mirage 38,200Btu Heat Focusing Patio Heater These instructions are for your safety. Please read them thoroughly before use and retain them for future reference. DANGER: If
100% Safety Shutoff Control 40,000 BTUH Input Rating Constant Pilot Propane Gas
 glor sun The Original Outdoor Patio Heater Manufactured by INFRARED DYNAMICS, INC. Yorba Linda, CA 92886 U.S.A. Tel: (714) 572-4050 Fax: (714) 572-6093 Toll-Free: (888) 317-5255 www.infradyne.com SPECIFICATIONS:
Hanover Outdoor Furniture IMPORTANT. If you have any problems with this product (missing or damaged parts, assembly issues, etc.),
,") Hanover Outdoor Furniture IMPORTANT If you have any problems with this product (missing or damaged parts, assembly issues, etc.), PLEASE DO NOT RETURN TO THE RETAILER/STORE from where you purchased the
Hanover Outdoor Furniture IMPORTANT If you have any problems with this product (missing or damaged parts, assembly issues, etc.), PLEASE DO NOT RETURN TO THE RETAILER/STORE from where you purchased the
4 Burner LP Gas Grill
 MODEL# WARNING: Improper installation, adjustment, alteration, service or maintenance can cause injury or property damage. Read the installation, operation and maintenance instructions thoroughly before
NATURAL GAS CONVERSION KIT
 NATURAL GAS CONVERSION KIT Model # 498425 For use with Char-Broil RED Series Grills Only. FOR OUTDOOR USE ONLY This Natural Gas Conversion Kit can be used ONLY with Dual Fuel grills. WARNING CALIFORNIA
OPERATING INSTRUCTIONS AND OWNER S MANUAL
 OPERATING INSTRUCTIONS AND OWNER S MANUAL MR. HEATER READ INSTRUCTIONS CAREFULLY: Read and follow all instructions. Place instructions in a safe place for future reference. Do not allow anyone who has
Service Center: Outdoor LP Gas Barbecue Grill MODEL# GSF2818K WARNING:
 MODEL# Outdoor LP Gas Barbecue Grill WARNING: Improper installation, adjustment, alteration, service or maintenance can cause injury or property damage. Read the installation, operation and maintenance
Gas Fire Patio Heater Q9
 Gas Fire Patio Heater Q9 Instruction Manual Please read the manual BEFORE you unpack or install the fire TABLE OF CONTENTS Warning 3 Getting Started 4 What s Included 5 Assembly Procedures 6 Product Drawing
OWNER'S MANUAL WARNING WARNING WARNING WARNING WARNING. Factory No.: HYFP Style No.: WARNING WARNING READ BEFORE USE!
 OWNER'S MANUAL READ BEFORE USE! Factory No.: HYFP30205-19 Style No.: 65209 For Outdoor Use Only! Use Propane Gas Only! - USE PROPANE GAS ONLY! Do not store or use gasoline or other flammable vapors and
Owner s Manual TABLETOP PATIO HEATER MODEL # PHRDGH/SS-TT
 Owner s Manual TABLETOP PATIO HEATER MODEL # PHRDGH/SS-TT FOR YOUR SAFETY If you smell gas: 1. Shut off gas to the appliance. 2. Extinguish any open flame. 3. If odor continues keep away from the appliance
Portable Gas Barbecue Grill
 MODEL# Portable Gas Barbecue Grill WARNING Improper installation, adjustment, alteration, service or maintenance can cause injury or property damage. Read the installation, operation and maintenance instructions
OPERATING INSTRUCTIONS AND OWNER S MANUAL
 Serial Numbers 734000000001000-7340000000169215 OPERATING INSTRUCTIONS AND OWNER S MANUAL Model # MH9B READ INSTRUCTIONS CAREFULLY: Read and follow all instructions. Place instructions in a safe place
WARNING CAUTION. Liquid Propane Gas Grill. Use and Care Guide. This Grill Is For Outdoor Use Only. Model No Parts Assembly Safety Rules
 Use and Care Guide Liquid Propane Gas Grill Model No. 415.16661800 This Grill Is For Outdoor Use Only WARNING Read this manual before cooking on grill. Failure to follow all manufacturer s instructions
Outdoor LP Gas Barbecue Grill
 MODEL# WARNING: Improper installation, adjustment, alteration, service or maintenance can cause injury or property damage. Read the installation, operation and maintenance instructions thoroughly before
LP GAS COOKER OWNER S MANUAL
 READ MANUAL BEFORE USE MODEL #2212 LP GAS COOKER OWNER S MANUAL SAFETY ALERTS, ASSEMBLY & OPERATING INSTRUCTIONS GENERAL MAINTENANCE & STORAGE This manual is for Barbour International "Bayou Classic" products