Installation Instructions and Owner s Manual. XBW & XBW-ARSENIC Series. Backwashing Filter Systems
|
|
|
- Horace Fleming
- 5 years ago
- Views:
Transcription
 693-1972 Fax (260) 693-0602 XBW Series Instruction Manual 181030.docx")
1 Installation Instructions and Owner s Manual XBW & XBW-ARSENIC Series Backwashing Filter Systems First Sales, LLC US Highway 33 N, Churubusco, IN Phone (260) Fax (260) XBW Series Instruction Manual docx
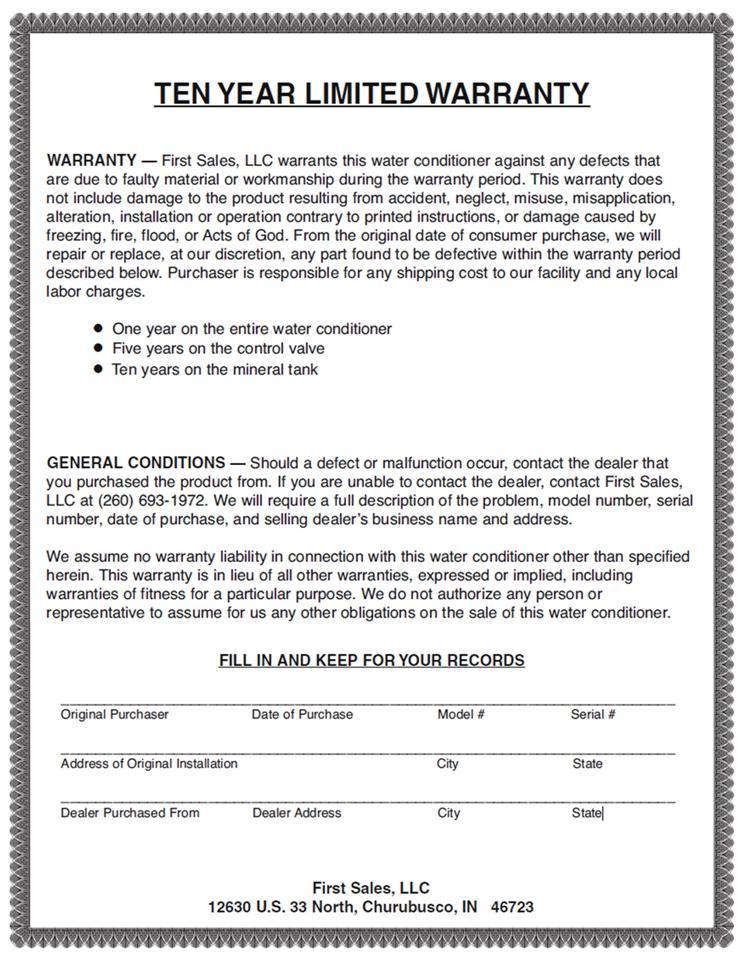
2 Table of Contents Pre-installation Instructions Page 2 Typical Installation Page 4 Detailed Installation Page 5 Bypass Valve Page 5 Media Replenishment Page 6 Display and Operation Page 6 Regeneration Page 7 Statistics Page 8 Installer Settings Page 9 Vacation Mode Page 10 Eco Mode Page 11 Specifications Page 12 Component Parts Breakdown & List Page 13 Control Valve Parts Breakdown & List Page 14 Installation Fitting Assemblies Page 15 Troubleshooting Page 17 Ten Year Limited Warranty Page 18 1
3 Pre-installation Instructions Description of the backwashing filter The XBW systems include a filtration tank (with gravel and distributor) and a backwashing control valve with bypass. Filtration media for use with the XBW systems are purchased separately and selected from the following types: PART MEDIA VOLUME SHIP. PACKAGE WT. NUMBER TYPE / APPLICATION (CU. FT.) (LBS.) A10 ACTIVATED CARBON 1.00 BAG 29 A05P TASTE & ODOR REDUCTION 0.50 PAIL 14 ACC10 CATALYTIC CARBON 1.00 BAG 29 ACC05P CHLORAMINE REDUCTION 0.50 PAIL 14 BIRM B BAG 41 B05P REDUCTION OF IRON AND MANGANESE 0.50 PAIL 20 C05P CALCITE SELF LIMITING ACID NEUTRALIZER 0.50 PAIL 45 FILTER AG FA BAG 24 FA05P SUSPENDED SOLIDS REDUCTION 0.50 PAIL 12 ZEOLITE ZEO BAG 25 Z05P SUSPENDED SOLIDS/ SEDIMENT REDUCTION 0.50 PAIL 50 N05 ARSENIC-10 QFS05P NEUTRALIZER ACID NEUTRALIZER ARSENIC REDUCTION REPLACEMENT MEDIA for XBW- ARSENIC FILTERS QUARTZ FILTER SAND (.45mm x.55mm) SEDIMENT REDUCTION 0.50 PAIL 43 1 BAG PAIL 51 The XBW-ARSENIC systems include a filtration tank (with gravel and distributor), arsenic reduction media (shipped separately) and a backwashing control valve with bypass. Media is included only with XBW-ARSENIC units. 2
4 Pre-installation Instructions (cont.) Successful Application Any filter media may have specific limitations and/or requirements for successful application. A water sample should be submitted to First Sales for analysis and recommendation by Customer Service. XBW-ARSENIC IMPORTANT: Contact First Sales technical services to assist with proper sizing based on the level of arsenic in the water and the flow rate requirement. The arsenic test results must be from a certified laboratory to ensure accuracy. Other water quality information is required as well, and will determine if pre-treatment equipment is required to meet the influent water quality pre-requisites for the XBW-ARSENIC system: Iron < 0.1 ppm, Manganese < 0.01 ppm, ph < 8.0, Silica < 30 ppm, Hardness > 5 gpg is preferred but not required unless silica is present. Once the system has been installed, an arsenic test should be done to determine if the arsenic level is being reduced sufficiently (10 ppb or less, per the EPA MCL) and should be tested regularly (every 6 months recommended) to ensure the system is functioning properly and to indicate when the media has become exhausted. Time of Backwash Periodically the control valve will go through a backwash cycle. This cycle is factory preset to 12:00 A.M. flushing the accumulated sediment and/or precipitant to the drain. After the backwashing process the unit is now prepared for the next period of service. Water Supply This filter will function properly when the water supply is furnished by a jet pump, submersible pump, variable speed (constant pressure) pump or community water supply. As with all other filter systems, however, it is imperative that the well pump provides enough flow rate for the filter to adequately backwash. In order to ensure sufficient backwash flow rate the following pumping rate test should be performed prior to installing the backwashing filter. 1. Make certain no water is being drawn in the house. 2. Open spigot nearest pressure tank. 3. When well pump starts, close spigot and measure time (in seconds) to refill pressure tank (well pump turns back off). This is Cycle Time. 4. Using a container of known volume, draw water from pressure tank and measure how many gallons until the pump turns back on again. This is Draw Down. 5. Calculate pumping rate by dividing draw down by cycle time and multiplying by 60. Draw Down (gallons) Cycle Time (seconds) X 60 = Pumping Rate (gallons per minute) Example: Draw down is 8 gallons Cycle time is 65 seconds 8 gallons 65 seconds X 60 = 7.4 gpm (gallons per minute) 3
5 Pre-installation Instructions (cont.) Location Considerations The proper location to install the backwashing filter will ensure optimum filter performance and satisfactory water quality. The following factors should be considered in selecting the location of this system. 1. The backwashing filter must be installed after the pressure tank (private well system only). 2. The system should be installed as close as possible (preferably within 15 ) to an adequate floor or laundry drain capable of handling the backwash cycle volume and flow rate (refer to unit specifications). An air gap should be provided between the backwashing filter drain line and plumbing drain. 3. All water conditioning equipment should be installed at least 10 prior to the water heater. Water temperatures exceeding 100 F can damage the internal components of the control valve and filter tank. An expansion tank may need to be installed in the line to the water heater in order to allow for thermal expansion and comply with local plumbing codes. 4. Water pressure must not exceed the range of psi. 5. The system must not be subject to freezing temperatures. 6. The control valve requires 115/120 V, 60 Hz electricity from a three prong outlet that is not wired to a switch. 7. Never install a cartridge type filter prior to the backwashing filter. Any cartridge or in-line filter (if desired) may be installed after the backwashing filter. This will prevent restricting the water flow and pressure available for backwash. 8. Appliances requiring extended periods of continuous or high flow water use (i.e. geothermal heat pumps, swimming pools, lawn irrigation, outside hose bibs, etc.) should bypass the filter. Typical Installation Treated Water Iron Free Hard Water Grounding Strap Untreated Water for geothermal heat pumps, swimming pools, lawn irrigation, hose bibs etc. Expansion Tank Untreated Water Water Heater Softener (If required) XBW, Iron Filter w/ Inlet Coupling XBW-ARSENIC Check Valve (if required for XBW-ARSENIC) Pressure Tank FIGURE 1: Typical Installation 4
6 Detailed Installation Instructions STEP 1: STEP 2: STEP 3: STEP 4: STEP 5: STEP 6: STEP 7: STEP 8: STEP 9: STEP 10: Carefully remove all components from packaging. DO NOT DISCARD PACKAGING until all water filter system components and fittings have been located. -DH suffix models fill media through dome hole & skip to step 4. With the backwashing filter unit in the upright position, remove the control valve from the mineral tank being careful to not pull the distributor out of the gravel at the bottom of the tank. Cover the top of the distributor tube with the included red cap and, using the included blue media funnel, pour filter media(s) into the mineral tank. If using multiple filter media types, load in the order of heaviest (most dense) to lightest (least dense) of space MUST be left empty at the top of the mineral tank to allow for media bed expansion during backwash and to prevent filter media from being discharged through the drain line. Use a garden hose or bucket to fill the media tank with water. Carbon or Filter Ag should soak for at least 2 hours before executing STEP 11 and the other remaining steps. Clean mineral tank (or dome hole) threads to remove any filter media. If -DH suffix model, replace dome plug. Otherwise, remove red cap from distributor tube and reinstall control valve by threading it securely onto the mineral tank. (O-ring seal; HAND TIGHTEN ONLY!) Attach the 90 degree adapters to the inlet and outlet of the control valve (if desired). Hand tighten union nuts. Do not over tighten. Attach bypass valve to the inlet/outlet of control valve or of the 90 degree adapters (if installed). Shut off water at main supply. Relieve pressure by opening nearest faucet. SHUT OFF POWER OR FUEL SUPPLY TO WATER HEATER. Cut main supply line as required to fit plumbing to inlet and outlet of bypass valve. DO NOT PLUMB INLET AND OUTLET BACKWARDS. Piping should be supported. Do not apply heat to any fitting attached to the bypass or control valve. Use the provided polyethylene tubing (NO VINYL TUBING) to run drain line from control valve discharge fitting to floor drain or sump pit capable of handling the backwash rate of the filter. DISCHARGE END OF THE DRAIN LINE MUST BE FIRMLY SECURED! There must be an air gap at the end of the drain line to prevent siphoning of waste water and meet plumbing code. Total length of drain line should be 15 or less. AVOID OVERHEAD DRAINS. Plug the filter into an un-switched electrical outlet. Ensure control valve is in the Service position (time of day is displayed on the screen {refer to page 5 for Home Screen Display}). Place bypass valve in the Bypass position (refer to Figure 2 below). Open main supply valve or turn on power to pump on private well systems. FIGURE 2: Bypass Valve Operation 5
7 Detailed Installation Instructions (continued) STEP 11: STEP 12: STEP 13: STEP 14: STEP 15: STEP 16: Hold down the REGEN button until the motor starts. This will advance the control valve to the backwash position. Once the backwash cycle countdown begins, unplug the power from the control valve to keep it in the backwash position. Rotate the INLET knob of the bypass valve ¼ of the way to Service allowing unit to fill slowly. This will slowly purge trapped air and carbon media fines to the drain. Be patient. When all air and carbon fines have been purged from the system and only water is running to the drain; slowly rotate the inlet knob of the bypass valve to the Service position. Stop momentarily if air or media fines appear in the drain and allow it to clear. Repeat until fully in the service position and then turn the outlet knob to the service position also. Plug the power cable back in. The unit will return to service and display the Home Screen. Check for leaks and correct as necessary. Turn power or fuel supply back on to water heater. Press the SET button to set the current time of day on the timer (note AM and PM). Media Replacement If media replacement is ever required, a wet/dry shop vacuum can used to remove the filter media from the filter tank. CAUTION: There is a layer of gravel under the filter media. Make sure that only filter media is extracted. The filter media should then be replaced by new media. Ensure that there is a minimum of (depending on the type of media) from the media to the top of the tank to allow room for expansion during backwash cycle. The original start up and flushing procedure should be repeated with the new media. Display and Operation - Home Screen Flow indicator Flashes with water use Current Time of Day including AM or PM indicator Regen Tonight Illuminates to show pending regeneration status 4 User Input buttons Active prompts for user input buttons Vacation Mode button and indicator light Eco Mode button and indicator light ONLY use with softener configurations The active prompts displayed at the bottom of the circuit board indicate the function of each user button. 6
8 Display and Operation - Setting Time Home screen displays current time-of-day. Press SET button to access time set screen. Using and, set the current time-of day hours. Note the AM and PM indicator and set the time accordingly. Press NEXT button to set current minutes. Using and, set the current minutes. Press NEXT button to save changes and return to Home screen. Regeneration Momentarily pressing and releasing the REGEN button will cause the Regen Tonight indicator to illuminate on the top right side of the display. The regeneration process will begin at the next programmed time-of-regeneration (factory preset for 12:00 AM) Pressing and HOLDING the REGEN button for approximately 3 seconds will initiate an immediate regeneration. NOTE: The regeneration cycle will disable the Regen Tonight indicator (if illuminated). The regeneration cycle will also reset the gallons remaining until next regeneration (applies to softener configurations only) and the days override interval. Momentarily pressing and releasing the REGEN button again will cancel the delayed regeneration cycle. 7
9 Regeneration Continued The following cycles are listed in the factory programmed sequence. Each cycle in the process may be advanced without waiting for the programmed cycle duration, for installation, troubleshooting, or maintenance purposes by pressing the NEXT button. Cycle: BACKWASH Press NEXT button to advance to Rinse Cycle. 1. The Backwash and Regen indicators will be illuminated on the display. 2. The control valve will advance to the Backwash position. 3. The cycle duration will begin to count down on the display once the control valve is in the proper position. 4. Water will flow up through the filter media then out the drain flushing accumulated solids. 5. The control valve has an internal bypass to allow untreated water to be used for service during this cycle. Cycle: RINSE Press NEXT button to return control to the HOME position. 1. The Rinse and Regen indicators will be illuminated on the display. 2. The control valve will advance to the Rinse position. 3. The cycle duration will begin to count down on the display once the control valve is in the proper position. 4. Water will flow down through the filter media then out the drain preparing the filter bed for service. 5. The control valve has an internal bypass to allow untreated water to be used for service during this cycle. Display and Operation - Stats Home screen displays current time-of-day. The flow indicator will flash if water is being used. The Regen Tonight indicator will be illuminated if the filter is queued for regeneration. Pressing STATS button advances screen to current flow rate. Current Flow screen displays the flow rate that is currently being treated by the softener (if any). The word FLOW is displayed on top left corner of screen whether water is being used or not. Display registers flow rate in gallons per minute. DOES NOT APPLY to XBW Series units. Pressing NEXT button advances screen to volume remaining. Volume remaining screen displays the number of gallons that can be treated before the scheduled regeneration cycle when the control valve is configured for a softener. DOES NOT APPLY to XBW Series units. Pressing DONE button returns display to Home Screen. 8
10 Display and Operation Installer Settings Cycles The installer settings provide access to the control valve cycle times. The factory settings have been programmed for maximum efficiency. Altering the factory programmed cycles will affect the systems performance. NOTE: Extreme caution must be taken when adjusting the control valve cycles. Decreasing a cycle time or completely deleting the cycle may cause the system to stop functioning. Home screen displays current time-of-day. Press and HOLD CHECKLIST button for approximately 3 seconds to access installer settings. Press NEXT button to set incoming HARDNESS level. Ensure the Iron indicator is illuminated on the left side of the display and using the and buttons set the incoming iron concentration. NOTE: This setting only applies if the control valve is configured for a softener. It should be set to 0 for the XBW Series units. Ensure the Hardness indicator is illuminated on the left side of the display and using the and buttons set the incoming hardness level. Press NEXT button to set regeneration DAYS OVERRIDE interval NOTE: This setting only applies if the control valve is configured for a softener. It should be set to 0 for the XBW Series units.. Using and, set the desired day override interval. The regeneration day override function will cause the filter to regenerate after a designated number of days. The override interval will reset after every regeneration cycle whether initiated manually or by volume. The day override function will be disabled if the VACATION mode is active. This should be set to 3 for XBW Series units. Press NEXT button to set REGENERATION TIME hours. Ensure the Regen Time indicator is illuminated. Using and, set the desired time of regeneration hours. Note the AM and PM indicator and set the time accordingly. This should be set to 12 AM for XBW Series units. Press NEXT button to set REGENERATION TIME minutes. Ensure the Regen Time indicator is illuminated. Using and, set the desired time of regeneration minutes. This should be set to 00 for XBW Series units. 9
11 Display and Operation Installer Settings Cycles (continued) Press NEXT button to set PROPORTIONAL BRINING. Press NEXT button to set cycle #1 duration. Using and, the Proportional Brining function can be set to ON or OFF. This feature can also be manually toggled on or off with the ECO button on the face of the front panel. IMPORTANT: This feature only applies when the control valve is configured for a softener. This feature must be turned off for XBW Series units. Otherwise, the unit will not regenerate. Ensure the Backwash and Minutes indicators are illuminated. Using and, set the desired length of time for BACKWASH cycle Press NEXT button to set cycle #2 duration. Ensure the Rinse and Minutes indicators are illuminated. Using and, set the desired length of time for RINSE cycle. After all cycles have been set press either NEXT or DONE button to return to Home Screen. Vacation Mode The VACATION mode may be activated or deactivated by pressing the VAC button on the front panel. The red LED light will be illuminated when the vacation mode is activated. Once activated, the vacation mode will prevent the water filter from regenerating. This may be used if the house will not be occupied for an extended period of time. The vacation mode is initiated by pressing the VAC button on the front panel. Vacation mode must be manually deactivated with XBW units. Vacation mode should not be activated if using Calcite or Neutralizer media, to keep the media from cementing. 10
12 . ECO Mode The ECO mode may be activated or deactivated by pressing the ECO button on the front panel. The green LED light will be illuminated when the ECO mode is activated. The ECO Mode MUST only be used when the control valve is configured for a water softener. This feature does not apply to XBW units. 11
13 Specifications Description Volume, cu. ft. Filter media (See page 2) XBW10 XBW10ARSENIC Model Number XBW20 XBW15 XBW20ARSENIC XBW Gravel Underbed, lbs Operating Flow Rate, gpm Cont.(no duration limit, 5 gpm/ft 2 ) Svc. (intermittent flow,10 gpm/ft 2 ) Peak (10 min or less, 15 gpm/ft 2 ) Regen. Flow Rates, gpm 1 Backwash & Rapid Rinse Connection Size, Type ¾ MNPT ¾ MNPT ¾ MNPT ¾ MNPT Factory Programming Settings Day Override Setting Regeneration Time 12:00 AM 12:00 AM 12:00 AM 12:00 AM Backwash (minutes) Fast Rinse (minutes) Total Water Used, gallons Dimensions, in. Mineral Tank, diameter x height 10 x x x x 54 Overall, depth x width x height: (less 90 close installation adapters) 21 x 11 x x 11 x x 12 x x 13 x 59 (with 90 close installation adapters) 17 x 11 x x 11 x x 12 x x 13 x 69 Approximate Ship Wt., lbs Some media may require a different DLFC to be installed 2 Add a -1 suffix to model number for 1 MNPT connection 12

14 Component Parts Breakdown MODEL NUMBER REF DESCRIPTION XBW10 XBW20 XBW15 XBW10ARSENIC XBW20ARSENIC XBW25 A Control Valve XBW10 VLV ASSY L/BP XBW10 VLV ASSY L/BP XBW20 VLV ASSY L/BP XBW20 VLV ASSY L/BP B Mineral Tank MTP1044N MTP1054N MTP1248N MTP1354N MTP1044DOME MTP1054DOME MTP1248DOME MTP1354DOME C Distributor D100S-48 D100S-54 D100S-48 D100S-54 D Media Qty 1 cu ft 1.5 cu ft 2 cu ft 2.5 cu ft E 1/4/ x 1/8 gravel QC20 QC20 QC QC20 90 deg. Adapters, NOT bypass valve, 1 elbows SHOWN & ¾ compression fittings Refer to Control Valve Breakdown on following pages. NOT SHOWN Optional Tank Jacket TJZ1054-BK TJZ1054-BK TJZ1252-BK TJZ1252-BK NOT SHOWN Distributor Adapter SA900 SA900 SA900 SA900 NOT SHOWN Top Screen FHS101 FHS101 FHS101 FHS101 1 Only applies to models with -DH suffix. 13

15 Control Valve Parts Breakdown REF # Part Number Description REF # 14 Part Number Description 1 FCC-950 Front Cover 16 EBA Bypass Elbow 2 PCB-3486 Circuit Board (specify unit model) 17 BP 213 Bypass Valve 3 DC-12 DC Adaptor with cord EBA975 4 BV910-BW Brine Valve Assembly for BW Filt. 18 EBA900 5 CAB945 Piston and Rod Assembly EBA915 ¾ NPT Elbow (includes nut and o-ring) 1 NPT Elbow (includes nut and o-ring) 1 ½ NPT Elbow (includes nut and o-ring) 6 TSS900 Seal Cartridge Assembly 19 TAF131 Tank Attachment 7 RVS932 Injector Assembly w/o-rings 20 TN101 Tank Nut 8 FS165 Injector Filter Screen 21 VG145 Venturi Gasket 9 OR344 Valve to Tank Adaptor O-Ring 22 VP145 Venturi Plate 10 OR337 Tank O-ring 23 VB FC901 Drain Fitting (12338 barb elbow not included) Venturi Hex Head Bolt, 18-8 SS 1/4-20 x 1/2" 24 QCF987 Quick Connect Flow Assembly 12 FC103 Drain Fitting Retainer Clip 25 HPC-075 Hair Pin Clip 14 MCA945 Motor and Cam Assembly (includes nut micro switches) K420-MICRO Micro Switch (2 required) NOT SHOWN Drain Fitting, Hose Barb, 90 Elbow, 1/2" x 1/2"

16 Installation Fitting Assemblies PVC MALE NPT ELBOW 90 DEGREE BYPASS ELBOW Ref Part # Description Qty Ref Part # Description Qty EBA900 1 Elbow Assembly 1* EBA Bypass Elbow Assembly 1 EB100 1 Elbow 1 1 EB175 Bypass Elbow 1 2 OR324 O-ring, OR324 O-ring, C 101 Split Ring Retainer 1 3 C 101 Split Ring Retainer 1 1* 4 C 102 Connector Nut 1 4 C 102 Connector Nut 1 1 (*2 required) (*2 required) /2 PVC MALE NPT ELBOW ¾ PVC MALE NPT ELBOW Ref Part # Description Qty Ref Part # Description Qty EBA /2 Elbow Assembly 1* EBA975 3/4 Elbow Assembly 1* 1 EB Elbow 1 1 EB750 3/4 Elbow 1 2 OR324 O-ring, OR324 O-ring, C 101 Split Ring Retainer 1 3 C 101 Split Ring Retainer 1 4 C 102 Connector Nut 1 4 C 102 Connector Nut 1 (*2 required) (*2 required) 15
 1 4 1 STRAIGHT FITTING Ref Part # Description Qty TC204-1 1 Straight Fitting Assembly 1*")
 1 4 C 102 Connector Nut 1 (*2 required) 3/4 QUICK CONNECT Ref Part # Description Qty")
17 Installation Fitting Assemblies (cont.) STRAIGHT FITTING Ref Part # Description Qty TC Straight Fitting Assembly 1* 1 TC Straight 1 2 OR324 O-ring, -324 (not shown) 1 3 C 101 Split Ring Retainer (not shown) 1 4 C 102 Connector Nut 1 (*2 required) 3/4 QUICK CONNECT Ref Part # Description Qty QFNCR4 3/4 Quick Connect Assembly 1* (*2 required) 16
18 Troubleshooting PROBLEM CAUSES SOLUTIONS Excessive pressure drop through filter Contaminant not being properly removed Loss of media to drain Howling or whistling noise during regeneration Control Valve cycles continually Continuous flow of water to drain Media in the service lines A) Filter not backwashing B) Filter bed loaded with sand C) Drain line restricted D) Top Screen Fouled E) Control Valve plugged with debris A) Leaking bypass valve B) Internal valve leak C) Distributor not seated properly in control valve D) Water usage flow rate exceeds filter specifications E) Media is fouled or has reached its adsorptive capacity A) Air in system B) Insufficient soak time before first backwash after installing media A) Inadequate drain line diameter or drain line restricted A) Faulty switch B) Faulty circuit board C) Faulty timer motor A) Loss of electrical power during regeneration B) Program setup incorrectly C) Debris in control valve D) Internal leak in control valve E) Drive motor faulty A) Unit installed backwards 1) Check drive motor and replace if faulty 2) Ensure uninterrupted power supply 3) Check Backwash frequency setup 4) Verify sediment being removed is less dense than the filter media and install a Spin-Down type sediment filter ahead of the filter to remove well sand 5) Verify adequate pumping rate for backwash 6) Check drain line for restriction: frozen, plugged, kinked, exceeds 15, overhead installation, flexible drain line, drain line diameter too small 7) Remove and clean top screen 8) Disassemble and clean control valve 1) Verify bypass valve is in service position 2) Replace piston, spacers and seals 3) Verify distributor tube seated securely in control valve body 4) Verify actual water usage flow rates against system specifications 5) Increase length of backwash and rinse cycles 6) Re-bed the filter with new media 1) Eliminate the source of air in the system 2) Check media level and adjust if necessary 1) Reconfigure or replace drain line 1) Replace faulty switch 2) Replace faulty circuit board 3) Replace faulty timer motor 1) Ensure electrical outlet is functioning 2) Verify timer programming 3) Disassemble and clean control valve 4) Replace seals and/or piston 5) Replace faulty drive motor 1) Re-plumb the water lines so that the supply side of the line is connected to the inlet of the bypass and the service side is connected to the outlet. 17
19 18
Installation Instructions and Owner s Manual. FBW, FEBW, FBW-ARSENIC & FEBW-ARSENIC Series. Backwashing Filter Systems
 Installation Instructions and Owner s Manual FBW, FEBW, FBW-ARSENIC & FEBW-ARSENIC Series Backwashing Filter Systems First Sales, LLC 12630 US Highway 33 N Churubusco, IN 46723 Phone (260) 693-1972 Fax
Installation Instructions and Owner s Manual. XTS Series. Water Softening System
 Installation Instructions and Owner s Manual XTS Series Water Softening System First Sales, LLC 12630 US Highway 33 N Churubusco, IN 46723 Phone (260) 693-1972 Fax (260) 693-0602 XTS Series Instruction
Installation Instructions and Owner s Manual. O3 & O3E Series. Iron Reduction System
 Installation Instructions and Owner s Manual O3 & O3E Series Iron Reduction System First Sales, LLC 12630 US Highway 33 N Churubusco, IN 46723 Phone (260) 693-1972 Fax (260) 693-0602 O3-O3E Instruction
Installation Instructions and Owner s Manual. OXY3 & OXY3E Series. Iron Reduction System
 Installation Instructions and Owner s Manual OXY3 & OXY3E Series Iron Reduction System First Sales, LLC 12630 US Highway 33 N Churubusco, IN 46723 Phone (260) 693-1972 Fax (260) 693-0602 OXY3-OXY3E Instruction
Installation Instructions and Owner s Manual. KLX2 & KLX2E Series. Catalytic Filter System
 Installation Instructions and Owner s Manual KLX2 & KLX2E Series Catalytic Filter System First Sales, LLC 12630 US Highway 33 N Churubusco, IN 46723 Phone (260) 693-1972 Fax (260) 693-0602 KLX2-KLX2E Instruction
Installation Instructions and Owner s Manual. CITY Series Water Softening and Filter System
 Installation Instructions and Owner s Manual CITY Series Water Softening and Filter System First Sales, LLC 12630 US Highway 33 N Churubusco, IN 46723 Phone (260) 693-1972 Fax (260) 693-0602 CITY Series
Installation Instructions and Owner s Manual. FSN Series. Nitrate Removal Water Softening System
 Installation Instructions and Owner s Manual FSN Series Nitrate Removal Water Softening System First Sales, LLC 12630 US Highway 33 N Churubusco, IN 46723 Phone (260) 693-1972 Fax (260) 693-0602 FSN Series
Fully Automatic Water Filters
 INSTALLATION INSTRUCTIONS Fully Automatic Water Filters INSTALLATION INFORMATION Model No. Unit Date Code Date Installed WATER ANALYSIS RECORD Hardness GPG Sulfur PPM Iron PPM ph Manganese PPM Tannins
Installation Instructions & Operating Manual. EM Series. Water Softener System
 Installation Instructions & Operating Manual EM Series Water Softener System First Sales, LLC 1630 US Highway 33 N Churubusco, IN 4673 Phone (60) 693-197 Fax (60) 693-060 EM Installation Manual 170818.docx
Installation Instructions and Owner s Manual. HE, IM & INT Series. Water Softener System
 Installation Instructions and Owner s Manual HE, IM & INT Series Water Softener System First Sales, LLC 1630 US Highway 33 N Churubusco, IN 4673 Phone (60) 693-197 Fax (60) 693-060 HE-IM-INT Instruction
Installation Instructions and Owner s Manual. N, NMS, NES, & INT2 Series. Water Softening Systems
 Installation Instructions and Owner s Manual N, NMS, NES, & INT2 Series Water Softening Systems MODEL NUMBERS: Time Clock Mechanical Metered NC Series NMCS Series N Series NMS Series High Efficiency High
Installation & Service Manual
 Installation & Service Manual Table of Contents Unpacking & Inspection... 2 Basic Guidelines... 2 Specifications... 3 Before Starting Installation Where to install the filter... 4 Tools, pipe, fittings
Installation Instructions and Owner s Manual. PDIM Series. Water Softener System
 Installation Instructions and Owner s Manual PDIM Series Water Softener System First Sales, LLC 1630 US Highway 33 N Churubusco, IN 4673 Phone (60) 693-197 Fax (60) 693-060 PDIM Instruction Manual 170717.docx
Installation Instructions and Owner s Manual. FS, FSM, & FES Series. Water Softening System
 Installation Instructions and Owner s Manual FS, FSM, & FES Series Water Softening System MODEL NUMBERS: Time Clock Mechanical Metered FSL Series FSLM Series FS Series FSM Series High Efficiency High Efficiency
WS1 Softener Installation & Start-Up Guide
 WS1 Softener Installation & Start-Up Guide Thank you for purchasing a Van Isle Conditioner. With proper installation and a little routine maintenance your system will be providing treated water for many
Clean Water Made Easy
 Clean Water Made Easy http://www.cleanwaterstore.com Pro-OX 1650 Iron Filter Installation & Start-Up Guide Thank you for purchasing a Clean Water System! With proper installation and a little routine maintenance
Installation Instructions & Owner's Manual. IM & INT Series
 Installation Instructions & Owner's Manual IM & INT Series 12630 US Highway 33 N. Churubusco, IN 46723 Phone: (260) 693-1972 Fax: (260)693-0602 www.sterlingwatertreatment.com TABLE OF CONTENTS: Preinstallation
WS1 Greensand Installation & Start Up Guide
 WS1 Greensand Installation & Start Up Guide Thank you for purchasing a WS1 Water System for the removal of iron, manganese and hydrogen sulphide gas. With proper installation and a little routine maintenance
The WateRx Plant. Features/Benefits. Applications (for municipal water usage) Great water throughout the home or office. Automatic weekly backwash
 Great water throughout the home or office. Automatic weekly backwash") The WateRx Plant Features/Benefits Great water throughout the home or office Automatic weekly backwash Simple media recharge each year Direct drop ship to customer via UPS Easily tailored to meet specific
The WateRx Plant Features/Benefits Great water throughout the home or office Automatic weekly backwash Simple media recharge each year Direct drop ship to customer via UPS Easily tailored to meet specific
7800 Neutralizer Installation & Start-Up Guide
 Clean Water Made Easy www.cleanwaterstore.com 7800 Neutralizer Installation & Start-Up Guide Thank you for purchasing a Clean Water System! With proper installation and a little routine maintenance your
Clean Water Made Easy. Fleck 7000 Tannin Filter Installation & Startup Guide. Questions?
 Clean Water Made Easy www.cleanwaterstore.com Fleck 7000 Tannin Filter Installation & Startup Guide For Tannin Filters with Vortech Distributor Screen Thank you for purchasing a Clean Water System! With
OWNER S MANUAL. Premium Series Two Tank 1-PLUS-1 Water Conditioner & Whole House Filters
 OWNER S MANUAL Premium Series Two Tank 1-PLUS-1 Water Conditioner & Whole House Filters Congratulations! You ve selected our Premium Series Two Tank 1-PLUS-1 water conditioner and whole house filter for
Sanitizer Series. Water Conditioners
 Sanitizer Series Water Conditioners TABLE OF CONTENTS Installation Instructions..........................................3-4 Start-up Procedures.............................................5-6 Programming
FULLY AUTOMATIC WATER SOFTENER
 OWNERS GUIDE TO INSTALLATION AND OPERATION Section: 6.10.130 FM2035 0302 Supersedes 0102 FULLY AUTOMATIC WATER SOFTENER MODEL 340 SAFETY INFORMATION Read the instructions carefully and learn the specific
Water Softener & Single Tank Triple Treat System Installation Overview. Using 1850 Metered Valves
 Water Softener & Single Tank Triple Treat System Installation Overview Using 1850 Metered Valves System Installation CAUTION: Do not use systems on untreated well water that is microbiologically unsafe.
5700-E Sediment Filter Installation & Start-Up Guide
 Clean Water Made Easy www.cleanwaterstore.com 5700-E Sediment Filter Installation & Start-Up Guide Thank you for purchasing a Clean Water System! With proper installation and a little routine maintenance
Fully Automatic Water Softeners
 OWNERS GUIDE TO INSTALLATION AND OPERATION Fully Automatic Water Softeners FW0782 0211 Supersedes 0410 Models S15DC29DR and S15DC39DR SAFETY INFORMATION Read the instructions carefully and learn the specific
Clean Water Made Easy
 Clean Water Made Easy www.cleanwaterstore.com CWS Plus Neutralizer/Birm Blend Installation & Start-Up Guide Thank you for purchasing a Clean Water System! With proper installation and a little routine
Clean Water Made Easy
 Clean Water Made Easy http://www.cleanwaterstore.com Pro-OX 5700-E Iron Filter Installation & Start-Up Guide Thank you for purchasing a Clean Water System! With proper installation and a little routine
Autotrol Performa FA Valve
 Autotrol Performa FA Valve With 400 Series Control Water Conditioning Control System Dealer Installation, Operation, and Maintenance Manual Table of Contents Installation................................
AUTOTROL 363TC AUTOMATIC FILTER VALVE SERVICE MANUAL
 AUTOTROL 363TC AUTOMATIC FILTER VALVE SERVICE MANUAL 2013 Pentair Residential Filtration, LLC www.pentairaqua.com/pro TABLE OF CONTENTS MANUAL OVERVIEW... 2 SAFETY INFORMATION... 2 TYPICAL TOOLS AND FITTINGS
CWS Plus Sediment Filter Installation & Start Up Guide
 Clean Water Made Easy www.cleanwaterstore.com CWS Plus Sediment Filter Installation & Start Up Guide Thank you for purchasing a Clean Water System! With proper installation and a little routine maintenance
Fleck 2510 SXT Catalox Installation & Start Up Guide
 Fleck 2510 SXT Catalox Installation & Start Up Guide For Catalox Filters with PotPerm Bleach Solution Tank Thank you for purchasing a Clean Water System! With proper installation and a little routine maintenance
Clean Water Made Easy. CWS Time Clock Softener Installation & Start Up Guide. Questions?
 Clean Water Made Easy www.cleanwaterstore.com CWS Time Clock Softener Installation & Start Up Guide Thank you for purchasing a Clean Water System! With proper installation and a little routine maintenance
Fleck 5600 SXT. Installation Guide. Make a list of all of the plumbing fittings needed to install; a typical list looks like this:
 Installation Guide Before you assemble your new system, be sure that the following conditions have been met for placement of your softener: Getting Started Level, firm surface, such as concrete, on which
TITAN VI High Efficiency Water Conditioner Installation and Operation Manual
 TITAN VI High Efficiency Water Conditioner Installation and Operation Manual Manufacturer s Warranty Holts Water Conditioning 369 South Mountainway Drive Orem, UT 84058 801-426-9243 To the original purchaser,
Iron Air Charge MangOx 2510 SXT Installation & Start Up Guide
 Iron Air Charge MangOx 2510 SXT Installation & Start Up Guide Thank you for purchasing a Clean Water System! With proper installation and a little routine maintenance your system will be providing iron
Installation Manual & Owner s Guide
 Installation Manual & Owner s Guide Table of Contents Benefits of Iron Shield +... 1 How Iron Shield + Works... 2 Unpacking & Inspection... 3 Basic Guidelines... 3 Specifications... 4 Regeneration Schedules...
1850 Series TRIPLE TREAT Operation Manual
 1850 Series TRIPLE TREAT Operation Manual BRINE TANK RESIN TANK CARBON TANK System shown with optional tank jackets. Note: 1. Read all instructions carefully before operation. 2. Avoid pinched o-rings
Water Softener Installation Guide Effective for all Softeners from our Range
 Water Softener Installation Guide Effective for all Softeners from our Range Planning Your Installation Always observe the water byelaws. Ensure there is only one rising main, that you have allowed space
541D19 SERIES. Technical Manual. A Division of Aquion Partners L.P.
 541D19 SERIES Technical Manual A Division of Aquion Partners L.P. Table of Contents Introduction... Page 1 Technical Specifications... Page 2 Flow Diagrams... Page 3 Injector & Flow Control Selection Injector...
TITAN Pro-Max High Efficiency Upflow Water Conditioner Installation and Operation Manual
 TITAN Pro-Max High Efficiency Upflow Water Conditioner Installation and Operation Manual TITAN VI Pro-Max Manufacturer s Warranty Holts Water Conditioning 369 South Mountainway Drive Orem, UT 84058 801-426-9243
Clean Water Made Easy
 Clean Water Made Easy http://www.cleanwaterstore.com Pro-OX 2510 Iron Filter Installation & Start- Up Guide Thank you for purchasing a Clean Water System! With proper installation and a little routine
5900e Neutralizer Installation & Start Up Guide
 Clean Water Made Easy www.cleanwaterstore.com 5900e Neutralizer Installation & Start Up Guide Thank you for purchasing a Clean Water System! With proper installation and a little routine maintenance your
Fully Automatic Water Softeners
 OWNERS GUIDE TO INSTALLATION AND OPERATION Fully Automatic Water Softeners SINGLE TANK CABINET MODELS TWO TANK MODELS Read the instructions carefully and learn the specific details regarding installation
Evolve Series. Water Softeners and Conditioners. For Models: EV1 EV2 EVR EVRC EVRS EVRCS. For Cabinet Models: EVC EVCS
 Evolve Series Water Softeners and Conditioners For Models: EV EV EVR EVRC EVRS EVRCS For Cabinet Models: EVC EVCS TABLE OF CONTENTS Pre-Installation Instructions for Dealers... Bypass Valve.... Installation....5
FLECK 5600 WATER SOFTENER INSTALLATION
 FLECK 5600 WATER SOFTENER INSTALLATION Discount Water Softeners recommends using a licensed plumber to install your water softener. The following installation instructions are for use with the water softener
Installation and Operation Manual
 185HE CLA CHLORAMINE REDUCTION FILTER Proud member of Canadian Institute of Plumbing & Heating. Proud member of Canadian Water Quality Association. 1. Read all instructions carefully before operation.
Installation and Operation Manual
 Installation and Operation Manual NOTE: RISER / DISTRIBUTOR PIPE SHOULD BE CUT 1/2 BELOW THE TOP SURFACE OF THE TANK INSERT. MTS 95 System REVISION # 3 REVISION DATE SEPTEMBER 12, 2013 2 Table of Contents
Record of System Specifications 2 Product Dimensions 3 Pre-Installation Checklist 4 System Installation 5-9 Installation Notice, Unit location,
 Record of System Specifications 2 Product Dimensions 3 Pre-Installation Checklist 4 System Installation 5-9 Installation Notice, Unit location, Plumbing Setup, Control Valve Installation Instructions 5
Table of Contents. Unpacking / Inspection
 2 3 Table of Contents Unpacking / Inspection Safety Guide Proper Installation Specifications Before Starting Installation Where To Install The Filter Sizing Requirements Installation Instructions System
Owner s Manual. Models: AWP-SE1 and AWP-SE2 Series Water Conditioners _RevG
 Owner s Manual Models: AWP-SE and AWP-SE Series Water Conditioners 5 Clair Rd. W, Guelph, Ontario, Canada NL R t. (+) 59.76.0 tf..800.65.76 (US and Canada only) t. + 7 77 0 (Europe only) f. (+) 59.76.5069
RIVERSOFT Water Softener System
 RIVERSOFT Water Softener System Operations manual MODELS: RIVERSOFT 4 - RIVERSOFT 8 - RIVERSOFT 16 - RIVERSOFT 30 RiverSoft Demand Water Softener Installation and Operating Instructions TABLE OF CONTTS
EVOLIO-560 Water Softener System
 EVOLIO-560 Water Softener System Operations manual IT FR DE ES MODELS: EVOLIO-560 8 - EVOLIO-560 15 - EVOLIO-560 20 - EVOLIO-560 30 EVOLIO-560 Demand Water Softener Installation and Operating Instructions
TotalCare, CareSoft Elite CareSoft Pro. and. Series. Water Softeners and Conditioners. For Models: TC1 TC2 CSE CSERC CSP CSPRC
 TotalCare, CareSoft Elite CareSoft Pro Series Water Softeners and Conditioners and For Models: TC TC2 CSE CSERC CSP CSPRC For Cabinet Models: CSEC CSPC TABLE OF CONTENTS Preinstallation Instructions for
Fleck 5600 Carbon Filter Installation & Start Up Guide
 Clean Water Made Easy www.cleanwaterstore.com Fleck 5600 Carbon Filter Installation & Start Up Guide Thank you for purchasing a Clean Water System! With proper installation and a little routine maintenance
Fleck 2510 Softener Installation & Start Up Guide
 Clean Water Made Easy www.cleanwaterstore.com Fleck 2510 Softener Installation & Start Up Guide Thank you for purchasing a Clean Water System! With proper installation and a little routine maintenance
Fleck 7000 Sediment Filter Installation & Start-Up Guide
 Clean Water Made Easy www.cleanwaterstore.com Fleck 7000 Sediment Filter Installation & Start-Up Guide Thank you for purchasing a Clean Water System! With proper installation and a little routine maintenance
ProFlo SXT Valve Downflow / Upflow
 ProFlo SXT Valve Downflow / Upflow Automatic Water Softeners Operation Manual Read all instructions carefully before operation. #54719 Rev. 1/09 US Performance and Specifications Downflow Upflow Capacity
MASTER. Water Conditioning Corp. MP-TS-10T/20T with the 255/762 Logix Control Valve With Vortech. Installation and Operation Manual
 MASTER Water Conditioning Corp. www.masterwater.com Installation and Operation Manual MP-TS-10T/20T with the 255/762 Logix Control Valve With Vortech February 2010 Table of Contents Page No. Topic Description
765 Valve Filters (Taste & Odor, Nextsand, Multimedia, Neutralizer)
") 765 Valve Filters (Taste & Odor, Nextsand, Multimedia, Neutralizer) Owners Manual FOLLOWTHE INSTALLATION INSTRUCTIONS CAREFULLY. FAILURE TO INSTALL THE UNIT PROPERLY VOIDS THE WARRANTY. BEFORE YOU BEGIN
765 Valve Filters (Taste & Odor, Nextsand, Multimedia, Neutralizer) Owners Manual FOLLOWTHE INSTALLATION INSTRUCTIONS CAREFULLY. FAILURE TO INSTALL THE UNIT PROPERLY VOIDS THE WARRANTY. BEFORE YOU BEGIN
Model NFF Iron, Manganese, Hydrogen Sulfide Reduction
 Super Filter Model NFF Iron, Manganese, Hydrogen Sulfide Reduction Operating and Maintenance Manual Page 1 of this manual contains operating conditions. 57055 9/07 Enjoy clean, stain-free laundry and dishes...
Owner's Manual. WS Series. Water Softener
 Owner's Manual WS-165-150 Series Water Softener Table of Contents WHAT'S INCLUDED 3 OPERATING CONDITIONS 4 ASSEMBLY INSTRUCTIONS 6 FLUSHING THE WATER LINES 13 MASTERPROGRAMMING 14 PROGRAMMING KEYAND GENERAL
Installation and Operation Manual
 Installation and Operation Manual 95 BIF / BAF Filter Manual NOTE: 1.5 RISER / DISTRIBUTOR PIPE SHOULD BE CUT 1/2 BELOW THE TOP SURFACE OF THE TANK INSERT. 1. Read all instructions carefully before operation.
Green Water Systems OWNERS MANUAL. Includes: Installation Procedures, Warranties, Service & Operation Guidelines.
 Green Water Systems OWNERS MANUAL Includes: Installation Procedures, Warranties, Service & Operation Guidelines. GS Elite GS PRO GS1 1 Cu. Ft. S. C. S. GS1.5 1 Cu. Ft. S. C. S. GS2 2 Cu. Ft. S. C. S. 7000
HD / HDL Valves & Systems Service Manual
 Innovative Solutions for Your Water HD / HDL Valves & Systems Service Manual Hankscraft Runxin, LLC 300 Wengel Drive Reedsburg, WI 53959 608.524.9465 sales@hrh2o.com hrh2o.com 2 Table of Contents 1. Introduction...
485CLA Chloramine Reduction System. Proud member of Canadian Institute of Plumbing & Heating. Proud member of Canadian Water Quality Association.
 Owners Manual 485CLA Chloramine Reduction System Proud member of Canadian Institute of Plumbing & Heating. Proud member of Canadian Water Quality Association. REVISION # 1 REVISION DATE November 10, 2012
Installation, Operation, and Maintenance Manual. Waterlogix Metered Residential Water Softener
 Installation, Operation, and Maintenance Manual Waterlogix Metered Residential Water Softener Waterlogix WLS-075 Waterlogix WLS-075C Waterlogix WLS-100 Waterlogix WLS-100C Waterlogix WLS-150 Waterlogix
Econoflo SXT Automatic Meter Initiated Water Softener
 Econoflo SXT Automatic Meter Initiated Water Softener Operating and Maintenance Manual Page 5 of this manual contains important maintenance procedures for the continued proper operation of your unit. These
The Inlet and Outlet should be as per below illustration. This will ensure that water will flow through the filter in an upflow configuration
 Owners Manual The Inlet and Outlet should be as per below illustration. This will ensure that water will flow through the filter in an upflow configuration INLET OUTLET NRV Filter FOLLOWTHE INSTALLATION
89 BIF/BAF USER MANUAL
 89 BIF/BAF USER MANUAL Owners Manual 1. Read all instructions carefully before operation. 2. Avoid pinched o-rings during installation by applying (provided with install kit) NSF certified lubricant to
Novatek. Operating and Service Manual SXT Chemical Free Iron Filter. Made in Canada
 Operating and Service Manual Novatek 6200 SXT Chemical Free Iron Filter Made in Canada Introduction Read this Manual First Read this manual thoroughly to become familiar with the device and its capabilities
Installation and Operation Manual
 Installation and Operation Manual Novo Clear 485 Automatic Water Filters Multi-Media Neutralizing Carbon Proud member of Canadian Institute of Plumbing & Heating. Proud member of Canadian Water Quality
This unit is superb for commercial applications where soft water is required 100% of the time.
 Model 9000 water softener Rayne Infinity Water Softener This image portrays the locations the 9000 water softner unit is best suited; a car wash; laundry; motel and restaurants. This model 9000 water softener
Plumbline 1000 Series Timered Softeners Owners Manual Water Softener Models
 Plumbline 1000 Series Timered Softeners Owners Manual Water Softener Models PS1000T PS1500T Table of Contents How to Use Soft Water 3 Product Line Overview 5 System Operation 6 System Maintenance and Install
AUTOTROL 363 DEMAND AUTOMATIC FILTER VALVE Service Manual
 AUTOTROL 363 DEMAND AUTOMATIC FILTER VALVE Service Manual 2014 Pentair Residential Filtration, LLC www.pentairaqua.com/pro TABLE OF CONTENTS MANUAL OVERVIEW... 2 SAFETY INFORMATION... 2 TYPICAL TOOLS AND
AUTOTROL 360 MANUAL & 361 SEMI-AUTOMATIC FILTER VALVES SERVICE MANUAL
 AUTOTROL 360 MANUAL & 361 SEMI-AUTOMATIC FILTER VALVES SERVICE MANUAL waterpurification.pentair.com TABLE OF CONTENTS MANUAL OVERVIEW... 2 SAFETY INFORMATION... 2 TYPICAL TOOLS AND FITTINGS REQUIRED...
High Flow 7000 SXT Water Softener
 High Flow 7000 SXT Water Softener Operating and Maintenance Manual WQA Tested and Certified against CSA B483.1 Read all instructions carefully before operation. #54736WQA 3/11 ii Performance Data Sheet
MP-MBA-45T-1/60T-1 / 75T-1
 MASTER Water Conditioning Corp. www.masterwater.com Installation and Operation Manual MP-MBA-45T-1/60T-1 / 75T-1 with the 268/762 Logix Control Valve July 2006 Table of Contents Page No. Topic Description
565 TLC Softener & Tannins Reduction System
 565 TLC Softener & Tannins Reduction System Owners Manual 1. Read all instructions carefully before operation. 2. Avoid pinched o-rings during installation by applying (provided with install kit) NSF certified
Plumbline 2000 Series Metered Softeners Owners Manual Water Softener Models
 Plumbline 2000 Series Metered Softeners Owners Manual Water Softener Models PS2000M PS2500M PS2700M PS2900M Table of Contents How to Use Soft Water 3 Product Line Overview 5 System Operation 6 System Maintenance
7000 Meter Initiated Valve
 7000 Meter Initiated Valve Water Softener Operation Manual Read all instructions carefully before operation. #51400 Rev. 2/09 Performance and Specifications Item Model Capacity at regeneration salt levels
High Flow 7000 SXT Series Water Softeners
 High Flow 7000 SXT Series Water Softeners Operating and Maintenance Manual Read all instructions carefully before operation. #54736 12/08 Performance and Specifications Model Capacity - Grains Flow Rates
Model 7000SXT. Service Manual. IMPORTANT: Fill in Pertinent Information on Page 3 for Future Reference
 Model 7000SXT Service Manual IMPORTANT: Fill in Pertinent Information on Page 3 for Future Reference Table of Contents Job Specification Sheet... 3 Installation Instructions... 4 Start-Up Instructions...
Care and Use Manual Tank Series Appliances
 Care and Use Manual Tank Series Appliances 4.4-1 Information Provided for the Proper Set-Up, Installation and Start-Up of the following Appliances: EWS Series of Whole Home Filtration and Physical Conditioning:
Fleck 2510 Sediment Filter Installation & Start-Up Guide
 Clean Water Made Easy www.cleanwaterstore.com Fleck 2510 Sediment Filter Installation & Start-Up Guide Thank you for purchasing a Clean Water System! With proper installation and a little routine maintenance
5900S Softener Installation & Start-Up Guide
 Clean Water Made Easy www.cleanwaterstore.com 5900S Softener Installation & Start-Up Guide Thank you for purchasing a Clean Water System! With proper installation and a little routine maintenance your
765 IS Greensand Filter. Proud member of Canadian Institute of Plumbing & Heating. Proud member of Canadian Water Quality Association.
 765 IS Greensand Filter Proud member of Canadian Institute of Plumbing & Heating. Owners Manual Proud member of Canadian Water Quality Association. 1. Read all instructions carefully before operation.
NovoSoft 465 Series SIM Water Softener Operation Manual
 NovoSoft 465 Series SIM Water Softener Operation Manual Note: 1. Read all instructions carefully before operation. 2. Avoid pinched o-rings during installation by applying (provided with install kit) NSF
5900e Greensand Filter Installation & Start-Up Guide
 Clean Water Made Easy www.cleanwaterstore.com 5900e Greensand Filter Installation & Start-Up Guide Thank you for purchasing a Clean Water System! With proper installation and a little routine maintenance
IMPORTANT SAFETY INFORMATION READ ALL...
 INSTALLATION and SERVICE MANUAL HOUSEPURE MODELS HP03 and HP04 736-0137 Table of Contents IMPORTANT SAFETY INFORMATION READ ALL... 3 P/N 41482 Rev A 06/04 INSTRUCTIONS BEFORE USING... 3 FEEDWATER... 4
6700XTR Upflow Valve. Water Softener Operation Manual. Read all instructions carefully before operation. #51548 Rev. 2/09
 6700XTR Upflow Valve Water Softener Operation Manual Read all instructions carefully before operation. #51548 Rev. 2/09 Performance and Specifications Item Model Capacity at regeneration salt levels Service
GE & PROFILE SmartWater Softener Systems
 GE & PROFILE SmartWater Softener Systems INSTALLATION INSTRUCTIONS GE Models GNSF18Z01, GNSF2Z01, GNSF5Z01, GXSF2Z01 & Profile Model PNSF1Z01 TABLE OF CONTENTS: Page # Important Installation Recommendations
Spectrum TM. Installation, Service & Operation Manual O FLO. SoftH 2. Water Softener. Table of Contents
 Installation, Service & Operation Manual SoftH 2 O FLO Water Softener Table of Contents 1. Description & Equipment Adjustments p.2 2. Components, Features & Functions p.3 3. Valve User Interface p.4 4.
High Performance System
 High Performance System Owner s Manual Manufactured by: HELLENBRAND, INC. 404 Moravian Valley Road Waunakee, Wisconsin 53597 Phone: 608-849-3050 Fax 608-849-7398 Web: www.hellenbrand.com Email: info@hellenbrand.com
RAINFRESH CGFE GREENSAND FILTERS FOR REMOVAL OF IRON, MANGANESE & HYDROGEN SULFIDE. Installation & operation instructions
 RAINFRESH CGFE GREENSAND FILTERS FOR REMOVAL OF IRON, MANGANESE & HYDROGEN SULFIDE Installation & operation instructions Thank you for purchasing one of our ENVIROGARD / Rainfresh Greensand Filter Systems.
565IS Greensand Filter. Proud member of Canadian Institute of Plumbing & Heating. Proud member of Canadian Water Quality Association.
 565IS Greensand Filter Proud member of Canadian Institute of Plumbing & Heating. Owners Manual Proud member of Canadian Water Quality Association. 1. Read all instructions carefully before operation. 2.
5900S Neutralizer Operation & Maintenance Manual
 Clean Water Made Easy www.cleanwaterstore.com 5900S Neutralizer Operation & Maintenance Manual Thank you for purchasing a Clean Water System! With proper installation and a little routine maintenance your
6700XTR Valve Downflow
 6700XTR Valve Downflow Automatic Water Softeners Operation Manual Read all instructions carefully before operation. #51545 Rev. 11/08 US Performance and Specifications Downflow Capacity at Various Salt
Owners Manual 89 BIF/BAF. Chemical Free Iron Filter
 Owners Manual 89 BIF/BAF Chemical Free Iron Filter 1. Read all instructions carefully before operation. 2. Avoid pinched o-rings during installation by applying (providedwith install kit) NSF certified