USA CDN. SANIMARIN Macerator Toilet Owner s Manual SANIMARIN 31C SANIMARIN 35 SANIMARIN 48
|
|
|
- Cuthbert Burke
- 6 years ago
- Views:
Transcription


1 IND1-01 SANIMARIN Macerator Toilet Owner s Manual CDN USA U.S Newfield Avenue, Suite B, Edison, NJ Toll Free: INSTALLATION INSTRUCTIONS The user should retain these instructions for future reference SANIMARIN 31C SANIMARIN 35 SANIMARIN 48 Canada Speedvale Avenue West, Guelph, ON N1K 1E6 Toll Free:


")
2 2 L L (31 C) W R Q Q D x 3 A B Ø 32/50 G E F U 3 SANIMARIN 31C SANIMARIN 35 SANIMARIN /2 1 1/2 14 1/2 17 1/4 14 1/2 510 mm 12 1/4 18 1/4 18 1/2 9 3/4 9 1/2 12 1/2 11 3/4 15 3/4 11 3/4 310 mm 18 1/4 8 1/2 5 SANIMARIN 31 C SANIMARIN 35 SANIMARIN V SANIMARIN 31 C SANIMARIN 35 SANIMARIN V 9,8 9,8 6,5 6,5 Vertical Height (ft) 3, ,6 5,3 7,9 10,5 13,2 15,8 18, ,7 Flow Rate (Gal/mn) Vertical Height (ft) 3, ,6 5,3 7,9 10,5 13,2 15,8 18, ,7 26 Flow Rate (Gal/mn)


3 6 6a a m m 25 1 b m m c d B G A + + F E 6b D x2 U Q 1 6c 8742 N 297 SANIMARIN USA 210x280.indd 3 D L 1/02/10 17:01:22


")
 WC + MOTOR")
 - BATTERY")

4 6 SUITE 6c (31 C) STICKER: + BATTERY 3 WHITE 2 1 6d a R WHITE WC BLACK BATTERY b c 6d (31 C) a POSITIVE SEA WATER PUMP (option) SWITCH WHITE VALVE (white) WC + MOTOR (red) - MOTOR (black) VALVE (white) - BATTERY 8742 N 297 SANIMARIN USA 210x280.indd 4 + BATTERY 1/02/10 17:01:26


5 6 SUITE 6g A B A Control Panel l B Electronic box Electronic connections 1 Keyboard 2 Tank level indicator 3 Battery 4 Motor: red positive, black negative 5 Solenoid valve: white 6 Optional pump 7 SANIMARIN 31 C SANIMARIN 35 SANIMARIN 48 SANIFLO A Group SFA Company 12 V = 260 W - 24 V = 260 W
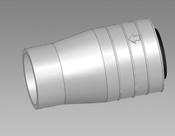
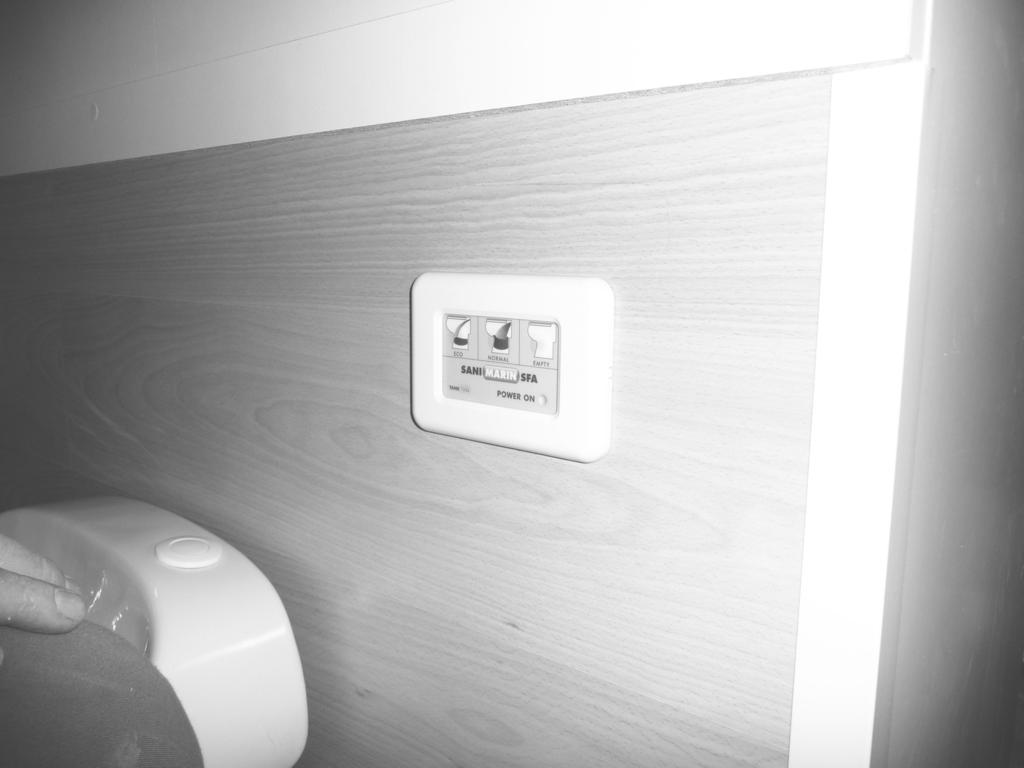
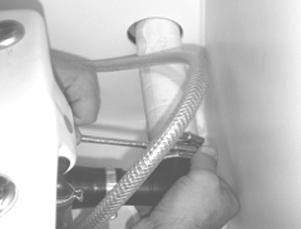
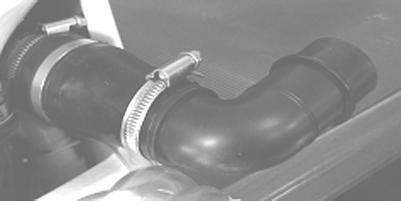
6 1 GENERAL SANIMARIN is a WC equipped with a pump/macerator which installed and used correctly will give reliable and consistent service for many years. SANIMARIN is for marine or mobil unit use. Please follow these installation instructions, paying attention to the following warnings; Possible danger to personnel, Warning of possible electrical hazard, «WARNING» Possible danger of damage to the macerator. APPLICATION SN 35 C & SN 48 SANIMARIN uses an electronic keyboard L which operates as follows; STANDARD Operation: press the NORMAL pad on the control console. Cycle time 19 secs. Water consumption: 2.2 lit / 0.58 gallons. ECO Cycle: press the ECO pad on the control console. Cycle time 10 secs. Water consumption: 1.2 lit / 0.31 gallons. DRAINING Cycle: press continuously the EMPTY pad on the control console. Adjustment of the cycle of rinsing The rinsing time during the Normal cycle can be programmed, to add up to a further 5 seconds. The cycle time thus varies between 19 seconds and 24 seconds, and water consumption varies between 2.2 l / 0.58 gal and 3 l / 0.79 gal. To enter the programming mode: press the Normal and Eco keys at the same time for at least 5 seconds. The red LED flashes for 5 seconds and then goes out. To increase rinsing time by 1 second: press the Normal key = 1 beep (press 5 times at most). To reduce rinsing time by 1 second: press the Eco key = 1 beep. To exit the programming mode automatically: no keys pressed for 5 seconds = the green LED comes on. The water consumption programmed remains in the memory even after the unit has been disconnected from the power supply. Management of the black water holding tank LEDs and Buzzer: Depend on the status of the Holding Tank high level switch (optional connection to the electronic box R). Normal level: Green LED on, red LED off. Buzzer silent and all cycles authorized. High level reached: Green LED off, red LED flashing = Full message visible, + Beeps when a key is pressed. 3 further cycles allowed. Pressing Normal for 5 seconds will return cycles to normal operation. APPLICATION SN 31 C SN 31 C is commanded by a two-position switch: Add water: bowl flushing command Pump out: maceration and discharge command Use: 1/ FLUSH: (Add Water) recommended water level: halfway up the bowl 2/ DISCHARGE: (Pump out) 3/ FLUSH: (Add Water) to fill the bottom of the bowl with water Note 1: In rough seas, empty the bowl (using the pump out position) to avoid spillage Note 2: No automatic cycle 3 DIMENSIONS (see drawing n 3 page 2) 4 TECHNICAL DATA Applications 6 INSTALLATION GUIDE 6a FIXING BOWL TO THE FLOOR discharge of a WC Max. vertical evacuation 3 m / 9.8 ft Max. horizontal evacuation 30 m / 98 ft Nominal power 260 W in 12 V version 260 W in 24 V version Electrical class III Isolation level IPX4 Net weight SN 31 C 16,4 Kg / 36.2 Ibs SN 35 22,2 Kg / 48.9 Ibs SN 48 23,8 Kg / 52.5 Ibs CAUTION : This product should not be used for any other purpose other than that described here. The minimum discharge pipe inner diameter should be 25 mm / 1 inch. 5 PERFORMANCE CURVE (see drawing n 5 page 2) a Draw the outline of the base on the floor, in the area around the fixing holes in the ceramic bowl. b Measure 15 mm / 0.59 inch from the outline drawn, position the brackets A and drill through the middle of the holes. c Screw the brackets in place, leaving them loose, they will be tightened once the bowl has been fitted. d Fit the bowl. Note: wait until all the connections have been made before fixing the bowl definitively in place. Note: on the SANIMARIN 35, there is only one bracket, in the front. The two screws at the back are placed vertically. 6b CONNECTING THE WASTE PIPE AND THE WATER SUPPLY PIPE Connect the 38/38 mm / 1 1/2 diameter bend Q or the 38/25 mm / 1 inch diameter bend Q to the check valve U and the waste pipe, and then fix in place with clip D. (through-the-wall, SN35) (trough-the-floor, SN48 & SN31C) 1 Water supply pipe. To be connected to a seawater pump (supplied as an option), or to the pressurized onboard freshwater system. The pressure in the system must be at least 1.7 bar (flowrate 2.5gpm/ 9.5 gpm). Safety: To ensure that your installation is safe under all heeling conditions, put a loop in the feeder and waste pipes, with a high point 50 cm / 19.6 inchabove the waterline. Fit a ventilation valve at the high point of each loop. Note: it is possible to fit a seawater pump other than the pump supplied as an option, provided that the current requirement is not more than 16 A (In that case you must insert a 12 or 24 VDC electrical relay). Raw water pump must not be demand type. Pump is controled by signal from control module or rocker switch for SN31C. 6c FITTING THE CONTROL TOUCHPAD (SN35 & SN48) The touchpad L must be fitted in a position where it does not interfere with use of the seat and cover, and it must not be placed more than 1.50 m / 59 inch from the electrical control box R. Cut out a rectangle measuring 80x50 mm / 3.15x1.96 inchfrom the bulkhead. Fix the keyboard in a horizontal position and clip the frame into place.
7 6c 31C FITTING THE ROCKER SWITCH AND PUSHBUTTON (SN31C) Panel cut-out: rectangle 40 mm 5 mm. Fitting the switch: Cut out a rectangle in the bulkhead, to the measurements shown above. Fix the holder supplied in place with screws, and then insert the switch. Wire up the switch (6d). 6d ELECTRICAL CONNECTIONS (SN35 & SN48) a - Fix the box R in a dry, protected location. b - Connect the cable from the touchpad to the box. c Insert and connect the electrical wiring from the SANIMARIN to the electrical box, see 6g drawing. Lastly, connect the electrical box to the battery, making sure that the cross-section of the wires is sufficient - 12 VDC: AWG 12 (4sq.mm) up to 9m/30ft and larger if a greater length is required VCD: AWG 14 (2.5sq.mm) up to 9m/30ft and larger if a greater length is required. 6d 31C ELECTRICAL CONNECTIONS (SN31C) : see picture The electricity supply to the SANIMARIN must be connected directly to the boat s electrical switchboard, and it must be used solely for that equipment. It is advisable to add a 25 A fuse in a 12 Volt system, and a 15 A fuse in a 24 Volt system. Make sure the wires are connected correctly: Red wire = positive (+) terminal, black wire = negative (-) terminal 7 DISCHARGE PIPE Caution: Please check local legislation regarding discharge from on board toilets- i.e. holding tanks etc. SANIMARIN macerates and pumps at the same time. A seacock should be fitted where the SANIMARIN discharges through a skin fitting. (see drawing 7 ) 2 Caution: For units installed below the water line, the discharge pipe should rise at least 50 cm / 19.7 inch above water level and be fitted with an anti-syphon valve prior to falling and discharging through the skin fitting. SANIMARIN does not require the use of chemicals in order to operate. 8 OPERATING TEST FOR PUTTING INTO SERVICE AND SUBSEQUENT CHECKS SN35 & SN Open the water admission valve fully to ensure a good bowl rinse. 2 - STANDARD Cycle Press pushbutton NORMAL and after approximately 9 seconds of flush cycle, the pump will start and run for approximately 6 seconds to clear the bowl and then it takes 4 seconds to reprime the bowl. 3 - Throw several sheets of toilet tissue into the bowl and repeat the cycle. The bowl should completely clear. Repeat the cycle again. 4 - ECO Cycle Press pushbutton ECO and after approximately 3 seconds of flush cycle the pump will start and complete the discharge within a further 3 seconds and then it takes 4 seconds to reprime the bowl. SN31C Connect the unit to the power supply, and turn the watersupply valve on fully to flush the unit thoroughly. Press Add water until the waterlevel is about halfway up the bowl (about 9 sec), put some pieces of toilet paper in the bowl, Pump out (about 6 sec) and then Add water (about 4 sec). Note: We recommend compliance with the time lapses shown above. 9 USAGE SANIMARIN can be used like any normal toilet and does not require any particular maintenance. Caution 1 Only the disposal of toilet papers, fecal matter, and waste water will be under guarantee. Any damage due to foreign bodies such as cotton, condoms, sanitary towels, wet wipes food, hair, or liquids such as oils, solvent products, will not be under guarantee. Caution 2 If away for a long period (holiday, ) or in the event of a long interruption of electricity, the water and electricity supplies to the SANIMARIN should be switched off. 10 SERVICE Normal non-foaming household bleaches/wc cleansers can be used with this unit. 11 WINTERING In the event of a long period without use, rinse the bowl and carry out several flushing cycles with a supply of fresh water. 12 FAULT FINDING In most cases, any inconsistencies in the operation of the unit will be minor and easy rectified. Please refer to the chart below. If the problem cannot be easily remedied thanks to this chart, please call our SANIFLO Service organisation or go to a SANIFLO-approved technician. SYMPTOM The cycle proceeds correctly, the motor turns but water in the bowl empties slowly or not at all The cycle proceeds correctly, but some water remains in the bowl after a cycle The motor rattles or crunches SN35/SN48 After the button on the control console has been pressed, the cycle does not start The cycle engages but little water runs in the bowl The cycle engages but water does not run in the bowl SN31C After pressing add water, little water enters the bowl After pressing add water, no water enters the bowlwater, no water enters the bowl Disconnect the electrical power supply, before attempting any work on the unit. PROBABLE CAUSES The evacuation is clogged The height of evacuation is too great The discharge pipe is pinched Foreign body into the bowl. Faulty programmer Faulty control console The inlet filter of the solenoid valve (18) is clogged. The water feed pipe is pinched. The stop valve is closed. The solenoid valve (18) is defective. The inlet filter of the solenoid valve (18) is clogged. The water feed pipe is pinched. The stop valve is closed. The solenoid valve (18) is defective. REMEDIES Dismount and clean the discharge pipe. Modify the installation. Check the route of the discharge pipe. Disconnect the motor supplies. Close water admission. Remove the motor unit. With a hook, withdraw all the matters being able to obstruct the rotation of macerator. With a tool, turn the turbine in the 2 directions until rotation is free. Re-connect the motor supplies and press on the pneumatic contactor to control the correct operation of unit. Open water supply. If the macerator remains blocked, we recommend to call the SFA service. Replace the control console Call an SFA service agent. Clean the filter of the solenoid valve. Check the water admission pipe. Open the stop valve. Change the solenoid valve. Clean the filter of the solenoid valve. Check the water admission pipe. Open the stop valve. Change the solenoid valve. 13 GUARANTEE 2 years guarantee from date of purchase, subject to correct installation and correct use: disposal of toilet papers and fecal matter only. Guarantee is limited to replacement or service of the defective spare parts, and any indemnity or claim for damages will not be included. Freight and packing costs, travel expenses are not included in the guarantee. It does not cover any normal deterioration of the material over time, any external deterioration or accident, incorrect disposal of sanitary products. Any modification without prior notice will not be under guarantee. Fixing, modification, or replacement of parts without our agreement will not be guaranted, and will invalidate it. Our liability is solely for the product itself. Guarantee starts from date of purchase we may request a copy of the invoice to validate the purchase date.

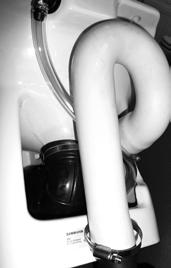
8 2 5a SANIMARIN 35 and SANIMARIN 48 for 110 V A G B C x 1 D E F H x 1 I x Hand basin J x 1 option K x 1 VERTICAL DISTANCE Flow Rate (US gallon/mn) H 1 2 OK OK 3 D Ø 1 C I 6 SANIMARIN SFA SANIFLO CS40 / CLV V - 60 Hz - 7,2 A IP44-1 GENERAL DESCRIPTION The SANIMARIN is a water efficient toilet, it uses approximately 4 liters (1.06 gallons) of water per flush. 5 INSTALLATION 5a DISCHARGE PIPE INSTALLATION See fig. n 5a 1, 2, 3 (above). At the rear of the SANIMARIN is a rubber hose of 11/4-inch in diameter. Enclosed with the SANIMARIN is a rubber elbow I and a flapper style checkvalve assembly H. Before inserting the checkvalve into the rubber hose, know in which direction you want to run the discharge installation. When facing the toilet from the front, you may want to run the discharge pipe to either the right hand side or to the left hand side of the SANIMARIN. It is very important, that the open side of the checkvalve flapper, faces the direction of the discharge pipe. Insert flapper assembly into the pipe and push discharge elbow over it. Tighten the assembly with the provided gear clamp. 1. PVC: 1-inch solvent welded pipe. The flared end of a 1-inch coupling (or bend) fits exactly inside the rubber elbow. This pipe has a thicker wall thickness and fits therefore inside the discharge elbow. Use bends rather than elbows. Use two 45 elbows back-to-back to make up a 90 elbow. 2. Copper: 1-inch copper. 3. The flared end of a 1-inch coupling (or bend) fits exactly inside the rubber elbow. Use bends rather than elbows. 4. CPVC: 1-inch solvent weld pipe. 5. The flared end of a 1-inch coupling (or bend) fits exactly inside the rubber elbow. Use bends rather than elbows. Use two 45 elbows back-to-back to make up a 90 elbow. If you make the discharge installation with pipe smaller than 11/4-inch, start the installation by inserting a coupling or an elbow into the discharge elbow and clamp down with a gear clamp. From there use a short piece of pipe before you change directions, (up, down, rear). Do not yet connect the short piece of pipe to the discharge installation. If your installation requires a vertical discharge (and when made with 1-inch material), you may want to install a Full-Flow Ball Valve for servicing purposes and finish your discharge pipe installation. The connection to the soil-stack should be made with an approved TY fitting and should be in accordance with your local plumbing code. (Using a SADDLE CLIP may not be permitted in your area.) Because of the incorporated non-return valve, the pipe work can be installed up to 3m (9 feet) in height. (It is unadvisable to add an additional check valve.) It is possible to install the discharge pipe in either upwards or downwards direction. When discharging downwards it is necessary to run the discharge pipe horizontally for a distance of 12-inches (30cm) before changing directions. Normally, an anti-siphon valve is not necessary because the SANIMARIN automatically stops siphoning action. 5b WATER SUPPLY CONNECTION See fig. n 5c (technical data sheet). For the best possible flushing action, the SANIMARIN needs to be connected to a 1/2-inch water supply. The SANIMARIN is supplied with a supply tube. The copper end of this supply tube will fit inside the 3/8-inch compression end of a shut-off valve. Due to the international distribution of our product range, it may be possible that the tip of the supply connector is metric. Simply cut this portion off and you are left with a 3/8» connector. 5c ELECTRICAL CONNECTION The SANIMARIN should be connected to a 120 V, 60 Hz, 15 Amp. Ground Fault Circuit Interrupter, (either of the breaker or receptacle type). Connect only to receptacle protected by a ground fault circuit. Warning: risk of electric shock - this pump is suplied with a grounding conductor and grounding type attachment plug to reduce the risk of electrical shock be certain that it is connected only to a properly grounded - type receptacle. 5d COMMISSIONING THE UNIT 1. Open the stop valve completely. 2. Plug the electrical cord into the receptacle. 3. Push the air switch and hold for one second, let the unit go through its cycle, repeat. 4. Now throw some toilet paper into the bowl and press the switch again to verify the correct working of the unit and discharge pipe. In case of electrical power failure of any duration, it is necessary to close the Shut-Off valve, because leaks, no matter how small, may fill up the bowl in time and cause flooding.
Sanipack is a compact pump/macerator specially designed to take the waste from a wall hung or back to wall WC pan.
 1. escription Sanipack is a compact pump/macerator specially designed to take the waste from a wall hung or back to wall WC pan. I The Sanipack will pump away the waste from a WC, washbasin and shower.
Please also see 10 golden rules for correct Saniflo installation on
 1. Description Sanichasse is a WC-suite with a 6 litre flush and built-in pump macerator. Handwash-basin and shower can also be connected. However the inlet is at the back of the machine which may require
Model Series. PumpAgents.com - buy pumps and parts online QUIET - FLUSH ELECTRIC TOILET. Model Series FEATURES SPECIFICATIONS INSTALLATION
 PumpAgents.com - Click here for Pricing/Ordering Model 37045-Series QUIET - FLUSH ELECTRIC TOILET FEATURES Very quiet flush cycle - like a household toilet Single button flush actuator - with dual function
The Marine Throne. Model TMT S/37045/X-Series QUIET - FLUSH ELECTRIC TOILET. "all the comforts of home" FEATURES SPECIFICATIONS INSTALLATION
 The Marine Throne "all the comforts of home" Model TMT S/37045/X-Series QUIET - FLUSH ELECTRIC TOILET FEATURES Very quiet flush cycle - like a household toilet Single button flush actuator - with dual
TECHNICAL INFORMATION T 15xx Dryers
 TECHNICAL INFORMATION T 15xx Dryers 2010 Miele USA Table of Contents 1.0 2.0 3.0 T 15xx Dryers Construction and Design... 5 1.1 Appliance Overview Vented Models... 5 1.2 Appliance Overview Condenser Models...
TECHNICAL INFORMATION T1500 Series Clothes Dryers
 TECHNICAL INFORMATION T1500 Series Clothes Dryers 2003 Miele - Table of Contents 1.0 CONSTRUCTION & DESIGN 1.1 Appliance Overview - Vented 1 1.2 Appliance Overview Condenser Models 2 1.3 Controls Overview
Instruction Manual for Electric Marine Toilets LT-0E and LT-1E
 Instruction Manual for Electric Marine Toilets LT-0E and LT-1E www.nuovarade.com Nuova Rade Electric toilets LT-0E and LT-1E,can be supplied as either 12V or 24V and have been designed to make your life
WATERGENIE. Install a Toilet or Bathroom anywhere you like Installation and Maintenance Instructions
 WATERGENIE Install a Toilet or Bathroom anywhere you like Installation and Maintenance Instructions Read carefully before installing Watergenie; retain this Instruction Book for future reference This product
INSTALLATION AND CARE INSTRUCTIONS
 INSTALLATION AND CARE INSTRUCTIONS THESE INSTRUCTIONS MUST BE READ BEFORE INSTALLATION IS ATTEMPTED. FAILURE TO DO SO MAY COMPROMISE WARRANTY. FOLLOWING INSTALLATION PLEASE LEAVE ALL PAPERWORK WITH CLIENT
INSTALLATION INSTRUCTIONS
 INSTALLATION INSTRUCTIONS TM DishDrawer dishwasher DD36SDFTX (Designer) & DD36STI (Integrated) models US CA 59008D 04.3 a SAFETY AND WARNINGS Electrical hazard WARNING! Before installing the dishwasher,
WARNING , IMPORTANT NOTICE Dometic sanitation systems must be installed according to Dometic s recommended procedures.
 8812 8818, 8848 8819 8800 series MASTERFlush MACERATOR Toilets INSTRUCTION MANUAL IMPORTANT NOTICE Dometic sanitation systems must be installed according to Dometic s recommended procedures.! WARNING This
TECHNICAL INFORMATION Touchtronic Clothes Dryers
 TECHNICAL INFORMATION Touchtronic Clothes Dryers Includes: T1302, T1303, T1322, T1329ci T1403 & T1405 2004 Miele This page intentionally left blank. Table of Contents GENERAL INFORMATION A. Warning and
Dishwasher. Installation manual DW60M9990AP
 Dishwasher manual DW60M9990AP DW9000M_DD68-00197B-00_EN.indd 1 6/1/2017 4:34:14 PM Contents Contents 3 What s included 3 requirements 7 Dimensions and specifications 9 Step-by-step installation 11 2 English
8700 Series MasterFlush Toilets. Macerator Toilet Operation manual. Mazerier-WC Bedienungsanleitung WC dilacérateur Mode d emploi...
 EN Macerator Toilet Operation manual DE Mazerier-WC Bedienungsanleitung.... 13 FR WC dilacérateur Mode d emploi... 22 ES Inodoro triturador Manual de instrucciones.......... 32 NL Toilet met versnijdingspomp
Installation Instructions. For the 18 Built-In Dishwasher and Front Color Panels
 Installation Instructions For the 18 Built-In Dishwasher and Front Color Panels Printed in USA 154232102 Before You Begin DO NOT INSTALL DISHWASHER UNTIL YOU HAVE READ ALL INSTRUCTIONS. FOR YOUR SAFETY,
52 STRATHMERE CEILING FAN
 52 STRATHMERE CEILING FAN Owner s Manual Models #20341 If a problem cannot be remedied or you are experiencing difficulty with installation, please contact the Service Department: 1-877-459-3267, 9 a.m.-
INSTALLATION AND CARE INSTRUCTIONS
 INSTALLATION AND CARE INSTRUCTIONS THESE INSTRUCTIONS MUST E READ EFORE INSTALLATION IS ATTEMPTED. FAILURE TO DO SO MAY COMPROMISE WARRANTY. FOLLOWING INSTALLATION PLEASE LEAvE ALL PAPERWORK WITH CLIENT
INSTALLATION INSTRUCTIONS
 INSTALLATION INSTRUCTIONS DishDrawer TM dishwasher DD24SUT7 and DD24SVT7 models US CA 590225B 04.4 SAFETY AND WARNINGS Electrical hazard WARNING! Before installing the dishwasher, remove the house fuse
GRUNDFOS INSTRUCTIONS. Sololift2 C-3. Installation and operating instructions
 GRUNDFOS INSTRUCTIONS Sololift2 C-3 Installation and operating instructions English (US) English (US) Installation and operating instructions Original installation and operating instructions. CONTENTS
DISHWASHER. Models DW2432 and DW2432SS. Installation Manual. Write Serial Number (on inner door of unit) here:
 here:") DISHWASHER Models DW2432 and DW2432SS Installation Manual Write Serial Number (on inner door of unit) here: Felix Storch, Inc. Summit Appliance Division 770 Garrison Avenue Bronx, New York 10474 www.summitappliance.com
DISHWASHER Models DW2432 and DW2432SS Installation Manual Write Serial Number (on inner door of unit) here: Felix Storch, Inc. Summit Appliance Division 770 Garrison Avenue Bronx, New York 10474 www.summitappliance.com
1 ESMA, Inc. P. O. BOX 734 * SOUTH HOLLAND, IL * (800) * FAX (708)
 * FAX (708)") 1 2 Instructions for Ultrasonic Washer E789 (U.L. Approved) 1. INTRODUCTION The E789 Automatic Ultrasonic Washer automatically performs a cleaning cycle, the major steps of which are: Ultrasonic cleaning
1 2 Instructions for Ultrasonic Washer E789 (U.L. Approved) 1. INTRODUCTION The E789 Automatic Ultrasonic Washer automatically performs a cleaning cycle, the major steps of which are: Ultrasonic cleaning
Mira Sport Max with Airboost
 Mira Sport Max with Airboost 9.0 & 10.8 kw These instructions must be left with the user Installation Guide 1 INTRODUCTION our instructions and recommendations. inside the shower. The Mira Sport Max with
One-Touch Dispense. Multi-temp selections. 208 F For tea, coffee, instant noodle. 194 F Keep warm around 194 F. 176 F Keep warm around 176 F.
 Instruction Manual Automatic Dispensing Hot Water Pot with Multi-temperature Function Automatic Dispensing One-Touch Dispense FEATURES Reboil Function 5 Temperature Settings Image Of SP-5016 208 F For
INSTALLATION INSTRUCTIONS
 INSTALLATION INSTRUCTIONS TM DishDrawer dishwasher DD4S 7 & DD4ST 7 models US CA 59004D 04.3 FOLLOW THE INSTALLATION SEQUENCE RELEVANT TO YOUR MODEL STANDARD HEIGHT SINGLE MODELS TALL HEIGHT SINGLE MODELS
Water Boilers ME10EN, ME15EN. Table of Contents
 Water Boilers ME10EN, ME15EN Operator Manual Model ME15EN Model ME10EN Safety Information...2 Rough-In Drawing...3 Installation...4 Priming...5 Cleaning...5 Table of Contents Adjustments...6 Maintenance...7
3 In 1 AIR CONDITIONER with REMOTE CONTROL MODEL NO: CA9000 PART No: OPERATION & MAINTENANCE INSTRUCTIONS
 3 In 1 AIR CONDITIONER with REMOTE CONTROL MODEL NO: CA9000 PART No: 32305600 OPERATION & MAINTENANCE INSTRUCTIONS 0304 Parts List Item Part No Description Qty 1 FT900001 Top Cover 1 2 FT900002 Filter
CONDITIONS OF SALE AND WARRANTY
 M.E.P. Mbl 100 Monoblock - Operator s handbook CONDITIONS OF SALE AND WARRANTY 1. Read carefully this operator's handbook before operating our Mbl 100 Monoblock. 2. M.E.P. guarantees his Mbl 100 Monoblock
48 TAYLOR CEILING FAN
 48 TAYLOR CEILING FAN Owner s Manual Models #20554 If a problem cannot be remedied or you are experiencing difficulty in installation, please contact the Service Department: 1-877-459-3267, 9 a.m.- 5 p.m.
Ecoboiler T20 & T30 SERVICE MANUAL. Marco Beverage Systems Ltd. 63d Heather Road, Sandyford Industrial Estate, Dublin 18, Republic of Ireland
 Ecoboiler T20 & T30 SERVICE MANUAL Marco Beverage Systems Ltd. 63d Heather Road, Sandyford Industrial Estate, Dublin 18, Republic of Ireland Ireland Tel: (01) 295 2674 Ireland Fax: (01) 295 3715 UK Tel:
Toilet. Installation and Maintenance Instructions
 Elegance Elegance Marine Toilet Installation and Maintenance Instructions THE FOLLOWING ARE CAUTIONARY STATEMENTS THAT MUST BE READ AND FOLLOWED DURING BOTH INSTALLATION AND OPERATION. WARNING: WARNING:
52 CEILING FAN. Owner s Manual Models #50336, 50337
 52 CEILING FAN Owner s Manual Models #50336, 50337 If a problem cannot be remedied or you are experiencing difficulty in installation, please contact the Service Department: 1-877-706-3267, 9 a.m.- 5 p.m.
Installation GUIDE VDWU524SS VDWU524WSSS FDWU524WS FDWU524 VDWU324SS FDWU324
 Installation GUIDE VDWU524SS VDWU524WSSS FDWU524WS FDWU524 VDWU324SS FDWU324 To prevent accidents, which could cause serious injury or death, as well as machine damage read these instructions before installation
SINGLE DISHDRAWER TM DISHWASHER
 SINGLE DISHDRAWER TM DISHWASHER DD4SA & DD4SCT models INSTALLATION GUIDE US CA 595B 08.7 SAFETY AND WARNINGS! WARNING! Electrical Shock Hazard Before installing the dishwasher, remove the house fuse or
3500 SERIES CONVECTION STEAM COOKER PARTS AND SERVICE MANUAL
 3500 SERIES CONVECTION STEAM COOKER PARTS AND SERVICE MANUAL EFFECTIVE JULY 30, 2014 Superseding All Previous Parts Lists. The Company reserves the right to make substitution in the event that items specified
REVIVAL LITE VITREOUS CHINA REVERSE TRAP TOILET
 REVIVAL LITE VITREOUS CHINA REVERSE TRAP TOILET BEFORE YOU BEGIN HOW TO USE THESE INSTRUCTIONS Please read these instructions carefully to familiarize yourself with the required tools, materials, and installation
Lite Flush Electric Toilets
 Lite Flush Electric Toilets Models 58500-Series FEATURES Space saving stylish design Compact size, rotatable seat Virtually silent operation Choice of leaving bowl wet or dry after use Non-clogging large
Installation. Please keep this manual for future reference.
 Installation Tecma Bathroom Anywhere Owner s and Installation Manual Please keep this manual for future reference. Read ALL these instructions before installing the Tecma Bathroom Anywhere unit. Warning
INSTALLATION INSTRUCTIONS UNDERCOUNTER DISHWASHERS
 INSTALLATION INSTRUCTIONS UNDERCOUNTER DISHWASHERS VIKING 111 Front Street Greenwood, Mississippi 38930 USA (662) 455-1200 IMPORTANT - PLEASE READ AND FOLLOW Before beginning - please read these instructions
SERVICE MANUAL. Ecoboiler Model range: T20 ( ) T30 ( )
 T30 ( )") SERVICE MANUAL Ecoboiler Model range: T20 (1000662) T30 (1000663) Marco Beverage Systems Ltd. 63d Heather Road, Sandyford Industrial Estate, Dublin 18, Republic of Ireland Ireland Tel: (01) 295 2674 Ireland
SERVICE MANUAL Ecoboiler Model range: T20 (1000662) T30 (1000663) Marco Beverage Systems Ltd. 63d Heather Road, Sandyford Industrial Estate, Dublin 18, Republic of Ireland Ireland Tel: (01) 295 2674 Ireland
PO Box 827 Hawley, MN (218) Fax (218)
 Fax (218)") Introduction Before proceeding with the installation or operation of the Oil Alert System, read all instructions thoroughly, as well as complying with all Federal, State and Local codes, Regulations and
Introduction Before proceeding with the installation or operation of the Oil Alert System, read all instructions thoroughly, as well as complying with all Federal, State and Local codes, Regulations and
Installation Instructions
 Installation Instructions For the 18" Built-In Dishwasher Sears, Roebuck and Co. Sears Canada, Inc. Hoffman Estates, IL 60179 U.S.A. Toronto, Ontario, Canada M5B 2B8 154435201 Before You Begin DO NOT INSTALL
Top Control Dishwasher
 INSTALLATION GUIDE Top Control Dishwasher NS-DWH2BS8/NS-DWH2SS8/NS-DWR2BS8/NS-DWR2WH8/NS-DWR2SS8 Before using your new product, please read these instructions to prevent any damage. Contents Introduction......................................................................................................
B.I.C.A Built-In Coffee Appliance
 B.I.C.A Built-In Coffee Appliance Automatic Coffee Brewer Parts & Service Models: 1033510, 1033510S & 1033511 3828 S. Main St. Los Angeles, CA 90037-1491 800-421-6860 310-787-5444 Fax 310-787-5412 e-mail:
Removing shipping locks
 y Safety instructions Scope of delivery Moisture in the drum is due to end inspection. Removing shipping locks Water connection l The washing machine is heavy - lift with caution. Frozen hoses can tear/burst.
WELLWORTH /HIGHLINE WITH PEACEKEEPER VITREOUS CHINA TOILET
 WELLWORTH /HIGHLINE WITH PEACEKEEPER VITREOUS CHINA TOILET BEFORE YOU BEGIN HOW TO USE THESE INSTRUCTIONS Please read these instructions carefully to familiarize yourself with the required tools, materials,
Greenleaf 600 Macerator Toilet Waste Pump
 Greenleaf 600 Macerator Toilet Waste Pump Website: Contact: www. greenleaftrade.co.nz Introduction The Greenleaf 600 toilet macerator waste pump is suitable for use in domestic waste / sewerage installations.
BURWELL BIDET TOILET SEAT INSTALLATION
 BEFORE YOU BEGIN We recommend consulting a professional if you are unfamiliar with installing plumbing fixtures. Signature Hardware accepts no liability for any damage to the product, plumbing, toilet,
J120 STEAM BOOSTER INSTALLATION, OPERATION, AND SERVICE MANUAL J120 STEAM BOOSTER. J120 Steam Booster Manual D
 INSTALLATION, OPERATION, AND SERVICE MANUAL J120 STEAM BOOSTER J120 STEAM BOOSTER J120 Steam Booster Manual REVISION HISTORY Revision Letter Revision Date Made by Applicable ECNs Details A 10-27-04 CBW
Dishwasher Installation Manual
 Dishwasher Installation Manual DW 51600 SS DW 51600 FBI DWT 51600 SS DWT 51600 FBI DWT 81800 FBI DWT 81800 SS DWT 81800 SSIH DWT 81800 SSWS DWT 52600 WIH DWT 52600 SSIH DWT 52600 BIH DWT 52800 WIH DWT
SWIMMING POOL HEAT PUMP UNIT ECO - series. Installation & Instruction manual
 SWIMMING POOL HEAT PUMP UNIT ECO - series Installation & Instruction manual Rev. 1.00 28.11.2007 Contents SWIMMING POOL HEAT PUMP UNIT 1 CONTENTS 2 1. PREFACE 3 2. SPECIFICATIONS 4 2.1 Performance data
The Danger signal indicates an immediately hazardous situation which, if not avoided, will result in death or serious injury.
 The Danger signal indicates an immediately hazardous situation which, if not avoided, will result in death or serious injury. The Warning signal alerts you to potential hazards or unsafe practices which,
52 SAN LUCAS CEILING FAN
 52 SAN LUCAS CEILING FAN Owner s Manual Models #20551 If a problem cannot be remedied or you are experiencing difficulty in installation, please contact the Service Department: 1-877-459-3267, 9 a.m.-
DOUBLE DISHDRAWER TM DISHWASHER
 DOUBLE DISHDRAWER TM DISHWASHER DD4DDFT & DD4DVT models INSTALLATION GUIDE US CA 5985 A 08.7 SAFETY AND WARNINGS! WARNING! Electrical Shock Hazard Before installing the dishwasher, remove the house fuse
Installation Instructions
 GE Consumer & Industrial Appliances Installation Instructions Junction Box Cover Within this user bag, you will find a junction box cover and a #10 hex head screw used to attach the junction box cover
OUTDOOR DISHWASHER INSTALLATION INSTRUCTIONS
 OUTDOOR DISHWASHER INSTALLATION INSTRUCTIONS IMPORTANT! Read all of these instructions before installing the dishwasher. AUTOMATIC HIGH LOOP The drain hose is fastened to the back of the machine at the
Jabsco Marine Toilets SIMPLY RELIABLE SOLUTIONS FOR EVERY BOAT AND BUDGET
 Jabsco Marine Toilets SIMPLY RELIABLE SOLUTIONS FOR EVERY BOAT AND BUDGET 3 From best-selling manual toilets to household-style luxury models, our marine toilets are both simple and reliable. All toilet
Model: Series. PumpAgents.com - buy pumps and parts online. DESIGNER STYLED MARINE TOILET With Integral Bowl Rinse Water/Waste Evacuation Pump
 PumpAgents.com - Click here for Pricing/Ordering Model: 37085-Series DESIGNER STYLED MARINE ILET With Integral Bowl Rinse Water/Waste Evacuation Pump FEATURES Single button flush actuator All toilet plumbing
Technical data. Bathroom/shower room installations. Water services (WRAS approved)
") Technical data The Closomat toilet MUST be installed by a competent or qualified person. Explanation of symbols Safety instructions in this manual are identified by symbols. The safety instructions are
Technical data The Closomat toilet MUST be installed by a competent or qualified person. Explanation of symbols Safety instructions in this manual are identified by symbols. The safety instructions are
PARTS & ACCESSORIES INSTALLATION AND SAFETY INSTRCUTIONS ITEM NO.:60010BZGTGLD SAFETY PRECAUTION. Canopy. Downrod. Housing. Transmitter CR2032/3V
 L I G H T I N G INSTALLATION AND SAFETY INSTRCUTIONS ITEM NO.:000BZGTGLD SAFETY PRECAUTION PARTS & ACCESSORIES Canopy Downrod Housing WARNING To make sure power is off before attempting installation. WARNING
52 BERKSHIRE CEILING FAN
 52 BERKSHIRE CEILING FAN Owner s Manual Models #20223, 20224 If a problem cannot be remedied or you are experiencing difficulty in installation, please contact the Service Department: 1-877-459-3267, 9
Built-In Dishwasher. Installation Instructions. BEFORE YOU BEGIN Read these instructions completely and carefully. IMPORTANT The dishwasher MUST be
 Installation Instructions Built-In Dishwasher If you have questions, call 800.GE.CARES (800.432.2737) or visit our website at: www.ge.com BEFORE YOU BEGIN Read these instructions completely and carefully.
Dishwasher Installation Instructions DW 24XT/DW 24XV
 Dishwasher Installation Instructions DW 24XT/DW 24XV Installation Instructions Dishwasher BEFORE YOU BEGIN Read these instructions completely and carefully. IMPORTANT Observe all governing codes and ordinances.
EVAC Commercial Marine Equipment TOILET TECHNICAL DATA EVAC 90, SQUATTING TOILET. To main vacuum line, connection Ø50.
 Date: 25 Jan 2005 Doc. 1:114E TECHNICAL DATA 5979301 EVAC 90, SQUATTING To main vacuum line, connection Ø50 Service door 600 Push button Fresh water supply connection 1/2" MPT BSP 700 700 Flushing mechanism
WC2 & WC3 Installation & Maintenance Instructions
 WC2 & WC3 Installation & Maintenance Instructions Please leave this instruction booklet with the home owner as it contains important guarantee, maintenance and safety information WC3 shown WC2 WC3 IMPORTANT
(3 plastic wire connectors,blade balancing kit, 2 extra mounting screws #10-32 for outlet box.)
") Excel Lighting & Manufacturing Ltd. Lifetime Limited Warranty Excel Lighting & Manufacturing Ltd. Warrants the fan motor to be free from defects in workmanship and material present at time of shipment
Excel Lighting & Manufacturing Ltd. Lifetime Limited Warranty Excel Lighting & Manufacturing Ltd. Warrants the fan motor to be free from defects in workmanship and material present at time of shipment
52 BARSTOW CEILING FAN
 52 BARSTOW CEILING FAN Owner s Manual Models #20519 If a problem cannot be remedied or you are experiencing difficulty with installation, please contact the Service Department: 1-877-459-3267, 9 a.m.-
INSTALLATION INSTRUCTIONS
 INSTALLATION INSTRUCTIONS TM DishDrawer dishwasher DD4D 7 & DD4DT 7 models US CA 59004D 04.3 FOLLOW THE INSTALLATION SEQUENCE RELEVANT TO YOUR MODEL STANDARD HEIGHT DOUBLE MODELS TALL HEIGHT DOUBLE MODELS
INSTALLATION INSTRUCTIONS
 INSTALLATION INSTRUCTIONS TM DishDrawer dishwasher DD90SDF(H)TX, DD90SDFTM (Designer) & DD90S(H)TI (Integrated) models NZ AU GB IE 5900D 04.3 FOLLOW THE INSTALLATION SEQUENCE RELEVANT TO YOUR MODEL Designer
2 INLET / HIGH HEAD DRAIN PUMP SYSTEMS MODELS , INSTALLATION INSTRUCTIONS PREINSTALLATION CHECKLIST
 Your Peace of Mind is Our Top Priority Product information presented here reflects conditions at time of publication. Consult factory regarding discrepancies or inconsistencies. MAIL TO: P.O. BOX 637 Louisville,
Owner s Manual WARNING! Congratulations
 Owner s Manual Congratulations on your purchase of the Tecma EasyFit marine toilet. Please read this Manual completely to ensure satisfaction. Thetford s Technical Support Team is committed to providing
FRANKE MINERVA 3-IN-1 HOT WATER TAP HEATING TANK INSTALLATION GUIDE
 FRANKE MINERVA 3-IN-1 HOT WATER TAP HEATING TANK INSTALLATION GUIDE Introduction Thank you for purchasing this Franke product, which has been designed and manufactured to the highest quality standards.
If you have any problems with this product, please call BEFORE returning it to your retailer.
 CP35 PORTABLE EVAPORATIVE COOLER USE & CARE GUIDE Read and Save These Instructions If you have any problems with this product, please call 1-800-643-8341 BEFORE returning it to your retailer. NOTICE: This
Viking Installation Guide
 Viking Installation Guide Viking Range Corporation 111 Front Street Greenwood, Mississippi 38930 USA (662) 455-1200 For product information, call 1-888-VIKING1 (845-4641) or visit the Viking Web site at
Moisture inside the drum is due to final testing.
 Safety instructions Scope of delivery depending on model Moisture inside the drum is due to final testing. Removing the transport safety devices Water connection depending on model The washing machine
Elegance. Marine. Toilet. Installation and Maintenance Instructions. Manufactured after August 2016
 Marine Elegance Installation and Maintenance Instructions WARNING: WARNING: THE FOLLOWING ARE CAUTIONARY STATEMENTS THAT MUST BE READ AND FOLLOWED DURING BOTH INSTALLATION AND OPERATION. Raritan Engineering
Moisture inside the drum is due to final testing.
 Safety instructions Scope of delivery depending on model Moisture inside the drum is due to final testing. Removing the transport braces Water connection depending on model The washing machine is heavy
EEMAX HOME ADVANTAGE
 EEMAX HOME ADVANTAGE ELECTRIC INSTANTANEOUS WATER HEATER INSTALLATION GUIDE AND OWNERS MANUAL MODELS COVERED:- SS015240TC 208-240V SS019240TC 208-240V READ THE GENERAL SAFETY SECTION BEGINNING ON THE INSIDE
COUTURE ECO-LITE VITREOUS CHINA REVERSE TRAP TOILETS
 COUTURE ECO-LITE VITREOUS CHINA REVERSE TRAP TOILETS BEFORE YOU BEGIN HOW TO USE THESE INSTRUCTIONS Please read these instructions carefully to familiarize yourself with the required tools, materials,
DH 100 P. Always Dry dehumidifier. with. Condensation Removal System
 DH 100 P Always Dry dehumidifier with Condensation Removal System IMPORTANT SAFEGUARD Read all instructions before using this dehumidifier. To reduce the risk of fire, electric shock, or injury to persons
Installation Instructions
 50ES--A, 50EZ--A, 50VG--A, B, 50VL--A, B, 50VR--A, 50VT--A, B 604D-- --A, 607C-- --A, B, 607E-- --A, 704D-- --A, 707C-- --A, B, 707E-- --A PA3G -- -- A, PH3G -- -- A, PA4G, PH4G PAD3, PHD3, PAD4, PHD4,
Installation Instructions
 Installation Instructions Built-In Dishwasher If you have questions, call 800-944-9400(US),800-245-8352(Canada)or visit our website at: www.frigidaire.com BEFORE YOU BEGIN Read these instructions completely
Pre-Installation Instructions. Installation Instruction. Installation Instructions. kah. wall. Warning. User s Manual and warranty
 Pre-Installation Instructions Installation Instruction User s Manual and warranty Installation plate Junction valve Check if the accessories fit your toilet dimension and then install bidet seat. Remote
Torrena 42 Ceiling Fan
 Torrena 42 Ceiling Fan Owner s Manual Part # 269268, 269269 Model # 32096, 32097 Exclusively Distributed by: HD Supply Facilities Maintenance, Ltd. Atlanta, GA 30339 2017 Made in China If you are experiencing
CFS-2000 CHILLER TM. Operating Instructions P/N (110 VAC) P/N (230 VAC)
 P/N (230 VAC)") CFS-2000 CHILLER TM Operating Instructions P/N 100100 (110 VAC) P/N 100105 (230 VAC) Thank you for purchasing this CFS-2000 CHILLER TM! As you will notice from the table of contents, the manual for your
CFS-2000 CHILLER TM Operating Instructions P/N 100100 (110 VAC) P/N 100105 (230 VAC) Thank you for purchasing this CFS-2000 CHILLER TM! As you will notice from the table of contents, the manual for your
Some models are supplied with a protective film on steel and aluminium parts. This film must be removed before installing/using the appliance.
 ELECTRIC RANGE for residential use only R Models: VEFSEE365D.. INSTALLATION INSTRUCTIONS IMPORTANT - PLEASE READ AND FOLLOW Before beginning, please read these instructions completely and carefully. Do
INSTALLATION MANUAL. Split-type Air Conditioner (Cooling and Heating) Outdoor Unit UQB09JJWC UQB12JJWC. Indoor Unit AQB09JJWC AQB12JJWC
 Outdoor Unit UQB09JJWC UQB12JJWC. Indoor Unit AQB09JJWC AQB12JJWC") AQB09JJ6WC_IM_E_2585 2006.4.17 4:26 PM Page 17 INSTALLATION MANUAL Indoor Unit AQB09JJWC AQB12JJWC Outdoor Unit UQB09JJWC UQB12JJWC ENGLISH FRANÇAIS ESPAÑOL Split-type Air Conditioner (Cooling and Heating)
AQB09JJ6WC_IM_E_2585 2006.4.17 4:26 PM Page 17 INSTALLATION MANUAL Indoor Unit AQB09JJWC AQB12JJWC Outdoor Unit UQB09JJWC UQB12JJWC ENGLISH FRANÇAIS ESPAÑOL Split-type Air Conditioner (Cooling and Heating)
Use & Care Manual. Electric Tankless Water Heaters. With Installation Instructions for the Installer AP15447 (10/10)
") Use & Care Manual With Installation Instructions for the Installer Electric Tankless Water Heaters The purpose of this manual is twofold: one, to provide the installer with the basic directions and recommendations
Use & Care Manual With Installation Instructions for the Installer Electric Tankless Water Heaters The purpose of this manual is twofold: one, to provide the installer with the basic directions and recommendations
Operating Instructions
 Operating Instructions Cassette toilet for recreational vehicles CTS 40 Cassette toilet Record for future reference: Model number... MBA /0 Product number... Serial number... N - AUS / NZ 4 605-35 GROUP
Camarillo 52 Ceiling Fan
 Owner s Manual Camarillo 52 Ceiling Fan Part # 269263, 269259, 269287 Model # 32091, 32092, 32087 Exclusively Distributed by: HD Supply Facilities Maintenance, Ltd. Atlanta, GA 30339 2017 Made in China
The Extraordinaire OWNER S MANUAL. Orbital Ceiling Fan. Model No. OF110** READ AND SAVE THESE INSTRUCTIONS. Net Weight 14.5 lbs. or 6.59 kg.
 The Extraordinaire Orbital Fan WARNING: Support Directly From Building Structure Net Weight 14.5 lbs. or 6.59 kg. Model No. OF110** OWNER S MANUAL READ AND SAVE THESE INSTRUCTIONS Important Safety Instructions
1. Take the hoses and elbow out of the holders, depending on model. max. 100 cm. min. * cm
 Safety instructions The washing machine is heavy - take care when lifting. Caution: frozen hoses may rip/burst. Do not install the washing machine in areas exposed to frost or outdoors. The washing machine
Air Cleaning Equipment, Inc. 303 N. Main St. Broadway, NC iers.com
 Read and Save These Instructions Horizon Galaxy - Installation and Operations Manual Air Cleaning Equipment, Inc. 303 N. Main St. Broadway, NC 27505 www.horizondehumidif iers.com 1 Safety Notes: The Horizon
20-GALLON MOBILE PARTS WASHER OWNER S MANUAL
 20-GALLON MOBILE PARTS WASHER OWNER S MANUAL WARNING: Read carefully and understand all INSTRUCTIONS before operating. Failure to follow the safety rules and other basic safety precautions may result in
Model Series ELECTRIC WATER SYSTEM PUMP. PumpAgents.com - buy pumps and parts online. Model Series. Automatic Multi-Outlet FEATURES
 PumpAgents.com - Click here for Pricing/Ordering Model 36950-2 Series ELECTRIC WATER SYSTEM PUMP Automatic Multi-Outlet FEATURES Self-Priming Diaphragm Design Allows Dry Running Built-in Discharge Check
Vacuum toilet system Instruction manual. Series. Series and Series. VacuFlush
 EN Vacuum toilet system Instruction manual 4800 Series 4600 Series 4800 and 4600 Series VacuFlush Toilets 1 1 2 1 A 2 7 B 3 5 4 6 3 B C G C D A D F E 4 2 4 10 6 9 1 3 7 8 5 2 Notes on using the manual
Automatic Water System Pump SERIES
 Automatic Water System Pump 42755 SERIES Automatic Water System Pump Purpose of this manual The purpose of this manual is to provide necessary information for product installation, operation and maintenance.
Owner's Manual. Please read this document carefully before installing and/or using your vacuum cleaning system.
 Owner's Manual for household use only Please read this document carefully before installing and/or using your vacuum cleaning system. Model : Serial No : Important Safety Instructions When using an electrical
K 2.97 M. Specifications Operating pressure, max PSI Water volume GPM Voltage V Amp draw AMPS
 K 2.97 M High Pressure Washer Operator Manual Overview... 2 Important Precautions... 3-4 Assembly Instructions... 4 Operating Instructions... 5 GFCI Instructions... 6 Using the Accessories... 6 Working
Minor Home Repairs. November 4, County of Henrico Department of Community Revitalization
 Minor Home Repairs 1 November 4, 2017 County of Henrico Department of Community Revitalization Educate homeowners on basic technical skills that will help the homeowner understand daily operations of different
DOUBLE DISHDRAWER TM DISHWASHER
 DOUBLE DISHDRAWER TM DISHWASHER DD60DA & DD60DC models INSTALLATION GUIDE NZ AU GB IE 591151C 08.17 WARNING! Electrical shock hazard Before installing the dishwasher, remove the house fuse or open the