Epoch Dual Speed Rotary Sander Operator s Manual
|
|
|
- Thomasine Sims
- 5 years ago
- Views:
Transcription


1 Epoch Dual Speed Rotary Sander Operator s Manual

 cannot read this manual, have it explained fully before attempting to operate this machine.")
2 READ THIS BOOK This book has important information for the use and safe operation of this machine. Failure to read this book prior to operating or attempting any service or maintenance procedure to your American Sanders machine could result in injury to you or to other personnel; damage to the machine or to other property could occur as well. You must have training in the operation of this machine before using it. If your operator(s) cannot read this manual, have it explained fully before attempting to operate this machine. All directions given in this book are as seen from the operator s position at the rear of the machine. EN Contents Operator Safety Instructions Machine Introduction... 0V Electrical Connection Instructions... 7 Machine Set-up Operating Instructions... 0 Maintenance... SECTION II - Parts and Service Manual Notes... 3 Main Assembly Base Assembly Handle Assembly Connection Diagram... 0 Motor & Gearbox Assembly... HydraSand Assembly Wiring Diagrams... 4 Warranty... 7 WARNING! The Products sold with this Manual contain or may contain chemicals that are known to certain governments (such as the State of California, as identified in its Proposition 5 Regulatory Warning Law) to cause cancer, birth defects or other reproductive harm. In certain locations (including the State of California) purchasers of these Products that place them in service at an employment job site or a publicly accessible space are required by regulation to make certain notices, warnings or disclosures regarding the chemicals that are or may be contained in the Products at or about such work sites. It is the purchaser s responsibility to know the content of, and to comply with, any laws and regulations relating to the use of these Products in such environments. The Manufacturer disclaims any responsibility to advise purchasers of any specific requirements that may be applicable to the use of the Products in such environments. ***This product is intended for commercial use only*** Operator Safety Instructions In this Operation Manual you will find three statements that you must read and observe to ensure safe operation of this machine. DANGER means: Severe bodily injury or death can occur to you or other personnel if the DANGER statements found on this machine or in this Operation Manual are ignored or are not adhered to. Read and observe all DANGER statements found in this Operation Manual and on your machine. WARNING means: Injury can occur to you or to other personnel if the WARNING statements found on your machine or in the Operation Manual are ignored or are not adhered to. Read and observe all WARNING statements found in this Operation Manual and on your machine. CAUTION means: Damage can occur to the machine or to other property if the CAUTION statements found on your machine or in this Operation Manual are ignored or are not adhered to. Read and observe all CAUTION statements found in this Operation Manual and on your machine.


3 DANGER: DANGER: DANGER: DANGER: Failure to read the Owner s Manual prior to operating or servicing your American Sanders machine could result in injury to you or to other personnel; damage to the machine or to other property could occur as well. You must have training in the operation of this machine before using it. If you or your operator(s) cannot read English, have this manual explained fully before attempting to operate this machine. A. Sanding/finishing wood floors can create an explosive or combustible environment. Do not operate this machine around solvents, thinners, alcohol, fuels, floor finishes, wood dust or any other flammable materials. Cigarette lighters, pilot lights, electrical sparks and all other sources of ignition should be extinguished or avoided. Keep work area well ventilated. B. Dust generated from sanding wood floors can spontaneously ignite or explode. Promptly dispose of any sanding dust in a metal container clear of any combustibles. Do not dispose in a fire. A. Electrocution could occur if the machine is being serviced while the machine is connected to a power source. Disconnect the power supply before servicing. B. Electrocution or fire could occur if the machine is being operated with a damaged power cord. Keep the power cord clear of the pad. Always lift the cord over the machine. Do not move the machine by the power cord. C.Shock hazard. Do not use the machine if it has been rained on or sprayed with water. To avoid injury keep hands, feet, and loose clothing away from all moving parts on the machine. Disconnect the power cord before replacing the pad, changing the abrasive, or when servicing. Do not operate the machine unless all guards are in place. Never leave the machine unattended while connected to a power source. WARNING: Injury can occur if protective clothing or equipment is not used while sanding. Always wear safety goggles, protective clothing, and dust mask while sanding. WARNING: WARNING: WARNING: This sander is not to be used on pressure treated wood. Some pressure treated woods contain arsenic and sanding pressure treated wood produces hazardous dust. Inhaling hazardous dust from pressure treated wood can cause serious injury or death. Sanding pressure treated wood decks or uneven surfaces can damage the sander which is not covered under warranty or damage waiver. Any alterations or modifications of this machine could result in damage to the machine or injury to the operator or other bystanders. Alterations or modifications not authorized by the manufacturer voids any and all warranties and liabilities. Risk of explosion. Floor sanding can result in an explosive mixture of fine dust and air. Use floor sanding machine only in a well-ventilated area free from any flame or match. 3
4 EN 4
5 EN 5
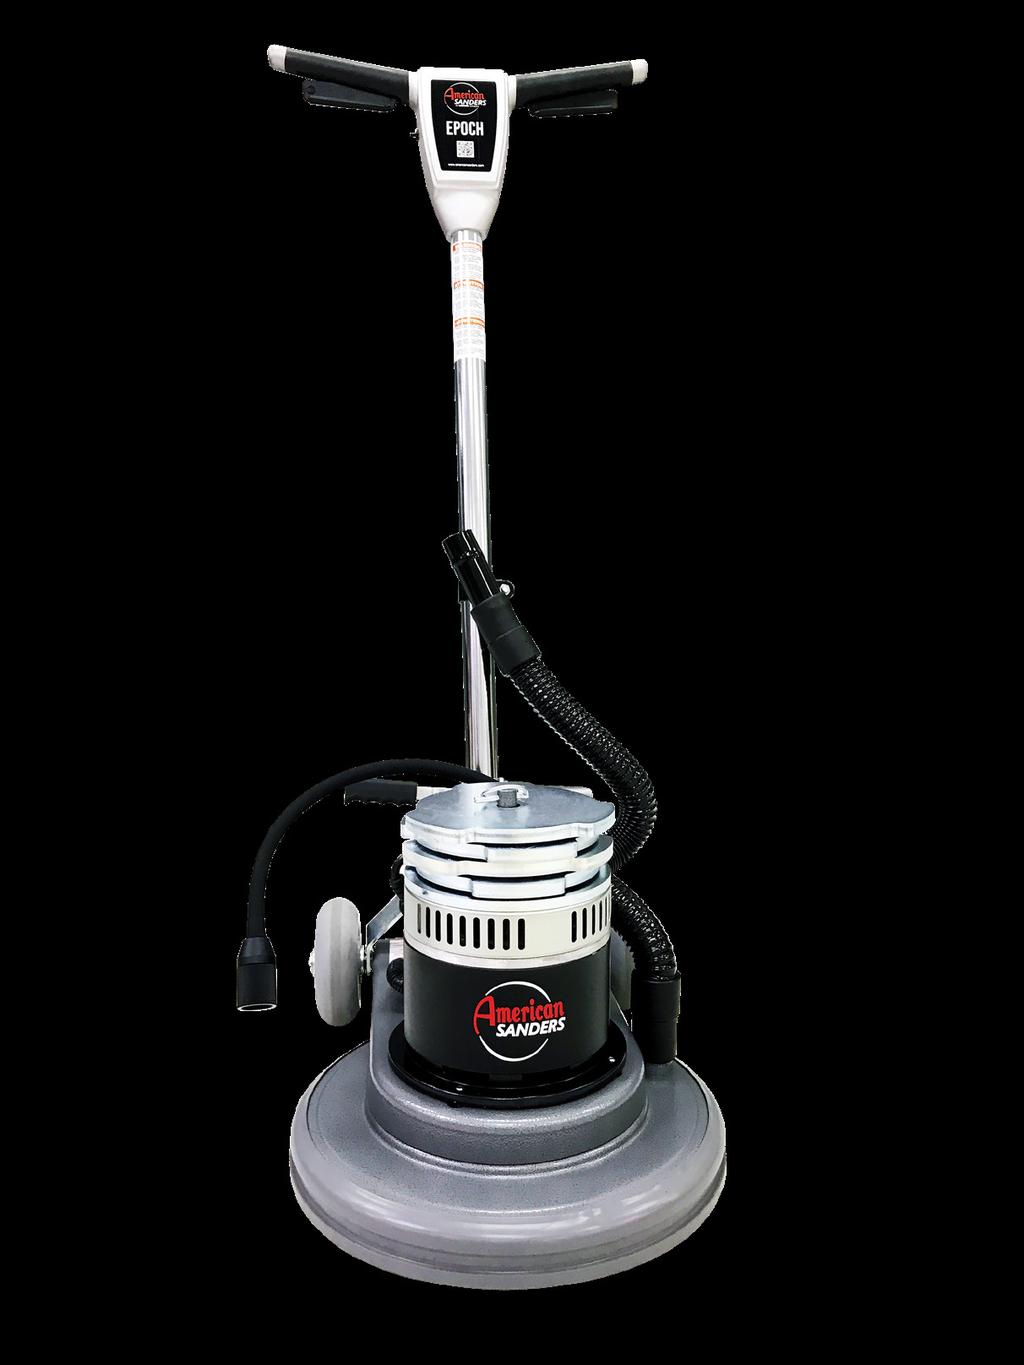
6 Introduction The Epoch The Epoch is a floor sanding machine. It can also be used for polishing, buffing and stripping. The machine can be used on wood, vinyl, terrazzo or cement floors. Model 077A with HydraSand 078A 079A with HydraSand (CSA) Code Number 077A 078A 079A Voltage (Volts) Frequency (Hz) Current (Amps) Power (hp).5 (. kw).5 (. kw).5 (. kw) Pad Diameter.0 (40 mm).0 (40 mm).0 (40 mm) Pad Speed (rpm) 75 or or or 300 Cord Length (feet) 50 (5. m) 50 (5. m) 50 (5. m) Weight (pounds) Machine only - 95 lbs (43 kg) Machine w/ weights - 0 lbs (54 kg) Machine w/ weights & HydraSand - 3 lbs (0 kg) Machine only - 95 lbs (43 kg) Machine w/ weights - 0 lbs (54 kg) Machine w/ weights & HydraSand - 3 lbs (0 kg) Machine only - 95 lbs (43 kg) Machine w/ weights - 0 lbs (54 kg) Machine w/ weights & HydraSand - 3 lbs (0 kg) CAUTION: Your equipment may be inappropriate on some installations. Always consult with the flooring manufacturer on the proper installation, preparation, and finishing of their product. Determine suitability of your equipment in preparing the product.
7 Electrical Connection Instructions 0 VOLT MACHINES Instructions for connection to the power supply and the electrical ground. This product must be grounded. If it should malfunction or breakdown, grounding provides a path of least resistance for electric current to reduce the risk of electrical shock. This product is equipped with a cord having an equipment-grounding conductor and grounding plug. The plug must be inserted into an appropriate oulet that is properly installed and grounded in accordance with all local codes and ordinances. WARNING: Improper connection of the equipment-grounding conductor can result in a risk of electric shock. Check with qualified electrician or service person if you are in doubt as to whether the outlet is properly grounded. Do not modify the plug provided with the product - if it will not fit the outlet, have a proper outlet installed by a qualified electrician. This product is for use on a nominal 0 volt circuit and has a grounding attachment plug that looks like the plug illustrated in Fig.. Make sure that the product is connected to an outlet having the same configuration as the plug. No adaptor should be used with this product. Always connect the machine to a dedicated 0 amp electrical line to prevent nuisance breaker tripping and line overload due to other devices. WARNING: To prevent possible electric shock, protect the machine from rain. Keep the machine in a dry building. WARNING: To prevent possible electric shock, always use a 3-wire electrical system connected to the electrical ground. For maximum protection against electrical shock, use a circuit that is protected by a ground fault circuit interupter. Consult your electrical contractor. WARNING: Do not cut, remove or break the ground pin. If the outlet does not fit the plug, consult your electrical contractor. WARNING: Have worn, cut or damaged cords replaced by an authorized service person. EXTENSION CORDS Use only an approved extension cord with three conductors, a plug with three terminals, and a connector body with three holes. The machine has a power cord with wire size AWG (AWG means American Wire Gauge). Use of an extension cord requires use of American Sanders 40590A POWER BOOSTER to supply adequate voltage for operation. WARNING: If you use an extension cord, use an extension cord with minimum wire size AWG. Do not use an extension cord longer than 50 feet. Do not join two extension cords. Grounding Pin Grounded Outlet (United States, Mexico and Canada) Figure Grounded Outlet Box 7
8 Machine Set-up WARNING: Always remove the electrical plug from the electrical outlet before installing or changing the sandpaper. How To Install The Sandpaper (HydraSand) To install the sandpaper, follow this procedure: Figure. Put the handle in the vertical position.. Lock the handle. To lock the handle, push the locking lever down. See figure. 3. Tilt the machine backward until the handle is on the floor. 4. Put one foot on each side of the machine. 5. The HydraSand sanding head utilizes hook and loop style sanding paper. Pull off the pad hook the spent abrasive. Replace with new sanding abrasive. See figure A. How To Install The Sandpaper (Alternate Hard Plate) Figure A. Put the handle in the vertical position.. Lock the handle. To lock the handle, push the locking lever down. See figure. 3. Tilt the machine backward until the handle is on the floor. 4. Put one foot on each side of the machine. 5. Using a 7/8 wrench, remove the nut and the washer that hold the paper holder. See figure.. Put the sandpaper on the sanding pad. 7. Put the paper holder in position. See figure Install the washer and the nut that hold the paper holder. Two Speed Selection This machine comes equipped with a selector switch for 75 or 300 RPM operation. See figure 4 for location of speed switch. 75 RPM speed selection is for use with finer grit sanding abrasive (00 grit or greater) to help reduce the effects of abrasive heat on the wood that can lead to closing wood pours and discoloration from burnishing the woods surface. This speed is also used for buffing and polishing. Figure 300 RPM operation will yield the greatest wood removal and productivity and can successfully be used with more course grit abrasives. (80 grit or below) CAUTION: Wood species differ greatly in their sanding characteristics, always test the speed selection with any grit abrasive used to understand how the wood will react. The general guidelines given here may not be appropriate for your conditions. CAUTION: Do not use the 75 RPM setting for 80 grit or lower. This could result in an over-current condition. Sanding Cuts and Sandpaper Figure 3 Initial Cut The purpose of the initial cut is to remove old finish and gross imperfections on the floor surface. A coarse abrasive should be used. If glazing, loading, or burning takes place immediately into an initial cut, select a coarser abrasive. If this should occur during an initial cut, the abrasive has dulled and must be replaced. Final Cuts The purpose of a finishing cut is to remove the scratches produced during the initial cut. Use a fine (0-80 grit) grain abrasive. Figure 4 If the surface remains rough after a finishing cut, it may be necessary to use an even finer grain of abrasive (80-00 grit). Care should be taken in selecting the grit size of the abrasive. A very fine grain will close the pores on a wood floor making admission of a stain difficult. Note some finer grain abrasives may begin to heat the woods surface and burnish the wood grain. use the low motor speed to help avoid this result. 8
9 Machine Set-up WARNING: Always remove the electrical plug from the electrical outlet before installing or changing the pad or brush. How To Install The Brush Or Pad Driver To install the brush or pad driver, follow this procedure:. Put the handle in the vertical position. Figure 5. To lock the handle, push the locking lever down.see figure Tilt the machine backward until the handle is on the floor. See figure. 4. Put one foot on each side of the machine. See figure. 5. Align the lugs () on the locking plate into the pad driver adapter openings (). See figure 7.. To lock the brush or pad into position, turn the brush or pad driver clockwise. 7. Turn the brush or pad counterclockwise to unlock and remove the brush. 8. Lift the machine to the vertical position. Figure NOTE: To prevent damage to the brush or pad driver, remove the accessory while not in use. Keep the brush in a cool, dry place. How To Adjust The Handle To adjust the handle, follow this procedure:. The locking lever is on the lower part of the handle tube. Use your foot to lift the lever. See figure 5.. Lower the handle to the best operating position. NOTE: For the best operating position, keep your back straight, bend only your arms. Figure 7. The lugs.. The drive adpater openings. 3. Using your foot, push the locking lever down. 4. Hold the handle against your body for the best control. 9
10 Operating Instructions WARNING: Never start machine when the handle is in the vertical position. Figure 8 The switch to start and stop the machine is activated by the interlock switch (Fig. 8) and the levers (Fig 8A) under the handle grips. To start the machine, follow this procedure:. Lower the handle. Lock the handle in the best position for operation. (Fig. 9) NOTE: Make sure you hold the handle with both hands. Figure 8A 3. Push the interlock switch (Fig. 8), and apply pressure to the levers (Fig. 8A). How To Control The Machine NOTE: Sanding operations create higher torque conditions than normal floor polishing. Make sure you firmly grip the handle with both hands. The side to side movement of the machine is controlled by raising the handle and pressing down on the handle. To move the machine to the left, press down on the handle slightly. To move the machine to the right, raise the handle slightly. Adding And Removing Additional Weight Figure 9 This Machine comes with four (4).5 pound (.8 kg) removable weights for a total of 5 pounds (.3 kg) maximum that can be added to increase the PSI load and abrasive performance. See figure 0. Caution should be used if adding weight to the machine as this increases the torque required to turn the abrasive, thus increasing the amperage required by the motor to perform the sanding operation. Floors with finish or residue like sealers increase the resistance on the abrasive; adding weight in this condition can overload the motor and trip a 0 amp circuit breaker. Figure 0 Should this occur allow 5 minutes for the machine and breaker to cool. Remove additional weight and operate the machine in the 300 rpm setting to reduce the load placed on the motor. How To Use The Lamp To Position the Lamp. The attached LED lamp will only operate when the machine is plugged in.. Bend the flexible arm of the lamp to the desired position. 3. Press the ON switch at the base of the lamp attached to the frame of the machine. See figure. Figure 0
11 Maintenance WARNING: Maintenance must be done by authorized personnel only. CAUTION: Keep all adjustments according to specifications. Maintenance Instructions Return the machine to a American Sanders Authorized Service Location every months for maintenance inspections. Switches WARNING: All electrical repairs must be done by authorized personnel only. The machine must be tested after electrical repairs to make sure it is safe to operate. Disconnect the electrical plug from the electrical outlet before doing any electrical repairs. The start and stop switch has an interlock which prevents the contacts from being closed. If any part of the switch is not operating, replace the part. If any part of the electrical system of the machine is not operating or is damaged, replace the part. Make sure all connections are tight. Return the machine to the American Sanders Service Branch or a American Sanders Authorized Service Center for electrical repairs or testing. Maintenance Of The Motor If repairs to the gear unit or motor are needed, do not disassemble the gears and motor. Return the machine to the nearest American Sanders Service Branch or American Sanders Authorized Service Center. For safe operation, and longer life to your American Sanders product, use only American Sanders parts. NOTE: The grease (50380) for the gear box needs to be changed every year. The Epoch requires 8 oz. of grease.
12 Maintenance Problem Possible Cause Solution Machine will not start Motor runs sluggish Fuse / circuit breaker repeatedly trips Machine wobbles during operation Light does not work No power Switch lever safety lock not depressed Bad connection Bad motor speed selector switch Defective Switch Low voltage Check the main power supply (building circuit breaker). Check the cord connection at the wall outlet Hold in the switch lever safety lock and then engage switch levers. Check the motor and cord interlock connections. Change the motor speed. If motor runs, change the speed selector switch. Check and replace if necessary. Using extension cord with wire smaller than /3. Replace with a /3 extension cord. Using more than one extension cord. Only use one 50ft /3 extension cord. Electrically connect to American Sanders Power Booster. Motor carbon brushes are worn Check and replace if necessary. Defective handle switch Bad rectifier Low voltage Not on a dedicated circuit Motor is overloaded Bad connection Defective motor Defective pad Machine left setting on pad for extended time Warped block on brush or padholder Block not installed properly HydraSand head damaged. Light switch not turned "ON". Light damaged Check and replace if necessary. Contact an authorized American Sander Dealer. Eliminate extension cord & locate a power source closer to work site. Have voltage checked by a qualified electrican. Electrically connect to American Sanders Power Booster. Make sure there is no other items using power on the circuit. Remove weights. Switch to high speed, especially if using paper lower than 00 grit or if removing finish. Contact an authorized American Sander Dealer. Contact an authorized American Sander Dealer. One side is more dense than the other. Replace pad. Pad has taken "a set". Replace pad. Check and replace if necessary. Remove and install properly. Inspect head and repair or replace Turn "ON" light. Check and replace if necessary.
13 00 DC Sander Operator s Manual Notes: 3
14 Main Assembly RF
15 Main Assembly ITEM QTY PART NUMBER AS05700 AS A 8843A A 50794A AS04000 AS A 04A 3038A 83A NB AS05000 NB AS0500 NB04300 AS0700 AS0500 AS0000 NB NB A 3075A 04A SA B Parts List DESCRIPTION HANDLE ASM., SANDER 00, EPOCH DECAL, HANDLE, DS00, EPOCH ADAPTER, HOSE, SANDER, WELD. BOLT, CARRIAGE, 5/-8 X / NUT, 5/-8 HEX LOCK CORDSET, -3 X 40FT 5-5P BUSHING NYLON CK MOTOR, GEAR,.5HP, 5V, HI-AMP, SPEED DECAL, AMERICAN SANDERS, 3" SEAL FOAM WLDMNT DUST SHIELD BUMPER 7 SHIELD INNER RS DC SCREW, 5/-8 X /", SHCS, W/ DOG PT WASHER 5/ SAE FLAT WASHER, LOCK, 5/ PLATE, WEIGHT, BRACKET, 7.8" DIA. SCREW, SOCKET, FLAT, 0-3 X 3/4, CS, SS ROD, WEIGHT, BRACKET, THREADED PIN, LYNCH, /4" X 3/4" WEIGHT, 8" DIA, W/ RUBBER FEET FEET, RUBBER,.8" OD,." H, BLACK - (NOT SHOWN, WEIGHT FEET REPLACEMENT) LIGHT, TASK, LED, ASM. SCREW, 8-3 X ", RH, PHILLIPS CLAMP, 3/4" ID, RETAINER WASHER FLAT 0 TYPE B WIDE SKIRT, RS-DC ASSY PAD DRIVER PLATE, DRIVE, HYDRA SAND, ASM..5" X 30" CUFFS BE BLACK RF
16 Base Assembly RF
17 Base Assembly Parts List ITEM QTY PART NUMBER DESCRIPTION AS0700 FRAME, SANDER 00, EPOCH, W/ INSERTS RV00900 WHEEL, PERFORMA, " GREY A LINK ARM RIGHT A LINK ARM LEFT 5 570A PLUG-BUTTON MP5400 BUSHING, FLANGED, BRONZE, / ID X /4 L A LABEL WARNING A SCREW 3/8- X A WASHER BOWED.5ID X.0OD 0 NB03400 WASHER, FLAT, /", SS 9034 NUT LK 3/8 - REG WASHER WEAR CAM WASHER, 3/8" SAE, FLAT CAM ASSY WITH GRIP A WASHER FLT.5X.5 X.0 NYLON 85307A SCREW, 0-3 X 5/8, PN ST PH 7 809A WASHER FLAT 0 TYPE B WIDE RF
18 Handle Assembly RF
19 Handle Assembly Parts List ITEM QTY PART NUMBER DESCRIPTION 074A HANDLE, FRONT - CFP 075A HANDLE, REAR - CFP 3 AS05400 CORD, INTERCONNECT, 5 CONDUCTOR, SANDER A CLAMP HANDLE CK 5 373A HANDLE TUBE 8084A SCREW 0-3UNF X.75 HRCS A SCREW 0-3 X 3/8 HRCS 8 809A WASHER FLAT 0 TYPE B WIDE 9 087A MODULE INTERLOCK ASM 0 MP CORD, ADAPTER RF
20 Connection Diagram 0
21 Motor & Gearbox Assembly Note: Use 8 ounces of grease in Gearbox Item Ref. No. Description Qty 5347A GEARBOX (0V) MP50800 MOTOR W/ GEARBOX (30V) GREASE, 4oz TUBE (NOT SHOWN) A GEAR, PLANET A GEAR, RING A COVER, GEARBOX 59A RETAINER, BEARING 7 583A SHAFT, PLANET A GEAR, PINION A RETAINER, SHAFT A SPACER, SLEEVE 995A COUPLING, SHAFT 804A SCREW, #0 X BEARING, BALL 00 3 Item Ref. No. Description Qty BEARING, BALL BEARING, BALL BEARING, NEEDLE A SCREW, #0 X 3/4 8 MP FLANGE, MOUNTING, GEARBOX REPLACEMENT MOTOR PARTS 9 MP BRUSH, CARBON, ASM. (NOT SHOWN) 4 0 AS000 RECTIFIER, MOTOR (NOT SHOWN) MP48800 CONTROL, SPEED, ASM. (NOT SHOWN) MP COVER, MOTOR (NOT SHOWN) A CORDSET, IEC (NOT SHOWN) 4 MP BEARING, TOP (NOT SHOWN) 5 MP BEARING, BOTTOM (NOT SHOWN) MP48300 SWITCH, TOGGLE, SINGLE POLE (NOT SHOWN)
22 HydraSand Assembly RF
23 HydraSand Assembly ITEM B QTY PART NUMBER AS AS000 AS AS NB0900 NB0 NB07000 AS AS NB375 NB NB07300 AS00300 AS NB07400 AS Parts List DESCRIPTION PAD, FOAM, 5" PLATE, STEEL, DRIVER, 5" (OPTIONAL) HOUSING, BEARING, DRIVER SHAFT, DRIVER BOLT, HEX, /4-0 X 3/4, GD 5 WASHER, LOCK, /4" RING, RETAINING, EXT RING, ISOLATOR PLATE, CLUTCH, DRIVER BEARING-BALL 00 CUSTOM NUT, LOCK, /4" WASHER, LOCK, 5/" SCREW, SOCKET, FLAT, CS, /4-0 x ", SS PLATE, DRIVER PAD, DRIVER, 5", ASM WASHER, GROUND, /4" RING, SPACER RF
24 Wiring Diagram 4
25 5
26
27 Limited Warranty Epoch Dual Speed Rotary Sander TO QUALIFY FOR THIS WARRANTY () Machine must be registered within 30 days from the time of purchase on a form provided by American Sanders. Your American Sanders Distributor is responsible for the registration of your machine. Please cooperate with your Distributor in supplying necessary information on the card. () The machine must have been purchased from American Sanders or an authorized American Sanders Distributor. (3) This warranty extends to the original purchaser only and is not transferable to subsequent owners. TIME PERIODS ONE () YEAR WARRANTY - For the Epoch Dual Speed Rotary Sander. Warranted to be free from defects in material and workmanship for a period of one () year from the date of purchase by the original owners. (See Exclusions) EXCLUSIONS (Not Covered by Warranty) () Expendable wear items and parts that fail through normal wear by reason of their characteristics (cords, pads, pad holders, belts, wheels, carbon motor brushes, bulbs, filters, bags, or other consumable parts). () This warranty does not extend to parts affected by misuse, neglect, abuse, accidents, damage in transit, overloading the capacity of the machine, failure due to lack of proper maintenance or care as described in the operating and maintenance instructions. All defective parts must be returned to the distributor for credit. (3) Minor adjustments, such as tightening of screws or bolts not connected with the replacement of parts, are not covered. (4) Repairs or alterations by an organization other than the factory or an Authorized Service Center are not covered and will void any American Sanders warranty as to the parts or systems repaired or altered by a non-authorized organization. THE OBLIGATION OF AMERICAN SANDERS () The obligation of American Sanders under this warranty is limited to repairing or replacing, at its option, any part which is proven to be defective in material or workmanship under normal use for the applicable period stated above. () Warranty repairs will be made by your American Sanders Distributor without charge for parts and labor. They will be compensated with a warranty labor rate of $45.00 per hour, for the first year of ownership. (3) Parts repaired or replaced under this warranty are warranted only during the balance of the original warranty period. All defective parts replaced under these warranties become the property of American Sanders. WARRANTY SERVICE To obtain warranty service, take your machine and proof of purchase to any authorized American Sander Distributor. American Sanders will not reimburse expenses for service calls or travel. For the Distributor in your area, call American Sanders Customer Service Department at or If you are dissatisfied with the service that you receive, call or write American Sanders Customer Service Department for further assistance. INSTRUCTIONS AND CONDITIONS FOR WARRANTY REIMBURSEMENT Order replacement part: Orders will be processed and charged, as normal procedure. Call American Sanders for R/A number. You will need the Machine Serial Number and the Machine Model Number. Parts must be returned, accompanied with the R/A number to be eligible for warranty credit. All Warranty Parts will be shipped prepaid UPS Ground, any other method will be at the recipients expense. Freight on any Warranty Part after 30 days must be paid for by the Purchaser. Warranty labor rate is $45.00 per hour. Credit will be issued upon completion of the above steps, at the above rates. Transportation of hazardous waste or contaminated equipment is subject to various laws and regulations. In returning machines, parts, or accessories under this limited warranty, the end user must certify in writing that the machines, parts, or accessories being returned have not been used for handling, clean up, or disposal of hazardous waste or hazardous materials including but not limited to such things as asbestos, anthrax etc. or if the machines, parts, or accessories being returned have been used for handling, clean up, or diposal of hazardous waste or hazardous materials, then the end user must have the machines, parts or accessories decontaminated by licensed and qualified decontamination professionals and provide written certification of this decontamination signed by the decontamination professionals. These machines, parts or accessories are to be returned only to the local American Sanders Service Center for warranty service along with decontamination certification. DISCLAIMER OF CONSEQUENTIAL THERE ARE NO WARRANTIES THAT EXTEND BEYOND THE DESCRIPTION OF THE LIMITED WARRANTIES STATED WITHIN. NO OTHER WARRANTY, EXPRESSED OR IMPLIED, INCLUDING BUT NOT LIMITED TO ANY IMPLIED WARRANTY OF MERCHANTABLILITY OR FITNESS FOR A PARTICULAR PURPOSE, IS MADE EXCEPT AS EXPRESSLY STATED HEREIN. ANY STATUTORY IMPLIED WARRANTIES, INCLUDING ANY WARRANTY OF MERCHANTABILITY OR FITNESS FOR A PARTICULAR PURPOSE, THAT ARE IMPOSED BY LAW DESPITE THE EXPRESS LIMITATION OR WARRANTIES ABOVE, ARE EXPRESSLY LIMITED TO THE DURATION OF THE WRITTEN WARRANTY. BUYER UNDERSTANDS, ACKNOWLEDGES AND AGREES THAT THE REMEDIES PROVIDED UNDER THIS LIMITED WARRANTY ARE THE SOLE AND EXCLUSIVE REMEDIES AVAILABLE TO THE BUYER. AMERICAN SANDERS DISCLAIMS ANY RESPONSIBLITY FOR LOSS OF USER TIME OF THE AMERICAN SANDERS MACHINE OR ANY OTHER INCIDENTAL OR CONSEQUENTIAL DAMAGES. THIS INCLUDES, BUT NOT LIMITED TO INDIRECT, SPECIAL OR CONSEQUENTIAL DAMAGES ARISING OUT OF OR IN CONNECTION WITH THE FURNISHING, PERFORMANCE, USE OF OR INABILITY TO USE THE MACHINE. ANY EXTENSIONS OF OR MODIFICATIONS MADE TO THIS WARRANTY BY A DEALER/DISTRIBUTOR OF AMERICAN SANDERS ARE THE SOLE RESPONSIBILITY OF THE DEALER/DISTRIBUTOR. American Sanders reserves the right to change its warranty policy without notice. Copyright 07 American Sanders LT07700_B; 047 7
28 American Sanders an AMANO Company Eclipse Rd PO Box 909 Sparta, North Carolina 875 USA Fax American Sanders LT07700 Epoch_B
225FPCF Operator s Manual
 Floor Polisher 225FPCF Operator s Manual FOR YOUR SAFETY DO NOT store or use gasoline or other flammable vapors and liquids in the vicinity of this or any other appliance. Record This Important Information
PE225BU Operator s Manual
 Floor Burnisher PE225BU Operator s Manual FOR YOUR SAFETY DO NOT store or use gasoline or other flammable vapors and liquids in the vicinity of this or any other appliance. Record This Important Information
Ultra Speed Burnisher 120V & 240V with NEMA Plug
 Ultra Speed Burnisher 120V & 240V with NEMA Plug Operator's Manual Manual del operador Manuel de l utilisateur READ THIS BOOK LEA ESTE MANUAL LISEZ CE MANUEL ES FR English (2-12) Español (14-24) Français
FM-17DS & FM-20DS FLOOR MACHINES
 PARTS & OPERATING MANUAL FM-17DS & FM-20DS FLOOR MACHINES PLEASE READ THIS BOOK This operator s book has important information for the use and safe operation of this machine. Read this book carefully before
PE225GP Operator s Manual
 Dual Speed Grinder / Polisher PE5GP Operator s Manual FOR YOUR SAFETY DO NOT store or use gasoline or other flammable vapors and liquids in the vicinity of this or any other appliance. Record This Important
Operator s Manual. Stripping Solution Applicator
 Operator s Manual Stripping Solution Applicator Record this Important Information Date of Purchase Purchased From Address City State Zip Phone Contact Serial Number Emergency Contacts Medical Emergency
FM-17HD & FM-20HD FLOOR MACHINES
 PARTS & OPERATING MANUAL FM-17HD & FM-20HD FLOOR MACHINES PLEASE READ THIS BOOK This operator s book has important information for the use and safe operation of this machine. Read this book carefully before
POLISHERS. MODELS SeaRay 133 OPERATING & MAINTENANCE
 POLISHERS MODELS SeaRay 133 INTRODUCTION OPERATING & MAINTENANCE INSTRUCTIONS This operator s book has important information for the use and safe operation of this machine. Read this book carefully before
Si Ud. no pueden leer el Inglés, se hagan explicar este manual completamente antes de tratar el manejo o servicio de esta máquina.
 Operator's Manual OBS-18 OBS-18DC READ THIS BOOK This book has important information for the use and safe operation of this machine. Failure to read this book prior to operating or attempting any service
E-1 EDGER POLISHER/SCRUBBER
 E-1 EDGER POLISHER/SCRUBBER INTRODUCTION OPERATING & MAINTENANCE INSTRUCTIONS READ THIS BOOK This operator s book has important information for the use and safe operation of this machine. Read this book
JOB EXTRACTOR OPERATIONS MANUAL REV A
 JOB EXTRACTOR OPERATIONS MANUAL REV A October 2002 OPERATOR SAFETY INSTRUCTIONS WARNING DANGER: Failure to read and observe all DANGER statements could result in severe bodily injury or death. Read and
FM-ME EDGER/SCRUBBER FLOOR MACHINE
 PARTS & OPERATING MANUAL FM-ME EDGER/SCRUBBER FLOOR MACHINE PLEASE READ THIS BOOK This operator s book has important information for the use and safe operation of this machine. Read this book carefully
Si Ud. o sus operadores no pueden leer el Inglés, se hagan explicar este manual completamente antes de tratar el manejo o servicio de esta máquina.
 Operator's Manual 3DS READ THIS BOOK This book has important information for the use and safe operation of this machine. Failure to read this book prior to operating or attempting any service or maintenance
Electronic Service Manuals
 Electronic Service Manuals This electronic document is provided as a service to our customers. We do not create the contents of the information contained in this document. Should you have detailed questions
WET/DRY VACUUM. QUEST for Continuous Improvement Windsor s Quality Management System is Certified ISO MODEL: T1. Operating Instructions (ENG)
") WET/DRY VACUUM Operating Instructions (ENG) MODEL: T1 y QUEST for Continuous Improvement Windsor s Quality Management System is Certified ISO 9001. Read these instructions before operating the machine.
WET/DRY VACUUM Operating Instructions (ENG) MODEL: T1 y QUEST for Continuous Improvement Windsor s Quality Management System is Certified ISO 9001. Read these instructions before operating the machine.
FM-ME EDGER/SCRUBBER FLOOR MACHINE. Model: PARTS & OPERATING MANUAL
 FM-ME EDGER/SCRUBBER FLOOR MACHINE Model: 515451 PARTS & OPERATING MANUAL Thank you for purchasing a Pacific Floorcare product. Carefully inspect all components for freight damage. If such damage is discovered,
FLOOR MACHINE EDGER MINI SCRUBBER MODEL E-1
 FLOOR MACHINE EDGER MINI SCRUBBER MODEL E-1 INTRODUCTION OPERATING & MAINTENANCE INSTRUCTIONS This operator s book has important information for the use and safe operation of this machine. Read this book
SD2000 FLOOR BURNISHER
 SD2000 FLOOR BURNISHER OPERATION & PARTS MANUAL REV A April 2003 SPECIFICATIONS Length: 33.75 inches Width: 2 inches Height: 50 inches Weight: 69 pounds Pad Speed: 2000 Pad Diameter: 20 inches Drive Motor:.5
MINI-EDGER POLISHER/SCRUBBER
 MINI-EDGER POLISHER/SCRUBBER INTRODUCTION OPERATING & MAINTENANCE INSTRUCTIONS READ THIS BOOK This operator s book has important information for the use and safe operation of this machine. Read this book
SEARAY LOW MOISTURE POLISHER/SCRUBBER OPERATING & MAINTENANCE
 SEARAY LOW MOISTURE POLISHER/SCRUBBER INTRODUCTION OPERATING & MAINTENANCE INSTRUCTIONS This operator s book has important information for the use and safe operation of this machine. Read this book carefully
AURA WIDE AREA VACUUM Parts Manual
 AURA WIDE AREA VACUUM Parts Manual INTRODUCTION OPERATING & MAINTENANCE INSTRUCTIONS READ THIS BOOK This operator s book has important information for the use and safe operation of this machine. Read this
LARGE AREA VACUUM LAV-30
 LARGE AREA VACUUM LAV-30 INTRODUCTION OPERATING & MAINTENANCE INSTRUCTIONS READ THIS BOOK This operator s book has important information for the use and safe operation of this machine. Read this book carefully
FMU-1500 High-Speed Burnisher
 New Equipment Warranty Limited Warranty The manufacturer gives you the following limited warranty for this product if it was originally purchased for use, not resale, from BISSELL BigGreen Commercial or
MN908 No. 282C Replaces 282B LB7013
 No. 282C Replaces 282B LB7013 Instruction Manual For Baldor Dust Control Units Models DC7, DC7 3, DC8, DC8 3, DC10, DC10 3, DC12, DC12 3 and DC14 3. For use on Grinders mounted to GA16 and GA20 pedestals
WAV-30 WIDE AREA VACUUM
 PARTS & OPERATING MANUAL WAV-30 WIDE AREA VACUUM PLEASE READ THIS BOOK This operator s book has important information for the use and safe operation of this machine. Read this book carefully before starting
CREWMAN 20 ORB CREWMAN 28 ORB
 E88066-00 E88068-00 E88070-00 CREWMAN 20 ORB CREWMAN 28 ORB 20, 28 Orbital Strip Machines Operator and Parts Manual 400 Van Camp Road Bowling Green, Ohio 43402 Customer Service: 888-GO-BETCO Fax: 800-445-5056
Operating Instructions (ENG) MODEL: AM115V. Read instructions before operating the machine. AM /24/00
 MODEL: AM115V. Read instructions before operating the machine. AM /24/00") Operating Instructions (ENG) MODEL: AM115V Read instructions before operating the machine. A AM 98710 03/24/00 THIS PAGE LEFT BLANK INTENTIONALLY 1 MACHINE DATA LOG/OVERVIEW MODEL DATE OF PURCHASE SERIAL
Operating Instructions (ENG) MODEL: AM115V Read instructions before operating the machine. A AM 98710 03/24/00 THIS PAGE LEFT BLANK INTENTIONALLY 1 MACHINE DATA LOG/OVERVIEW MODEL DATE OF PURCHASE SERIAL
BIOCIDE ANTIMICROBIAL DRY VACUUM
 BIOCIDE ANTIMICROBIAL DRY VACUUM Model: ATIBCV IMPORTANT SAFETY INSTRUCTIONS When using an electrical appliance, basic precaution must always be followed, including the following: READ ALL INSTRUCTIONS
Canister Vacuums S6EVO. Operations and Parts Manual. Models: S6EVO
 Canister Vacuums S6EVO Operations and Parts Manual Models: S6EVO 2 IMPORTANT SAFETY INSTRUCTIONS When using an electrical appliance, basic precaution must always be followed, including the following: READ
Pump Out Vacuums Polyethylene & Steel
 Pump Out Vacuums Polyethylene & Steel Operations and Parts Manual 110 volt receptacle on single motor only Models: 415P-AD 429P-AD 415DS IMPORTANT SAFETY INSTRUCTIONS When using an electrical appliance,
Parts and Service Manual BURNISHER MODEL: MR , MR , MR , MR
 Parts and Service Manual BURNISHER MODEL: MR2000-115, MR1500-115, MR2000-220, MR1500-220 TABLE OF CONTENTS RECEIVING YOUR EQUIPMENT... 3 WARNINGS AND SAFETY... 3 ELECTRICAL INFORMATION... 4 GROUNDING INSTRUCTIONS...
WAV-26 UPRIGHT WIDE AREA VACUUM
 PARTS & OPERATING MANUAL WAV-26 UPRIGHT WIDE AREA VACUUM PLEASE READ THIS BOOK This operator s book has important information for the use and safe operation of this machine. Read this book carefully before
User s Manual and Operating Instructions
 User s Manual and Operating Instructions Model Numbers: PT-18W-DDF-A, PT-20F-DDF-A, PT-20S-DDF, PT-24O-DDF, PT-24-DDF, PT-24-DDF-F, PT-30-DDF, PT-30P-DDF-A, PT-30P-DDF-AF READ AND SAVE THESE INSTRUCTIONS
User s Manual and Operating Instructions
 User s Manual and Operating Instructions Model Numbers: CL-30P-DDF, CL-20F-DDF, CL-24O-DDF, CL-30-DDF READ AND SAVE THESE INSTRUCTIONS IMPORTANT: Read and understand all of the directions in this manual
GENIUS 14 GENIUS 18 OPERATING & MAINTENANCE
 GENIUS 14 GENIUS 18 INTRODUCTION OPERATING & MAINTENANCE INSTRUCTIONS This operator s book has important information for the use and safe operation of this machine. Read this book carefully before starting
Operations and Parts Manual
 Canister Vacuums Hospital Vac Operations and Parts Manual Models: S9HOSPITAL 2 IMPORTANT SAFETY INSTRUCTIONS When using an electrical appliance, basic precaution must always be followed, including the
Wet/Dry Vacuums Polyethylene, Polypropylene, & Steel
 Wet/Dry Vacuums Polyethylene, Polypropylene, & Steel Operations and Parts Manual Models: 315P 415P 429P 430P 415S 415ST 415PLT 429ST IMPORTANT SAFETY INSTRUCTIONS When using an electrical appliance, basic
SSS BPV- 40 Backpack Vacuum
 SSS BPV- 40 Backpack Vacuum Manual The contents of this manual are based on the latest product information available at the time of publication. Triple S reserves the right to make changes or improvements
FES - Series Portable Electric Heaters. YES - Series Suspended Electric Heaters CONTENTS
 FOSTORIA INDUSTRIES, INC. A DIVISION OF FES - Series Portable Electric Heaters YES - Series Suspended Electric Heaters (FES-1524-3E shown) IMPORTANT SAFETY INFORMATION INSIDE Serious injury or death possible.
Electronic Service Manuals
 Electronic Service Manuals This electronic document is provided as a service to our customers. We do not create the contents of the information contained in this document. Should you have detailed questions
OWNER'S MANUAL IMPORTANT: READ OWNER'S MANUAL CAREFULLY MODEL : CHEETAH DC2000 FOR YOUR CONVENIENCE, RECORD THE FOLLOWING IMPORTANT INFORMATION MODEL:
 OWNER'S MANUAL IMPORTANT: READ OWNER'S MANUAL CAREFULLY MODEL : CHEETAH DC2000 FOR YOUR CONVENIENCE, RECORD THE FOLLOWING IMPORTANT INFORMATION MODEL: SERIAL NUMBER:-------- DATE PURCHASED: PURCHASED FROM:
Parts & Operations Manual
 Parts & Operations Manual 28 20 Integra-D Orbital Floor Machine Model: ORB20, ORB20V/ ORB28, ORB28V Serial Number: Date of Purchase: More info: www.ipceagle.com Integra-D - Orbital Floor Machines About
SSS Intrepid 16 FMS. Manual
 SSS Intrepid 16 FMS Manual The contents of this manual are based on the latest product information available at the time of publication. Triple S reserves the right to make changes or improvements to its
INTELLI-VAC 14 INTELLI-VAC 18
 INTELLI-VAC 14 INTELLI-VAC 18 INTRODUCTION OPERATING & MAINTENANCE INSTRUCTIONS This operator s book has important information for the use and safe operation of this machine. Read this book carefully before
GALAXY FLOOR MACHINE
 OPERATION MANUAL GALAXY FLOOR MACHINE IMPORTANT SAFETY INSTRUCTIONS WARNING: Failure to observe these instructions can cause personal injury to machine operator or bystanders. WARNING: Shock or electrocution
W Model 1RKU2 w/optional Wall mount. Unit Model Weight (Lbs) Kilowatts Volts- Phase Amps Fan Output Heat Output
 Kilowatts Volts- Phase Amps Fan Output Heat Output") Operating Instructions & Parts Manual 1RKT2, 1RKT3, 1RKT4, 1RKT5, 1RKT9 and 1RKU2 Please read and save these instructions. Read carefully before attempting to assemble, install, operate or maintain the
Operating Instructions & Parts Manual 1RKT2, 1RKT3, 1RKT4, 1RKT5, 1RKT9 and 1RKU2 Please read and save these instructions. Read carefully before attempting to assemble, install, operate or maintain the
GULPER 16SV 16 GALLON WET/DRY VACUUM WITH FRONT MOUNT SQUEEGEE
 GULPER 16SV 16 GALLON WET/DRY VACUUM WITH FRONT MOUNT SQUEEGEE INTRODUCTION OPERATING & MAINTENANCE INSTRUCTIONS This operator s book has important information for the use and safe operation of this machine.
Operator and Parts Manual Nu-1600 Burnisher, Belt Drive Nu-2000 Burnisher, Belt Drive
 Operator and Parts Manual Nu-1600 Burnisher, Belt Drive Nu-2000 Burnisher, Belt Drive NuSource Enterprises, LLC; A 4699 61 st St. Suite C; Holland, MI 49423 Length 33.75 in. Width 21 in. Height 50 in.
WET/DRY VACUUM MODEL SV-12
 WET/DRY VACUUM MODEL SV-12 INTRODUCTION OPERATING & MAINTENANCE INSTRUCTIONS READ THIS BOOK This operator s book has important information for the use and safe operation of this machine. Read this book
Tornado BI-SPEED SCRUB/BUFF FLOOR MACHINES. Operation & Maintenance Manual For Commercial Use Only
 TORNADO INDUSTRIES 7401 W. LAWRENCE AVENUE CHICAGO, IL 60706 (708) 867-5100 FAX (708) 867-6968 www.tornadovac.com Tornado Operation & Maintenance Manual For Commercial Use Only BI-SPEED SCRUB/BUFF FLOOR
MC MC MC MC MC833130
 Pic-A-Vac Model: MC832085 MC833085 MC832105 MC833105 MC832130 MC833130 OPERATION SERVICE PARTS CARE Revised 8/01 FOR COMMERCIAL USE ONLY IMPORTANT SAFETY INSTRUCTIONS When using an electrical appliance,
The Extraordinaire OWNER S MANUAL. Orbital Ceiling Fan. Model No. OF110** READ AND SAVE THESE INSTRUCTIONS. Net Weight 14.5 lbs. or 6.59 kg.
 The Extraordinaire Orbital Fan WARNING: Support Directly From Building Structure Net Weight 14.5 lbs. or 6.59 kg. Model No. OF110** OWNER S MANUAL READ AND SAVE THESE INSTRUCTIONS Important Safety Instructions
THE BOSS-175/300 Heavy-Duty Floor Machine with Interchangeable Apron 13, 15, 17, 19 and 21 Aprons
 CLEANMASTER 75 / 300 RPM Providing the Finest Global Floor Care Solutions THE BOSS-75/300 Heavy-Duty Floor Machine with Interchangeable Apron 3, 5, 7, 9 and Aprons Safety enhanced non-conductive dual triggers
WET/DRY VACUUMS POLYETHYLENE, POLYPROPYLENE & STEEL
 WET/DRY VACUUMS POLYETHYLENE, POLYPROPYLENE & STEEL MODELS: 315P 415P 429P 415S 415ST 415PLT 429ST OPERATIONS AND PARTS MANUAL IMPORTANT READ THIS MANUAL PRIOR TO USE. TABLE OF CONTENTS Page No. Important
FMC DUAL SPEED Floor Machine SERIES
 New Equipment Warranty Limited Warranty The manufacturer gives you the following limited warranty for this product if it was originally purchased for use, not resale, from BISSELL BigGreen Commercial or
7165 Dust Collector Owner s Manual
 7165 Dust Collector Owner s Manual Oliver Machinery M-7165 12/2016 Seattle, WA Copyright 2003-2017 info@olivermachinery.net www.olivermachinery.net CONTENTS IMPORTANT SAFETY RULES----------------------------------------------------------------
High-Velocity Floor Fan
 High-Velocity Floor Fan Owner s Manual WARNING: Read carefully and understand all ASSEMBLY AND OPERATION INSTRUCTIONS before operating. Failure to follow the safety rules and other basic safety precautions
17" PRO BUFFERS. Operation l Care l Service. Caution! Read Safety and General Instructions carefully before using for the first time. REV.
 17" PRO BUFFERS heavy-duty floor machines owner S/operator Smanual #HEX1BFRHD 1-1/2 HP Induction, Dual Capacitor AC Motor and SDP (Severe Duty Planetary) #HEX1BFRHDI 1-1/2 HP Sealed Induction, Dual Capacitor
Parts and Instruction Manual ET Extraction Tool
 Parts and Instruction Manual ET Extraction Tool This manual is furnished with each new MINUTEMAN ET Extraction Tool. This provides the necessary operating and preventive maintenance instructions. Operators
TABLE OF CONTENTS
 TABLE OF CONTENTS Safety Precautions Machine Operation Machine Maintenance & Storage Handle Release Assembly Instructions Parts Lists Wiring Diagram Warranty Policy 3 4 4 5 6-10 11 12-2- SAFETY PRECAUTIONS!!!
1500 RPM BURNISHER. Model P WARNING: OPERATOR MUST READ AND UNDERSTAND THIS MANUAL COMPLETELY BEFORE OPERATING THIS EQUIPMENT.
 OPERATOR S MANUAL & PARTS LIST 1500 RPM BURNISHER Model P1500-3 U.S. Patent Number 4,845,798 U.S. Patent Number 4,756,042 U.S. Patent Number 296,252 WARNING: OPERATOR MUST READ AND UNDERSTAND THIS MANUAL
D O U B L E A U G E R M O R TA R M I X E R OWNER S MANUAL
 D O U B L E A U G E R M O R TA R M I X E R OWNER S MANUAL WARNING: Read carefully and understand all INSTRUCTIONS before operating. Failure to follow the safety rules and other basic safety precautions
SPA BLOWER OWNER'S MANUAL XXXX, XXXX, XXXX, XXXX, XXXX, XXXX fax
 SPA BLOWER OWNER'S MANUAL 80015-XXXX, 80016-XXXX, 80017-XXXX, 80018-XXXX, 80019-XXXX, 80020-XXXX fax 888.610.3839 2015 323300-015 6/15 THIS PAGE INTENTIONALLY LEFT BLANK. 2 Operating Instructions and Parts
5HP CYCLONE DUST COLLECTOR MANUAL
 5HP CYCLONE DUST COLLECTOR MANUAL LAGUNA TOOLS 2072 Alton Parkway Irvine, California 92606 Ph: 800.234.1976 www.lagunatools.com 2018, Laguna Tools, Inc. LAGUNA and the LAGUNA Logo are the registered trademarks
PS /2 Inch Angle Grinder Assembly & Operating Instructions READ ALL INSTRUCTIONS AND WARNINGS BEFORE USING THIS PRODUCT.
 PS07214 4 1/2 Inch Angle Grinder Assembly & Operating Instructions READ ALL INSTRUCTIONS AND WARNINGS BEFORE USING THIS PRODUCT. This manual provides important information on proper operation & maintenance.
BG6UL. 6 Inch Bench Grinder Assembly & Operating Instructions
 BG6UL 6 Inch Bench Grinder Assembly & Operating Instructions READ ALL INSTRUCTIONS AND WARNINGS BEFORE USING THIS PRODUCT. SAVE THESE INSTRUCTIONS FOR FUTURE REFERENCE. This manual provides important information
Tornado. Operation & Maintenance Manual For Commercial Use Only. The DS Series of 175 RPM Floor Maintenance Machines
 TORNADO INDUSTRIES 7401 W. LAWRENCE AVENUE CHICAGO, IL 60706 (708) 867-5100 FAX (708) 867-6968 www.tornadovac.com Tornado Operation & Maintenance Manual For Commercial Use Only The DS Series of 175 RPM
IMPORTANT SAFETY INFORMATION
 OPERATION INSTALLATION PARTS MANUAL www.fostoriaindustries.com Made in U.S.A. ELECTRIC PORTABLE HEATER FES-1024-1CA 08860010 YES-1024-1CA 08861510 FES-1520-3A 08860110 YES-1520-3A 08860810 FES-1524-1A
Indoor/Outdoor Electric Patio Heater Model No: HP Operating Instructions HP Soleus Air International
 Indoor/Outdoor Electric Patio Heater Model No: HP1-15-50 Operating Instructions 3098007 HP1-15-50 2009 Soleus Air International Thank you for choosing a Soleus Air Indoor/Outdoor Patio Heater. This owner
User s Manual and Operating Instructions
 User s Manual and Operating Instructions Model Numbers: CL-36-BDF-A, CL-42-BDF-A, CL-48-BDF-A READ AND SAVE THESE INSTRUCTIONS IMPORTANT: Read and understand all of the directions in this manual before
Model: C C Ambassador 20. Automatic Carpet Scrubber OPERATION SERVICE PARTS CARE
 Ambassador 20 Automatic Carpet Scrubber Model: C8420-115 C8420-240 OPERATION SERVICE PARTS CARE This manual is furnished with each new Minuteman Ambassador 20. This provides the necessary operating and
GP-6 Cabmaker Owner s Manual and Operating Instructions
 GP- Cabmaker Owner s Manual and Operating Instructions Belts Model: Part# 80008 Diamond Pads Model: Part# 80005 Carbide Wheel Model: Part# 8000 Revision 05 0.08 Manual Part No. 597 Caution: Read all safety
Wheelbarrow Mixer Operations Manual
 Wheelbarrow Mixer Operations Manual Part# MIX3, MIX3-UK EDI# 27275, 27276 104 S. 8th Ave. Marshalltown, IA Phone 800-888-0127 / 641-753-0127 Fax 800-477-6341 / 641-753-6341 www.marshalltown.com 1 of 20
36 & 48 E-Z Cone Fan. Installation & Operator s Instruction Manual (Direct Drive)
") 36 & 48 E-Z Cone Fan Installation & Operator s Instruction Manual (Direct Drive) September 1997 MV1433C Chore-Time Warranty Chore-Time Equipment warrants each new product manufactured by it to be free
36 & 48 E-Z Cone Fan Installation & Operator s Instruction Manual (Direct Drive) September 1997 MV1433C Chore-Time Warranty Chore-Time Equipment warrants each new product manufactured by it to be free
OPERATIONS MANUAL REV A
 OPERATIONS MANUAL REV A October 2002 OPERATOR SAFETY INSTRUCTIONS WARNING DANGER: Failure to read and observe all DANGER statements could result in severe bodily injury or death. Read and observe all DANGER
Electronic Service Manuals
 Electronic Service Manuals This electronic document is provided as a service to our customers. We do not create the contents of the information contained in this document. Should you have detailed questions
Ultra Lightweight Household & Commercial Vacuums
 Owner s Manual Ultra Lightweight Household & Commercial Vacuums Save These Instructions Index Important Safety Instructions............................................................. 2 Polarization Instructions................................................................
ELECTRIC FIREPLACE HEATER WITH SINGLE GLASS DOOR
 ELECTRIC FIREPLACE HEATER WITH SINGLE GLASS DOOR Model 91797 ASSEMBLY and Operating Instructions Visit our website at: http://www.harborfreight.com Read this material before using this product. Failure
Integra Family. Operations Manual. Models: Integra TX SS, Integra HD, Integra DS, Integra DS LA, Integra UHS, Machine Name: Serial Number:
 Integra Family GREEN CIRCLE CERCLE VERT Operations Manual Models: Integra TX SS, Integra HD, Integra DS, Integra DS LA, Integra UHS, Machine Name: Date of Purchase: Serial Number: Service Center Number:
48 Vanguard Belt Drive Fans Installation and Operators Instruction Manual
 8 Vanguard Belt Drive Fans Installation and Operators Instruction Manual Thank You The employees of Chore-Time Equipment would like to thank your for your recent Chore-Time purchase. If a problem should
60In. Ceiling Fan. Owner s Manual
 60In. Ceiling Fan Owner s Manual WARNING: Read carefully and understand all ASSEMBLY AND OPERATION INSTRUCTIONS before operating. Failure to follow the safety rules and other basic safety precautions may
OPERATORS MANUAL FOR Mi-T-M CORONA DISCHARGE OZONE GENERATORS
 OPERATORS MANUAL FOR Mi-T-M CORONA DISCHARGE OZONE GENERATORS CAUTION RISK OF INJURY! READ MANUAL BEFORE OPERATING! This manual is an important part of the Corona Discharge Ozone Generator and must remain
1715HD, 2015HD Instructions For Use Models: ,
 1715HD, 2015HD Instructions For Use Models: 56380201, 56380202 12/09 Form Number 56041825 IMPORTANT SAFETY INSTRUCTIONS This machine is only suitable for commercial use, for example in hotels, schools,
CRV Clean Room Vacuum
 CRV Clean Room Vacuum Model: C80704-01, 02 SS (115V) C80704-03, 04 Painted (115V) C80704-07, 12 Painted (240V) C80704-08, 09 SS (240V) OPERATION SERVICE PARTS CARE Revised 7/02 FOR COMMERCIAL USE ONLY
48 Vanguard Belt Drive Fans Installation and Operators Instruction Manual
 8 Vanguard Belt Drive Fans Installation and Operators Instruction Manual Thank You The employees of Chore-Time Equipment would like to thank your for your recent Chore-Time purchase. If a problem should
Roanoke 48 in Ceiling Fan Owner s Manual. Roanoke Ventilador de Techo de 1,22 m Manual del Propietario
 160 854 Roanoke 48 in Ceiling Fan Owner s Manual Roanoke Ventilador de Techo de 1,22 m Manual del Propietario 48 Roanoke Ceiling Fan by Hampton Bay Thank you for purchasing our ceiling fan. This product
55-Gallon Dispenser Package
 INSTRUCTIONS-PARTS LIST INSTRUCTIONS This manual contains important warnings and information. READ AND KEEP FOR REFERENCE. 308 666 Rev. A Husky 715 55-Gallon Dispenser Package 100 psi (6.9 bar) Maximum
MRS-6 Maxi-Guard II. Model: C , 12, 13, 14 OPERATION SERVICE PARTS CARE. Revised 2/02
 MRS-6 Maxi-Guard II Model: C86006-11, 12, 13, 14 OPERATION SERVICE PARTS CARE Revised 2/02 OPERATING INSTRUCTIONS INSPECTION Carefully unpack and inspect your machine for shipping damage. Each unit is
READ AND UNDERSTAND THESE INSTRUCTIONS BEFORE OPERATING THE MACHINE
 XAACT Xtract 200 INFORMATION & OPERATING INSTRUCTIONS READ AND UNDERSTAND THESE INSTRUCTIONS BEFORE OPERATING THE MACHINE 78-00018 Rev B 032912 1 CONTENTS: Machine Specifications............ 2 Record Important
Technical Data. Name: ERIKA Automat fully automatic machine to divide and to round dough pieces of the same size
 AUTOMAT MANUAL 1 Technical Data Name: ERIKA Automat fully automatic machine to divide and to round dough pieces of the same size Type Divisions Dough Portions (in ounces) Plate Nos. 3 30 1.0 3.5 #35 4/40A
MERCURY HD-22 AUTOSCRUBBER Safe Operations
 Safe Operations PROPER OPERATING PROCEDURES By following proper operating procedures, the Mercury DS- 26 Autoscubber can provide you with productive, easy to operate, safe and clean floors. This machine
User s Manual and Operating Instructions
 User s Manual and Operating Instructions Model Numbers: MAC-12F, MAC-20F-DDF, MAC-20FO-DDF, MAC-20S-DDF, MAC-24-DDF, MAC-24P, MAC-24POSC, MAC-24W, MAC-24WOSC, MAC-30W, MAC-30WOSC, MAC-30-DDF, MAC-30P-DDF,
H-16.5 Record Cleaning Machine Setup and Instruction Manual
 H-16.5 Record Cleaning Machine Setup and Instruction Manual VPI INDUSTRIES, INC., 77 CLIFFWOOD AVE., #3B, CLIFFWOOD, NJ 07721 PHONE: 1-732-583-6895, FAX: 1-732-946-8578 http://www.vpiindustries.com 1 Table
MAXUM 5 5 Gallon Box Extractor
 MAXUM 5 5 Gallon Box Extractor INTRODUCTION OPERATING & MAINTENANCE INSTRUCTIONS This operator s book has important information for the use and safe operation of this machine. Read this book carefully
20 High velocity Air
 20 High velocity Air Circulator 66878 Set up and Operating Instructions Distributed exclusively by Harbor Freight Tools. 3491 Mission Oaks Blvd., Camarillo, CA 93011 Visit our website at: http://www.harborfreight.com
Operating Instructions & Parts Manual Models 99533, 99532
 Operating Instructions & Parts Manual Models 99533, 99532 2 Please read and save these instructions. Read carefully before attempting to assemble, install, operate or maintain the product described. Protect
HOTSPOT. Two Gallon Pump Up Spotter OPERATING & MAINTENANCE
 HOTSPOT Two Gallon Pump Up Spotter INTRODUCTION OPERATING & MAINTENANCE INSTRUCTIONS This operator s book has important information for the use and safe operation of this machine. Read this book carefully
OPERATOR S MANUAL & PARTS LIST Ultra High Speed Burnishers
 OPERATOR S MANUAL & PARTS LIST Ultra High Speed Burnishers 1200 RPM Model M1200-3 1600 RPM Model M1600-3 2000 RPM Model M2000-3 U.S. Patent Number 4,845,798 U.S. Patent Number 4,756,042 U.S. Patent Number
Sanitaire. Owner s Guide. 10 GALLON Box Extractor SC6088 Series IMPORTANT
 Sanitaire 10 GALLON Box Extractor SC6088 Series Part No. SC6088 Rev 2 (3/14) Owner s Guide IMPORTANT Do not return this product to the store. Call 1-800-800-8975* Monday - Friday 8:00 AM to 7:30 PM and
OPERATIONS MANUAL & PARTS LIST. BX2 Fastracts Extractor. IPC Eagle 3650 Dodd Rd, Eagan MN
 OPERATIONS MANUAL & PARTS LIST BX2 Fastracts Extractor IPC Eagle 3650 Dodd Rd, Eagan MN 55123 800.486.2775 www.ipceagle.com BEFORE OPERATING THE MACHINE Read the manual carefully and completely before