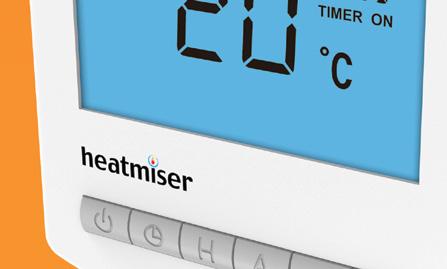
Model: Slimline-RF. 1 Slimline Series
|
|
|
- Baldwin Ramsey
- 6 years ago
- Views:
Transcription


1 Model: Slimline-RF
2 Model: Slimline-RF 1 Slimline Series
3 Table of Contents Product Image 1 Holiday Programming 22 Table of Contents What is a Programmable Room Thermostat? Setting the Hot Water Switching Times Hot Water Override Installation Procedure Installing the Batteries Replacing the Batteries Frost Protection Power ON / OFF Re-calibrating the Thermostat Pairing with the RF-Switch Receiver Pairing with the UH8-RF Wiring Centre Factory Reset Optional Features LCD Display Setting the Clock 15 Temperature Display 16 Setting the Comfort levels Locking the Thermostat 19 Setting the Temperature 20 Temperature Hold 21 Model: Slimline-RF 2
4 What Section is a Header Programmable Room Thermostat? A programmable room thermostat is both a programmer and a room thermostat. The programmer allows you to set On and Setback periods to suit your own lifestyle. The room thermostat works by sensing the air temperature, switching on the heating when the air temperature falls below the thermostat setting, and switching it off once this set temperature has been reached. So a programmable room thermostat lets you choose what times you want the heating to be on, and what temperature it should reach while it is on. It will allow you to select different temperatures in your home at different times of the day (and days of the week) to meet your particular needs and preferences. Setting a room thermostat to a higher temperature will not make the room heat up any faster. How quickly the room heats up depends on the design & size of the heating system. Similarly reducing the temperature setting does not affect how quickly the room cools down. Setting a programmable room thermostat to a lower temperature will result in the room being controlled at a lower temperature, and saves energy. The way to set and use your programmable room thermostat is to find the lowest temperature settings that you are comfortable with at the different times you have chosen, and then leave it alone to do its job. 3 Slimline Series
5 Section Header The best way to do this is to set the room thermostat to a low temperature say 18 C, and then turn it up by 1 C each day until you are comfortable with the temperature. You won t have to adjust the thermostat further. Any adjustment above this setting will waste energy and cost you more money. If your heating system is a boiler with radiators, there will usually be only one programmable room thermostat to control the whole house. But you can have different temperatures in individual rooms by installing thermostatic radiator valves (TRVs) on individual radiators. If you don t have TRVs, you should choose a temperature that is reasonable for the whole house. If you do have TRVs, you can choose a slightly higher setting to make sure that even the coldest room is comfortable, then prevent any overheating in other rooms by adjusting the TRVs. You are able to temporarily adjust the heating program by overriding or using the temperature hold feature. These features are explained further on pages 20 and 21 of this manual. Programmable room thermostats need a free flow of air to sense the temperature, so they must not be covered by curtains or blocked by furniture. Nearby electric fires, televisions, wall or table lamps may also prevent the thermostat from working properly. Model: Slimline-RF 4
6 Installation Section Header Procedure Do Mount the thermostat at eye level. Read the instructions fully so you get the best from our product. Don t Do not install near to a direct heat source as this will affect functionality. Do not push hard on the LCD screen as this may cause irreparable damage. This wireless thermostat is designed to be surface mounted. Step 1 Carefully separate the front half of the thermostat from the back plate by placing a small flat head terminal driver into the slots on the bottom face of the thermostat. Step 2 Mark 2 hole positions on the wall using the backplate as a positioning template. Drill at the marked positions and insert a wall plug into each hole. Step 3 Screw the thermostat back plate securely on the wall. Step 4 Clip the front of the thermostat back onto the thermostat back plate. 5 Slimline Series


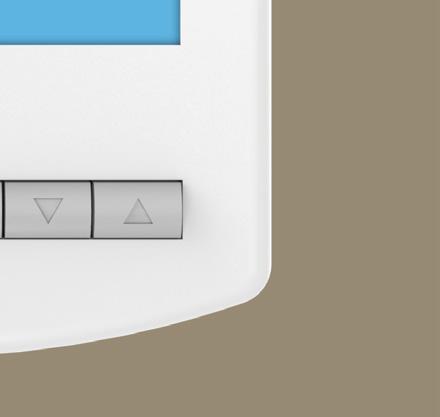
7 1 Section Header Model: Slimline-RF 6

8 Installing Section Header the Batteries 2x AAA batteries have been supplied with this thermostat. To access the battery holder, push and release the compartment door located on the bottom face of the thermostat. 7 Slimline Series


9 Section Header Insert the batteries in the empty battery holder, ensuring that each battery is orientated for the correct polarity + / -. Push the battery holder back inside the thermostat until it is secured in its closed position. Model: Slimline-RF 8

10 Replacing Section Header the Batteries Batteries have a fixed lifespan and will need to be replaced occasionally to ensure the thermostat operates correctly. The thermostat will inform you when the batteries need to be replaced by displaying the battery icon on screen. Note: You must replace the batteries within 1 minute of removal in order to retain the current clock and comfort level settings. 9 Slimline Series Battery Icon (Flashes)
11 Pairing With the RF-Switch Section Header If using with the UH8-RF wiring centre, turn to page 11. With the thermostat turned OFF: Press & hold the Clock button until you see two sets of numbers appear... The small number 01 in the top right corner of the LCD is the feature number. Press Clock repeatedly until you see feature 06 (Receiver Type)... The options within feature 06 are: 00 = UH8-RF or 01 = RF-Switch receiver. Use the Up/Down keys to set feature 06 to 01 (RF-Switch)... Press Clock again until you see feature 07 (Receiver Address)... You can now select a Receiver Address from Use the Up/Down keys to set feature 07 to (You must set a unique receiver address for each receiver installed). Press A to confirm settings and the display will go blank... If in mode 02, the hot water will automatically be paired to HW2. Model: Slimline-RF 10
12 Pairing Section the Header Thermostat On the RF-Switch receiver, press and hold the CH1 Pairing button (if a valve is used) or Boiler CH Pairing button until the Comms LED flashes. With the thermostat turned OFF, press & hold the A button for 5 seconds... The thermostat will send a signal for 1 minute and will flash the RF signal icon... If pairing is successful, the Comms LED on the RF-Switch receiver will go out. Press the Power button on the thermostat once to confirm pairing... If pairing is unsuccessful, check features 06 to 07 have been configured correctly. To eliminate a possible signal issue, reposition the thermostat closer to the receiver and repeat the pairing process again. Pairing With the UH8-RF Wiring Centre On the UH8-RF, take note of the numbers set on the rotary switches (UH8-RF ID numbers 01-99). Each UH8-RF on the system needs to have a different ID number. Set your first UH8-RF to 01 With the thermostat turned OFF: Press & hold the Clock button until 2 sets of numbers appear on screen... The small number 01 in the top right corner of the LCD is the feature number. 11 Slimline Series Example: Rotary Switch showing ID No. 99.
13 Section Header Press Clock repeatedly until you see feature 06 (Receiver Type)... The options within feature 06 are: 00 = UH8-RF or 01 = RF-Switch receiver. Use the Up/Down keys to set feature 06 to 00 (UH8-RF)... Press Clock again until you see feature 07 (UH8-RF Board Address)... Use the Up/Down keys to set the large digits to the board address of the UH8-RF. This is the number set on the UH8-RF rotary switches... (You must set a unique board address for each UH8-RF installed). Press Clock again until you see feature 08 (Zone number, 01-08)... The UH8-RF is an 8 zone receiver. Use the Up/Down buttons to select the zone this thermostat should be linked to... Press Clock again until you see feature (00 = Underfloor heating, 01 = Radiators.) Use the Up/Down buttons to specify whether the thermostat is controlling underfloor heating or radiators... Press A to confirm settings and the display will go blank... Press the Power button once to turn the thermostat back ON... Press the Up key to set the target temperature above the room temperature; the flame symbol will appear and the assigned zone on the UH8-RF will be activated... This indicates pairing between the thermostat and the UH8-RF is successful. Model: Slimline-RF 12

14 Section Header Slimline Series
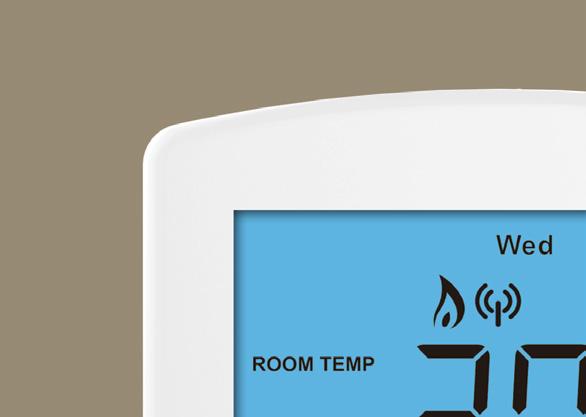
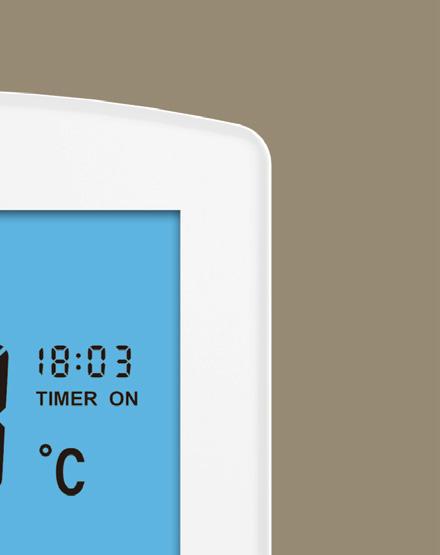
15 LCD Section Display Header 1. Room Temp - Indicates the current temperature sensor mode. 2. Day Indicator - Displays the current day. 3. Frost Icon - Displayed when the thermostat is in frost protection mode. 4. Flame Icon - Displayed when the thermostat is calling for heat, flashes when the Optimum Start function is in operation. 5. RF Icon - Flashes when the thermostat communicates with the receiver. 6. Temperature Hold - Displayed when manually overriding the program, HOLD FOR and the time period are displayed. 7. Set - Displayed when changes are made to programs or temperature set points. 8. Holiday Indicator - Displayed when the programmer is in holiday mode. 9. Current Temp - Indicates the current sensor temperature. 10. Program Cycle Indicator - Displayed during programming only to show which period is being altered. 11. Battery Level - Indicates when the batteries require replacement. 12. Keypad Lock Indicator - Displayed when the keypad is locked. 13. Units of Temperature - Degrees Celsius or Fahrenheit. 14. Timer Status Displays the current state of the timed output. 15. Clock - Digital clock display in 24h format. Model: Slimline-RF 14

16 Setting Section the Header Clock To set the clock, follow these steps. With the thermostat turned ON, press the Clock key three times... Use the Up/Down keys to set the hours... Press H to confirm settings... Use the Up/Down keys to set the minutes... Press H to confirm settings... Use the Up/Down keys to set the day of the week... Press A to confirm settings and return to main display... Day Hours Minutes 15 Slimline Series
17 Temperature Section Header Display The temperature display information is driven by two different inputs; the sensor measurement and the target temperature you have set. Room Temperature Set Temperature This is the current room temperature. This is the temperature you are trying to achieve in your home. Model: Slimline-RF 16
 09.30-16 C (Leave) 16.30-22 C (Return) 23.")
18 Comfort Section Header Levels Explained The thermostat provides Weekday/Weekend or 7 Day Programming options. You should consult the Optional Features section to select the required mode. The thermostat is supplied with comfort levels already programmed, but these can be changed easily. The default times and temperatures are; C (Wake) C (Leave) C (Return) C (Sleep) If you only want to use 2 levels, you should program the unused levels to Note: For Weekday/Weekend programming, the 4 comfort levels are the same for all weekdays but can be different for the weekends. For 7 Day programming, each day can have 4 different comfort levels. To program comfort levels, press the Clock key once... For Weekday/Weekend programming, Mon Tue Wed Thu Fri are displayed on screen. For 7 Day programming, only Mon is displayed in the day indicator field. 17 Slimline Series
19 Section Header Use the Up/Down keys to enter the required WAKE time... Press H to confirm settings... Use the Up/Down keys to enter the required WAKE temperature... Press H to confirm settings... You will now see LEAVE displayed on screen. Repeat the programming steps for each period until complete. For unused periods enter and the thermostat will ignore the setting. Press A to confirm settings and return to main display... Note: In 7 Day programming mode you can repeat for each day independently. In Weekday/Weekend programming mode you will see Sat Sun displayed on screen and can repeat for the weekend. To change the programming mode please refer to pages Model: Slimline-RF 18
20 Locking Section Header the Thermostat The thermostat has a keypad lock facility. To activate the lock follow these steps. Press and hold the A and Down keys together for 10 seconds... You will see the lock symbol appear on screen... To unlock, repeat the steps above until the lock symbol disappears. Note: The keypad lock indicator is only displayed when the lock is active. Keypad Lock Indicator 19 Slimline Series
21 Temperature Section Header Control The Up/Down keys allow you to adjust the set temperature... When you press either key, you will see the word SET and the desired temperature will be displayed on screen. Use the Up/Down keys to adjust the SET value... Press A to confirm settings and return to main display... Note: This override will be maintained until the next programmed comfort level. Set Temperature Set Icon Model: Slimline-RF 20
22 Temperature Section Header Hold The temperature hold function allows you to manually override the current operating program and set a different temperature for a desired period. Press H to commence temperature hold... Use the Up/Down keys to enter the required Hold time... Press H to confirm settings... Use the Up/Down keys to enter the required Hold temperature... Press A to confirm settings and return to main display... You will see the Hold For indication is displayed on screen. The time will countdown the set duration and then revert to the normal program. Hold ON Indicator Hold Time Remaining To cancel temperature hold, follow the same steps but reduce the Hold time to 00:00 hours. 21 Slimline Series

23 Holiday Section Header The holiday function reduces the set temperature in your home to the frost protection temperature setting (see page 27). The thermostat will maintain this temperature for the duration of the holiday and will then automatically return to the program schedule on your return. Press H three times (until you see the suitcase on screen)... Use the Up/Down keys to enter the number of days holiday... Press A to confirm settings and return to main display... The display will show a suitcase indicating the thermostat is in holiday mode. Note: A holiday period does not start until 00:00 the next day. For example, if you set a holiday period on Friday for 2 days, Saturday will be counted as the first day and the thermostat will revert back to the programmed schedule at 00:00 on Monday. Holiday Days Holiday ON Indicator To cancel, follow the same steps but reduce the Holiday duration to 00 days. Model: Slimline-RF 22

24 Setting Section the Header Hot Water Switching Times Press the Clock key twice... If your thermostat is setup for Weekday/Weekend programming, Mon-Fri will be displayed on screen. For 7 day programming Mon will be displayed on screen. Using the Up/Down keys, enter the required start time for Hot Water Time 1... Press H to confirm settings... Use the Up/Down keys, enter the required end time for Hot Water Time 1... Press H to confirm settings... Repeat the programming steps for each switching time, entering for any unused periods. Time Timer Status 23 Slimline Series

25 Section Hot Water Header Override You can override the hot water override by pressing the key. If the hot water is OFF, pressing the key will switch the hot water ON and similarly pressing the key when the hot water is ON will switch it OFF. Timer ON or OFF will flash to show when the hot water has been overridden. This override will last until the next programmed setting. Timer Status Model: Slimline-RF 24
26 Frost Section Mode Header Pressing the Power button once will place the thermostat in frost protect mode. In this mode, the thermostat will display the frost icon and will only turn the heating on should the room temperature drop below the set frost temperature (see page 27). Should the heating be turned on whilst in frost mode, the flame icon will be displayed. To cancel the frost protect mode, press the Power button once again. Heating On/Off The heating is indicated ON when the flame icon is displayed. When the flame icon is absent, there is no requirement for heating to achieve the set temperature but the thermostat remains active. To turn the thermostat OFF completely, press and hold the Power button... The display and heating output will be turned OFF completely.* Press the Power button once to turn the thermostat back ON... *See Feature 3 on page Slimline Series
27 Re-calibrating Section Header the Thermostat If you need to re-calibrate the thermostat, follow these steps. Press and hold the Power button to turn the thermostat OFF... Press and hold BOTH the Power and Down keys together until the temperature appears on the screen... Use the Up/Down keys to configure the new temperature... Press A to confirm settings... Press the Power button once to turn the thermostat back ON... Factory Reset The thermostat has a reset function to restore all settings to their factory defaults. To perform a factory reset, follow these steps. Press and hold the Power button to turn the thermostat OFF... Press and hold the Power and Up keys together until the LCD powers up. All of the icons will be displayed on screen... When the icons have disappeared from the screen, the thermostat has been successfully reset. Press the Power button once to turn the thermostat back ON... Model: Slimline-RF 26
28 Optional Section Header Features Explained FEATURES 1-4 AND ARE OPTIONAL AND IN MOST CASES NEED NOT BE ADJUSTED Feature 01 - Temperature Format: This function allows you to select between C and F. Feature 02 Switching Differential: This function allows you to increase the switching differential of the thermostat. The default is 1 C which means that with a set temperature of 20 C, the thermostat will switch the heating on at 19 C and off at 20 C. With a 2 C differential, the heating will switch on at 18 C and off at 20 C. Feature 03 Frost Protect: You can set whether the thermostat will maintain the frost temperature when the thermostat display is turned off. As a default, this is enabled. Feature 04 Frost Protect Temperature: This is the temperature maintained when the thermostat is in frost mode. The range is C. The default is 12 C and is suitable for most applications. Feature 05 Output Delay: To prevent rapid switching, and output delay can be entered. This can be set from minutes. The default is 00 which means there is no delay. Feature 06 UH8-RF or RF-Switch receiver: The thermostat can work with our UH8-RF 8 zone wiring centre or RF-Switch receiver. This setting determines which is being used. Feature 07 Receiver Address: Within one building, up to 99 UH8-RF s or 32 RF-Switch s can be used. Each RF-Switch must have a unique receiver address (01-32). Feature 08 Zone Number (UH8-RF only): This is the zone number you are assigning the thermostat to on the UH8-RF. Zone Feature 09 Underfloor Heating or Radiator Zone (UH8-RF Only): This setting determines whether the thermostat will activate the pump & boiler output on the UH8-RF. If set to 00 the outputs will be activated. 00 = UFH, 01 = Radiators 27 Slimline Series
29 Section Header Feature 10 Fail Safe: If enabled, the thermostat will send a signal to the receiver every 20 minutes. Should the receiver fail to receive two signals, the receiver will activate the output for 20% of the time. This is to protect the system against a loss of wireless signal and in case the thermostat battery fails whilst you are away. Feature 11 Temperature Up/Down Limit: This function allows you to limit the use of the up and down keys. This limit is also applicable when the thermostat is locked and so allows you to give others limited control over the heating system. Feature 12 Air Sensor Selection: On this thermostat, you can select which sensor should be used - built in sensor or remote air sensor. Feature 13 Not used on this model. Feature 14 Optimum Start: Optimum start will delay the start up of the heating system to the latest possible moment to avoid unnecessary heating and ensure the building is warm at the programmed time. The thermostat uses the rate of change information to calculate how long the heating needs to raise the building temperature 1 C (with a rate of change of 20, the thermostat has calculated the heating needs 20 minutes to raise the building temperature 1 C) and starts the heating accordingly. Feature 15 Rate of Change: For information only. Feature 16-5/2 Day or 7 Day Programming: The thermostat offers 2 programming methods. Weekday/Weekend allows you to program 4 comfort levels for the weekdays and 4 different comfort levels for the weekend. In 7 Day program mode, each day has 4 comfort levels that can be programmed independently. Feature 17 Thermostat Mode: Here you can set in which mode you would like the thermostat to operate. The options are, manual (non-programmable), programmable, or programmable with hot water time clock. Model: Slimline-RF 28
30 Adjusting Section Header the Optional Settings To adjust the optional settings, follow these steps. Press and hold the Power button to turn the thermostat OFF... Press and hold the Clock key until the display appears as shown below... Setting Value Feature Number Use the Clock key to cycle through the features... Use the Up/Down keys to change the setting... Press A to confirm settings... Press the Power button once again to turn the thermostat back ON Slimline Series
31 Section Optional Header Settings - Feature Table FEATURE DESCRIPTION SETTING 01 Temperature Format 00 = C, 01 = F ( C = Default) Switching Differential Frost Mode C (01 C = Default) 00 = Disabled, 01 = Enabled (01 = Default) Frost Protection Temperature Output Delay C (12 C = Default) Minutes (00 = Default) UH8-RF or RF-Switch Receiver Receiver Board Address 00 = UH8-RF, 01 = RF-Switch (00 = Default) UH8-RF = 01-99, RF-Switch = Zone Number Underfloor Heating or Radiator (UH8-RF Only) UH8-RF , RF-Switch = Not Used Underfloor Heating = 00, Radiator Zone = Fail Safe Up/Down Limit 00 Disabled, 01 Enabled (01 = Default) C (00 C = Default) Sensor Selection Not Used 00 = Built in Air, 01 = Remote Air Not Used Preheat Setting Rate of Change hours (00 = default) Minute to raise 1 C /2 Day or 7 Day Programming Thermostat Mode 00 = 5/2 day, 01 = 7 day (00 = default) 00 = Manual, 01 = Programmable, 02 = Programmable + Hot Water Model: Slimline-RF 30
1254 669090 Or view")

32 Want More Information? Call our support team on: +44 (0) Or view technical specifications directly on our website: PDF FAQ Facebook: facebook.com/thermostats Rev.2.0
Model: Slimline-B. Battery Series
 Model: Slimline-B Model: Slimline-B 2 Battery Series Table of Contents Product Image 1 Holiday Programming 20 Table of Contents 2 Frost Protection 21 What is a Programmable Room Thermostat? Installation
Model: Touch-RF. 1 Wireless Series
 Model: Touch-RF Model: Touch-RF 1 Wireless Series Table Of Contents Product Image 1 Locking the Keypad 18 Table of Contents 2 Temperature Control 19 What is a Programmable Room Thermostat? 3-4 Hot Water
Model: Slimline-N. 1 Slimline Series
 Model: Slimline-N Model: Slimline-N 1 Slimline Series Table of Contents Product Image Table of Contents What is a Programmable Room Thermostat? Installation Procedure LCD Display Operating Mode Setting
Model : PRT-EN Model: PRT-EN1
 Model: PRT-EN Model: PRT-EN 1 Model: PRT-EN Table of Contents Product Image Table of Contents What is a Programmable Room Thermostat? Installation Procedure LCD Display Setting the Clock Temperature Display
Table of Contents. SLIMLINE Series MODEL: SLIMLINE
 Table of Contents Product Image 1 Table of Contents 2 What is a Programmable Room Thermostat? 3-4 Installation Procedure 5-6 LCD Display 7-8 Setting the Clock 9 Temperature Display 10 Setting the Comfort
: PRT / PRT PRT / PRT-N1
 Model: PRT / PRT-N Model: PRT / PRT-N 1 Model: PRT / PRT-N Table of Contents Product Image Table of Contents What is a Programmable Room Thermostat? Installation Procedure LCD Display Setting the Clock
Underfloor Heating Programmable Thermostat
 Underfloor Heating Programmable Thermostat t: 093 4906 m: 0794 69635 w: www.gs-ufh.co.uk e: gs@warmfloors.co.uk POWER CLOCK H A DOWN UP TO CHANGE THE TIMINGS AT ANY STAGE DURING THE PROCESS YOU CAN PRESS
Table of Contents. Product Image 1 Locking/Unlocking the neoair 24 Table of Contents 2 Frost Protection 25 What is a Programmable Room Thermostat?
 Table of Contents Product Image 1 Locking/Unlocking the neoair 24 Table of Contents 2 Frost Protection 25 What is a Programmable Room Thermostat? 3-4 Power ON/OFF 26 Holiday Programming 27 Installation
Model: PRT-TS / PRT-NTS
 Model: PRT-TS / PRT-NTS Model: PRT-TS / PRT-NTS 1 Model: PRT-TS / PRT-NTS Table Of Contents Product Image 1 Temperature Control 14 Table of Contents 2 Temperature Hold 15 What is a Programmable Room Thermostat?
12V. Model: Available in : Sapphire Black and Glacier White. 2 Series
 Model: Available in : Sapphire Black and Glacier White 2 Series Table of Contents Product Image 1 Locking/Unlocking the neostat 19 Table of Contents 2 Frost Protection 20 What is a Programmable Room Thermostat?
Model: Available in : Sapphire Black and Glacier White. 1 Series
 Model: Available in : Sapphire Black and Glacier White 1 Series Table of Contents Product Image 1 Frost Protection 20 Table of Contents 2 Power ON/OFF 21 What is a Programmable Room Thermostat? Installation
Table of Contents. Model: Series. Available in : Sapphire Black and Glacier White. Product Image. 20 Table of Contents.
 1 Model: Available in : Sapphire Black and Glacier White Table of Contents Product Image 1 Frost Protection 20 Table of Contents 2 Power ON/OFF 21 What is a Programmable Room Thermostat? Installation Procedure
Model: PRT2-TS / PRT2-NTS EU. Model: Touch Duo
 Model: PRT2-TS / PRT2-NTS EU Model: Touch Duo 1 Model: Touch Duo 1 TouchScreen Series Series Table Of Contents Product Image 1 Temperature Control 14 Table of Contents 2 Temperature Hold 15 What is a Programmable
PRT-TS WiFi PRT-TS WiFi
 Model: PRT-TS WiFi Model: PRT-TS WiFi 1 Model: PRT-TS WiFi Table Of Contents Product Image 1 Frost Protection 16 Table of Contents 2 Heating ON/OFF 16 What is a Programmable Room Thermostat? Installation
Model: 1 Series 12V. Available in: Sapphire Black and Glacier White
 Model: Available in: Sapphire Black and Glacier White 1 Series Table of Contents Product Image Table of Contents What is a Programmable Room Thermostat? Installation Procedure Mode Select Pairing the neohub
Operating Instructions Model: PRT-RP Version 3. 05/11 Revision 2 Ref: PRTRP
 Operating Instructions Model: PRT-RP Version 3 05/11 Revision 2 Ref: PRTRP Contents Page What is a programmable thermostat? 2-4 Installation 5-6 Icons explained 6 Temperature Display 7 Setting the Clock
Model: Available in: Sapphire Black and Glacier White. 1 Series
 Model: Available in: Sapphire Black and Glacier White 1 Series Table of Contents Product Image Table of Contents What is a Programmable Room Thermostat? Installation Procedure Mode Select Pairing the neohub
50110_HM-neoStat-2014_Layout 1 31/10/ :33 Page 1 neo
 neo Model: Available in : Sapphire Black and Glacier White 1 Wavin neo Table of Contents Product Image 1 Optional Features 19-22 Table of Contents 2 Re-calibrating the Thermostat 23 What is a Programmable
Table of Contents. Product Image Table of Contents What is a Programmable Room Thermostat? Installation Procedure
 1 Model: 1 Table of Contents Product Image Table of Contents What is a Programmable Room Thermostat? Installation Procedure 1 2 3-4 5-6 Mode Select Pairing the ProTouch iq Hub Pairing the ProTouch iq What
Operating Instructions Model: PRT/HW - PRT/HW-N Version 3. 09/09 Revision 2 Ref: PRT/HW/NV3
 Operating Instructions Model: PRT/HW - PRT/HW-N Version 3 09/09 Revision 2 Ref: PRT/HW/NV3 Contents Page What is a programmable thermostat? 2-4 Installation 5-6 Icons explained 6 Temperature Display 7
Model: Touch-RS. 1 Touch-RS
 Model: Touch-RS Model: Touch-RS 1 Touch-RS Table of Contents Product Image 1 Temperature Hold 15 Table of Contents 2 Holiday Programming 16 What is a Programmable Room Thermostat? Installation Procedure
Operating Instructions Model: PRT-TS WiFi RF. 01/13 Version 1 Ref: PRT-TSWIFI RF
 Operating Instructions Model: PRT-TS WiFi RF 01/13 Version 1 Ref: PRT-TSWIFI RF Contents Page Setting up your WiFi Thermostat 2-6 Remote Connection Setup 6-8 Pairing with the Receiver 8-12 Display Symbols
Model: Edge-HC. 1 edge-hc
 Model: Model: Edge-HC 1 edge-hc Table Of Contents Product Image Table of Contents Installation Procedure System Type LCD Display Power On/OFF Setting the Time & Date Mode Select Fan Speed Temperature Display
Operating Instructions Model : HC HC-N
 Operating Instructions Model : HC HC-N This product should be installed by a qualified electrician. Improper installation may result in injury, death or property damage. Contents Table Contents 1 What
Operating Instructions
 Operating Instructions Model : PRT-E / PRT-EN Installer Note: This thermostat is a combination model allowing you to choose between Floor Only or Air & Floor temperature control. Please see page 11 for
Uponor Comfort-E Thermostat Dig. Prog Set T-86 INSTALLATION AND OPERATION MANUAL
 Uponor Comfort-E Thermostat Dig. Prog Set T-86 INSTLLTION ND OPERTION MNUL 08 2017 Contents 1 Copyright and disclaimer...3 2 Preface...4 2.1 Safety instructions...4 2.2 Correct disposal of this product...4
Drayton Digistat +3RF
 Drayton Digistat +3RF Programmable Room Thermostat Wireless 5-2 Day / 7 Day Model: RF701/22092 Power Supply: Battery - Thermostat Mains - Digistat SCR Invensys Controls Europe Customer Service Tel: 0845
C-Stat 17-ZW User Instructions
 C-Stat 17-ZW User Instructions 7 Day Wireless Programmable Room Thermostat and ASR-ZW Receiver Programmable room thermostats are widely recognised as one of the best ways in which to control central heating.
CS027 User Instructions
 CS027 User Instructions Battery Powered 7 Day Programmable Room Thermostat Programmable room thermostats are widely recognised as one of the best ways in which to control central heating. The CS027 programmable
MAKING MODERN LIVING POSSIBLE. TP7001 Range Electronic 7 Day Programmable Room Thermostat. User Guide. Danfoss Heating
 MAKING MODERN LIVING POSSIBLE TP7001 Range Electronic 7 Day Programmable Room Thermostat Danfoss Heating User Guide TP7001 Electronic 7 Day Programmable Room Thermostat For a large print version of these
AUTO CM CM USER GUIDE
 1 2 3 4 5 6 7 AUTO CM701...2-6 CM707...7-11 USER GUIDE CM701 - USER GUIDE Description The Honeywell CM701 is a programmable room thermostat designed to control your heating system efficiently, providing
Model: RT510RF. Installation Manual
 Model: RT50RF Installation Manual Contents Product compliance... 3 Safety Information... 3 Box content... 3 Introduction... 3 Features... Installation... 5. RXRT50 Receiver... 5 Button Description for
CM707. Programmable Room Thermostat with Optimum Start, Optimum Stop and Delayed Start. User Guide
 CM707 Programmable Room Thermostat with Optimum Start, Optimum Stop and Delayed Start User Guide WHAT IS A PROGRAMMABLE ROOM THERMOSTAT? An explanation for householders... A programmable room thermostat
CentaurStat 7 User Operating Instructions Central Heating Programmable Room ThermoStat
 CentaurStat 7 User Operating Instructions Central Heating Programmable Room ThermoStat The Centaurstat 7 is a programmable room thermostat that provides precise temperature control from a single point
DIGISTAT OPTIMISER PROGRAMMABLE 7 DAY ROOM THERMOSTAT SYSTEM. Radio frequency controlled programmable room thermostat
 DIGISTAT OPTIMISER PROGRAMMABLE 7 DAY ROOM THERMOSTAT SYSTEM Radio frequency controlled programmable room thermostat FOR GREENSTAR 25 HE and GREENSTAR 30 HE MODELS Hol Man Auto Day SIGNAL HEATING ON OVERRIDE
ThermoPlus AS2-RF & ASR-RF Installation Instructions
 ThermoPlus AS2-RF & ASR-RF Installation Instructions The Horstmann ThermoPlus AS2-RF is a wireless room thermostat that has been designed to make its operation very simple for the householder. The built
ECO AND DATE /06 ARTWORK DESCRIPTION. 22 page A6 : Saddle stitch (2-wire) 6 page : 4 colour : 170gsm Silk 18 page : 1 colour : 100gsm Silk
 6 page : 4 colour : 170gsm Silk 18 page : 1 colour : 100gsm Silk") DRAWING DETAILS PART NUMBER 42011077-103 ISS R1 ECO AND DATE 0024168 08/06 ARTWORK DESCRIPTION CM921 USER GUIDE BOOKLET (UK - English) DRAWN MKTING MF BM DATE 08/06 BOOKLET DETAILS SPECIFICATION COVER
DRAWING DETAILS PART NUMBER 42011077-103 ISS R1 ECO AND DATE 0024168 08/06 ARTWORK DESCRIPTION CM921 USER GUIDE BOOKLET (UK - English) DRAWN MKTING MF BM DATE 08/06 BOOKLET DETAILS SPECIFICATION COVER
User Manual THR870CUK Programmable Thermostat
 User Manual UK Programmable Thermostat 50051984-001 Rev. A WARNING: This product must be correctly installed and configured to work properly (see pages 20-31). If you are not experienced in wiring electrical
Digital Room Thermostat
 Digital Room Thermostat Instruction Manual Model No RT500 PRODUCT COMPLIANCE This product complies with the essential requirements of the following EC Directives: Electro-Magnetic Compatibility directive
Battery Powered Electronic Programmable Room Thermostat
 Battery Powered Electronic Programmable Room Thermostat Cat. No. TRT035 Operating & Installation Instructions What is a programmable room thermostat?...an explanation for householders A programmable room
DIGISTAT PROGRAMMABLE 24 HOUR ROOM THERMOSTAT SYSTEM. Radio frequency controlled programmable room thermostat.
 ROOM THERMOSTAT SYSTEM Radio frequency controlled programmable room thermostat. LARGE RECEIVER: 24CDi, 26CDi Xtra, 28CDi, 35CDi Mk I and 35CDi Mk II SMALL RECEIVER: 24i Junior, 28i Junior and Si Mk II
Battery Powered Electronic Programmable Room Thermostat Cat. No. TRT035. Operating & Installation Instructions
 Battery Powered Electronic Programmable Room Thermostat Cat. No. TRT035 Operating & Installation Instructions What is a programmable room thermostat?... an explanation for householders A programmable room
CM921 - User Guide 1 day Wireless Programmable Room Thermostat with LoT technology
 Description The Honeywell CM921 is a wireless programmable room thermostat designed to control you heating system efficiently, providing comfortable temperatures when you are at home and energy savings
Model: RT310RF. Installation Manual
 Model: RT310RF Installation Manual Contents Product Compliance... 3 Safety Information... 3 Box Content... 3 Introduction... 4 Features... 5 Installation... 5 Button functions and keys... 7 Installer mode...
Model: RT310. Installation Manual
 Model: RT310 Installation Manual Contents Product Compliance... 3 Safety Information... 3 Box Content... 3 Introduction... 4 Features... 5 Installation... 5 Button functions and keys... 7 Installer Mode...
User Manual THR872CUK Wireless Programmable Thermostat
 User Manual THR872CUK Wireless Programmable Thermostat 50051985-001 Rev. A WARNING: This product must be correctly installed and configured to work properly (see pages 20-31). If you are not experienced
RF Programmable Room Thermostat User Instructions
 ESRTP4RF RF Programmable Room Thermostat User Instructions Thank you for choosing ESi Controls. All our products are tested in the UK so we are confident this product will reach you in perfect condition
User Guide Y9420H Sundial RF 2 Pack 2
 PLEASE RESPECT YOUR ENVIRONMENT! Take care to dispose of this product and any packaging or literature in an appropriate way WHAT IS A PROGRAMMER?...an Explanation for Householders (as recommended by the
User Manual THR842DUK Wireless Digital Thermostat
 User Manual THR842DUK Wireless Digital Thermostat 50051983-001 Rev. A WARNING: This product must be correctly installed and configured to work properly (see pages 12-23). If you are not experienced in
Elegance. SMT-700 User manual. Ver
 Elegance SMT-700 User manual Ver 3.0. 0807 Congratulations on the purchase of your new Thermostat! Your new air conditioning system thermostat has been built using the best components and design philosophy
User Guide for EHE & EHE Programmable Room Thermostat
 User Guide for EHE0200153 & EHE0200154 Programmable Room Thermostat Description The EHE0200153 & EHE0200154 are programmable room thermostats designed to control your heating system efficiently, providing
MAKING MODERN LIVING POSSIBLE RET2000 B/M/MS. Electronic digital thermostat with LCD User Guide. Danfoss Heating
 MAKING MODERN LIVING POSSIBLE Danfoss Heating RET2000 B/M/MS Electronic digital thermostat with LCD User Guide For a large print version of these instructions please call Marketing on 0845 121 7400. Danfoss
ESRTPRF. Wireless Programmable Room Thermostat, with Delayed & Optimum Start. User and Installation Instructions M/A MANUAL
 M/A MANUAL ESRTPRF Wireless Programmable Room Thermostat, with Delayed & Optimum Start User and Installation Instructions INDEX User Instructions What is a Programmable Room Thermostat? 1 Introduction
RT021 User and Installation Instructions
 RT021 User and Installation Instructions Battery Operated Electronic Room Thermostat with TPI Temperature Control Software 1 2 The RT021 is a battery powered electronic room thermostat designed to provide
irad Wireless Controller
 irad Wireless Controller The irad Wireless Controller is a wireless (433MHz) programmable thermostat giving high precision room temperature control. It also had a seven day programmer with up to six temperature
TB8220U Commercial Programmable Thermostat OWNER S GUIDE
 TB8220U Commercial Programmable Thermostat OWNER S GUIDE 63-2643 Contents Features... 3 Main Screen Selections... 4 Programming Heating and Cooling Schedule... 6 Operating the Thermostat... 10 Replacing
3 Channel Multi-Purpose Programmer User Instructions
 ES3247B 3 Channel Multi-Purpose Programmer User Instructions Thank you for choosing ESi Controls. All our products are tested in the UK so we are confident this product will reach you in perfect condition
Digital Electronic Thermostat With RF
 Digital Electronic Thermostat With RF Instruction Manual Model No RT300RF PRODUCT COMPLIANCE This product complies with the essential requirements of the following EC Directives: Electro-Magnetic Compatibility
Vokèra OpenTherm 711 with external sensor connected
 Vokèra OpenTherm 711 with external sensor connected Setup guide to using the OpenTherm Control with an external weather compensation sensor fitted. If you are unsure if an external sensor is fitted check
USER'S OPERATING INSTRUCTIONS
 SAT-2 Thermostat COOL FAN DRY HEAT AUTO SLEEP SWING AUTO ZONE SUN MON TUE WED THU FRI SAT HEATER ON OFF ERR UNIT USER'S OPERATING INSTRUCTIONS CONTENTS Page Introduction 3 Features Summary 3 Display 4
Programmable Thermostat with Plug in RF Boiler Control Model: ST620VBC INSTRUCTION MANUAL
 Programmable Thermostat with Plug in RF Boiler Control Model: ST620VBC INSTRUCTION MANUAL PRODUCT COMPLIANCE SALUS Controls Plc hereby declares that the radio equipment type 868Mhz is in compliance with
INFRARED PANEL HEATER
 INFRARED PANEL HEATER ON/OFF LOCK O C/ O F SET MODE TIME FAV INSTRUCTION MANUAL CONTENTS 1. INCLUDED IN THE BOX 2. MODEL SPECIFICATIONS 3. REMOTE CONTROL/BUILT IN RECEIVER 4. WARNINGS & PRECAUTIONS 5.
ES3247B. 3 Channel Programmer. User and Installation Instructions
 ES3247B 3 Channel Programmer User and Installation Instructions INDEX User Instructions What is a Channel Programmer? 1 Introduction to the 3 Channel Programmer 2 Quick Operating Guide 3 Programming the
Evolution Control. Zone Control Homeowner s Guide
 Evolution Control Zone Control Homeowner s Guide CONGRATULATIONS! Your decision to choose the Bryant Evolution Control puts you in a select group of homeowners who understand the value of precise comfort
Type UCG/UDG. English...1 Français...7 Español Up button. OK button. Down button
 USER MANUAL Type UCG/UDG 57116D 06/12 (MBC) 1.10 2012 OJ Electronics A/S...1 Français...7 Español... 14 Type UCG/UDG Contents Introduction...1 First Time Settings...1 Ground Fault Circuit Interrupter (GFCI)...1
- Brochure D 542. Introduction. Features. tekmarnet 4 Thermostat /05. 5 Data Brochure Control settings wiring instructions
 - Brochure tekmarnet 4 Thermostat 542 D 542 06/05 1 Information Brochure Choose controls to match application Application Brochure Design your mechanical applications 2 3 Rough In Wiring Rough-in 4 Wiring
SAT-3 Room Temperature Controller
 SAT-3 Room Temperature Controller USER S OPERATING INSTRUCTIONS Contents Introduction 5 Features Summary 5 Operation 7 On/Off 7 Room Temperature Adjustment 7 Operating Mode Selection 8 Fan Speed Selection
Parts Diagram. Up button. Down button. Right (fan) button. Left (system) button. RC/RH Jumper. Field programming pins
 button. Left (system) button. RC/RH Jumper. Field programming pins") Table of Contents Parts Diagram........................................................... 1 Icon Descriptions......................................................... 2 Specifications...........................................................
Table of Contents Parts Diagram........................................................... 1 Icon Descriptions......................................................... 2 Specifications...........................................................
ET4 heat/cool day RF programmable room thermostat. ET4 Receiver
 TFC GROUP LLP Programmable RF Room Thermostat ET4 ET4 heat/cool 5+1+1 day RF programmable room thermostat 1 N 2 ET4 Receiver L L Supply Live N Supply Neutral 1 Live Return 2 Live Feed 20V AC 50Hz 24 240V
Product Manual SZ1009
 Product Manual SZ1009 Conventional Heating & Cooling Thermostats with Heat Pump Mode Communicating Thermostats Description The SZ1009 is a microprocessor-based mable thermostats designed for conventional
Model: RT310i. Smartphone Controlled Thermostat. Installation Manual
 Model: RT310i Smartphone Controlled Thermostat Installation Manual Contents Product Compliance... 3 Safety Information... 3 Introduction... 4 Overview... 5 Box contents... 5 Features... 5 Connecting the
Programmable Thermostat
 Set & $ave Programmable Thermostat Installation and Operation Manual English Model 44360 Form# 42710-01 20091204 2009 Hunter Fan Co. 2 Table of Contents Important Information... 5 Tools... 6 Uninstalling
Installation, Start-Up, and Operating Instructions
 Installation, Start-Up, and Operating Instructions CONTENTS Page SAFETY CONSIDERATIONS...1 GENERAL...1 INSTALLATION...1-5 Install Batteries...1 Select Transmitter Location (Optional)...1 Mount Transmitter
Easy-Stat. Wireless Programmable Room Thermostat Pt No
 Easy-Stat Wireless Programmable Room Thermostat Pt No 7.2000050 1 Installing the receiver The receiver must be installed into the boiler control panel, refer to the boiler installation manual for guidance.
1 For All Programmable Digital Thermostat
 OWNER'S MANUAL P/N P374-2300FM 1 For All Programmable Digital Thermostat Am OFF OVERRIDE Meets California Title 24 unts flush to the wall 7 Day Programmable 3 Occupied, 1 Unoccupied Auto-Changeover Large,
Vokèra OpenTherm 711 without external sensor connected
 Vokèra OpenTherm 711 without external sensor connected Setup guide to using the OpenTherm Control without an external weather compensation sensor fitted. If you are unsure if there is an external sensor
RGR150 USER S MANUAL. Wireless Rain Gauge with Thermometer and Clock
 RGR150 manual-final-091908:layout 1 9/19/08 8:59 AM Page 1 RGR150 USER S MANUAL Wireless Rain Gauge with Thermometer and Clock INTRODUCTION Thank you for selecting this Wireless Rain Gauge. This device
Panel Convector Heater User Instructions
 Panel Convector Heater User Instructions LEVPH750TPR, LEVPH1250TPR, LEVPH1500TPR, LEVPH2200TPR IMPORTANT SAFEGUARDS Before use, please read and follow these instructions carefully, even if you feel you
Table of Contents. Introduction. Radio Frequency Control. Initial setup Setting the time. Setting the temperature
 LHZ USER GUIDE LHZ User Guide LHZ would like to thank you for purchasing your LHZ radiator. You have purchased a high quality, German designed and manufactured heating device, which will give you soft
Product Manual SZ1022/SZ1031/SZ1035/
 Product Manual SZ1022/SZ1031/SZ1035/ Conventional Heating & Cooling Thermostats Communicating Thermostats Description The SZ1022, SZ1031, and SZ1035, are microprocessorbased mable thermostats designed
OWNER S MANUAL. Part Number P RF
 OWNER S MANUAL CPE230RF Commercial Programmable Thermostat Wireless Transmitter Part Number P474-2300RF CONTENTS Page GENERAL... 2 CONFIGURATION... 3-12 Transmitter Display... 3 Transmitter Indicator...
USER GUIDE Wireless room thermostat with hot water control (DHW & single zone CH)
") USER GUIDE Wireless room thermostat with hot water control (DHW & single zone CH) Logic Heat H / Logic Max Heat H / Logic System S / Logic Max System S / Vogue System / Vogue Max System Contents Introduction...
USER GUIDE Wireless room thermostat with hot water control (DHW & single zone CH) Logic Heat H / Logic Max Heat H / Logic System S / Logic Max System S / Vogue System / Vogue Max System Contents Introduction...
INITIALIZATION / INSTALLATION
 INITIALIZATION / INSTALLATION REMOTE CONTROL The remote control has a range of approximately 50 ft. (15.25m); it does not have to be pointed at the fireplace and can pass through most obstacles (including
- Data Brochure tekmarnet 4 Thermostat 542e
 - Data Brochure tekmarnet 4 Thermostat 542e D 542e 03/08 1 Information Brochure Choose controls to match application 2 Application Brochure Design your mechanical applications 3 Rough In Wiring Rough-in
Slimline Curve Electric Radiator. Step by Step Programming Guide
 Slimline Curve Electric Radiator Step by Step Programming Guide Setting the Clock Press the > button repeatedly to move across to the clock icon (next to the P icon) Use the + and - buttons to select the
ELECTRONIC THERMOSTAT
 110-792B 7/12/01 8:28 AM Page 1 ELECTRONIC THERMOSTAT Owner s Manual MODEL 8554 5-2 Day Programmable Thermostat 110-792B 7/12/01 8:28 AM Page 2 OWNER S MANUAL TABLE OF CONTENTS ENERGY STAR Program Information............................................................
Operating Manual. Series Touchscreen Programmable Demand Control Thermostat. UtilityPRO TM
 Operating Manual UtilityPRO TM Series Touchscreen Programmable Demand Control Thermostat 85-3126 BE CAREFUL! Never use sharp instruments, such as a pencil or pen, to press touchscreen keys. To prevent
Disclaimer. Trademarks. Copyright. Warranty
 1 Disclaimer Trademarks Copyright Control4 makes no representations or warranties with respect to any Control4 hardware, software, or the contents or use of this publication, and specifically disclaims
Owner s Manual. Part Number 33CS250-RC
 CONTENTS Page GENERAL... 1 CONFIGURATION... 1-4 Transmitter Display... 1 Transmitter Indicator... 1 Transmitter Front Panel Buttons... 1 Set Clock... 2 Programming Thermostat Schedules... 3 OPERATION...5
Infinity Control. Homeowner s Guide. The New Feeling of Comfort
 TM Infinity Control Homeowner s Guide The New Feeling of Comfort CONGRATULATIONS! Your decision to choose the Carrier Infinity Control puts you in a select group of homeowners who understand the value
CRX Single Zone Wireless Controller. Installation and User Guide. 1. Getting to know your CRX2 wireless controller
 Please read this guide carefully and retain for future use and maintenance. CRX2-01 Single Zone Wireless Controller Installation and User Guide 1. Getting to know your CRX2 wireless controller An illustration
Digital Room Thermostat with TPI & Delayed Start User Instructions
 ESRTD5 & ESRTD5VF Digital Room Thermostat with TPI & Delayed Start User Instructions Thank you for choosing ESi Controls. All our products are tested in the UK so we are confident this product will reach
OWNER'S MANUAL. How to operate your new Programmable Thermostat
 OWNER'S MANUAL How to operate your new Programmable Thermostat Congratulations! You made a smart choice when you purchased your new programmable thermostat. It s the smart thermostat that: Keeps you comfortable
COMF RT SYSTEM. T-32-TS Touchscreen Thermostat. User Manual
 COM RT SYSTEM T-32-TS Touchscreen Thermostat User Manual TABLE O CONTENTS INTRODUCTION USINGTHETOUCHSCREEN DISPLAY TYPICAL DISPLAY SETTINGTHE DAY,TIME AND CALENDAR SETTING DAYLIGHT SAVINGTIME BASIC UNCTIONS
CT2800 Programmable Thermostat
 CT2800 Programmable Thermostat INSTALLATION AND PROGRAMMING INSTRUCTIONS Welcome to the world of comfort and energy savings with your new Honeywell Programmable Thermostat. Your new thermostat will automatically
Cat No. 099A. Digital Programmable Thermostat for Weekday/Weekend Setting. User Maunal
 Cat No. 099A Digital Programmable Thermostat for Weekday/Weekend Setting User Maunal TABLE OF CONTENT 1 INTRODUCTION. 2 2 INSTALLATION. 4 3 SETTING CLOCK. 11 4 SETTING PROGRAM...12 5 SLEEP OPERATION MODE
Owner s Manual. Digital Thermostat. Heat/Cool & Heat Pump 7-Day Programmable S1-THEM22P7S COMMERCIAL. Model HVAC SERVICE PARTS
 Owner s Manual Model COMMERCIAL TM BACKLIT DISPLAY HVAC SERVICE PARTS Heat/Cool & Heat Pump 7-Day Programmable Digital Thermostat Use with most Heat Pump Systems: 2-Heat, 2-Cool Stages: 2-Heat, 2-Cool
MC200. Users Instructions. HEATING DIVISION Hort Bridge Ilminster, Somerset TA19 9PS Tel: Fax:
 MC200 Users Instructions BSI Registered Firm HEATING DIVISION Hort Bridge Ilminster, Somerset TA19 9PS Tel: 01460 53535 Fax: 01460 52341 FM 414 Ind. & Comm. Air Heaters; Air Moving Equipment; Flues & Chimneys;
INSTALLATION MANUAL. * If using remote sensors the thermostat must be hardwired. Need Help?
 INSTALLATION MANUAL This manual covers the following models: T955W Master Thermostat Base Module Thermostat Applications Guide Description Gas or Oil Heat Electric Furnace Heat Pump (No Aux. or Emergency
SAS6000UTK-7 UNIVERSAL THERMOSTAT
 SAS6000UTK-7 UNIVERSAL THERMOSTAT Used with Single Stage, Multi-Stage, Heat pump Installation and operation instructions SPECIFICATION: Power Supply Dual Power 24VAC (18-30VAC,50/60Hz) or Battery Powered