GENERAL PURPOSE STEAM STERILIZER PRIMUS PSS 500 CONTROL PART I GENERAL INFORMATION. PSS-500 Controls Software Version July 2, 2008 Version 1.
|
|
|
- Easter Franklin
- 5 years ago
- Views:
Transcription

1
2
3 PRIMUS GENERAL PURPOSE STEAM STERILIZER PRIMUS PSS 500 CONTROL PART I GENERAL INFORMATION PSS-500 Controls Software Version 7923 July 2, 2008 Version South 25th Street, Omaha, NE TE: (402) ; FAX (402) PRIMUS.MAN\PRIMUS.IOS/ PRIMUS Sterilizer Company, Inc. 117 South 25th Street, Omaha, NE TE: (402) ; FAX: (402)
4 , Omaha, NE by PRIMUS Sterilizer Company Printed in the United States of America Steam Sterilizer Installation, Operation, and Maintenance Manual V196 Controller Includes Bibliographical References 117 South 25th Street, Omaha, NE TE: (402) ; FAX (402) URL: GP PSS5 Part I
5 TABLE OF CONTENTS Page i TABLE OF CONTENTS PART I. GENERAL MANUAL Page SECTION 1.0 GENERAL INFORMATION Warranty Service Agreement Safety Precautions Bibliography Definitions and Terms...4 SECTION 2.0 STERILIZER DESCRIPTION General Construction Frame Chamber Jacket Doors Insulation Plumbing and Fixtures Vacuum System Air Filtration Control Panel PSS 500 Controls Instrumentation/Sensors Gauges Printer Devices Recording Instruments Accessories...8 SECTION 3.0 SAFETY FEATURES Door Pins Door Limit Switches/Pressure Settings...9 SECTION 4.0 CONTROLS Facility Power Disconnect Manual Supply Valves...9 SECTION 5.0 MANUFACTURER S RECORDS South 25th Street, Omaha, NE TE: (402) ; FAX (402) URL: GP PSS5 Part I
6 THIS PAGE INTENTIONALLY LEFT BLANK GP PSS5 Part I South 25th Street, Omaha, NE TE: (402) ; FAX (402) URL:
7 GENERAL INFORMATION Page 1 SECTION 1.0 GENERAL INFORMATION This section contains general information about the PRIMUS General Purpose Steam Sterilizer using the PSS500 Control. This sterilizer is specifically designed to process goods using only the cycles specified in the User s manual section of this document. If there is any doubt about the sterilization process of a specific material or product, we suggest you contact the manufacturer of the product for recommended sterilization technique. 1.1 Warranty This sterilizer is not designed to process flammable liquids, nor liquids in containers, that are not designed for sterilization. Any alteration of the sterilizer, which affects its operation, will void the warranty. Any alterations could violate state and local regulations and jeopardize insurance coverage. Failure to perform suggested maintenance may cause the warranty to be null and void. Refer to the following. Equipment Warranty for further clarification on what is covered. LIMITATIONS AND LIABILITY AND INDEMNITY IN NO CASE, WHETHER AS A RESULT OF A BREACH OF CONTRACT, BREACH OF WARRANTY, OR TORT (INCLUDING PRIMUS OR CUSTOMER S WILLFUL ACT OF NEGLIGENCE OR STRICT LIABILITY), SHALL PRIMUS OR CUSTOMER BE LIABLE TO THE OTHER FOR ANY CONSEQUENTIAL OR INCIDENTAL DAMAGES INCURRED BY THE OTHER, INCLUDING, BUT NOT LIMITED TO, LOSS OF REVENUE, PROFITS, OR GOODWILL. HOWEVER, NOTHING CONTAINED IN THIS AGREEMENT IS INTENDED TO RELIEVE EITHER PRIMUS OR CUSTOMER FROM CLAIMS, LIABILITY, DAMAGES OR EXPENSES RESULTING FROM BODILY INJURY, INCLUDING DEATH, OR FROM PROPERTY DAMAGE INCURRED DUE TO THE WILLFUL ACTS, THE NEGLIGENCE OF, OR THE STRICT LIABILITY OF THAT PARTY. PRIMUS AGREES TO DEFEND, INDEMNIFY AND HOLD CUSTOMER HARMLESS FROM ANY AND ALL CLAIMS, LIABILITY, DAMAGES OR EXPENSES DUE TO PERSONAL INJURIES, INCLUDING DEATH, TO EMPLOYEES OF PRIMUS AND CUSTOMER AND TO THIRD PARTIES AND FOR PROPERTY DAMAGE TO THE EXTENT OF THE WILLFUL ACTS OF THE NEGLIGENCE OF PRIMUS OR THE STRICT LIABILITY OF PRIMUS CAUSED BY THE ACTS OR OMISSIONS OF PRIMUS. CUSTOMER AGREES TO DEFEND, INDEMNIFY AND HOLD PRIMUS HARMLESS FROM ANY AND ALL CLAIMS, LIABILITY, DAMAGES OR EXPENSES DUE TO PERSONAL INJURIES, INCLUDING DEATH, TO EMPLOYEES OF CUSTOMER AND PRIMUS AND TO THIRD PARTIES AND FROM PROPERTY DAMAGE TO THE EXTENT OF THE WILLFUL ACTS, THE NEGLIGENCE OF CUSTOMER, OR THE STRICT LIABILITY OF CUSTOMER CAUSED BY THE ACTS OR OMISSIONS OF CUSTOMER. GP PSS5 Part I South 25th Street, Omaha, NE TE: (402) ; FAX (402) URL:
 344-4200; FAX")
8 GENERAL INFORMATION Page 2 GP PSS5 Part I South 25th Street, Omaha, NE TE: (402) ; FAX (402) URL:
9 GENERAL INFORMATION Page Service Agreement The cost-effective way to prevent downtime, due to equipment malfunction, is with regularly scheduled maintenance, performed by qualified technicians trained in the latest technology. PRIMUS, or your dealer, offers extended service agreements to provide regular maintenance of your sterilizer that will help correct little problems before they become big ones. PRIMUS Service combines the precise maintenance program and factory-trained technicians to assure you of maximum productivity. Technicians thoroughly inspect, clean, adjust, and provide all necessary maintenance to keep your sterilizer performing according to factory specifications. A service agreement with PRIMUS will ensure that the vessel will be warranted for fifteen years. 1.3 Safety Precautions The following is a summary of how WARNINGS and CAUTIONS are denoted in this manual. WARNINGS indicate the potential for danger to personnel, and CAUTIONS indicate the potential for damage to the equipment. These precautions are found throughout the document where they are applicable. Carefully read the manual before proceeding to use or service the unit. IN THIS MANUAL, WARNINGS DRAW ATTENTION TO THE POTENTIAL FOR DANGER TO PERSONNEL. AS DEMONSTRATED HERE, THE ENTIRE WARNING NOTATION IS EMPHASIZED BY THE ICON TO THE LEFT WITH BOLD, CAPITAL PRINT. IN THIS MANUAL, CAUTIONS DRAW ATTENTION TO THE POTENTIAL FOR DAMAGE TO EQUIPMENT. AS DEMONSTRATED HERE, THE CAUTION INFORMATION IS EMPHASIZED BY THE ICON TO THE LEFT WITH CAPITAL PRINT. 1.4 Bibliography American Society of Mechanical Engineers (ASME) Section VIII, Division 1 Association for the Advancement of Medical Instrumentation (AAMI) Standards and Recommended Practices, Volume 1 Sterilization; Arlington VA, 1992 Association for the Advancement of Medical Instrumentation (AAMI) Standards and Recommended Practices, Volume 1S, Sterilization Supplemental; Arlington VA, 1994 United States Food and Drug Administration (FDA), Part 820 of Title 21 of the Code of Federal Regulations (21CFR 820) National Fire Protection Association, National Electrical Code; ANSI/NFPA 70. Boston, National Plumbing Code (NPC) Perkins, John J.; Principles and Methods of Sterilization in Health Sciences; Charles C. Thomas Co., South 25th Street, Omaha, NE TE: (402) ; FAX (402) URL: GP PSS5 Part I
10 GENERAL INFORMATION Page Definitions and Terms AAMI - Association for the Advancement of Medical Instrumentation. BOWIE-DICK TEST - Used to test the efficacy of pre-vacuum high temperature steam sterilizers. CALIBRATION - Process of checking and adjusting devices or instruments for accuracy of measurement. CONTROLLER ASSEMBLY V2.0 - Consists of the SBC196 computer and the A/D Board with the two EPROMs. CYCLE - A set of events (phases) that occur over a period of time that can be repeated. EEPROM - Electronically Erasable Programmable Read Only Memory. A non-volatile memory chip whose bit patterns can be electronically erased and reprogrammed by the user. All setpoints, parameters, and calibration values are stored on the EEPROM. EPROM - Erasable Programmable Read Only Memory. A non-volatile memory chip whose bit patterns can be erased and reprogrammed by the factory. (Operational and Calibration) FACTORY CONFIGURATION NO. - This is a preset number entered in the PSS500 control by the factory and determined by the type of machine. LCD - Liquid Crystal Display. LED - Light Emitting Diode. NIST - National Institute of Standards and Testing. OPERATOR - Person or persons charged with day-to-day operation of the sterilization equipment. OPERATOR PANEL - Consists of the touchpad, printer, and chamber pressure gauge. PARAMETER - Quantities or constant values that vary with the circumstances of application. Parameters are selected from menus that are accessible on the touchpad display. PHASE - Any of the stages in a cycle. PRESSURE TRANSDUCER - A device that converts pressure into an electrical signal. PSIG - Pounds per Square Inch Gauge. PSIA - Pounds per Square Inch Absolute. GP PSS5 Part I South 25th Street, Omaha, NE TE: (402) ; FAX (402) URL:
11 GENERAL INFORMATION Page 5 RTD - Resistance Temperature Device - a device that converts temperature into a specific resistance value. SBC196 - The microcontroller circuit board attached above the A/D Board on the Controller. SETPOINTS - Values entered for setting exact points in cycle parameters. These are global settings, applying to specific cycles. U-1 - A manufacturer s data report for pressure vessels as required by the Provisions of the ASME Code Rules, Section VIII, Division 1. This form is filed with the National Board of Boiler and Pressure Vessel Inspectors. U-2 - A manufacturer s data report for all types of electric boilers as required by the Provisions of the ASME Code Rules, Section 1. USER - Equipment owner, persons, client, or parties having responsibility for the outcome of a particular type of sterilization process being done. SECTION 2.0 STERILIZER DESCRIPTION 2.1 General PRIMUS Sterilizers are available in a multi-functional Steam Sterilizer with Hi-Vacuum and Gravity capabilities or as a Laboratory/Lo-Temperature Steam Sterilizer. All units are available for installation, either recessed through a wall or freestanding. Freestanding sterilizers are cabinet mounted, with stainless steel panels. 16 X 16, 20 X 20 and 26 X 26 cross-section sterilizers have vertical, manual or power doors. Units larger than 26 X 26 are equipped with a power horizontal door. Our sterilizers feature the PSS 500 MicroComputer control package with a digital printer. The PSS 500 MicroComputer controls steam sterilizers with a pulsing, pressure/vacuum, air removal system. Visual indicators monitor all cycle phases with audible and visual cycle completion indicators. It is designed for efficient sterilization with wrapped or unwrapped instruments, dry goods and flasked liquids. 2.2 Construction Frame The vessel is secured to a welded structural frame. The frame is constructed of carbon steel (stainless steel available as buyer s option) and covered with corrosion resistant paint. It is mounted on threaded leveling screws with supplemental steel weight distribution footpads Chamber The chamber, including bulkhead, is fabricated of solid 316L stainless steel. Chambers are of entirely welded construction with interior, longitudinal corners that are radiused. The chamber is fully jacketed. GP PSS5 Part I South 25th Street, Omaha, NE TE: (402) ; FAX (402) URL:
12 GENERAL INFORMATION Page 6 Steam baffles are positioned in the chamber to minimize wetting by condensate and insure proper steam distribution Jacket The jacket is constructed of AISI Type 304 stainless steel and is mounted to the chamber over channel supports designed to achieve uniform distribution of steam. The jacket enables the stabilization of temperature around the chamber, thereby reducing the time required to bring the chamber up to sterilization temperatures. This provides superior temperature distribution and prevents the formation of condensation on the chamber walls. The jacket is constructed in accordance with ASME Section VIII, Division 1 for unfired pressure vessels, and is so stamped Doors Door(s) are constructed of solid 316L stainless steel which provides ease of cleaning and uniform quality for all chamber surfaces. Door(s) are designed to prevent opening while under pressure. A silicon gasket recessed within the chamber head ring seals the Door(s). The gasket is retracted before a door may be opened. Door(s) are vertical sliding, counter-balanced and manually operated, or optionally powered, for 16 x 16, 20 x 20, and 26 x 26 chamber sizes. Door(s) are horizontal-sliding powered for chamber sizes larger than 26 X 26. Horizontal door models are available with doors that slide from left-to-right, or right-to-left Insulation Superior heat loss reduction is achieved with one-inch rigid fiberglass insulation overlaid with 16-gage aluminum sheet metal. The sheet metal is formed, overlapped, and riveted. The aluminum makes the insulation system impervious to water, thus eliminating wet, sagging insulation Plumbing and Fixtures All plumbing and piping components delivering steam or sterile air to the product are stainless steel threaded, brass or copper. All major piping and electrical components are tagged and numbered to match the P&ID diagrams. Threaded stainless steel is available as a customer option. Traps are thermostatic, non-proprietary, and industrial grade. They are positioned and sized for maximum efficiency. Traps are used for the removal of air and condensate from the system. Control valves are non-proprietary, industrial grade, brass or stainless steel. They are actuated by electric solenoids or air pressure. Safety valves are ASME approved, stamped, and sized for the vessel design pressure. The steam source requires clean house steam or integral steam generator with particulates removed. Steam shall be suitably trapped to ensure that it is dry and supplied at PSIG. An automatic steam condenser exhaust system reduces temperature of exhaust steam flowing to the drain. GP PSS5 Part I South 25th Street, Omaha, NE TE: (402) ; FAX (402) URL:
13 GENERAL INFORMATION Page Vacuum System Rapid evacuation of chamber air, steam, and condensate is achieved with a water ejector provided as standard equipment with PRIMUS Sterilizers. Liquid ring vacuum pumps may be provided as an option and are standard on sterilizers that are greater then 75 cubic feet.. Both the ejector and the optional vacuum pump are capable of air evacuation to a "deep" vacuum (e.g., 2 PSIA) in the chamber. Effluent discharge temperature is further reduced by a dual pass, coil bundle, heat exchanger before entering the vacuum pump. The discharge temperature is further reduced by cool water at the floor drain (Drain Quench) Air Filtration The air inlet filter is a cellulose-medium type. It is 100% efficient at 0.2 microns, and mounted external to the chamber. An additional 0.3 micron filter element for outside air will be mounted for Air-In Control Panel The gauges, touchpad and printer are mounted in the stainless fascia panel PSS 500 Controls The PRIMUS PSS 500 control system provides for automatic operation through all phases of the sterilization cycle. Cycle parameters can be selected and programmed by the operator. All cycle phases are monitored visually. Cycle completion indicators are provided both audibly and visually. The control is an embedded MicroComputer system with non-volatile memory storage eliminating the need for battery back up. The computer consists of solid-state devices, isolated from heat and moisture in a NEMA-rated, shielded enclosure. The MicroComputer control is self-diagnostic and provides information to the operator on a 2-line, 16 character LCD located on the control touchpad. An audible tone accompanies all alarms indicating a problem with the cycle. When specified, cycle parameters may be locked out by the supervisor through the use of touchpad keystrokes. The control touchpad provides information on cycle progress by LED indicators. Specific information on cycle parameters and progress, in addition to alarms, are shown on the LCD display. Cycle selection and programming are entered by control panel pushbuttons, which provide an audible signal when pressed. Controls include a cycle advance button to allow the operator to manually advance the cycle. The control panel indicates the use of cycle advance, which phases were advanced, and continually displays this information until the door is opened at the end of the cycle. Cycle progress including time, temperature, pressure, and alarms are reported on a 24-character thermal or impact printer. The touchpad contains pushbuttons and the LCD display. Cycle progress is displayed by LEDs on the Operator s Panel. Inputs are made using the numbered cycle buttons (See Part III, User s Manual, Figure 2.1-1, Touchpad Display). Double door sterilizers have a touchpad near each door Instrumentation/Sensors An analog pressure transducer or transmitter senses pressure. Temperature is sensed by 100 ohm platinum RTDs. Temperature readouts are provided in either Fahrenheit or Centigrade as specified. GP PSS5 Part I South 25th Street, Omaha, NE TE: (402) ; FAX (402) URL:
14 GENERAL INFORMATION Page Gauges PRIMUS sterilizers have, as a standard, digital display gauges located on both Side A and Side B of double door sterilizers, which display chamber pressure. Primus General Purpose sterilizers are also equipped with compound dial gauges offered as customer option in the service area Printer Devices A compact reliable thermal or impact printer provides recording of time, temperature, pressure, cycle number, sterilizer number, and date for each cycle. Printed reports of calibration and operator selected parameters are provided Recording Instruments The standard strip printer provides an alpha-numeric printout of cycle identification, cycle parameters, date/time, chamber temperature, chamber pressure, and alarm statements on 2¼" wide, single-ply thermal or impact printer paper. Additionally, a circular chart recorder may be provided when graphical or continuous multi-channel recording is required Accessories Loading equipment - Bottom shelf with adjustable shelf(ves), or loading cart(s) with transfer carriage(s). Integral Electric Steam Generator/Boiler - used when house steam is not available. Boost Pump used to increase water pressure in areas that do not have sufficient water pressure. GP PSS5 Part I South 25th Street, Omaha, NE TE: (402) ; FAX (402) URL:
15 GENERAL INFORMATION Page 9 SECTION 3.0 SAFETY FEATURES 3.1 Door Pins On horizontal sliding doors, security of the door is maintained by multiple two-inch stainless steel pins, which slide into stainless steel receivers. Pins and receivers are aligned along both vertical edges of the door. The number and size of pins and receivers on each side are dependent upon vessel size. Vertical doors slide up and down in milled grooves in the stainless steel headring. When closed, the door is surrounded on all four sides by a retaining angle. The chamber and door mechanisms are hydro-tested at 150% of the operating pressure rating of 45 pounds. Safety conscious design and construction of the door prevents opening while the chamber is under pressure. 3.2 Door Limit Switches/Pressure Settings Horizontal doors have door-closed switch(es) that are adjustable. The sterilizer cannot enter cycle processing until a signal is received from the door-closed switch(es). Manually operated Vertical doors have door-closed switch(es). The sterilizer cannot enter cycle until the door-closed signal(s) are received. Power door(s) have door open and closed switches. The sterilizer cannot enter processing until a signal is received from the door-closed switch(es). SECTION 4.0 CONTROLS 4.1 Facility Power Disconnect A dedicated facility power line should be supplied for the sterilizer. The operator should be instructed where the main power disconnect is and how to disconnect the power. The customer should wire the dedicated power line to the junction box, which contains a surge suppressor for the incoming power. The sterilizer has a main power switch and indicator light on the side of the control box. 4.2 Manual Supply Valves Manual supply valves should be provided by the customer/contractor at the sterilizer site. The Piping and Instrumentation Diagram identify where the customer should provide shut-off valves for water, steam and air to the sterilizer. SECTION 5.0 MANUFACTURER S RECORDS Refer to Appendix A, Manufacturer s Records, for the manufacturer s records applicable to this unit. GP PSS5 Part I South 25th Street, Omaha, NE TE: (402) ; FAX (402) URL:
16 GENERAL INFORMATION Page 10 THIS PAGE INTENTIONALLY LEFT BLANK GP PSS5 Part I South 25th Street, Omaha, NE TE: (402) ; FAX (402) URL:
17 PRIMUS GENERAL PURPOSE STEAM STERILIZER PRIMUS PSS500 SERIES PART II INSTALLATION MANUAL PSS-500 Controls Software Version 7923 July 2, 2008 Version South 25th Street, Omaha, NE TE: (402) ; FAX (402) PRIMUS.MAN\PRIMUS.IOS/ South 25th Street, Omaha, NE TE: (402) ; FAX: (402)
18 , Omaha, NE by PRIMUS Sterilizer Company Printed in the United States of America Steam Sterilizer Installation, Operation, and Maintenance Manual V196 Controller Includes Bibliographical References GP PSS5 Part II _07/ South 25th Street, Omaha, NE TE: (402) ; FAX (402) URL:
19 TABLE OF CONTENTS Page i TABLE OF CONTENTS Page PART II INSTALLATION MANUAL SECTION 1.0 PRE-INSTALLATION Review Installation Requirements Examine Equipment Review Drawings Pre-Installation Inspection...1 SECTION 2.0 INSTALLATION Stabilizing and Leveling Recessed Model: Cabinet Model: Installing a Vertical Single Door Unit Recessed Cabinet Enclosed Double Vertical Door Unit Recessed Cabinet Enclosed Installing a Horizontal Door Unit Connecting Utilities (without boiler) Steam Other Steam Considerations Water Electrical Connecting Utilities (with boiler) Power Service for Optional Boiler Drain Installation Checklist...11 GP PSS5 Part II _07/ South 25th Street, Omaha, NE TE: (402) ; FAX (402) URL:
20 LIST OF FIGURES AND TABLES Page ii LIST OF TABLES TABLE PAGE Service Requirements - Water...3 GP PSS5 Part II _07/ South 25th Street, Omaha, NE TE: (402) ; FAX (402) URL:
21 INSTALLATION Page 1 SECTION 1.0 PRE-INSTALLATION 1.1 Review Installation Requirements Review the installation information below prior to beginning the installation of the sterilizer. Check the Occupational Health and Safety Act and National Electric Code, as well as local electric and plumbing codes, for any special requirements that may pertain to the installation of this sterilizer. Refer to the Uncrating Instructions attached to the sterilizer to ensure the machine is not damaged during uncrating. For recessed models refer to paragraph 2.1.1, Recessed Models item f, for instructions on how to assemble the front panel. For cabinet models refer to paragraph 2.1.2, Cabinet Models item e. 1.2 Examine Equipment Inventory all delivered equipment against the packing list. Check all boxes and wrapping materials prior to removal. Any damage should be promptly reported to the transportation company responsible for delivery and also reported to. Should you determine an item missing, notify immediately. NOTE 1.3 Review Drawings Installation personnel should thoroughly familiarize themselves with the General Arrangement, P&ID, and Electrical drawings prior to installing the sterilizer. Refer to the Maintenance Section for all drawings applicable to this unit. 1.4 Pre-Installation Inspection The following items should be checked prior to installing the sterilizer: Access Clearance A minimum of 18 on all sides and 24 on top. Utility Service Lines Check the Equipment Arrangement Diagram for supply line sizes, pressure and other utility requirements. Water Supply - Backflow prevention is by others. Check local codes for requirements. The sterilizer is not equipped with a vacuum breaker or backflow prevention device. Shutoff valves should be installed in steam and water supply lines near the sterilizer. This will enable the sterilizer to be serviced without shutting off the building supply. Disconnect switches, capable of being locked in the OFF position, must also be installed in electric supply lines near the sterilizer. Electrical Requirements Sterilizer Controls: Terminal box for 120VAC, 50/60 Hz, 10 amp. 117 South 25th Street, Omaha, NE TE: (402) ; FAX (402) URL: GP PSS5 Part II _07/070208
22 INSTALLATION Page 2 Steam Supply Line Provide dedicated circuit of quality suitable for computer to sterilizer. If optional boiler is specified, do not share the service. Verify that the building steam supply line is well drained and trapped. This will ensure condensate free steam between 97 and 100% saturated vapor to the sterilizer. The customer should provide a trap in the steam line, before the shutoff valve, to remove condensate. Connect to a medium pressure, steam supply line, regulated ( 5 PSIG). Steam supplied with dynamic stability at PSIG. Confirm steam service requirements on the Equipment Arrangement drawing in the Maintenance Section of this manual. DO NOT SUPPLY SUPER HEATED STEAM. IT IS HAZARDOUS AND WILL INHIBIT THE STEAM STERILIZATION PROCESS. 117 South 25th Street, Omaha, NE TE: (402) ; FAX (402) URL: GP PSS5 Part II _07/070208
23 INSTALLATION Page 3 Cold Water Temperature is not to exceed 70 F. If an optional vacuum pump is used, temperature is not to exceed 60 F, so that the pump achieves maximum efficiency. Dynamic pressure of PSIG with a water hardness of not more that 80 ppm is recommended. CHAMBER SIZE WATER FLOW 16 X 16 X 26 (980 lbs.*) 8 GPM (3/4 NPT) 20 X 20 X 39 (1520 lbs.*) 8 GPM (3/4 NPT) 26 X 26 X 39 (1840 lbs.*) 8 GPM. (3/4 NPT) 26 X 26 X 49 (2200 lbs.*) 14 GPM (3/4 NPT) 26 X 26 X 67 (2600 lbs.*) 14 GPM (3/4 NPT) *Sterilizer Weight, Single Door Table Service Requirements - Water Sterilizer Drain Electric Steam Boiler Drain (For units with a electric steam boiler only) A minimum 2 diameter is recommended for the floor drain. A floor sink is recommended. An atmospherically vented drain is required. Confirm water service requirements on the Equipment Arrangement drawing in the Maintenance Section of this manual. On the side of the Electric Steam Boiler is a 1/2 inch NPT shutoff valve. This must be piped to a 1/2 inch ODT drain terminal. NOTE: If a hot blow-down is performed on the electric steam boiler, the drain line must be connected to a receiver capable of withstanding 212 F (100 C) water. If a cold blow-down is performed, the connection to a standard drain is acceptable. See User s Manual and local codes for more information on blow-down. IMPORTANT: Sizes shown are service connections only. Building drain lines must be increased by one pipe size to provide for sufficient flow rate. 117 South 25th Street, Omaha, NE TE: (402) ; FAX (402) URL: GP PSS5 Part II _07/070208
24 INSTALLATION Page 4 SECTION 2.0 INSTALLATION LACERATION HAZARD - USING PLIERS OR OTHER CLAMPING DEVICE, HOLD THE BANDING STRAP WHILE IT IS BEING CUT. THIS WILL HELP AVOID INJURIES TO EYES AND HANDS WHEN TENSION IS RELEASED. ALWAYS WEAR PROTECTIVE EYE GOGGLES WHEN CUTTING STEEL BANDS. PROTECTIVE PLASTIC COVERING SHOULD BE REMOVED SLOWLY TO REDUCE THE LEVEL OF STATIC DISCHARGE. 2.1 Stabilizing and Leveling Recessed Model: a. Move the sterilizer into position. Refer to the architect's approved drawings for location and vessel orientation. b. If additional vertical clearance is required to move the unit into the wall opening, lower the vessel by screwing the feet counterclockwise into the frame. c. Place the provided metal footpads under the adjustable feet to distribute the point loads and stabilize the sterilizer. If seismic anchoring is required, a drawing will be provided. The installation instructions are attached to the drawing. d. Adjust the feet by screwing them clockwise or counterclockwise in the frame until the sterilizer chamber is level and centered in the wall opening. Use a carpenter's bubble level front-to-rear and side-to-side on the chamber floor, to level the sterilizer. Repeat the process periodically, during the installation. NOTE ACCURATE LEVELING IS CRITICAL TO THE SAFE AND EFFICIENT OPERATION OF THE STERILIZER. If transfer carriages are used, align the height of the transfer carriage with the bottom of the chamber. e. If applicable, position the seismic anchor plates as depicted in the drawing and anchor to the floor through the holes provided in the plates. f. After rough positioning and initial leveling of the sterilizer, install fascia panels to verify the position of the unit in the wall opening. Adjust placement of unit until fascia panels are centered over wall opening and the back of the panels are flush and straight in relation to the wall. The panel mounting studs may also be used as a fine adjustment for a flush fit to the wall. GP PSS5 Part II _07/ South 25th Street, Omaha, NE TE: (402) ; FAX (402) URL:
25 INSTALLATION Page 5 For double door installation, refer to the Equipment Arrangement Diagram in the Maintenance Section of this manual for proper placement of the fascia panels. NOTE: Ensure that the fascia panels are installed to the correct end of the sterilizer. Second fascia panel should be installed only after the unit is positioned through wall Cabinet Model: a. Move the sterilizer into position. Refer to Part IV, Maintenance Manual, for the Equipment Arrangement drawing or drawings provided and approved by the customer's architect. b. Adjust the height of the sterilizer, and anchor as outlined in paragraph 2.1.1, Recessed Models. c. If the cabinet panel support brackets are not assembled on the frame, assemble them with the nuts, bolts, and washers provided. d. Unpack and assemble the front and side panels using fastening hardware provided. e. After rough positioning and initial leveling of the sterilizer, install fascia panels to verify position of unit in wall opening. Adjust placement of unit until fascia panels are centered over wall opening and the back of the panels are flush and straight in relation to the wall. The panel mounting studs may also be used as a fine adjustment for a flush fit to the wall. 2.2 Installing a Vertical Single Door Unit NOTE It is critical to the overall operation of all sterilizer doors that the sterilizer chamber be level in all directions. a. Remove the banding straps from the supports holding up the door. 1. On large units (e.g. 26 X 26) two people are required to hold the door and one person to remove the supports. Once the supports are removed, lower the door. b. Ensure that the cable remains around the pulley as door is lowered. c. Cut the banding strap on the counterweight. d. Open the door counterweight cover and ensure the lead shot is evenly distributed across the box Recessed Move the sterilizer back into the wall opening until the fascia panel fits tight against wall face. GP PSS5 Part II _07/ South 25th Street, Omaha, NE TE: (402) ; FAX (402) URL:
26 INSTALLATION Page Cabinet Enclosed a. If the cabinet panel support brackets are not assembled on the frame, assemble them with the nuts, bolts and washers provided. Refer to the Equipment Arrangement Diagram in Part IV, Maintenance Manual. b. Unpack and assemble the front and side panels using fastening hardware provided. c. Adjust the panel mounting studs to provide flush connection of all panels. 2.3 Double Vertical Door Unit Repeat the installation instructions in paragraph 2.2, for the second door Recessed a. Move sterilizer through one or both wall openings until the fascia panel fits tight against the face of the wall. Install the second fascia panel. b. Refer to the Equipment Arrangement Diagram provided in Part IV, Maintenance Manual, for the proper placement of the fascia panels Cabinet Enclosed a. If the cabinet panel support brackets are not assembled on the frame, assemble them with the nuts, bolts and washers provided. Refer to the Equipment Arrangement Diagram in Part IV, Maintenance Manual. b. Unpack and assemble the front and side panels using fastening hardware provided. c. Refer to the Equipment Arrangement Diagram provided in Part IV, Maintenance Manual, for the proper placement of the fascia panels. d. Adjust the panel mounting studs to provide flush connection of all panels. 2.4 Installing a Horizontal Door Unit On double door units, if the unit has outriggers they must be installed on the sterilizer before opening the doors. NOTE a. Carefully remove the two trolleys from the door, making note of how the spacers and the trolley halves separate, so that they can be reassembled the same way they were removed. b. Attach the I-Beam to the sterilizer with the eight bolts, lock washers, and flat washers provided. Line up the marks on the I-beam bracket and the sheet aluminum shell. Hand tighten the bolts, only at this time. GP PSS5 Part II _07/ South 25th Street, Omaha, NE TE: (402) ; FAX (402) URL:
27 INSTALLATION Page 7 c. Attach the two trolleys, with the holes for the two ¼"-20 bolts facing the back of the sterilizer. Push the bolt through the two halves; placing the nut on the backside. Do not over-tighten. Install a cotter pin to secure in place. d. Remove the banding straps from door(s). e. Lock the two nuts on the trolleys and screw the stud into the door, thus raising the door until the pins are centered in the holes. (Required only if pins are not centered) f. Door should be ready to open. g. Loosen the two brass door guides on the bottom of the door. Attach the bottom track to the sterilizer frame with the two bolts provided. Line up the marks on the frame and the bottom of the track bracket. Move the track down and adjust the two track guides until they are in the track approximately ¼" - ½". Tighten the four bolts. h. Attach the air cylinder bracket to the trolleys using the four bolts provided. Attach the air cylinder to the bracket using the pin and hitch pin provided with the hardware. The two air lines are marked; attach accordingly. The door switches are marked such that they can only be installed one way; connect as indicated. Once the door switches are installed, apply power to the sterilizer to enable adjustment. Open the door completely. Disconnect the air supply to the sterilizer. Open the lid on the electronic cabinet, and examine the white relay module that is labeled "DOOR OPEN". The LED indicator on the relay should be on. If the LED is not lit, loosen the proximity switch on the air cylinder, and slide it along the cylinder until the LED illuminates. Tighten the proximity switch to achieve correct positioning and provide for correct on and off operation. Some trial and error is to be expected. i. Repeat step h. with the Door-Close relay. Close the door all the way and observe the relay labeled "DOOR CLOSED". j. The door should move freely. If it does not, inspect and locate areas of binding and adjust as necessary. Note that the bottom track has two adjusting bolts that move the track in and out. k The 3/8-16 set screws on the door should have been preset at the time of manufacture. If further adjustment is required, adjust when the sterilizer is cold. Leave 0.035" clearance between each pin and setscrew. l. Keep the I-beam and bottom track clear of obstructions, and lubricate the bottom track with powder graphite. GP PSS5 Part II _07/ South 25th Street, Omaha, NE TE: (402) ; FAX (402) URL:
28 INSTALLATION Page Connecting Utilities (without boiler) Steam The effectiveness of steam sterilization is dependent on the character and quality of the steam used. Steam generators based on evaporation from high pressure hot water should not be used, since the steam produced is of inferior quality for sterilization purposes. Since the steam comes in physical contact with the goods to be sterilized, it should be free of additives, solid particles or other foreign matter. The requirement for steam sterilization is medium pressure, saturated, "clean" steam supplied with dynamic stability at PSIG. Since steam supply lines carry steam and condensate, additional steam line draining and separation of liquid may be required. Refer to the utilities service requirements on the Equipment Arrangement drawing in Part IV, Maintenance Manual. Connect sterilizer to a medium pressure steam supply line (50-80 PSIG) or as otherwise specified on the drawing. Ensure that steam supply line is properly trapped to prevent excess condensate from entering the sterilizer. Refer to the National Plumbing Code, and local codes, to assure a proper installation in your location Other Steam Considerations A connection should be provided on the steam supply line adjacent to the sterilizer to enable steam to be sampled for the presence of undissolved gases, wetness, and contaminants. A steam pressure gauge should be provided ahead of steam shut off. When small electric steam boilers are used, the water supply pressure must be PSIG to maintain the proper water level in the electric boiler. Keep feed water valves open at all times during operation. LACK OF SUFFICIENT WATER CAN RESULT IN BOILER FAILURE. During operation, keep drain valves closed. Pump and boiler must be separated by check valves to avoid damage to the pump. Safety valve(s) shall not be piped with a discharge line extension that is of smaller bore size than the outlet of the safety valve. If discharge piping is added, it must be supported so that strain is not placed on the safety valve Water Refer to the Equipment Arrangement Drawing, in Part IV, Maintenance Manual, for the water flow rate. GP PSS5 Part II _07/ South 25th Street, Omaha, NE TE: (402) ; FAX (402) URL:
29 INSTALLATION Page 9 Connect the sterilizer to a cold water supply line capable of dynamic supply pressure of PSIG, with a recommended water hardness of not more than 80 ppm. Temperature of the water supply should not exceed 70 F. If an optional vacuum pump is used; water temperature should not exceed 60 F, so that the pump achieves maximum efficiency Electrical INSTALLATION OF PROPER ELECTRICAL SERVICES IS THE RESPONSIBILITY OF THE PURCHASER. A QUALIFIED ELECTRICIAN SHOULD MAKE CONNECTION. STERILIZERS WITH OPTIONAL BOILER, FEEDWATER PUMP, OR VACUUM PUMP REQUIRES MULTIPLE POWER SOURCES. Connect the primary sterilizer control to an electrical disconnect located in the same space as the equipment. This must be a dedicated circuit of 120VAC, 10 amp, 60 Hz, single phase. If a dedicated circuit is not used, interference to the computer may result. Location of the primary electric service box on the sterilizer is indicated in the Equipment Arrangement Drawing, in Part IV, Maintenance Manual. 2.6 Connecting Utilities (with boiler) Refer to the Piping and Instrumentation Diagram for connection of the water supply. If the optional steam boiler is used, treated water should be connected directly to the feed pump on the boiler. CONSIDERATION SHOULD BE GIVEN TO THE EFFECTIVENESS OF THE BOILER'S WATER LEVEL CONTROL WHEN HIGH PURITY WATER IS USED. ENSURE THAT THE TYPE OF LOW WATER LEVEL CONTROL DEVICE IS SUITABLE FOR USE WITH HIGH RESISTANCE WATER. HIGH PURITY WATER SYSTEMS WORK BEST WITH FLOAT TYPE LEVEL CONTROLS. BEFORE OPERATING THE STERILIZER/BOILER SYSTEM, ALWAYS REFER TO THE MANUAL THAT IS SUPPLIED BY THE MANUFACTURER OF THE BOILER. CERTAIN BOILER CLEANING PRODUCTS WILL CAUSE DAMAGE TO HEATING ELEMENTS. REFER TO THE MANUAL SUPPLIED BY THE MANUFACTURER OF THE BOILER. If the sterilizer is fitted with a steam generator (boiler), refer to the boiler manual provided in Appendix A, Manufacturer s Records. The boiler requires a dedicated circuit as specified on its data plate. Refer to the tags on the sterilizer's electrical boxes for the correct wiring connections. TO AVOID POTENTIAL SHOCK HAZARDS, PROVIDE A SECURE ELECTRICAL GROUND FOR THE VACUUM PUMP AND OPTIONAL BOILER ACCORDING TO NATIONAL ELECTRIC CODE (NFPA70) STANDARDS. SERVICE WIRING TO BOILER SHOULD BE IN ACCORDANCE WITH LOCAL CODES OR N.E.C. REQUIREMENTS. REFER TO THE WIRING DIAGRAM IN PART IV, MAINTENANCE MANUAL. GP PSS5 Part II _07/ South 25th Street, Omaha, NE TE: (402) ; FAX (402) URL:
30 INSTALLATION Page 10 IMPROPER ELECTRICAL POWER CONNECTION, SUBSTITUTION OF COMPONENTS, OR MODIFICATIONS TO WIRING SYSTEMS SHALL VOID THE WARRANTY AND MAY LEAD TO DANGEROUS OPERATING CONDITIONS Power Service for Optional Boiler Refer to the boiler manufacturer s installation, operation and maintenance manual on electrical installation requirements. The boiler requires a dedicated circuit, as specified on the boiler s data plate. Refer to the tags on the sterilizer s electrical boxes for correct wiring connections Drain Sterilizers equipped with more than one waste water outlet should be piped separately to the floor drain. Check local regulations regarding waste drain requirements, such as waste water temperature, etc. The drain outlet from recessed sterilizers should terminate within the utility area. The drain outlet from cabinet sterilizers should terminate within the cabinet space. A minimum diameter of 2" is recommended for the floor drain. A floor sink is recommended. Run a sloping pipe with unreduced bore from the sterilizer outlet to the drain. The sterilizer must have an air break between the drain pipe and the floor drain. NOTE The sterilizer CANNOT be hard piped to the drain. The drain pipe(s) should terminate not closer than ½" above the highest liquid level of the water trap in the drain. GP PSS5 Part II _07/ South 25th Street, Omaha, NE TE: (402) ; FAX (402) URL:
31 INSTALLATION Page Installation Checklist The following items are to be checked after installation: a. Utilities 1. Water Supply Backflow prevention device installed Water Pressure measured (spec is PSIG (dynamic)) Supply piping adequately sized Shut-offs located nearby 2. Steam Supply Supply is adequately trapped Supply pressure measured (spec PSIG (dynamic)) Supply piping adequate sized Shut-offs located nearby 3. Electrical Power Voltage per Equipment Arrangement Diagram Disconnect located nearby Dedicated electrical circuit 4. Waste Air gap Drain capacity adequate Pipes sloped properly b. Units checks Door properly opens, closes, lowers, and latches smoothly Door switches adjusted correctly Chamber strainer in place Rack and shelves/loading cart operates properly Pumps running in correct direction Unit properly leveled ACCEPT INITIAL DATE YES NO 117 South 25th Street, Omaha, NE TE: (402) ; FAX (402) URL: GP PSS5 Part II _07/070208
32 INSTALLATION Page 12 c. Cycle Operations Unit powers up correctly Typical cycle run GP PSS5 Part II _07/ South 25th Street, Omaha, NE TE: (402) ; FAX (402) URL:
33 PRIMUS GENERAL PURPOSE STEAM STERILIZER PRIMUS PSS500 SERIES PART III USER S MANUAL PSS-500 Controls Software Version 7923 June 30, 2008 Version South 25th Street, Omaha, NE TE: (402) ; FAX (402) PRIMUS.MAN\PRIMUS.IOS/ PRIMUS Sterilizer Company, Inc. 117 South 25th Street, Omaha, NE TE: (402) ; FAX: (402)
34 , Omaha, NE by PRIMUS Sterilizer Company Printed in the United States of America Steam Sterilizer Installation, Operation, and Maintenance Manual V196 Controller Includes Bibliographical References GP PSS5 Part III / South 25th Street, Omaha, NE TE: (402) ; FAX (402)
35 TABLE OF CONTENTS Page i TABLE OF CONTENTS PART III USER S MANUAL Page SECTION 1.0 INTRODUCTION TO USER S INFORMATION Background Scope Purpose...1 SECTION 2.0 CONTROL PANEL OPERATING INSTRUCTIONS Vertical Touchpad Horizontal Touchpad (Optional)...3 SECTION 3.0 STERILIZER OPERATION Power Up Factory Validated Cycles Factory Preset Cycle Description Sterilizer Options Optional Laboratory/Lo Temperature Control Optional Effluent Control Compressed Air Over Heated Air Drain Condensate Removal System Jacket Cooling Load Probe Centigrade Serial Data User ID Phases Starting the Cycle Clock Setting Print Interval Setting Sterilizer Doors Loading the Sterilizer Unloading the Sterilizer Shutdown Sterilizer Off Power Off Alarms, Timeouts and Loss of Power...21 SECTION 4.0 PROGRAMMING CYCLE PARAMETERS Parameter Definitions Programming Password Protection...31 SECTION 5.0 PRINTER USER MAINTENANCE Thermal Dot Matrix Printer (Cybertech) Printer Reprint/Feed Switch Loading Paper Loading Printer Take-Up Spool Unloading Paper From The Take-Up Spool...34 GP PSS5 Part III / S. 25 th Street Omaha NE Tel: (402) FAX: (402)
36 TABLE OF CONTENTS Page ii TABLE OF CONTENTS Page 5.2 Thermal Printer with Take-Up Reel (Keltron Optional) Printer Indicators and Control Tearing Paper Strip Thermal Paper Paper Replacement Impact Printer (optional) Printer Indicators and Control Removing the Paper Report Paper Replacement Ribbon Replacement...41 SECTION 6.0 CONTROL MEASURES FOR STERILITY ASSURANCE Sterilizer Efficacy...43 GP PSS5 Part III / S. 25 th Street Omaha NE Tel: (402) FAX: (402)
37 LIST OF FIGURES AND TABLES Page iii LIST OF FIGURES FIGURE PAGE VERTICAL TOUCHPAD DISPLAY HORIZONTAL TOUCHPAD DISPLAY GRAVITY and VACUUM CYCLES LIQUID CYCLES WITH SLOW EXHAUST END POINT SET ABOVE ATMOSPHERE PRESSURE LIQUID CYCLES WITH SLOW EXHAUST END POINT SET BELOW ATMOSPHERE PRESSURE CYCLE MENU CONFIGURATION Thermal Dot-Matrix Printer Loading Thermal Printer Paper Loading Printer Take-Up Spool Thermal Printer Front Panel (Optional Keltron) Paper Loading Front Panel - 24 Column Printer Paper Loading Printer Ribbon Replacement...42 LIST OF TABLES TABLE PAGE FACTORY PRESET CYCLES GRAVITY CYCLE PARAMETERS VACUUM CYCLE PARAMETERS LIQUIDS CYCLE PARAMETERS TEST(VAC) CYCLE PARAMETERS VAC LEAK TEST CYCLE PARAMETERS...31 GP PSS5 Part III / S. 25 th Street Omaha NE Tel: (402) FAX: (402)
38 LIST OF FIGURES AND TABLES Page iv THIS PAGE INTENTIONALLY LEFT BLANK GP PSS5 Part III / S. 25 th Street Omaha NE Tel: (402) FAX: (402)
39 USER S MANUAL Page 1 SECTION 1.0 INTRODUCTION TO USER S INFORMATION 1.1 Background The PSS Steam Sterilizer is designed for a wide range of sterilizing applications suitable for clinical, laboratory, industrial and biopharmaceutical use. The sterilizer features fully automatic, computer-controlled operation of all cycles with application for processing the following items: 1. Wrapped or unwrapped instruments 2. Vented glassware and flasked liquids 3. Culture media 4. Laboratory supplies 5. Other temperature and moisture stable materials 6. Low Temperature Media* The Control System is designed to be user friendly with straightforward operation. Any of the four available cycles, VACUUM, GRAVITY, LIQUIDS, or TEST (VAC), have settable parameters that can be configured by the operator and stored in cycles 1 7; cycle eight is reserved as a test cycle. The cycle parameters of the eight stored programs are held in non-volatile memory for instant recall by the operator at the touch of a button. NOTE *Applications that require operating temperatures below C (e.g., AGAR) require the Lab/Lo Temperature option. The intended use of this option is not for reprocessing items for direct patient contact. CYCLES THAT HAVE BEEN MODIFIED FROM FACTORY PRESET VALUES MUST BE VALIDATED BY THE END USER 1.2 Scope This manual provides information and procedural steps for the supervisor and the operator. The sterilizer is designed to process goods using the cycles described in this section. Preventive maintenance is essential to safe and effective use of the sterilizer. Refer to the Part IV, Maintenance Manual, for complete details. 1.3 Purpose The purpose of this manual is to present important information on the setup and usage of the PRIMUS Sterilizer. These procedures are important to ensure safe operation of the sterilizer and to provide sterile products. GP PSS5 Part III / S. 25 th Street Omaha NE Tel: (402) FAX: (402)
40 USER S MANUAL Page 2 SECTION 2.0 CONTROL PANEL OPERATING INSTRUCTIONS Primus sterilizers may have either a horizontal or vertical touchpad. 2.1 Vertical Touchpad The vertical touchpad contains a Liquid Crystal Display (LCD) and is standard on all PRIMUS sterilizers. Cycle progression is displayed by Light Emitting Diodes (LEDs) on the Operator Panel. Cycle selection is made using the numbered buttons (See Figure 2.1-1). Changes to the settable cycle parameters (# of prevacs, temperature, time, etc.), are made using the appropriate button as described later in the manual. Double door units have a touchpad on both sides of the unit Liquid Crystal Display (LCD) 2. Light Emitting Diode (LED) 3. Cycle Button 4. Heart Button FIGURE VERTICAL TOUCHPAD DISPLAY The LCD screen on the touchpad displays operator information. During programming, the settable parameter and its value are displayed. When the sterilizer is in operation, the LCD displays the phase, pressure, and temperature status of the cycle in progress. Any fault/error statements are also displayed on the LCD. GP PSS5 Part III / S. 25 th Street Omaha NE Tel: (402) FAX: (402)
41 USER S MANUAL Page Horizontal Touchpad (Optional) The horizontal touchpad contains a Liquid Crystal Display (LCD) and is optional on PRIMUS Sterilizers. Cycle progression is displayed by Light Emitting Diodes (LEDs) on the Operator Panel. Cycle selection is made using the numbered buttons (See Figure 2.2-1). Changes to the settable cycle parameters (# of prevacs, temperature, time, etc.), are made using the appropriate button as described later in the manual. Double door units have a touchpad on both sides of the unit Liquid Crystal Display (LCD) 2. Light Emitting Diode (LED) 3. Cycle Button 4. Heart Button 4 FIGURE HORIZONTAL TOUCHPAD DISPLAY The LCD screen on the touchpad displays operator information. During programming, the settable parameter and its value are displayed. When the sterilizer is in operation, the LCD displays the phase, pressure, and temperature status of the cycle in progress. Any fault/error statements are also displayed on the LCD. GP PSS5 Part III / S. 25 th Street Omaha NE Tel: (402) FAX: (402)
42 USER S MANUAL Page 4 SECTION 3.0 STERILIZER OPERATION This section describes the operation of the sterilizer. 3.1 Power Up Turn on steam, water, and air. Turn the power to the sterilizer on by using the Power On toggle (circuit breaker) switch on the side of the control box. The LCD on the front panel will display the cycle name and number. If display is not lit, press the [ON] button located on the control touchpad. 3.2 Factory Validated Cycles Primus sterilizers come with eight preset cycles from the factory including Sterilize Time, Sterilize Temperature, and Dry Time for various loads. Cycle number 8 is reserved for Vacuum Leak Test for sterilizers with that option. This is a 20 minute test that provides a pass/fail printed report. The vacuum end point and total allowable leak rate are the two settable parameters for Vacuum Leak Test. The cycle parameters for each preset cycle are defined in Table Sterilize Time and Temperature, Dry Time and number of Pre-Vacs are programmable using the cycle parameter menu (Reference Section 4.0 Programming Cycle Parameters). Any deviation from factory preset values must be validated by the end user. Cycle numbers 1-4 are selected by pressing the corresponding button [1], [2], [3], [4], cycle numbers 5 8 are selected by pressing the [ ] [ 1 ], [ ] [ 2 ], [ ] [3 ], and [ ] [4] respectively. Cycle Number Cycle Type Sterilize Temp Sterilize Time (Min) Dry Time (Min) No. of Prevacs 1 Vacuum 134 O C (273 O F) Vacuum 134 O C (273 O F) Vacuum 134 O C (273 O F) Vacuum 134 O C (273 O F) Gravity 134 O C (2753 O F) Gravity O C (253 O F) Liquids O C (253 O F) Test (Vac) C (273 O F) 3-1/ Vacuum Leak Test N/A N/A N/A N/A (Optional) * Dry time in LIQUIDS cycle is liquid cool time. ANY CYCLES WITH SETTINGS OTHER THAN THOSE LISTED ABOVE MUST BE VALIDATED BY THE END USER. GP PSS5 Part III / S. 25 th Street Omaha NE Tel: (402) FAX: (402)
43 USER S MANUAL Page 5 Table FACTORY PRESET CYCLES 3.3 Factory Preset Cycle Description The following describes the Factory Preset Cycles as depicted in Table 3.2-1, Factory Preset Cycles, for Gravity, Vacuum, Liquid, Test(Vac) and Vacuum Leak Test. GRAVITY Cycle: When a GRAVITY Cycle is selected, air removal is accomplished by a gravity air purge providing a rapid cycle with very fast temperature rise. GRAVITY cycles are appropriate for loads where air removal from porous materials (packs, etc.) is not required. The sterilize phase is followed by a fast exhaust until the chamber pressure drops to at or below atmospheric pressure (0.0) PSI. Drying is achieved by drawing a vacuum in the chamber, hence removing steam and condensate through the chamber drain. After the drying phase time has elapsed, and the chamber pressure is at or below atmospheric pressure, the indicator lights and the buzzer indicates completion and the door gasket is automatically retracted. If the door gasket does not retract fully, pressing the [DOOR] button will cause the unit to retract the door gasket. After chamber pressure is reduced to atmospheric pressure, the door may be opened. VACUUM Cycle: LIQUIDS Cycle: Selecting a VACUUM Cycle instructs the sterilizer to run a pulsing, pressure/vacuum, preconditioning cycle prior to entering the Sterilize Phase. The Sterilize Phase is followed by a Fast Exhaust Phase, until the chamber pressure drops to at or below atmospheric pressure. Drying begins and the normally required drying time is reduced by pulling one or more vacuum pulses in the chamber, thus removing moisture. The combination of the hot chamber walls and the vacuum in the chamber extracts moisture from the load through the chamber drain. After the drying phase time has elapsed, the chamber vacuum is relieved, and the indicator lights and the buzzer indicate completion. Pressing the [DOOR] button will retract the door gasket and the door may be opened. When a LIQUIDS Cycle is selected, the sterilizer is instructed to process liquid loads. The LIQUIDS Cycle is the same as the GRAVITY Cycle but, in addition, provides an adjustable, slow exhaust that is intended to prevent boiling while the liquids cool. After the Sterilize Phase the chamber will enter a Slow Exhaust Phase, as previously determined by the Service Setup Procedure (see Part IV, Maintenance). When the operator selects parameters for a LIQUIDS Cycle, drying time is not offered for selection. Instead a FLOW COOL process pulls air through the chamber. Upon completion of sterilization, a pre-selected Slow Exhaust Phase reduces the chamber pressure to approximately atmospheric pressure. The indicator lights and the buzzer sounds to indicate completion. 117 S. 25 th Street Omaha NE Tel: (402) FAX: (402) GP PSS5 Part III /063008
44 USER S MANUAL Page 6 NOTE To initiate FLOW COOL, SLOW EXHAUST END POINT must be set equal to or less than 0 PSIG. FLOW COOL at End of Cycle is an option. See warnings related to liquids processing prior to operating a LIQUIDS Cycle. TEST(VAC) Cycles: A TEST(VAC) Cycle is provided as an option to accommodate Bowie-Dick Test parameters on vacuum sterilizers. VACUUM LEAK TEST Cycle: (optional) A VACUUM LEAK TEST Cycle, provided as cycle number 8, is used to ensure a seal tight chamber. This cycle provides for a vacuum with a stabilization time followed by the actual Vacuum Leak Test. The last phase is 20 minutes long with all chamber valves closed and vacuum pump/ejector off. A pass/fail report is provided at the end of the Vacuum Leak Test. 3.4 Sterilizer Options The following sterilizer options are available, if selected at time of order Optional Laboratory/Lo Temperature Control Control of cycle temperature below C/230.2 F is accomplished by the additional piping of the Laboratory/Lo unit which re-circulates steam from the chamber drain back into the chamber steam supply port. The LAB LOW T CUTOFF point must be set to a higher temperature than the set point for the STERILIZE TEMP of the sterilize phase of the cycle. For example, if the set point of STERILIZE TEMP of cycle #1 is C/221.2 F, the LAB LOW T CUTOFF value in the configuration mode must be set to C/221.2 F or higher. For setting the LAB LOW T CUTOFF value, please refer to the maintenance manual. THE LABORATORY/LO TEMPERATURE CONTROL FEATURE IS NOT INTENDED FOR REPROCESSING REUSABLE MEDICAL DEVICES Optional Effluent Control For installations where bio-hazardous material of chamber (i.e., product, effluent condensate and vapor), cannot be discharged from the chamber prior to completion of the sterilization cycle without treatment. Chamber steam condensate is held inside the chamber throughout the sterilization cycle. Steam enters the chamber from the bottom of the chamber to ensure that the condensate is kept at the sterilization temperature throughout the cycle. Vacuum is pulled from the top of the chamber through a 0.2-micron filter to ensure adequate filtration before the drain Compressed Air Over Air-over cooling incorporates air over-pressure during the cooling phase to ensure that the liquid media does not boil over when steam pressure is removed. Steam is displaced in the chamber GP PSS5 Part III / S. 25 th Street Omaha NE Tel: (402) FAX: (402)
45 USER S MANUAL Page 7 with cool air to cool chamber walls, promote cooling of load and shorten exhaust phase of a liquids cycle. Filtered compressed air is supplied by the end user. The cycle parameter that determines the length of time for Compressed Air Over is Liquid Cool Time Heated Air This option requires a heat exchanger that utilizes the jacket steam. This provides for heated air to the chamber at the completion of the drying phase to assist in drying the load Drain Condensate Removal System A sight glass in the chamber drain shall be provided for visual monitoring of the drain line for accumulation of condensate and for a water-in-drain sensor. This sensor provides an input to the control system that, when activated, provides for a controlled removal of condensate through the use of a special bleed valve Jacket Cooling Jacket Cooling, displaces steam in jacket with water or air to cool chamber walls, promote cooling of load and shorten exhaust phase of liquids cycle. This option requires special construction of the vessel Load Probe A single probe placed in load provides load temperature as a temperature parameter for the Heat Load phase of cycle. Conax type adapter provided over validation port, as an option Centigrade Centigrade Reading displays and prints temperature in degrees centigrade Serial Data Serial Data Output provides RS232 connection to transmit cycle printouts to a remote PC to maintain a record of each cycle User ID The optional user identification feature provides operator controlled access for starting a cycle. When the START button is pressed on the Control Panel, the operator is prompted to enter his or her user identification number and, if the user identification is correct, the cycle is started. If an incorrect password is entered, the Control Panel reverts back to the Idle mode. There are a total of 4 unique user identification numbers that can be entered into the Setpoints menu using the Cal EEPROM (ref. Part IV, Maintenance Manual, Cycle Parameters). 3.5 Phases The following graph depicts pressure vs. time for sterilizer phases as they relate to VACUUM, GRAVITY, LIQUID and TEST (VAC) cycles. GP PSS5 Part III / S. 25 th Street Omaha NE Tel: (402) FAX: (402)
46 USER S MANUAL Page 8 CHARGE GASKET PURGE PRECHARGE/PREVAC CHARGE STERILIZE COMPRESSED AIR OVER FAST EXHAUST SLOW EXHAUST POST CHARGE/POSTVAC DRYING COOLING//FLOW COOL AIR-IN GASKET RETRACT CYCLE COMPLETE PRESSURE AMBIENT TIME 1. Dashed line depicts Slow Exhaust for LIQUIDS cycle 2. TEST (VAC) equivalent to phases of the VACUUM Cycle FIGURE GRAVITY and VACUUM CYCLES GP PSS5 Part III / S. 25 th Street Omaha NE Tel: (402) FAX: (402)
47 USER S MANUAL Page S. 25 th Street Omaha NE Tel: (402) FAX: (402) GP PSS5 Part III / FIGURE LIQUID CYCLES WITH SLOW EXHAUST END POINT SET ABOVE ATMOSPHERE PRESSURE P R E S S U R E TIME A I R P U R G E P R E V A C C H A R G E G A S K E T H E A T C H A M B E R H E A T L O A D S T E R I L I Z E L I Q U I D C O O L I N G S L O W E X H A U S T G A S K E T R E T R A C T F L O W C O O L I N G C Y C L E C O M P L E T E C O O L I N G F A S T E X H A U S T 1. Heat Load phase requires a Load Probe 2. Liquid Cooling requires Compressed Air to Chamber
48 USER S MANUAL Page S. 25 th Street Omaha NE Tel: (402) FAX: (402) GP PSS5 Part III / FIGURE LIQUID CYCLES WITH SLOW EXHAUST END POINT SET BELOW ATMOSPHERE PRESSURE P R E S S U R E TIME A I R P U R G E P R E V A C C H A R G E G A S K E T H E A T C H A M B E R H E A T L O A D S T E R I L I Z E L I Q U I D C O O L I N G S L O W E X H A U S T F L O W C O O L I N G G A S K E T R E T R A C T F L O W C O O L I N G C Y C L E C O M P L E T E ATMOSPHERIC PRESSURE A I R I N 1. Heat Load phase requires a Load Probe 2. Liquid Cooling requires Compressed Air to Chambe
49 USER S MANUAL Page Starting the Cycle 1. To select a cycle, press the touchpad button [ 1 ], [ 2 ], [ 3 ], [ 4 ], (and for cycles 5-8) [ ] [ 1 ], ] [ 2 ], [ ] [3 ], [ ] [ 4 ] corresponding to the cycle number of the desired cycle that has been factory preset or previously configured and put into memory by an authorized user. The LED indicator on the button for the selected cycle number will light and the name of cycle type along with Sterilization Temp, Sterilization Time, and Dry/Cool Time will be indicated on the LCD. NOTE The READY light will not be lit, nor will the [START] button be operative, until the jacket temperature has reached 2 C / 6 F below operating temperature and all doors are closed. To view the jacket temperature, press the upper left hand heart on the touchpad. 2. Close the sterilizer door. The touchpad LED indicators (READY), (DOOR CLOSED), and (START) will light. THE GASKET RETRACT [DOOR] BUTTON IS USED ONLY IN THE EVENT OF AN ABNORMAL OR ABORTED CYCLE. IF IT IS NECESSARY TO USE THIS BUTTON TO COMPLETE A CYCLE, CONTACT AUTHORIZED SERVICE PERSONNEL. THE STERILIZER DOOR IS DESIGNED NOT TO OPEN UNTIL CHAMBER PRESSURE IS APPROXIMATELY AT ATMOSPHERIC PRESSURE (DISPLAYED IN PSIG/INHG). ATTEMPTING TO FORCE THE DOOR OPEN WHILE UNDER PRESSURE MAY DAMAGE THE DOOR OR CAUSE SERIOUS INJURY! 3. Push the touchpad [START] button. The (READY) and (START) LED indicators will go out. If USER ID option is selected, a User ID screen will appear. By pressing the UP [ ] or DOWN [ ] arrow enter an authorized password and then press [ENTER]. If the user enters an invalid password the display reverts back to the Ready screen. If Optional USER ID is not selected, pressing the start button will begin the cycle. 4. The cycle proceeds automatically, with Operator Panel indicator lights and LCD display, monitoring phases and conditions throughout the cycle. The cycle progresses automatically through the phases as follows: (See Figures 3.5-1and and 3.5-3) Charge Gasket (CHARGE GASKET) The Steam to Gasket valve opens to pressurize the door gasket, thus sealing the chamber and holding the door closed during the cycle. Air Removal (PRECHARGE) (PURGE The chamber drain is opened and steam is admitted for a preset time to allow rapid removal of air from the chamber. GP PSS5 Part III / S. 25 th Street Omaha NE Tel: (402) FAX: (402)
50 USER S MANUAL Page 12 Air Removal (PREVAC) Successive vacuum/pressure pulses optimize air removal prior to admitting steam for the sterilize cycle. As defined in 4.0 Programming Cycle Parameters, prevac pulses 1 and 2 have fixed end points for vacuum. The vacuum end point for pulses 3 6 is defined by the cycle parameter (PREVAC) VAC POINT. The charge end point for all prevac pulses is defined by the PRECHARGE cycle parameter. The number of prevacs is set by the # OF PREVACS cycle parameter. The number of PRE-VACUUM repetitions are adjustable from 0-6 pulses Charge Chamber (HEAT CHAMBER) The chamber drain is closed and steam is admitted to the chamber until the pre-selected setpoint temperature is reached. This is accomplished by using Half-Ramp and Final Ramp Slopes. Heat Load (Load Probe Control Option) While in this phase of the cycle, the sterilizer continues to control the temperature of the Chamber at the Chamber temperature setpoint until the Load Probe temperature reaches the value set in the LOADP TEMP parameter. When the Load Probe reaches temperature, the controller will allow the start of sterilization phase. Sterilize (STERILIZE) When sterilize temperature is reached, the sterilizing timer begins to count down. The chamber is controlled at sterilize temperature for the pre-selected sterilize time. Fast Exhaust (EXHAUST) Once the pre-selected sterilize time has elapsed, the Fast Exhaust Phase begins. Steam and condensate are drawn from the chamber, through the chamber drain, and further condensed in the drain system until the chamber pressure drops within 1.0 PSI of atmospheric pressure. Slow Exhaust (EXHAUST) (Liquid Cycle only) Once the pre-selected sterilize time has elapsed; the Slow Exhaust Phase begins. Steam and condensate are drawn from the chamber, through the chamber drain, and further condensed in the drain system until the chamber pressure drops to at or below atmospheric pressure. Steam and Condensate Removal (POST-VACS) At the conclusion of the exhaust phase, POST-VACUUM pulses begin the removal of steam and condensate from the chamber and the load. The charge end point is fixed at atmosphere pressure and the vacuum end point is set by the DRY VAC POINT in the cycle parameters for all pulses selected. The number of postvacs is set by the # OF POSTVACS cycle parameter. When the vacuum setpoint is reached for each selected postvac, the chamber drain remains open and a drying period commences for the amount of time set by the DRY TIME cycle parameter. The number of POST-VACUUM repetitions are adjustable from 0-6 pulses. Vacuum pulses assist drying by extracting moisture from the wrapped load. POST-VACUUM drying is not available for LIQUIDS Cycles. Drying (DRYING) The vacuum pump or ejector system continues to exhaust steam and condensate GP PSS5 Part III / S. 25 th Street Omaha NE Tel: (402) FAX: (402)
51 USER S MANUAL Page 13 through the chamber drain for the pre-selected drying time. As a result, a deep vacuum is created in the chamber to assist drying. Hot chamber walls contribute to this process. Cooling (COOLING) Cooling with Gasket Sealed This operation pulls air through the vessel by opening the Air-In valve and running the vacuum system and drain during a LIQUIDS Cycle. Flow Cool (FLOW COOL) Cooling with Gasket Unsealed Flow Cooling is provided for all LIQUID cycles. Following gasket retract, air is pulled through the vessel, around the door, to the drain by running the vacuum system. NOTE If option to disregard this phase, not initiated. Air-In (AIR-IN) The Air-In valve is opened and filtered air is drawn into the chamber, thus relieving the vacuum and returning the chamber to ambient pressure. Gasket Retract (GASKET RETRACT) The gasket drain valve opens and the vacuum in the drain system provides rapid retraction of the door gasket. Complete (COMPLETE) The buzzer sounds and the Operator Panel (COMPLETE) LED indicator signals conclusion of the cycle. Opening the door silences the buzzer and resets the controls, otherwise, the buzzer stops automatically after two (2) minutes. 5. At cycle completion, the Operator Panel (COMPLETE) LED indicator will come on and the buzzer will sound until the door is opened. The buzzer will stop automatically if the door is not opened within two (2) minutes. 6. The sterilizer returns to stand-by, jacket heated, and awaiting start of the next cycle. 3.7 Clock Setting 1. Press the [ ] button ( TIME HOUR will appear) 2. Press [ENTER] to edit the hour, press [ ] or [ ] to change the HOUR, then press [ENTER] again to save the new setting. If the hour is OK press [ ] or [ ] to see the next item. 3. Repeat step #2 for TIME MINUTE, DATE MONTH, DATE DAY and DATE YEAR. GP PSS5 Part III / S. 25 th Street Omaha NE Tel: (402) FAX: (402)
52 USER S MANUAL Page Print Interval Setting Print Interval Setting is the frequency at which printout will occur during all phases. The interval setting is changed using the following instructions: 1. Press the [ ] button ( TIME HOUR will appear) 2. Press [ ] to scroll to PRINT_INTERVAL 3. Press [ENTER] 4. Use [ ] or [ ] to change the PRINT_INTERVAL value 5. Press ENTER 6. Press [ADV] button twice to exit to idle mode 3.9 Sterilizer Doors NOTE Sterilizer doors should remain in the closed position unless the operator is loading or unloading the unit. Sterilizer doors in the closed position provide more efficient use of jacket steam and in addition, building air conditioning load is also conserved. Better dimensional stability is provided when doors are maintained closed, especially on larger sterilizers. Doors returned to the closed position after loading/unloading provide an additional margin of safety especially on double door units. In addition, the operator can start a cycle without physically closing the opposite side door. The function of the Operator Panel [DOOR] button is dependent on the following: A. SINGLE DOOR MODELS: MANUALLY OPERATED VERTICAL SLIDING DOORS Completion of cycle will cause automatic retraction of the door gasket, so the door may be opened. If door gasket does not retract, pressing the [DOOR] button should provide the vacuum required to retract the gasket, so the door may be opened. If the [DOOR] button must be used to open the door, equipment failure may have occurred. Inform maintenance personnel. To Operate: Press and hold until door gasket begins release (about two seconds). B. DOUBLE DOOR MODELS: Completion of cycle will cause automatic retraction of both door gaskets, Load: A-side and Unload: B- side, so either door may be opened. If door gasket does not retract, pressing the [DOOR] button should provide the vacuum required to retract the gaskets so the door may be opened. If use of the [DOOR] GP PSS5 Part III / S. 25 th Street Omaha NE Tel: (402) FAX: (402)
53 USER S MANUAL Page 15 button is required, inform maintenance personnel. To Operate: Press and hold until door gasket begins release (about two seconds). GP PSS5 Part III / S. 25 th Street Omaha NE Tel: (402) FAX: (402)
54 USER S MANUAL Page 16 C. DOUBLE DOOR MODELS WITH BIOSEAL: Double Door Bioseal sterilizers incorporate an additional door control feature intended to maintain biological separation through Door Interlock. This additional door control feature is achieved through use of the [DOOR] button as follows: a. In most cases, cycles are initiated from the A-Side. Once the cycle is completed, the B-side gasket automatically retracts. However, the A side door gasket is not retracted and the door on side A remains sealed. At this point the sterilizer assumes that the B-door will be opened, but either door may be opened. If the expected B-side is opened, the A-side gasket remains sealed and the A-side door is prevented from opening until the B-side door is closed and sealed. When the door on side-b has been closed, the B-side is immediately resealed, and the A-side gasket is retracted. The A-side door may now be opened. NOTE Either side applies to only those sterilizers manufactured to provide both Pass Through (A to B), and either Return processing flow feature (A to A, or B to B). In Bioseal sterilizers limited to the optional feature of Pass Through only processing flow, only door B may be opened at conclusion of cycle. Also note that complete operational control of sterilizers (through the Operator Control) is only possible on the side with the door open. With one door open, the Operator Control on the side with the door closed will be limited to display only. Both sides will present identical messages at all times. b. Alternately, if the door on the A-side is to be opened, the [DOOR] button on the A side must be pressed. Once pressed, the gasket on the B-side immediately reseals the B door. When the B-door is resealed, the A-door gasket retracts and the A-door may now be opened. This sequence of events occurs rapidly. A. SINGLE DOOR MODELS POWER OPERATED VERTICAL SLIDING DOORS Completion of cycle will automatically retract the door gasket. Once the door is fully open, the power door will close by pressing the [DOOR] button until the door is completely closed. The [DOOR] button must remain pressed until the door completely closes. NOTE NOTE All Vertical Sliding Power Doors feature a Mushroom Button as standard or a Kick Panel as an option used as the [DOOR] button. The power door cannot be opened once the door gasket is charged and the cycle has started, the door can only be opened at the end of a cycle after the door gasket is retracted. 117 S. 25 th Street Omaha NE Tel: (402) FAX: (402) GP PSS5 Part III /063008
55 USER S MANUAL Page 17 A. SINGLE DOOR MODELS: POWER OPERATED HORIZONTAL SLIDING DOORS Horizontal Power Door models always requires pressing the [DOOR] button to open, or close doors. Completion of cycle will automatically retract the door gasket. To Open: Press and release the [DOOR] button (approximately 2 seconds), and the door will automatically open. To Close: Press and hold the [DOOR] button until the door is completely closed. If the [DOOR] button is released before door is fully closed the door will automatically return to the door open position. Once the door is completely open the door will also shut manually. B. DOUBLE DOOR MODELS: Horizontal Power Door models always require pressing the [DOOR] button to open, or close doors. Completion of cycle will automatically retract the door gasket. To Open: Press and release the [DOOR] button (approximately 2 seconds), and the door will automatically open. To Close: Press and hold the [DOOR] button until the door is completely closed. If the [DOOR] button is released before door is fully closed the door will automatically return to the door open position. Once the door is completely open the door will also shut manually. C. DOUBLE DOOR MODELS WITH BIOSEAL: Double Door sterilizers with Bioseal incorporate an additional door control feature intended to maintain biological separation through the Door Interlock feature. This additional door control feature is achieved through use of [DOOR] button as follows: a. In most cases, cycles are initiated from the A-Side. Once the cycle is completed, the B-Side gasket retracts. The A-side door gasket is not retracted and the door remains sealed. At this point the sterilizer assumes that the B door will be opened, but either door may be opened. If the expected B-side is opened, the A-side gasket remains sealed and the A-side door is prevented from opening until the load has been removed from the B-side. Once the door on side B has been closed, and the A-side [DOOR] button pressed (and held); the B-side is immediately resealed and the A-side gasket is retracted. As the [DOOR] button remains pressed, the door on the A-side will begin to open. The [DOOR] button must remain depressed until the door is completely open. b. Alternately, if the [DOOR] button on side A is pressed (and held); the gasket on the B-side immediately reseals the B-door. Once the B-door is resealed, the A-door gasket retracts and the door A-door begins to open. GP PSS5 Part III / S. 25 th Street Omaha NE Tel: (402) FAX: (402)
56 USER S MANUAL Page 18 NOTE It may help to remember the following rule: Anytime the Side A Door is opened, a successful cycle must be run to enable opening the Side B Door. The above features are incorporated to further reduce your chance of cross contamination. THE STERILIZER DOOR IS DESIGNED TO NOT OPEN UNTIL CHAMBER PRESSURE IS APPROXIMATELY AT ATMOSPHERIC PRESSURE. ATTEMPTING TO FORCE THE DOOR OPEN WHILE UNDER PRESSURE MAY DAMAGE THE DOOR OR CAUSE SERIOUS INJURY! GP PSS5 Part III / S. 25 th Street Omaha NE Tel: (402) FAX: (402)
57 USER S MANUAL Page Loading the Sterilizer NEVER OVERLOAD THE STERILIZER OR STERILIZATION MAY NOT BE ACHIEVED. APPROPRIATE STERILIZER LOADING MUST BE DETERMINED ACCORDING TO PUBLISHED STANDARDS (I.E., AAMI). CAREFULLY DOCUMENT LOAD PERFORMANCE STUDIES (PERFORMANCE QUALIFICATION). IF THERE IS ANY DOUBT REGARDING THE CORRECT CYCLE FOR ANY STEAM STERILIZATION REQUIREMENT OR WHETHER AN ITEM WILL WITHSTAND STEAM STERILIZATION, CONTACT THE MANUFACTURER OF THE ITEM TO BE STERILIZED FOR RECOMMENDATIONS. LIQUID CYCLES ARE INTENDED ONLY FOR THE STERILIZATION OF LIQUIDS. DO NOT USE ANY OTHER CYCLE FOR LIQUIDS. WHEN PROCESSING LIQUIDS IN THE STERILIZER USE CONTAINERS WITH VENTED CLOSURES. DO NOT USE SCREW CAPS OR RUBBER STOPPERS WITH A CRIMPED SEAL. USE ONLY TYPE I BOROSILICATE (PYREX) GLASS BOTTLES. DO NOT USE ORDINARY GLASS BOTTLES OR ANY CONTAINERS THAT ARE NOT DESIGNED FOR STERILIZATION. FAILURE TO USE APPROVED CONTAINERS MAY RESULT IN VIOLENT AGITATION OF THE LIQUIDS, BOILING, OR BOTTLE EXPLOSION. USE CLOSURES MANUFACTURED FOR THE CONTAINERS USED, OTHERWISE, STERILIZE WITHOUT CAPS. NEVER STERILIZE SEALED CONTAINERS IN A CYCLE OTHER THAN A LIQUIDS CYCLE. SLOW EXHAUST PROHIBITS A RAPID CHANGE IN PRESSURE BETWEEN THE CONTENTS OF PARTIALLY VENTED OR SEALED CONTAINERS AND THE PRESSURE BEING RELIEVED IN THE CHAMBER. RAPID CHANGES MAY LEAD TO EXPLOSIONS OF SEALED GLASS CONTAINERS. SLOW EXHAUST ALSO ALLOWS MORE COMPLETE REMOVAL OF VAPOR CREATED DURING STERILIZATION OF LIQUIDS. Packs requiring an identical exposure cycle may be sterilized in the same load. Loading procedures must allow for free circulation of steam around each pack. Materials capable of holding water, such as solid bottomed pans, basins, and trays, should be arranged (normally on their sides) so that if water is present, the water will drain out. Placing packs with metal items above linen items should be avoided. Never obstruct the drains in the bottom of the chamber. Shelving or other supports must be used to raise the load above the bottom of the chamber. The load should be positioned to avoid contact with all chamber surfaces, including door(s), so that steam penetration to the load is not obstructed. GP PSS5 Part III / S. 25 th Street Omaha NE Tel: (402) FAX: (402)
58 USER S MANUAL Page Unloading the Sterilizer LOADING CARTS, SHELVING, AND THE INTERIOR OF THE STERILIZER ARE HOT. CARE MUST BE TAKEN TO AVOID SKIN CONTACT. GLOVES AND OTHER PERSONAL PROTECTIVE EQUIPMENT SHOULD ALWAYS BE WORN WHEN UNLOADING ITEMS FROM THE STERILIZER. EYE PROTECTION SHOULD ALSO BE WORN WHEN STERILIZING GLASS CONTAINER LOADS. Extreme care should always be taken when unloading sterilizer at the end of a cycle. If loading carts have been used for sterilization, then items should remain on cart until adequately cooled. They should not be touched during the cooling process. During cooling, the sterilizer cart should be placed in a low traffic area where there are no cold air vents in close proximity. Warm items should never be transferred from the cart to cold metal racks or shelves for cooling Shutdown Sterilizer Off Press [OFF] button on touchpad to turn sterilizer off Power Off Turn power off using Power-off toggle (Circuit Breaker) Switch on side of the control box. GP PSS5 Part III / S. 25 th Street Omaha NE Tel: (402) FAX: (402)
59 USER S MANUAL Page Alarms, Timeouts, User Advance and Loss of Power If the parameters of each phase are satisfied, PRIMUS sterilizer controls are designed to progress through each phase. Should an exception (alarm, timeout, user advance (by pressing the ADV key) or loss of power) error occur, a message will appear on the touchpad LCD display and printout. In addition, a buzzer sounds with all door and door gasket alarms. If no response is made within 30 seconds, the unit auto-advances (printout will read AUTO ABORT ). Cycle timeouts will print out the specific timeout that occurred with no audible alarm and cycle will be auto-advanced to exhaust. If the user advances the cycle before the Sterilize Phase is complete, Door Gasket A will retract at Cycle Complete. If the user advances the cycle after Sterilizer Phase, Door Gasket B will retract at Cycle Complete. Refer to the following table for alarms, timeout and loss of power information. Alarms and Timeouts are as follows:: ALARM/WARNINGS SYMPTOM CAUSE/SOLUTION AUDIBLE ALARM CONDITION: Door not closed during cycle DISPLAYED: DOOR NOT CLOSED PRINTOUT: DOOR NOT CLOSED AUDIBLE ALARM CONDITION: Door gasket not charged during cycle DISPLAYED: GASKET ERROR PRINTOUT: DOOR GASKET ERROR Door switch out of adjustment or broken. Door gasket seal is lost. Steam pressure low. Press [1] (ABORT) - Advances to Exhaust Phase Press [2] (RETRY) - Checks to see if problem still exists Press [3] (Ignore) Ignores problem If problem continues call maintenance technician. Press [1] (ABORT) - Advances to Exhaust Phase Press [2] (RETRY) - Checks to see if problem still exists Press [3] (Ignore) Ignores problem If problem continues call maintenance technician. THIS STERILIZER USES A PRESSURIZED GASKET TO CONTAIN CHAMBER PRESSURE. IF GASKET PRESSURE FAILS, STEAM MAY BE RELEASED INTO THE ROOM. NOTIFY QUALIFIED SERVICE PERSONNEL. GP PSS5 Part III / S. 25 th Street Omaha NE Tel: (402) FAX: (402)
60 USER S MANUAL Page 22 ALARM/WARNINGS SYMPTOM CAUSE/SOLUTION AUDIBLE ALARM CONDITION: Chamber temperature exceeds over temperature alarm offset during the sterilization phase of the cycle DISPLAYED: OVER TEMPERATURE PRINTOUT:!OVER TEMPERATURE! AUDIBLE ALARM CONDITION: Chamber temperature drops below under temperature alarm offset during the sterilization phase of the cycle DISPLAYED: LOW TEMPERATURE PRINTOUT:!UNDER TEMPERATURE! TIMEOUT CONDITION: Heat Chamber phase of cycle has exceeded the heat chamber time-out setpoint DISPLAYED: PRINTOUT: TIMEOUT: STEAM TO CHAMBER RETARDED AUTO ADVANCING Temperature increases above the preset limits. Temperature falls below the preset limits. Chamber does not reach STERILIZE TEMP within time specified by heat chamber time-out setpoint. Press [START] to retry. If problem persists, press [ADV] to end cycle and call maintenance technician. Press [START] to retry. If problem persists, press [ADV] to end cycle and call maintenance technician. No response required by the user. Cycle auto-advances. The following message will flash on the display and print out CYCLE MAY BE COMPRISED. Call maintenance technician. 117 S. 25 th Street Omaha NE Tel: (402) FAX: (402) GP PSS5 Part III /063008
61 USER S MANUAL Page 23 TIMEOUT ALARM/WARNINGS CONDITION: PRECHARGE PHASE OF CYCLE HAS EXCEEDED THE PRECHARGE TIME-OUT SETPOINT DISPLAYED: PRINTOUT: TIMEOUT: STEAM TO CHAMBER RETARDED PRECHARGE TIMEOUT AUTO ADVANCING TIMEOUT CONDITION: Prevac phase of cycle has exceeded the prevac time-out setpoint DISPLAYED: PRINTOUT: TIMEOUT: IN AIR REMOVAL PREVAC TIMEOUT AUTO ADVANCING TIMEOUT CONDITION: Post-Vac phase of cycle has exceeded the post-vac time-out setpoint DISPLAYED: PRINTOUT: TIMEOUT IN POST VACUUM AUTO ADVANCING SYMPTOM PRECHARGE parameter not reached. Vacuum setpoint not reached in time allowed by PREVAC time-out. Post-Vac vacuum setpoint not reached in time allowed by Post-Vac time-out. CAUSE/SOLUTION Maintenance required - call technician. Cycle auto-advances to cycle complete. Lights flash LOAD MAY BE COMPRISED. Maintenance required - call technician. Maintenance required - call technician. 117 S. 25 th Street Omaha NE Tel: (402) FAX: (402) GP PSS5 Part III /063008
62 USER S MANUAL Page 24 ALARM/WARNINGS SYMPTOM CAUSE/SOLUTION LOSS OF POWER CONDITION: Loss of power during cycle DISPLAYED: ERROR LOAD MAY BE COMPROMISED PRINTOUT: POWER FAILURE DETECTED AUTOMATIC POWER-UP AUTO ADVANCING Hot Liquid in Chamber Power interrupted during cycle. (Someone pulls the plug or the wall power fails) Displayed at the end of the Liquid Cycle. If power fluctuation no user response required, unit autoadvances when power is restored. If no power user should check power source. This is a normal warning, no user action required. 117 S. 25 th Street Omaha NE Tel: (402) FAX: (402) GP PSS5 Part III /063008
63 USER S MANUAL Page 25 SECTION 4.0 PROGRAMMING CYCLE PARAMETERS Cycle numbers 1 7 have four available types of sterilizer cycles. VACUUM, GRAVITY, LIQUIDS, or TEST (VAC), have settable parameters that can be changed by the end user (see paragraph 4.3) and then stored in one of seven cycle numbers. Cycle number 8 is pre-configured for Vacuum Leak Test for units configured with that option (see Part IV, Maintenance manual for Vacuum Leak Test setup and operation). To configure a cycle, press the numbered button according to the desired cycle number to be set, changed, or reviewed. Cycle numbers 1-4 are selected by pressing the corresponding button [ 1 ], [ 2 ], [ 3 ], [ 4 ], cycle numbers 5-8 are selected by pressing [ ] [ 1 ], [ ] [ 2 ], [ ] [3 ], and [ ] [4]. NOTE The Password Protection feature may be used to provide controlled access to the entry or alteration of cycle parameters. For instructions, refer to paragraph Parameter Definitions The following terms and definitions explain the parameters of the cycles depicted in Figure 4.1-1, Cycle Menu Configuration. STERILIZE TIME STERILIZE TEMP DRY TIME/LIQ COOL TIME PURGE TIME PRECHARGE The amount of time spent in Sterilize phase (exposure time). The temperature at which the unit will begin the Sterilize phase. The time spent removing moisture/cooling the chamber. The time spent trying to remove air from the chamber (Air removal). The pressure to be achieved during charge portion of all PREVAC phases selected. This setting applies to all pulses (1-6). PREVAC VAC PNT This sets the vacuum point end point for pulses 3, 4, 5 and 6. Pulse 1 has a fixed vacuum end point of 5.0 InHg and pulse 2 has a fixed vacuum end point of 10.0 InHg. HALF-RAMP TIME FINAL RAMP SLP BOOST OFFSET (Optional) LOADP TEMP (Optional) The amount of time in which the sterilizer will climb from its current temperature halfway to the STERILIZE TEMP. Once the HALF-RAMP TIME is satisfied, the controller will ramp the chamber temperature to the STERILIZE TEMP in this amount of temperature per minute. The number of degrees below STERILIZE TEMP where the large steam valve is no longer operated, and a small steam valve begins to operate (Preventing overshoot). NOT ON ALL UNITS. Load Probe Temperature at which the sterilization phase will begin. Maximum temperature setpoint is 1 (one degree) less than STERILIZATION TEMP. 117 S. 25 th Street Omaha NE Tel: (402) FAX: (402) GP PSS5 Part III /063008
64 USER S MANUAL Page 26 PREVAC VACTIME DRY VAC POINT The time spent in vacuum after the PRE-VAC VAC PNT is reached while in PREVAC phase The vacuum pressure that the sterilizer will try to reach before it starts to decrement the DRY TIME setting (on Post-Vacs #1 through #6). # OF PREVACS The number of pulses the sterilizer will pull a vacuum before STERILIZE. # OF POSTVACS The number of pulses the sterilizer will pull a vacuum after STERILIZE. SLOW EX END PNT SLOW EXH. RAMP The end point to be reached while in the SLOW EXHAUST phase. (LIQUIDS CYCLES ONLY) The rate at which the chamber will decrease in pressure after STERILIZE until SLOW EX END PNT is reached (To prevent boil over). 117 S. 25 th Street Omaha NE Tel: (402) FAX: (402) GP PSS5 Part III /063008
65 USER S MANUAL Page 27 MENU GRAVITY VACUUM LIQUIDS TEST (VAC) VAC LEAK TEST - STERILIZE TIME - STERILIZE TEMP - DRY TIME - PURGE TIME - PRECHARGE - (PREVAC) VAC PNT - (PREVAC) VAC TIME - HALF-RAMP TIME - FINAL RAMP SLP - BOOST OFFSET* - LOAD P TEMP* - DRY VAC POINT - # OF PREVACS - # OF POSTVACS - STERILIZE TIME - STERILIZE TEMP - DRY TIME - PURGE TIME - PRECHARGE - (PREVAC) VAC PNT - (PREVAC) VAC TIME - HALF-RAMP TIME - FINAL RAMP SLP - BOOST OFFSET* - LOAD P TEMP* - DRY VAC POINT - # OF PREVACS - # OF POSTVACS - STERILIZE TIME - STERILIZE TEMP - LIQ COOL TIME - PURGE TIME - PRECHARGE - (PREVAC) VAC PNT - (PREVAC) VAC TIME - HALF-RAMP TIME - FINAL RAMP SLP - BOOST OFFSET* - LOAD P TEMP* - UNUSED - # OF PREVACS - SLOW EX END PNT - SLOW EXH. RAMP - STERILIZE TIME - STERILIZE TEMP - DRY TIME - PURGE TIME - PRECHARGE - (PREVAC) VAC PNT - (PREVAC) VAC TIME - HALF-RAMP TIME - FINAL RAMP SLP - BOOST OFFSET* - LOAD P TEMP* - DRY VAC POINT - # OF PREVACS - # OF POSTVACS - VACUUM LEVEL *NOTE: Optional items available only if the sterilizer is configured for these options FIGURE CYCLE MENU CONFIGURATION GP PSS5 Part III / S. 25 th Street Omaha NE Tel: (402) FAX: (402)
66 USER S MANUAL Page Programming To review or change the parameters of the selected cycle number, press [MENU] on the Vertical touchpad or [STER TEMP], [STER TIME], or [DRY TIME] button on the Horizontal touchpad. The first parameter displayed is CYCLE TYPE. The cycle type can be changed to either, GRAVITY, VACUUM, LIQUID, or TEST (VAC). See Tables through for a description of the cycle parameters relative to the types of cycles. To change the cycle type at this cycle number, press [ENTER] followed by scroll [ ] to display the different cycles. When the desired cycle is displayed, press [ENTER] to make the cycle selection. Press [ ] to scroll to the next settable parameter. Each parameter can be set by pressing [ENTER] then scrolling [ ] or [ ] to change the parameter value. When the LED on the [*] button is lit, the control is in rapid advance. To advance the control in smaller increments, press the [*] and the LED will turn off. The controller is now in slow advance. Once the parameter is set, press [ENTER] and scroll [ ] to the next parameter. After the last parameter is set, press [ADV] to return to the idle screen for operation. Pressing [ADV] any time during the process will exit the control to the next level. For units with the optional Vacuum Leak Test, to review or change the parameter of cycle #8 press [MENU] on the vertical touchpad or [STER TEMP], [STER TIME], or [DRY TIME] button on the Horizontal touchpad. See Table for a description of the cycle parameters relating to cycle #8 (Vacuum Leak Test). CYCLES THAT HAVE BEEN MODIFIED FROM FACTORY PRESET VALUES MUST BE VALIDATED BY THE END USER GP PSS5 Part III / S. 25 th Street Omaha NE Tel: (402) FAX: (402)
67 USER S MANUAL Page 29 The various parameters, setting descriptions, and set point ranges are found in the index below. Cycle Parameters definitions are found in paragraph 4.1. PARAMETER UNIT RANGE STERILIZE TIME MIN:SEC 3: :30 STERILIZE TEMP DEG C (F) 70.0 C (158.0 F) C (280.4 F) DRY TIME MIN:SEC 0: :00 PURGE TIME MIN:SEC 0:00-60:00 PRECHARGE PSIG PREVAC VAC PNT InHg 0-29 PREVAC VACTIME MIN:SEC 0:00 30:00 HALF-RAMP MIN:SEC 0:01-16:40 FINAL RAMP SLP DEG/MINUTE C ( F) BOOST OFFSET 3 DEG C (F) C ( F) LOADP TEMP #1 4 DEG C (F) C ( F) DRY VAC POINT InHg 0-29 # OF PREVACS # 0 6 # OF POSTVACS # Minimum range is set in CAL mode SETPOINTS MENU MIN. STERILIZE 2 Minimum range is set in CAL mode SETPOINTS MENU MINIMUM DRY TIME 3 Requires additional steam to chamber valve 4 Optional Load Probe Control 5 Low end vacuum level is dependent on the vacuum system capabilities TABLE GRAVITY CYCLE PARAMETERS PARAMETER UNITS RANGE STERILIZE TIME MIN:SEC 3: :30 STERILIZE TEMP DEG C (F) 70.0 C (158.0 F) C (280.4 F) DRY TIME MIN:SEC 2: :00 PURGE TIME MIN:SEC 0:00-60:00 PRECHARGE PSIG PREVAC VAC PNT InHg 0-29 PREVAC VACTIME MIN:SEC 0:00-30:00 HALF-RAMP MIN:SEC 0:01-16:40 FINAL RAMP SLP DEG/MIN C ( F) BOOST OFFSET 3 DEG C (F) C ( F) LOADP TEMP #1 4 DEG C (F) C ( F) DRY VAC POINT InHg 0-29 # OF PREVACS # 0-6 # OF POSTVACS # Minimum range is set in CAL mode SETPOINTS MENU MIN. STERILIZE 2 Minimum range is set in CAL mode SETPOINTS MENU MINIMUM DRY TIME 3 Requires additional steam to chamber valve 4 Optional Load Probe Control 5 Low end vacuum level is dependent on the vacuum system capabilities TABLE VACUUM CYCLE PARAMETERS GP PSS5 Part III / S. 25 th Street Omaha NE Tel: (402) FAX: (402)
68 USER S MANUAL Page 30 PARAMETER UNITS RANGE STERILIZE TIME MIN:SEC 3: :30 STERILIZE TEMP DEG C (F) 70.0 C (158.0 F) C (308 F) 2 LIQ COOL TIME MIN:SEC 0:00-239:00 PURGE TIME MIN:SEC 0:00-60:00 PRECHARGE PSIG (PREVAC) VAC PNT InHg 0-29 (PREVAC) VACTIME MIN:SEC 0:00-30:00 HALF-RAMP MIN:SEC 0:01-16:40 FINAL RAMP SLP DEG/MIN C ( F) BOOST OFFSET 3 DEG C (F) C ( F) LOADP TEMP #1 4 DEG C (F) 70.0 C (158.0 F) C (308 F) UNUSED N/A N/A # OF PREVACS # 0-6 SLO EX END PNT PSIG/InHg 12.0 PSIG InHg SLOW EXH. RAMP PSI/MINUTE 0.1 to Minimum range is set in CAL mode SETPOINTS MENU MIN. STERILIZE 2 Maximum range is set in CAL mode SETPOINTS MENU MAX LIQUID TEMP 3 Requires additional steam to chamber valve 4 Optional Load Probe Control 5 Low end vacuum level is dependent on the vacuum system capabilities TABLE LIQUIDS CYCLE PARAMETERS GP PSS5 Part III / PARAMETER UNITS RANGE STERILIZE TIME MIN:SEC 3: :30 STERILIZE TEMP DEG C (F) 70.0 C (158.0 F) C (280.4 F) DRY TIME MIN:SEC 2: :00 PURGE TIME MIN:SEC 0:00-60:00 PRECHARGE PSIG PREVAC VAC PNT InHg 0-29 PREVAC VACTIME MIN:SEC 0-30:00 HALF-RAMP MIN:SEC 0:01-16:40 FINAL RAMP SLP DEG/MIN C ( F) BOOST OFFSET 3 DEG C (F) C ( F) LOADP TEMP #1 4 DEG C (F) C ( F) DRY VAC POINT InHg 0-29 # OF PREVACS # 0-6 # OF POSTVACS # Minimum range is set in CAL mode SETPOINTS MENU MIN. STERILIZE 2 Minimum range is set in CAL mode SETPOINTS MENU MINIMUM DRY TIME 3 Requires additional steam to chamber valve 4 Optional Load Probe Control 5 Low end vacuum level is dependent on the vacuum system capabilities TABLE TEST(VAC) CYCLE PARAMETERS 117 S. 25 th Street Omaha NE Tel: (402) FAX: (402)
69 USER S MANUAL Page 31 PARAMETER UNITS RANGE VACUUM LEVEL SETPOINT InHg 0-29 TABLE OPTIONAL VAC LEAK TEST CYCLE PARAMETERS 4.3 Password Protection The Password Protection feature may be used to provide controlled access to the entry or alteration of cycle parameters. Password Protection Stored cycle parameters can be protected by a supervisor password. 1. Assure controller is in idle mode. Cycle type and jacket temperature should be displayed on the LCD. Press [ADV] to exit to idle mode. 2. Press upper right [ ] button on the Primus logo to access password function. 3. Enter current password 4. Controller prompts for new password 5. Enter new password 6. 0 means controller is not password protected When changes are attempted to the cycle parameters, the operator will be prompted for a password. If the incorrect password is entered, the LCD will display LOCKED FEATURE. GP PSS5 Part III / S. 25 th Street Omaha NE Tel: (402) FAX: (402)
. This section provides information for loading paper into the 24 Column Printer.")
70 USER S MANUAL Page 32 SECTION 5.0 Printer User Maintenance The standard printer for the PRIMUS General Purpose sterilizer is a compact, 24 column thermal printer (refer to Figure 5.1-1, Front Panel - 24 Column Printer). This section provides information for loading paper into the 24 Column Printer. Refer to the manufacture s User s Manual for user maintenance on all other Printers and Recording devices. 5.1 Thermal Dot Matrix Printer (Cybertech) The multifunctional, thermal dot matrix printer is located on the fascia panel of the sterilizer, near the Operator Interface. All printer-operating controls are located on the front of the printer. Figure 5.1 Thermal Dot-Matrix Printer Printer Reprint/Feed Switch When the printer is first powered on and the REPRINT switch is momentarily pressed, a test print will occur (refer to Figure 5.1, Thermal Dot-Matrix Printer). Once a cycle report is sent to the printer, it can be reprinted by momentarily pressing the REPRINT switch. Pressing the FEED switch will advance the paper. GP PSS5 Part III / S. 25 th Street Omaha NE Tel: (402) FAX: (402)
71 USER S MANUAL Page 33 NOTE If the switch is in the FEED position at power up the printing will be upside down. Note this condition stays set until the same FEED switch on power up cycle is repeated. The status LED will be on in normal operation. A flashing LED indicates the printer has a fault condition. The fault may be out of paper, print head in the open position, or the printer is over temperature Loading Paper The following steps should be followed to load the printer with paper. 1. Open the clear acrylic front cover of printer to access the paper take-up compartment. 2. If needed, follow steps in , Unloading Paper From the Take-Up Spool to remove any printed reports. 3. Open the paper supply compartment and remove any unused paper and the paper core. 4. Insert the new paper into the paper compartment with loose end of paper exiting front of printer (see Figure 5.1.2, Loading Thermal Printer Paper). The front panel LED should be flashing. Figure Loading Thermal Printer Paper 5. Close the paper supply compartment with paper exiting printer and ensure that the paper is properly aligned. The LED should now be ON continuously. 6. Depress the REPRINT/FEED switch to the REPRINT position switch. If there is no image on the paper, either the paper is in the printer backwards or the paper is not GP PSS5 Part III / S. 25 th Street Omaha NE Tel: (402) FAX: (402)
72 USER S MANUAL Page 34 thermal paper. Reverse the paper, or replace with thermal paper to correct this condition Loading Printer Take-Up Spool 1. The removable spool snaps between the two rotating discs (see Figure 5.1.3, Loading Printer Take-Up spool). The slot in the removable spool must be aligned with the drive pin on the right side of the disc. Figure Loading Printer Take-Up Spool 2. Place the end of the spool onto the left side disc hub and apply slight pressure to move the spring loaded disc (use the paper release handle to assist). Then place the left end of the spool onto the right side disc hub making sure to align the drive pin. 3. Place the loose end of the paper exiting the printer into the slot in the removable spool. Fold the end of the paper into a V before placing into the slot to secure the paper in the spool. 4. Depress the REPRINT/FEED switch to the FEED position to feed and take up the paper. Do this until all the paper slack is taken up Unloading Paper From The Take-Up Spool 1. If there is still paper in the printer, tear off the paper using the printer cut off bar. 2. Align the finger slots on both the right and left side discs. GP PSS5 Part III / S. 25 th Street Omaha NE Tel: (402) FAX: (402)
73 USER S MANUAL Page While grasping the paper roll in the take-up area, push the paper release to the left. (See Figure 5.1.3, Loading Printer Take-Up Spool) 4. Pull the roll out of the take-up area and if necessary gently move it side to side to clear the hubs on the discs. 5. Retrieve the take-up spool by pushing it out of the roll of paper. 5.2 Thermal Printer with Take-Up Reel (Keltron Optional) The printer is located on the fascia panel near the Operator Interface. All printer-operating controls are located on the front of the printer. FEED PWR EOP TEST PRIMUS DAILY LOAD NO.. 4 STERILIZER NO.. 1 DATE..X/XX/XXXX CYCLE #1 VACUUM *********************** * * * MANUFACTURED BY * * PRIMUS STERILIZER * * COMPANY, INC. * * OMAHA, NE * * * * SW DATE XXXX * * SW P/N XX-XXXX * * * *********************** XX XXX Figure Thermal Printer Front Panel (Optional Keltron) GP PSS5 Part III / S. 25 th Street Omaha NE Tel: (402) FAX: (402)
74 USER S MANUAL Page Printer Indicators and Control POWER ON indicator - The green LED, labeled (PWR), is on if power is applied to the printer. Paper - Out/Printer - Ready indicator - The yellow LED, labeled (EOP), provides the following: 1. When the yellow LED is lit, the printer is ready to print. 2. When the EOP yellow LED is lit and blinks at 1 second intervals, the printer is out of paper. The full buffer (memory) is indicated with a rapid blinking rate. 3. Two membrane switch buttons are located on the front panel. These buttons are identified as [FEED] and [TEST]. The functions of these buttons are as follows: [FEED] is used to advance paper. Each time [FEED] is pressed; the paper will advance one line. [TEST] is used to test the printer. If pressed when the printer is on-line, the version of the printers operating program is printed Tearing Paper Strip The paper cutting edge of the printer is the top edge of the paper opening. To tear the paper, hold the paper from the right side and pull the paper up against the cutting edge while moving your hand up and to the left Thermal Paper The Thermal Printer paper is permanent for 10 years. DO NOT OVERRIDE THE FACTORY SETTING THAT EVACUATES STEAM FROM THE CHAMBER AT CYCLE COMPLETE. CONTACT WITH STEAM WILL OBLITERATE PRINTED COPY. ALWAYS MAINTAIN A DRY TIME SUFFICIENT TO EVACUATE THE CHAMBER OF ALL RESIDUAL STEAM. PRIMUS has long recognized the potential danger to an operator from residual steam when opening the door upon completion of a cycle. To protect the operator, PRIMUS incorporates a factory setting to evacuate the chamber of steam prior to releasing the door to be opened. Steam contacting the paper will obliterate printed copy and is an indication of unsafe operation. If the operator chooses to operate in an unsafe manner, printer paper should be torn from the printer prior to opening the door. GP PSS5 Part III / S. 25 th Street Omaha NE Tel: (402) FAX: (402)
75 USER S MANUAL Page Paper Replacement When the printer is out of paper, the yellow (EOP), out-of-paper LED will blink at 1 second intervals. PRIMUS recommends that the paper be replaced when the end-of-paper indicator appears at the edge of the paper. The end-of-paper indicator is usually a red line on the edge of the paper strip. The use of PRIMUS printer paper is recommended. DO NOT RUN ANOTHER CYCLE AFTER THE RED LINE APPEARS. The paper compartment is located behind the front bezel. To access the paper tray assembly and replace paper, proceed as follows: 1. Prepare a roll of 2¼" wide thermal printer paper. (See Part IV, Maintenance Manual, for the spare parts lists). 2. Printer power must be ON to replace the paper. 3. To access the printer tray assembly, pull the front bezel forward and down. Bezel is hinged and latched magnetically. NOTE When the printer is out of paper, it is placed Off-line automatically. The Yellow LED will be BLINKING for the out of paper indication. When the paper is replaced the printer will automatically be placed back on-line. 4. Insert a new roll of paper on the paper holder axle and guide the edge of the paper into the printer mechanism paper input. Exposed circuit components do not contain perceptible voltages, but care should be taken to avoid damaging delicate electronic components. Thread the paper as shown in Figure with the paper coming off the top of the roll rather than the bottom of the roll. The Thermal Printer has an autofeed feature simply line the paper up in the slot and the printer mechanism will grab and pull it through to the front. 5. After loading paper press feed button on face of printer until sufficient quantity of paper is fed to insert into take-up slot and put 3-4 wraps onto take-up reel spool. 6. After rolling excess paper onto take-up reel spool, place spool into holder making sure drive gears mesh. GP PSS5 Part III / S. 25 th Street Omaha NE Tel: (402) FAX: (402)
76 USER S MANUAL Page 38 Figure Paper Loading 7. When the paper is replaced the printer is automatically placed on-line. 8. Close printer case up to fascia until magnetic latch engages. GP PSS5 Part III / S. 25 th Street Omaha NE Tel: (402) FAX: (402)
77 USER S MANUAL Page Impact Printer (optional) Figure Front Panel - 24 Column Printer Printer Indicators and Control POWER ON indicator - The green LED, labeled DTR, is ON if power is applied to the printer. Paper Out / Printer Ready indicator / Buffer Full - The yellow LED, labeled EOP, provides the following: 1. When the yellow LED is lit, the printer is ready to print. 2. When the EOP yellow LED is lit and blinking, the printer is out of paper. 3. A rapid blinking rate indicates that the character buffer is full (the paper may need changing). 4. Two membrane push buttons are located on the front panel. These push buttons are identified as FEED and TEST. The functions of these buttons are as follows: The FEED button is used to advance paper. Each time the FEED button is pressed, the paper will advance one line. The TEST button is used to test the printer. If pressed when the printer is online, the printer s operating system version and related time/date is printed. GP PSS5 Part III / S. 25 th Street Omaha NE Tel: (402) FAX: (402)
78 USER S MANUAL Page Removing the Paper Report The paper cutting edge of the printer is located under the paper at the edge of the printer mechanism. To tear off the report, hold the paper from the right side and pull the paper down (snap it) against the cutting from right to left Paper Replacement When the printer is out of paper, the yellow EOP, out-of-paper LED will blink slowly. PRIMUS recommends that the paper be replaced when the end-of-paper indicator appears at the edge of the paper. The end-of-paper indicator is usually a red line on the edge of the paper strip. The use of PRIMUS printer paper is recommended. DO NOT RUN ANOTHER CYCLE AFTER THE RED LINE APPEARS. THE STERILIZER SHOULD BE TURNED OFF TO REPLACE THE PAPER, OR DATA IN THE STERILIZER CONTROL OR PRINTER BUFFER MAY BE LOST. The paper compartment is located behind the front bezel. To access the paper tray assembly and replace paper, proceed as follows: 1. Prepare a roll of 2¼" printer paper. (See Part IV, Maintenance Manual, for the spare parts lists). 2. Grasp the black edges of the printer front bezel and pull the printer forward from the operating position. 3. Lift the paper holder shaft and remove the expended paper core. 4. Insert a new roll of paper on the paper holder shaft and guide the edge of the paper into the printer mechanism paper input. Exposed circuit components do not contain perceptible voltages, but care should be taken to avoid damaging delicate electronic components. The paper path illustrated in Figure , shows the paper coming off the top of the roll, rather than from the bottom. Feed the paper forward, while pressing the FEED button, until paper feeds correctly through the front of the printer. GP PSS5 Part III / S. 25 th Street Omaha NE Tel: (402) FAX: (402)
79 USER S MANUAL Page 41 Figure Paper Loading 5. Carefully push the printer back into the operating position. This completes paper loading for the printer Ribbon Replacement 1. Remove the new ribbon cartridge from its plastic wrap. (reference Part IV, Maintenance Manual, Spare Parts List.). 2. Tighten the ribbon on the new cartridge by rotating the ribbed wheel on the front of the ribbon cartridge clockwise until the ribbon is taut. 3. Remove the old ribbon by placing a finger in the notched portion of the upper left corners of the paper slot marked PULL (refer to Figure , Printer Ribbon Replacement). Note the relationship of the paper ribbon and print head as the old ribbon is removed. 4. Press the FEED push button to run out 2 to 3 inches of paper. Slip the new ribbon over the paper and gently push the cartridge in place so the ribbon is positioned between the paper and the print head. GP PSS5 Part III / S. 25 th Street Omaha NE Tel: (402) FAX: (402)
80 USER S MANUAL Page 42 Figure Printer Ribbon Replacement GP PSS5 Part III / S. 25 th Street Omaha NE Tel: (402) FAX: (402)
81 USER S MANUAL Page 43 SECTION 6.0 CONTROL MEASURES FOR STERILITY ASSURANCE 6.1 Sterilizer Efficacy Sterilizer must be monitored routinely to evaluate its efficacy. Verify that appropriate cycle time, temperature, and pressure is met in each cycle using the Printer report for verification. Biological indicators and chemical indicators provide additional information on sterilization efficacy. When selecting biological and chemical indicators for saturated steam cycles, always inspect the indicator label. Verify the indicator is intended to monitor your specific cycle temperature. When performing routine monitoring. Place indicators in an appropriate test pack or your most challenging load. Place the test pack or load in the most difficult to sterilize chamber location. The most difficult to sterilize location in the Primus PSS 500 Series sterilizer is the lowest shelf closet to the drain. GP PSS5 Part III / S. 25 th Street Omaha NE Tel: (402) FAX: (402)
82 PRIMUS GENERAL PURPOSE STEAM STERILIZER PRIMUS PSS500 SERIES PART IV MAINTENANCE MANUAL PSS-500 Controls Software Version 7923 July 2, 2008 Version South 25th Street, Omaha, NE TE: (402) ; FAX (402) PRIMUS.MAN\PRIMUS.IOS/ South 25th Street, Omaha, NE TE: (402) ; FAX: (402)
83 , Omaha, NE by PRIMUS Sterilizer Company Printed in the United States of America Steam Sterilizer Installation, Operation, and Maintenance Manual V196 Controller Includes Bibliographical References GP PSS5 Part IV _07/ South 25th Street, Omaha, NE TE: (402) ; FAX (402)
84 TABLE OF CONTENTS Page i TABLE OF CONTENTS Page PART IV. MAINTENANCE MANUAL SECTION 1.0 PREVENTIVE MAINTENANCE Preventive Maintenance - Electrically Heated Units Only...5 SECTION 2.0 CONFIGURATION/CALIBRATION Turning on the Sterilizer Power Up Entering the Diagnostics Menu Setpoints Definitions Testing Outputs Testing Inputs Printer Diagnostics Sensor Diagnostics Entering EEPROM DIAGS Menu Entering CALIBRATE Menu Easy Cal Procedures CALIBRATING CHAMBER PRESSURE Calibration Procedure for Jacket and Chamber Temperature using Chamber Drain as the Heat Source Set Cycle Parameters Vacuum Leak Test (Optional)...27 SECTION 3.0 TROUBLESHOOTING Mechanical Electrical Software Effluent Sterilizer Error Handling Procedure...32 SECTION 4.0 PRINTER PAPER REPLACEMENT Loading Paper (Cybertech Printer) Loading Printer Take-Up Spool Unloading Paper From The Take-Up Spool Paper Replacement (Optional Keltron Printer)...35 SECTION 5.0 RECOMMENDED SPARE PARTS LIST...37 SECTION 6.0 DRAWINGS AND BILL OF MATERIALS Equipment Layout Major Plumbing List Piping and Instrument Diagram Electrical Diagram Major Electrical List...43 GP PSS5 Part IV _07/ South 25th Street, Omaha, NE TE: (402) ; FAX (402)
85 LIST OF FIGURES AND TABLES Page iii LIST OF FIGURES FIGURE PAGE Electronic Controller Loading Thermal Printer Paper (Cybertech Printer) Loading Printer Take-Up Spool (Cybertech Printer) PAPER LOADING (Optional Keltron Printer)...36 LIST OF TABLES TABLE PAGE Diagnostics Menu OUTPUT DIAGS Parameters INPUT DIAGS Parameters SENSOR DIAGS Parameters EEPROM Setpoints (Page 1 of 3) EEPROM Setpoints (Page 2 of 3) EEPROM Setpoints (Page 3 of 3) CALIBRATE Parameters Parameters Menu (Page 1 of 2) Parameters Menu (Page 2 of 2) SATURATED STEAM TABLE CORRECTED FOR ALTITUDE INCREMENTS OF 1000 FEET...26 GP PSS5 Part IV _07/ South 25th Street, Omaha, NE TE: (402) ; FAX (402)
86 MAINTENANCE MANUAL Page 1 SECTION 1.0 PREVENTIVE MAINTENANCE Maintenance procedures described in this section should be performed regularly at the intervals indicated to provide the longest useful life possible for your sterilizer. Refer to the maintenance log for daily, weekly, quarterly, annually, and as needed procedures. For units with optional steam generator (boiler) or a steam-to-steam generator refer to the additional maintenance recommendations in Appendix A, Manufacturer s Records. Refer to the recommended spare parts list (Section 5.0) for any replacement parts needed and call your service representative. Preventive Maintenance and failures resulting from a lack of preventive maintenance are not covered under warranty. Refer to Part 1, General Information, for full details. WHEN REMOVING ANY EQUIPMENT COVERS, OR ENTERING THE CHAMBER FOR MAINTENANCE, SHUT OFF ALL UTILITIES, AND ALLOW THE STERILIZER AND PIPES TO COOL PRIOR TO PERFORMING MAINTENANCE. CHECK SURFACE TEMPERATURES BEFORE ATTEMPTING WORK. USE HEAT RESISTANT PROTECTIVE CLOTHING AUTHORIZED BY THE SAFETY OFFICER EMPLOYED BY THE OWNER. DO NOT USE STEEL WIRE BRUSHES OR STEEL WOOL ON THE SURFACES OF THE CHAMBER OR THE CHAMBER DOOR. IF INTENSIVE CLEANING IS REQUIRED, USE NYLON BRUSHES OR CLEANING PADS, SUCH AS 3M SCOTCHBRITE, OR EQUIVALENT. WHEN CHECKING VESSEL SAFETY VALVES, AVOID THE DISCHARGE OUTLET OF THE SAFETY VALVE WHEN OPERATING THE PRESSURE RELEASE LEVER. THE HANDLE OF THE PRESSURE RELIEF VALVE MAY BE HOT. CARE SHOULD BE TAKEN TO AVOID BURNS WHEN TEST OPERATING THESE VALVES. Maintenance Required Daily Weekly Quarterly Annually AS NEED Clean Chamber and remove spill residue and staining If optional pin traps are used, remove and inspect for accumulation of residue such as, paper, fabric, or other materials. THIS IS VERY IMPORTANT FOLLOWING ANY BREAKAGE OF GLASS OR LOAD CONTAINERS. Remove and clean shelving, transfer carts, and loading equipment. A mild cleaning solution is recommended. If stubborn stains remain use detergent or a cleaner for stainless steel. Be sure to rinse thoroughly. Clean exterior stainless steel surfaces with Stainless Steel Polish. X X X X GP PSS5 Part IV _07/ South 25th Street, Omaha, NE TE: (402) ; FAX (402)
87 MAINTENANCE MANUAL Page 2 Maintenance Required Daily Weekly Quarterly Annually AS NEED Inspect the pneumatic lines, switches, and cylinder components. Remove lint and dirt from the areas. Test that door operates smoothly. Horizontal power doors move on an overhead beam/trolley assembly. The cylindrical lugs on the door (s) should mate smoothly with the tabs on the vessel. Wheel bearings in the trolley assemblies are sealed and do not require lubrication. Adjust the trolley assembly only if necessary. Remove the door gasket and determine the need for replacement or reseating. To remove gasket insert a flat blade screwdriver between the gasket groove and the gasket. Gently remove the gasket by prying it forward from the groove. NOTE: Take care not to nick or gouge the gasket when removing. When a portion of the gasket is out of the groove, carefully pull the remainder from the groove. Irregular retraction of the gasket into the gasket groove may be due to an aging gasket. Inspect the entire circumference for cuts, nicks, gouges or irregularities caused by wear. Ensure gasket is still pliable. Replace gasket if damage or wear is evident. If no damage is determined, rinse with clean water and dry with lint-free cloth. If reusing, reverse the gasket so that the sides that faced the head rings will now face the doors. Gasket grooves should be cleaned with detergent and a cloth. Allow time to dry. Clean the inside surface of the door where the gasket contact is made. On vertical sliding door units, the door guide assembly may need to be removed. Reinstall gasket, locating the seam of the door gasket and placing seam of gasket in the top of the groove. Press the gasket into the head ring groove, working from the side, top and bottom. Equally distribute the excess and use your fingers to press the gasket as deeply as possible X X X X X GP PSS5 Part IV _07/ South 25th Street, Omaha, NE TE: (402) ; FAX (402)
88 MAINTENANCE MANUAL Page 3 Maintenance Required Daily Weekly Quarterly Annually AS NEED into the door gasket groove. Test (operate) steam pressure relief valves by lifting the test lever on the valve. For your safety identify the discharge path from the valve before proceeding with the test. It should be routed into a discharge pipe. If not, make sure no one is in the path of the steam discharge Remove and clean strainers that may be located in the supply lines. Refer to the piping schematic for locations. It is critical that the strainers remain clean. Remove the metal strainer from the holder. Clean inside and outside using compressed air or a brush and mild detergent. Replace strainer in the holder. Replace strainer cap by turning clockwise until it is securely seated Check the pressure of the incoming steam. If the optional steam regulator is used, readjust the steam supply regulator to meet PRIMUS Sterilizer Company, LLC installation specifications found in the Installation Manual. Check the pressure of the incoming water supply. If necessary, readjust supply regulator s service booster system to meet PRIMUS Sterilizer Company, LLC installation specifications found in the Installation Manual. Sterilizers with optional air operated gasket, check the pressure of the incoming air supply. Readjust, if necessary, the supply regulator s to meet installation specifications found in the Installation Manual. Inspect all pipes fittings, valves, and connections for visible evidence of leaks or corrosion. CONTACT YOUR PRIMUS STERILIZER COMPANY, LLC SERVICE REPRESENTATIVE FOR REPAIR. Check all solenoid valves for internal and external leaks. Verify impeded and smooth, snappy operation. Install repair kit as needed. X X X X X X X X GP PSS5 Part IV _07/ South 25th Street, Omaha, NE TE: (402) ; FAX (402)
89 MAINTENANCE MANUAL Page 4 Maintenance Required Daily Weekly Quarterly Annually AS NEED Inspect and tap all check valves. Replace as necessary. Replace the air filter(s) and o-ring gasket. The assembly must be airtight. Refer to Volume II for the manufacture s information regarding this sterilizer s air filtration. Clean all exterior surfaces of the cabinet. Sterilizers with an optional pressure regulator are to be tested for correct and consistent steam operating pressures after the regulator. Examine Manufacturer s Cutsheet Manual for manufacturer s information regarding the optional pressure regulator. Run test cycles and verify proper timing, cycle progression, and operation of all LCD indicators, the Operator Panel(s), and the audible alarm. Replace the Over Pressure Rupture Disk. Refer to the manufacturer s instructions in the Manufacturer s Cutsheet Manual. Verify the presence of a secure electrical ground. Inspect the entire assembly for steam, water, or (as applicable) air leaks. Clean the sterilizer s mechanical space. Perform a complete calibration for the sterilizer using the calibration procedures. The user determines the frequency of calibrations; however, this period should not be greater than one year. recommends that sterilizers subject to validation and cgmp standards be revalidated at one-year intervals. Inspect the inside surfaces of the chamber for deposits of scale. If scale is present, use a cleaner and descaler according to the directions on the container. While the rate of scale accumulation varies between facilities, PRIMUS Sterilizer Company, LLC recommends that a regular schedule for descaling be adopted according to individual user requirements. Install new steam trap kit when a steam trap fails. X X X X X X X X X X X X GP PSS5 Part IV _07/ South 25th Street, Omaha, NE TE: (402) ; FAX (402)
90 MAINTENANCE MANUAL Page Preventive Maintenance - Electrically Heated Units Only Maintenance Required Daily Weekly Quarterly Annually AS NEED Optional boiler units refer to the boiler manufacturers' instructions. All boiler maintenance should be provided by qualified personnel. (See Appendix A, Manufacturer s Records) TURN OFF THE ELECTRICAL POWER SWITCH TO THE UNIT BEFORE REMOVING ANY COVERS FOR MAINTENANCE OR PROCEEDING WITH THE BOILER BLOW DOWN PROCEDURE. X Check the condition of heating elements. Inspect all boiler pressure controls. Optional Steam-to-Steam generator units refer to the manufacturers' instructions. All generator maintenance should be provided by qualified personnel. (See Appendix A, Manufacturer s Records) X X X ALLOW THERMOSTATIC TRAPS TO COOL BEFORE REMOVING COVERS. SINCE THERE IS NOTHING TO LIMIT ITS EXPANSION, THE DIAPHRAGM ON THE INSIDE MAY RUPTURE OR FATIGUE IF TRAP IS OPENED WHEN HOT. If the user added a vacuum breaker in the cold water supply to sterilizer, consider cleaning the vacuum breaker. X FOR ELECTRICAL MAINTENANCE, DISCONNECT ELECTRICAL POWER TO THE STERILIZER PRIOR TO REMOVING ANY ELECTRICAL COVERS. VOLTAGE PRESENT IS DANGEROUS AND MAY BE FATAL IF CONTACTED. SECTION 2.0 CONFIGURATION/CALIBRATION 2.1 Turning on the Sterilizer Prior to turning on the machine, make sure that the switch on the A/D Revision 2.0 board (inside control box) has been switched to the Configuration EPROM (CAL mode) and not the Operational EEPROM (OPS mode). (See Figure ) GP PSS5 Part IV _07/ South 25th Street, Omaha, NE TE: (402) ; FAX (402)
91 MAINTENANCE MANUAL Page Power Up Turn the power on to the sterilizer by using the Power On switch on the side of the control box. The touchpad display on the front panel will read (HIT ANY BUTTON) and the LEDs will light briefly and rotate through the buttons on the touchpad Entering the Diagnostics Menu Hit any button on the touchpad and the display will read (OUTPUT DIAGS). OUTPUT DIAGS is one of the six parameters under the Diagnostics Menu (see Table ). If it is not displayed, scroll [ ] or [ ] until the proper display is read. OUTPUT DIAGS INPUT DIAGS PRINTER DIAGS SENSOR DIAGS EEPROM DIAGS CALIBRATE END Table Diagnostics Menu GP PSS5 Part IV _07/ South 25th Street, Omaha, NE TE: (402) ; FAX (402)
92 MAINTENANCE MANUAL Page Setpoints Definitions The following terms and definitions explain the setpoints menu found in Figure , Diagnostics Menu. PASSWORD JOB_NUMBER STERILIZER_NUM CHARGE_GASKET RETRACT_GASKET CHAMBER TO DRAIN DELTA T JACKET OFFSET OVERTEMP ALARM OFFSET UNDER TEMP ALARM OFFSET HI LIMIT PSIG MAX LIQUID TEMP MAX LIQUIDS PRESSURE MIN. STERILIZE MINIMUM DRY TIME HEAT CHM TIMEOUT PRECHARGE TIMEOUT Selectable number from 0 (meaning no password set) to The PASSWORD prevents the cycle parameters from being changed. Selectable number from 90 0 to (Factory setting For users with more than one sterilizer (A means of sterilizer identification) Time spent charging the gasket before gasket pressure switch input is checked. Time spent retracting the gasket. This is compensation for the difference between the chamber temperature compared to the drain temperature (typically less than.3 C). Applied to the STERILIZE TEMP. This is where the jacket will maintain its temperature. The number of degrees above STERILIZE TEMP at which an alarm will alert the user. The number of degrees below STERILIZE TEMP at which an alarm will alert the user. The maximum pressure during sterilization that is allowed for non-liquid cycles. The maximum allowable STERILIZE TEMP for liquids cycle. The maximum allowable pressure during sterilization of liquid cycle before all steam to chamber is turned off. The minimum amount of time user can set for STERILIZE TIME. The minimum amount of time the user can set for DRY TIME/LIQ COOLTIME. The amount of time spent trying to reach the STERILIZE TEMP before the unit auto-advances (aborts the cycle). The amount of time spent trying to reach the PRECHARGE setting (used in the VACUUM cycles) before the unit autoadvances (aborts the cycle). 117 South 25th Street, Omaha, NE TE: (402) ; FAX (402) GP PSS5 Part IV _07/070208
93 MAINTENANCE MANUAL Page 8 PREVAC TIMEOUT POSTVAC TIMEOUT *LAB LOW T CUTOFF CYCLES LAST SERV TOTAL CYCLES COUNT VAC LEAK TEST VALUE FACTORY CONFIG # USER ID #1-#4 The amount of time spent trying to reach the (PREVAC) VAC PNT before the unit auto-advances (aborts the cycle). The amount of time spent trying to reach the DRY VAC POINT before the unit auto-advances (aborts the cycle). The STERILIZE TEMP below which all cycles will be ran in a Low Temperature (recirculating steam) manner. NOT ON ALL UNITS. A means of determining how many cycles have been ran on the unit since it s first run. Cycle count over the life of the sterilizer. (Optional) The amount of leakage allowed for the preconfigured 20 minute cycle. A number set at the factory determining unit configuration and options. (Optional) Selectable number from 0 (meaning no ID set) to A number which allows up to four users to start the sterilizer. * Option only on LAB-LOW Units GP PSS5 Part IV _07/ South 25th Street, Omaha, NE TE: (402) ; FAX (402)
94 MAINTENANCE MANUAL Page 9 HIT ANY BUTTON (DIAGNOSTICS MAIN) MENU) OUTPUT DIAGS INPUT DIAGS PRINTER DIAGS SENSOR DIAGS EEPROM DIAGS CALIBRATE END - EJECTOR(VACUUM) - DRAIN SOLENOID - JACKET_STEAM - CHAMBER_STEAM - AIR_IN_SOLENOID - BUZZER - AIR_TO_GASKET_A - RETRACT_GASKET_A - AIR_TO_GASKET_B 1 - RETRACT_GASKET_B 1 - BOOST_SOLENOID - POWER CONTROL - OPEN_DOOR_A 2 - CLOSE _DOOR_A 2 - OPEN _DOOR_B CLOSE _DOOR_B SPECIAL BLEED 3 - RETRACT_A & VAC - RETRACT_B & VAC 1 - CHAMBER TRAP 4 - QUENCH WATER - TO MAIN MENU - DOOR A CLOSED - DOOR A GASK PRES - DOOR B CLOSED 1 - DOOR B GASK PRES 1 - DOOR A COMP OPEN 2 - DOOR B COMP OPEN 1, 2 - WATER IN DRAIN 3 - TO MAIN MENU 1 - FOR DOUBLE DOOR UNITS ONLY 2 FOR POWER DOOR UNITS ONLY 3 - FOR UNITS WITH A WATER IN DRAIN SENSOR ONLY 4 - FOR UNITS SUPPLIED WITH AIR OVER ONLY 5 - FOR UNITS WITH LOAD PROBE ONLY 6 FOR USER ID OPTION ONLY SENDS INFO TO PRINTER - CHAMBER - JACKET - PRESSURE - LOAD_TEMPERATURE - TO MAIN MENU - CALIB PRESSURE LOW - CALIB PRESSURE HIGH - CALIBRATE JACKET LOW - CALIBRATE JACKET HIGH - CALIBRATE CHAMBR LOW - CALIBRATE CHAMBR HIGH - CALIBRATE LOAD P LOW 5 - CALIBRATE LOAD P HIGH 5 - TO MAIN MENU SETPOINTS MENU SET DEFAULT VALUES PRINT MACHINE VALUES - PASSWORD - JOB_NUMBER - STERILIZER_NUM - CHARGE GASKET - RETRACT GASKET - CHAMBER TO DRAIN DELTA T - JACKET OFFSET - OVERTEMP ALARM OFFSET - UNDERTEMP ALARM OFFSET - HI LIMIT PSIG - MAX LIQUID TEMP - MAX LIQUIDS PRESSURE - MIN STERILIZE - MINIMUM DRY TIME - HEAT CHM TIMEOUT - PRECHRGE TIMEOUT - PREVAC TIMEOUT - POSTVAC TIMEOUT - UNUSED 6 - CYCLES LAST SERV - TOTAL CYCLE COUNT - VAC LEAK TEST - FACTORY CONFIG - USER ID # USER ID # USER ID # USER ID # TO MAIN MENU SETS RECOMMENDED VALUES PRINTS SETPOINTS AND PARAMENTERS OF ALL 8 CYCLE FIGURE DIAGNOSTICS MENU 117 South 25th Street, Omaha, NE TE: (402) ; FAX (402) GP PSS5 Part IV _07/070208
95 MAINTENANCE MANUAL Page Testing Outputs Press [ENTER] to reach the OUTPUT DIAGS Menu. The OUTPUT DIAGS Menu contains each output necessary to operate the sterilizer (see Table ). These outputs are selected by scrolling [ ] or [ ] and pressing [ENTER]. This procedure assures that each device and its corresponding relay is operating properly. This can be verified by listening for the appropriate solenoid to engage and watching to see if the LED on the relay will light. Relays are located in the control box. [ENTER] can be pressed and held as many times as necessary. HOT STEAM COULD BE EXPELLED WHEN TESTING CHAMBER STEAM OR STEAM TO GASKET VALVES DURING OUTPUT DIAGNOSTICS CHECK. EJECTOR (VACUUM) DRAIN SOLENOID JACKET STEAM CHAMBER STEAM AIR IN SOLENOID BUZZER STEAM 1 TO GASKET A RETRACT GASKET A STEAM 1,2 TO GASKET B RETRACT 2 GASKET B BOOST SOLENOID 4 POWER CONTROL OPEN 3 DOOR A CLOSE 3 DOOR A OPEN 2,3 DOOR A CLOSE 2,3 DOOR B GP PSS5 Part IV _07/ South 25th Street, Omaha, NE TE: (402) ; FAX (402)
96 MAINTENANCE MANUAL Page 11 SPECIAL BLEED 5 RETRACT A & VAC RETRACT B 2 & VAC CHAMBER TRAP 3 QUENCH WATER 1 Air is optional; 2 Optional for Double Door; 3 Optional for Power Door, 4 Available only if optional Precise Control is selected, 5 Optional for Water-in-Drain Table OUTPUT DIAGS Parameters When this procedure is complete, press [ADV] to return to (OUTPUT DIAGS) Testing Inputs Scroll [ ] to display (INPUT DIAGS). Press [ENTER] to enter the INPUT DIAGS Menu. The INPUT DIAGS Menu contains each input necessary to operate the sterilizer (see Table ). These inputs are selected by scrolling [ ] or [ ] and pressing [ENTER]. This procedure assures that each device and its corresponding relay is operating properly. This can be verified by watching to see if the LED on the relay will light or by pressing and holding [ENTER]. The LCD will display YES YES YES or NO NO NO. Relays are located in the control box. [ENTER] can be pressed and held as many times as necessary. If no other input is desired, press [ADV] to exit this menu. DOOR A CLOSED DOOR A GASK PRES DOOR 2 B CLOSED DOOR 2 B GASK PRES DOOR 1 A COMP OPEN DOOR 2 B COMP OPEN WATER 3 IN DRAIN 1 Optional for Power Door; 2 Optional for Double Door; 3 Optional for Water-In-Drain Table INPUT DIAGS Parameters GP PSS5 Part IV _07/ South 25th Street, Omaha, NE TE: (402) ; FAX (402)
97 MAINTENANCE MANUAL Page Printer Diagnostics Scroll [ ] to display (PRINTER DIAGS). Press [ENTER] to test block. The display will return to (OUTPUT DIAGS). If no other input is desired, press [ADV] to exit this menu Sensor Diagnostics Scroll [ ] to (SENSOR DIAGS). Press [ENTER] to display one of the six parameters (see Table ). This display is for monitoring actual operating values only. If no other input is desired, press [ADV] to exit this menu. CHAMBER (Temperature) JACKET (Temperature) (Chamber) PRESSURE LOAD TEMPERATURE Table SENSOR DIAGS Parameters GP PSS5 Part IV _07/ South 25th Street, Omaha, NE TE: (402) ; FAX (402)
98 MAINTENANCE MANUAL Page Entering EEPROM DIAGS Menu Scroll [ ] to reach the EEPROM DIAGS Menu. The EEPROM DIAGS menu contains the SET SETPOINTS menu and will display (SETPOINTS MENU). Press [ENTER] to display one of the settable parameters (see Table ). To change settings press [ENTER], use [ ] or [ ] to increment/decrement values. Use the [ ] button to switch between fast and slow advance increments. Press [ENTER] to accept values. Press [ADV] to exit to EEPROM DIAGS menu. If no other input is desired, press [ADV] to exit this menu. CYCLE PARAMETER DESCRIPTION RANGE MINIMUM MAXIMUM DEFAULT PASSWORD Some machines have a hardware keylock. This menu will not appear on machines without the password. Password protected items are: Cycle Parameters (STER TIME, DRY TIME, STER TEMP, CYCLE TYPE) Setting the Clock (not all machines) = no password JOB_NUMBER STERILIZER_NUM Configuration EPROM has no password protections. Only trained personnel should work in the Configuration program. Factory assigned number to each unit (#####) For users with more than one sterilizer. Table EEPROM Setpoints (Page 1 of 3) Job Number South 25th Street, Omaha, NE TE: (402) ; FAX (402) GP PSS5 Part IV _07/070208
99 MAINTENANCE MANUAL Page 14 CYCLE PARAMETER DESCRIPTION RANGE MINIMUM MAXIMUM DEFAULT CHARGE GASKET (LOCK TIME) RETRACT GASKET (UNLOCK TIME) CHAMBER TO DRAIN DELTA T JACKET OFFSET OVERTEMP ALARM OFFSET UNDERTEMP ALARM OFFSET HI LIMIT PSIG MAX LIQUID TEMP Time spent sealing gaskets and time spent retracting gaskets. ONLY ON MACHINES WITH POWERED GASKETS. KITS WITH A STEERING WHEEL DO NOT HAVE POWERED GASKETS. Time spent retracting gaskets. ONLY ON MACHINES WITH POWERED GASKETS. KITS WITH A STEERING WHEEL DO NOT HAVE POWERED GASKETS. Sets the amount of temperature difference we expect to see between the chamber and drain. Applies the offset for sterilization temperature to the current cycle and maintains the jacket at this temperature. If average temperature goes above the OVERTEMP offset, user will get this alarm. If average temperature goes below the UNDERTEMP offset, the user will get this alarm. Maximum pressure during sterilization that allows nonliquids cycles to reach before turning off steam and boost steam. Maximum temperature allowed for liquids to reach during sterilization before all the steam is turned off 0:00 min:sec 0:00 min:sec -1.0 C, -1.8 F C F 0.0 C/F 0.0 C/F 4:15 min:sec 4:15 min:sec 0.0 C/F 20.0 C 36.0 F 44.4 C 80.0 F 44.4 C 80.0 F 0:10 min:sec 0:10 min:sec 0.0 C/F -2.0 C -3.6 F 5.0 C 9.0 F 1.3 C 2.3 F 0.1 PSIG 40.0 PSIG 32.0 PSIG 70.0 C F Table EEPROM Setpoints (Page 2 of 3) C F 125 C 257 F GP PSS5 Part IV _07/ South 25th Street, Omaha, NE TE: (402) ; FAX (402)
100 MAINTENANCE MANUAL Page 15 CYCLE PARAMETER DESCRIPTION RANGE MINIMUM MAXIMUM DEFAULT MAX LIQUIDS PRESSURE MIN. STERILIZE MINIMUM DRY TIME HEAT CHM TIMEOUT PRECHARGE TIMEOUT PREVAC TIMEOUT POSTVAC TIMEOUT *LAB LOW T CUTOFF CYCLES LAST SERV TOTAL CYCLE COUNT Maximum pressure allowed for liquids to reach during sterilization before all the steam is turned off. Sets the minimum amount of time the user can enter as a sterilization time using the STER TIME button. Sets the minimum amount of time the user can enter as the dry time using the DRY TIME button. Time allowed for chamber to rise to STERILIZE TEMP. Time allowed for chamber to charge to precharge setting. Time allowed for a vacuum PREVAC VAC PNT to be reached. Time allowed for a vacuum DRY VAC POINT to be reached. Temperature setting at which all cycles with the sterilize temp set below this point will be ran in low temperature manner. Provides an accurate means of determining how many cycles have been ran since unit was last serviced. Provides an accurate count of the number of cycles that have been ran on unit. The amount of allowable 0.0 PSIG 40.0 PSIG 18.0 PSIG 3:00 99:00 3:00 minutes 0:00 120:00 1:00 minutes 1:00 239:00 20:00 minutes 1:00 239:00 20:00 minutes 1:00 239:00 20:00 minutes 1:00 239:00 20:00 minutes 33.3 C 92.0 F C 308 F C 235 F *Vac Leak Test Value 0.1 InHg 10.0 InHg 1.1 InHg PSIG leakage for 20 Vac Leak Test FACTORY CONFIG Configuration setables Factory Set *USER ID #1 User ID number *USER ID #2 User ID number *USER ID #3 User ID number *USER ID #4 User ID number *Option Table EEPROM Setpoints (Page 3 of 3) GP PSS5 Part IV _07/ South 25th Street, Omaha, NE TE: (402) ; FAX (402)
101 MAINTENANCE MANUAL Page Entering CALIBRATE Menu Scroll [ ] to reach the CALIBRATE menu. Press [ENTER] to display one of the setable parameters (see Table ). To change settings press [ENTER], use [ ] or [ ] to increment/decrement values. Use the [ ] button to switch decimal place increments. Press [ENTER] to accept values. If no other calibration is desired, press [ADV] to exit this menu. CALIB PRESSURE ZERO CALIB PRESSURE HIGH CALIB JACKET LOW CALIB JACKET HIGH CALIB CHMBR LOW CALIB CHMBR HIGH *CALIB LOAD P HIGH *CALIB LOAD P LOW *Available on units with Load Probe Option Selected Table CALIBRATE Parameters Easy Cal Procedures The purpose of EASY CAL is to allow field calibration for units where N.I.S.T. traceability, in calibration, is not required. The maximum sterilization dwell temperature should always be verified with a LAG thermometer or other reliable temperature indicator. EASY CAL allows the service technician to calibrate pressure and temperature using steam pressure and room temperature. Calibration may also be achieved with a heat well and outside pressure source, if desired, or in those cases where N.I.S.T. in traceable calibration is preferred. ONLY QUALIFIED MAINTENANCE PERSONNEL EXPERIENCED IN CALIBRATION AND REPAIR OF ELECTRONIC DEVICES, SHOULD INSTALL AND USE THE CONFIGURATION EPROM. ONCE INSTALLED, THE CONFIGURATION EPROM ALLOWS BYPASS OF ALL INTERLOCK CONTROLS. FOR INSTANCE, STEAM MAY BE INJECTED INTO THE CHAMBER WITH DOORS OPEN! ALWAYS TURN OFF THE ELECTRICAL POWER TO THE STERILIZER BEFORE PROCEEDING WITH EITHER OF THE FOLLOWING: REMOVAL OR INSTALLATION OF AN EPROM. SWITCHING BETWEEN EPROMS. GP PSS5 Part IV _07/ South 25th Street, Omaha, NE TE: (402) ; FAX (402)
102 MAINTENANCE MANUAL Page 17 PREPARATION STEP 1. STEP 2. Turn power off at the Control Cabinet. Open the cover on the Control Cabinet and locate the two Electronic Controller circuit boards. The SBC196 board is located on top of the A/D Revision 2.0 Board (see Figure ). Move the EPROM Selector Switch (S1) to CAL. J1-5 VDC & 15 VDC Supply Voltages J2 - Not Used J3 - Keypad/Display Interface J4 - Not Used J6A - Com1 (Printer, Pins 2 & 3) J7 - Input/Output Communications J8 - Pressure Input J9-3 or 4 wire RTD Input (Chamber) J10-3 or 4 wire RTD Input (Jacket) J11-3 or 4 wire RTD Input (Load) J12 - EPROM Communication Cable JP5, JP6, & JP7 - Shunt/Jumper for 3 wire RD s. Do not shunt for 4 wire RTD s. U2 - EEPROM (Hold s all settable values) U5 - RAM chip U6 - EPROM communication Cable U29 - EPROM (Operational) U30 - EPROM (Calibration) Figure Electronic Controller CALIBRATING CHAMBER PRESSURE STEP 1 Turn on power to the machine by placing the POWER ON switch to ON position. The LCD will display the message: (HIT ANY BUTTON) and the LED indicator lamps on the operator panel will flash on and off. STEP 2. STEP 3. Press any button on the Operator Panel. This will cause a display of OUTPUT DIAGS, or one of the other CONFIGURATION EPROM menus. Use the arrows [, ] to scroll the menu until the LCD displays: CALIBRATE. 117 South 25th Street, Omaha, NE TE: (402) ; FAX (402) GP PSS5 Part IV _07/070208
103 MAINTENANCE MANUAL Page 18 NOTE During calibration, the functions of the buttons on the Operator Panel change. After entering the CALIBRATE menu, the LEDs on the number buttons are illuminated which indicate alternate functions. Below are the alternate functions used during the calibration procedure: [1] Introduces steam to chamber, simultaneously through the Chamber Boost valve and Chamber Trim valve. If only one valve supplies steam to the chamber, it will be designated as the Chamber Trim valve. [2] Opens Chamber Drain valve; activates the vacuum system, and introduces fresh steam to chamber as a purge cycle. [3] Activates Chamber Drain valve to allow chamber to empty in a gravity flow fashion. [4] Activates Chamber Drain valve and vacuum system to allow rapid evacuation of the chamber as in PREVAC [5] Upper right button activates Jacket solenoid valve to allow steam to jacket [START] Charges gasket. When gasket is fully engaged the LEDs will illuminate. STEP 4. STEP 5. STEP 6. STEP 7. STEP 8. STEP 9. NOTE STEP 10. STEP 11. Press [ENTER] and CALIB PRESSURE LOW will be displayed. Open the chamber door. Press [ENTER]. 0.0 will appear in the lower right corner. Press [ENTER] to store above setting. Close the chamber door. CALIB PRESSURE LOW will appear on the display again. Use the arrows [, ] to scroll to CALIB PRESSURE HIGH. Press [START] to charge the door gasket. Observe that all four cycle lights on the touchpad are illuminated, indicating that the pressure switch contact is made and the door gasket(s) are sealed. Press and hold button [2] on the touchpad for at least one (1) minute to purge the chamber. Press and hold button [1] until 36 pounds of pressure is reached on the chamber pressure gauge. When the button is released the pressure will begin to slowly decrease. If pressure decrease is too rapid, or too slow, close off the chamber bleed valve and back it off ¼ to ½ turn. 117 South 25th Street, Omaha, NE TE: (402) ; FAX (402) GP PSS5 Part IV _07/070208
104 MAINTENANCE MANUAL Page 19 STEP 12. STEP 13. NOTE STEP 14. Press the [ENTER] button. The number 32 will appear in the lower right corner of the LCD. When the falling pressure in the chamber reaches 32 lbs., press [ENTER] immediately. The printer will print a calibration report. This completes Chamber Pressure Calibration. There is no Jacket Pressure Calibration. Press the [DOOR] button on the touchpad. This initiates depressurization of the vessel. After approximately 1 1/2 minutes, press the [DOOR] button again to retract the gasket. The door can now be opened. TEMPERATURE CALIBRATION PREPARATION STEP 15. NOTE STEP 16. Using the touchpad arrows [, ] scroll to the calibration menu. You may scroll up or down in the menu to reach Calibration. Verify there is no pressure in the jacket or chamber by checking vessel gauges. Carefully remove Jacket and Chamber RTD s. STEP 17. Select either room temperature or heat well for use as a low temperature reference. If a heat well is chosen, 44 0 C is the recommended setting. STEP 18. Scroll to display CALIBRATE and press [ENTER]. You will be in the Calibration Menu. NOTE If using chamber drain for temperature reference, read Calibration Procedure for Jacket and Chamber Temperature using Chamber Drain as the Heat Source, beginning on page 19. CALIBRATE JACKET TEMPERATURE LOW STEP 19. Using the touch pad arrows [, ], scroll to CALIBRATE JACKET LOW. Press [ENTER] to select. A number will appear in the lower right corner of the LCD. Use the arrows [, ] to increase, or decrease, the number to match the Low Temp Reference, e.g., the room or heat well temperature. During calibration, the asterisk [ ] button will toggle between tenths of a degree or whole degrees. NOTE If room temperature is being used as the reference temperature, ensure RTD is suspended at least 3 from any heat source. If the heat well is to be used, place RTD in the heat well. Allow time for temperature of RTD and heat source to stabilize. The required time to stabilize will vary depending on the reference temperature source. STEP 20. Press [ENTER] to store JACKET LOW value and print calibration report. 117 South 25th Street, Omaha, NE TE: (402) ; FAX (402) GP PSS5 Part IV _07/070208
105 MAINTENANCE MANUAL Page 20 CALIBRATE CHAMBER TEMPERATURE LOW STEP 21. Use the touchpad arrows [, ] to scroll to CALIBRATE CHAMBER LOW, and press [ENTER] to select. A number will appear in the lower right corner of the LCD. Use the arrows [, ] to increase, or decrease, the number to match the Low Temperature Reference, e.g., room or heat well temperature. Allow time for temperature of RTD and heat source to stabilize. The time will vary depending on the reference temperature source. During calibration the asterisk [ ] button will toggle between tenths of a degree or whole degrees. When Chamber temperature has stabilized, press [ENTER] to store CALIBRATE CHAMBER LOW. *CALIBRATE LOAD TEMPERATURE LOW STEP 22. Use the touchpad arrows [, ] to scroll to CALIBRATE LOAD TEMP LOW, and press [ENTER] to select. A number will appear in the lower right corner of the LCD. Use the arrows [, ] to increase, or decrease, the number to match the Low Temperature Reference, e.g., room or heat well temperature. Allow time for temperature of RTD and heat source to stabilize. The time will vary depending on the reference temperature source. During calibration the asterisk [ ] button will toggle between tenths of a degree or whole degrees. When Chamber temperature has stabilized, press [ENTER] to store CALIBRATE LOAD LOW. * Option available on units with Load Probe Selected CALIBRATE JACKET TEMPERATURE HIGH STEP 23. Use the touchpad arrows [, ] to scroll to CALIBRATE JACKET HIGH and press [ENTER] to select. A number will appear in the lower right corner of the LCD. Use the arrows to increase, or decrease, the number to match the High Temperature Reference (suggested C or F) when heat well is used. Allow time for temperature of RTD and heat source to stabilize. The time will vary depending on the reference temperature source. During calibration, the asterisk [ ] button will toggle between tenths of a degree or whole degrees. When Jacket temperature has stabilized, press [ENTER] to store Jacket High Temperature. GP PSS5 Part IV _07/ South 25th Street, Omaha, NE TE: (402) ; FAX (402)
106 MAINTENANCE MANUAL Page 21 CALIBRATE CHAMBER TEMPERATURE HIGH STEP 24. Use the touchpad arrows [, ] to scroll to CALIBRATE CHAMBER HIGH and press [ENTER] to select. A number will appear in the lower right corner of the LCD. Use the arrows to increase, or decrease, the number to match the High Temperature Reference (suggested C or F) when heat well is used. Allow time for temperature of RTD and heat source to stabilize. The time will vary depending on the reference temperature source. During calibration, the asterisk [ ] button will toggle between tenths of a degree or whole degrees. When Jacket temperature has stabilized, press [ENTER] to store Chamber High Temperature. *CALIBRATE LOAD TEMPERATURE HIGH STEP 25. Use the touchpad arrows [, ] to scroll to CALIBRATE LOAD HIGH, and press [ENTER] to select. A number will appear in the lower right corner of the LCD. Use [, ] to increase or decrease, the number to match the High Temperature Reference (suggested C or F). Allow time for temperature of RTD and heat source to stabilize. This time will vary depending on the reference temperature source. During calibration, the asterisk [ ] button will toggle between tenths of a degree or whole degrees. When load probe temperature has stabilized, press [ENTER] to store Load High Temperature. * Option available on units with Load Probe Selected Calibration Procedure for Jacket and Chamber Temperature using Chamber Drain as the Heat Source The following EASY CAL procedures are provided for qualified trained technicians or factory representatives using Chamber Drain as the Heat Source. STEP 1. STEP 2. Install the Jacket RTD in the chamber drain receptacle. Close the chamber door and press [START] to charge the gasket(s). Refer to Steam Table (Table 1-0) and select pressure to use for temperature correlation during calibration (32.0 PSIG is suggested.) Press and hold button [2] on the touchpad to allow the chamber to purge for one (1) minute. 117 South 25th Street, Omaha, NE TE: (402) ; FAX (402) GP PSS5 Part IV _07/070208
107 MAINTENANCE MANUAL Page 22 STEP 3. STEP 4. Press and hold button [1] until there is at least a ten (10) pound reading on the chamber pressure gauge. Press and hold button [4] until a reading of 5 inches of vacuum is registered on the chamber pressure gauge. Repeat Steps 2-4 three times increasing the vacuum by five-inch increments for each cycle. This will result in a final vacuum reading of twenty inches (20 ). STEP 5. Use the [, ] to scroll to CALIBRATE JACKET HIGH and press [ENTER]. STEP 6. Charge the chamber to 32.0 PSIG and press [ENTER]. A number representing temperature will appear in the lower right corner of the touchpad LCD. STEP 7. Use the arrows [, ], to change the number in the lower right corner to match the number determined earlier in STEP 1. During calibration, the asterisk [ ] button will toggle between tenths of a degree or whole degrees. Press [ENTER] when the chamber pressure drops to the selected pressure temperature from the Steam Table (Table 1-0). The printer will print a Calibration Report. NOTE STEP 8. STEP 9. STEP 10. STEP 11. *LOAD TEMP may be calibrated at this point. (Start from Step 5 using CALIBRATE LOAD HIGH.) If the value drops below the desired pressure before the [ENTER] button is pressed, press the [ADV] button and then the [1] button to build Chamber pressure back to 32.0 PSIG. Use the [, ] to scroll to CALIBRATE JACKET HIGH and press [ENTER]. Repeat Steps 6 and 7. Press the [DOOR] button to de-pressurize the vessel. After 1 1/2 minutes press the [DOOR] button to retract the gasket. The door can now be opened. Remove the Jacket RTD from the Chamber Drain RTD receptacle and reinstall it in the Jacket RTD receptacle. Install Chamber Drain RTD in the Chamber Drain RTD Receptacle. Close the Chamber Door and press [START] to charge the gasket(s). STEP 12. STEP 13. Select the pressure from the Steam Table (Table 1-0) to use for temperature correlation during calibration (32.0 PSIG is suggested.) Press and hold button [2] on the touchpad to allow the chamber to purge for one (1) minute. Then, release button [2] and press and hold button [1] until there is at least a ten (10) pound reading on the chamber pressure gauge. Release button [1] and press and hold button [4] until a 5-inch vacuum is reading on the chamber pressure gauge. 117 South 25th Street, Omaha, NE TE: (402) ; FAX (402) GP PSS5 Part IV _07/070208
108 MAINTENANCE MANUAL Page 23 Repeat these Steps three times increasing the vacuum by five-inch increments for each cycle. This will result in a final vacuum reading of twenty inches (20 ). Use the [, ] to scroll to CALIBRATE CHAMBER HIGH and press [ENTER]. STEP 14. STEP 15. NOTE STEP 16. Charge the chamber to 32.0 PSIG and press [ENTER]. A number will appear in the lower right corner of the touchpad LCD. Use the arrows [, ], to change the number in the lower right corner to match the number determined earlier in Step 1. During calibration, the asterisk [ ] button will toggle between tenths of a degree or whole degrees. Press [ENTER] when the chamber pressure drops to the selected pressure temperature from the Steam Table (Table 1-0). The printer will print a Calibration Report. If the value drops below the desired pressure before the [ENTER] button is pressed, press the [ADV] button and press and hold button [1] to build chamber pressure back to 32.0 PSIG. Use the [, ] to scroll to CALIBRATE CHAMBER HIGH and press [ENTER]. Repeat Steps 14 and 15. Press the [DOOR] button to depressurize the vessel. After 1 1/2 minutes press the [DOOR] button to retract the gasket. The door can now be opened. STEP 17. When all of the above steps have been completed, turn power OFF at the electronic control cabinet and switch back to OPER. * Option available on units with Load Probe Selected GP PSS5 Part IV _07/ South 25th Street, Omaha, NE TE: (402) ; FAX (402)
109 MAINTENANCE MANUAL Page Set Cycle Parameters After cycle is selected (Refer to Part III, User s Manual, paragraph ), scroll [ ] to see the first cycle parameter (see tables below). Each parameter can be set by pressing [ENTER] then scrolling [ ] or [ ] and using the [*]. Once the parameter is set, press [ENTER] and scroll [ ] to the next parameter. After the last parameter is set, the display will return to the Cycle Menu, which displays the cycle number and type. Press [ADV] to exit the cycle menu. Repeat paragraph and to select additional cycles and parameters. Press [ADV] to return to the idle screen for operation. CYCLE PARAMETERS DESCRIPTION DEFAULT STERILIZE TIME Time spent during sterilization phase 30:00 minutes STERILIZE TEMP Sterilization temperature set point 125 C /275 F DRY TIME/ Drying time spent after exhaust phase 2:00 minutes LIQUID COOL TIME PURGE TIME MIN:SEC Time spent passing steam through the 1:30 minutes chamber to remove air PRECHARGE PSIG During each precharge portion of the precharge/prevac cycle, amount of steam pumped in until we reach this pressure. 10 PSIG PREVAC VAC POINT Vacuum to attain and on prevacs 3, 4, 5, 20 InHg INCHES HG and 6 before timer starts. PREVAC VAC TIME Amount of time to hold vacuum on prevacs 2:00 minutes HALF-RAMP TIME MIN:SEC Amount of time which the sterilizer takes to go from current temperature to HALF WAY 0:30 seconds FINAL RAMP SLOPE DEG/MIN BOOST OFFSET DEG C to the sterilization temperature. As the temperature ramps up to sterilization temperature, the slope gradually decreases. When the slope reaches this value, maintain this rate the rest of the way to the sterilization temperature. Used only on machines with a second (boost) steam valve. Offset specifies the number of degrees below sterilization set point above which boost steam valve will not turn on. Table Parameters Menu (Page 1 of 2) 2.0 C 3.6 F 4.0 C 7.2 F GP PSS5 Part IV _07/ South 25th Street, Omaha, NE TE: (402) ; FAX (402)
110 MAINTENANCE MANUAL Page 25 CYCLE PARAMETERS DESCRIPTION DEFAULT *LOAD P TEMP Temperature at which the sterilization phase will begin. # OF PREVACS Number of prevacs. (Applicable to vacuum type cycles only) # OF POSTVACS Number of postvacs. (Applicable to vacuum cycles only) SLO EX END POINT Liquids Slow Exhaust - pressure at +PSI/-INHG which this phase ends SLOW EXH. RAMP Rate of allowed pressure to decay PSI/MIN DRY VAC POINT during liquids cycle slow exhaust Chamber pressure setpoint to determine when to start Drying time. If set at ambient pressure then POSTVACS setpoint must be set to zero. Maximum of one degree under STERILIZATION TEMP InHg.7 PSI 10 PSIG Postvacs - each postvac pulls down to the DRY VAC POINT and then times for the DRY TIME. Traditional Dry - the dry timer does not start until DRY VAC POINT is reached * Option available on units with Optional Load Probe Control Table Parameters Menu (Page 2 of 2) Adjust parameter for each cycle type and test the cycles. Collect temperature and pressure data during the sterilization phase to ensure that cycles perform as required. Compare the data with the Steam Table (see Table ) to ensure correct temperature/pressure correlation. GP PSS5 Part IV _07/ South 25th Street, Omaha, NE TE: (402) ; FAX (402)
111 MAINTENANCE MANUAL Page 26 ALTITUDE IN FEET INCHES OF HG (Sea Level) PSIA TEMPERATURE(S) PSIG PSIG PSIG PSIG PSIG PSIG C = F C = F C = F C = F C = F C = F C = F C = F C = F C = F C = F NOTES: 1 Sea Level = PSIA = Inches of Hg Atmospheres = Inches of Hg Atmosphere = PSIA = 1 Inch Hg. Each 1000 Ft. of Altitude = 1 Inch of Hg Displacement 2. All Hg 0.0 C. Table SATURATED STEAM TABLE CORRECTED FOR ALTITUDE INCREMENTS OF 1000 FEET GP PSS5 Part IV _07/ South 25th Street, Omaha, NE TE: (402) ; FAX (402)
112 MAINTENANCE MANUAL Page Vacuum Leak Test (Optional) The Vacuum Leak Test is fixed in cycle #8. The following provides a functional description of the Vacuum Leak Test cycle: The Jacket temperature must be at least F (125.0 C) before the START push button on the touchpad can be activated. An LED on the START push button lights to indicate the jacket is up to the required temperature. After start is initiated, the sterilizer seals the gasket(s) then turns on the vacuum system (the drain valve is activated in IDLE mode and remains activated during the vacuum phase). A report header is generated by the printer. The sterilizer begins to pull a vacuum in the chamber and the printer provides the pressure every minute on the report. When the VACUUM LEVEL setpoint is reached, the vacuum system and drain valve are deactivated and a five minute stabilization period begins. At the end of the stabilization period, the 20- minute leak test begins. At the end of the test, the control system provides a VAC TEST PASSED/FAILED report along with the amount of VACUUM LOST. An exhaust, then an air-in phase follows to equalize the chamber to atmospheric pressure. The door gasket is then unsealed, completing the cycle. The following steps are to be used to perform the vacuum leak test: 1. Turn power off at control cabinet. In the control box, switch S1 on the A/D Board (Rev 2.0) Circuit board to CAL and turn power on. 2. Scroll up or down to "EEPROM DIAGS", press [ENTER]. 3. Scroll up or down to "SETPOINT MENU", press [ENTER]. 4. Scroll up or down to "VAC LEAK TEST VALUE", press [ENTER]. Limits for this setpoint are InHg. 5. Enter a value which will be the maximum vacuum lost to determine PASS/FAIL. This value is the total allowable vacuum lost after 20 minutes hold time. Press [ENTER] to store this value. 6. Press the [ADV] button until "HIT ANY BUTTON" appears. 7. Turn power off, switch S1 to OPER and turn power back on. 8. Press the [ ] and then the number button [4] to choose cycle number Press the [MENU] or [STER TEMP, STER TIME, DRY TIME] button to enter into the cycle parameter menu. 10. Set the "VACUUM LEVEL", and press [ENTER]. Limits for this setpoint is 0 30 InHg. 11. Press the [ENTER] button and then the [, ] to set the desired vacuum level at which to perform the vacuum leak test. Press [ENTER] again to save this setpoint. 12. Press the [ADV] button to return to IDLE mode. 13. Close the door and ensure that the Jacket has reached operating temperature. Press the [START] button to start the Vacuum Leak Test. GP PSS5 Part IV _07/ South 25th Street, Omaha, NE TE: (402) ; FAX (402)
113 MAINTENANCE MANUAL Page 28 SECTION 3.0 Troubleshooting The problems and cause/solutions described here are intended to be performed by a trained maintenance technician. ONLY A FULLY QUALIFIED MAINTENANCE TECHNICIAN MUST MAKE REPAIRS AND ADJUSTMENTS TO THIS UNIT. MAINTENANCE PERFORMED BY INEXPERIENCED, UNQUALIFIED PERSONS OR INSTALLATION OF UNAUTHORIZED PARTS COULD CAUSE PERSONAL INJURY OR VOID WARRANTY. (SEE WARRANTY) SHUT OFF ALL UTILITIES TO STERILIZER BEFORE SERVICING TO PREVENT ELECTRIC SHOCK HAZARD. TO PREVENT BURNS ALLOW STERILIZER AND GENERATOR (IF APPLICABLE) TO COOL TO ROOM TEMPERATURE BEFORE PERFORMING ANY CLEANING OR MAINTENANCE PROCEDURES. 3.1 Mechanical PROBLEM DOOR OPEN LED does not light when door is open. Door screws are not preset correctly. CAUSE/SOLUTIONS Open the door all the way. Disconnect the air supply to the sterilizer. Open the lid on the electronic cabinet and examine the white relay module that is labeled DOOR OPEN. The LED indicator on the relay should be on. If the LED is not lit, loosen the proximity switch on the air cylinder and slide it along the cylinder until the LED illuminates. Carefully tighten the proximity switch just as the LED comes on. The 3/8-16 set screws on the door should have been preset at the time of manufacture. If further adjustment is required, adjust when the sterilizer is cold. Leave.035 clearance between each pin and setscrew. 117 South 25th Street, Omaha, NE TE: (402) ; FAX (402) GP PSS5 Part IV _07/070208
114 MAINTENANCE MANUAL Page Electrical Unit has no power. PROBLEM CAUSE/SOLUTIONS Turn unit back on at the main power switch or reset the circuit breaker to the wall power. Power failure will not cause the unit to lose any settings, however, if the power is off for 24 hours the date and time will need to be reset. If the power failure occurred during a cycle, when power is restored you will receive a printout POWER FAILURE DETECTED AUTO- ADVANCING. The unit will auto-advance to the Exhaust Phase. The cycle that was interrupted should be rerun. 3.3 Software If the parameters of each phase are satisfied, PRIMUS sterilizers are designed to progress through each phase. Should an error occur, a message will appear on the touchpad LCD display. The user has the following options for most error messages: Button Selection Press [1] (ABORT) Press [2] (RETRY) Press [3] (IGNORE) Results Advances to Exhaust Phase Checks to see if problem still exists Ignore error and continue through cycle Error messages are as follows: ALARM/WARNINGS CAUSE RECOMMENDED ACTION Door Not Closed Door Gasket Error (Single Door) Door A Gasket Error (Double Door) Door switch out of adjustment or broken. Door gasket seat is damaged. Low steam pressure. Ensure door switch properly adjusted. Ensure wiring is not broken or loose Replace door gasket. Ensure air pressure is above 30 PSIG GP PSS5 Part IV _07/ South 25th Street, Omaha, NE TE: (402) ; FAX (402)
115 MAINTENANCE MANUAL Page 30 ALARM/WARNINGS CAUSE RECOMMENDED ACTION THIS STERILIZER USES A PRESSURIZED GASKET TO CONTAIN CHAMBER PRESSURE. IF GASKET PRESSURE FAILS, STEAM MAY BE RELEASED INTO THE ROOM. NOTIFY QUALIFIED SERVICE PERSONNEL. Pressure Bad PRINTOUT: PRESSURE OUT OF RANGE Over Temperature DISPLAY: START OR ADVANCE Under Temperature DISPLAY: START OR ADVANCE Heat Chamber Time-out PRINT OUT: STEAM TO CHAMBER RETARDED AUTO ADVANCING Precharge Time-out PRINT OUT: TIMEOUT: STEAM TO CHAMBER RETARDED AUTO ADVANCING Pressure out of range Temperature increases above the preset limits. Temperature falls below the preset limits. Chamber does not reach specified setpoint in allowable time period. Low steam supply. Bad pressure transducer/transmitter Pressure above 45 PSIG Check Half Ramp/Final Ramp setpoints Ensure drain bleed valve is properly set Check for moisture in the drain Check Chamber RTD Low steam pressure Moisture in Drain Check the Steam to Chamber valve Check pressure regulator for failure Check Chamber RTD Ensure steam supply is sufficient. Ensure setpoints are properly set Ensure steam supply is sufficient Ensure setpoints are properly set PREVAC Time-out Vacuum setpoint not reached in Low water pressure. GP PSS5 Part IV _07/ South 25th Street, Omaha, NE TE: (402) ; FAX (402)
116 MAINTENANCE MANUAL Page 31 ALARM/WARNINGS CAUSE RECOMMENDED ACTION PRINT OUT: AUTO ADVANCES time allowed by PREVAC timeout. Bad vacuum pump Check proper water pressure Check vacuum pump Check piping integrity Post-Vac Time-out PRINT OUT: AUTO ADVANCES Post-Vac vacuum setpoint not reached in time allowed by Post-Vac time-out. Check proper water pressure Check piping integrity Power Failure Power interrupted during cycle. Check electrical service Once power restored - Unit auto-advances to exhaust *Water in Drain Pressure Out of Range Hot Liquid in Chamber * OPTIONAL Water detected in Chamber drain. Pressure in the system exceeds 45 PSIG or drops below 30 InHg Displayed at the end of the LIQUIDS Cycle. Fixed automatically by opening special bleed valve to get water out of the chamber drain. Check Transducer/transmitter Recalibrate pressure setpoints Control out of calibration, recalibrate Check the main control pressure input circuitry This is normal. GP PSS5 Part IV _07/ South 25th Street, Omaha, NE TE: (402) ; FAX (402)
117 MAINTENANCE MANUAL Page Effluent Sterilizer Error Handling Procedure If any error occurs during cycle, the LCD touch pad will display: LOCKOUT ACTIVE, * KEY = BUZR OFF and the sterilizer cycle will be halted with the chamber door gaskets sealed and drain closed. All other valves will be in a fail-safe mode. The only thing that the user (operator) can perform when LOCKOUT mode occurs is to press the asterisk key to silence the buzzer. After pressing the asterisk key (button) the LCD touch pad will display: LOCKOUT ACTIVE, CALL MAINTENANCE. The printer will document the error and lockout condition. Designated personnel will need to perform the following steps and rectify the situation: 1. Open the control cabinet and locate the small slide switch marked OPER. CAL. mounted along side of the two program EPROMS on the analog circuit board ( REV 2.0). 2. Perform this step quickly so as to maintain door gasket pressure during power off. Turn off the electrical power to the control system (on the side of the control cabinet) and slide the small switch marked OPER / CAL to the CAL position and turn the electrical power to the control system back on. The control system maintains both door gaskets sealed as indicated by the related output relay LEDs. 3. If needed, refer to Part IV of the User s manual for a complete description of OUTPUT DIAGS. To use the manual outputs (e.g., RETRACT_A_&_VAC - retracts the Side A Door Gasket), press the up arrow key to scroll to OUTPUT DIAGS. Press the ENTER key and continue to press the up arrow key until the desired manual output function is displayed. Pressing the ENTER key causes the function to be active. Both door gaskets will remain sealed unless door gasket A or B is retracted using OUTPUT DIAGS. To return to the main menu, press the ADV key. 4. Once the situation is clear, LOCKOUT needs to be reset (this is set when an error occurs during a cycle in operational mode). In order to reset LOCKOUT, scroll through the main menu, using the up arrow key, to access the EPROM DIAGS menu. Press the ENTER key, then scroll to RESET LOCKOUT MODE and press the ENTER key. To re-run the cycle, perform the following additional step: 5. If the door gaskets were not retracted while in the maintenance mode (CAL) and the RESET LOCKOUT MODE was activated, the control system can be changed back to the OPER mode. Use the procedure provided in step #2 to switch from CAL back to OPER. Restart the cycle by pressing the START key. The cycle can be initiated with both door gasket sealed. If the START LED is not lit, the Jacket temperature may need to come up to set point. GP PSS5 Part IV _07/ South 25th Street, Omaha, NE TE: (402) ; FAX (402)

118 MAINTENANCE MANUAL Page 33 Section 4.0 Printer Paper Replacement 4.1 Loading Paper (Cybertech Printer) The following steps should be followed to load the printer with paper. 1. Open the clear acrylic front cover of printer to access the paper take-up compartment. 2. If needed, follow steps in 4.1.1, Unloading Paper From the Take-Up Spool to remove any printed reports. 3. Open the paper supply compartment and remove any unused paper and the paper core. 4. Insert the new paper (See Section 5.0, Recommended Spare Parts List) into the paper compartment with loose end of paper exiting front of printer (see Figure 4.1-1, Loading Thermal Printer Paper). The front panel LED should be flashing. Figure Loading Thermal Printer Paper (Cybertech Printer) 5. Close the paper supply compartment with paper exiting printer and ensure that the paper is properly aligned. The LED should now be ON continuously. 6. Depress the REPRINT/FEED switch to the REPRINT position switch. If there is no image on the paper, either the paper is in the printer backwards or the paper is not thermal paper. Reverse the paper, or replace with thermal paper to correct this condition. GP PSS5 Part IV _07/ South 25th Street, Omaha, NE TE: (402) ; FAX (402)
 2.")
119 MAINTENANCE MANUAL Page Loading Printer Take-Up Spool 1. The removable spool snaps between the two rotating discs (see Figure , Loading Printer Take-Up spool). The slot in the removable spool must be aligned with the drive pin on the right side of the disc. Figure Loading Printer Take-Up Spool (Cybertech Printer) 2. Place the end of the spool onto the left side disc hub and apply slight pressure to move the spring loaded disc (use the paper release handle to assist). Then place the left end of the spool onto the right side disc hub making sure to align the drive pin. 3. Place the loose end of the paper exiting the printer into the slot in the removable spool. Fold the end of the paper into a V before placing into the slot to secure the paper in the spool. 4. Depress the REPRINT/FEED switch to the FEED position to feed and take up the paper. Do this until all the paper slack is taken up Unloading Paper From The Take-Up Spool 1. If there is still paper in the printer, tear off the paper using the printer cut off bar. 2. Align the finger slots on both the right and left side discs. 3. While grasping the paper roll in the take-up area, push the paper release to the left. (See Figure , Loading Printer Take-Up Spool) GP PSS5 Part IV _07/ South 25th Street, Omaha, NE TE: (402) ; FAX (402)
120 MAINTENANCE MANUAL Page Pull the roll out of the take-up area and if necessary gently move it side to side to clear the hubs on the discs. 5. Retrieve the take-up spool by pushing it out of the roll of paper. 4.2 Paper Replacement (Optional Keltron Printer) When the printer is out of paper, the yellow (EOP), out-of-paper LED will blink at 1 second intervals. PRIMUS recommends that the paper be replaced when the end-of-paper indicator appears at the edge of the paper. The end-of-paper indicator is usually a red line on the edge of the paper strip. The use of PRIMUS printer paper is recommended. DO NOT RUN ANOTHER CYCLE AFTER THE RED LINE APPEARSTO AVOID LOSS OF DATA STORED IN THE PRINT BUFFER, THE PRINTER MUST BE PLACED OFF-LINE WHILE REPLACING THE PAPER. The paper compartment is located behind the front bezel. To access the paper tray assembly and replace paper, proceed as follows: 1. Prepare a roll of 2¼" thermal printer paper. (See Section 5.0 for the spare parts lists). 2. Printer power must be ON to replace the paper. 3. Press the [SLCT] switch once to place the printer Off-line, the EOP LED turns off to indicate the printer is Off-line. To access the printer tray assembly, pull the front bezel forward. NOTE When the printer is out of paper, it is placed Off-line automatically. The Yellow LED will be BLINKING for the out of paper indication. When the paper is replaced the Yellow LED will be out because the printer is still Off-line. Press the [SLCT] switch to place the printer On-line. 4. Insert a new roll of paper on the paper holder shaft and guide the edge of the paper into the printer mechanism paper input. Exposed circuit components do not contain perceptible voltages, but use care to avoid damaging delicate electronic components. Thread paper as shown in Figure with the paper coming off the top of the roll rather than the bottom of the roll. The Thermal Printer has an autofeed feature-simply line the paper up in the slot and the printer mechanism will grab and pull it through to the front. GP PSS5 Part IV _07/ South 25th Street, Omaha, NE TE: (402) ; FAX (402)
121 MAINTENANCE MANUAL Page 36 FIGURE PAPER LOADING (Optional Keltron Printer) 5. When the paper is replaced, printer auto on line. GP PSS5 Part IV _07/ South 25th Street, Omaha, NE TE: (402) ; FAX (402)
122 MAINTENANCE MANUAL Page 37 SECTION 5.0 RECOMMENDED SPARE PARTS LIST PRIMUS SPARE PARTS LIST Part Number Description VALVE,SOLENOID,1/8,AIR STACKING,3-WAY FILTER,0.3 MICRON (Used with Air-In Filter Assembly) VALVE,NEEDLE,1/4,STM VALVE,PNEUMATIC,BR,1/2,HP STM,N/C KIT VALVE,PNEUMATIC,BR,1/2,HP STM,N/C (400087) VALVE,PNEUMATIC,BR,1,HP STM,N/C KIT,VALVE,PNEUMATIC,BR,1,HP STM,N/C (400088) VALVE,PNEUMATIC,SS,1/2,HP STM,N/C RTD ELEMENT,SINGLE,72 LEAD,1/ RTD ELEMENT,DOUBLE,72 LEAD,1/ RTD ELEMENT,DOUBLE,216 LEAD,1/ VALVE,SOLENOID,1/4 AIR DOUBLE,3-WAY RTD ELEMENT,SINGLE,216 LEAD,1/ TRAP,THERMATIC,BR,1/2, PSI KIT,TRAP,THERMATIC,BR,1/2, PSI (400694) VALVE,SOLENOID,BR,1/4,STM,WTR,N/C KIT,VALVE,SOLENOID,BR,1/4,STM,WTR,N/C (400697) VALVE,SOLENOID,BR,1/2,LP STM,N/C KIT,VALVE,SOLENOID,BR,1/2,LP STM,N/C (400699) VALVE,SOLENOID,BR,1/2,HP STM,N/C KIT,VALVE,SOLENOID,BR,1/2,HP STM,N/C (400701) VALVE,SOLENOID,BR,1/2,WTR,N/C KIT,VALVE,SOLENOID,BR,1/2,WTR,N/C (400703) VALVE,SOLENOID,SS,1/2,HP STM,N/C KIT,VALVE,SOLENOID,SS,1/2,HP STM,N/C (400705) VALVE,SOLENOID,BR,3/4,LP STM,N/C KIT,VALVE,SOLENOID,BR,3/4,LP STM,N/C (400707) GP PSS5 Part IV _07/ South 25th Street, Omaha, NE TE: (402) ; FAX (402)
123 MAINTENANCE MANUAL Page 38 Part Number Description VALVE,SOLENOID,1/8,AIR STACKING,3-WAY FILTER,0.3 MICRON (Used with Air-In Filter Assembly) VALVE,NEEDLE,1/4,STM VALVE,PNEUMATIC,BR,1/2,HP STM,N/C KIT VALVE,PNEUMATIC,BR,1/2,HP STM,N/C (400087) VALVE,PNEUMATIC,BR,1,HP STM,N/C KIT,VALVE,PNEUMATIC,BR,1,HP STM,N/C (400088) VALVE,PNEUMATIC,SS,1/2,HP STM,N/C RTD ELEMENT,SINGLE,72 LEAD,1/ RTD ELEMENT,DOUBLE,72 LEAD,1/ RTD ELEMENT,DOUBLE,216 LEAD,1/ VALVE,SOLENOID,1/4 AIR DOUBLE,3-WAY RTD ELEMENT,SINGLE,216 LEAD,1/ TRAP,THERMATIC,BR,1/2, PSI KIT,TRAP,THERMATIC,BR,1/2, PSI (400694) VALVE,SOLENOID,BR,1/4,STM,WTR,N/C KIT,VALVE,SOLENOID,BR,1/4,STM,WTR,N/C (400697) VALVE,SOLENOID,BR,1/2,LP STM,N/C KIT,VALVE,SOLENOID,BR,1/2,LP STM,N/C (400699) VALVE,SOLENOID,BR,1/2,HP STM,N/C KIT,VALVE,SOLENOID,BR,1/2,HP STM,N/C (400701) VALVE,SOLENOID,BR,1/2,WTR,N/C KIT,VALVE,SOLENOID,BR,1/2,WTR,N/C (400703) VALVE,SOLENOID,SS,1/2,HP STM,N/C KIT,VALVE,SOLENOID,SS,1/2,HP STM,N/C (400705) VALVE,SOLENOID,BR,3/4,LP STM,N/C KIT,VALVE,SOLENOID,BR,3/4,LP STM,N/C (400707) VALVE,SOLENOID,BR,3/4,HP STM,N/C KIT,VALVE,SOLENOID,BR,3/4,HP STM,N/C (400709) VALVE,SOLENOID,BR,3/4,WTR,N/C GP PSS5 Part IV _07/ South 25th Street, Omaha, NE TE: (402) ; FAX (402)
124 MAINTENANCE MANUAL Page 39 Part Number Description KIT,VALVE,SOLENOID,BR,3/4,WTR,N/C (400711) VALVE,SOLENOID,BR,1/2,LP,N/O KIT,VALVE,SOLENOID,BR,1/2,LP,N/O (400713) VALVE,SOLENOID,BR,1/4,3 WAY,N/C,5/64 ORFICE KIT,VALVE,SOLENOID,BR,1/4,3 WAY,N/C,5/64 ORFICE (400715) VALVE,SOLENOID,BR,1/2,LP STM,N/C,0 DIFFERENTAL KIT,VALVE,SOLENOID,BR,1/2,LP STM,N/C,0 DIFFERENTAL (400719) VALVE,SOLENOID,BR,3/4,LP STM,N/C,0 DIFFERENTAL KIT,VALVE,SOLENOID,BR,3/4,LP STM,N/C,0 DIFFERENTAL (400722) VALVE,SOL,BR,1/4",3-WAY,WTR K KIT,VALVE,SOL,BR,1/4",3-WAY,WTR (463282) VALVE,SOL,BR,1/4",STM,WTR,AIR K KIT,VALVE,SOL,BR,1/4",STM,WTR,AIR (463265) VALVE,SOL,SS,1/4",STM,WTR,AIR K KIT,VALVE,SOL,SS,1/4",STM,WTR,AIR (463266) VALVE,SOL,SS,1/2"STM,AIR K KIT,VALVE,SOL,SS,1/2"STM,AIR (463267) VALVE,SOL,BR,1/2",STM,AIR K KIT,VALVE,SOL,BR,1/2",STM,AIR (463263) VALVE,SOL,BR,3/4",STM,AIR K KIT,VALVE,SOL,BR,3/4",STM,AIR (463264) VALVE,SOL,BR,1/2",WTR K KIT,VALVE,SOL,BR,1/2",WTR (463283) VALVE,SOL,BR,3/4",WTR K KIT,VALVE,SOL,BR,3/4",WTR (463284) VALVE,PNEU,BR,1/2",STM,AIR,WTR K KIT,VALVE,PNEU,BR,1/2",STM,AIR,WTR (463270) S KIT,SEAL,PNEU,BR,1/2",STM,AIR,WTR (463270) VALVE,PNEU,BR,3/4",STM,AIR,WTR K KIT,VALVE,PNEU,BR,3/4",STM,AIR,WTR (463271) GP PSS5 Part IV _07/ South 25th Street, Omaha, NE TE: (402) ; FAX (402)
125 MAINTENANCE MANUAL Page 40 Part Number Description S KIT,SEAL,PNEU,BR,3/4",STM,AIR,WTR ( VALVE,PNEU,BR,1",STM,AIR,WTR K KIT,VALVE,PNEU,BR,1",STM,AIR,WTR (463272) S SEAL,PNEU,BR,1",STM,AIR,WTR (463272) VALVE,PNEU,BR,1-1/4",STM,AIR,WTR K KIT,VALVE,PNEU,BR,1-1/4",STM,AIR,WTR (463273) S SEAL,PNEU,BR,1-1/4",STM,AIR,WTR (463273) VALVE,PNEU,BR,1-1/2",STM,AIR,WTR K KIT,VALVE,PNEU,BR,1-1/2",STM,AIR,WTR (463274) S SEAL,PNEU,BR,1-1/2",STM,AIR,WTR (463274) VALVE,PNEU,BR,2",STM,AIR,WTR K KIT,VALVE,PNEU,BR,2",STM,AIR,WTR (463275) S SEAL,PNEU,BR,2",STM,AIR,WTR (463275) VALVE,PNEU,SS,1/2",STM,AIR,WTR K KIT,VALVE,PNEU,SS,1/2",STM,AIR,WTR (463276) S SEAL,PNEU,SS,1/2",STM,AIR,WTR (463276) VALVE,PNEU,SS,3/4",STM,AIR,WTR K KIT,VALVE,PNEU,SS,3/4",STM,AIR,WTR (463277) S SEAL,PNEU,SS,3/4",STM,AIR,WTR (463277) VALVE,PNEU,SS,1",STM,AIR,WTR K KIT,VALVE,PNEU,SS,1",STM,AIR,WTR (463278) S SEAL,PNEU,SS,1",STM,AIR,WTR (463278) VALVE,PNEU,SS,1-1/4",STM,AIR,WTR K KIT,VALVE,PNEU,SS,1-1/4",STM,AIR,WTR (463279) S SEAL,PNEU,SS,1-1/4",STM,AIR,WTR (463279) VALVE,PNEU,SS,1-1/2",STM,AIR,WTR K KIT,VALVE,PNEU,SS,1-1/2",STM,AIR,WTR (463314) S SEAL,PNEU,SS,1-1/2",STM,AIR,WTR (463314) VALVE,PNEU,UC,BR,1/2",STM,AIR,WTR,ULTRA COMPACT K KIT,VALVE,PNEU,UC,BR,1/2",STM,AIR,WTR,ULTRA COMPACT (456041) GP PSS5 Part IV _07/ South 25th Street, Omaha, NE TE: (402) ; FAX (402)
126 MAINTENANCE MANUAL Page 41 Part Number Description S SEAL,PNEU,UC,BR,1/2",STM,AIR,WTR,ULTRA COMPACT (456041) VALVE,PNEU,UC,SS,3/8",STM,AIR,WTR,ULTRA COMPACT K KIT,VALVE,PNEU,UC,SS,3/8",STM,AIR,WTR,ULTRA COMPACT (459052) S SEAL,PNEU,UC,SS,3/8",STM,AIR,WTR,ULTRA COMPACT (459052) VALVE,PNEU,UC,BR,3/8",STM,AIR,WTR,ULTRA COMPACT K KIT,VALVE,PNEU,UC,BR,3/8",STM,AIR,WTR,ULTRA COMPACT (459049) S SEAL,PNEU,UC,BR,3/8",STM,AIR,WTR,ULTRA COMPACT (459049) VALVE,PNEU,BR,1/2",N/O,STM,AIR,WTR K KIT,VALVE,PNEU,BR,1/2",N/O,STM,AIR,WTR (463316) S SEAL,PNEU,BR,1/2",N/O,STM,AIR,WTR (463316) VALVE,PNEU,SS,1/2",N/O,STM,AIR,WTR K KIT,VALVE,PNEU,SS,1/2",N/O,STM,AIR,WTR (463330) S SEAL,PNEU,SS,1/2",N/O,STM,AIR,WTR (463330) SWITCH,PRESS,BR,SETTING,10R/EP SWITCH,PRESS,SS,SETTING,10R/EP VALVE,NEEDLE,BR,1/8,WATER POLISH, STAINLESS STEEL LOAD PROBE,SINGLE,216,1/4 AUTOCLAVABLE PAPER,THERMAL,PRINTER,SIX PACK (Keltron) PAPER,IMPACT,PRINTER,SIX PACK (Keltron) RIBBON,IMPACT,PRINTER (Keltron) PAPER, THERMAL, PRINTER, Fo PRINT,SIX PACK (Cybertech) See Manufacture GASKET, DOOR (BASED ON VESSEL SIZE) 117 South 25th Street, Omaha, NE TE: (402) ; FAX (402) GP PSS5 Part IV _07/070208
127 MAINTENANCE MANUAL Page CONTROLLER ASSEMBLY, V2.0 ELECTRICAL PARTS TOUCHPAD ASSEMBLY, HORIZONTAL TOUCHPAD ASSEMBLY, VERTICAL RELAY OUTPUT, 120VAC,N/O3 AMPS RELAY OUTPUT, 240VAC,N/C,3 AMP RELAY OUTPUT, DRY CONTACT RELAY INPUT,2.5-28VDC RELAY INPUT, 120 VAC FUSE,4 AMP, 2 PIN (Opto Relays) *See your Major Plumbing List for the components installed on your machine. 1. Valve kit replaces valve listed e.g., (XXXXX) GP PSS5 Part IV _07/ South 25th Street, Omaha, NE TE: (402) ; FAX (402)
128 MAINTENANCE MANUAL Page 43 SECTION 6.0 DRAWINGS AND BILL OF MATERIALS 6.1 Equipment Layout 6.2 Major Plumbing List 6.3 Piping and Instrument Diagram 6.4 Electrical Diagram 6.5 Major Electrical List GP PSS5 Part IV _07/ South 25th Street, Omaha, NE TE: (402) ; FAX (402)
129
130 MAJOR PLUMBING LIST PLUMBING DWG: 17515P REV: TAG ID. PRIMUS P/N MFR. MFR. P/N DESCRIPTION FUNCTION BV APOLLO VALVE,BALL,MANUAL,BR,1/4 AIR SUPPLY CV UNITED BRASS 62SE1/2 W/EPDM VALVE,CHECK,SWING,BR,1/2, AIR-IN CHECK CV UNITED BRASS 62SE1/2 W/EPDM VALVE,CHECK,SWING,BR,1/2, SPECIAL BLEED CHECK CV UNITED BRASS 62SE1/2 W/EPDM VALVE,CHECK,SWING,BR,1/2, CHAMBER DRAIN CV CONBRACO VALVE,CHECK,BALL-CONE,BR,1/4 GASKET RETRACT CV PARKER 4Z-C4L-1/3EPR-B VALVE,CHECK,BR,1/4T,EPDM,1/3#, AIR TO GASKET HNH CONBRACO STRAINER,"Y",BR,1/2,50X50 COLD WATER IN HV ANDERSON 103CC VALVE,NEEDLE,BR,1/8"M,WTR WATER QUENCH HV PARKER 4M4Z-VL4AR-B VALVE,NEEDLE,1/4,STM CHAMBER BLEED HVY MEISSNER D03-97PE FILTER,AIR,0.3,10" AIR-IN KAL SCHUTTE&KOERTIN 99SX010J0010 EJECTOR,SS,3/4 WATER TO EJECTOR LCV Watson McDaniel TT125 TRAP,THERMATIC,BR,1/2, CHAMBER DRAIN TRAP LCV Watson McDaniel TT125 TRAP,THERMATIC,BR,1/2, JACKET TRAP OR Primus ORIFICE,1/2" PIPE, BR, PRESS FIT, 1/4" ID STEAM TO CHAMBER PCV MIYAWAKI RE 1 REGULATOR,PRESS,BR,3/4,7-60PSI STEAM TO CHAMBER PCV NORGREN B92G-NNK-QT1-RMG REGULATOR,AIR,W/ FILTER,1/4 AIR TO GASKET PI WIKA GAUGE,PRESS,CHMB,30HG-60PSI CHAMBER PRESSURE PS NASON SM-2A-10R/HR/EP SWITCH,PRESS,BR,SETTING 10R/EP GASKET PRESSURE PSV CONBRACO L-45-UV VALVE,SAFETY,BR,3/4,45# JACKET PRESSURE PSV CONBRACO L-45-UV VALVE,SAFETY,BR,3/4,45# CHAMBER PRESSURE PT BARKSDALE 422H2-03-A TRANSDUCER,PRESS,0-100 MV,0-50 CHAMBER PRESSURE SV BURKERT VALVE,SOL,BR,1/4",STM,WTR,AIR AIR TO GASKET SV BURKERT VALVE,SOL,BR,1/4",STM,WTR,AIR GASKET RETRACT SV BURKERT VALVE,SOL,BR,1/2",WATER WATER TO EJECTOR SV BURKERT VALVE,SOL,BR,1/2",STM,AIR CHAMBER DRAIN SV BURKERT VALVE,SOL,BR,1/2",STM,AIR STEAM TO JACKET SV BURKERT VALVE,SOL,BR,1/2",STM,AIR CHAMBER TRIM SV BURKERT VALVE,SOL,BR,1/2",STM,AIR AIR-IN SV BURKERT VALVE,SOL,BR,1/4",STM,WTR,AIR WATER QUENCH TE SENSORTEC RBBJL-KW04A B RTD ELEMENT,SGL,72"LEAD,1/4 TO CPU (JACKET RTD) TE SENSORTEC RBBJL-KW04A B(0RTD ELEMENT,SGL,144" LEAD TO CPU (CHAMBER RTD) TS NASON TM-1A-110R/HR SWITCH,TEMP,BR,SETTING 110R WATER QUENCH DRAWN BY: N.T. DATE: JOB NO: MODEL NO: PSS5-B-MESD PAGE 1 OF 1
131 MAJOR BOILER PLUMBING LIST BOILER PLUMBING DWG: 1460Y22 REV: C TAG ID. PRIMUS P/N MFR. MFR. P/N DESCRIPTION FUNCTION BLOWDOWN DURA VALVE EA2001-3/4" BOILER,VALVE,3/4,BLOWDOWN BOILER BLOWDOWN BOILER SUSSMAN 36AB3-PRI BOILER,36KW,208V,3P BOILER BV NIBCO /2" VALVE,BALL,MANUAL,BR,1/2 STEAM FROM BOILER MOTOR DAYTON 6K160E MOTOR,FEED WATER,1/4HP,120V FEED WATER MOTOR PUMP PROCON 101A100F11BB PUMP,FEED WATER,BR,100GPH FEED WATER PUMP SV BURKERT VALVE,SOL,BR,1/2",WATER WATER TO BOILER BLOWDOWN DRAWN BY: B.S. DATE: REV DATE: JOB NO: MODEL: BOILER, 36KW, 208 VAC, 3 P, INTEGRAL PAGE 1 OF 1
132
133
134
135 MAJOR ELECTRICAL LIST PLUMBING DWG: 17515P REV: ELECTRCIAL DWG: 17515E REV: LINE PRIMUS P/N MFR. MFR. P/N DESCRIPTION FUNCTION CONTROL ENG C &C BOX,CONTROL,21X10X5,W/HOLES, ELECTRICAL ENCLOSURE LITTLEFUSE V130LA20A MOV-SURGE SUPPRESSOR,130V RMS SURGE SUPPRESSOR AIRPAX T A-03-20AL-V SWITCH/CIRCUIT BREAKER,SPST POWER ON/OFF CHICAGO MINI 93F3532 PILOT LIGHT,125VAC,RED LENSE POWER ON/OFF VISUAL INDICATOR MECHATRONICS MDH06DL5/M FILTER,LINE,1PHASE,6AMP NOISE FILTER LITTLEFUSE 846S GY FUSE HOLDER,2 FUSE SYSTEM PROTECTION BUSSMAN 28F055 FUSE,1/2AMP,250V SYSTEM PROTECTION POWER SUPPLY, 5VDC & 15VDC POWER SUPPLY LITTLEFUSE 846S GY FUSE HOLDER,2 FUSE PRINTER POWER SUPPLY PROTECTION BUSSMAN AGC-1 FUSE,1AMP,250V,FAST-ACTING PRINTER POWER SUPPLY PROTECTION POWER ONE HB A POWER SUPPLY,24VAC THERMAL PRINTER POWER SUPPLY CORNELL DUBLIER380LX223M035A042 CAPACITOR,22000 UFD,35VDC PRINTER CAPACITOR Omron 120D10 RELAY,SOLID STATE,5-24/120V WATER QUENCH (CR 24) NASON TM-1A-110R/HR SWITCH,TEMP,BR,SETTING 110R WATER QUENCH (TS 24) OPTO 22 G40AC5 RELAY,OUTPUT,120VAC,3AMP MASTER POWER OPTO 22 G40AC5A5 RELAY,OUTPUT,240VAC,N/C,3AMP POWER CONTROL NASON SM-2A-10R/HR/EP SWITCH,PRESS,BR,SETTING 10R/EP GASKET PRESS. SWITCH (PS 09) OPTO 22 G41DC5K RELAY,INPUT,2.5-28VDC GASKET PRESS. SWITCH Primus DOOR SWITCH ASSEMBLY, 16 DOOR SWITCH CLOSED (LS 08) OPTO 22 G41DC5K RELAY,INPUT,2.5-28VDC DOOR SWITCH CLOSED OPTO 22 G40DC5R RELAY,OUTPUT DRY CONTACT BUZZER OPTO 22 G40AC5 RELAY,OUTPUT,120VAC,3AMP CHAMBER AIR IN BURKERT VALVE,SOL,BR,1/2",STM,AIR CHAMBER AIR IN (SV 06) OPTO 22 G40AC5 RELAY,OUTPUT,120VAC,3AMP CHAMBER TRIM BURKERT VALVE,SOL,BR,1/2",STM,AIR CHAMBER TRIM (SV 05) OPTO 22 G40AC5 RELAY,OUTPUT,120VAC,3AMP JACKET STEAM BURKERT VALVE,SOL,BR,1/2",STM,AIR JACKET STEAM (SV 04) OPTO 22 G40AC5 RELAY,OUTPUT,120VAC,3AMP CHAMBER DRAIN BURKERT VALVE,SOL,BR,1/2",STM,AIR CHAMBER DRAIN (SV 03) OPTO 22 G40AC5 RELAY,OUTPUT,120VAC,3AMP EJECTOR BURKERT VALVE,SOL,BR,1/2",WATER EJECTOR (SV 02) OPTO 22 G40AC5 RELAY,OUTPUT,120VAC,3AMP GASKET "A" RETRACT BURKERT VALVE,SOL,BR,1/4",STM,WTR,AIR GASKET "A" RETRACT (SV 01) OPTO 22 G40AC5 RELAY,OUTPUT,120VAC,3AMP GASKET "A" PRESSURE BURKERT VALVE,SOL,BR,1/4",STM,WTR,AIR GASKET "A" PRESSURE (SV 00) Primus TOUCHPAD ASSEMBLY,VERTICAL,COMPLETE OPERATOR INPUT DOOR Primus CONTROLLER ASSEMBLY, V2.0, STEP-C1 SYSTEM CONTROL STAR MICRONICS RMB-06 BUZZER ELEMENT,6V PRINTER ALARM DRAWN BY: N.T. DATE: JOB NO: MODEL NO: PSS5-B-MESD PAGE 1 OF 2
136 MAJOR ELECTRICAL LIST PLUMBING DWG: 17515P REV: ELECTRCIAL DWG: 17515E REV: BARKSDALE 422H2-03-A TRANSDUCER,PRESS,0-100 MV,0-50 CHAMBER PRESS SENSORTEC RBBJL-KW04A B(0RTD ELEMENT,SGL,144" LEAD CHAMBER DRAIN RTD CyberTech PRNTR0004JPR PRINTER,THERMAL,FO CONTROL HARD COPY WITNESS DEVICE SENSORTEC RBBJL-KW04A B RTD ELEMENT,SGL,72"LEAD,1/4 JACKET RTD PRIMUS LOAD PROBE, ASSEMBLY, 216" LEAD DRAWN BY: N.T. DATE: JOB NO: MODEL NO: PSS5-B-MESD PAGE 2 OF 2
137 MAINTENANCE MANUAL Page 44 THIS PAGE INTENTIONALLY LEFT BLANK GP PSS5 Part IV _07/ South 25th Street, Omaha, NE TE: (402) ; FAX (402)
138
139

140

141


142

143

144
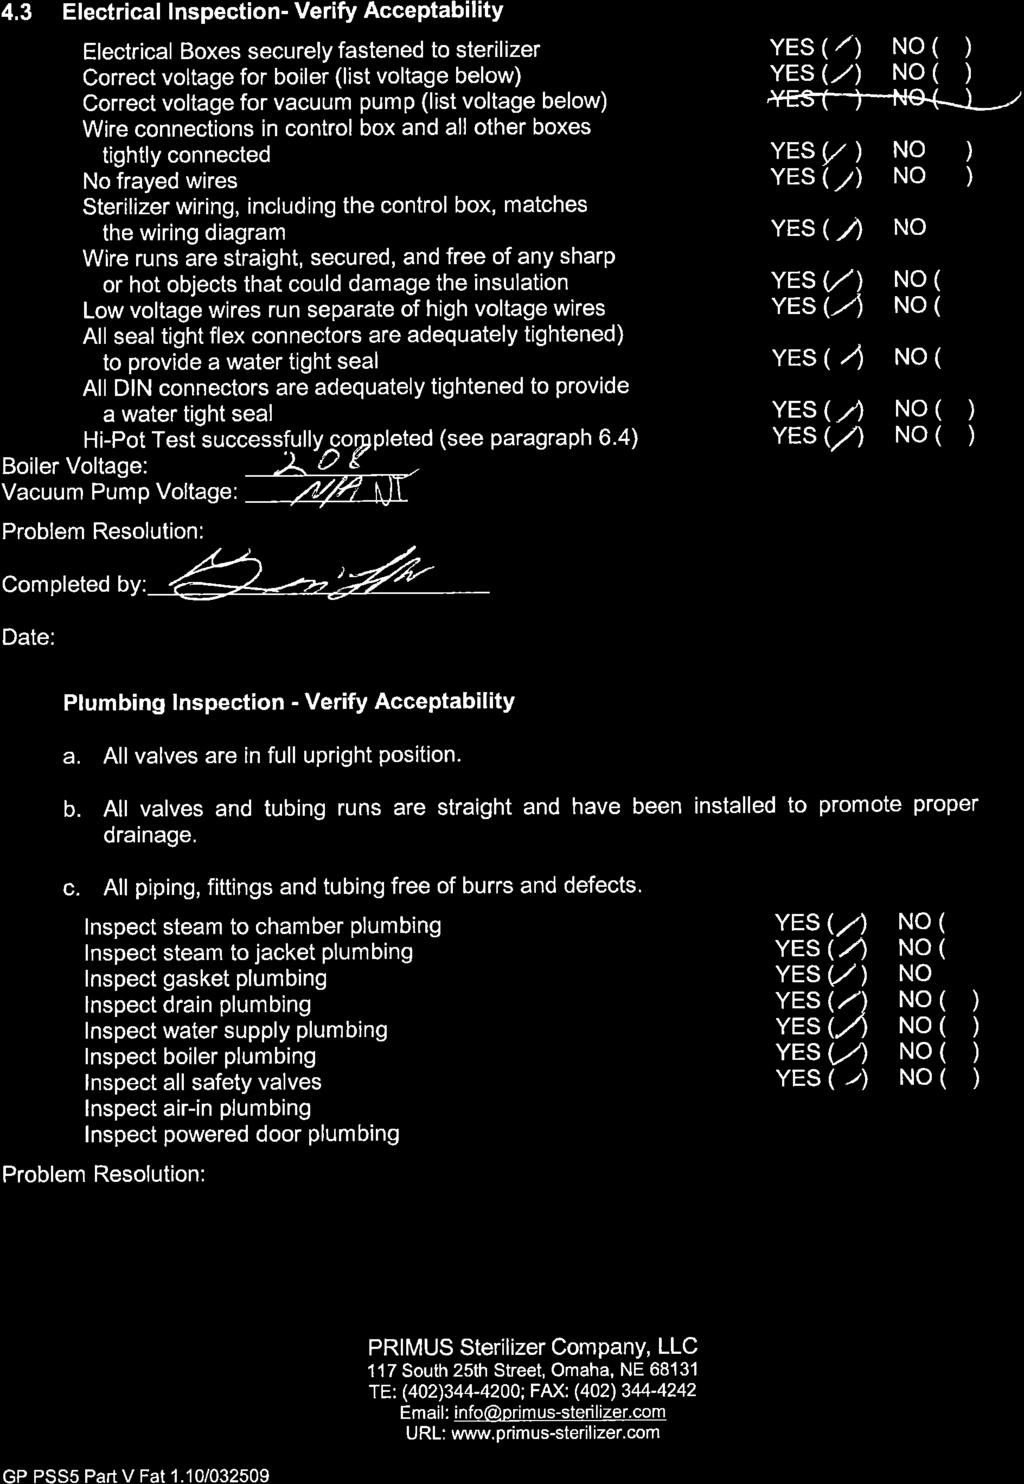
145

146

147
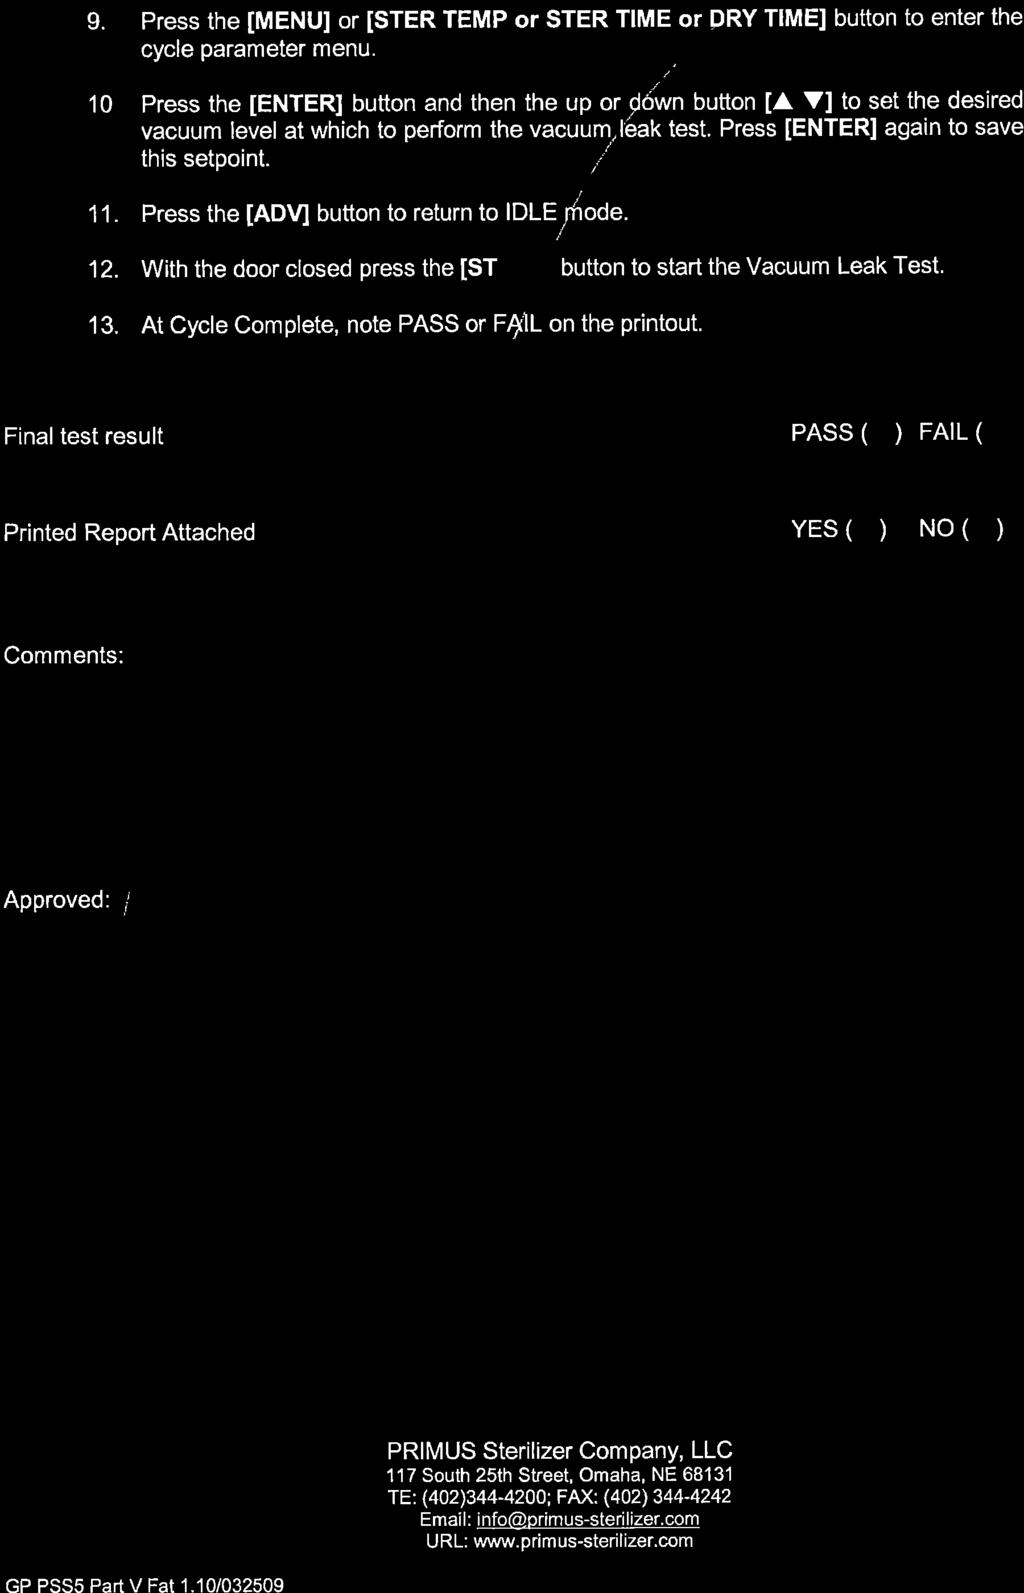
148

149
150


151

152
153

154

155

156

157

158

159
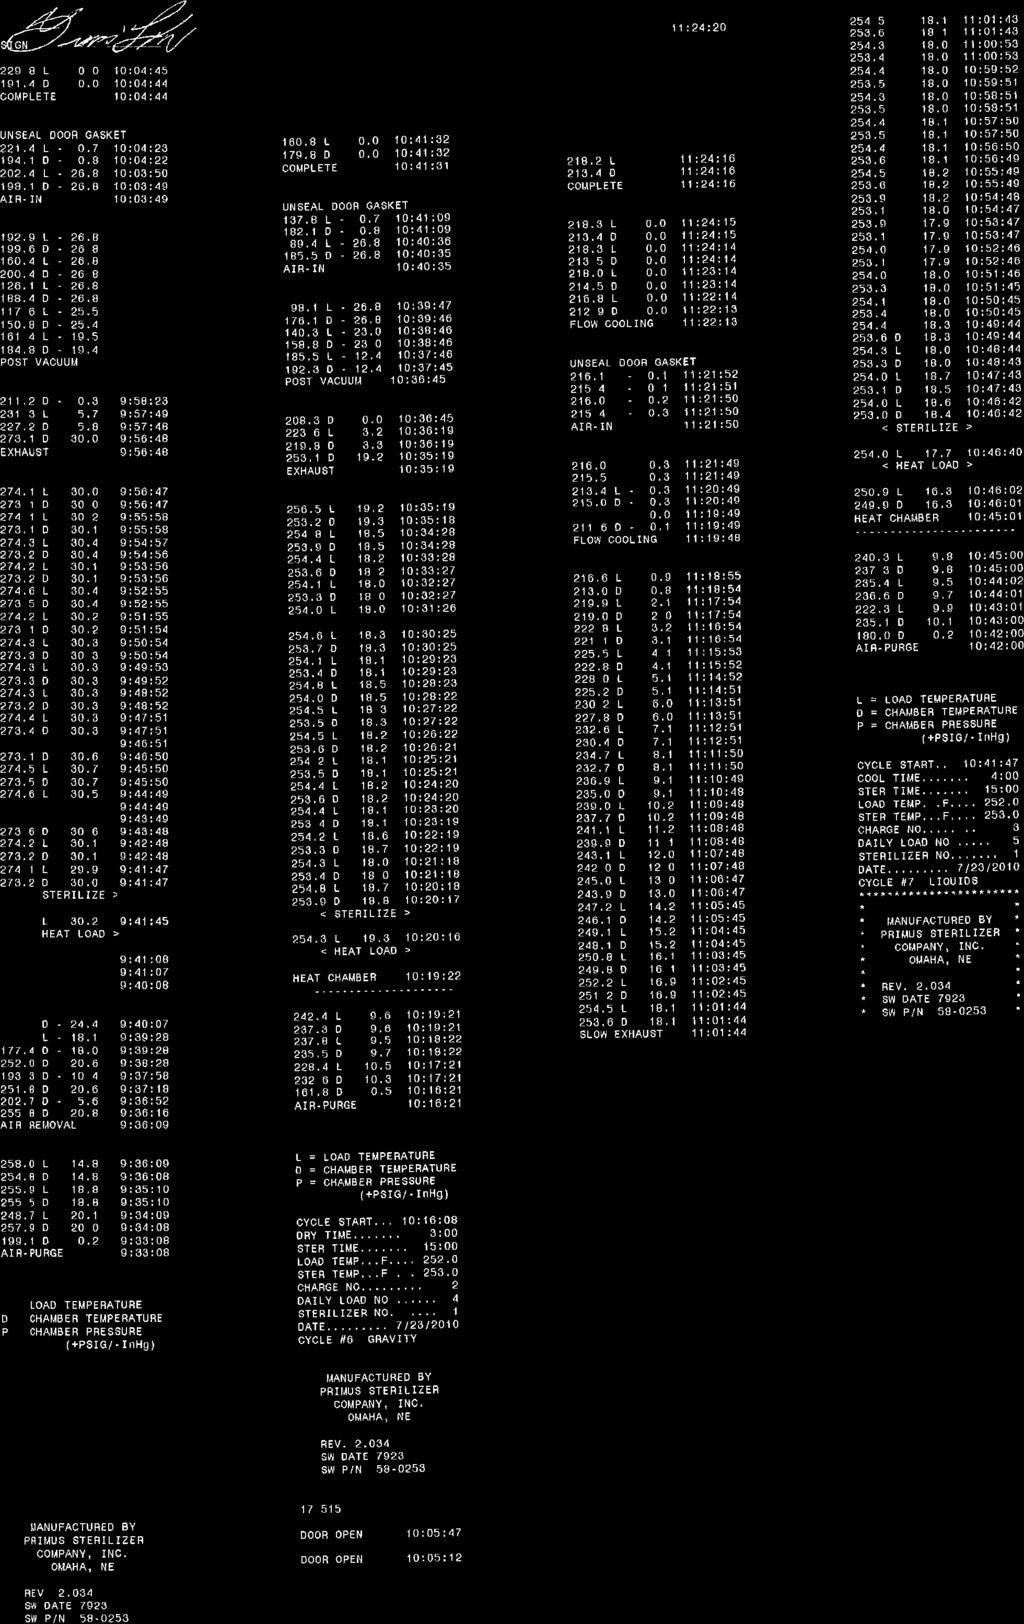
160

161
 344-4200; FAX: (402) 344-4242 KUHLMAN TECHNOLOGIES INC. 10512 N.E.68 th Street Kirkland Washington 98033 TE.")
162 PRIMUS GENERAL PURPOSE STEAM STERILIZER PRIMUS PSS 500 CONTROL APPENDIX A MANUFACTURER S RECORDS PSS-500 Controls Software Version 7923 July 2, 2008 Version 1.07 PRIMUS STERILIZER COMPANY, LLC 117 South 25 th Street, Omaha NE TE: (402) ; FAX: (402) KUHLMAN TECHNOLOGIES INC N.E.68 th Street Kirkland Washington TE.:(206) ; FAX:(206) ; TELEX:26346 KTI-UR
163 , Omaha, NE by PRIMUS Sterilizer Company Printed in the United States of America Steam Sterilizer General Information, Installation, User s Manual V196 controller Includes Bibliographical References GP PSS5 APPA _08/ South 25th Street, Omaha, NE TE: (402) ; FAX (402) URL:
164 MANUFACTURERS RECORDS Appendix A Page i TABLE CONTENTS Page APPENDIX A: MANUFACTURER S RECORDS 10.1 Heat Records U-1s Boiler Manual/U-2I... 1 GP PSS5 APPA _08/ South 25th Street, Omaha, NE TE: (402) ; FAX (402) URL:
165 MANUFACTURERS RECORDS Appendix A Page i THIS PAGE INTENTIONALLY LEFT BLANK 117 South 25th Street, Omaha, NE TE: (402) ; FAX (402) URL: GP PSS5 APPA _08/070208
166 MANUFACTURERS RECORDS Appendix A Page A-1 APPENDIX A. Manufacturer s Records 10.1 Heat Records Manufacturer s heat records are provided where applicable for sanitary fittings. Heat records provide a record of the components of the stainless used in the development of the sanitary fittings U-1s A Form U-1 Manufacturer s Data Report for Pressure Vessels that registers this unit with the National Board of Boiler and Pressure Vessel Inspectors follows Boiler Manual or Steam to Steam Generator If your sterilizer has an optional stainless steel boiler or a steam to steam generator installed, than the manufacturer s Installation, Operation, and Maintenance Manual and the U-2 (applies to boilers only) specific to your unit will follow. GP PSS5 APPA _08/ South 25th Street, Omaha, NE TE: (402) ; FAX (402) URL:
167 MANUFACTURERS RECORDS Appendix A Page A-2 THIS PAGE INTENTIONALLY LEFT BLANK GP PSS5 APPA _08/ South 25th Street, Omaha, NE TE: (402) ; FAX (402) URL:
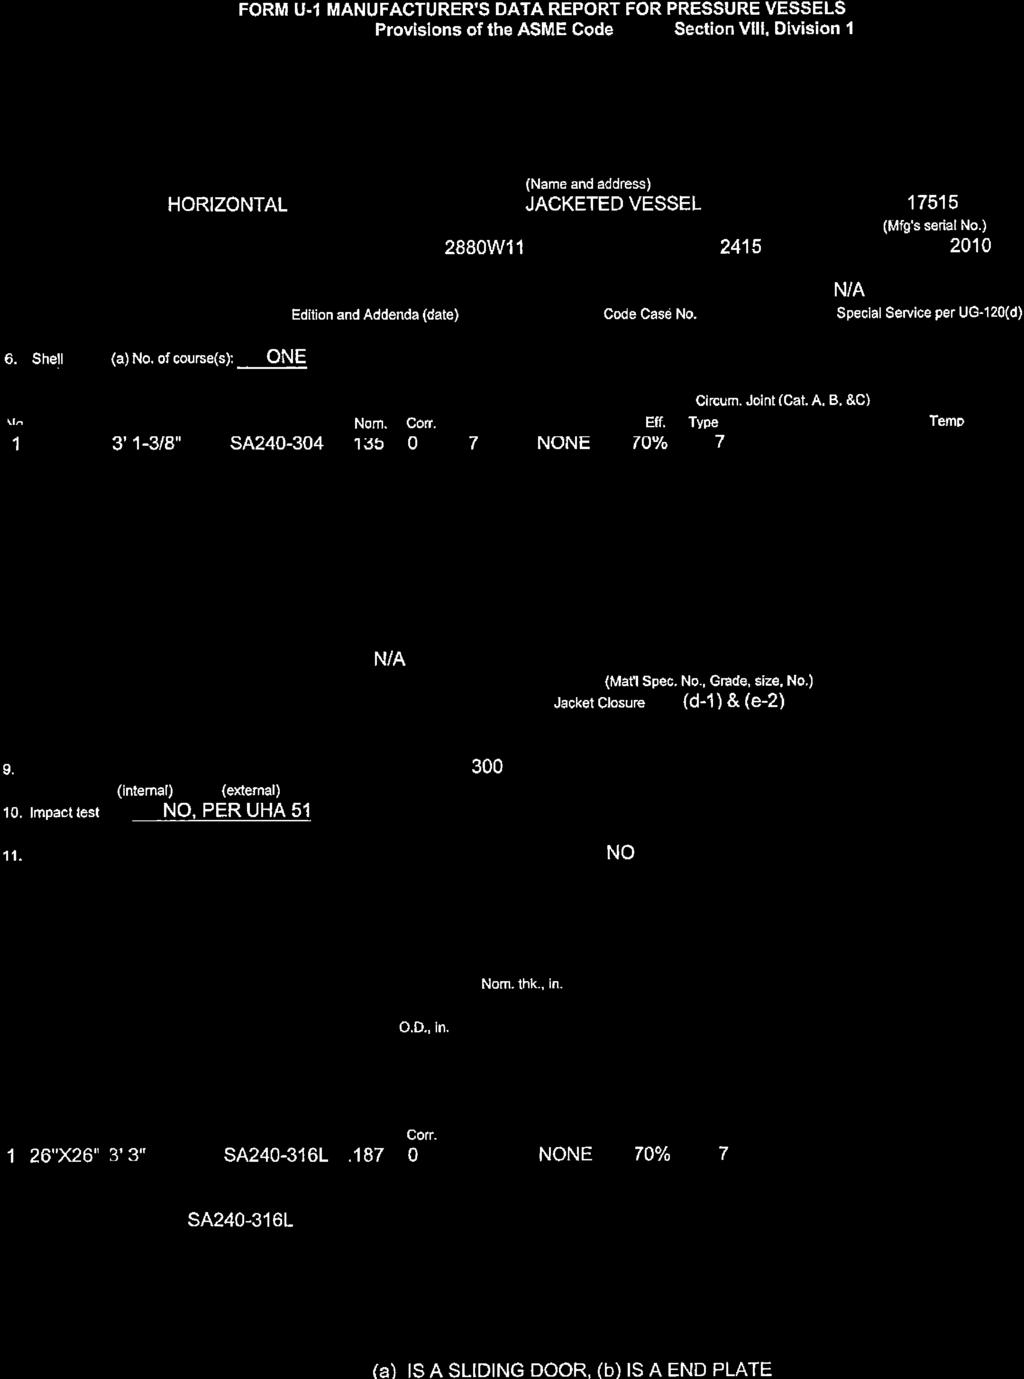

168

169

170

171


172
173

174

175

176

177

178


179
Sterilizer Model LS2020 Series Beta Star Life Science Products of R-V Industries
 SECTION 11630 - STERILIZERS PART 1 - GENERAL 1.1 SUMMARY A. Section Includes: 1.2 REFERENCES 1. Small Steam Sterilizer A. The following industry, association and government codes and standards are cited
OPERATOR MANUAL RELIANCE 1024/1034. Laboratory Glassware Dryers. (10/18/01) P Rev. 4
 P Rev. 4") OPERATOR MANUAL RELIANCE 1024/1034 Laboratory Glassware Dryers (10/18/01) P-122990-607 Rev. 4 LIMITATIONS OF LIABILITY AND INDEMNITY IN NO CASE, WHETHER AS A RESULT OF A BREACH OF CONTRACT, BREACH OF WARRANTY,
OPERATOR MANUAL RELIANCE 1024/1034 Laboratory Glassware Dryers (10/18/01) P-122990-607 Rev. 4 LIMITATIONS OF LIABILITY AND INDEMNITY IN NO CASE, WHETHER AS A RESULT OF A BREACH OF CONTRACT, BREACH OF WARRANTY,
Unfired Steam Generators (Series RB) Installation, Operation and Maintenance
 Installation, Operation and Maintenance") Unfired Steam Generators (Series RB) Installation, Operation and Maintenance Horizontal USG Vertical USG 534-EN Please read and save these instructions Disclaimers This Installation, Operation, and Maintenance
Unfired Steam Generators (Series RB) Installation, Operation and Maintenance Horizontal USG Vertical USG 534-EN Please read and save these instructions Disclaimers This Installation, Operation, and Maintenance
Installation, Operation and Maintenance
 Bulletin No. 534 Installation, Operation and Maintenance Unfired Steam Generators (Series RB) Horizontal USG Vertical USG Disclaimers This Installation, Operation, and Maintenance Manual is intended to
AMSCO CENTURY MEDIUM STEAM STERILIZER 26 X 37.5" NORTH AMERICA
 AMSCO CENTURY MEDIUM STEAM STERILIZER 6 X 37.5" NORTH AMERICA APPLICATION Two configurations are available for sterilization of heat- and moisture-stable materials used in healthcare facilities: Prevacuum
MARK-COSTELLO WASTE STERILIZER SPECIFICATION SHEET
 MARK-COSTELLO WASTE STERILIZER SPECIFICATION SHEET The Mark-Costello Waste Sterilzer is designed and manufactured in accordance with the following specifications: Vessel shall be built in accordance with
LSII /51 STERILIZER MACHINE SPECIFICATION A REV DATE REVISION BY CHK APP 0 5/18/2016 RELEASED FOR INFORMATION JPK GBJ KWH
 LSII-262639/51 STERILIZER MACHINE SPECIFICATION A-83-37630 REV DATE REVISION BY CHK APP 0 5/18/2016 RELEASED FOR INFORMATION JPK GBJ KWH Table of Contents 1.0 PART I GENERAL... 3 1.1 Vessel Volume... 3
AMSCO EVOLUTION STEAM STERILIZERS - NORTH AMERICA
 AMSCO EVOLUTION STEAM STERILIZERS - NORTH AMERICA APPLICATION This sterilizer is configured for prevacuum sterilization of heat- and moisture-stable materials used in healthcare facilities. These units
SMALL STERILIZER SERIES 26 x 26 MODEL
 BETA STAR LIFE SCIENCE EQUIPMENT SMALL STERILIZER SERIES 26 x 26 MODEL ECO-FRIENDLY Reduce your facility s water footprint with Beta Star s EnviroVac Vacuum System. Mechanical and programmable conservation
C. ASME Compliance: Fabricate and label water chiller heat exchangers to comply with ASME Boiler and Pressure Vessel Code: Section VIII, Division 1.
 SECTION 236426 - ROTARY-SCREW WATER CHILLERS PART 1 - GENERAL 1.1 SUMMARY A. This Section includes packaged, water cooled or air cooled as scheduled, electric-motor-driven, rotary-screw water chillers
SCD. SMALL CYLINDER DRYER with Touchscreen Controller INSTRUCTION MANUAL MANUAL NUMBER Issued March 2015
 SCD SMALL CYLINDER DRYER with Touchscreen Controller INSTRUCTION MANUAL MANUAL NUMBER 21-11-1042 Issued March 2015 Copyright 2015, Galiso, Inc. 22 Ponderosa Ct., Montrose, CO 81401 (970) 249-0233 (800)
AMSCO REMANUFACTURED MEDIUM STERILIZERS
 AMSCO REMANUFACTURED MEDIUM STERILIZERS APPLICATION Two configurations are available for sterilization of certain materials used in hospitals or laboratories. Gravity - designed for sterilization of liquids,
Castle. Model 233HC Vacuum and Gravity Steam Sterilizer for Healthcare Applications. data and specifications
 Castle Model 233HC Vacuum and Gravity Steam Sterilizer for Healthcare Applications data and specifications PRODUCT A microcomputer-controlled automatic steam sterilizer with six preprogrammed cycles that
cgmp STEAM STERILIZERS
 cgmp STEAM STERILIZERS BMT is a member of the MMM Group, one of the world s leading suppliers of sterilization products with offices in over 20 different countries and manufacturing facilities in the USA,
Integrity 270 Integrity 270VP INTEGRITY STEAM STERILIZER INTRODUCTION
 5085 Corporate Exchange Blvd. S.E. Grand Rapids, MI 49512 616.656.2900 Integrity 270 Integrity 270VP INTEGRITY STEAM STERILIZER INTRODUCTION The SKYTRON Integrity 270 sterilizers utilize gravity displacement
INDIRECT FIRED, SEMI-INSTANTANEOUS STEAM & BOILER WATER HEATER. Compact Design. High Recovery. Energy Efficient. Stainless Alloy Construction
 INDIRECT FIRED, SEMI-INSTANTANEOUS STEAM & BOILER WATER HEATER Compact Design High Recovery Energy Efficient Stainless Alloy Construction Factory Packaged Integral Safety System ASME Constructed & Stamped
OPERATING AND MAINTENANCE MANUAL FOR PLATE HEAT EXCHANGER INDIRECT FIRED WATER HEATER. Electric Heater Company Base Model "BWXP"
 OPERATING AND MAINTENANCE MANUAL FOR PLATE HEAT EXCHANGER INDIRECT FIRED WATER HEATER Electric Heater Company Base Model "BWXP" HUBBELL ELECTRIC HEATER COMPANY P.O. BOX 288 STRATFORD, CT 06615 PHONE: (203)
INSTALLATION, OPERATING & MAINTENANCE INSTRUCTIONS FOR 350 SERIES CIRCULATION HEATERS
 INDEECO Circulation Heaters are designed to provide years of trouble free operation if properly installed and maintained. Please read and follow these instructions for installing and maintaining the heater.
Revitalize Building Mechanical Systems (4619)
") SECTION 235216 FIRE-TUBE CONDENSING BOILERS PART 1 - GENERAL 1.1 RELATED DOCUMENTS A. Drawings and general provisions of the Contract, including General and Supplementary Conditions and Division 01 Specification
SECTION 235216 FIRE-TUBE CONDENSING BOILERS PART 1 - GENERAL 1.1 RELATED DOCUMENTS A. Drawings and general provisions of the Contract, including General and Supplementary Conditions and Division 01 Specification
SE Series Modular Electric Stone-Hearth Deck Oven INSTALLATION & OPERATION MANUAL LBC BAKERY EQUIPMENT, INC st Ave NE Tulalip, WA 98271, USA
 SE Series Modular Electric Stone-Hearth Deck Oven INSTALLATION & OPERATION MANUAL LBC BAKERY EQUIPMENT, INC. 6026 31 st Ave NE Tulalip, WA 98271, USA Toll Free: 888-722-5686 Email: sales@lbcbakery.com
Installation Manual CARBONATOR With Plain-Water Booster
 CORNELIUS INC One Cornelius Place Anoka, MN 55303-6234 Telephone (800) 238-3600 Facsimile (763) 422-3246 Installation Manual CARBONATOR With Plain-Water Booster IMPORTANT: It is the responsibility of the
AIC Series Float & Thermostatic Steam Trap Installation and Maintenance Instructions
 AIC Series Float & Thermostatic Steam Trap Installation and Maintenance Instructions 138-EN Please read and save these instructions Contents General Safety Information... 3 Product Information...3-5 Product
UHIR Series. Horizontal or Vertical Mounting Industrial / Commercial Electric Unit Heater. Owner s Manual
 UHIR Series Horizontal or Vertical Mounting Industrial / Commercial Electric Unit Heater Owner s Manual This manual covers installation, maintenance and repair parts. Read carefully before attempting to
Viking Installation Guide
 Viking Installation Guide Viking Range Corporation 111 Front Street Greenwood, Mississippi 38930 USA (662) 455-1200 For product information, call 1-888-VIKING1 (845-4641) or visit the Viking Web site at
Installation, Operation, and Maintenance Manual CEMLINE CORPORATION
 $7.50 Installation, Operation, and Maintenance Manual CEMLINE CORPORATION Unfired Steam Generators (USG Series) Horizontal USG Vertical USG CEMLINE CORPORATION P. O. Box 55, Cheswick, PA, 15024 Phone:
AZTECA A LITRE STERILISER
 Product Description Azteca A-6615 is a fully automatic high-speed pre & post vacuum steam sterilizer. This model is an electrically heated sterilizer, which operates with saturated steam as a sterilizing
CHLORIDE GASES CHLORIDES
 Note: Always have this machine s model and serial number (printed on the first page of this document) ready when calling Consolidated for service or parts. WARNING If this sterilizer s chamber is constructed
VS SERIES NH3 STEAM VAPORIZERS OPERATION MANUAL
 VS SERIES NH3 STEAM VAPORIZERS Revised March 1997 OPERATION MANUAL CONTENTS PAGE 1. GENERAL................................... 1 Figure 1-1 - VS Series Vaporizer......................... B How to Select
FLCH4R Garage and Utility Electric Heater
 FLCH4R Garage and Utility Electric Heater Installation, Operation & Maintenance Instructions Model No. Volts Amps Watts BTU/HR Phase High Low High Low High Low Min Fuse Size* FLCH4R 208 17.3 8.66 3600
Carbon Dioxide Sample-Draw Detector Operator s Manual
 35-3001-05-03 Carbon Dioxide Sample-Draw Detector Operator s Manual Part Number: 71-0413 Revision: 0 Released: 8/4/17 www.rkiinstruments.com WARNING Read and understand this instruction manual before operating
Installation Instructions. For the 18 Built-In Dishwasher and Front Color Panels
 Installation Instructions For the 18 Built-In Dishwasher and Front Color Panels Printed in USA 154232102 Before You Begin DO NOT INSTALL DISHWASHER UNTIL YOU HAVE READ ALL INSTRUCTIONS. FOR YOUR SAFETY,
NEUTRONICS MINI ID R-1234yf REFRIGERANT IDENTIFIER OPERATION MANUAL
 NEUTRONICS MINI ID R-1234yf REFRIGERANT IDENTIFIER OPERATION MANUAL 456 Creamery Way, Exton, PA 19341, USA Phone: 610.524.8800 Fax: 610.524.8807 Email: info@refrigerantid.com www.refrigerantid.com Page
CELDEK Evaporative Cooler Module Installation, Operation, and Maintenance Manual. CELDEK Evaporative Cooler
 CELDEK Evaporative Cooler Module Installation, Operation, and Maintenance Manual CELDEK Evaporative Cooler RECEIVING AND INSPECTION Upon receiving unit, check for any interior and exterior damage, and
Installation & Maintenance Instructions
 IMPORTANT INSTRUCTIONS READ AND SAVE THESE INSTRUCTIONS Saving energy and creating healthy, comfortable environments No. II-450 Date July, 2015 DRIVE-THRU UNIT 3 AIR CURTAIN SERIES DTU03 for outdoor use
COOPER POWER SERIES. Reclosers MN280015EN
 Reclosers MN280015EN Effective September 2015 Supersedes S280-10-7 November 2002 COOPER POWER SERIES Types 4H and V4H, single-phase reclosers; Types 6H and V6H, three-phase reclosers installation of KA705H4-1
RK/ RK Carbon Monoxide Detector Operator s Manual
 65-2496RK/65-2499RK Carbon Monoxide Detector Operator s Manual Part Number: 71-0156RK Revision: 0 Released: 2/16/11 www.rkiinstruments.com WARNING Read and understand this instruction manual before operating
RK/ RK Oxygen Detector Operator s Manual
 65-2494RK/65-2497RK Oxygen Detector Operator s Manual Part Number: 71-0179RK Revision: 0 Released: 2/16/11 www.rkiinstruments.com WARNING Read and understand this instruction manual before operating detector.
Niles Steel Tank Hot Water Generator Installation and Operation Manual
 Niles Steel Tank Hot Water Generator Installation and Operation Manual Contents: Contents 1 Hazard definitions 1 1. General Information.... 2 Availability... 3 Optional Control Packages... 5 2. Installation....
MODEL: 1407, , 1408, & INSTALLATION AND INSTRUCTION MANUAL
 ECONOMY VACUUM OVEN MODEL: 1407, 1407-2, 1408, & 1408-2 INSTALLATION AND INSTRUCTION MANUAL Sheldon Manufacturing Inc. P.O. Box 627, Cornelius, Oregon 97113 EMAIL: tech@shellab.com INTERNET: http://www.shellab.com/~shellab
WKS 4000 SERIES (USA only) --INSTALLATION INSTRUCTIONS--
 --INSTALLATION INSTRUCTIONS--") 8610 Production Avenue San Diego, California 92121 (858) 566-7465 Fax (858) 566-1943 WKS 4000 SERIES (USA only) --INSTALLATION INSTRUCTIONS-- Thank you for choosing a BREEZAIRE cooling unit. We believe
8610 Production Avenue San Diego, California 92121 (858) 566-7465 Fax (858) 566-1943 WKS 4000 SERIES (USA only) --INSTALLATION INSTRUCTIONS-- Thank you for choosing a BREEZAIRE cooling unit. We believe
Standard and CELDEK Evaporative Cooler Modules Installation, Operation, and Maintenance Manual
 Standard and CELDEK Evaporative Cooler Modules Installation, Operation, and Maintenance Manual Standard Evaporative Cooler CELDEK Evaporative Cooler RECEIVING AND INSPECTION Upon receiving unit, check
Please Read and Save These Instructions.
 Page 1 of 8 RadonAway Ward Hill, MA. GP500 Fan Installation Instructions Please Read and Save These Instructions. DO NOT CONNECT POWER SUPPLY UNTIL FAN IS COMPLETELY INSTALLED. MAKE SURE ELECTRICAL SERVICE
Standard and CELDEK Evaporative Cooler Modules Installation, Operation, and Maintenance Manual
 Standard and CELDEK Evaporative Cooler Modules Installation, Operation, and Maintenance Manual Standard Evaporative Cooler CELDEK Evaporative Cooler RECEIVING AND INSPECTION Upon receiving unit, check
92831 TEL: (714) FAX:
 FAX:") Document No. 1800-11 High-Performance Vacuum/Nitrogen Copyright 2010 Terra Universal Inc. All rights reserved. Revised October 2010 Terra Universal, Inc. TerraUniversal.com 800 S. Raymond Ave. Fullerton,
Document No. 1800-11 High-Performance Vacuum/Nitrogen Copyright 2010 Terra Universal Inc. All rights reserved. Revised October 2010 Terra Universal, Inc. TerraUniversal.com 800 S. Raymond Ave. Fullerton,
AMSCO C Series Small Steam Sterilizers 16 x 16" (406 x 406mm) 20 x 20" (508 x 508 mm)
 20 x 20 (508 x 508 mm)") OPERATOR MANUAL AMSCO C Series Small Steam Sterilizers 16 x 16" (406 x 406mm) 20 x 20" (508 x 508 mm) Prevacuum Steam Flush Pressure Pulse (05/07/12) P129394-176 A WORD FROM STERIS CORPORATION This manual
OPERATOR MANUAL AMSCO C Series Small Steam Sterilizers 16 x 16" (406 x 406mm) 20 x 20" (508 x 508 mm) Prevacuum Steam Flush Pressure Pulse (05/07/12) P129394-176 A WORD FROM STERIS CORPORATION This manual
Bench Series Ovens Models 21 / 31 / 51 Operating Manual
 Heat cycle HEATER SWITCH RECIRC. FAN Quincy Lab, Inc. Bench Series Ovens Models 21 / 31 / 51 Operating Manual Standard Contents (1) Bench Series Oven (2) Adjustable chrome wire shelf (4) Shelf brackets
FLASH PAK STERILIZATION CONTAINER SYSTEM
 INSTRUCTIONS FOR USE FLASH PAK STERILIZATION CONTAINER SYSTEM Description The Flash Pak Sterilization Container System consists of a family of rigid reusable containers that provide an effective sterilization
Installation. 324 Series Built-In Dishwashers U L. Viking Range, LLC 111 Front Street Greenwood, Mississippi USA (662)
") Installation Viking Range, LLC Front Street Greenwood, Mississippi 890 USA (66) 455-00 For product information, call -888-845-464 or visit the Viking Website at vikingrange.com U L C U L 4 Series Built-In
Installation Viking Range, LLC Front Street Greenwood, Mississippi 890 USA (66) 455-00 For product information, call -888-845-464 or visit the Viking Website at vikingrange.com U L C U L 4 Series Built-In
AMSCO CENTURY SMALL STERILIZERS DOMESTIC
 AMSCO CENTURY SMALL STERILIZERS DOMESTIC APPLICATION Amsco Century Small Sterilizers are designed for sterilization of materials used in healthcare facilities. They are available in two configurations:
InstructIon Manual KrEs EQuIPMEnt stands
 Instruction Manual Instruction Manual SELF-CONTAINED AND REMOTE Kairak KRES model refrigerated equipment stand units are available in many lengths from 36 to 120 inches long. These units are available
SECTION PACKAGED COMPRESSOR AND CONDENSER UNITS
 SECTION 236200 - PACKAGED COMPRESSOR AND CONDENSER UNITS PART 1 - GENERAL 1.1 RELATED DOCUMENTS A. Drawings and general provisions of the Contract, including General and Supplementary Conditions apply
KINGS COUNTY JAIL EXPANSION PHASE III COUNTY OF KINGS SECTION
 SECTION 237433, PART 1 - GENERAL 1.1 RELATED DOCUMENTS A. Drawings and general provisions of the Contract, including General and Supplementary Conditions and Division 01 Specification Sections, apply to
Installation Instructions
 GE Consumer & Industrial Appliances Installation Instructions Junction Box Cover Within this user bag, you will find a junction box cover and a #10 hex head screw used to attach the junction box cover
ESTEEM AUTOCLAVE SLIDING SINGLE DOOR:-
 ESTEEM AUTOCLAVE SLIDING SINGLE DOOR ESTEEM AUTOCLAVE SLIDING SINGLE DOOR:- ESTA-108A For Sterilization of glass wares / containers, vessels, linen, rubber articles culture media etc. Sliding doors with
Built-In Dishwasher. Installation Instructions. BEFORE YOU BEGIN Read these instructions completely and carefully. IMPORTANT The dishwasher MUST be
 Installation Instructions Built-In Dishwasher If you have questions, call 800.GE.CARES (800.432.2737) or visit our website at: www.ge.com BEFORE YOU BEGIN Read these instructions completely and carefully.
COOPER POWER SERIES. Types R, W, WV and RV reclosers, KA869R and KA835W series trip coils replacement instructions. Reclosers MN280020EN
 Reclosers MN280020EN Effective October 2015 Supersedes S280-80-14 December 2003 COOPER POWER SERIES Types R, W, WV and RV reclosers, KA869R and KA835W series trip coils replacement instructions DISCLAIMER
Installation Instructions
 Installation Instructions Built-In Dishwasher If you have questions, call 800-944-9400(US),800-245-8352(Canada)or visit our website at: www.frigidaire.com BEFORE YOU BEGIN Read these instructions completely
INSTALLATION INSTRUCTIONS TXV Coils for Manufactured Housing EMA
 TXV Coils for Manufactured Housing EMA NOTE: Read the entire instruction manual before starting the installation. SAFETY CONSIDERATIONS Improper installation, adjustment, alteration, service, maintenance,
INSTALLATION INSTRUCTIONS
 INSTALLATION INSTRUCTIONS BUILT-IN BOTTOM MOUNT REFRIGERATOR/FREEZER DBRTGK72SS-GRILLE KIT (FOR designer SERIES ONLY) VIKING RANGE CORPORATION 111 Front Street Greenwood, Mississippi (MS) 38930 USA (662)
TABLE 1 Electrical Specifications
 CHRONOMITE HIGH CAPACITY INSTANT-TEMP WATER HEATERS INSTALLATION AND OPERATION INSTRUCTIONS (208-240V Models) (Before installation, compare electrical requirements needed for the model of heater selected)
USG Series. Unfired Steam Generators Generate Clean Steam With Boiler Steam or High Temperature Hot Water as the Energy Source
 USG Series Unfired Steam Generators Generate Clean Steam With Boiler Steam or High Temperature Hot Water as the Energy Source CEMLINE CORPORATION P.O. BOX 55 CHESWICK, PENNSYLVANIA 15024 Phone: (724) 274-5430
G Series SAVE THESE INSTRUCTIONS. (Model B) Convector Heater for Hazardous Locations GENERAL! INSTALLATION
 Convector Heater for Hazardous Locations GENERAL! INSTALLATION") G Series (Model B) Convector Heater for Hazardous Locations Type G-Series Convection Heaters are designed for use in Class I, Div. I hazardous environments. Units without control options are suitable for
G Series (Model B) Convector Heater for Hazardous Locations Type G-Series Convection Heaters are designed for use in Class I, Div. I hazardous environments. Units without control options are suitable for
Wilbur Curtis Company, Inc.
 Find out more on the web. WILBURCURTIS.COM MODEL WB-14-11 Service Manual Water Boiler 14 Gallon Gas Important Safeguards/Conventions This appliance is designed for commercial use. Any servicing other than
INSTALLATION, OPERATION AND MAINTENANCE MANUAL FOR COMMERCIAL INDIRECT POWERED WATER HEATER
 INSTALLATION, OPERATION AND MAINTENANCE MANUAL FOR COMMERCIAL INDIRECT POWERED WATER HEATER ELECTRIC HEATER COMPANY BASE MODEL T Edition 0 HUBBELL ELECTRIC HEATER COMPANY P.O. BOX 88 STRATFORD, CT 0665
CO 2. Incubators. Incubator, the first microprocessor-based system, and the first menu-driven control system, but we offer the
 Radiant Warm Wall Compact Incubator Reduced Oxygen Incubator Automatic Water-Jacketed Incubator, stacked For more than 45 years, Lab-Line has been on the cutting edge of incubator development. Not only
VACUUM OVEN. Model: VPX9-2. Installation and Operation Manual
 VACUUM OVEN Model: VPX9-2 Installation and Operation Manual Sheldon Manufacturing, Inc. P.O. Box 627, 300 N 26 th Avenue, Cornelius, Oregon 97113 EMAIL: tech @ Shellab.com; www.shellab.com 1-800-322-4897
OPERATING AND MAINTENANCE MANUAL FOR ELECTRIC STAINLESS STEEL HEATER FOR DEIONIZED (DI) WATER ELECTRIC HEATER COMPANY BASE MODEL D
 WATER ELECTRIC HEATER COMPANY BASE MODEL D") OPERATING AND MAINTENANCE MANUAL FOR ELECTRIC STAINLESS STEEL HEATER FOR DEIONIZED (DI) WATER ELECTRIC HEATER COMPANY BASE MODEL D HUBBELL ELECTRIC HEATER COMPANY P.O. BOX 288 STRATFORD, CT 06615 PHONE:
OPERATING AND MAINTENANCE MANUAL FOR ELECTRIC STAINLESS STEEL HEATER FOR DEIONIZED (DI) WATER ELECTRIC HEATER COMPANY BASE MODEL D HUBBELL ELECTRIC HEATER COMPANY P.O. BOX 288 STRATFORD, CT 06615 PHONE:
FN 032/055/120 DRY HEAT STERILIZERS / OVENS FN 300/400/500 DRY HEAT STERILIZERS / OVENS KD 200/400/700 OVENS EV 018 VACUUM OVEN
 FN 032/055/120 DRY HEAT STERILIZERS / OVENS Three different sizes: 32, 55 and 120 liters. Temperature range: Ambient Temperature +5 C / 250 C. Designed for sterilization, drying and heating purposes. User
TECHNICAL INSTRUCTIONS
 TECHNICAL INSTRUCTIONS 24-Month Maintenance Kit P/N 58015-02 For BMK2.0 (Nozzle Mix) Description of Document: This TID provides the procedures to perform recommended 24-Month maintenance on the following
Installation Guide. 15 W./24 W. Undercounter Refrigeration
 Installation Guide 15 W./24 W. Undercounter Refrigeration Table of Contents Warnings & Important Information 3 Proper Disposal 4 Dimensions (15 W. Professional) 5 Dimensions (24 W. Professional) 6 Dimensions
OPERATION & INSTALLATION MANUAL
 OPERATION & INSTALLATION MANUAL Model: SIO 14 & SIO 18 Electric Tankless Hot Water Generators Table of Contents SAFETY INFORMATION... 1 INTRODUCTION... 2 Unit Operation:... 2 Unit Freezing:... 3 Maintenance:...
STORAGE TANK INSTALLATION and OPERATION MANUAL
 LST-I-O 100161529_2000014416 Rev F STORAGE TANK INSTALLATION and OPERATION MANUAL LOW LEAD CONTENT The information contained in this manual is intended for use by qualified professional installers, or
TABLE 1 Electrical Specifications. Phase
 CHRONOMITE HIGH CAPACITY INSTANT-TEMP WATER HEATERS INSTALLATION AND OPERATION INSTRUCTIONS (208-240V 3 Φ Models) (Before installation, compare electrical requirements needed for the model of heater selected)
Controllers. Instruction Manual WARNING
 Controllers Instruction Manual WARNING THIS MANUAL MUST BE CAREFULLY READ BY ALL INDIVIDUALS WHO HAVE OR WILL HAVE THE RESPONSIBILITY FOR INSTALLING, USING OR SERVICING THIS PRODUCT. Like any piece of
Industrial Vacuums, Inc
 Instructions/Spare Parts Manual Nilfisk Model GWD255 Drum Top Vacuum CAUTION: This Nilfisk vacuum cleaner is not to be used in explosion-hazardous areas, as serious injury could result. Under no circumstances
Installation Manual PS-225 & PS-275
 Installation Manual PS-225 & PS-275 Table of Contents Pre-Uncrating Checklist... 1 Verifying System Requirements... 2 Verifying System Direction... 2 Verifying the Electrical Requirements... 2 Removal
STEAM STERILIZER SERIE S1000 (RBE)
") STEAM STERILIZER SERIE S1000 (RBE) INTRODUCTION: Of Turkish manufacturing, our sterilizers Series S1000 (RBE) are designed for the purpose of inactivating and sterilizing infectious waste generated in
STEAM STERILIZER SERIE S1000 (RBE) INTRODUCTION: Of Turkish manufacturing, our sterilizers Series S1000 (RBE) are designed for the purpose of inactivating and sterilizing infectious waste generated in
SCM. Micro. Streaming Current Monitor. Analyzer. Sensor/Sampler with light shield removed. The Analyzer. Instrument Overview
 Micro SCM Streaming Current Monitor A Watts Water Technologies Company Instrument Overview The instrument consists of the Analyzer and the SCM sensor. Analyzer The Analyzer The monitor has a built in graphic
Dishwasher Installation Instructions DW 24XT/DW 24XV
 Dishwasher Installation Instructions DW 24XT/DW 24XV Installation Instructions Dishwasher BEFORE YOU BEGIN Read these instructions completely and carefully. IMPORTANT Observe all governing codes and ordinances.
Manual No: Revision: D. Sump Sensor. Installation Guide
 Manual No: 576013-301 Revision: D Sump Sensor Installation Guide Notice Veeder-Root makes no warranty of any kind with regard to this publication, including, but not limited to, the implied warranties
INSTALLATION INSTRUCTIONS FOR 7330C740 FLUSH MOUNT CEILING ASSEMBLY
 INSTALLATION INSTRUCTIONS FOR 7330C740 FLUSH MOUNT CEILING ASSEMBLY TABLE OF CONTENTS Warnings...3 Package Contents...3 General Information...3 Supply Ducting And Registers...3 Routing 115 VAC Wiring...5
RK-02 Multi Point Detector Operator s Manual
 65-2485RK-02 Multi Point Detector Operator s Manual Part Number: 71-0237RK Revision: A Released: 11/26/14 RKI Instruments, Inc. www.rkiinstruments.com WARNING Read and understand this instruction manual
Control Operating Costs. Gain Process Efficiency.
 S t e a m s t e r i l i z e r s Control Operating Costs. Gain Process Efficiency. Amsco Century Small and Amsco Millennium Steam Sterilizers Amsco Century Small and Amsco Millennium Steam Sterilizers The
INSTALLATION AND SERVICE MANUAL
 INSTALLATION AND SERVICE MANUAL Electric Power Water Heater 12kW 162kW NOTE: retain this manual for future reference Installation and service must be performed by Qualified Service Personnel Only. WARRANTY:
1 ESMA, Inc. P. O. BOX 734 * SOUTH HOLLAND, IL * (800) * FAX (708)
 * FAX (708)") 1 2 Instructions for Ultrasonic Washer E789 (U.L. Approved) 1. INTRODUCTION The E789 Automatic Ultrasonic Washer automatically performs a cleaning cycle, the major steps of which are: Ultrasonic cleaning
1 2 Instructions for Ultrasonic Washer E789 (U.L. Approved) 1. INTRODUCTION The E789 Automatic Ultrasonic Washer automatically performs a cleaning cycle, the major steps of which are: Ultrasonic cleaning
Installation Instructions
 Installation Instructions KFN 9855 ide en - CA Installation, repair and maintenance work should be performed by a Miele authorized service technician in accordance with national and local safety regulations
WAIWELA SERIES-TWO WATER HEATERS
 WAIWELA SERIES-TWO WATER HEATERS ELECTRIC INSTANTANEOUS WATER HEATER INSTALLATION GUIDE AND OWNERS MANUAL MODELS COVERED WET-12 T, TC, T2-240/208 V SPECIAL, V READ THE GENERAL SAFETY SECTION BEGINNING
Installation and Operation Manual
 Page 1 Installation and Operation Manual Microseparator System For ES4 Edgers Distributed Exclusively by: Satisloh North America N 116, W 18111 Morse Drive Germantown, WI. 53022 Tel: (262) 255-6001 Fax:
Remote Relay Module (RRM)
") Remote Relay Module (RRM) Instruction Manual WARNING THIS MANUAL MUST BE CAREFULLY READ BY ALL INDIVIDUALS WHO HAVE OR WILL HAVE THE RESPONSIBILITY FOR INSTALLING, USING OR SERVICING THIS PRODUCT. Like
Remote Relay Module (RRM) Instruction Manual WARNING THIS MANUAL MUST BE CAREFULLY READ BY ALL INDIVIDUALS WHO HAVE OR WILL HAVE THE RESPONSIBILITY FOR INSTALLING, USING OR SERVICING THIS PRODUCT. Like
BASIL 6000 TUNNEL CAGE WASHER
 BASIL 6000 TUNNEL CAGE WASHER APPLICATION For thorough, efficient cleaning of cages, debris pans, bottles, feeder bowls, and miscellaneous items used in the care of laboratory animals. DESCRIPTION The
Operating Manual "Mark II" Solid-State Digital Automatic Controlled Sterilizers
 Operating Manual "Mark II" Solid-State Digital Automatic Controlled Sterilizers Rev. 070129 PLEASE READ CAREFULLY BEFORE ATTEMPTING TO OPERATE YOUR STERILIZER. Copyright: Consolidated Stills and Sterilizers
INSTALLATION INSTRUCTIONS
 INSTALLATION INSTRUCTIONS BUILT-IN BOTTOM MOUNT REFRIGERATOR/FREEZER BRTGK72SS-GRILLE KIT (FOR PROFESSIONAL SERIES ONLY) VIKING RANGE CORPORATION 111 Front Street Greenwood, Mississippi (MS) 38930 USA
VSA Series Air Dryer. User s Guide
 VSA Series Air Dryer User s Guide Models covered: VSA1 VSA2 VSA3 VSA4 1. Welcome & Congratulations Congratulations on your purchase of a new PUREGAS VSA SERIES AIR DRYER! We here at PUREGAS are very proud
Fisher Scientific Model 281A Vacuum Oven. Installation and Operating Manual Rev. 0
 Fisher Scientific Model 281A Vacuum Oven Installation and Operating Manual 30979 Rev. 0 Preface Models covered in this manual: Catalog numbers Models numbers Voltage 13-262-50 6288 120V 13-262-51 6289
TABLE OF CONTENTS. NOTE: Read the entire instruction manual before starting the installation. TROUBLESHOOTING... 13
 R 410A Duct Free Split System Air Conditioner and Heat Pump Product Family: DFS4(A/H) System, DFC4(A/H)3 Outdoor, DFF4(A/H)H Indoor NOTE: Read the entire instruction manual before starting the installation.
User Manual Box Exhaust Fan Series (Belt Drive)
") User Manual Box Exhaust Fan Series (Belt Drive) 36" Box Exhaust Fan with Three Wing Blade Box with Aluminum Shutter 54" Box with Cone 800-779-3267 sales@schaeferfan.com www.schaeferfan.com 2013 Schaefer
User Manual Box Exhaust Fan Series (Belt Drive) 36" Box Exhaust Fan with Three Wing Blade Box with Aluminum Shutter 54" Box with Cone 800-779-3267 sales@schaeferfan.com www.schaeferfan.com 2013 Schaefer
LGB Gas fired boiler
 LGB Gas fired boiler Control Supplement LGB-5 Series 2 Propane gas CSD-1 Control System Part Number 550-110-682/0304 Please read this page first Hazard definitions To the installer... The following terms
Installation Instructions
 Installation Instructions Built-In Dishwasher If you have questions, call 800-GECARES or visit our website at: www.geappliances.com BEFORE YOU BEGIN Read these instructions completely and carefully. IMPORTANT
Installation Guide. 15 W./24 W. Undercounter Refrigeration U L. Viking Range Corporation. 111 Front Street. Greenwood, Mississippi USA
 Installation Guide Viking Range Corporation 111 Front Street Greenwood, Mississippi 38930 USA (662) 455-1200 For product information, call 1-888-845-4641 U L C U L 15 W./24 W. Undercounter Refrigeration
R-RCM & R-RSB SERIES
 R-RCM & R-RSB SERIES CHEESEMELTER & SALAMANDER BROILERS INSTALLATION - OPERATION - MAINTENANCE CHEESEMELTERS R-RCM-24 R-RCM-36 R-RCM-48 R-RCM-60 SALAMANDERS R-RSB-24 R-RSB-36 R-RSB-48 Telephone: (802)