STEP BY STEP INSTALLATION INSTRUCTIONS. Vertical Honeycomb Shades
|
|
|
- Matilda Hall
- 5 years ago
- Views:
Transcription
1 STEP BY STEP INSTALLATION INSTRUCTIONS Vertical Honeycomb Shades
2 Everything You Need A Smooth Set-Up We want you to love your new window coverings and that includes having a smooth installation experience. If you encounter any difficulties or questions, please reach out to us for help. It s why we re here. Call us at or visit for more info on installation. We recommend you hold on to all packaging until your window coverings are fully installed. Should something go wrong (we strongly doubt it), we want any potential returns to be a painless as possible. Customer Service Hours Monday Friday: 6am 7pm PT Saturday Sunday: 7am 4pm PT smithandnoble.com Table of Contents Step 1 - Getting Started Overview - Vertical Honeycomb Shades Step 2 - Determine Shade Type Outside Mount Installation Step 3 - Bracket Installation Step 4 - Installing the Headrail Step 5 - Outside Mount Vertical Rails Installation Step 6 - Assemble the Moving Rails Step 7 - Install the Vertical Rails Step 8 - Attach the Stationary Rails Bottom Brackets Inside and Ceiling Mount Installation Step 1 - Bracket Installation Step 2 - Prepare the Headrail Step 3 - Install Vertical Rails Step 4 - Moving Rail Brackets Installation Step 5 - Attach Fabric Clips to Rail Clips in Headrail Step 6 - Attach the Stationary Rails Bottom Brackets Traditional (on the floor) Inside & Outside Mount Installation Step 1 - Bracket Installation Step 2 - Assemble the Moving Rail(s) Step 3 - Outside Mount Rail(s) Installation Step 4 - Inside & Outside Mount Attach Bottom Brackets Final Adjustments Shade Adjustments Valance Adjustments Assemble the Returns onto the Valance Handles & Headrail Attach and Removal Troubleshooting Care & Cleaning Warranty Back Cover 1 smithandnoble.com
 of installaton.")
3 Step 1 Getting Started Step 1 Getting Started Parts and Tools Before you begin, check to make sure that you have all of the materials listed below and on page 4 for the number of shades that you are installing, and for the type(s) of installaton. The contents of your hardware package may vary depending upon how the shade was ordered and whether the shade is mounted inside or outside the window or door opening. WOOD (INCLUDED) DRYWALL/ METAL PLASTER (NOT INCLUDED) (NOT INCLUDED) Regular Valance Clips Jumbo Valance Clips TOOLS REQUIRED Level Flat Blade and and Phillips Phillips Screwdriver(s) Screwdrivers Measuring Tape Tape Pencil Scissors Scissors Variable Speed Drill with Variable Assorted Speed Drill Bits Drill with Assorted Drill Bits Valance Return and Valance Corner (For Outside Mount and Inside Non-Flush Mount) 3 smithandnoble.com
4 Overview Step 2 Determine Shade Type Vertical Honeycomb Shades - Left Stack Shown Valance Clip Valance Return Aluminum Valance Extension Bracket Mounting Bracket Valance Corner End Cap Inside Mount Shim Cord Tensioner Moving Rail Bracket Assembly End Plate Cord Tensioner Cord Split Stack (Center Opening) Headrail Fabric Clip Rail Clip End Plate Stationary Rail Bracket Stationary Rail Snap Pin Moving Rail Handle Refer to the packaging label to determine each of the following: Determine which Vertical Application design you are installing: left stack, right stack, center stack or split stack (center opening). Determine if your shade is an inside mount (mounting inside the window casement), outside mount (mounting outside the window casement), or ceiling mount (mounting directly into the ceiling). Stationary Rail Bottom Bracket Inside Mount Adaptor 5 smithandnoble.com
5 Step 3 Bracket Installation Bracket Spacing Outside Mount Installation Outside Mount For inside and ceiling mount installations, see page 19. For traditional (on the floor) inside and outside mount installations, see page 32. The shade height can be found on the packaging label. If no label exists, contact Smith & Noble. Use a level to ensure that the brackets are level and aligned. 7 smithandnoble.com
6 Step 3 Bracket Installation Step 4 Installing the Headrail Outside Mount with Spacer Blocks Each spacer block projects installation brackets 1 2" away from the mounting surface. Spacer blocks can be useful for above-trim installations. Place the top of the spacer block a minimum of from the top of the window opening. When mounting to drywall, you must use a wall anchor. The supplied screws are not long enough for use with wall anchors. Please make sure the screws used are long enough to mount the rail securely. Outside Mount with Extension Brackets Outside Mount Note: The headrail will not slide back and forth in the mounting brackets once installed. Prepare the Rail Step 5 Outside Mount the Vertical Rails Side Stack (Left and Right) and Split Stack Use two screws to mount extension brackets Level and align brackets with a level. Install the Stationary Rail Bottom Bracket THE BASE SHOULD EXTEND TOWARD THE WINDOW FRONT OF SHADE STATIONARY RAIL STATIONARY RAIL BOTTOM BRACKET 9 smithandnoble.com BASE
7 Step 6 Assemble the Moving Rails Step 7 Installing the Vertical Rails-Side Stack Side Stack (Left and Right) Side Stack (Left and Right) 1. Remove the end plate from the stationary side of the headrail, if attached (for the left stack, remove the left end plate; for the right stack, remove the right end plate). 2. Pick up the rails and fabric as one unit and slide the rollers of the moving rail bracket onto the rear track of the headrail. Center Stack Insert both moving rail brackets into the moving rail. Remove both snap pins located in each moving rail. Slide the moving rail bracket into the moving rail. Replace the snap pins through both the moving rail and the moving rail bracket. 3. Slide the rail clips onto the appropriate groove in the front track. Grand Cell fabric - back groove Split Stack Insert both moving rail brackets into the moving rails (as shown). Remove both snap pins located in each moving rail. Slide the moving rail bracket into the moving rail. Replace the snap pins through both the moving rail and the moving rail bracket. Grand Cell fabric Back Groove 11 smithandnoble.com


8 Step 7 Installing the Vertical Rails Step 7 Installing the Vertical Rails-Center Stack Center Stack Grand Cell fabric - back groove 3. Slide the left moving rail bracket into the headrail. Grand Cell fabric Back Groove 4. Install the left end plate. 5. Install the cord tensioner. Unwind the cord and spring from the right end plate. Slide the cord tensioner into the channel at the front of the headrail. Attach the right end plate. Note: You will adjust the cord tensioner later. 13 smithandnoble.com


 Grand Cell fabric Back Groove 5. Install the stationary rail. The stationary rail bracket has two slots at the top.")
9 Step 7 Installing the Vertical Rails-Split Stack Step 7 Installing the Vertical Rails Split Stack (Left Stack Illustrated) 1. Remove the left end plate from the headrail. End Plate Front of Headrail 4. Slide the rail clips into the appropriate front track in the headrail Grand Cell fabric - back groove 2. Insert the center pull plate in the center channel and screw in at the center point of the headrail. (The illustration at right references the placemat of the center pull plate in the center groove. It still needs to be centered in the headrail before screwing down.) Grand Cell fabric Back Groove 5. Install the stationary rail. The stationary rail bracket has two slots at the top. The back tracks of the headrail fi t into these slots. 3. Pick up the left set of rails and fabric and slide the rollers of the moving rail bracket onto the rear track of the headrail. Insert the bracket into the back track of the headrail as shown. Twist the rail to lock it in place. 15 smithandnoble.com

10 Step 7 Installing the Vertical Rails Step 8 Attach Bottom Brackets Outside Mount - Stationary Rail Make sure the bracket aligns with the end of the headrail. Note: It may be necessary to use a screwdriver and mallet to move the bracket to the end of the headrail. Secure the Stationary Rails with the Bottom Brackets Side Stack (Left and Right) and Split Stack 6. Install the left end plate. 7. Install the right fabric panel and stationary rails using the previously described process (Steps 3-6). Use a level to ensure that the stationary rail is exactly vertical when viewed from both the front and the side. Slide the screw through the bracket and into the mounting surface. You may use an extension bracket to mount the stationary rail away from the wall. An extension bracket may be necessary if you used spacer blocks with the mounting brackets. blocks with the mounting brackets 8. Install the cord tensioner. Unwind the cord from the end plate. Slide the cord tensioner into the channel at the front of the headrail. Front of Top Rail End Plate 9. Attach the right end plate. Note: You will adjust the cord tensioner later. Cord Tensioner Go to page 42 for Final Adjustments. 17 smithandnoble.com


11 Step 1 Bracket Installation Mount the Brackets Bracket Spacing Measure and mark where to attach the installation brackets. Place installation brackets 8" in from the ends of the shade. Space additional brackets evenly between the two end brackets. Inside and Ceiling Mount Installation 8" Space Evenly Space Evenly 8" Installation Brackets Attach the Bracket Shim Attach the shim to the top of the mounting bracket. It snaps on and is held in place by the screw holes. Note: The shim is necessary for the valance installation. Mount each bracket with an attached shim at the previously marked location. Use a level to ensure that the brackets are level and aligned. 19 smithandnoble.com

 8\" See Chart For Depth Side Stack - Left Stack See the illustration at right for the order of components as they are installed in the headrail See the illustration at right")

12 Step 1 Bracket Installation Step 2 Prepare the Headrail Inside Mount / Ceiling Mount Install the Components into the Headrail Position the installation brackets so the tops of the brackets attach to a fl at horizontal surface. Measure and mark all brackets locations. Use the chart below for your measurements. Use a level to ensure that the brackets are level and aligned. Note: When mounting to drywall, you must use a wall anchor such as a molly or toggle bolt. (see below) 8" See Chart For Depth Side Stack - Left Stack See the illustration at right for the order of components as they are installed in the headrail See the illustration at right for the order of components as they are installed in the headrail Rail Clips Stationary Side End Plate Headrail Moving Rail Bracket 1. Detach the rail clips from the fabric clips. To detach, twist the rail clip while holding the base of the fabric clip in place. Rail Clip Fabric Clip MOLLY BOLT TOGGLE BOLT Rail Clip Fabric Clip Note: Should the rail clip become slightly open, gently squeeze the prongs back together. Grand Cell 21 smithandnoble.com
13 Step 2 Prepare the Headrail Step 2 Prepare the Headrail Grand Cell fabric - back groove. Grand Cell fabric Back Groove Side Stack - Right Stack 23 smithandnoble.com
14 Step 2 Prepare the Headrail Step 2 Prepare the Headrail Center Stack Spring Partially Attach the Valance Clips Follow the steps starting on page 22. See the illustration at right for the order of components as they are installed in the headrail. Rail Clips Place the valance clips into the headrail. Keep a minimum 3" between the end of the headrail and the valance clips. Be sure to avoid areas where the headrail attaches to the mounting brackets. Valance Clip 3" Minimum Moving Rail Bracket Headrail End Plate Note: Do NOT snap the valance clips completely onto the front of the headrail. Leave the end of the valance clips as shown. You will snap the end of the valance clip on later. Install Headrail Split Stack Follow the steps starting on page 22. See the illustration at right for the order of components as they are installed in the headrail. Headrail Rail Clips End Plate Center Pull Plate (in the Headrail) Moving Rail Bracket Hold the headrail parallel to the installation brackets. The front of the brackets should be under the front groove on the top of the rail. 1) Push the headrail straight up. 2) Slide the headrail into the brackets until they click. 1. Mounting Bracket 2. Shim UP Headrail Front of Shade Front of Shade BACK 25 smithandnoble.com
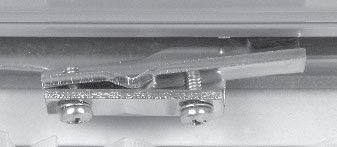
 and Split Stack Install the Stationary Rail Bottom Bracket Note: Do not insert the bracket completely. Leave at least 1/2\" of the bracket showing below the stationary rail.")
 The base of the bottom bracket should extend toward the window. Note: Do not attach the bracket to the mounting surface at this time.")
15 Step 3 Vertical Rails Installation Step 3 Vertical Rails Installation Prepare the Vertical Rails Inside Mount - Side Stack (Left and Right) and Split Stack Prepare the Vertical Rails Inside Mount - Side Stack (Left and Right) and Split Stack Install the Stationary Rail Bottom Bracket Note: Do not insert the bracket completely. Leave at least 1/2" of the bracket showing below the stationary rail. Insert the stationary rail bottom bracket into the bottom of the stationary rail. (For split stack, insert a bottom bracket into each stationary rail.) The base of the bottom bracket should extend toward the window. Note: Do not attach the bracket to the mounting surface at this time. (LEFT STACK ILLUSTRATED) FRONT OF SHADE STATIONARY RAIL Install the Stationary Rail 1. Side Stack: Pick up all the rails and fabric as one unit. Split Stack: Pick up all the left panel rails and fabric as one unit, repeat with the right panel of rails and fabric. 2. Install the stationary rail. The stationary rail bracket has two slots at the top. The back tracks of the headrail fit into these slots. THE BASE SHOULD EXTEND TOWARD THE WINDOW BASE STATIONARY RAIL BOTTOM BRACKET Insert the bracket into the back track of the headrail. Twist the rail 90 o to lock it in place. Top of Stationary Rail Bracket Tip: Install the stationary rail as close to the end of the headrail as possible. Center Stack Center Stack shadings do not have stationary rails. Skip this section and go to page 29, Install the Moving Rail Bracket(s). 27 smithandnoble.com

, Split Stack, and")


16 Step 4 Moving Rail Brackets Installation Step 5 Attach Fabric Clips to the Headrail Side Stack (Left and Right), Split Stack, and Center Stack Attach the Fabric Clips to the Rail Clips in the Headrail Side Stack (Left and Right), Split Stack, and Center Stack Center Stack Shades Verify the Stationary Rail is Flush Against the End Plate 29 smithandnoble.com

17 Step 6 Bottom Bracket Installation Secure the Stationary Rail(s) Side Stack (Left and Right) and Split Stack Use a level to ensure the stationary rail is exactly vertical when viewed from both the front and the side. Secure the screw through the bracket and into the bottom of the mounting surface. See the next step if you ordered your shade with a cut-out or you prefer to secure the rail to the side. Use the inside mount adaptor to secure the stationary rail to the side of the casement. Traditional (ON THE FLOOR) Inside and Ceiling Mount Installation Note: If you ordered your shade with a cut-out, such as for baseboards or other obstructions, you must use the inside mount adaptor. Align the screw hole of the adaptor to face the window casement (or wall). Slide the inside mount adaptor onto the stationary rail bottom bracket. Secure a screw through the inside mount adaptor and into the casement. 31 smithandnoble.com
 and Split Stack Install the")

18 Step 1 Bracket Installation Step 2 Assemble the Moving Rail(s) Prepare the Rails Side Stack (Left and Right) and Split Stack Install the Stationary Rail Bottom Bracket Side Stack (Left and Right) Center Stack Split Stack SIDE STACK CENTER STACK SPLIT STACK 33 smithandnoble.com

 End Plate Front Of Headrail Split Stack 2.")


19 Step 2 Moving Rails Assembly Step 2 Moving Rails Assembly 1. Remove the end plate from the stationary side of the headrail, if attached. For a Left Stack, remove the left end plate; for a Right Stack, remove the right end plate. (Left Stack Illustrated) End Plate Front Of Headrail Split Stack 2. Insert the center pull plate in the center channel and screw in at the center point of the headrail. (The illustration at right references the placement of the center pull plate in the center groove. It still needs to be centered in the headrail before screwing down.) 3. Gather all the rails and fabric and slide the rollers of the moving rail bracket onto the rear track of the headrail. 4. Slide the rail clips onto the appropriate groove in the front track. Grand Cell back groove Grand Cell Back Groove 35 smithandnoble.com

20 Step 2 Moving Rails Assembly Step 3 Headrail Installation 7. Install the cord tensioner. Unwind the cord and spring from the right end plate. Slide the cord tensioner into the channel at the front of the headrail. Attach the right end plate. Note: You will adjust the cord tensioner later. 8. Attach the other end plate. Inside Mount Partially Attach the Valance Clips Step 3 Headrail Installation Outside Mount Headrail Preparation Install the Headrail Install the Headrail 37 smithandnoble.com
21 Step 4 Bottom Bracket Attachment Step 4 Bottom Bracket Attachment Outside Mount Stationary Rail Bottom Bracket Attachment Side Stack (Left and Right) and Split Stack Inside Mount Stationary Rail Bottom Inside Mount Bracket Attachment Side Stack (Left and Right) and Split Stack 39 smithandnoble.com
22 Final Adjustments 41 smithandnoble.com


23 Shade Adjustments Shade Adjustments Remove Excess Cord Adjust the Vertical Alignment Adjust the Cord Tension Test the Shade To Adjust the bottom end of the Moving Rail to the right: Adjust the Cord Tension To Adjust the bottom end of the Moving Rail to the left: 43 smithandnoble.com
 Lock Prongs on locks Valance Return Outside mounts and non-flush inside mounts only: Attach the valance return and the valance corner end cap to each end of the valance.")

24 Valance Attachment Assemble the Returns onto Valance Finish Attaching the Valance Clips Grand Cell Valance Corner End Cap Snap the ends of the valance clips under the edge of the headrail. Valance (Front of Shade) Lock Prongs on locks Valance Return Outside mounts and non-flush inside mounts only: Attach the valance return and the valance corner end cap to each end of the valance. Use the valance corner end cap and the lock to attach a return to each end of the valance. NOTE: Use a flat surface to attach the return to the valance. Slide the valance corner end cap into the valance return. IMPORTANT: Do not hammer the end cap into the valance return. The end cap will bend. Jumbo Valance Clip Valance Return (Left Return Shown) Valance Corner End Cap Place the lock into the circular opening of the valance corner end cap with the prongs facing out. Prong Using a flat blade screwdriver, turn the lock to the upright position. The tab on the valance corner end cap will stop the lock from turning all the way around. NOTE: It is normal for the prongs on the lock to separate when the screwdriver is inserted. Once the valance corner end cap is attached to the valance return, repeat the steps to attach the valance corner end cap to the valance. 45 smithandnoble.com

25 Handles & Headrail Attach & Removal Troubleshooting Attach the Handle(s) Position the handle so the holes on the flat portion of the handle are aligned with the screw holes on the moving rail. The curve of the handle should face out, away from the fabric. Attach each handle to its moving rail using the provided screws. Holds are pre-drilled into each moving rail. Problem Problem Symptom/Solution The shade binds or moves The shade does not stay in position. If the shade does not slide with ease, you may need to adjust the cord tension. Slide the cord tensioner away from the fabric stack slightly to decrease the tension. Check that the cord is not pinched. If the shade does not stay in position, you may need to adjust the cord tension. Slide the cord tensioner toward the fabric stack slightly to increase the tension. Headrail Removal Should the need arise, the headrail can be easily removed. Remove the valance. While holding the headrail assembly, push back on the bottom tab of the mounting bracket to release the bottom edge of the headrail. Roll the back of the headrail downward and out from the bracket. CAUTION: Because the bracket is stiff, the headrail may be difficult to remove. Use a flat blade screwdriver wrapped in a soft cloth. Push the blade against the bottom tab of the mounting bracket and twist slightly to pop the rail off the bracket. Be careful not to scratch the finish on the back of the headrail. The shade is not vertically aligned. The installation brackets do not allow enough clearance for the shade (to clear moldings or window cranks). A fabric carrier needs to be reattached. Adjust the screws on the moving rail. To move the bottom of the rail to the right, loosen the left screw 1/2 turn and tighten the right screw 1/2 turn. To move the bottom of the moving rail to the left, reverse the process and loosen the right screw as you tighten the left. Use an extension bracket or spacer blocks for mounting each installation bracket to allow adequate clearance for your shade. Place each carrier between a pair of fabric cells. Align the hole in Fabric Car rier the fabric carrier with the hole in the fabric cells. Snap the carrier closed by pinching the two pieces of the carrier together from top to bottom. The cord tensioner does not lock into place. screwdriver, scrape the paint from the inside of the channel used for the cord tensioner. 47 smithandnoble.com
26 Care & Cleaning Notes 49 smithandnoble.com
27 Warranty Service The enjoyment of your window coverings should be everlasting, which is why our products come with a limited lifetime warranty. The warranty applies to the original owner, requires a proof of purchase and covers defects in material or craftsmanship. Shades or blinds must have been properly installed. We reserve the right to determine if your window covering warrants a repair or a replacement. In need of warranty service? Call us at and we ll arrange for a repair or replacement ASAP Smith & Noble Home, Inc. All Rights Reserved SN1016
STEP BY STEP INSTALLATION INSTRUCTIONS. Durawood Blinds. Easy Lift Cordless
 STEP BY STEP INSTALLATION INSTRUCTIONS Durawood Blinds Easy Lift Cordless Table of Contents Everything You Need A Smooth Set-Up We want you to love your new blinds and that includes having a smooth installation
STEP BY STEP INSTALLATION INSTRUCTIONS. Wood Blinds. Cordless Control
 STEP BY STEP INSTALLATION INSTRUCTIONS Wood Blinds Cordless Control Everything You Need Table of Contents Step 1 - Getting Started....3 Overview - Standard Control Wood Blinds....4 Step 2 - Mounting the
Vertical Blinds. Step by Step Installation Instructions
 Vertical Blinds Step by Step Installation Instructions Everything You Need A Smooth Set-Up We want you to love your new window coverings and that includes having a smooth installation experience. We recommend
STEP BY STEP INSTALLATION INSTRUCTIONS. Wood Blinds. Standard Control
 STEP BY STEP INSTALLATION INSTRUCTIONS Wood Blinds Standard Control Everything You Need Table of Contents Step 1 - Getting Started...3 Overview - Standard Control Wood Blinds...4 Step 2 - Mounting the
Manhattan & Loft Aluminum Cornices
 Step by Step Installation Instructions Manhattan & Loft Aluminum Cornices Manhattan Loft Wall Mount Everything You Need Table of Contents Step 1 - Getting Started (Parts & Tools).... 3 Overview - Cornice....
STEP BY STEP INSTALLATION INSTRUCTIONS. Durawood Blinds. Standard Lift
 STEP BY STEP INSTALLATION INSTRUCTIONS Durawood Blinds Standard Lift Everything You Need A Smooth Set-Up We want you to love your new blinds and that includes having a smooth installation experience. If
Step by Step Installation Instructions. Rod Mounted Valance. Wall Mount
 Step by Step Installation Instructions Rod Mounted Valance Wall Mount Everything You Need Table of Contents Step 1 - Getting Started (Parts & Tools).... 3 Overview -... 4 Step 2 - Attaching the Brackets....
STEP BY STEP INSTALLATION INSTRUCTIONS. Natural Woven Shades. Waterfall Valance
 STEP BY STEP INSTALLATION INSTRUCTIONS Natural Woven Shades Waterfall Valance Everything You Need Table of Contents Step 1 - Getting Started.... 3 Overview - Natural Woven Waterfall Valance..............
STEP BY STEP INSTALLATION INSTRUCTIONS. Natural Woven Shades. Standard Top Down/Bottom Up Slim Headrail Operable Lining
 STEP BY STEP INSTALLATION INSTRUCTIONS Natural Woven Shades Standard Top Down/Bottom Up Slim Headrail Operable Lining Table of Contents Everything You Need A Smooth Set-Up We want you to love your new
Installation Operation Care
 Installation Operation Care Duette and Applause Honeycomb Shades Vertiglide System CONTENTS Getting Started: Product View... 1 Tools and Fasteners Needed... 2 Installation: Installation Overview... 3 Outside
Installation Operation Care
 Installation Operation Care Duette and Applause Honeycomb Shades Vertiglide System CONTENTS Getting Started: Product View... 1 Tools and Fasteners Needed... 2 Installation: Installation Overview... 3 Outside
Installation Operation Care
 Installation Operation Care Duette and Applause Honeycomb Shades Vertiglide Side Stack Design CONTENTS Getting Started: Product View... 1 Tools and Fasteners Needed... 2 Installation: Installation Overview...
HONEYCOMB AND PLEATED SHADES
 HONEYCOMB AND PLEATED SHADES GETTING STARTED BRACkET INFORMATION A few simple tools are required: The brackets you received with your product are REQUIRED for proper installation. Brackets should be installed
Installation Instructions
 Aluminum Blinds Installation Instructions Echelon, Traditions & Integra Aluminum Blinds 2 Metro Aluminum Blinds *Click on any page to return to the Table of Contents* Echelon, Traditions & Integra Aluminum
Installation and Care Instructions
 Installation and Care Instructions THANK YOU for purchasing a Hunter Douglas product. Your new blind has been custom built for you from the highest quality materials. Once in your window, it will provide
Installation Instructions
 Wood Blinds Installation Instructions Heartland Woods Heartland Woods w/ Continuum *Click on any page to return to the Table of Contents* Heartland Woods Wood Blinds Mounting Inside or Outside Window Frame
HONEYCOMB AND PLEATED SHADES
 HONEYCOMB AND PLEATED SHADES GETTING STARTED BRACKET INFORMATION A few simple tools are required: The brackets you received with your product are required for proper installation. Brackets should be installed
Installation and Care Instructions
 Installation and Care Instructions 2" Horizontal Aluminum Blinds MagnaView Tilt Feature CONTENTS Getting Started................................................ 1 Mount the Installation s....................................
GETTING STARTED OPTIONAL HARDWARE A
 ROLLER SHADES Continuous Cord Loop and Link System without Cassette Double Roller GETTING STARTED OPTIONAL HARDWARE A few simple tools are required: Hold Down Brackets Spacer Block Spacers Steel Tape Measure
MINI BLINDS Classic GETTING STARTED STANDARD HARDWARE. A few simple tools are required: OPTIONAL HARDWARE
 MINI BLINDS Classic GETTING STARTED STANDARD HARDWARE A few simple tools are required: Steel Tape Measure Pencil Level End Brackets (Open Position LH & RH) Top Brackets Power Drill and Drill Bits Flathead
Installation and Care Instructions
 Installation and Care Instructions 2" Horizontal Aluminum Blinds MagnaView Tilt Feature Thank you for your purchase. Your new blinds have been custom built for you from the highest quality materials. Properly
Installation and Care Instructions. Wood Blinds and Alternative Wood Blinds. LiteRise Touch System. Getting Started
 Installation and Care Instructions Wood Blinds and THANK YOU for purchasing a Hunter Douglas product. Your new blind has been custom built for you from the highest quality materials. Once in your window,
Installation Operation Care. Vertical Blind Collection Paramount, PermAlign, and PermaTrak Headrail Systems
 Installation Operation Care Vertical Blind Collection Paramount, PermAlign, and PermaTrak Headrail Systems CONTENTS Getting Started: Product View... 1 Tools and Fasteners Needed... 2 Installation: Installation
CONTENTS BEFORE YOU BEGIN
 Owner s Guide Wood Blinds Alternative Wood Blinds 2" Aluminum Horizontal Blinds Intelligence Interface Motor Clip Receiver Eye Battery Holder Battery Cover Remote PowerTilt Motorized Tilt System CONTENTS
Installation Operation Care
 Installation Operation Care Skyline Gliding Window Panels CONTENTS Getting Started: Mounting Types And Window Terminology... 1 Unpack The Box... 1 Installation Components Required... 2 Optional Components...
Installation Operation Care
 Installation Operation Care Roman Shades EasyRise and UltraGlide Lifting Systems CONTENTS Getting Started: Product View... 1 Tools and Fasteners Needed... 2 Mounting Types and Window Terminology... 2 Installation:
Installation Operation Care
 Installation Operation Care Provenance Woven Wood Shades Standard Cordlock and Clutch Operated Shades CONTENTS Getting Started: Product View... 1 Tools and Fasteners Needed... 2 Mounting Types and Window
INSTALLATION INSTRUCTIONS TOOLS YOU WILL NEED GETTING STARTED
 INSTALLATION INSTRUCTIONS HONEYCOMB SHADES STANDARD RECTANGULAR Thank you for your purchase. This shade has been custom built for you from the highest quality materials. To avoid errors and save valuable
Installation Operation Care
 Installation Operation Care 2" Horizontal Aluminum Blinds MagnaView Tilt Feature 5102014000F 4/14 CONTENTS Getting Started: Product View Reveal with MagnaView... 1 Product View Natural Elements with MagnaView...
Installation Operation Care
 Installation Operation Care Horizontal Blinds Standard Hardware System LiteRise Operating System UltraGlide Operating System CONTENTS Getting Started: Product View...1 Tools and Fasteners Needed...2 Unpack
INSTALLATION INSTRUCTIONS. WOOD BLINDS 1-3/8, 2 and 2-3/8 SLAT SIZES. FAUX WOOD BLINDS 2 and 2-1/2 SLAT SIZES
 INSTALLATION INSTRUCTIONS WOOD BLINDS 1-3/8, 2 and 2-3/8 SLAT SIZES FAUX WOOD BLINDS 2 and 2-1/2 SLAT SIZES STANDARD CORDLESS LIFT Thank you for your purchase. This blind has been custom built for you
FAUX WOOD BLINDS 2 & 2-1/2 SLAT SIZES
 INSTALLATION INSTRUCTIONS FAUX WOOD BLINDS 2 & 2-1/2 SLAT SIZES STANDARD RECTANGULAR Thank you for your purchase. This blind has been custom built for you from the highest quality materials. To avoid errors
2" and 2 1/2" Wood Horizontal Blinds 2", 2 1/4" and 2 1/2" Faux Wood Horizontal Blinds. Installation & Operating Instructions
 2" and 2 1/2" Wood Horizontal Blinds 2", 2 1/4" and 2 1/2" Faux Wood Horizontal Blinds Installation & Operating Instructions TC07-08.2011 TABLE OF CONTENTS Product View...3 GETTING STARTED...4 Tools Required:...4
Installation Operation Care
 Installation Operation Care Provenance Woven Wood Shades Standard Cordlock And Clutch Operated Shades CONTENTS Getting Started: Installation Components Needed... 1 Tools And Fasteners Needed... 2 Mounting
Horizontal Blinds Installation Instructions
 Horizontal Blinds Installation Instructions Mounting Options Inside mount: Blind is mounted inside the window frame, either to the top of the frame or to the sides. Outside mount: Blind is mounted either
Duette and Applause Honeycomb Shades
 Replacement Guide SUS NIÑOS/A V OS ENFANT YOUR CHILDR CHI PCN 5102116000 Printed Printed in in China China Replacement Guide Replacement Guide Replacement Guide PROTEJ Honeycomb Shades PROTÉG For Standard
Measuring for BLINDS AND SHADES & DRAPERY, PANELS, VALANCES AND CORNICES
 Measuring for BLINDS AND SHADES & DRAPERY, PANELS, VALANCES AND CORNICES OVERVIEW AND MOUNTING OPTIONS Our measuring guide will take you through the steps you need to measure your windows. Just a few simple
Installation Operation Care
 Installation Operation Care EasyRise UltraGlide LiteRise Vignette Modern Roman Shades Traditional Style EasyRise, LiteRise, and UltraGlide Operating Systems CONTENTS Getting Started: Product View Traditional
Before you begin the installation process, gather the following tools and keep them handy:
 Vertical Blind Installation Instructions ucontact@udoblinds.com 1-855-205-8442 Congratulations on purchasing vertical blinds from Follow these instructions to properly install your blinds. Tools You Need
Installation Operation Care
 Installation Operation Care Horizontal Blinds Standard Cordlock, Operable Specialty Shapes, LiteRise, SimpleLift, and UltraGlide Operating Systems CONTENTS GETTING STARTED Product View Standard Cordlock
Installation Instructions Vertical Blinds
 Installation Instructions Vertical Blinds Installing Your New Vertical Blinds Thank you for your purchase of a Century Blinds Inc. Vertical Blind. Please take a moment to review the contents of your parts
Soft Sheer Vertical. Installation and Care Guide
 Soft Sheer Vertical Installation and Care Guide Soft Sheer Vertical Blinds represent a design breakthrough in style, efficiency and function. The unique fabric structure and hardware system are designed
INSTALLATION INSTRUCTIONS. Vertical Blinds
 1 INSTALLATION INSTRUCTIONS Vertical Blinds Vinyl & Fabric Thank you for your purchase. This blind has been custom built for you from the highest quality materials. To avoid errors and save valuable time,
INSTALLATION INSTRUCTIONS. WOOD BLINDS 1-3/8, 2 and 2-3/8 SLAT SIZES. COMPOSITE FAUX WOOD BLINDS 2 and 2-1/2 SLAT SIZES
 INSTALLATION INSTRUCTIONS WOOD BLINDS 1-3/8, 2 and 2-3/8 SLAT SIZES COMPOSITE FAUX WOOD BLINDS 2 and 2-1/2 SLAT SIZES POLYMER FAUX WOOD BLINDS 2 and 2-1/2 SLAT SIZES STANDARD CORDLESS LIFT Thank you for
Privacy Aluminum Shade
 Privacy Aluminum Shade Installation Instructions Email: customerservice@blindster.com Call us: (888) 256-8672 Mon - Fri 8am - 7pm (CT) Congratulations on purchasing an Aluminum Privacy Blind from Blindster.
Graber Lake Forest Faux Wood and Premium Faux Wood Blind
 2 3 5 6 8 7 1 2" (5.1cm) Blind shown 1. Blind (cord tilt shown) 2. Mounting Brackets 3. Center support bracket (if required). Mounting screws (2 per bracket) 5. Projection brackets (optional, one per mounting
Timber Venetians Manual
 Timber Venetians Manual Measuring & Limitations Timber Venetians Measuring Architrave & Reveal Face & Reveal Corners Bays Options & Limitations Maximum Width Minimum Width Fixed Control Minimum Width Tilt
HONEYCOMB SHADES CORDLESS LIFT SYSTEM CONTINUOUS CORD LOOP SYSTEM REMOTELIFT 2.0 SYSTEM
 INSTALLATION INSTRUCTIONS HONEYCOMB SHADES CORDLESS LIFT SYSTEM CONTINUOUS CORD LOOP SYSTEM REMOTELIFT 2.0 SYSTEM Thank you for your purchase. This shade has been custom built for you from the highest
Install. Operate. Care.
 Install. Operate. Care. Standard Hardware System LiteRise Cordless System Wood Blinds Alternative Wood Blinds 2" Aluminum Blinds Thank you for your purchase. By selecting a horizontal blind for your window,
Aluminum Horizontal Blinds BOX BRACKET INSTALLATION
 Aluminum Horizontal Blinds BOX BRACKET INSTALLATION MOUNT THE INSTALLATION BRACKETS Mounting Options The installation brackets may be inside mounted, outside mounted or ceiling mounted. In all cases, level
INSTALLATION INSTRUCTIONS. Aluminum Blinds - Standard - - Lift & Lock -
 1 INSTALLATION INSTRUCTIONS Aluminum Blinds - Standard - - Lift & Lock - 1 Deluxe 1 Traditional 1 Value & 1 Basic 2 Macro Thank you for your purchase. This blind has been custom built for you from the
ST. KITTS CEILING FAN
 ITEM #0845047 ST. KITTS CEILING FAN MODEL #40829 Questions, problems or missing parts? Before returning this item to your retailer, call our customer service department at 1-800-643-0067, Monday - Thursday,
Installation Instructions for Vertical Blind
 Installation Instructions for Vertical Blind In order to have an accurate installation it is necessary to follow these simple steps. 1. Tools needed Marker or pencil, measuring tape, screwdriver and screws
Install. Operate. Care.
 Install. Operate. Care. Standard HeadMaster System LiteRise Cordless System Wood Blinds Alternative Wood Blinds 2" Aluminum Blinds Thank you for your purchase. By selecting a horizontal blind for your
TOUCHDOWN 48 CEILING FAN
 TOUCHDOWN 48 CEILING FAN MODEL #50205 Español p. 20 Questions, problems, missing parts? Before returning to your retailer, call our customer service department at 1-877-361-3883, Monday - Thursday, 8 am
Once you ve located these components, set them aside so they ll be handy as you begin the installation process. Screw Holes
 Wood Blinds Installation Instructions with Magnet Valance Email: customerservice@blindster.com Call us: (888) 256-8672 Mon - Fri 8am - 7pm (CT) How to Install Your Wood Blinds Before you get started installing
Over-the-Range Microwave Oven Installation Instructions MVH130* MVH230* MVH330*
 Over-the-Range Microwave Oven Installation Instructions MVH130* MVH230* MVH330* * Additional alphanumeric characters representing other models in the series may follow each model number. Keep these instructions
Installation Instructions
 Installation Instructions Above the Cooktop Microwave Oven JVM60 and JVM65 Questions? Call -800-56- or Visit our Website at: GEAppliances.ca BEFORE YOU BEGIN Read these instructions completely and carefully.
Cordless CellularFabric Shade. owner's handbook
 Cordless CellularFabric Shade owner's handbook 2 WARNING Young children can STRANGLE in cord and bead chain loops. They can also wrap cords around their necks and STRANGLE. Always keep cords and bead chains
Installation Instructions
 Installation Instructions Over the Range Microwave Oven PVM88 Questions? Call -800-56-44 or Visit our Website at: GEAppliances.ca BEFORE YOU BEGIN Read these instructions completely and carefully. IMPORTANT
SPRINGHILL 44 CEILING FAN
 SPRINGHILL 44 CEILING FAN MODELS #50184, 50185 Español p. 20 Questions, problems, missing parts? Before returning to your retailer, call our customer service department at 1-877-361-3883, Monday - Thursday,
MAYFIELD CEILING FAN LISTED E ITEM # MODEL #BTH44ABZC5C BTH44BNK5C Español p. 20 ATTACH YOUR RECEIPT HERE.
 Harbor Breeze is a registered trademark of LF, LLC. All Rights Reserved. ITEM #0331094 0331096 MAYFIELD CEILING FAN MODEL #BTH44ABZC5C BTH44BNK5C Español p. 20 ATTACH YOUR RECEIPT HERE Serial Number Purchase
SUTTON 52 CEILING FAN
 SUTTON 52 CEILING FAN MODELS #50188, 50189, 50190 Español p. 19 Questions, problems, missing parts? Before returning to your retailer, call our customer service department at 1-877-361-3883, Monday - Thursday,
ELSTON 52 CEILING FAN
 ELSTON 52 CEILING FAN MODEL #10290 Español p. 21 Questions, problems, missing parts? Before returning to your retailer, call our customer service department at 1-877-361-3883, Monday - Thursday, 8 am -
DUVAL 52 CEILING FAN MODELS #50201, Español p. 19 LISTED FOR DAMP LOCATION
 DUVAL 52 CEILING FAN MODELS #50201, 50206 Español p. 19 LISTED FOR DAMP LOCATION Questions, problems, missing parts? Before returning to your retailer, call our customer service department at 1-877-361-3883,
Wood. Blind owner's handbook
 Wood owner's handbook 2 WARNING Cords and bead chains can loop around a child s neck and strangle. Always keep cords and bead chains out of children s reach. Move furniture away from cords and bead chains.
Installation Instructions
 Installation Instructions Above the Cooktop Microwave Oven PVM1899 & PVM2155 Questions? Call 1-800-561-3344 or Visit our Website at: GEAppliances.ca BEFORE YOU BEGIN Read these instructions completely
PRODUCT INFORMATION MANUAL SECTION: 3 VERI SHADES VERI SHADES
 VERI SHADES Where innovation meets style and functionality. A contemporary take on a classic window covering, Veri Shades combines the versatility of a vertical blind with the elegant appeal of a soft
Installation Instructions
 Installation Instructions Over the Range Microwave Oven BEFORE YOU BEGIN (Read these instructions completely and carefully.) IMPORTANT IMPORTANT Save these instructions for local inspector s use. Observe
TILGHMAN CEILING FAN. LISTED For Damp Location E ITEM # MODEL #WCK52LMW5N WCK52NWZ5N. Español p. 20 ATTACH YOUR RECEIPT HERE
 ITEM #0294980 0294981 TILGHMAN CEILING FAN Harbor Breeze is a registered trademark of LF, LLC. All Rights Reserved. MODEL #WCK52LMW5N WCK52NWZ5N Español p. 20 ATTACH YOUR RECEIPT HERE Serial Number Purchase
Installation Instructions
 GE Consumer & Industrial Appliances Installation Instructions Junction Box Cover Within this user bag, you will find a junction box cover and a #10 hex head screw used to attach the junction box cover
Fillmore Small Pendant Assembly and Installation Instructions
 CAUTION: Fillmore Small Pendant Assembly and Installation Instructions BEFORE INSTALLING FIXTURE, MAKE SURE THE POWER TO THE CIRCUIT IS TURNED OFF AT THE MAIN FUSE BOX / CIRCUIT BREAKER UTILITY BOX. Important
WARNING. Tighten strain relief screws to secure cable. Make sure screw heads are facing up when tightening conduit nut.
 WARNING Electrical Shock Hazard Electrically ground dishwasher. Connect ground wire to green ground connector in terminal box. Do not use an extension cord. Failure to follow these instructions can result
Please read and save these instructions. Should you have any questions or difficulty installing your fan, call us first!
 IC/Air2 and IC/Air3 Installation Instructions and Owners Manual Please read and save these instructions. Should you have any questions or difficulty installing your fan, call us first! Customer Service
INSTALLATION GLYDEA MOTORIZED TRACK PRODUCT OVERVIEW. 1. Glydea Motor 2. Motorized Drapery Track. 3. Wall Brackets 4. One Touch Ceiling Bracket
 PRODUCT OVERVIEW 1. Glydea Motor 2. Motorized Drapery Track 2 3. Wall Brackets 4. One Touch Ceiling Bracket 7 6 6 7 5. Return Hooks 6. Master Carrier/Carrier Arms 1 7. Carriers 8. Swivel/Ceiling Bracket
Table of Contents What to Expect with Your Installation. Ceiling Plate. Tools Needed.
 Table of Contents Congratulations on purchasing your new Casablanca ceiling fan! It will provide comfort and performance in your home or office for many years. This installation and operation manual contains
CUSTOM DRAPERY + CUSTOM WINDOW HARDWARE PROGRAMS
 CUSTOM DRAPERY + CUSTOM WINDOW HARDWARE PROGRAMS GETTING STARTED: From the fabric you select to the hardware you choose, window treatments are an opportunity to define a room s style. This guide outlines
Table of Contents What to Expect with Your Installation. Tools Needed. Wall Control
 Table of Contents Congratulations on purchasing your new Casablanca ceiling fan! It will provide comfort and performance in your home or office for many years. This installation and operation manual contains
Built-In Dishwasher. Installation Instructions. BEFORE YOU BEGIN Read these instructions completely and carefully. IMPORTANT The dishwasher MUST be
 Installation Instructions Built-In Dishwasher If you have questions, call 800.GE.CARES (800.432.2737) or visit our website at: www.ge.com BEFORE YOU BEGIN Read these instructions completely and carefully.
Top Control Dishwasher
 INSTALLATION GUIDE Top Control Dishwasher NS-DWH2BS8/NS-DWH2SS8/NS-DWR2BS8/NS-DWR2WH8/NS-DWR2SS8 Before using your new product, please read these instructions to prevent any damage. Contents Introduction......................................................................................................
Dishwasher Installation Instructions DW 24XT/DW 24XV
 Dishwasher Installation Instructions DW 24XT/DW 24XV Installation Instructions Dishwasher BEFORE YOU BEGIN Read these instructions completely and carefully. IMPORTANT Observe all governing codes and ordinances.
Table of Contents What to Expect with Your Installation. Tools Needed. Motor Housing.
 Table of Contents Congratulations on purchasing your new Casablanca ceiling fan! It will provide comfort and performance in your home or office for many years. This installation and operation manual contains
ITEM # BUILDER S SERIES CEILING FAN MODEL #41391
 Harbor Breeze Harb or Breeze ITEM #0915543 BUILDER S SERIES CEILING FAN MODEL #41391 Harbor Breeze is a registered trademark of LF, LLC. All Rights Reserved. Español p. 18 ATTACH YOUR RECEIPT HERE Purchase
Table of Contents What to Expect with Your Installation. Tools Needed. Wall Control
 Table of Contents Congratulations on purchasing your new Casablanca ceiling fan! It will provide comfort and performance in your home or office for many years. This installation and operation manual contains
Here is what comes in your box:
 Here is what comes in your box: We recommend that you pull everything out of the box and lay it out. We have grouped the drawn components below with the hardware you ll need for those parts. The screws
Speaker Wall Mount (MSP-DCCSPM)
") INSTALLATION INSTRUCTIONS Speaker Wall Mount () The speaker wall mount is a convenient mounting solution for speakers that are compatible with flat panel displays. The speaker wall bracket is equipped
INSTALLATION INSTRUCTIONS Speaker Wall Mount () The speaker wall mount is a convenient mounting solution for speakers that are compatible with flat panel displays. The speaker wall bracket is equipped
BAY BRIDGE CEILING FAN
 Harbor Breeze is a registered trademark of LF, LLC. All Rights Reserved. ITEM #0451817 BAY BRIDGE CEILING FAN MODEL #CPJ1240 Español p. 19 ATTACH YOUR RECEIPT HERE Serial Number Purchase Date Questions,
Luxaflex Metal Venetian Blinds Guarantee, Installation, Safety & Care Instructions
 Luxaflex Metal Venetian Blinds Guarantee, Installation, Safety & Care Instructions ! WARNING Young children can be strangled by loops in pull cords, chains, tapes and inner cords that operate the product.
Table of Contents. What to Expect with. Mounting Options. Tools Needed. Preparation. Wiring. Downrod.
 Table of Contents www.casablancafanco.com What to Expect with Your Installation Congratulations on purchasing your new Casablanca ceiling fan! It will provide comfort and performance in your home or office
CARMEL 48 CEILING FAN
 CARMEL 48 CEILING FAN MODELS #50196, 50197 Español p. 21 Questions, problems, missing parts? Before returning to your retailer, call our customer service department at 1-877-361-3883, Monday - Thursday,
ITEM # , CARATUK RIVER CEILING FAN MODEL #40046, 40303
 ITEM #0833928, 0807428 CARATUK RIVER CEILING FAN MODEL #40046, 40303 Harbor Breeze is a registered trademark of LF, LLC. All Rights Reserved. Español p. 21 ATTACH YOUR RECEIPT HERE Purchase Date Questions,
Installation Instructions
 Dear customer! Thank you for choosing this quality product from ASKO. We hope it will meet your expectations and fulfil your needs for many years to come. Scandinavian design combines clean lines, everyday
SUPRA 52. U.S. Patents: D450,830 INSTRUCTION MANUAL WARRANTY CERTIFICATE
 SUPRA 52 BY U.S. Patents: D450,830 INSTRUCTION MANUAL WARRANTY CERTIFICATE This product is protected by United States Federal and/or State Law, including Patent, Trademark and/or Copyright laws. Manual
Table of Contents. What to Expect with. Mounting Options. Tools Needed. Wall Control
 Table of Contents www.casablancafanco.com What to Expect with Your Installation Congratulations on purchasing your new Casablanca ceiling fan! It will provide comfort and performance in your home or office
Installation Instructions
 Installation Instructions Built-In Dishwasher If you have questions, call 800-944-9400(US),800-245-8352(Canada)or visit our website at: www.frigidaire.com BEFORE YOU BEGIN Read these instructions completely
TILGHMAN CEILING FAN ITEM # MODEL #WCK44NWZ5L1. español p. 21 ATTACH YOUR RECEIPT HERE. Serial Number. Purchase Date
 ITEM #0889808 TILGHMAN CEILING FAN MOEL #WCK44NWZ5L1 español p. 21 ATTACH YOUR RECEIPT HERE 4009218 APPROVE FOR USE IN AMP LOCATIONS Serial Number Purchase ate Questions, problems, missing parts? Before
ITEM # , , PAWTUCKET CEILING FAN MODEL #40958, 40959, 40047
 ITEM #0803775, 0721899, 0807427 PAWTUCKET CEILING FAN MODEL #40958, 40959, 40047 Harbor Breeze is a registered trademark of LF, LLC. All Rights Reserved. Español p. 20 ATTACH YOUR RECEIPT HERE Serial Number
Torrena 42 Ceiling Fan
 Torrena 42 Ceiling Fan Owner s Manual Part # 269268, 269269 Model # 32096, 32097 Exclusively Distributed by: HD Supply Facilities Maintenance, Ltd. Atlanta, GA 30339 2017 Made in China If you are experiencing
INSTALLATION INSTRUCTIONS Lift & Lock for Horizontal Blinds
 INSTALLATION INSTRUCTIONS Lift & Lock for Horizontal Blinds 6/2016 Installating Your New Horizontal Blinds Please take a moment to review the contents of your package. Your package should contain the following:
Undercounter Refrigeration
 INSTALLATION GUIDE Undercounter Refrigeration Contents Undercounter Refrigeration..................... 3 Undercounter Specifications.................... 4 Site Preparation..............................