OPERATING INSTRUCTIONS
|
|
|
- Maximilian Douglas Mitchell
- 6 years ago
- Views:
Transcription


1 OPERATING INSTRUCTIONS SMALL AND LARGE POTATO BAKERS MODELS PBFV & PBFV BEDIENUNGSANLEITUNG MODE D EMPLOI GEBRUIKSAANWIJZING PLEASE READ CAREFULLY (Rev 0; 0/09/00)
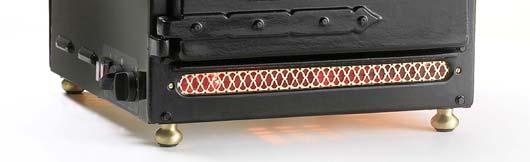
2 INTRODUCTION Each King Edward Product is individually handmade by craftsmen using traditional methods and materials. Please follow our recommendations carefully, you will then enjoy many years of excellent service and lasting good looks from this product. INSTALLATION & COMMISSIONING We recommend that wherever possible, the baker is sited near adequate extraction / ventilation to assist with the disposal of steam. The exterior of this appliance will get hot during operation, so suitable precautions must be taken. Make sure that the mains flex cannot come into contact with hot surfaces and is adjusted to the required length by a suitably qualified person. If the supply cord is damaged, it must be replaced by the Manufacturer, its Service Agent or Similarly Qualified Persons in order to avoid a hazard. Do not position the baker near to the edge of a counter enabling staff or customers to brush against it in passing. The adjustable feet can be raised up or down to enable the baker to be sited firmly on most surfaces: loosen the lock nut anti-clockwise with spanner; adjust brass foot to desired level & re-tighten nut. Brass Foot Screw Position the baker so that the electrical socket can be reached easily in the event the baker needs to be disconnected from the electric supply. Do not push excess flex under the baker. The baker can be lifted at either side of the canopy where the brass screws are positioned. OPERATING RECOMMENDATIONS The interior of this appliance will get very hot during operation. ALWAYS use an oven glove (preferably one which covers the wrist and lower arm as well) when operating the baker or removing potatoes from it. Take particular care when opening the main oven door; the built-up steam and heat inside will escape as soon as the door is opened and could cause injury if you are standing too close. Handle baked potatoes carefully, occasionally they may burst in the oven or whilst being handled. All King Edward ovens MUST be operated by suitably trained staff. Under NO circumstances should children come into contact with or operate this appliance. Always use best practise and take all reasonable precaution to avoid accidents when using this oven. INSTRUCTIONS FOR USE Take out wire trays and position potatoes ready for loading. Plug baker in at socket and switch on fan oven switch and then turn thermostat knob to desired setting. The switches are shown in the panel below: Control Panel for Small Potato Baker PB(FV) Control Panel for Large Potato Baker PB(FV) Fan Oven Timer Display Fan Oven Timer Oven Temp Oven Oven Temp The neon light will go off in approximately 0 minutes, this will indicate that the oven has reached temperature. Using oven gloves, load the prepared trays into the oven. You may set the audible timer for the desired cooking period, this will ring and the neon light will go off when the time is up. When cooked sufficiently, the potatoes will feel soft when gently squeezed, they can then be transferred to the top display cabinet where they will be kept hot. To maintain adequate storage temperature in the top display area, the main oven must be left on at normal operating temperature (90-00 C).
3 3 3 a OVEN COMPONENT LIST FOR POTATO BAKERS PB(F) & PB(F) Index No Part Description PB(F) PB(F) Door Frame (cast) 7000v 7000v Main oven door (cast) 7000v 7000v 3 Top oven door (cast) 70003v 70003v 4 Door handle (cast) Door catch 5005v 5005v 6 Top door retaining arm Top door retaining spring Funnel (brass) 70008v 70008v 9 Canopy (brass trimmed) 70009v 70009v 0 Roundhead screw (brass) Side block Socket screw M Roundhead screw S/s screw hexhead Door catch stud 5005v 5005v 6 Brass foot rubber insert Right painted panel 7007r 7007r 8 Wire tray (55x35mm; 300x358mm) 7008v 7008v 9 Gallery (brass) a Fireglow Bulb 9007a 9007a 0 Painted Flemish glass Door knob a M6 screw c/s s/s 500a 500a Door pins Top door glass 7003v Door pins M6 element cover nut Fan element cover
4 Wiring Diagram - Potato Baker 8 Top Bulb Top Oven Element 6 Wiring code: NEUTRAL LIVE Fan Motor Main Oven Fan Element 0a 5 33 Earth Stud 5 Front Panel 37 Timer 33 Mains Flex N L Mains 7 Connector T Stat 8a 30 3 Bottom Bulb Holder Display Oven Switch 3 Thermal Cut Out ELECTRICAL COMPONENT LIST Fan Oven Switch Index No Part Description PB(F) PB(F) Mains flex GB (Euro 30) Wire Red or Brown 70030v 70040v 3 Wire Red or Brown v v 5 Wire Red or Brown v v 6 Wire Red or Brown v v 8 Wire Red or Brown v v Wire Black or Blue 7003v 7004v 5 Wire Green/Yellow 70035v 70045v 7 Mains Connector 90306v 90306v 8 Top bulb (high temp) a Wire Red or Brown F/glow bulb GB (Euro 307) Fan motor a Wire Green/Yellow 70036v v Top oven element n/a 7000 Main oven fan element Thermal cut-out Thermostat 90303v 90303v 5 Neon indicator (with tails) 90305a 90305a 6 Switch (Red) n/a a 30 Bracket GB (Euro 90408) Bulbholder GB (Euro 9048) Square top bulbholder Control knob Timer (90 minutes) T90 T90
5 Guide for baking times Do not use the baker with the thermostat on full, as this will invariably burn the outside of the potatoes before the inside is cooked. When the oven is fully loaded, particularly with larger potatoes, air-flow inside may become restricted, in this case it may be desirable to reduce the cooking temperature whilst increasing the cooking time. Large Baker PB(F) 50x6/8oz potatoes at 90 C - 00 C for 60 minutes approx. 40x0oz potatoes at 90 C - 00 C for 80 minutes approx. Small Baker PB(F) 4x8oz potatoes at 90 C - 00 C for 60 minutes approx. 8x0oz potatoes at 90 C - 00 C for 80 minutes approx. Large Potato Baker - model PB(FV) only: this model has an independent heater for the top display area which may be operated at any time by the display oven switch on the control panel. However, we recommend that for this oven you will also need to have the main oven left on at normal operating temperature (90 C - 00 C) to achieve best results from the top display area. ABOUT POTATOES We recommend the use of washed and graded baking potatoes as non-baking varieties take longer to cookand don t produce such good results, King Edward, Maris Piper or Desiree are three good baking varieties although your supplier may be able to recommend others to you. Some ways you can prepare your potatoes include: Rubbing the skins in olive oil and salt. ~ (makes the skins crisper) Pricking the skins ~ (may reduce the risk of the potatoes bursting) Wrapping them in foil ~ (produces a much wetter potato with a soft, thin skin, also increases the cooking time, ~ not really a proper jacket potato). The skin of the potato will become thicker and crunchier if it is cooked for longer at a lower temperature. However once the baked potatoes are removed from the oven, the skins will become softer as they reduce in temperature. Once removed from the very hot temperature of the baking oven and placed into the lower temperature of the holding oven, the potatoes will inevitably reduce in core temperature. The display oven is intentionally at a lower temperature to prevent the potato from over-cooking; this also helps to prolong the display life of the potato. Despite being prepared and cooked in the same way, the same batch of potatoes can produce different results! Please use the method of baking that suits you best and gives you the results you want ~ HAPPY BAKING! CLEANING AND MAINTENANCE IMPORTANT - Always allow the oven to cool and unplug it at the socket before cleaning. Never use abrasive or corrosive materials on any of the oven surfaces. Do not submerge the baker in water or use any water jets to clean it. The solid brass embellishments may be cleaned using a proprietary brass cleaner, however this will remove the lacquer finish applied at the manufacturing stage. Stubborn spills or marks may be removed easier when the oven is still slightly warm. To maintain the high gloss finish and visual appeal of the baker, the exterior panels should be cleaned with warm soapy water and a soft cloth followed by polishing with glass/window cleaner or a proprietary polish suitable for metalwork. The oven interior can be cleaned using a domestic oven interior cleaner, please follow the instructions carefully. The oven trays may be removed and cleaned in warm soapy water. Please contact your supplier for frame touch-up paint and replacement bulbs.
 70034 70034 35 Front D glass 70035 70035 36 Front panel (painted) 70036v 70036v 37 Galv. Access panel 70037 70037 38 Galv.")
6 No Part Description PB(F) PB(F) 8 Steam vent Main door seal 7009v 7009v 30 Self tapping screw 500v 500v 3 Brass screw Front frame (cast) Brass convex Name plate (brass oval) Front D glass Front panel (painted) 70036v 70036v 37 Galv. Access panel Galv. Bulb cover panel Painted side panel (left) 70039v 70039v minute timer T90 T90 4 Solid baking tray (optional) WIRING INSTRUCTIONS Prepare all 3 wires using trimming template Loosen cord grip Wire in the sequence: Neutral Live Earth Ensure terminal screws are tight Always use 3 amp (Brown) fuse Tighten cord grip onto cord before replacing cover E N L 40mm 8mm 5mm 8mm mm 8mm EARTH GREEN/YELLOW NEUTRAL BLUE LIVE BROWN If in doubt contact a qualified electrician. THIS APPLIANCE MUST BE EARTHED CHANGING BULBS Red bulb in base - 60 watt amber (fireglow) obtainable from most DIY / Hardware stores Unplug machine; carefully tip oven onto front or back (not side) using a cushion or soft towel folded underneath for protection Unscrew the bulb cover panel (index no. 38). Replace bulb and reverse above process High temperature Display/Storage area bulb - obtainable from supplier of oven Approach from heated display area inside; lever off glass cover and replace with new bulb NB: Bulbs are not covered by guarantee
7 SERVICE SHEET FOR PB(F)V & PB(F)V DISCONNECT FROM ELECTRICITY SUPPLY BEFORE COMMENCING SERVICE. Replacing top oven bulb: Access is gained through top oven door, lever off glass cover, unscrew bulb - replace cover ensuring cut-out in cover is over bulb housing side.. Replacing lower bulb (below main oven): Carefully tip oven onto front or back (not side) using a towel or similar for protection. Unscrew central bulb. Reverse process. 3. Replacing door seal (main oven): Lift door off hinges, lie flat with seal facing upwards, unscrew all screws next to seal, remove seal and replace. Reverse process. *Ensure seal is tucked inside lip on cast door and is even all round before fully tightening screws - do not over-tighten. 4. Replacing top oven bulb assembly: Remove outer canopy, screws each side, remove inner canopy by removing side blocks, (allen key needed). Pull off wire connectors. Assembly can be removed through oven after pushing in clamps around sides. Reverse process. 5. Replacing top oven element - PB(F)V only: (5.) Remove panel (opposite side to doors) by unscrewing outer screws and removing top brass convex strip, slacken slightly lower convex strip, tilt top of panel forward and pull upwards. (When replacing ensure top convex strip goes back the same way with arrow on back pointing upwards). (5.) Remove wire connectors, unscrew 4 screws from panel element is bolted to, pull out complete assembly, unbolt from element, pull back side clips from each side of element, replace element. Reverse process. *Test oven by switching off main oven (green) switch on top oven (red) and wait until heat is felt in top oven. 6. Replacing thermal cut-out: (6.) As 5.. (6.) Remove wire connectors, unscrew screws and remove fibre washers behind plate. Reverse process. *Important - fibre washer must be replaced between cut-out plate and oven or oven will cut-out prematurely and disable cooking process. Test oven at full temperature and allow to cycle several times. If whole oven (including lights) go off, cut-off plate needs bending away from oven - retest when cooled. 7. Replacing main oven fan: (7.) Remove element cover inside oven by screwing nuts on cover and pulling outwards. (7.) Unscrew central nut clockwise, remove fan blade. (7.3) As 5.. (7.4) Pull off wire connectors from fan motor, unscrew 3 nuts securing fan assembly also 3 brass washers and 3 silicone washers, remove fan assembly, check condition of silicone washers under fan assembly and if deteriorated - replace. Reverse Process. *When replacing fan assembly ensure there are silicone washers either side of back plate. *Use nut loc or similar on nuts to prevent them from coming loose!. Test oven by turning green switch on, turn thermostat to mid setting (50-00 C) towards neon. Allow oven to cycle several times, making sure fan blade does not catch on element cover. 8. Replacing main oven element: (8.) As 5.. Remove wire connectors from element (below fan). (8.) As 7.. (8.3) Unscrew central screw and off-centre screw, pull out element and replace. Reverse process. *Test oven 9. Replacing thermostat: (9.) As 7.. (9.) Carefully open slightly, clips holding thermostat sensor. Move in line with hole capillary passes through. (9.3) As 5.. (9.4) Pull capillary and sensor though and move out of way. Pass new thermostat sensor through hole and put into position in clips. Carefully close clips back to hold sensor. Push new thermostat body, old excess capillary and sensor through slot where wire etc passes down into cavity. *Leave new capillary slightly slack as not to pull on sensor inside oven. Tidy and secure new capillary onto earth wire and ensure it is routed well away from any element and fan motor connections using cable ties. Reverse process 5.. (9.5) Carefully tip oven onto front or back (not side) using a towel or similar for protection. (9.6) Remove complete access panel from underneath after unscrewing all screws from outside edge of panel. (9.7) Pull off thermostat knob, unscrew large nut and washer from outside of panel, pull old thermostat out completely. Position new thermostat through locating holes with flat on shaft facing noen. Replace access panel, position back on feet. *Test thermostat by turning knob with mid setting towards neon. Wait until neon goes out and cycles several times before turning off.
8 FAULT FINDING GUIDE Nothing Works: Is the oven switched on at the socket? Is the main oven switch on? Is trip on main fuse board on? Has fuse blown in plug? *If trip/fuse continues to trip/blow after resetting/replacing consult service engineer *Both top oven and lower bulbs may have blown - giving the impression of oven not working! If all above are OK but oven still does not heat up - see next section Oven Not Heating Up: Turn oven thermostat knob to mid setting (50-00ºC) in line with neon, does neon light up? Yes - look inside oven to see if fan blade is turning (F models only) No and fan not turning - consult service engineer Oven Burning Product: Is thermostat turned above 0 ºC (temperature in line with neon)? Yes -try a lower setting (80-00 ºC) *Larger potatoes may need cooking at lower temperature for longer to prevent over cooking outside before inside is cooked No - does neon light go off when temperature knob is turned to low setting (below 00 ºC) or off? No - consult service engineer PB(F)V ONLY : An additional visual check can be made. The whole oven, (lights, elements and fan) cycles off and then on again some time later indicating a replacement thermostat is required. Yes - consult service engineer GUARANTEE All King Edward equipment is covered by a year guarantee from the time of purchase; this does not effect your statutory rights. Depending on the contract you have entered into with your supplier, the guarantee may cover Parts Only or be full Parts & Labour. Please check with your supplier for confirmation. Irrespective of the level of cover certain items are not covered by the manufacturers guarantee: bulbs, fuses, main oven door seal, glass and damage to the mains lead. The manufacturers guarantee covers all components with the exceptions highlighted above but it does not cover external surfaces and trim. Breakages to external trim (eg brass fittings, flue, etc) and the deterioration in the quality/appearance of surface panels, canopy and stainless steel interiors, which are deemed to have been caused by general wear & tear through oven usage, are not covered by this guarantee. Please check your fuses and electricity supply before calling out an engineer as service calls requested in error will be charged at the normal rate. Please have the equipment sited where it is easily accessible to the engineer and where there is adequate room to work. In the case of an oven, please ensure the product has not been used within 6 hours of the engineers visit and that it has cooled down sufficiently to work on. Most service calls will be responded to within 48 hours. However, in exceptional circumstances we may require the equipment back at our factory for investigation and repair. In these instances please allow 4 working days from collection to delivery. Persons not authorised by King Edward Catering Equipment should not attempt to repair/adjust any part without our prior consent as this may invalidate our guarantee as would the fitting of non specified parts. Please contact King Edward on or your equipment supplier if you have any problems. For future reference please write your equipment serial number here:
OPERATING INSTRUCTIONS
 OPERATING INSTRUCTIONS BAKE-KING KING OVEN BEDIENUNGSANLEITUNG MODE D EMPLOI GEBRUIKSAANWIJZING PLEASE READ CAREFULLY (Rev 1; 01/03/2012 INSTALLATION INSTRUCTIONS We recommend that wherever possible, the
OPERATING INSTRUCTIONS
 OPERATING INSTRUCTIONS HOT FOOD MERCHANDISER Product code: HFMV BEDIENUNGSANLEITUNG MODE D EMPLOI GEBRUIKSAANWIJZING PLEASE READ CAREFULLY (Rev3; 01/06/2010) INTRODUCTION Each King Edward Product is individually
OPERATING INSTRUCTIONS
 OPERATING INSTRUCTIONS VISTA HOT FOOD DISPLAY Product code: VHFD BEDIENUNGSANLEITUNG MODE D EMPLOI GEBRUIKSAANWIJZING PLEASE READ CAREFULLY (Rev 4; 10/08/2010) INTRODUCTION Each King Edward Product is
OPERATING INSTRUCTIONS
 OPERATING INSTRUCTIONS SMALL AND LARGE BAIN MARIE MODELS BM1V & BM2V BEDIENUNGSANLEITUNG MODE D EMPLOI GEBRUIKSAANWIJZING PLEASE READ CAREFULLY Rev3; 01/06/2010 INTRODUCTION Each King Edward Product is
User Instruction Manual
 User Instruction Manual Counter Top Convection Oven Please read and keep these instructions These instructions cover the Burco counter top convection oven model CTCO01, SKU 444440542 CTCO01 SKU 444440542
WAILEA OWNER S MANUAL
 WAILEA OWNER S MANUAL The blades in each pack are matched for equal weight to assure smooth fan operation. If more than one fan is being installed, be careful not to mix blades from different cartons.
User, Installation and Servicing Instructions. Panther Static Hot Cupboards G1, G2 and G3 IS86 ECN1881
 User, Installation and Servicing Instructions Panther Static Hot Cupboards G1, G2 and G3 Panther Static Hot Cupboard User Instructions Installation Remove all packaging and protective coatings from both
PARTS & ACCESSORIES INSTALLATION AND SAFETY INSTRCUTIONS ITEM NO.:60010BZGTGLD SAFETY PRECAUTION. Canopy. Downrod. Housing. Transmitter CR2032/3V
 L I G H T I N G INSTALLATION AND SAFETY INSTRCUTIONS ITEM NO.:000BZGTGLD SAFETY PRECAUTION PARTS & ACCESSORIES Canopy Downrod Housing WARNING To make sure power is off before attempting installation. WARNING
E25 CONVECTION OVEN E25MS CONVECTION OVEN SERVICE MANUAL
 E25 CONVECTION OVEN E25MS CONVECTION OVEN SERVICE MANUAL E25 Convection Oven -- WARNING: ALL INSTALLATION AND SERVICE REPAIR WORK MUST BE CARRIED OUT BY QUALIFIED PERSONS ONLY. E25 Convection Oven -2-
Built-in Conventional Oven
 Built-in Conventional Oven LAM3204 User & Installation Guide using this manual Thank you for choosing LAMONA Built - In Oven. This user Manual contains important information on safety and instructions
Installation, Operating and Servicing Instructions
 Installation, Operating and Servicing Instructions Electric Convection Oven ECO8, ECO9 Please make a note of your product details for future use: Date Purchased: Model Number: Serial Number: Dealer: IS
VERTICAL COOKING PRECISIO/PRECIJET COMBI OVEN PRECISIO/ PRECIJET OVENS S.A.V. MAINTENANCE AND REPAIR
 VERTICAL COOKING S.A.V. PRECISIO/ PRECIJET OVENS MAINTENANCE AND REPAIR 27/03/2012 PPS-3BEFM10PC GENERAL Tools Every time this symbol appears, it is imperative to have the appropriate tool in order to
User and Installation Instructions. Opus 700 Electric Salamander Grill OE7304 IS318 ECN3011
 User and Installation Instructions Opus 700 Electric Salamander Grill OE7304 IS318 ECN3011 USER / INSTALLATION INSTRUCTIONS Please read the following carefully before using this appliance. Warnings and
900 Quadrant Steam Shower Cabin with 6 Body Jets
 Product Specification Working Pressure 1.5 to 4 bar Pressure MUST be balanced Dimensions 2250 H x 900 D x 900 W Door Opening 480mm Steam Generator 2.8Kw Fuse size: 13 amp fuse spur 900 Quadrant Steam Shower
WARMING AND MERCHANDISING CABINET
 WARMING AND MERCHANDISING CABINET MODEL 695 MODEL 695-S (Two door unit shown) (Single door unit shown) Snack foods have to be hot and moist to be appealing. Cold won t do... Dry won t do. Wisco s model
6L PRESSURE COOKER. Instruction Manual. Model: PLA1424
 6L PRESSURE COOKER Instruction Manual Model: PLA1424 Due to ongoing product improvements, specifications and accessories may change without notice. Actual product may differ slightly to that depicted.
This appliance has been CE-marked on the basis of compliance with the Low Voltage and EMC Directives for the voltages stated on the data plate.
 DOMINATORPLUS ELECTRIC RANGE APPLIANCES INSTALLATION and SERVICING INSTRUCTIONS IMPORTANT The installer must ensure that the installation of the appliance is in conformity with these instructions and National
PARTS & ACCESSORIES INSTALLATION AND SAFETY INSTRCUTIONS ITEM NO.:60006PC SAFETY PRECAUTION. Canopy. Downrod. Housing. Blade. Transmitter CR2032/3V
 L I G H T I N G INSTALLATION AND SAFETY INSTRCUTIONS ITEM NO.:000PC SAFETY PRECAUTION PARTS & ACCESSORIES Canopy Downrod Housing IMPORTANT : PLEASE READ BEFORE INSTALLATION.. Do not connect this remote
User Instruction Manual
 User Instruction Manual Export Electric Catering Urn Please read and keep these instructions These instructions cover the Burco 10, 20 and 30 litre electric catering urns for export SKU s 444441912, 444441913
User and Installation Instructions. Opus 700 Electric Wet Well Bain Marie OE7601 IS195 ECN2396
 User and Installation Instructions Opus 700 Electric Wet Well Bain Marie OE7601 IS195 ECN2396 Please read the following carefully before using this appliance. Warnings and Precautions Please ensure that
UBBU60LFA. Built-under Fridge Manual for Installation, Use and Maintenance IM UBBU60LFA_
 UBBU60LFA Built-under Fridge Manual for Installation, Use and Maintenance IM UBBU60LFA_20131023 Before first use You must allow the fridge to settle for at least twenty four hours prior to switching the
SK110, SK210 & SK310 Single Ovens Installation, Use and Maintenance
 SK110, SK210 & SK310 Single Ovens Installation, Use and Maintenance Customer Care Department The Group Ltd. Harby Road Langar Nottinghamshire NG13 9HY T : 01949 862 012 F : 01949 862 003 E : customer.care@cda.eu
E32 CONVECTION OVEN SERVICE MANUAL
 E32 CONVECTION OVEN SERVICE MANUAL Applies to units from S/N 40256-1- WARNING: ALL INSTALLATION AND SERVICE REPAIR WORK MUST BE CARRIED OUT BY QUALIFIED PERSONS ONLY. -2- CONTENTS This manual is designed
GAS COOKER GAS OVEN SERIES. Owner s Manual Please read this manual carefully before operating your set. Retain it for future reference.
 GAS COOKER GAS OVEN SERIES Owner s Manual Please read this manual carefully before operating your set. Retain it for future reference. Record model number and serial number of the set. See the label attached
600mm Electric Cooktop with Solid Elements
 600mm Electric Cooktop with Solid Elements Model: ACS6SE2 ICS6SE3 Installation and Operation Manual Congratulations on choosing one our appliances, we hope you have many reliable years of use from this
FW422 Integrated In Column Larder Fridge Manual for Installation, Use and Maintenance
 FW422 Integrated In Column Larder Fridge Manual for Installation, Use and Maintenance 1 Customer Care Department The Group Ltd. Harby Road Langar Nottinghamshire NG13 9HY T : 01949 862 012 F : 01949 862
VK902 Compact Combination Microwave Oven Installation, Use and Maintenance
 VK902 Compact Combination Microwave Oven Installation, Use and Maintenance Customer Care Department The Group Ltd. Harby Road Langar Nottinghamshire NG13 9HY T : 01949 862 012 F : 01949 862 003 E : customer.care@cda.eu
BSF60WH / BSF60SS BUILT IN ELECTRIC FAN OVEN. Instruction Manual. Please read these instructions carefully before use and retain for future reference
 BSF60WH / BSF60SS BUILT IN ELECTRIC FAN OVEN Instruction Manual Please read these instructions carefully before use and retain for future reference SAFETY INSTRUCTIONS Important: This appliance is not
Manual / Handbuch Spare parts list / Ersatzteilliste
 Manual / Handbuch Spare parts list / Ersatzteilliste Equipment Imp.-Exp. GmbH Zitterpappelweg 9 D - 22391 Hamburg Tel.: + 49 40 60009468-0 Fax: + 49 40 536 75 01 E - M a i l : i n f o @ w e s c o - n a
Owner s Manual STOVES. MODELS 620 Kitchenaire. 621 Kitchenaire 711S
 Owner s Manual STOVES MODELS 620 Kitchenaire 621 Kitchenaire 711S CONTENTS 2 Introduction 2 Unpacking 2 Installation 2 Electrical Installation 3 Safety Advice 3 Control Panels 4 The Oven 5 Solid Plates
Autofill counter top water boiler
 Autofill counter top water boiler Please read and keep these instructions For Burco counter top water boilers 76500 (SKU 444448531) and 76502 (SKU 444448533) Getting the best from your water boiler Remove
INFRARED IP55 HEATER INSTRUCTIONS FOR: MODEL:- QZWP45N 1. SAFETY INSTRUCTIONS
 INSTRUCTIONS FOR: INFRARED IP55 HEATER MODEL:- QZWP45N Thank you for purchasing a Consort Claudgen product. Manufactured to a high standard this product will, if used according to these instructions and
For Models FF2310APS, FF2310APW, FF2310APB 55cm FREESTANDING FRIDGE FREEZER. Instruction Manual
 For Models FF2310APS, FF2310APW, FF2310APB 55cm FREESTANDING FRIDGE FREEZER Instruction Manual Please read these instructions carefully before use and retain for future reference. Before switching on your
BUILT-IN OVEN MODEL: EBO-E7081D(SS) Owner s Manual Please read this manual carefully before operating your set. Retain it for future reference.
 Owner s Manual Please read this manual carefully before operating your set. Retain it for future reference.") BUILT-IN OVEN MODEL: EBO-E7081D(SS) Owner s Manual Please read this manual carefully before operating your set. Retain it for future reference. Record model number and serial number of the set. See the
BUILT-IN OVEN MODEL: EBO-E7081D(SS) Owner s Manual Please read this manual carefully before operating your set. Retain it for future reference. Record model number and serial number of the set. See the
Autofill wall mounted water. boiler. Getting the best from your water. boiler. Please read and keep these instructions
 Autofill wall mounted water boiler Please read and keep these instructions For Burco wall mounted boilers 76700 (SKU 444448534), 76702 (SKU 444448546), & 76704 (SKU444448548) Getting the best from your
HORIZONTAL COOKING SERIES: 700 / 900 S.A.V MAINTENANCE & AFTER SALES WORK PPS-3WE711911CH
 SERIES: 700 / 900 S.A.V MAINTENANCE & AFTER SALES WORK PPS-3WE711911CH GENERAL Tools Every time you se this symbol it is vital that you have the tool indicated to ensure correct and compliant work is undertaken
Imperial Electric Fires
 Imperial Electric Fires GB IE MODELS: Flamescape II Curvascape II manual & remote. Installation and User Instructions PLEASE READ THESE INSTRUCTIONS CAREFULLY AND RETAIN FOR FUTURE REFERENCE This electric
FW422. Integrated In Column Larder Fridge. Installation, use and maintenance.
 FW422 Integrated In Column Larder Fridge Installation, use and maintenance www.cda.eu Contents: 3 Important information 5 Important safety warnings 6 Before first use 7 Setting the temperature 7 Guidance
Camarillo 52 Ceiling Fan
 Owner s Manual Camarillo 52 Ceiling Fan Part # 269263, 269259, 269287 Model # 32091, 32092, 32087 Exclusively Distributed by: HD Supply Facilities Maintenance, Ltd. Atlanta, GA 30339 2017 Made in China
E26 CONVECTION OVEN SERVICE MANUAL. Revision 1/F
 E26 CONVECTION OVEN SERVICE MANUAL -1- WARNING: ALL INSTALLATION AND SERVICE REPAIR WORK MUST BE CARRIED OUT BY QUALIFIED PERSONS ONLY. -2- CONTENTS This manual is designed to take a more in depth look
WARMING AND MERCHANDISING CABINET
 WARMING AND MERCHANDISING CABINET Above red graphics now replace green graphics shown in photo. MODEL 695 (Single door unit shown) MODEL 695-S (Single door unit shown) Snack foods have to be hot and moist
OWNERS INSTRUCTION MANUAL
 OWNERS INSTRUCTION MANUAL 132CM/52 Classic INSTALLATION OPERATION MAINTENANCE CAUTION READ INSTRUCTIONS CAREFULLY FOR SAFE INSTALLATION AND FAN OPERATION. IF UNSURE CONSULT A QUALIFIED ELECTRICIAN SUITABLE
E32M CONVECTION OVEN SERVICE MANUAL. Revision 1/F
 E32M CONVECTION OVEN SERVICE MANUAL -- WARNING: ALL INSTALLATION AND SERVICE REPAIR WORK MUST BE CARRIED OUT BY QUALIFIED PERSONS ONLY. -2- CONTENTS This manual is designed to take a more in depth look
DOMINATORPLUS ELECTRIC RANGE APPLIANCES INSTALLATION and SERVICING INSTRUCTIONS
 DOMINATORPLUS ELECTRIC RANGE APPLIANCES INSTALLATION and SERVICING INSTRUCTIONS IMPORTANT The installer must ensure that the installation of the appliance is in conformity with these instructions and National
INSTALLATION INSTRUCTION for ceiling fan
 INSTALLATION INSTRUCTION for ceiling fan F8203 Installation & Operating Instructions for the Parrotuncle Owner s Installation,Manual Motor is core parts of the fan and the most expensive in all the components.
AGA 13 AMP RETRO-FIT WITH AIMS
 AGA 13 AMP RETRO-FIT WITH AIMS (OIL TO ELECTRIC) FITTING INSTRUCTIONS LEAVE WITH CUSTOMER For use in GB and IE 04/14 EINS 515736 OIL TO ELECTRIC CONVERSION INSTRUCTIONS l ISOLATE ELECTRIC SUPPLY, OIL SUPPLY
GRANDE OWNER S MANUAL
 LE GRANDE OWNER S MANUAL The blades in each pack are matched for equal weight to assure smooth fan operation. If more than one fan is being installed, be careful not to mix blades from different cartons.
LT4X AND LT6X Electric Slot Toasters
 LT4X AND LT6X Electric Slot Toasters INSTALLATION AND USER INSTRUCTIONS Please read the following carefully before commencing work on this equipment WARNING AND PRECAUTIONS This appliance must be installed
E32 CONVECTION OVEN SERVICE MANUAL -1- Revision 1/F3508
 E32 CONVECTION OVEN SERVICE MANUAL -1- WARNING: ALL INSTALLATION AND SERVICE REPAIR WORK MUST BE CARRIED OUT BY QUALIFIED PERSONS ONLY. -2- CONTENTS This manual is designed to take a more in depth look
Service Instructions
 BASIC EXCELLENT PERFECT U Universal ovens I Incubators S Sterilisers Service Instructions Mo Tu We Th Fr Sa Su t3 on off h t2 t1 t4 loop 4 3 2 1 STERI DEFRO C MIN MAX C IN 1 IN 2 OUT IN 1 IN 2 OUT % rh
Lo-Carbon T-series Window & Roof Models
 Lo-Carbon T-series Window & Roof Models Installation & User Instructions WIRED 456165A (9 WW) 456168A (9 RF) 456173A (12 WW) 456176A (12 RF) WIRELESS 456169A (9 WW) 456172A (9 RF) 456177A (12 WW) 456180A
WELCOME BLUE - NEUTRAL BROWN LIVE GREEN AND YELLOW - EARTH
 Zephyr 16 DC FAN WELCOME Thank you and congratulation for choosing an EcoAir DC Fan to help you improve the air quality within your home. Inside you will find many helpful tips on how to use and maintain
INSTRUCTION MANUAL. UBES60SS2 60cm 4 Solid plate electric hob
 INSTRUCTION MANUAL UBES60SS2 60cm 4 Solid plate electric hob NOTE: This User Instruction Manual contains important information, including safety & installation points, which will enable you to get the
TECHNICAL INFORMATION Touchtronic Clothes Dryers
 TECHNICAL INFORMATION Touchtronic Clothes Dryers Includes: T1302, T1303, T1322, T1329ci T1403 & T1405 2004 Miele This page intentionally left blank. Table of Contents GENERAL INFORMATION A. Warning and
NOTICE . SAFE SERVICING PRACTICES. Electric Wall Oven with Electronic Oven Control
 SERVICE DATA SHEET 318047418 (0504) Rev. A Electric Wall Oven with Electronic Oven Control NOTICE This service data sheet is intended for use by persons having electrical and mechanical training and a
User Instruction Manual
 User Instruction Manual Mulled Wine Heater Please read and keep these instructions You will need: -32 amp plug socket -Temperature thermometer These instructions cover the Mulled Wine Heater Mulled Wine
HOTPLATE COUNTERTOP AND OVEN RANGE
 F900 SERIES User, installation and servicing instructions HOTPLATE COUNTERTOP AND OVEN RANGE E9042, E9084, E9184 Read these instructions before use DATE PURCHASED: MODEL NUMBER: SERIAL NUMBER: DEALER:
CONTENT. Precautions to Avoid Possible Exposure to Excessive Microwave Energy.. Important Safeguards... Control Panel...
 MODEL:EMO-F2073(WH) CONTENT Precautions to Avoid Possible Exposure to Excessive Microwave Energy.. Important Safeguards... Part Name Control Panel... Installation of the Microwave Oven...... Grounding
SAFETY AND OPERATING MANUAL
 SAFETY AND OPERATING MANUAL 2 General Safety Warnings WARNING: Read all safety warnings and all instructions. Failure to follow the warnings and instructions may result in electric shock, fire and/or serious
EVX101 Extractor Installation, Use and Maintenance
 EVX101 Extractor Installation, Use and Maintenance Customer Care Department The Group Ltd. Harby Road Langar Nottinghamshire NG13 9HY T : 01949 862 012 F : 01949 862 003 E : customer.care@cda.eu W : www.cda.eu
BUILT-IN OVEN MODEL: EBO-D7080D(SS) Owner s Manual Please read this manual carefully before operating your set. Retain it for future reference.
 Owner s Manual Please read this manual carefully before operating your set. Retain it for future reference.") BUILT-IN OVEN MODEL: EBO-D7080D(SS) Owner s Manual Please read this manual carefully before operating your set. Retain it for future reference. Record model number and serial number of the set. See the
BUILT-IN OVEN MODEL: EBO-D7080D(SS) Owner s Manual Please read this manual carefully before operating your set. Retain it for future reference. Record model number and serial number of the set. See the
Product instruction manual Easymount Wide Format Laminators
 Product instruction manual Easymount Wide Format Laminators The Easymount has been designed to be user friendly, however we strongly recommend you take a few minutes to read through this manual to ensure
SERVICE MANUAL DISHWASHERS DIVA ACCESSIBILITY DISHWASHERS
 SERVICE MANUAL DISHWASHERS DIVA ELECTROLUX HOME PRODUCTS S.p.A. Publication no. Spares Operations Italy Corso Lino Zanussi,30 I - 33080 PORCIA /PN (ITALY) 599 38 70-09 Fax +39 0434 394096 EN DISHWASHERS
INSTRUCTIONS MODEL: MWBT
 Page 1 of 15 INSTRUCTIONS MODEL: MWBT SAFETY INSTRUCTIONS INSTALLATION INSTRUCTIONS OPERATION INSTRUCTIONS MAINTENANCE INSTRUCTIONS WIRING DIAGRAM EXPLODED VIEW / PARTS LIST WARRANTY INFORMATION DISPOSAL
BATHROOM FURNITURE FITTING GUIDE
 SE30566C0 BATHROOM FURNITURE FITTING GUIDE Please spend 5 minutes reading this section before commencing with the installation of your new furniture. 1. Should any of your items have a defect, please do
Synergy Grill User & Engineer Installation & Conversion Guide
 Synergy Grill 1300 User & Engineer Installation & Conversion Guide 1 Index: Description Page Number/Section Important Information 3 Installation 4-6 / Section 1 Commissioning 6 / Section 2 Converting Gas
IS09 ECN2087. EB3, EB4 & EB6 Automatic Fill Water Boilers INSTALLATION, USER & SERVICING INSTRUCTIONS
 EB3, EB4 & EB6 Automatic Fill Water Boilers INSTALLATION, USER & SERVICING INSTRUCTIONS 1 Contents Introduction 3 Accessories Warnings and Precautions 4 Installation Preparation 5 Work Surfaces and Areas
INSTALLATION. Glass Panel Doors (select models) CAUTION
 CAUTION") Location Do not install refrigerator near oven, radiator or other heat source. If not possible, shield refrigerator with cabinet material. Do not install where temperature falls below 55 F (13 C) or rises
Location Do not install refrigerator near oven, radiator or other heat source. If not possible, shield refrigerator with cabinet material. Do not install where temperature falls below 55 F (13 C) or rises
Torrena 42 Ceiling Fan
 Torrena 42 Ceiling Fan Owner s Manual Part # 269268, 269269 Model # 32096, 32097 Exclusively Distributed by: HD Supply Facilities Maintenance, Ltd. Atlanta, GA 30339 2017 Made in China If you are experiencing
1. SAFETY RULES WARNING WARNING. 8. Avoid placing objects in the path of the blades.
 1 1. SAFETY RULES 1. To reduce the risk of electric shock, insure electricity has been turned off at the circuit breaker or fuse box before beginning. 2. All wiring must be in accordance with the National
When using electrical appliances, basic safety precautions should always be followed. These instructions should be saved for future reference:
 IMPORTANT SAFEGUARDS When using electrical appliances, basic safety precautions should always be followed. These instructions should be saved for future reference: Read and familiarise yourself with all
I N ST R UC T I ON MODEL 2612 & 2712 SLICERS MODELS 2612 ML ML FORM (12-98) 2612 SLICER
 2612 SLICER") I N ST R UC 2612 SLICER T I ON S MODEL 2612 & 2712 SLICERS MODELS 2612 ML-104829 2712 ML-104822 701 S. RIDGE AVENUE TROY, OHIO 45374-0001 FORM 34141 (12-98) Installation, Operation, and Care of MODEL 2612
I N ST R UC 2612 SLICER T I ON S MODEL 2612 & 2712 SLICERS MODELS 2612 ML-104829 2712 ML-104822 701 S. RIDGE AVENUE TROY, OHIO 45374-0001 FORM 34141 (12-98) Installation, Operation, and Care of MODEL 2612
DC740 Built-under & DC940 Built-In
 DC740 Built-under & DC940 Built-In Double Oven Installation, use and maintenance www.cda.eu Contents: 3 Important information 4 Important safety notes 6 Before first use 7 Notes on usage 8 Oven controls
FWC152 / FWC302 / FWC602 / FWC622 Wine Coolers
 FWC152 / FWC302 / FWC602 / FWC622 Wine Coolers Manual for Installation, Use and Maintenance Customer Care Department The Group Ltd. Harby Road Langar Nottinghamshire NG13 9HY T : 01949 862 012 F : 01949
OPUS Electric Chip Scuttle OE7109 USER /INSTALLATION INSTRUCTIONS
 OPUS Electric Chip Scuttle OE7109 USER /INSTALLATION INSTRUCTIONS Please read the following carefully before using this appliance. Warnings and Precautions Please ensure that all commissioning checks and
Ceiling Sweep Fan Assembly Instructions
 Ceiling Sweep Fan Assembly Instructions CSF Series Installation Note: This fan must be installed by a licenced electrical contractor Improperly installed ceiling sweep fans can be dangerous and expensive
OVENS AUS. Installation - Use - Maintenance. Oven models: 60cm Built in Ovens
 OVENS Installation - Use - Maintenance AUS Oven models: 60cm Built in Ovens 539.07.031 539.07.041 GENERAL INFORMATION Please read this booklet thoroughly before you use this appliance. It is important
Menumaster. Commercial Microwave Oven Owner's Manual GCSAND7RR
 Menumaster Commercial Microwave Oven Owner's Manual GCSAND7RR Keep these instructions for future reference. If the oven changes ownership, be sure this manual accompanies oven. Contents Model Identification
Cooled Incubators Series 1, 3 & 4. Instruction Manual
 Cooled Incubators Series 1, 3 & 4 Instruction Manual Instruction Manual for LMS Cooled Incubators Series 1, 3 & 4 Series 1 Models 305-60 litre capacity 303-180 litre capacity 250-250 litre capacity Series
PERFECT FIT IN-DASH HEAT/ COOL/ DEFROST FORD PICKUP
 specializing in AIR CONDITIONING, PARTS AND SYSTEMS for your classic vehicle PERFECT FIT IN-DASH HEAT/ COOL/ DEFROST 1960-66 FORD PICKUP CONTROL & OPERATING INSTRUCTIONS The controls on your new Perfect
Products documentation (REVISION DATE: 03/10/2011) OMFP6010 (60cm PIROLITIC OVEN)
 OMFP6010 (60cm PIROLITIC OVEN)") Products documentation (REVISION DATE: 03/10/2011) OMFP6010 (60cm PIROLITIC OVEN) Ovens Service Manual Models OMFP6010 CONTENTS This document has been published to be used for service only. The contents
Products documentation (REVISION DATE: 03/10/2011) OMFP6010 (60cm PIROLITIC OVEN) Ovens Service Manual Models OMFP6010 CONTENTS This document has been published to be used for service only. The contents
INSTALLER AND OWNER GUIDE
 5110831/03 INSTALLER AND OWNER GUIDE Model 808 Electric Heater This guide is intended to help you install and care for your Baxi Fires Division electric heater. Please read carefully before installing
60" Tulle PatioTM. Instruction Manual. A Kichler Select ceiling fan
 60" Tulle PatioTM A Kichler Select ceiling fan cul Certified for Wet Location Kichler Lighting 7711 East Pleasant Valley Road P.O. Box 318010 Cleveland, Ohio 44131-8010 Customer Service 866.558.5706 8:30
MALIBU STAR OWNER S MANUAL
 MALIBU STAR OWNER S MANUAL CONTENTS INTRODUCTION...................................................................... 1 MOUNTING RECOMMENDATIONS..........................................................
INSTRUCTIONS AND WARRANTY
 INSTRUCTIONS AND WARRANTY MODEL NO. RHFH913 Russell Hobbs EXTREME ECO Fan Heater Congratulations on purchasing our Russell Hobbs Extreme Eco Fan Heater. Each unit is manufactured to ensure safety and reliability.
User Instruction Manual
 User Instruction Manual 4 & 6 Slot Toasters This covers the Burco 4 & 6 slot toasters TSSL14 & TSSL16 444440355 & 444440356 Red End Cap 4 slot 444440606 Red End Cap 6 slot 444440608 Cream End Cap 4 slot
FWC153, FWC304, FWC604 & FWC624
 FWC153, FWC304, FWC604 & FWC624 Wine Coolers Installation, use and maintenance www.cda.eu Important The CDA Group Ltd cannot be held responsible for injuries or losses caused by incorrect use or installation
Contents. For your safety About your product Installing your appliance Using your appliance Care & cleaning...
 USER GUIDE TF5517S Contents For your safety..................................................... 1 About your product.................................................. 3 Installing your appliance...............................................
FWC152, FWC303, FWC603 & FWC623 Wine Coolers Installation, Use and Maintenance
 FWC152, FWC303, FWC603 & FWC623 Wine Coolers Installation, Use and Maintenance Customer Care Department The Group Ltd. Harby Road Langar Nottinghamshire NG13 9HY T : 01949 862 012 F : 01949 862 003 E :
INSTALLATION AND USER S MANUAL COOKER HOOD RS-600/A-S
 INSTALLATION AND USER S MANUAL COOKER HOOD RS-600/A-S RS-600 (CHS60SS)-GB-05.indd 1 6/8/2010 9:30:59 AM TABLE OF CONTENTS 1. Introduction 2 2. Safety precaution 2 3. Intended use 3 4. Parts supplied 3
RZ LITRE HALOGEN OVEN INSTRUCTIONS
 RZ102 12 LITRE HALOGEN OVEN INSTRUCTIONS Please ensure these instructions carefully before assembling or operating this product. Ensure you are familiar with all of the safety and operating instructions.
Service Manual 26 Self Trimming Fireplace with 3 Stage Remote
 Service Manual 26 Self Trimming Fireplace with 3 Stage Remote Model Number: DF2690 MOD: 0 Dimplex North America Limited 1367 Industrial Road Cambridge ON Canada N1R 7G8 1-800-668-6663 www.dimplex.com REV
BSM60SS / BSM60WH BUILT IN MULTI-FUNCTION ELECTRIC FAN OVEN. Instruction Manual
 BSM60SS / BSM60WH BUILT IN MULTI-FUNCTION ELECTRIC FAN OVEN Instruction Manual Please read these instructions carefully before use and retain for future reference CONTENTS Safety Instructions 2 Specifications
installation and operation manual for Hunter Ceiling Fans
 For Your Records and Warranty Assistance Model Name: Catalog/Model No.: Serial No.: Date Purchased: Where Purchased: For reference also attach your receipt or a copy of your receipt to the manual. installation
STEAM WALLPAPER STRIPPER MODEL HTW5
 STEAM WALLPAPER STRIPPER MODEL HTW5 From Serial Number 75154 (110 Volt North America only) OWNERS MANUAL & OPERATING INSTRUCTIONS 2016/11 Hiretech Part # 007717 WARNING For safe operation of this machine,
CREDA STORAGE RADIATORS
 5411160 Issue 1 July 99 CREDA STORAGE RADIATORS Models Covered:- AUTOMATIC 79331S 79341S 79351S 79361S (0.85kW) (1.7kW) (2.55kW) (3.4 kw) MANUAL 79334S 79344S 79354S 79364S (0.85kW) (1.7kW) (2.55kW) (3.4kW)
OE7008 & OE7010 Electric Oven Ranges
 OE7008 & OE700 Electric Oven Ranges USER, INSTALLATION AND SERVICING INSTRUCTIONS For use in G & IE IS97 ECN9 Dear Customer, Thank you for purchasing this Lincat product. This is just one of over 00 different
Glendale 52 in Ceiling Fan Owner's Manual. Glendale Ventilador de Techo de 1.32 m Manual del Propietario
 Glendale 52 in Ceiling Fan Owner's Manual Glendale Ventilador de Techo de 1.32 m Manual del Propietario Hampton Bay Lifetime Motor Warranty The retailer warrants the fan motor to be free from defects in
Part Nos.: Laminators
 Part Nos.: 22-22813 -1 18 22-22812 -1 24 Laminators Mega Electronics Limited Mega House, Grip Industrial Estate, Linton, Cambridge. England. CB21 4XN Tel: +44 (0) 1223 893900 Fax: +44 (0) 1223 893894 Email:
Hickory Rotisseries. Machine Type N / 5. 5 E 200ºF - 550ºF. Final Inspection:
 Installation Manual USA Hickory Rotisseries Models: N/5.5 E Machine Type N / 5. 5 E Total Power Rating Elements / Spits Electrical Rating Temperature Range Timer Delivery Date: 6000 or 8400 Watts 4 Elements