Vacuum-ultraviolet Ozone Systems. Installation & Operation Manual. Model OZ-SPA
|
|
|
- Meredith Potter
- 5 years ago
- Views:
Transcription


1 OzoneAX 3 T Vacuum-ultraviolet Ozone Systems Installation & Operation anual odel OZ-SPA

 feet (1.5m) of the unit. Follow all applicable electric codes. All permanent electrical connections should be performed by a qualified electrician.")

 feet from wall of pool water using nonmetallic plumbing.")

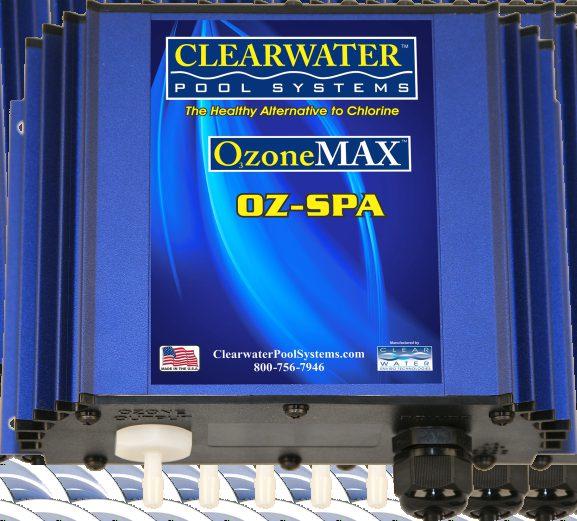
2 A. Important Safety Instructions IPORTANT SAFETY INSTRUCTIONS When using this electrical equipment, basic safety precautions should always be followed, including the following: READ AND FOLLOW ALL INSTRUCTIONS in this manual before attempting installation. A wire connector is provided on this unit to connect a minimum 12 AWG solid copper conductor between this unit and any metal equipment, metal enclosures of electrical equipment, metal water pipe, or conduit within five (5) feet (1.5m) of the unit. Follow all applicable electric codes. All permanent electrical connections should be performed by a qualified electrician. For cord and plug connected units: Risk of electric shock. Connect only to properly grounded, grounding type receptacle. For cord and plug connected units: Do not bury cord. For cord and plug connected units: Warning To reduce the risk of electric shock, replace damaged cord immediately. If electrically connecting this unit directly to pool controls, ensure the controls are protected by a (G.F.C.I.) Ground Fault Circuit Interrupter. Install at least five (5) feet from wall of pool water using nonmetallic plumbing. Install ozone generator no less than one (1) foot above the maximum water level to prevent water from contacting electrical equipment. Install in accordance with the installation instructions. ount the unit so that it is not accessible by anyone in the pool. Electric Shock Hazard. Disconnect unit from power source before attempting service. WARNING: Short term inhalation of high concentrations of ozone and long term inhalation of low concentrations of ozone can cause serious harmful physiological effects. Do not inhale ozone gas produced by this device. WARNING: UV Light is harmful to eyes and exposed skin. Do not look directly at the Ozone producing bulb used in this device. B. Identifying OzoneAX components OZ-SPA Power Box OZ-VIK Venturi Injection Kit Owners anual Warranty Card Indicator Light Output Connector 4 Piece olly Set with #10 Screws 2

3 C. Tools & aterials Required Bullet Level Hacksaw or Pipe Cutter PVC Cleaner/Primer Screwdrivers, Flat & Phillips Drill & Drill Bits PVC Cement Utility Knife Screws & Anchors D. Site Survey Power Source/ TimerBox OZ-SPA Unit Venturi Injector within 6 feet within 6 feet The OZ-SPA system is comprised of a power box and a venturi injection kit, which needs to be installed at the very end of the return line (after the filter, ionizer electrode chamber, heater, etc.). The ozone unit will need to be installed to a post or wall within six (6) feet of a 115 or 220VAC timer, electrical box or a 115V receptacle. This location will need to be within six (6) feet of location of the venturi injector. This location should be mounted at least one (1) foot above maximum water level and preferably out of direct sunlight. The ozone unit should be no closer than five (5) feet from a body of water. E. Installing the Power Box ount the OZ-SPA unit to a post or wall using the four mounting screw holes in the enclosure base. The unit may be mounted horizontally or vertically, however it is recommended that the vent holes not face upward and be directly exposed to rainfall. The location of the box must be within six (6) feet of the location of the venturi, which is plumbed on the return line. The unit should be mounted at least one (1) foot above maximum water level and preferably out of direct sunlight. The power box should also be located no closer than five (5) feet from a body of water. 3


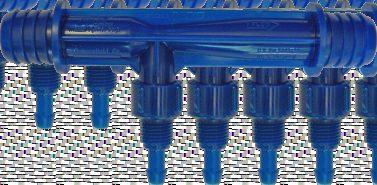
4 F. Electrical Any electrical connections should be performed by a certified electrician in accordance with all electrical codes. OZ-SPA systems are universal voltage, meaning the unit will work on 115 or 230VAC without any internal switching. When locating the power source, make sure that when the pump and motor shuts off, the OZ-SPA will too. The ideal source is the timer box. If no timer box exists, the unit can use the pump motor as its power source. In other words, the electrical connection should be such that the OZ-SPA is supplied power only when the power is supplied to the pool filter/circulation pump. A permanent ground bonding connector is provided on this unit and should be used to connect a minimum 12 AWG solid copper wire conductor to any metal equipment, metal enclosures of electrical equipment, metal water pipe, or conduit within five (5) feet of the unit. G. Installing the Venturi Injector Power Source/ Pump Timer N N N Kynar check valve ¼ reinforced vinyl hose Venturi Injector ¾ mpt to ¾ barbed adapter ¾ ID vinyl tubing water flow water flow SPA Pump N = Nylon Hose Clamps = etal Hose Clamps Filter 2 slip x ¾ fpt x 2 slip tee Heater Using the above drawing, install the venturi injector kit (OZ-VIK) as seen on page 6 4 Continue on next page >>>
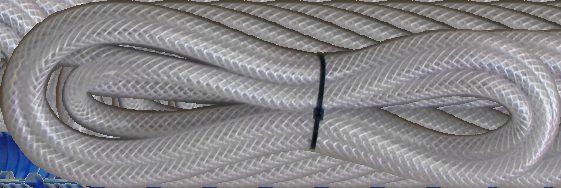
5 G. Installing the Venturi Injector (continued) OZ-VIK - Venturi Injection Kit O L I J H G K H N G. (1) azzei venturi injector H. (2) 2 slip x ¾ fpt x 2 slip tee I. (4) ¼ nylon hose clamps J. (4) 1 ¼ metal hose clamps K. (1) ¼ x ¼ Kynar check valve L. (1) 8' of ¾ ID vinyl tubing. (2) ¾ mpt to ¾ barbed adapter N. (9) ¼ x 14 long zip ties O. (1) 8' of ¼ reinforced vinyl hose AKE SURE THE WATER FLOWS IN THE DIRECTION OF THE ARROW ON THE VENTURI INJECTOR AND TO INSTALL IT IN THE CORRECT DIRECTION OF THE WATER FLOW. The installation of the Kynar check valve is a precautionary one we require during installation in case of the unlikely failure of the venturi that is built in the manifold. This would prevent water from entering the OzoneAX unit. To make sure this is properly installed, cut a few inches of the reinforced hose and insert one end on the outlet coming out of the OzoneAX unit. Install the check valve, then connect the other end of the remaining piece of hose to the check valve and then to the venturi injector which is located on the manifold. It is important that you install the Kynar check valve where air flow is allowed toward the injector. Air direction can be tested by blowing into the ¼ I.D. polybraid tubing. If correctly installed, you will see air bubbles enter the ¾ I.D. clear vinyl tubing. DO NOT SUCK ON THE ¼ I.D. TUBING WHEN CONNECTED TO THE OZONE SYSTE. After installation and turning on all the equipment, you will see a frothing (very tiny milk-like bubbles) action immediately after the venturi injector. This is located on the ¼ clear vinyl hose. These tiny bubbles should also appear at the nearest return line and possibly other return lines. This means ozone is getting injected into the pool s water. 5
 action immediately after the venturi injector. This is located on the ¼ clear vinyl hose.")
6 H. Starting the System Once everything has been connected, turn on the power to the OZ-SPA unit. ake sure all the connections are complete and tight. After installation and turning on all the equipment, you will see a frothing (very tiny milk-like bubbles) action immediately after the venturi injector. This is located on the ¼ clear vinyl hose. These tiny bubbles should also appear at the nearest return line and possibly other return lines. This means ozone is getting injected into the pool s water. water flow water flow I. Balancing the Spas Water ¼ reinforced vinyl hose Venturi Injector ¾ ID vinyl tubing (this side should be showing very small bubbles) Frothing Effect (small bubbles) Spa Water Chemistry To achieve optimal performance from the OZ-SPA system, it is recommended the following be performed prior to initial start-up: BACKWASH or clean filter Test and adjust water chemical balance to recommendations in the chart below ph Total Alkalinity (TA) ppm Calcium Hardness (CH) ppm Total Dissolved Solids (TDS) ppm Copper Ion Levels ppm J. Periodic Inspection The amazing thing you will notice about the OZ-SPA system is the clarity of the water, especially if you are using the ineralpure ionization system in conjunction with it. You might initially notice the water getting cloudy the first couple of days. DO NOT BE ALARED. THIS IS NORAL! You will want to clean or backwash your filter after the first week. Visual Inspection You will want to periodically inspect the power box in the evening to ensure the unit is functioned correctly. Turn the system on temporarily, if needed. The indicator light, located next to the output connector will glow a nice blue color. The ozone unit should only be on when the pump is running. To insure that the venturi injector and bypass are working correctly, simply observe to see if small bubbles are entering the pool and the frothing effect is taking place in the clear window of the venturi manifold window. Continue on next page >>> 6


7 K. Scheduled aintenance & Replacing the UV Bulb There is very little maintenance required with the OZ-SPA unit, however we do recommend you replace the ozone hoses and check valves once a year. Replace ozone hose once a year Order replacement part OZ-HOSEKIT from your dealer. This complete package includes 8 feet of hose, two check valves, 6 hose clamps, and 5 zip ties. Replacing the UV Bulb J. Periodic Inspection (continued) Periodically check the unit intake vent holes for the unlikely event of debris accumulation. It is important these vent holes are open for air to enter the ozone unit. Do not look directly into the vent holes when the UV bulb is operating. Plumbing Issues inor adjustment of the ball valve (when installing the manifold) may be required to divert water through the injector. This may be true with two speed or variable speed pumps. Older versions of these adjustable speed pumps do not adjust well and you will need to adjust the ball valve to accommodate flow through the venturi on low speed. There is an internal check valve in the venturi injector. In the unlikely event this area becomes clogged, it may be cleaned by removing the nut/barb and a retaining rubber seal. Care should be used not to lose the internal ball and spring while taking the rubber seal off. Clean and reinstall. Order replacement part OZ-10L Replacement Aqua Elite 10 bulb from your dealer. Replace the UV bulb after approximately 9,000 hours of use. This is approximately 12 years of running the ozone unit 2 hours a day, 365 days a year. We recommend the bulb gets changed at about 70% of its life for optimum performance, or the 9,000 hours. To determine the actual number of hours the ozone system has been running, simply calculate the number of days your spa is open a year by the number of hours per day the equipment is running. When the bulb does lose its power, you will notice the water getting cloudier quicker or having to use more chlorine than usual. You can also check the clear connector on the output tube of the power box. It should be a glowing blue in color if the bulb is on. Note: It is much easier to view this indicator feature in the evening hours when there is no bright sunlight. When replacing the UV bulb, we strongly recommend you remove the unit from the wall. This is to insure you carefully remove the delicate equipment from the metal enclosure properly, and seal back up tightly. etal plate with the bulb ballast attached to it Bottom of unit with bottom panel off Zip tie holding in bulb Cut zip tie holding in bulb Carefully remove bulb from metal bracket & white connector Carefully replace bulb in white connector and metal bracket Replacing the bulb in the OZ-SPA unit. 1. Disconnect power from the OZ-SPA unit. Coming into contact of the exposed ozone bulb can cause serious damage to your health. 2. Remove the six (6) screws on the bottom of the unit. Continue on next page >>> 7


8 K. Scheduled aintenance & Replacing the UV Bulb (continued) 3. Carefully pull off the bottom panel and slide out the metal plate with the UV bulb and ballast attached to it as far as it will go approximately 4 inches. There is a tether holding it in place so it will not completely disconnect from the ozone box. Be careful NOT to pull out any wires. 4. Cut the zip tie holding the bulb in the bulb clamp. Be careful NOT to break the bulb. 5. Carefully pull the bulb from the white connectors and the bulb clamp from holding them in place and remove. Be careful NOT to break the bulb. Dispose of bulb properly after removal. 6. Snap new bulb in place. Secure with the metal brackets. 7. Push metal plate back into its place inside the unit. There is no need to add another zip tie as this was used for shipping purposes. 8. Replace the bottom plate, making sure the gasket is seated in the groves properly. 9. Tighten the 6 screws back into place, securing the bottom plate tightly. 10. Reconnect power. ake sure the bulb indicator (the clear connector on the output tube of the power box) glows in a blue color. Again, you may want to check this in the evening hours out of direct sunlight. L. Warranty Information This unit comes with a 1-year warranty to be free from defects in material and workmanship under normal use from the date of purchase. See warranty card (blue card) included. OzoneAX 3 Vacuum-ultraviolet Ozone System T anufactured by Sustainable solutions for our future Designed, engineered & assembled in the USA. The Healthy Alternative to Chlorine Phone: Toll Free: SWI (7946) ClearwaterPoolSystems.com 3/17
PZ2 Series Manual. PROZONE INTERNATIONAL, Inc. Ozone Water Purification Systems. INSTALLATION GUIDE and OPERATION MANUAL. Prozone PZ2 Series
 PZ2 Series Manual PROZONE INTERNATIONAL, Inc. Ozone Water Purification Systems INSTALLATION GUIDE and OPERATION MANUAL Prozone PZ2 Series Ozone Generator Systems SAFETY READ AND FOLLOW ALL INSTRUCTIONS.
Ozone Generator Systems
 PZ2-4V - Commercial and Residential Pools & Spas Ozone Generator Systems INSTALLATION GUIDE and OPERATION MANUAL T. O3 NATURAL TECHNOLOGY Reduces Chemical Usage, Improves Sanitation Produces Crystal Clear
Ozone Generator Systems
 PZ2-1 & PZ2-2 - Commercial and Residential Pools & Spas Ozone Generator Systems INSTALLATION GUIDE and OPERATION MANUAL T. O3 NATURAL TECHNOLOGY Reduces Chemical Usage, Improves Sanitation Produces Crystal
PZ1, PZ3 & PZ6 Installation Guide
 PZ1, PZ3 & PZ6 Installation Guide PROZONE INTERNATIONAL, INC. Ozone Water Purification Systems INSTALLATION GUIDE Prozone PZ1, PZ3 and PZ6 Series Ozone Generator Systems SAFETY READ AND FOLLOW ALL INSTRUCTIONS.
FOR THE RECORD. You should record the model and serial numbers, which can be found on the back of the unit, for future reference.
 FOR THE RECORD You should record the model and serial numbers, which can be found on the back of the unit, for future reference. Warranty: 18 mo. on unit and 1 year on check valve assembly Model: The Ozone
OZONE SYSTEM FOR IN-GROUND POOLS New and Existing
 INSTALLATION & OPERATIONS MANUAL FOR Z0-910/912 OZONE SYSTEM FOR IN-GROUND POOLS New and Existing MANUFACTURED BY 3428 Bullock Lane San Luis Obispo, CA 93401 800-676-1335 4-0454-041900/03 IMPORTANT SAFETY
EcoMaster - Residential Pools up to 40,000 Gallons
 - Residential Pools up to 40,000 Gallons INSTALLATION/ OPERATION GUIDE Reduces Chemical Usage, Improves Sanitation Produces Crystal Clear Water Copyright 2013 Prozone Water Products: 3004 11 th Ave. -
OZONE SYSTEM FOR IN-GROUND POOLS UP TO 18,000 GALLONS
 INSTALLATION & OPERATIONS MANUAL FOR ZO-900 OZONE SYSTEM FOR IN-GROUND POOLS UP TO 18,000 GALLONS MANUFACTURED BY 3428 Bullock Lane San Luis Obispo, CA 93401 800-676-1335 4-0449 Rev. A.- 052605 Copyright
READ AND FOLLOW ALL INSTRUCTIONS SAVE THESE INSTRUCTIONS
 READ AND FOLLOW ALL INSTRUCTIONS SAVE THESE INSTRUCTIONS 1 IMPORTANT SAFETY INSTRUCTIONS Read the instructions The appliance is not to be used by persons (including children) with reduced physical, sensory
Next Generation Corona Discharge Installation & Operation Manual
 Next Generation Corona Discharge Installation & Operation Manual 4-2319-01 Rev.A IMPORTANT SAFETY INSTRUCTIONS READ & FOLLOW ALL INSTRUCTIONS Read this manual completely before attempting installation.
READ AND FOLLOW ALL INSTRUCTIONS SAVE THESE INSTRUCTIONS
 READ AND FOLLOW ALL INSTRUCTIONS SAVE THESE INSTRUCTIONS International Patent #9,938,166 Patented Micro-Ozone cell ozone technology: Patent #8367007 1 IMPORTANT SAFETY INSTRUCTIONS Read the maintenance
IMPORTANT SAFETY INSTRUCTIONS EC-AG1-25 EC-AG1, EC-AG2 SAVE THESE INSTRUCTIONS.
 IMPORTANT SAFETY INSTRUCTIONS 2 1. Read and Follow All Instructions 2. Read this manual completely before attempting installation. 3. All permanent electrical connections should be made by a qualified
EcoMaster - Residential Pools up to 40,000 Gallons
 - Residential Pools up to 40,000 Gallons INSTALLATION/ OPERATION GUIDE Reduces Chemical Usage, Improves Sanitation Produces Crystal Clear Water PROZONE Copyright 2018 Prozone Water Products: 3004 11 th
1, 2, & 4. Corona Discharge Ozone Generators INSTALLATION & OPERATION MANUAL. DEL Ozone SAN LUIS OBISPO, CA USA Fax:
 1, 2, & 4 Corona Discharge Ozone Generators INSTALLATION & OPERATION MANUAL DEL Ozone SAN LUIS OBISPO, CA 93401 USA 800-676-1335 Fax: 805-541-8459 111904 / 4-0308 Rev. F Table of Contents SECTION 1 General
Important Safety Instructions
 8 THE BUBBLE MIST STOPS COMING BACK INTO THE POOL: Note: Our suction side installation method requires a portion of the pump s power. Anything affecting the pump s performance affects our air draw. Under
A2Z Ozone, Inc. PRODUCT MANUAL
 A2Z Ozone, Inc. PRODUCT MANUAL INSTALLATION & OPERATION MANUAL CE www.a2zozone.com Rev. 02142018 CONTENTS Page Important Safety Instructions... Specifications... Installation Instructions... 3 4 5 Troubleshooting...
DEL AOP 25 INSTALLATION INSTRUCTIONS & PRODUCT MANUAL
 DEL AOP 25 INSTALLATION INSTRUCTIONS & PRODUCT MANUAL C-M-P.COM 4-2535-01 Rev.B IMPORTANT SAFETY INSTRUCTIONS READ AND FOLLOW ALL INSTRUCTIONS WARNING: Risk of electric shock. Install at least 5 feet from
Next Generation Corona Discharge Next Generation Corona Discharge Nueva generación Corona de descarga
 Next Generation Corona Discharge Next Generation Corona Discharge Nueva generación Corona de descarga EC-10, EC-20 & EC-40 Installation Manual Manuel d installation Manual de instalación...1 CANADIEN FRANÇAIS...15
BALLAST REPLACEMENT. Contents WARNING INSTALLATION MANUAL
 BALLAST REPLACEMENT INSTALLATION MANUAL WARNING Turn off power at main source before making any electrical connections or servicing the unit. UV light produced by this unit is harmful to the eyes and may
Ultraviolet Systems UV-C 50 INSTALLATION INSTRUCTIONS & PRODUCT MANUAL
 Ultraviolet Systems Inc. UV-C 50 INSTALLATION INSTRUCTIONS & PRODUCT MANUAL TABLE OF CONTENTS SECTION 1 General Information 1A. Description...1 1B. Specifications...1 SECTION 2 Installation 2A. Pool Preparation...
WINTERIZATION INDUSTRY BEST PRACTICE
 WINTERIZATION INDUSTRY BEST PRACTICE Zodiac Pool Systems, Inc. 1-800-822-7933 Regional Extension www.zodiacpoolsystems.com Zodiac Academy zodiac.academy@zodiac.com www.zodiacacademy.com Instructor: Email:
WATER PURIFYING SYSTEM
 ECO FRIENDLY PARAMOUNT CERTIFIED WATER PURIFYING SYSTEM INSTALLATION MANUAL 004-027-8818-00 REV 060116 US and Foreign patents and patents pending see www.1paramount.com/about/patents/ 295 East Corporate
Ozone + UV Sanitation
 Ozone + UV Sanitation Installation Manual 4-2177-01 Rev.C IMPORTANT SAFETY INSTRUCTIONS When installing and operating the DEL Spa Solar Eclipse, basic precautions should always be followed: READ AND FOLLOW
CONTENTS CONSIDERATIONS. General Plumbing Component Connection ILLUSTRATION. Control System CONFIGURATION. Voltage Verification CONNECTION
 AIR SERIES SYSTEM INSTALLATION MANUAL CONTENTS CONSIDERATIONS General Plumbing Component Connection 2 2 2 ILLUSTRATION Control System 3 CONFIGURATION Voltage Verification 4 CONNECTION Component Connection
MCD. Corona Discharge Ozone Generators MANUFACTURED BY Bullock Lane San Luis Obispo, CA
 MCD Corona Discharge Ozone Generators MANUFACTURED BY 3428 Bullock Lane San Luis Obispo, CA 93401 4-0622 Copyright 2005 DEL Ozone, Inc. IMPORTANT SAFETY INSTRUCTIONS When installing and using DEL Models
Ozone plus UV Sanitation System Installation & Operations Manual
 Ozone plus UV Sanitation System Installation & Operations Manual 3580 Sueldo Street, San Luis Obispo, CA 93401 800.676.1335 o3info@delozone.com www.delozone.com 4-2305-01 Rev.B TABLE OF CONTENTS SECTION
Clear Comfort Residential Pool & Spa Sanitization System Installation, Operations & Maintenance Manual
 Clear Comfort Residential Pool & Spa Sanitization System Installation, Operations & Maintenance Manual IMPORTANT SAFETY INSTRUCTIONS For Further Assistance Contact Us: 303.872.4477 support@clearcomfort.com
AllClear G2 Series Pressurized Filters Product Manual
 AllClear G2 Series Pressurized Filters Product Manual For Models: AllClear G2 2000 (Item #130050) AllClear G2 3500 (Item #130051) AllClear G2 4500 (Item #130052) AllClear G2 4500 AllClear G2 3500 Table
SimplyClear Pressurized Filter Product Manual
 SimplyClear Pressurized Filter Product Manual For Model: SimplyClear 1250 (Item #130040) Table of Contents: Important Information... 2 Package Contents... 3 Technical Specs... 3 How it Works.................................
OPERATORS MANUAL FOR Mi-T-M CORONA DISCHARGE OZONE GENERATORS
 OPERATORS MANUAL FOR Mi-T-M CORONA DISCHARGE OZONE GENERATORS CAUTION RISK OF INJURY! READ MANUAL BEFORE OPERATING! This manual is an important part of the Corona Discharge Ozone Generator and must remain
Next Generation Corona Discharge Auto Voltage Sensing Installation Manual
 Next Generation Corona Discharge Auto Voltage Sensing Installation Manual 4-2122-01 Rev.B IMPORTANT SAFETY INSTRUCTIONS When installing and operating the Spa Eclipse ozone generator, basic precautions
Cascade Premier and Elite Premier Bathing Systems with Aqua-Aire Installation / Assembly Instructions
 Cascade Premier and Elite Premier Bathing Systems with Aqua-Aire Installation / Assembly Instructions Premier Elite Premier PENNER PATIENT CARE, INC Box 523 / 102 Grant St. Aurora, NE 68818 360745P Revision
1-866-PENNERS
 Cascade Premier and Elite Premier Bathing Systems with Aqua-Aire Installation / Assembly Instructions Premier Elite Premier PENNER PATIENT CARE, INC Box 523 / 102 Grant St. Aurora, NE 68818 360745P Revision
OWNER S MANUAL. Vintage Signature Series models: AC750, AC1050, AC1100, AC1250, AC1500, AC1750. Proudly Made in the USA.
 OWNER S MANUAL Vintage Signature Series models: AC750, AC1050, AC1100, AC1250, AC1500, AC1750 Proudly Made in the USA support@aquacomfort.com 888-475-7443 Manufacturing High Quality, High Efficiency Heat
2 SPEED PUMP INSTRUCTION MANUAL READ THIS MANUAL CAREFULLY BEFORE USING YOUR 2 SPEED PUMP
 2 SPEED PUMP INSTRUCTION MANUAL READ THIS MANUAL CAREFULLY BEFORE USING YOUR 2 SPEED PUMP 8308 PUMP PARTS BREAKDOWN Ref # Part # Manf. # Descrip on 1 NEP2134 AC 81361 PUMP LID 2 NEP2135 AC 81396 PUMP LID
Installation and Operation Manual. ACF-18 Automatic Chlorinating Feeder
 Installation and Operation Manual ACF-18 Automatic Chlorinating Feeder Operating Specifications Inlet Flow: 1.0-1.5 gpm Outlet Flow: = Inlet Flow Inlet Pressure: 10-45 psi Maximum Output: 26 lbs. of Available
TIDALWAVE I/G POOL PUMP INSTRUCTION MANUAL
 TIDALWAVE I/G POOL PUMP INSTRUCTION MANUAL READ THIS MANUAL CAREFULLY BEFORE USING YOUR PUMP 88 PUMP PARTS BREAKDOWN REF # Order # Mfr # Description 1 NEP4 AC 348 Lid Knobs NEP AC 380 Strainer Lid 3 NEP6
JOHN DEERE GATOR HPX/XUV 2 PASSENGER HEATER INSTALLATION INSTRUCTIONS (p/n: 9PH20S30)
") P. 1 of 12 JOHN DEERE GATOR HPX/XUV 2 PASSENGER HEATER INSTALLATION INSTRUCTIONS (p/n: 9PH20S30) Item: Qty: Description: 1 2 1 x 1 x 5/8 Tee Fitting 2 2 Plastic Snap-in Hose Grommet 3 4 1-1/2" Hose Clamps
P. 1 of 12 JOHN DEERE GATOR HPX/XUV 2 PASSENGER HEATER INSTALLATION INSTRUCTIONS (p/n: 9PH20S30) Item: Qty: Description: 1 2 1 x 1 x 5/8 Tee Fitting 2 2 Plastic Snap-in Hose Grommet 3 4 1-1/2" Hose Clamps
gamma pond Ultraviolet Sterilizers
 gamma pond Ultraviolet Sterilizers Instructions for Models #1410 8w, 1411 15w, 1412 25w, 1403-40w Important Safety Instructions... Page 2 Installation... Page 3 Maintenance & Winterizing... Page 5 Warranty...
OWNER S MANUAL. Models: AC110, AC125, AC150 made from 2003 through Proudly Made in the USA
 OWNER S MANUAL Models: AC110, AC125, AC150 made from 2003 through 2010 Proudly Made in the USA support@aquacomfort.com www.aquacomfort.com/service-and-support/ (888) 475-7443 Manufacturing High Quality,
Owner s Manual RD432-0 Chemical Controller
 Owner s Manual RD432-0 Chemical Controller Table of Contents I. Introduction page 2 A. Water Chemistry page 2 B. Safety page 3 C. System Components page 4 D. Specifications page 7 E. Controller Panel Descriptions
MAXI PUMP INSTRUCTION MANUAL NE6151B /NE6171B READ THIS MANUAL CAREFULLY BEFORE USING YOUR MAXI PUMP
 MAXI PUMP INSTRUCTION MANUAL NE6151B /NE6171B READ THIS MANUAL CAREFULLY BEFORE USING YOUR MAXI PUMP 8104 MAXI-PUMP PARTS BREAKDOWN Re f # 1 2 3 4 5 6 7a 7b 8 9 10 11 12 13 14 15 16 2 Part # NEP2134 NEP2135
OWNER S MANUAL. Vintage Classic HEAT COOL models. Proudly Made in the USA
 OWNER S MANUAL Vintage Classic HEAT COOL models Proudly Made in the USA support@aquacomfort.com www.aquacomfort.com/service-and-support 888-475-7443 Manufacturing High Quality, High Efficiency Heat Pump
Ozone plus UV Sanitation System Installation & Operations Manual
 Ozone plus UV Sanitation System Installation & Operations Manual 800.676.1335 o3info@delozone.com www.delozone.com 4-2305-01 Rev.D TABLE OF CONTENTS SECTION 1 General Information 1A. Description...1 1B.
Owner s Manual. Installation, Operation and Maintenance SC-OZ, SC-OZ/2, S2Q-OZ, S2Q-OZ/2, S8Q-OZ, S8Q-OZ/2. Manufactured in Canada by:
 Installation, Operation and Maintenance Owner s Manual SC-OZ, SC-OZ/2, S2Q-OZ, S2Q-OZ/2, S8Q-OZ, S8Q-OZ/2 Note: These instructions apply to the installation in a swimming pool and/or spa. Although these
INSTALLATION AND OPERATION MANUAL
 F OR I NGROUND P OOLS INSTALLATION AND OPERATION MANUAL How Solar Pool Heating Works Why SunHeater TM Works Best Using your pool pump, water is automatically pumped through the solar collectors. The water
Sundance Spas SPA EQUIPMENT SYSTEM. Installation Instructions. P/N Rev. A
 Sundance Spas SPA EQUIPMENT SYSTEM Installation Instructions P/N 6530-456 Rev. A Contents Important Notices 1 Important Safety Instructions 2 Where to Place the Equipment System 3 Connecting Pipes Between
OUTDOOR DISHWASHER INSTALLATION INSTRUCTIONS
 OUTDOOR DISHWASHER INSTALLATION INSTRUCTIONS IMPORTANT! Read all of these instructions before installing the dishwasher. AUTOMATIC HIGH LOOP The drain hose is fastened to the back of the machine at the
INSTALLATION INSTRUCTIONS
 INSTALLATION INSTRUCTIONS VARIABLE SPEED BOOSTER PUMP IMPORTANT SAFETY INSTRUCTIONS READ AND FOLLOW ALL INSTRUCTIONS SAVE THESE INSTRUCTIONS IMPORTANT SAFETY INFORMATION WARNING: RISK OF ELECTRICAL SHOCK
Air Preparation System
 Theory of Operation/Product Description (continued) THEORY OF OPERATION/PRODUCT DESCRIPTION CHAPTER 1 RK2 Systems ozones are designed for safe, effective use in a variety of water treatment applications.
M770 ph Controller Owner s Manual
 M770 ph Controller Owner s Manual Table of Contents I. Introduction page 2 A. Water Chemistry page 2 B. Safety page 3 C. System Components page 4 D. Specifications page 7 E. Controller Panel Descriptions
HydroRite UVO 3. Troubleshooting Guide Residential. TSG-UVO158a. Copyright 2015 Hayward Industries Inc.
 HydroRite UVO 3 Troubleshooting Guide Residential TSG-UVO158a Copyright 2015 Hayward Industries Inc. Safety Precautions Warning! When installing and using this electrical equipment, basic safety precautions
DRAFT INSTALLATION INSTRUCTIONS. Solid-State Series !! NOTE!! Covers the following models: Refer to INSERT for additional information
 INSTALLATION INSTRUCTIONS Solid-State Series!! NOTE!! Covers the following models: " CS6100 - CS7100 " CS6200 - CS9200 " CS6220 - CS9220 " CS6230 - CS9230 " CS6500 - CS7500 " CS6330 - CS9300 " CS9400 -
PolyMax H2-24 Dutch Bucket System
 11234 PolyMax H2-24 Dutch Bucket System *Actual system may differ. PolyMax Dutch Buckets Versatile PolyMax Dutch Buckets are ideal for both small- and large-scale hydroponic growing. 2017 FarmTek All Rights
A2Z Ozone Inc. Clean Water and Pure Air for ALL around the world! Product Catalog 2014/15
 A2Z Ozone Inc. Clean Water and Pure Air for ALL around the world! Product Catalog 2014/15 A2Z OZONE INC. A2Z is passionate about promoting sustainable, healthier living through innovative air and water
PRECISION PRECISION. Installation and Operating Instructions FLOW. AUTOMATIC REGULATOR
 Installation and Operating Instructions FLOW AUTOMATIC REGULATOR SAFETY INSTRUCTIONS READ AND FOLLOW ALL INSTRUCTIONS WARNING Risk of Electric Shock. Connect only to a branch circuit protected by a ground-fault
SPA BLOWER OWNER'S MANUAL XXXX, XXXX, XXXX, XXXX, XXXX, XXXX fax
 SPA BLOWER OWNER'S MANUAL 80015-XXXX, 80016-XXXX, 80017-XXXX, 80018-XXXX, 80019-XXXX, 80020-XXXX fax 888.610.3839 2015 323300-015 6/15 THIS PAGE INTENTIONALLY LEFT BLANK. 2 Operating Instructions and Parts
Closing procedures for above-ground pools
 Closing procedures for above-ground pools Note: Carefully read this entire document before closing your pool. The following procedures are also available in video format under the «Videos» tab at www.trevi.com.
Genesis Whole House Chlorination System Page 2
 Genesis Whole House Chlorination System Page 2 Genesis Whole House Chlorination System Page 3 Table of Contents Performance Data and System Specifications................................ 4 Unpacking and
Owner s Manual PRINTED IN CANADA 05/2009
 Owner s Manual PRINTED IN CANADA 05/2009 Table of contents Introduction 2 General Safety Instructions 4 Installation Instructions Location 6 Water piping 7 Electrical 7 Bonding 8 Bonding and plumbing
INSTALLATION MANUAL. PP1 Ozone System Designed for use within pool skimmer
 PP1 Ozone System Designed for use within pool skimmer PERFECT POOL OZONE GENERATOR! NOTE TO INSTALLER: GIVE THIS MANUAL TO OWNER OPERATOR AFTER INSTALLATION SAFETY PRECAUTIONS! IMPORTANT SAFETY INSTRUCTIONS
Mixing Degas Vessel (MDV) EC-1, EC-2, EC-4, Total Eclipse 2 or 4, and TrioPure-25 or TrioPure-50
 EC-1, EC-2, EC-4, Total Eclipse 2 or 4, and TrioPure-25 or TrioPure-50") INSTALLATION MANUAL for MDV Mixing Degas Vessel (MDV) EC-1, EC-2, EC-4, Total Eclipse 2 or 4, and TrioPure-25 or TrioPure-50 MANUFACTURED BY 3428 Bullock Lane San Luis Obispo, CA 93401 800-676-1335 4-0635
INSTALLATION MANUAL for MDV Mixing Degas Vessel (MDV) EC-1, EC-2, EC-4, Total Eclipse 2 or 4, and TrioPure-25 or TrioPure-50 MANUFACTURED BY 3428 Bullock Lane San Luis Obispo, CA 93401 800-676-1335 4-0635
INSTALLATION MANUAL. PP2 Ozone System (No Filter Cartridge) PP3 Ozone System (With Filter Cartridge) nspdevelopment.com
 PP3 Ozone System (With Filter Cartridge) nspdevelopment.com") INSTALLATION MANUAL PP2 Ozone System (No Filter Cartridge) PP3 Ozone System (With Filter Cartridge) IN DECK CIRCULATION/FILTRATION UNIT PERFECT POOL OZONE GENERATOR! NOTE TO INSTALLER: GIVE THIS MANUAL
INSTALLATION MANUAL PP2 Ozone System (No Filter Cartridge) PP3 Ozone System (With Filter Cartridge) IN DECK CIRCULATION/FILTRATION UNIT PERFECT POOL OZONE GENERATOR! NOTE TO INSTALLER: GIVE THIS MANUAL
SB-175 Installation & Operation Manual
 The eco-friendly solution to hard water SB-175 Installation & Operation Manual Residential Unit Indoor/Outdoor Installation IDENTIFY THE SB-175 COMPONENTS Your new ScaleBlaster SB-175 unit includes the
Installation Instructions PRO SERIES
 Installation Instructions PRO SERIES If you are a plumber installing this unit, please leave this owners manual & warranty card with the owner when you finish the installation. Thank You! DO NOT USE THIS
HARMSCO INSTALLATION AND OPERATION MANUAL UPFLOW SWIMMING POOL CARTRIDGE FILTER CARTRIDGE CLEANING INSTRUCTIONS HARMSCO CARTRIDGES
 HARMSCO INSTALLATION AND OPERATION MANUAL UPFLOW SWIMMING POOL CARTRIDGE FILTER CARTRIDGE CLEANING INSTRUCTIONS HARMSCO CARTRIDGES May be cleaned and reused before replacement is necessary. Cartridge cleaning
SB-MAX Installation & Operation Manual
 The eco-friendly solution to hard water SB-MAX Installation & Operation Manual Residential unit for large homes and/or very hard water areas Indoor/Outdoor installation IDENTIFY THE SB-MAX COMPONENTS Your
INSTALLATION INSTRUCTIONS FOR ACCESSORY COMBUSTION AIR INLET FILTER KIT FOR ULTRA HIGH EFFICIENCY WATER HEATERS (PART# ) KIT CONTENTS:
 KIT CONTENTS:") INSTALLATION INSTRUCTIONS FOR ACCESSORY COMBUSTION AIR INLET FILTER KIT FOR ULTRA HIGH EFFICIENCY WATER HEATERS (PART# 239-47330-00) KIT CONTENTS: PART NUMBER DESCRIPTION 239-47248-00 COMBUSTION AIR INLET
INSTALLATION INSTRUCTIONS FOR ACCESSORY COMBUSTION AIR INLET FILTER KIT FOR ULTRA HIGH EFFICIENCY WATER HEATERS (PART# 239-47330-00) KIT CONTENTS: PART NUMBER DESCRIPTION 239-47248-00 COMBUSTION AIR INLET
Operation Manual for Eco-Logic Pond & Lake Restoration System
 Operation Manual for Eco-Logic Pond & Lake Restoration System 1) Overview of System Operation 2) Safety Precautions 3) Eco-Logic Unit Specifications / Equipment Installation Recommendations 4) Recommended
Air Preparation System
 Theory of Operation/Product Description (continued) THEORY OF OPERATION/PRODUCT DESCRIPTION CHAPTER 1 RK2 Systems ozones are designed for safe, effective use in a variety of water treatment applications.
UNIVERSAL AIR SERIES SYSTEM OPERATION MANUAL
 UNIVERSAL AIR SERIES SYSTEM OPERATION MANUAL CONTENTS Important Safety Instructions 2 INTRODUCTION Major Component Illustration 4 SYSTEM OPERATION Illustration System Mis-Wire System Over Temperature System
DEMA SOLID PRODUCT LAUNDRY MASTER TM MODEL: 581L-1W and 581L-2W INSTALLATION INSTRUCTIONS
 Included Parts: A. 581.1 Solid Bowl B. 58.1LA Vacuum Breaker C. 58.6 Stainless Steel Supply Tube D. 58.29 90º Compression Fitting E. 58.24 Straight Compression Fitting F. 58.7 Vinyl Discharge Tube G. 66.123
INSTALLATION INSTRUCTIONS
 INSTALLATION INSTRUCTIONS - Wall-mount indoor unit - OPERATING LIMITS Cooling Maximum conditions Heating Maximum conditions Outdoor temperature : 122 F (50 C) D.B. Outdoor temperature : 75 F (24 C) D.B.
Professional Series. Chemical Feed System Model # US Patent No. 6,752,930 B2
 Professional Series Chemical Feed System Model # 22152-02 US Patent No. 6,752,930 B2 Product Manual SureWater Technologies, Inc. The Solution X-2 Model # 22152-02 Table of Contents 1. Installation Instruction
M790 ph/orp Controller. Owner s Manual
 M790 ph/orp Controller Owner s Manual Table of Contents I. Introduction page 2 A. Water Chemistry page 2 B. Safety page 3 C. System Components page 4 D. Specifications page 7 E. Controller Panel Descriptions
register your product at a2zozone.com/pages/warranty SP Series Operating Manual
 register your product at a2zozone.com/pages/warranty SP Series Operating Manual Table of Contents Important Safety Information... 2 Technical Specifications... 3 SP Series Features... 4 Installation Instructions...
WL380 QUICK START GUIDE
 WL380 QUICK START GUIDE WARNING! Only trained and qualified technicians should attempt to install, maintain, or service Waterlogic equipment. Failure to follow all instructions in this manual could result
Arch Feeder: Installation Manual
 Arch Feeder: Installation Manual Model #A300N Arch Chemicals, Inc. 1200 Lower River Road, P.O. Box 800 Charleston, TN 37310-0800 Product Stewardship MAKING THE WORLD A BETTER PLACE Arch is committed to
PolyMax H1-10 Dutch Bucket System
 112529 PolyMax H1-10 Dutch Bucket System *Actual system may differ. PolyMax Dutch Buckets Versatile PolyMax Dutch Buckets are ideal for both small- and large-scale hydroponic growing. STK# DIMENSIONS 112529
#300 & #302 CHLORINEIBROMINE FEEDERS
 #300 & #302 CHLORINEIBROMINE FEEDERS R~M%' Features: No special venting required. Completely enclosed-no escaping gases. Positive external no-clog control valve. Feeder is designed to automatically lower
Installation Guide. Manufactured for Aero-Spa, LLC Web:
 Installation Guide Manufactured for Aero-Spa, LLC E-Mail: info@aero-spa.net Web: www.aero-spa.net For outdoor use only! WARNING Pool care and sanitizing is the sole responsibility of the owner. In some
PARTS MANUAL. American Dish Service ADS LOW-WATER DISHWASHER MODELS: L3DW / L3DWC EFFECTIVE: MAY, 2008
 EFFECTIVE: MAY, 2008 ADS LOW-WATER DISHWASHER MODELS: L3DW / L3DWC PARTS MANUAL 900 Blake Street Edwardsville, Kansas 66111 (913)422-3700 05/08 The part numbers contained in this publication are replacement
Owner s Manual LIMITED WARRANTY INFORMATION OBTAINING WARRANTY SERVICE FURTHER LIMITATIONS AND EXCLUSIONS ARE AS FOLLOWS REGISTRATION
 LIMITED WARRANTY INFORMATION Your DUCT PURE (Product) is warranted to be free from all defects in material and workmanship in normal household use for a period of 2 Years from date of purchase. The warranty
Detailed Cleaning Instructions
 NY Thermal Inc. Tel: (06) 67-6000 Toll Free: 1-800-688-27 Fax: 1-06-432-113 Web: www.ntiboilersl.com Email: info@ntiboilers.com Style Heat Exchanger occupants or, death. This boiler must be serviced by
American Hydro Systems
 Caution: Read all instructions carefully before beginning the installation Siphoning Systems Keep this manual handy for future reference Owner s Manual INSTALLATION OPERATION PARTS LIST DOSAGE Our Siphoning
Easy Dose Chemical Injection and Dispensing System DEMA Engineering Company
 Easy Dose Chemical Injection and Dispensing System DEMA Engineering Company Overview The DEMA Easy Dose is a simple and reliable chemical delivery system. Easy Dose features an electronic control system
Two Tier Illumifalls Patio Pond
 Two Tier Illumifalls Patio Pond REMINDER CALL 1-888-755-4497 BEFORE RETURNING TO STORE. Questions, problems, missing parts? Before returning to your retailer, call our customer service department at 1-888-755-4497,
Manual update 2016 MC37/MFC3600
 Manual update 2016 MC37/MFC3600 SETUP INSTRUCTIONS Evaporative cooling works on the principle of heat absorption by moisture evaporation. Simply put, heat is removed from the air as water evaporates. You
STOP. SAFETY INFORMATION Please read and understand this entire manual before attempting to assemble, operate or install the product.
 STOP Power supply required Questions, problems, missing parts? Before returning to your retailer, call our customer service department at 1-800-742-5044, 7:30 a.m. - 5 p.m., EST, Monday - Friday. 115 volts
IMPORTANT INSTRUCTIONS READ & SAVE
 5,000W/240V WALL / CEILING MOUNTED GARAGE HEATER WITH ELECTRONIC CONTROLLER AND REMOTE OWNER S MANUAL IMPORTANT INSTRUCTIONS READ & SAVE Model: PH-950NR PET OWNERS WARNING: The health of some small pets
FLCH4R Garage and Utility Electric Heater
 FLCH4R Garage and Utility Electric Heater Installation, Operation & Maintenance Instructions Model No. Volts Amps Watts BTU/HR Phase High Low High Low High Low Min Fuse Size* FLCH4R 208 17.3 8.66 3600
Installation Instructions. For the 18 Built-In Dishwasher and Front Color Panels
 Installation Instructions For the 18 Built-In Dishwasher and Front Color Panels Printed in USA 154232102 Before You Begin DO NOT INSTALL DISHWASHER UNTIL YOU HAVE READ ALL INSTRUCTIONS. FOR YOUR SAFETY,
6000 AIR SERIES SYSTEM OPERATION MANUAL A-AZ Rev.0 5/07
 000 AIR SERIES SYSTEM OPERATI MANUAL -00A-AZ Rev.0 /0 CTENTS NOTES Important Safety Instructions INTRODUCTI Major Component Illustration SYSTEM OPERATI Illustration GFCI (Ground Fault Circuit Interrupter)
Manual for MC37/MFC3600
 Manual for MC37/MFC3600 SETUP INSTRUCTIONS Evaporative cooling works on the principle of heat absorption by moisture evaporation. Simply put, heat is removed from the air as water evaporates. You feel
Installation Electric Dryers Instructions 01
 Installation Electric Dryers Instructions 01 Questions? Call 800.GE.CARES (800.432.2737) or visit our Web site at: GEAppliances.com This is the safety alert symbol. This symbol alerts you to potential
IMPORTANT WARNINGS IMPORTANT SAFETY INSTRUCTIONS
 IMPORTANT WARNINGS IMPORTANT SAFETY INSTRUCTIONS Suncourt recommends professional installation of the Airiva (or by an accomplished DIY person) Please read and save these entire instructions before starting
Heat Exchanger Block Replacement Instructions
 Series 1-4 Gas-fired water boiler Heat Exchanger Block Replacement Instructions Ultra-80 S1-4 Heat Exchanger Block Replacement Kit, Part No. 383-500-773 Ultra-105 S1-4 Heat Exchanger Block Replacement
OWNER S MANUAL. Models SCU-H11, SCU-H9, SCU-H7, SCU-H5, SCU-H3
 Warranty Information Maintenance Troubleshooting Operating Instructions Installation OWNER S MANUAL Models SCU-H11, SCU-H9, SCU-H7, SCU-H5, SCU-H3 DOMESTIC USE ONLY Please read this document carefully
Viking Installation Guide
 Viking Installation Guide Viking Range Corporation 111 Front Street Greenwood, Mississippi 38930 USA (662) 455-1200 For product information, call 1-888-VIKING1 (845-4641) or visit the Viking Web site at
Ozone Systems. Installation & Operation Manual CD15nx CD30nx. Corona Discharge Ozone Generators. ClearWater Tech, LLC. Integrated Ozone Systems
 Ozone Systems Installation & Operation Manual CD15nx CD30nx Corona Discharge Ozone Generators ClearWater Tech, LLC. Integrated Ozone Systems 850-E Capitolio Way, San Luis Obispo, Ca 93401 805-549-9724