Important Installation Guide & Operating Instruction
|
|
|
- Eric Davidson
- 5 years ago
- Views:
Transcription
1 Important Installation Guide & Operating Instruction
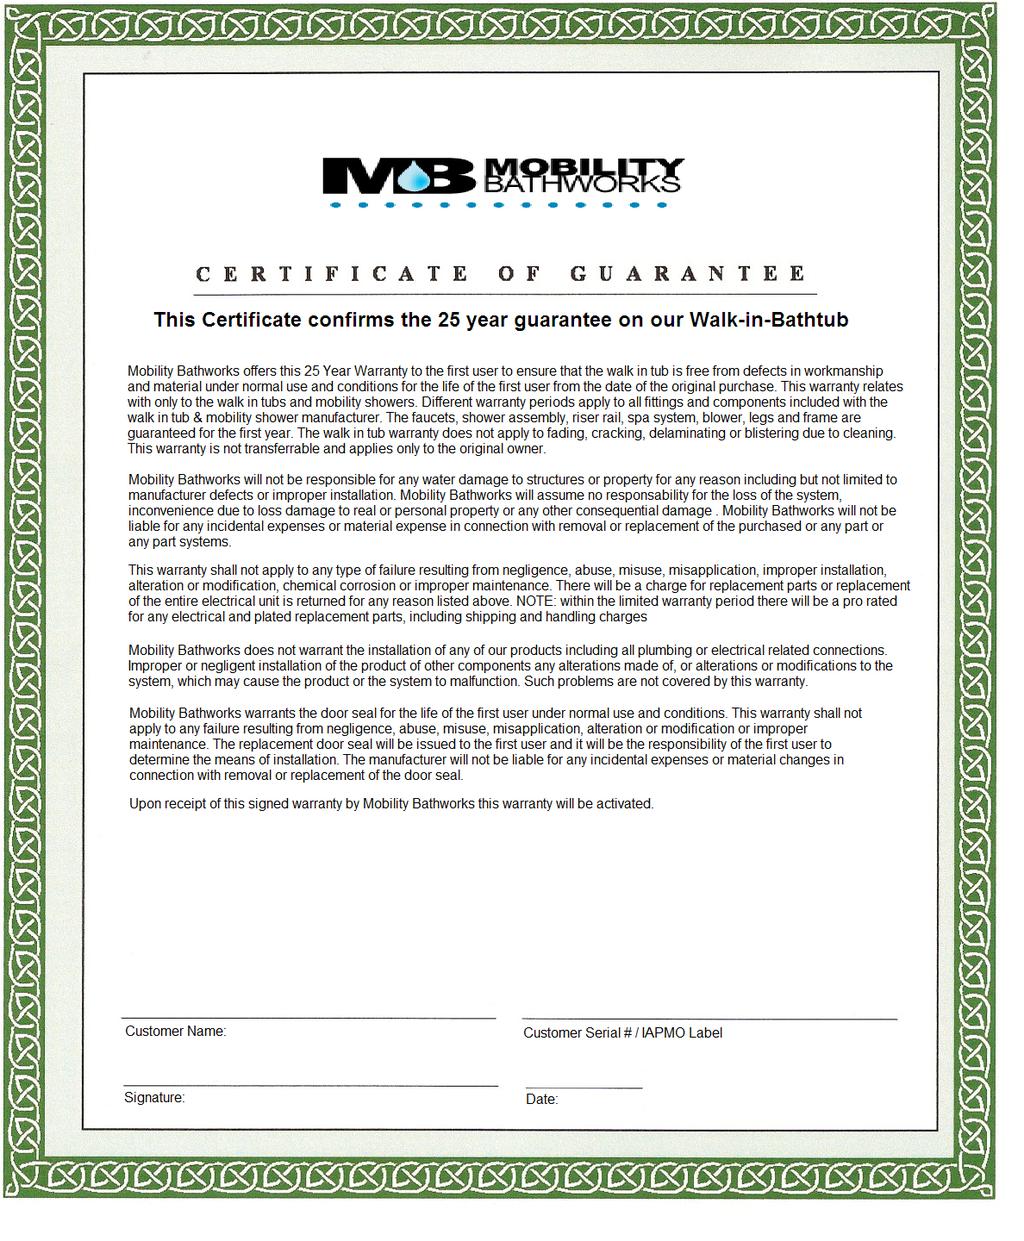
2 WARRANTY & REGISTRATION Important : 1. To ensure that your warranty is granted please fill out the product registration form in 30 Days it to MobilityBathworks@gmail.com or mail it to : Mobility Bathworks 306 A. West Broad St Quakertown, PA By Filling out the form the manufacturer will be able to process any warranty claims. 3. The information provided on the Product Registration Form will be kept on file by Mobility Bathworks. 4. If you want to opt in as personal showroom for your designated area please let us know so we can put you in our database. $ Referral Fee if a end user buys a walk in tub from us by looking at your Mobility Bathworks Elite Walk in Tub..
3 NOTES:
4
5 Safety Instuctions 1. All of Mobility Bathworks Elite Walk in Tub must be installed with a thermostatic, which can be supplied by installer. Thermostatic Valve is installed to regulate temperature in your walk in tub, so it s not to hot. 2. Mobility Bathworks accepts no responsibility for any injuries, burns, scalds or similar that may occur. 3. Read and Follow All Instructions 4. Installer is Responsible for getting governmental license and permits. 5. DANGER! To reduce the risk of injury, do not permit children or a person with immobility to use the walk in tub unless they are closely supervised at all times. 6. To avoid injury use caution when entering or exiting. 7. Never drop or insert any objects in openings. 8. Ensure walk in tub will fit through all passageways and doors. 9. The anti slip floor must remain clean at all times to minimize the risk of slippage. 10. Mobility Bathworks Walk in Tub is designed to be installed by a licensed tradesperson. We have a list of recommended Mobility Bathworks installers in your area if you don t have one. 11. Avoid the use of alcohol, prescription or over - the - counter drugs medication and sleep medication prior to or during the use of your Mobility Bathworks Walk in Tub. 12. The Installer must inspect and water test the tub before installation. 13. Consult your physician before using the air system if you are pregnant and / or have a heart condition. 14. Do not use electrical appliances within 4 feet from your Mobility Bathworks Walk in Tub.
6 Unpacking the Walk in Tub 1. Unpack and inspect the Mobility Bathworks Walk in Tub thoroughly for freight damages even when it doesn t look damaged. If there are any noticeable damage ** DO NOT ACCEPT THE WALK IN TUB FROM FREIGHT CARRIER ** Call US ASAP Mobility Bathworks is responsibility for shipping damages ceases upon delivery of the Mobility Bathworks Walk in Tub in good order of the carrier. 3. Never lift the Walk in Tub by it s plumbing fixtures. Lift the walk in tub by it s stainless steel frame. Two people is required to move a walk in tub. 4. Inspect the plumbing for any fittings that may have loosened in transit. 5. WARNING! If the walk in tub door comes shipped with the door closed make sure you leave it open overnight so gasket is fully uncompressed. 6. Follow all instructions in this manual. Failure to read and comply and read with all instructions can result in product damage or injury to both installer and homeowner. It will also result in assumption of all liability to the installer.

7 Installation Guide 1. Remove access panels that are held on by magnets. Remove these by using the orange suction cups on the panel and put them in a safe place until installation is complete. Orange Suction Cup 2. Place all accessories to the side. Only accessories approved by Mobility Bathworks should be used with this product. If you have questions call us at
8 3. All Mobility Bathworks Walk in Tubs are tested and operated in our factory prior to shipment. Transportation and mishandling may cause leaks. So testing the walk in tub when you have access to all sides is REQUIRED! 4. Place walk in tub on a flat surface where the water can be drained. 5. With clean rag clean the door seal on your walk in tub. 6. Close the drain and fill the walk in tub until it is up to a normal water height level which is usually alittle bit below the overflow and drain lever. Shown Here is Overflow & Drain Knob 7. Allow the water to stand in walk in tub for 30 minutes and then inspect all plumbing and seals for leaks. If there are any leaks or concerns call If the walk in tub is jetted supply electric to unit and run for 10 minutes and inspect for leaks. Inspect the unions around the pump; if leaks persist from the unions after tightening; loosen the unions and insure that the O-ring is seated properly.


9 9. Picture description of Pumps : CG Air Pump 120 Volts ** Hydrotherapy ** Syllent Water Pump 115 Volts ** Whirlpool ** If the pumps do not operate check the breaker to insure power is on and the cable connecting the controls to the pump is attached. 11. Ensure all jets are opening and working. Make sure they operate at all speeds.


10 12. Picture description of Jets in Tub : Picture shows Omni Air Jets for Hydrotherapy Picture shows Omni Air Jets & 4 PressurePoint Whirlpool Jets 13. Do Not Run any pumps or heaters unless the tub is filled with water to a proper level. Damaged due to dry running pump is not covered under warranty. 14. FAILURE TO PERFORM THESE TESTS BEFORE INSTALLATION WILL M AKE THE INSTALLER LIABLE FOR FUTURE REPAIR COSTS!! 15. Remove the existing tub and the wall and floor materials as required. 16. Clean area of any debris or trash. 17. Use 5 foot level and determine if the floor is level. If the floor is not level adjust all leveling feet to perfectly level the tub. 18. Make sure you level the walk in tub from the highest elevation point on the floor.
11 Make Sure Feet on the Tub is Leveled 19. All leveling feet on the walk in tub need to be touching the floor for the door to work properly with no leaks. 20. Start by leveling the outside 4 legs then the 2 legs in the center of the Mobility Bathworks walk in tub. 21. Make sure the drain and overflow are connected correctly. 22. Check to insure that the rough drain has been placed at the proper location. 23. While placing no tampering with the hinge or door seal which will void the warranty. 24. All units with plug in motors or heater must be connected to a (GFCI ) Ground Fault Circuit Interrupter. Should be tested on regular basis. 25. To test GFCI push the test button, the GFCI should interrupt the power. Push the RESET; power should be restored. If the GFCI fails to operate in this manner, there is ground current flowing, indicating the possibility of an electrical shock. Do not use this unit. 26. All units need a NEMA plug to be plugged into a wall outlet that is connected to a built-in circuit breaker and must be connected to a separate circuit with a 20 AMP breaker run directly from breaker panel box. 27. Place a wood platform on the metal mounting plate under the walk in tub seat. 28. Attach air pump to the wooden platform if it s the only system your using. ** Customers with Omni Jet Hydrotherapy ** 29. Secure the 1 white cuffed rubber tube that comes from the manifold onto the outlet of the spa blower using the metal clip provided. 30. Attach the thin, clear pneumatic impulse tube onto the nipples on the on/off switch and blower.
12 31. Before making any electrical connections, make certain that the electrical connection is turned OFF at the breaker, and take measures that it CANNOT accidentally be turned on again. 32. Once connected electrically, the spa system is ready to use. 33. Below is Electric Diagram : Electrical Diagram: Air Massage System * USA * Electrical Diagram: Water Massage System * USA *
13 Electrical Diagram: Hydro & Air Massage System * USA * *** Do not Use Air and Water Jets at the Same Time ** Electrical Diagram: Hydro & Air Massage System * Canada *
14 34. Mark position of the holes for the faucets/ taps and make sure that your piping will not obstruct by the Mobility Bathworks walk in tub stainless steel frame. DOUBLE CHECK ALL MEASUREMENTS 35. Drill holes for taps / faucets using correct size core drill bit. 36. Hook up the hot and cold lines with a water heater flex hose adfapter that is ¾ inches with a female connector. ** Make sure the flex hose has washers on both ends ** 37. For reverse plumbing, where the Mobility Bathworks walk in tub is flipped to the opposite hand to enable use where a toilet will be in the way of the Mobility Bathworks walk in tub door, the drain plumbing can be runned under the Mobility Bathworks walk in tub. 38. Again, check if the walk in tub is leveled on both sides of the tub surface. 39. If flanges are available ** required by US Plumbing Code ** pre drill the screw holes than screw the nail through the flange into the wall. 40. If you don t have a flange you can just silicone around the whole walk in tub to the walls.


15 41. If your walk in tub didn t come with flanges but you still desired them you can get a tile bead from American Standard : Tile Bead Flanges Avaliable : (single)/41887/cat/51 ** Below is Installation Guide **

16 42. Trim the extension box if need be. Extension / Filler Box to make 60 Length 43. Caulk the extension box to the wall. 44. Before filling the Mobility Bathworks walk in tub with water, be sure to wipe down the door seal using a damp soft cloth as well as the surface in the door jamb that will come in contact with the seal. 45. Fill the Mobility Bathworks walk in tub again, after 5 minutes check for leaks at all fittings, connections, door hinge and door seal. 46. Turn the pump and/or blower let it run at least 5 minutes. Check for leaks while the pump blower is running and again after it has been turned off. Check by hand where a visual check is not possible. 47. Reattach the front panels to the walk in tub which you took off earlier in Step: 1 with the suction cups. 48. Save these Instructions 49. Lastly use this walk in tub with great health. 50. Call Us if you need anything and tell a friend.


17 Customer Use & Operation Guide 1. Enter the walk in tub then close the door and seal it by pulling the handle toward you into the locked position. Below are pictures of the walk in tub handle. Bowling Ball Handle Roman Door Handle 2. A few tips on the door handle. Even though the walk in tub handle is put together with the strongest materials available it will not withstand a person putting their whole weight against it while either trying to pull themselves up out of the bath or using excessive force closing the door. If used in either of these ways the bottom of the handle will ultimately break away from it s fixing. The handle is designed as a closing mechanism and nothing more. User misuse of the handle will not be covered by the warranty. 3. Close the floor drain by twisting the overflow knob :

18 4. Close the drain by rotating the knob clockwise. 5. With the preset anti scald device in place, you can use the hot water in your walk in tub. 6. Fill the walk in tub to any desired depth, and relax as you have never before. Reminder : If your using the Omni Jets you need to have all the Omni Jets submerged with water. 7. Below is the picture of our popular Deluxe 5 Piece Roman Faucet.
19 8. Using your 3 Speed Omni Hydrotherapy System. * Please read this before operating your 3 Speed Omni Hydrotherapy System * Omni Air Jet Button Step 1 : Button is on the right side of the Walk in Tub near the Handle. Step 2 : To operate press the air button - Press button Once at Medium speed - Press button Twice at High speed - Press button Three times at Low speed - Press button Four times TURN OFF Step 3 : Recommended maximum time of use is for 20 Minutes. If the 3 Speed Omni Hydrotherapy System is left on it will automatically turn off after 20 Minutes. If you want to turn it on again just press the button again in step 2. Step 4 : ATTENTION! Self Cleaning System after every use will turn on by itself approximately 20 minutes after the Omni Air Jets turn off. It will than operate for 20 seconds and than turn itself off. What is the pump actually doing? Answer: The pump is removing any water that has retained in the air jet. Keeping the jet clean. Step 5: ATTENTION!The Omni Air Jets has a effective non-return valve which prevents the back flow of water in to the system. DO NOT attempt to remove the Omni Air Jets which is installed into the tub body. Step 6: Should the blower unit or air pump switch itself off prematurely and/or not be reactivated by the push button in step 2, the electricity supply should be checked together with any circuit breaker device or fuse on the supply. If no fault can be found with the electricity supply to the spa system, than contacted us at Step 7: Using the hydrotherapy too long can lead to hypothermia which is when your internal body temperature is higher than your normal temperature. Consult with a doctor regarding a safe temperature for you to bathe in.

20 9. Using your PressurePoint Whirlpool System ** Please before you use your whirlpool system ** PressurePoint Starter Switch. 10. After your luxurious bath turn the overflow knob counterclockwise to drain the water. Rotate Counterclockwise to have the water drain. 11. Pull on the walk in tub handle towards you in step 1 and exit the tub carefully.
21 Care for your Walk in Tub 1. Regular care of your Mobility Bathworks walk in tub will keep it clean and have it working at it s best. 2. DO NOT under any circumstances use wire brushes, metal sponges, knives, steel wool or scouring pads on any part of the Mobility Bathworks walk in tub. 3. DO NOT under any circumstances, use powerful solvent such as acetone, lacquer, paint thinner, benzene or abrasive cleaner on any part of the Mobility Bathworks walk in tub. 4. DO NOT use ammonia or chlorine based agents on any plated surface, as they will de-plated the surface and void the warranty on the plated finish. 5. DO NOT use any liquids, powders or oils if you have a air or/and water jet system. 6. Oil or grease spots can be lifted with denatured alcohol 7. Use liquid, non-bleach dish washing detergent to remove any construction residue. 8. Lightly rubbing with a liquid cleaning compound (such as polishing compound used for cars ) followed by a light application of liquid or paste wax, will restore luster to any duller surface. 9. Clean plated surfaces with warm water only. 10. Very important to keep your Walk in tub fixtures clean on a regular basis. The best way to counteract from detrimental affects occurring is to prevent water from remaining on any finished surface on the walk in tub. WIPE DOWN YOUR WALK IN TUB AFTER EVERY USE! 11. Very Important! Clean the door jamb and seal free of dirt or debris with a mild dish washing detergent and warm water using a soft cloth once a week.
22 Question & Answer Session Question # 1 : The door seal is not completely compressed. Should I try to adjust the door to make it tighter? Answer : No, there is no need to. Never adjust, move, undo or tamper with the door hinge. Question # 2 : How often should I clean my bath? Answer: Wipe after every use of your walk in tub. It is always important to wipe your door seal and remove debris. Question# 3 : Can I have a bubble bath in my walk in tub? Answer: Use some oils but do not use salts in your walk in tub. Question# 4: If I chip a walk in tub with a sharp object, what should I do? Answer: Buy a fiberglass repair kit and apply to the chip. Question# 5: Can I use the door to lean on for supporting getting in or out of the bath? Answer: No, do not use the walk in tub door for support. Do not alter the door fittings, tamper with the hinge or try to get a closer fit on the seal. Question# 6: Is there any routine maintenance to the door or hinge? Answer: No, Do not tamper with walk in tub door & handle.
23
24
Important Installation Guide & Operating Instruction
 Important Installation Guide & Operating Instruction To be removed for use by the occupant Packing Slip Included: 1. Faucets & Valves 2. Riser Rod 3. Shower Rod & Curtain 4. Grab Bar 5. Quick Hose 6. Front
Installation and Operation Manual MG-304. Please read this manual carefully before use.
 Installation and Operation Manual MG-304 Please read this manual carefully before use. 1 P a g e Important Safety Instructions: Warning! Use this unit only for its intended purposes or as described in
Diamond Whirlpool/Air pool INSTALLATION & OPERATION INSTRUCTION
 Diamond Whirlpool/Air pool INSTALLATION & OPERATION INSTRUCTION WARNING When using this unit, precautionary steps should be followed to prevent electrical shock or personal injury. 1. Do not permit children
IMPORTANT INSTALLATION and OPERATING INSTRUCTIONS
 IMPORTANT INSTALLATION and OPERATING INSTRUCTIONS To be provided to the Walk-In Tub owner/user. INSTRUCTIONS PERTAINING TO A RISK OF FIRE, ELECTRIC SHOCK OR INJURY TO PERSONS IMPORTANT SAFETY INSTRUCTIONS
RELAX. REVITALIZE. RESTORE. LUXURY SPA UNIT Installation Manual. English. For Model Numbers 2848, 2853, 3153 and 3255
 RELAX. REVITALIZE. RESTORE. LUXURY SPA UNIT Installation Manual For Model Numbers 2848, 2853, 3153 and 3255 English RELAX. REVITALIZE. RESTORE. Thank you for choosing a Secure Spa Luxury Spa Unit. Secure
WALK-IN BATH INSTALLATION INSTRUCTIONS AND OWNER S MANUAL
 WALK-IN BATH INSTALLATION INSTRUCTIONS AND OWNER S MANUAL CONGRATULATIONS! You are now the owner of a walk-in bathtub from the most trusted name in plumbing. We thank you for your purchase. Your American
CONGRATULATIONS! You are now the owner of the world s best walk-in bathtub from the inventor and manufacturer of acrylic walk-in bathtubs.
 OWNER S MANUAL CONGRATULATIONS! You are now the owner of the world s best walk-in bathtub from the inventor and manufacturer of acrylic walk-in bathtubs. We thank you for your purchase. Your Safety Tub
Factory Direct Walk-In Tubs WALK-IN TUB. Installation Manual. For Model Numbers VT2848, VT2853, VT3153 and VT3255
 Factory Direct Walk-In Tubs WALK-IN TUB Installation Manual For Model Numbers VT2848, VT2853, VT3153 and VT3255 FACTORY DIRECT WALK-IN TUBS Thank you for choosing an Vitality Tubs Walk-In Tub. Vitality
AWP 3260 CWH Installation Instructions Hydro-massage Bathtub - UL 1795
 Tools you might need for proper installation galvanized nails or screws large level hammer or screw gun shims adhesive Thank you for purchasing Praxis Bathware. For best results, please read and follow
Destination Collection Whirlpool Bath Installation Instructions
 Tools you might need for proper installation Galvanized Nails or Screws Large Level Hammer or Screw Gun Shims Adhesive Thank you for purchasing Praxis Bathware. For best results, please read and follow
IMPORTANT INSTALLATION & OPERATING INSTRUCTION
 IMPORTANT INSTALLATION & OPERATING INSTRUCTION To be provided to the owner/user. DIGNITY CUSTOMER SERVICE Contact Customer Service at (877) 711-TUBS (8827) Monday Friday 8:00 5:00 PST. Page 1 of 15 HLS
AirBath Hydro-Massage Tubs UL1795 Installation and Operating Instructions
 Tools you might need for proper installation Galvanized Nails or Screws - For Units with a Tiling Flange Four Foot Level Shims Caulking Gun Screw Gun Adhesive Thank you for purchasing the Praxis AirBath
Ella Gel Coat Walk In Tub E SERIES OWNER'S MANUAL
 Ella Gel Coat Walk In Tub E SERIES OWNER'S MANUAL REPRESENTING THESE MODEL NUMBERS: 26 x 52 E2645SL / E2645SR SOAKING E2645AL / E2645AR AIR MASSAGE E2645DL / E2645DR DUAL MASSAGE 30 x 48 E3048SL / E3048SR
COPPER FREESTANDING TUB
 COPPER FREESTANDING TUB INSTALLATION INSTRUCTIONS AND CARE GUIDE CONTENTS Tub Installation...2 Rough-In...2 Drain Installation...3 Drain without Overflow...3 Waste and Overflow Drain...3 Trimming Drain
BATHBAY COLLECTION INSTALLATION AND OPERATION INSTRUCTIONS
 Pre-Installation Planning READ INSTRUCTIONS COMPLETELY BEFORE BEGINNING INSTALLATION. 1. Do Not store units out of doors.- Keep out of sunlight and exposure to weather. 2. There are four different models
WALK IN BATH TUB OWNER S MANUAL
 WALK IN BATH TUB OWNER S MANUAL USWIBOWMAN-V1-10/12/07 1 TABLE OF CONTENTS WALK IN BATH TUB GENERAL INFORMATION INTENDED USE. 3 SAFETY INSTRUCTIONS. 4 CLASSIFICATION & TECHNICAL DETAILS. 4 OPERATING INSTRUCTIONS
Operating and Maintenance Instruction Manual. Combination Whirlpool and Air Bath Systems with Chromatherapy Lights
 Operating and Maintenance Instruction Manual Combination Whirlpool and Air Bath Systems with Chromatherapy Lights T h a n k y o u fo r c h o o s i n g A m e r i c a n S t a n d a rd ATTENTION INSTALLER:
Avenue (HY) Series Installation & Operation Manual
 Series Installation & Operation Manual") Avenue (HY) Series Installation & Operation Manual Note: You must read all installation & operation instructions prior to assembly and use of this unit. 1 P a g e Table of Contents Warnings. 3 HY Series
Avenue (HY) Series Installation & Operation Manual Note: You must read all installation & operation instructions prior to assembly and use of this unit. 1 P a g e Table of Contents Warnings. 3 HY Series
FREWIN STEAM SHOWER ENCLOSURE
 FREWIN STEAM SHOWER ENCLOSURE INSTALLATION AND USER MANUAL CONTENTS Steam Shower Enclosure Installation...2 Technical Information...2 Plumbing Requirements...2 Assembly...3 Tools and Materials...3 Installation...3
RESIN FREESTANDING TUB
 RESIN FREESTANDING TUB INSTALLATION INSTRUCTIONS AND CARE GUIDE CONTENTS Tub Installation...2 Rough-In...2 Drain Installation...3 Air Tub Installation...4 Electrical Installation...4 Remote Control Installation...5
Access Tubs. Installation & operating instructions COSTCO MODEL # / RIGHT COSTCO MODEL # / LEFT
 Installation & OPERATING INSTRUCTIONS Installation & operating instructions MODEL 3060SI HYDRO COSTCO MODEL # 391186/394862 - RIGHT COSTCO MODEL # 391197/394842 - LEFT Page 25 Access Tubs 5701 NW 35 Avenue
Before you begin, carefully read the installation instructions below. Observe all local electrical safety and plumbing codes.
 AIR TUB INSTALLATION Before you begin, carefully read the installation instructions below. Observe all local electrical safety and plumbing codes. Unpack and inspect tub and parts for damage. If any damage
Installation Guide. Pedicure Spa D K-163, K-1006, K-1011, K-1012
 Installation Guide Pedicure Spa K-163, K-1006, K-1011, K-1012 1063564-2-D Important Information WARNING: When using electrical products, basic precautions should always be followed, including the following:
ELLA SOAKING WALK IN BATHS OWNERS MANUAL. Representing these model numbers: L / R Elite Soaking L / R Royal Soaking
 Representing these model numbers: 03057 L / 03058 R Deluxe Soaking 03107 L / 03108 R Elite Soaking 03167 L / 03168 R Petite Soaking 03085 Companion Soaking 03117 L / 03118 R Royal Soaking ELLA SOAKING
LEVENS STEAM SHOWER ENCLOSURE
 LEVENS STEAM SHOWER ENCLOSURE INSTALLATION AND USER MANUAL CONTENTS Steam Shower Enclosure Installation...2 Technical Information...2 Plumbing Requirements...2 Assembly...3 Tools and Materials...3 Installation...3
COLONY COLLECTION OWNER S MANUAL. For your installation, operation, and maintenance needs. Whirlpools Air Baths Combo Baths Soakers
 LAUREL MOUNTAIN WHIRLPOOLS COLONY COLLECTION OWNER S MANUAL For your installation, operation, and maintenance needs. Whirlpools Air Baths Combo Baths Soakers *WATER TEST* PRIOR TO INSTALLATION Laurel Mountain
Installation & operating instructions
 Installation & OPERATING INSTRUCTIONS Installation & operating instructions MODEL 2747SEN Meditub 5701 NW 35 Avenue Miami, FL 33142 Phone 866-633-4882 Fax 866-560-1060 info@meditub.com http://www.meditub.com
ODEON OVE. A. Ordering Information. B. Required Electrical Service T01-C INSTALLATION INSTRUCTIONS
 ODEON OVE INSTALLATION INSTRUCTIONS BUBBLE MASSAGE BATH K-18212T-G1/G2, K-1709T-G1/G2 BEFORE YOU BEGIN Please read these instructions carefully to familiarize yourself with the required tools, materials,
America s Walk-In Tub. Installation & Instructions. Manufactured by. A Division of Spa World Corp NW 35th Avenue ANSI-Z124.1
 America s Walk-In Tub Installation & Operational Instructions REEF SOAKER ASME A112.19.7-2006 ANSI-Z124.1 Manufactured by ACCESS TUBS A Division of Spa World Corp. 5701 NW 35th Avenue Miami, Florida 33142
WALK-IN BATH INSTALLATION INSTRUCTIONS AND OWNER S MANUAL
 WALK-IN BATH INSTALLATION INSTRUCTIONS AND OWNER S MANUAL CONGRATULATIONS! You are now the owner of a walk-in bathtub from the most trusted name in plumbing. We thank you for your purchase. Your American
Meditub. Installation & operating instructions. Operating instructions
 Installation & OPERATING INSTRUCTIONS ditub Installation & operating instructions structions MODEL 3260 Page 25 Meditub 5701 NW 35 Avenue Miami, FL 33142 Phone 866-633-4882 Fax 866-560-1060 info@meditub.com
Access Tubs 3053 HYDRO INSTALLATION & OPERATING INSTRUCTIONS MODEL INSTALLATION & OPERATING INSTRUCTIONS
 INSTALLATION & OPERATING INSTRUCTIONS INSTALLATION & OPERATING INSTRUCTIONS MODEL 3053 HYDRO Costco Model # 321118/356196 - RIGHT Costco Model # 332440/356220 - LEFT Page 1 ACCESS TUBS 5701 NW 35 Avenue
Claw Feet & Pedestal Assembly
 Classique & Hotel Collection Soak & Jetted Tubs Baths of Distinction Inc. 5843 Carrier St, St. Petersburg, Florida, USA 33714 1.866.938.3880 Claw Feet & Pedestal Assembly All Tubs meet or exceeds ANSI
NEPTUNE Steam Room Installation Instructions
 NEPTUNE Steam Room Installation Instructions IMPORTANT Please read carefully the following instructions before installing your shower cabin. If you have any questions on this shower cabin installation
Ella Acrylic Outward Swing Walk In Tub OWNER'S MANUAL
 Ella Acrylic Outward Swing Walk In Tub OWNER'S MANUAL REPRESENTING THESE MODEL NUMBERS: Kai 30 in. x 57 in. OW5130SL / OW5130SR SOAKING OW5130AL / OW5130AR AIR MASSAGE OW5130DL / OW5130DR DUAL MASSAGE
PIPELESS WHIRLPOOL FOOT BATH OWNER S MANUAL. Model: FB2-S115
 PIPELESS WHIRLPOOL FOOT BATH OWNER S MANUAL Model: FB2-S115 TABLE OF CONTENTS IMPORTANT SAFETY INSTRUCTIONS...3 WARNINGS..4 INSTRUCTIONS PRIOR TO USE. 5 GROUNDING INSTRUCTIONS.... 5 HOW TO USE...6 HOW
Installation Guide BUBBLEMASSAGE. English page T01-A
 Installation Guide BUBBLEMASSAGE BATH 368 201419 English page 1-9 10-17 Before You Begin Please read these instructions carefully to familiarize yourself with the required tools, materials, and installation
Escape Series Walk-in Bathtubs
 #1093 Escape Series Walk-in Bathtubs Model XTW5128 Model XTW5332 Model XTW6035 www.bestbath.com 800.727.9907 723 Garber Street Caldwell, ID 83605 CARING FOR YOUR YOUR WALK-IN TUB Table of Contents Page
SYSTEM BASIC WHIRLPOOLS
 SYSTEM BASIC WHIRLPOOLS 114847-2-CB 2000 Kohler Co. IMPORTANT SAFETY INSTRUCTIONS ATTENTION INSTALLER: INSTRUCTIONS PERTAINING TO RISK OF FIRE, ELECTRIC SHOCK, OR INJURY TO PERSONS READ AND FOLLOW ALL
ARLEY STEAM SHOWER ENCLOSURE
 ARLEY STEAM SHOWER ENCLOSURE INSTALLATION AND USER MANUAL CONTENTS Steam Shower Enclosure Installation...2 Technical Information...2 Plumbing Requirements...2 Assembly...3 Tools and Materials...3 Installation...3
GULFSTREAM PLASTICS LTD.
 GULFSTREAM PLASTICS LTD. Cambridge, Ontario, Canada N1R 6T4 Phone (519) 622-0950 Toll Free 1-877-622-4853 Fax (519) 622-6926 Website: www.gulfstreamplastics.com Manufacturers of Acrylic Baths Whirlpools
IMPORTANT SAFETY INSTRUCTIONS GENERAL INSTRUCTIONS
 MR. INSTALLER - Please pass these IMPORTANT instructions along to the homeowner! STUDIO COLLECTION IMPORTANT SAFETY INSTRUCTIONS GENERAL INSTRUCTIONS INSTRUCTIONS PERTAINING TO A RISK OF FIRE, ELECTRIC
Installation Manual for M-G014 & M-G015
 Installation Manual for M-G014 & M-G015 M-G014 M-G015 1 Contents 1. Electrical specifications 2. Plumbing 3. Installation of Water connections 4. Installation of Drain 5. Operation of Bathtub 6. Troubleshooting
Murano Shower Cabin Installation Instruction
 Murano Shower Cabin Installation Instruction IMPORTANT Please read carefully the following instructions before installing your shower cabin. If you have any questions on this shower cabin installation
OWNER MANUAL PLEASE SAVE THIS MANUAL FOR FUTURE REFERENCE
 OWNER MANUAL PLEASE SAVE THIS MANUAL FOR FUTURE REFERENCE IDJET, Selena Bench, Gulfstream Inc. are trademarks of Gulfstream Inc. Patent #D709619, #8726430, #8680699, #D701318, #8662848, #8531048, #8366418,
Access Tubs 3238 DUAL ( AIR/HYDRO ) INSTALLATION & OPERATING INSTRUCTIONS MODEL INSTALLATION & OPERATING INSTRUCTIONS. Costco Item # /394831
 INSTALLATION & OPERATING INSTRUCTIONS MODEL INSTALLATION & OPERATING INSTRUCTIONS. Costco Item # /394831") INSTALLATION & OPERATING INSTRUCTIONS INSTALLATION & OPERATING INSTRUCTIONS MODEL 3238 DUAL ( AIR/HYDRO ) Costco Item # 391096/394831 Page 25 3238 DUAL WALK-IN TUB DESCRIPTION: The 3238 features a wide,
INSTALLATION & OPERATING INSTRUCTIONS INSTALLATION & OPERATING INSTRUCTIONS MODEL 3238 DUAL ( AIR/HYDRO ) Costco Item # 391096/394831 Page 25 3238 DUAL WALK-IN TUB DESCRIPTION: The 3238 features a wide,
Model K 520 M Part No
 Model K 520 M Part No. 1.069-680.0 High Pressure Washer Operator Manual Overview... 2 Precautions... 2-4 Assembly Instructions... 4 Operating Instructions... 5 Using the Accessories... 6 Working with Detergents...
Access Tubs. Installation & operating instructions. Costco Item # /394831
 Installation & OPERATING INSTRUCTIONS Installation & operating instructions MODEL 3238 DUAL ( AIR/HYDRO ) Costco Item # 391096/394831 Page 25 Access Tubs 5701 NW 35 Avenue Miami, FL 33142 Phone 877-249-2388
Whirlpool Bathtub Model Number: MT618
 INSTALLATION AND OWNER'S MANUAL Whirlpool Bathtub Model Number: MT618 Please carefully read these instructions before you begin to install the products. 07/11 Rev A P/N:100056-03 Thank you for purchasing
Bubble Massage Bath (Include Electronic Drain)
") Bubble Massage Bath (Include Electronic Drain) OWNER' S MANUAL 368 201419 1199575-T01-B 1, 2012 Copyright Kohler China Ltd., 2012 TABLE OF CONTENTS...2...3... 4...4...5... 7... 8 Thank You For Choosing
Bubble Massage Bath (Include Electronic Drain) OWNER' S MANUAL 368 201419 1199575-T01-B 1, 2012 Copyright Kohler China Ltd., 2012 TABLE OF CONTENTS...2...3... 4...4...5... 7... 8 Thank You For Choosing
OWNER MANUAL. Mini Lavender
 OWNER MANUAL PLEASE SAVE THIS MANUAL FOR FUTURE REFERENCE Mini Lavender Cleanjet MAX, Mini Lavender, Gulfstream Inc. are trademarks of Gulfstream Inc. Patent #D709619, #8726430, #8680699, #D701318, #8662848,
OWNER MANUAL PLEASE SAVE THIS MANUAL FOR FUTURE REFERENCE
 OWNER MANUAL PLEASE SAVE THIS MANUAL FOR FUTURE REFERENCE Table of Contents Owner Manual Safety and Precautions... 1-2 Identifying Parts... 3-4 Dimensions... 5 INSTALLATIONS Jet Assembly... 6-7 Plumbing
RELAX. REVITALIZE. RESTORE. LUXURY SPA UNIT Owner s Manual. English. For Model Numbers 2848, 2853, 3153 and 3255
 RELAX. REVITALIZE. RESTORE. LUXURY SPA UNIT Owner s Manual For Model Numbers 2848, 2853, 3153 and 3255 English This Page is Intentionally Left Blank For Printing Purposes Relax. Revitalize. Restore. Thank
Models: DB-2-HF, DB-3-HF, DB-4-HF, and DB-5-HF. For Service Information, Call
 Service Manual Design Basics Hot Food Tables Models: DB-2-HF, DB-3-HF, DB-4-HF, and DB-5-HF For Service Information, Call 800-544-3057 Please provide the following information: - Model number - Serial
Technical Specifications Section 1
 Technical Specifications Section 1 STANDARD UNIT: MODEL# RH4 Description: Model RH4 is a built-in, 60-gallon, side access bathing tub. Construction: The tub shell is a seamless piece of 3/16" thick fiberglass-reinforced
Cascade Premier and Elite Premier Bathing Systems with Aqua-Aire Installation / Assembly Instructions
 Cascade Premier and Elite Premier Bathing Systems with Aqua-Aire Installation / Assembly Instructions Premier Elite Premier PENNER PATIENT CARE, INC Box 523 / 102 Grant St. Aurora, NE 68818 360745P Revision
Installation Manual for the Manual Control Aquassure Bathtub For Models:
 Installation Manual for the Manual Control Aquassure Bathtub For Models: MRC MRCA MRCW MRCAW MLC MLCA MLCW MLCAW MRBN MRBNA MRBNW MRBNAW MLBN MLBNA MLBNW MLBNAW REV. 09-28-07 Introduction Aquassure products
CONTENTS CONSIDERATIONS. General Plumbing Component Connection ILLUSTRATION. Control System CONFIGURATION. Voltage Verification CONNECTION
 AIR SERIES SYSTEM INSTALLATION MANUAL CONTENTS CONSIDERATIONS General Plumbing Component Connection 2 2 2 ILLUSTRATION Control System 3 CONFIGURATION Voltage Verification 4 CONNECTION Component Connection
ELLA OUTWARD SWING DOOR WALK IN BATHS OWNERS MANUAL
 2016 ELLA OUTWARD SWING DOOR WALK IN BATHS OWNERS MANUAL REPRESENTING THESE MODEL NUMBERS: O2SA3060 Tub4Two OA3052 Dealer Exclusive OAF2639 Tiny Front Entry O2SA3671 Big4Two OA2652 Slim OA2660 Lounger
Installation & Operating Guide
 5-036 HOT WATER TANK Installation & Operating Guide Read all instructions thoroughly. Keep this guide for future reference. Proof of purchase is required for Warranty. Staple receipt or proof of purchase
1-866-PENNERS
 Cascade Premier and Elite Premier Bathing Systems with Aqua-Aire Installation / Assembly Instructions Premier Elite Premier PENNER PATIENT CARE, INC Box 523 / 102 Grant St. Aurora, NE 68818 360745P Revision
1/7 SPOUT INSTALLATION
 Rev 06/06 Installation Instruction CHADWICK COLLECTION Widespread Lavatory Set Please read the instructions completely before beginning the installation. Chadwick Collection Model Number: 430GL Flush both
INSTALLATION & OPERATIONAL INSTRUCTIONS. Manufactured by ATLANTIS WHIRLPOOLS A Division of Spa World Corp NW 35th Avenue ANSI-Z124.
 INSTALLATION & OPERATIONAL INSTRUCTIONS ASME A112.19.7-2006 ANSI-Z124.1 Manufactured by ATLANTIS WHIRLPOOLS A Division of Spa World Corp. 5701 NW 35th Avenue Miami, Florida 33142 INSTALLATION INSTRUCTIONS
I N S T R U C T I O N S
 INSTRUCTIONS HIPPO Deluxe Room Steam Vaporiser Congratulations on your purchase of the HIPPO Deluxe Room Steam Vaporiser. Before using this appliance, read the following instructions carefully as they
Waimea ShowerSpa MODEL #1034
 Start your day in a whole new way! GENERAL DESCRIPTION The Waimea ShowerSpa is sure to make waves with any décor. Wash away your worries with a unique cascading waterfall shower head, a 6" rain style shower
Model K 330 M Part No
 Model K 330 M Part No. 1.994-916.0 High Pressure Washer Operator Manual Overview..................................1 Precautions...............................1-3 Assembly Instructions.........................3
Access Tubs 3060WCA AIR INSTALLATION & OPERATING INSTRUCTIONS MODEL INSTALLATION & OPERATING INSTRUCTIONS
 INSTALLATION & OPERATING INSTRUCTIONS INSTALLATION & OPERATING INSTRUCTIONS 3060WCA AIR MODEL Costco Item # 558600/580183 Right Costco Item # 558596/580185 Left Page 25 3060WCA AIR WALK-IN TUB DESCRIPTION:
Operating and Maintenance Instruction Manual
 Operating and Maintenance Instruction Manual System I Whirlpool System I Whirlpool with Chromatherapy System II Whirlpool System II Whirlpool with Chromatherapy Thank you for choosing American Standard
ACRYLIC CLAWFOOT TUB
 ACRYLIC CLAWFOOT TUB INSTALLATION INSTRUCTIONS AND CARE GUIDE CONTENTS Tub Installation...2 Rough-In...2 Drain Installation...3 Drain without Overflow...3 Waste and Overflow Drain...3 Trimming Drain Pipes...4
Where the tap has a removable aerator on the spout exit it can be removed and cleaned periodically to maintain optimum flow performance.
 TAP6000 3 in Hot Tap Guarantee (UK only): 04-7 Your tap has the benefit of a comprehensive manufacturer s guarantee, details of which are shown on your Proof of Purchase Document. Any claim during the
Water Boilers ME10EN, ME15EN. Table of Contents
 Water Boilers ME10EN, ME15EN Operator Manual Model ME15EN Model ME10EN Safety Information...2 Rough-In Drawing...3 Installation...4 Priming...5 Cleaning...5 Table of Contents Adjustments...6 Maintenance...7
Oahu Showerspa Model #1035 Owner's Manual
 O A H U Oahu Showerspa Model #1035 Owner's Manual Oahu ShowerSpa Model #1034 Please Read The Following Instructions COMPLETELY Before Beginning! Our goal is to ensure your installation goes smoothly and
1.6 GALLON ONE PIECE TOILET
 1.6 GALLON ONE PIECE TOILET INSTALLATION INSTRUCTIONS Installer: Leave this manual for homeowner. Homeowner: Read this manual and keep for future reference. Save These Instructions for Future Use. Owner's
IMPORTANT SAFETY INSTRUCTIONS INSTRUCTIONS PERTAINING TO A RISK OF FIRE, ELECTRIC SHOCK, OR INJURY TO PERSONS.
 INSTALLATION INSTRUCTIONS INSTRUCTIONS PERTAINING TO A RISK OF FIRE, ELECTRIC SHOCK, OR INJURY TO PERSONS. READ AND FOLLOW ALL INSTRUCTIONS IMPORTANT SAFETY INSTRUCTIONS WARNING: WHEN USING YOUR HYDRO
Model K205 M Plus Part No
 Model K205 M Plus Part No. 1.223-820.0 High Pressure Washer Operator Manual Overview..................................1 Precautions...............................1-3 Assembly Instructions.........................3
STOP ACRYLIC TUB WITH INTEGRAL DRAIN PLANNING BEFORE YOU BEGIN TOOLS AND MATERIALS: GETTING STARTED INSTALLATION INSTRUCTIONS.
 BEFORE YOU BEGIN We recommend consulting a professional if you are unfamiliar with installing bathroom fixtures and plumbing. Signature Hardware accepts no liability for any damage to the floor, walls,
Assembly instructions. Alexandria Pedicare System ALEXANDRIA. Perfect design. Personal service.
 R Assembly instructions Alexandria Pedicare System ALEXANDRIA Perfect design. Personal service. IMPORTANT SAFETY PRECAUTIONS 1. Read and follow all instructions.. Danger: To reduce the risk of injury,
Food Slicer Visit our website at:
 Electric Food Slicer 42787 Set up And Operating Instructions Visit our website at: http://www.harborfreight.com Read this material before using this product. Failure to do so can result in serious injury.
K 3.97 M. Specifications or visit our website: In USA call: Part No
 K 3.97 M High Pressure Washer Operator Manual Overview... 2 Precautions... 2-4 Assembly Instructions... 4-5 Operating Instructions... 5-6 GFCI Instructions... 6 Using the Accessories... 6 Working with
Model K 240 plus Part No
 Model K 240 plus Part No. 1.223 585.0 High Pressure Washer Operator Manual Overview... 2 Precautions... 2-4 Assembly Instructions... 4 Operating Instructions... 5 GFCI Instructions... 6 Using the Accessories...
MOJAVE. Mojave ShowerSpa Model #1016 Owner's Manual
 MOJAVE Mojave ShowerSpa Model #1016 Owner's Manual Mojave ShowerSpa Model #1016 Please Read The Following Instructions COMPLETELY Before Beginning! Our goal is to ensure your installation goes smoothly
K 2.97 M. Specifications Operating pressure, max PSI Water volume GPM Voltage V Amp draw AMPS
 K 2.97 M High Pressure Washer Operator Manual Overview... 2 Important Precautions... 3-4 Assembly Instructions... 4 Operating Instructions... 5 GFCI Instructions... 6 Using the Accessories... 6 Working
SANTA CRUZ. Santa Cruz ShowerSpa Model #1033 Owner's Manual
 SANTA CRUZ Santa Cruz ShowerSpa Model #1033 Owner's Manual Santa Cruz ShowerSpa Model #1033 Please Read The Following Instructions COMPLETELY Before Beginning! Our goal is to ensure your installation goes
OWNER MANUAL PLEASE SAVE THIS MANUAL FOR FUTURE REFERENCE
 OWNER MANUAL PLEASE SAVE THIS MANUAL FOR FUTURE REFERENCE Table of Contents Owner Manual Safety and Precautions... 1-2 Identifying Parts... 3-4 INSTALLATIONS Attaching Seat... 5 Jet Assembly... 6-7 Plumbing
K Specifications. Max. Water Volume
 K 2.35 High Pressure Washer Operator Manual Overview... 2 Precautions... 2-4 Assembly Instructions... 4 Operating Instructions... 5 Using the Accessories... 6 Working with Detergents... 7 Shut Down and
SANCTUARY SPA OWNER S MANUAL INSTALLATION GUIDE
 Manufactured by: MTI Whirlpools, Inc. www.mtiwhirlpools.com 670 N. Price Road Sugar Hill, GA 30518 800 783 8827 770 271 8228 Fax 800 438 8827 Copyright 2004 by MTI Whirlpools, Inc. Modification Rights
ROHL Modern Bath Lombardia/Architectural ROHL Transitional Bath Avanti COLORS/FINISHES. Polished Chrome Polished Nickel Satin Nickel
 MODERN SINGLE LEG FLOOR MOUNTED TUB FILLER ROHL Modern Bath Lombardia/Architectural ROHL Transitional Bath Avanti M1687 FEATURES Popular single leg, floor mounted tub filler Solid brass construction Side
K 2.90 M. Specifications Operating pressure, max PSI Water volume GPM Voltage V Amp draw AMPS
 K 2.90 M High Pressure Washer Operator Manual Overview... 2 Important Precautions... 3-4 Assembly Instructions... 4 Operating Instructions... 5 GFCI Instructions... 6 Using the Accessories... 6 Working
Model K 280 M Part No
 Model K 280 M Part No. 1.189-205.0 High Pressure Washer Operator Manual Overview...................................1 Precautions................................1-3 Assembly Instructions.........................3
GRANITE COMPOSITE SINK
 GRANITE COMPOSITE SINK CONTENTS Sink Installation Faucet Drilling Drop-In Sink Undermount Sink Drain Installation 2 3 4 5 Materal Care and Maintenance 6 1 FAUCET DRILLING The hole for the faucet can be
ENGINEERED QUARTZ SINK Installation & Care Instructions
 Installation & Care Instructions FOR MODEL NUMBERS CA344D25-M CA344SB22-M CA3241E33-B CA3241E33-M CA324233-B CA324233-M CA344SB24-B CA344SB24-M CA344133-B CA344133-M CA3241L33-B CA3241L33-M CA344SB22-B
STAINLESS STEEL TUB INSTALLATION
 BEFORE YOU BEGIN We recommend consulting a professional if you are unfamiliar with installing plumbing fixtures. Signature Hardware accepts no liability for any damage to the faucet, plumbing, sink, counter
REVIVAL LITE VITREOUS CHINA REVERSE TRAP TOILET
 REVIVAL LITE VITREOUS CHINA REVERSE TRAP TOILET BEFORE YOU BEGIN HOW TO USE THESE INSTRUCTIONS Please read these instructions carefully to familiarize yourself with the required tools, materials, and installation
INSTALLATION INSTRUCTIONS
 Model: MPN: AN5534 INSTALLATION INSTRUCTIONS Version: 1.0 READ ALL INSTRUCTIONS BEFORE UNPACKING THE PRODUCT INSTRUCTIONS THAT, IF IGNORED COULD RESULT IN DEATH OR SERIOUS INJURY CAUSED BY INCORRECT HANDLING
3/4.8 AERODYNE 3/4.8L CLASS FIVE+
 3/4.8 AERODYNE 3/4.8L CLASS FIVE+ INSTALLATION INSTRUCTIONS VITREOUS CHINA SKIRTED TRAPWAY ONE-PIECE TOILET S-TRAP 305mm K-3869T/K-3869T-S S-TRAP 400mm K-4165T/K-4165T-S Please read these instructions
OWNER MANUAL PLEASE SAVE THIS MANUAL FOR FUTURE REFERENCE
 OWNER MANUAL PLEASE SAVE THIS MANUAL FOR FUTURE REFERENCE Vienna Bench Cleanjet MAX, Vienna Bench, Gulfstream Inc. are trademarks of Gulfstream Inc. Patent #D709619, #8726430, #8680699, #D701318, #8662848,
DRAFT INSTALLATION INSTRUCTIONS. Solid-State Series !! NOTE!! Covers the following models: Refer to INSERT for additional information
 INSTALLATION INSTRUCTIONS Solid-State Series!! NOTE!! Covers the following models: " CS6100 - CS7100 " CS6200 - CS9200 " CS6220 - CS9220 " CS6230 - CS9230 " CS6500 - CS7500 " CS6330 - CS9300 " CS9400 -
ACRYLIC PEDESTAL TUB
 BEFORE YOU BEGIN We recommend consulting a professional if you are unfamiliar with installing bathroom fixtures and plumbing. Signature Hardware accepts no liability for any damage to the floor, walls,
NIAGARA. Niagara ShowerSpa Model #1048B-BN Owner s Manual
 NIAGARA Niagara ShowerSpa Model #1048B-BN Owner s Manual Niagara ShowerSpa Model 1048B-BN Please Read The Following Instructions COMPLETELY Before Beginning! Our goal is to ensure your installation goes
SEABREEZE. SeaBreeze Rain Shower System Model #1086-CH Owner's Manual
 SEABREEZE SeaBreeze Rain Shower System Model #1086-CH Owner's Manual SeaBreeze Model #1086 Please Read The Following Instructions COMPLETELY Before Beginning! Our goal is to ensure your installation goes