DISPLAY ALARM SYSTEMS
|
|
|
- Randell Robertson
- 6 years ago
- Views:
Transcription
1 DISPLAY ALARM SYSTEMS ROVIS Co is the MYRIAD partner and distributor in Romania Tel: Fax: Adresa: Str. Garlei nr. 190A, sector 1, Bucuresti


2 SmartPhone Alarm Pad Mains or battery powered remote controlled alarm unit for use with SmartPhones or MP3 players CONTENTS: SmartPhone Alarm Pad Power Supply
3 SmartPhone Alarm Pad Installation If the alarm is mains powered you must first connect the power supply to the underside of the Pod. The Pod should be secured using the adhesive pad located on the base. Firstly clean the surface where the Pod is being placed. Remove the backing from the adhesive pad and press it down firmly onto the surface. The Pod features an anti-tamper switch which will activate the alarm if your Pod is removed. To secure a SmartPhone or MP3 to the Pod, remove the backing from the adhesive pad on the sensor and secure this to the back of the SmartPhone or MP3. If the optional charging cable is not being used please ensure the terminator is connected. Instructions Mains Powered Once mains supply is connected to the Pod, the LED on the sensor will be continuously lit showing power to the sensor. When using a charging lead, first remove the terminator from the bottom edge of the sensor and connect the compatible lead for the device. The SmartPhone or MP3 is now being charged even though the alarm is turned off. Turn the alarm on by holding the remote control 1cm from the infrared receiver on the right hand side of the alarm and pressing the button. The alarm will give one long beep and the green LED on the pod will be lit continuously indicating it is on. The alarm is now armed. If the SmartPhone or MP3 is removed the alarm will sound and the red LED will flash. Turn the alarm off by holding the remote control 1cm from the alarm s infrared receiver and pressing the button. The alarm will beep 3 times and it is now turned off. This will then allow you to investigate and resolve the issue. Reset the alarm as above.


4 Tablet Alarm Mains or battery powered remote controlled alarm unit for use with tablets. CONTENTS: Tablet Alarm complete with holder Power Supply
5 Tablet Alarm Installation The alarm can be secured using the adhesive pad located on the base or fixing with screws. Firstly clean the surface where the alarm is being placed. Remove the backing from the adhesive pad and press it down firmly onto the surface. If fixing with screws first remove the alarm from the holder by pressing down on the tab on the left hand side and slide the alarm backwards. This will give you access to the screw holes for the self-tapping screws (not supplied). Once the holder is secured to the surface, slide the alarm back until it clicks into position. The alarm features an anti-tamper switch which will activate the alarm if your alarm is removed. To secure a tablet to the alarm, remove the backing from the adhesive pad on the sensor and secure this to the back of the tablet. If the optional charging cable is not being used please ensure the terminator is connected Instructions Mains Powered Connect power supply to the alarm and you will hear a beep and the LED on the sensor will be continuously lit showing power to the sensor. The tablet can now be charged. When using a charging lead, first remove the terminator from the bottom edge of the sensor and connect the compatible lead for the device. The tablet is now being charged even though the alarm is turned off. Turn the alarm on by holding the remote control 1cm from the infrared receiver at the back of the alarm and pressing the button. The alarm will give one long beep and the green LED on the pod will be lit continuously showing it is powered. The alarm is now armed. If the tablet is removed, the alarm will sound and the red LED will flash. Turn the alarm off by holding the remote control 1cm from the infrared receiver at the back of the alarm and pressing the button. The alarm will beep 3 times and the alarm is now turned off. This will then allow you to resolve the issue. Reset the alarm as above. If the alarm is removed from its holder the anti-tamper switch will activate the alarm and the
6 Tablet Alarm Battery Powered Turn the alarm on by holding the remote control 1cm from the infrared receiver at the back of the alarm and pressing the button. The alarm will give one long beep and the green LED will light up then flash every 10 seconds. The alarm is now armed. If the tablet is removed the alarm will sound and the red LED will flash. Turn the alarm off by holding the remote control 1cm from the infrared receiver at the back of the alarm and pressing the button. The alarm will beep 3 times and it is now turned off. This will then allow you to resolve the issue. If the alarm is removed from its holder the anti-tamper switch will activate the alarm and the green LED will flash. Turn the alarm off as above and rectify the issue. Reset the alarm as above. To reset the alarm hold the remote control 1cm from the infrared receiver at the back of the alarm and press the button. The alarm will give one long beep and the green LED will light up once and flash every 10 seconds. The alarm is now armed. If the battery is low, the LED on the base will flash and the alarm will beep indicating the battery needs to be replaced immediately. Ensure the alarm is turned off when changing the battery. To replace the battery (3v Lithium Coin Cell CR2450M). Remove the alarm from the holder by pressing the tab on the side of the holder and sliding the alarm backwards. Carefully remove the 2 screws to gain access to the battery cover. Open the battery compartment, remove the old battery and fit the new battery. Replace the bracket ensuring it is facing the correct way and slide the alarm back into the holder until it clicks into position. Reset the alarm as above.

7 Camera Alarm Pod MK-II Mains powered remote controlled alarm unit for use with cameras. CONTENTS: Camera Alarm Pod complete with security screw and washer Power Supply Allen Key
8 Camera Alarm Pod MK-II Installation The Pod should be secured using the adhesive pad located on the base. Firstly clean the surface where the Pod is being placed. Remove the backing from the adhesive pad and press it down firmly onto the surface. The Pod features an anti-tamper switch which will activate the alarm if your Pod is removed. To secure a camera to the Pod, lift the sensor, paying particular attention to the security screw and washer as you will need these to attach the base of the camera to the sensor in the corresponding thread whilst ensuring that the anti-tamper switch is held down. If the optional charging cable is not being used please ensure the terminator is connected. Tighten the screw with the allen key provided. Connect power supply to the Pod and you will hear a beep and the LED on the sensor will be continuously lit showing power to the sensor. Instructions Turn the alarm on by holding the remote control 1cm from the infrared receiver located in the middle of the 3 LEDs on the alarm and pressing the button. The alarm will give one long beep and the green LED on the pod will be lit continuously showing it is powered. The alarm is now armed. If the camera is tampered with by either loosening of the security screw or attempted removal, the alarm will sound and the red LED on the left will flash. Turn the alarm off by holding the remote control 1cm from the alarm s infrared receiver and pressing the button. The alarm will beep 3 times and it is now turned off. This will then allow you to investigate and resolve the issue. Note: If the camera on the sensor has been twisted to release the sensor switch, do not twist this back again as the switch will be damaged. In order to re-position the camera, release the security screw, ensure the camera is in the correct position and re-tighten the screw as before. To reset the alarm hold the remote control 1cm from the alarm s infrared receiver and press the button. The alarm will give one long beep and the green LED will be lit continuously showing it is powered. The alarm is now armed. If the Pod is lifted from its fixed surface, the anti-tamper switch will activate the alarm and the green LED will flash. Turn the alarm off as above and rectify the issue. Reset the alarm as above. When using a charging lead, first while the alarm is off remove the terminator from the bottom edge of the sensor and connect the compatible lead for the device. The camera is now being charged even though the alarm is turned off. Optional extras are available upon request. Please contact us using the details below for more information.


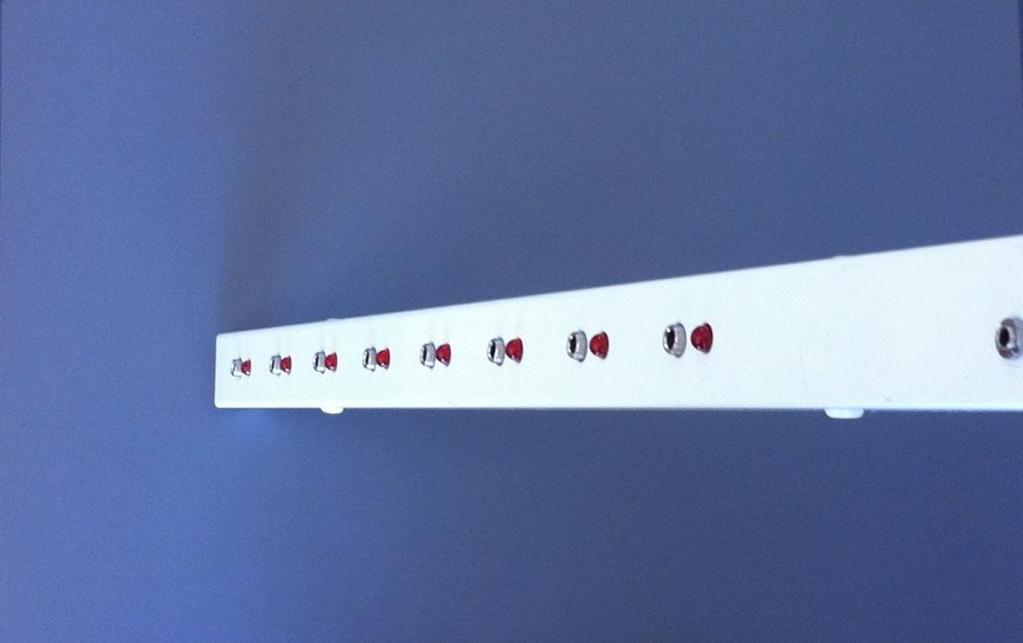
9 Port Alarm CONTENTS: Adhesive Pad 2 Terminators 2 Screws 1 Battery Cover Removal Tools
10 Port Alarm Instructions This alarm can protect 1 or 2 items of displayed merchandise. 1. Secure the alarm to a table or wall by means of the adhesive pad or screws. If using the adhesive pad remove centre and attach to the base around the anti-tamper switch. Once the alarm is secure insert the plug from the sensor cable into the socket on the alarm. If only 1 sensor is being used, you must insert the terminator into the other socket of the alarm or the alarm will keep sounding. 2. Attach the sensor cable to the device to be protected and ensure the sensor and displayed merchandise are well connected. 3. Turn the alarm on by holding the remote control 1cm from the infrared receiver and pressing the button. You will hear a long beep and the LED will flash every 10 seconds. The alarm is now active. If using the optional mains power supply the centre LED will be continuously lit when alarm is turned on. 4. If the alarm is triggered it will sound and the corresponding LED for each broken connection will flash. 5. Turn the alarm off by holding the remote control 1cm from the infrared receiver and pressing the button. The alarm will beep 3 times and it is now turned off, this will then allow you to resolve the issue. To reset the alarm repeat step The alarm also features an anti-tamper switch which will cause the alarm to sound and the middle LED to flash if an attempt is made to lift the alarm from its position. Note: If the battery needs to be changed, press in both rectangular holes (using battery cover removal tool or a flat head screwdriver) on either side of the alarm to release the battery cover.
. Make sure the transparent cover is on the outside to enable maintenance for the alarm.")
11 Alarmed Recoiler Operation 1. Open the transparent cover with a small pozi screwdriver. Remove the green battery spacer. The alarm is then active. The LED will flash every seconds. Replace lid and tighten screws. 2. Secure the recoiler to a display counter (by adhesive or screws). Make sure the transparent cover is on the outside to enable maintenance for the alarm. Fix cable end connector and make sure the connector is secured to the display merchandise. 3. If a cable is cut, the alarm will be triggered immediately, and the LED light will keep flashing. The only way to turn off the alarm is to take out the battery. 4. How to change the battery: Remove the transparent cover. Press the two sides of the battery drawer to pull the battery out from the box. Install the battery according to the instructions on the battery drawer. Put the battery drawer back inside the box. If the battery is installed correctly, the LED light will flash every seconds.

12 4/8 imput and LEDs module

13 SYGMA alarm central with keypad


14 Other products Tablet alarm without stand Limpet Remote Control

")


15 Other products Lens sensor Lightning charging sensor (coiled and straight) Apple 30 pin charging sensor (coiled and straight) Micro usb charging sensor (coiled and straight)
InVue Installation Instructions
 InVue Installation Instructions Rev0 10.03.2014 Introduction This document contains step-by-step instructions for installing our products and securing your merchandise. Please contact InVue Security Products
3 ZONE WIREFREE BURGLAR ALARM INSTALLATION & OPERATING INSTRUCTIONS
 WIREFREE PIRs WIREFREE KEYPAD AND CASE WIREFREE REMOTE WIREFREE DOOR CONTACT ukpanels.com Please note: Before you start to install this Micromark Alarm, we advise that you should take adequate safety precautions
Kwêbeam GSM/Interface/Repeater Module
 1 Kwêbeam GSM/Interface/Repeater Module Features - Full Kwêbeam system control via SMS - Easy to use with no installation required - Built-in backup battery - 868Mhz Kwêbeam repeater functionality - One
ED4000 & ED5000 SERIES EXIT DEVICES with M61 ALARM OPTION and ED40AK & ED50AK ALARM RETROFIT KIT
 Installation Instructions ED4000 & ED5000 SERIES EXIT DEVICES with M61 ALARM OPTION and ED40AK & ED50AK ALARM RETROFIT KIT ED4000 & E05000 Series Exit Devices x M61 Alarm Option Available for all exit
AG HOME ALARM Quick Start Guide
 AG400011 HOME ALARM Quick Start Guide Step 1 Power on and SIM Card Installation 1. Remove battery cover of the alarm panel. 2. Insert a SIM card into the slot and connect the Li-ion cell 2000mAh 3.7V and
2-ZONE EASYFIT INTRUDER ALARM
 SIREN PIR SENSORS MM084 MM44 MAINS ADAPTOR DOOR CONTACTS Please note: Before you start to install this Micromark Alarm, we advise that you should take adequate safety precautions when using power tools
WIRELESS WaterSwitch
 WIRELESS WaterSwitch INSTALLATION & USER GUIDE SECTION 1 - LeakSafe WaterSwitch Components Water Valve Control and 4 x AA batteries Wireless Switch Motorised Valve and integrated cable LeakDetector Tab,
2-ZONE EASYFIT INTRUDER ALARM
 EXTERNAL SIREN MM05 PIR SENSOR DOOR CONTACTS -ZONE EASYFIT INTRUDER ALARM INSTALLATION & OPERATING INSTRUCTIONS IMPORTANT: PLEASE READ THESE INSTRUCTIONS CAREFULLY BEFORE ATTEMPTING TO INSTALL THIS ALARM
Authentic experience in a powered, secured display.
 Authentic experience in a powered, secured display. Series 2865 is a flexible, multi-position security system that allows retailers to secure multiple electronics and accessories on a single fixture or
DS9370-BEL. Installation Instructions TriTech Ceiling Mount PIR/Microwave Intrusion Detector
 DS970-BEL EN Installation Instructions TriTech Ceiling Mount PIR/Microwave Intrusion Detector DS970-BEL Installation Instructions.0 Installation Considerations.0 Installation Considerations Not suitable
Table of Contents What to Expect with. Tools Needed. Mounting Options. Wiring. Switch Housing.
 Table of Contents Congratulations on purchasing your new Hunter ceiling fan! It will provide comfort and performance in your home or office for many years. This installation and operation manual contains
MPS-500 e-drum set. assembly instructions
 MPS-500 e-drum set assembly instructions Musikhaus Thomann e.k. Treppendorf 30 96138 Burgebrach Germany Telephone: +49 (0) 9546 9223-0 E-mail: info@thomann.de Internet: www.thomann.de 22.08.2012 Table
IDM4 CARAVAN ALARM. Operating instructions
 IDM4 CARAVAN ALARM Operating instructions Factory Settings Entry Delay - 0:00 (0 secs) Exit Delay - 0:20 (20secs) Siren On Time - 1:00 (1 minute) Manufacturers Personal Code - 1234 Operation Alarm Keypad
Suits all KPF849 models
 Kambrook - Australia Ground Floor, Suite 2, 170-180 Bourke Rd Alexandria NSW 2015, Australia Locked Bag 2000 Botany NSW 1455 Customer Service Line 1300 139 798 Customer Service Fax 1800 621 337 www.kambrook.com.au
PONY 2/4 User Guide 2017
 PONY 2/4 User Guide 2017 Table of Contents Dose Selection 2 Cleaning 3 Waste Drawer 4 Programming 5 Formatting 6 Error Codes 8 software version v.2.12.01 August 2017 1 Dose Selection Standby All keys are
TECHNICAL INFORMATION Touchtronic Clothes Dryers
 TECHNICAL INFORMATION Touchtronic Clothes Dryers Includes: T1302, T1303, T1322, T1329ci T1403 & T1405 2004 Miele This page intentionally left blank. Table of Contents GENERAL INFORMATION A. Warning and
Alarm Getting Started
 Alarm Getting Started What s in your Ring Alarm Kit Contents 1. Connect Base Station Ring Motion Detector Ring Keypad 2. Set up devices 3. Start with Security 4. Explore 5. Troubleshooting Ring Base Station
Premium 8 Zone Wireless Alarm Kit
 Premium 8 Zone Wireless Alarm Kit INTRODUCTION The wireless alarm system is designed to protect your home. It is a simple to use, easy to install unit. No special tools or training are required, all fixings
MINIMED 670G SYSTEM CHANGING THE MINIMED MIO INFUSION SET QUICK REFERENCE GUIDE
 START HERE Wash your hands. Select Reservoir & Tubing. Press. Select Options. Select New Reservoir. Remove the infusion set you have been using by loosening the adhesive and pulling away from body. Remove
USER MANUAL QSDL503AD Intelligent Auto-Dial Alarm System
 USER MANUAL QSDL503AD Intelligent Auto-Dial Alarm System Rev 10.28.2009 TABLE OF CONTENTS Section 1: USAGE... 1 Section 2: FEATURES... 1 Section 3: PACKAGE CONTENTS... 1 Section 4: SYSTEM INSTALLATION...
, '0''/).''$ /*'( 1'%* 00) ',))% *)) $ 3:36;$ !"## $%& '()*+,,,( '()*
.''$ /*'( 1'%* 00) ',))% *)) $ 3:36;$ !## $%& '()*+,,,( '()*") -'*.'/ 0,%,)$ *'/1', '0''/).''$23456533-7860/*'( -0''/).''10))'' $).''%0/*' 1'%* 00) ',))% *)) 0 ))))%))( 3 0''/).''0',''.$'.)%*., 0).''( 39523$ 3:36;$ 0/*'/'.''./ %.)'
-'*.'/ 0,%,)$ *'/1', '0''/).''$23456533-7860/*'( -0''/).''10))'' $).''%0/*' 1'%* 00) ',))% *)) 0 ))))%))( 3 0''/).''0',''.$'.)%*., 0).''( 39523$ 3:36;$ 0/*'/'.''./ %.)'
Nafion Dryer. Installation Manual QUI Version 1.4. October 2013
 Nafion Dryer Installation Manual Version 1.4 October 2013 1. Installation on an Air Server series 1... 2 1.1. Standard Air Server series 1... 3 1.2. Inverted Air Server series 1... 5 2. Installation on
Q3200 Smart Home Alarm. Kit Content and Installation Guide
 Q3200 Smart Home Alarm Kit Content and Installation Guide Table of Contents 1. Introduction 1 2. Installation 4 3. Troubleshooting & Factory Reset 7 4. Specifications 9 Information and illustrations are
Installation Instructions
 Request-to-Exit Dual Technology Motion Sensor 1048889B November 2005 Copyright 2005, GE Security Inc. Introduction This is the GE Request-to-Exit Dual Technology Motion Sensor for models -W, -B, and -G.
OPTIGUARD Product catalogue
 OPTIGUARD Product catalogue One of the biggest challenges in arranging a retail display is an aesthetically pleasing and clean demonstration of various products. OPTIGUARD solutions, apart from displaying
Service Manual 26 Self Trimming Fireplace with 3 Stage Remote
 Service Manual 26 Self Trimming Fireplace with 3 Stage Remote Model Number: DF2690 MOD: 0 Dimplex North America Limited 1367 Industrial Road Cambridge ON Canada N1R 7G8 1-800-668-6663 www.dimplex.com REV
WARNING: Warns of health hazards and identifies possible risks of injury. CAUTION: Indicates possible dangers to the machine or other objects.
 VBT3ASV USER GUIDE SAFETY INFORMATION About this user guide Read this user guide completely before using the machine. Keep this user guide for reference. If you pass your machine on to third parties, it
shine TM Manual User guide and installation instructions The global leader in door opening solutions
 shine TM Manual User guide and installation instructions The global leader in door opening solutions Important notes Product features Product not designed for external use. Do not use a tool to force the
Optonic G3 Smart Alarm
 Optonic G3 Smart Alarm I t is a well known fact that the best ideas are obvious; after you see it done of course! Three heads, one circuit, one battery, one bar. Three alarms in one Obvious? Originally,
AXS Strikemaster Engineering Manual
 AXS Strikemaster AXS Strikemaster Programming and Operation Manual Jan 2014 Page 1 of 23 Table of Contents Important Note... 3 Features and Benefits... 3 Ordering Details... 4 Dimensions... 5 Installation...
π H-7241 AIR CUSHION MACHINE PARTS uline.com BOX CONTENTS
 π H-7241 AIR CUSHION MACHINE 1-800-295-5510 uline.com BOX CONTENTS Air Cushion Machine Film Roll Holder Spacing Gauge Maintenance Kit Power Cord User Manual PARTS Control Panel Film Roll Holder Sealing
Conversion of Gazco Upgradable Controls to Battery Remote Control
 Conversion of Gazco Upgradable Controls to Battery Remote Control Ensure that combustible materials are not placed next to or on top of the appliance when using this control. Especially when using the
CS150 OWNER S MANUAL DISCRIMINATOR METAL DETECTOR
 OWNER S MANUAL DISCRIMINATOR METAL DETECTOR FEATURES ==================================================== With your Discriminator Metal Detector, you can hunt for coins, relics, jewellery, gold and silver
Pre-Installation Instructions. Installation Instruction. Installation Instructions. kah. wall. Warning. User s Manual and warranty
 Pre-Installation Instructions Installation Instruction User s Manual and warranty Installation plate Junction valve Check if the accessories fit your toilet dimension and then install bidet seat. Remote
Service Manual 26 Self Trimming Export Fireplace with 3 Stage On/Off Remote
 Service Manual 26 Self Trimming Export Fireplace with 3 Stage On/Off Remote Model Numbers: DF2608-EU - MOD / to A DF2608-AU - MOD / Dimplex North America Limited 1367 Industrial Road Cambridge ON Canada
Bosch Smart Home. Motion Detector Instruction Manual
 Bosch Smart Home Motion Detector Instruction Manual Start making your home smart! Please be sure to install the Bosch Smart Home Controller first. Ensure that you have a Bosch Smart Home Controller and
Installation & Troubleshooting Requirements
 Installation & Troubleshooting Requirements Wiring Diagram Operation Sequence Presumptions: Main valve knob should always remain in the ON position Gas is bled to the valve Electrical is properly connected
Chapter 5 Inspection and maintenance
 Basic guide Chapter 5 Inspection and maintenance Bench-top type temperature (and humidity) chamber Chapter 5 Inspection and maintenance This chapter describes how to perform regular inspection and maintenance
Installation Instructions EFS Hand Washing Station
 Installation Instructions EFS Hand Washing Station Both water and soap are sequenced and dispensed from outlet. Override button allows for non potable, water-only dispensing. Lighted icons indicate the
OPTIGUARD s Merchandise Security Systems
 OPTIGUARD s Merchandise Security Systems 1 OPTIGUARD Integrating electronic solutions Exhibition and presentation of stock Dedicated solutions Security systems Electronic customer advice Software systems
Instruction Manual Machine P/N: # & #
 Instruction Manual Machine P/N: 1000830# & 1000831# 1 CONTENTS 1. INFORMATION...3 1. Introduction...3 2. Safety...3 3. Warning Notes...3 4. Contact...4 5. Electrical Installation Procedure...4 6. Plumbing
GLOBAL. InstallatIon & operation manual
 InstallatIon & operation manual INDEX 1. INTRODUCTION... 5 2. FEATURES AND FUNCTIONS 2.1 Reporting Options... 2.2 Interfaces... 2.3 Programming... 2.4 Indicators and Controls...... 6 6 6 6 6 3. INSTALLATION...
Installing your TV on the Linear Actuator Lift
 Installing your TV on the Linear Actuator Lift Thank you for choosing TVLiftCabinet.com. This lift is designed to support TV s with a maximum weight of 80 lbs. MISSING PARTS or HAVE QUESTIONS? CALL 561-417-0999
TS400 & TS410. Intruder Alarm Control Panels. Operating Instructions
 TS400 & TS410 Intruder Alarm Control Panels Operating Instructions Zone Location Home Set Chime 1 Armed / Omitted 2 Armed / Omitted 3 Armed / Omitted 4 Armed / Omitted 5 Armed / Omitted F. Exit Always
OPERATING and SERVICE GUIDE USA - Coin in / Ticket out Feature.
 OPERATING and SERVICE GUIDE USA - Coin in / Ticket out Feature. Produced by ; Harry Levy Amusement Contractor Ltd Unit 6 Patricia Way Pysons Road Industrial Estate Broadstairs Kent CT10 2LF Tel 01843 866
USER GUIDE WIRE-FREE HOME PROTECTION SYSTEM AG100+ CONTENTS
 CONTENTS USER GUIDE WIRE-FREE HOME PROTECTION SYSTEM AG00 Section Getting started. General system overview. Introduction to the system. Items included with the system. Introduction to the Smart Panel.5
Agrifim A675CT Timer. Frequently Asked Questions
 Agrifim A675CT Timer Frequently Asked Questions 1 Contents How do I put batteries into the timer?.3 What type of batteries can be used?...3 How long will batteries last?...3 How do you program the timer?...3
Register the Gateway via PC. Package Content. Gateway Installation. 1 x Gateway 1 x Voice Siren 1 x IP Camera*
 Package Content 1 x Gateway 1 x Voice Siren 1 x IP Camera* Register the Gateway via PC Create a new account at www.elro-smartalarm.com 1. Click on Create a new account 1 x PIR Motion 1 x Magnetic 1 x Remote
Model 850 Investigator s Aid Accelerant and Gas Detector Operation and Maintenance
 Model 850 Investigator s Aid Accelerant and Gas Detector Operation and Maintenance www.graceindustries.com M850TM1215 December 2015 1 1. Cover 2. Table of Contents 3. Top View 4. Features & Benefits 5.
Service Manual for X9.5 and Older Models
 Service Manual for X9.5 and Older Models I. Common Issues... 2 A. Direct Air Motor... 2 A.1. Direct Air Motor will not run.... 2 A.2. Direct Air Motor is making a squealing sound.... 2 B. Full Bag Indicator
Important Safeguards (For your safety, please follow the instructions below.) Specification. Warning. Thermal mixing valve faucet.
 Specification. Warning. Thermal mixing valve faucet.") INSTALLATION MANUAL Important Safeguards (For your safety, please follow the instructions below.) AUTOMATIC FAUCET Thermal mixing valve faucet Specification In this Instruction Manual, the following symbols
INSTALLATION MANUAL Important Safeguards (For your safety, please follow the instructions below.) AUTOMATIC FAUCET Thermal mixing valve faucet Specification In this Instruction Manual, the following symbols
NookBox Installation Guide Keypad. Installation Guide. NookBox Keypad (P / E )
") 1 Installation Guide NookBox Keypad (P119010 / E6309744) 2 NookBox Keypad (P119010 / E6309744) 3 Parts Identification 1. Active LED 2. Status LED 3. Fault Display LED 4. Arm Key 5. Home Key 6. Key Check
1 Installation Guide NookBox Keypad (P119010 / E6309744) 2 NookBox Keypad (P119010 / E6309744) 3 Parts Identification 1. Active LED 2. Status LED 3. Fault Display LED 4. Arm Key 5. Home Key 6. Key Check
SERVICE MANUAL. Ecoboiler Model range: T20 ( ) T30 ( )
 T30 ( )") SERVICE MANUAL Ecoboiler Model range: T20 (1000662) T30 (1000663) Marco Beverage Systems Ltd. 63d Heather Road, Sandyford Industrial Estate, Dublin 18, Republic of Ireland Ireland Tel: (01) 295 2674 Ireland
SERVICE MANUAL Ecoboiler Model range: T20 (1000662) T30 (1000663) Marco Beverage Systems Ltd. 63d Heather Road, Sandyford Industrial Estate, Dublin 18, Republic of Ireland Ireland Tel: (01) 295 2674 Ireland
Total Protection Alarm System
 Total Protection Alarm System SMARTHOME #7307 PAT. D410633 Patents Pending Your Guide to the Total Protection Alarm System SMARTHOME #7307 2 TABLE OF CONTENTS PACKAGE CONTENTS...4 OVERVIEW...5 PLANNING
ProStar Ceiling Fan PS52. Installation Instructions Instrucciones de instalación Instructions d installation
 ProStar Ceiling Fan PS52 Installation Instructions Instrucciones de instalación Instructions d installation Read and Save These Safety Precautions. Turn off electricity at main switch before wiring or
Full Size Canister Service Manual Riccar Models 1700 / 1800 Power Nozzles RPB-100 / RPB-220 / RPB-224 / RPB-250
 Full Size Canister Service Manual Riccar Models 1700 / 1800 Power Nozzles RPB-100 / RPB-220 / RPB-224 / RPB-250 Table of Contents I. General Full Size Canister Issues...2 A. Full Bag Indicator...2 1. General
LeakSafe. solutions. WaterSwitch2. Installation Instructions
 LeakSafe solutions TM WaterSwitch2 Installation Instructions QUICK USER GUIDE 1. Turning water ON or OFF using the WaterSwitch Valve Control To turn the water ON, press and hold down the WATER ON button
Wireless D.I.Y. Alarm Kit
 Wireless D.I.Y. Alarm Kit User Manual December 2010 MAMI 21 Hubert Mathew Road Illiondale 1610 Tel: +27 11 452 4737 Email: sales@mami.co.za page 2/10 General The Wireless DIY kit, is a pre-programmed,
SA1, SA2, SA2PF Wirefree Alarm System
 SA1, SA2, SA2PF Wirefree Alarm System 1 4 7 0 2 3 5 6 8 9 ON AIR 2 1 LOW BATT. Installation & Operating Manual FOREWORD All devices in these wirefree alarm systems are designed and manufactured to provide
UNDERWATER CAMERA HOUSING LEAK DETECTOR
 UNDERWATER CAMERA HOUSING LEAK DETECTOR Thanks for purchasing our Underwater Camera Housing Leak Detector. This device is designed to give early warning to underwater photographers of small water leaks
MAGNETIC ELLIPTICAL TRAINER SF-E3416 USER MANUAL
 MAGNETIC ELLIPTICAL TRAINER SF-E3416 USER MANUAL IMPORTANT: Please read this manual carefully before using the product. Retain owner s manual for future reference. For Customer Service, please contact:
ADT Home Security Starter Kit. Setup Guide
 PRINTER S INSTRUCTIONS: GUIDE,QUICK START,NOVA - NORTEK P/N: 10016840C- INK: BLACK PLUS PMS 286C - MATERIAL: 105G COATED PAPER - SIZE: 127MM X 142.24MM - SCALE: 1-1 - BINDING: TRIM, FOLD AND SADDLE STITCHED
SERVICE MANUAL MULTI DECK 60 HOT MERCHANDISER MULTI DECK 100 HOT MERCHANDISER MULTI DECK 120 HOT MERCHANDISER CLASSIC DECK HOT MERCHANDISER
 SERVICE MANUAL MULTI DECK 60 HOT MERCHANDISER MULTI DECK 100 HOT MERCHANDISER MULTI DECK 120 HOT MERCHANDISER CLASSIC DECK HOT MERCHANDISER Classic Deck Hot Multi Deck 60 Multi Deck 100 Multi Deck 120
SERVICE MANUAL REFRIGERATION
 SERVICE MANUAL REFRIGERATION Electrolux Home Products S.p.A. Spares Operations Italy Corso lino Zanussi, 30 I - 33080 Porcia (PN) Fax +39 0434 394096 S.O.I. Edition: 10.2006 Publication no. 599 38 38-50
CEILING FAN OWNER'S MANUAL
 Style that revolves around you. CEILING FAN OWNER'S MANUAL QUATRO 10/09 WARNING: Read and follow these instructions carefully and be mindful of all warnings shown throughout. GENERAL INSTALLATION & OPERATION
HX-80NRAM. High Mount Outdoor Detector
 Battery operated with 2 PIRs and HX-80NRAM anti-masking Battery operated Battery saving logic Compatible with most wireless transmitter Long distance detection area (24.0 m) Flexible detection area setting
Your Pope Simple Set Automatic Tap Timer
 Your Pope Simple Set Automatic Tap Timer gives you all the convenience of set and forget garden watering. Just select how long and how often you want to water your garden and the Pope Simple Set Automatic
G4S SMARTalarm User Guide
 G4S SMARTalarm User Guide CONGRATULATIONS WITH YOUR NEW SECURITY SYSTEM! We are glad that you have chosen G4S SMARTalarm. G4S is the largest supplier of security solutions in the world. We have invested
169MHz Telecare Devices Heat Detector
 169MHz Telecare Devices Heat Detector Where should Heat Detectors be fitted? Compatible with Reach at home alarms, Advent xt warden call, Altec Response and Touchsafe Pro Nursecall systems Alarm temperature:
setting up your wireless system P300W, C300W, D300W and wireless interface Standards NFS NFS EN 54-11
 setting up your wireless system P300W, C300W, D300W and wireless interface Standards NFS 61 936 NFS 32001 EN 54-11 Megalarm wireless system General points The Megalarm mini wireless fire alarm system is
Ceiling Fan Installation Instructions
 OWNER S MANUAL Ceiling Fan Installation Instructions Total fan weight For 5SKR52XXD Series Fans READ AND SAVE THESE INSTRUCTIONS QUALITY CEILING FANS Installation SAFETY TIPS WARNING: TO REDUCE THE RISK
 www.eraeverywhere.com ERA Home Security Straight Road, Short Heath, Willenhall, West Midlands, WV12 5RA email: alarms @ eraeverywhere.com Customer Helpline: 0345 257 2500 Vault_V1.0_3616 IMPORTANT Table
MPS-425 e-drum set. assembly instructions
 MPS-425 e-drum set assembly instructions Musikhaus Thomann Thomann GmbH Hans-Thomann-Straße 1 96138 Burgebrach Germany Telephone: +49 (0) 9546 9223-0 E-mail: info@thomann.de Internet: www.thomann.de 20.07.2015,
6L PRESSURE COOKER. Instruction Manual. Model: PLA1424
 6L PRESSURE COOKER Instruction Manual Model: PLA1424 Due to ongoing product improvements, specifications and accessories may change without notice. Actual product may differ slightly to that depicted.
Installation. Leveling
 Your refrigerator was packed carefully for shipment. Remove and discard shelf packaging and tape. Do not remove the serial plate. Location Do not install refrigerator near oven, radiator or other heat
MINIMED 670G SYSTEM CHANGING THE MINIMED SILHOUETTE INFUSION SET QUICK REFERENCE GUIDE
 START HERE Wash your hands. Select Reservoir & Tubing. Press. Select Options. Select New Reservoir. Remove the infusion set you have been using by loosening the adhesive and pulling away from body. 5 Remove
ITI Caretaker Basic Commands
 ITI Caretaker Basic Commands System can be accessed by telephone or wireless keypad Zones - Up to 30 Wireless or 24 Hardwired Battery - 12 volt 1.9 amp rechargeable Lead-Acid inside main panel, only found
INSTALLATION GUIDE NZ AU
 DISHWASHER DW60U6I & DW60U2I models INSTALLATION GUIDE NZ AU 1 SAFETY AND WARNINGS 100 lb 45 kg! WARNING! Electrical shock hazard Before installing the dishwasher, remove the house fuse or open the circuit
EcoVision Door Manual
 EcoVision Door Manual for Reach-In (RMTD) Merchandisers Installation & Operation Manual Shipped With Case Data Sheets IMPORTANT Keep in store for future reference! MANUAL- I/O ECOVISION REACH-IN DOORS
ALC-PACK3. WiFi Alarm System with HD WiFi Camera. User Manual. Your Watchguard Wireless Security professional:
 status ALC-PACK3 WiFi Alarm System with HD WiFi Camera User Manual Your Watchguard Wireless Security professional: www.activeonline.com.au 1300 816 742 Foreword Congratulations on your purchase of the
Lite. Installation Manual User Guide
 Lite Installation Manual User Guide C Security Systems AB 2017 Contents Installation manual p. 2 1. Creating the user account 2. C-pod Lite start up 3. Install the C-pod Lite unit 4. Purchase a service
Syringe Pump. User Manual
 Syringe Pump User Manual Specifications Length Height Width Weight Waterproof Rating Battery 30 cm 13 cm 12.5 cm 1.8 kg IPX3 Rechargeable Li Polymer 7.4 V 1900 mah 6 Hour Battery Life Running 3 Hours When
Closomat Lima Vita installation & user guide
 Closomat Lima Vita installation & user guide design manufacture supply install service recycle Technical data The Closomat toilet MUST be installed by a competent or qualified person. Explanation of symbols
BOILING UNIT REDITAP. Installation and User Guide. IMPORTANT: This booklet should be left with the user after installation and demonstration
 in tap Boiling water to in tap sink Drain Valve (as high as possible) REDITAP CONNECTION SUMMARY Amp mains supply cold mains water into in tap optional filter cold water in hot water BOILING UNIT Installation
SMART HAL. User Guide. Red Shield. Wire-Free Home Alarm System with Phone Dialer. Model # WS-98X-01. Patent Pending.
 Red Shield SMART HAL Wire-Free Home Alarm System with Phone Dialer Patent Pending www.redshieldsecurity.com User Guide 2014 Red Shield Security Limited. All rights reserved. Red Shield logo is the trademark
Total Connect Box. User manual
 Total Connect Box User manual 1 Congratulations on your purchase of the Honeywell Total Connect Box security system. To make the best out of your system we advise you to read this manual carefully. This
RCR-REX Request-to-Exit Dual Technology Motion Sensor Installation Guide
 RCR-REX Request-to-Exit Dual Technology Motion Sensor Installation Guide Introduction This is the Interlogix RCR-REX Request-to-Exit Dual Technology Motion Sensor Installation Instructions for models RCR-REX-W,
NextGen Home Security. Quick Reference Guide
 TM NextGen Home Security Quick Reference Guide Fire Auxiliary Panic (not active) Stay Away Chime Reset Bypass To view the full user manual, go to www.bellaliant.net/homesecurity and select Support. Arming
C-IV 60 CEILING FAN READ AND SAVE THESE INSTRUCTIONS. FAN RATING AC 120V. 60Hz
 C-IV 60 CEILING FAN READ AND SAVE THESE INSTRUCTIONS FAN RATING AC 120V. 60Hz Please do not use any electric or battery powered tools in the assembly and installation of this or any Matthews Fan Company
Operation - the PIR internal movement sensor. Operation - the tilt sensor. Operation - awning light. Operation - marker / tail lights
 mobile alarm system Introducing the new Sargent STINGER 300 series modular alarm system. The Stinger 300 alarm system is almost identical to the Stinger 310 version, therefore the same user instructions
Features TREASURE HUNTER S CODE OF ETHICS
 63-3013.fm Page 3 Wednesday, July 26, 2000 9:42 AM ˆ Features With your Famous Trails Metal Detector, you can hunt for coins, relics, jewelry, gold, and silver just about anywhere. The Metal Detector is
G-10f/GCG-10f UPRIGHT COOLER
 G-Series Cooler G-10f/GCG-10f UPRIGHT COOLER Manual is for the following models: G-10F, G-10-F33EB GCG-10F, GCG-10-F33EB GCG-10F2, GCG-10-F233EB G-10-F33EB-HC, GCG-10-F33EB-HC GCG-10-F233EB-HC Instruction
The Challenger. Quick Reference User Guide
 The Challenger Quick Reference User Guide INTRODUCTION The Challenger panel combines sophisticated design with versatility. It is easy to user; and this, together with it s many other features, makes the
SA3. 6 Zone Wirefree Alarm System. Installation & Operating Manual 0 # ESC ENTER ZONE 1 ZONE 2 ZONE 3 ZONE 4 ZONE 5 ZONE 6 ZONE 7 ZONE 8
 SA3 6 Zone Wirefree Alarm System ZONE 1 ZONE 2 ZONE 3 ZONE 4 ZONE 5 ZONE 6 ZONE 7 ZONE 8 1 2 3 4 5 6 7 8! 9 * 0 # ESC Installation & Operating Manual FOREWORD This Wirefree Alarm System has been designed
Colour also can display the time Build a LED colour clock
 Colour also can display the time Build a LED colour clock Not all clocks use digits to display the time. This neat little clock tells you the time by using different colours for each digit. The colours
CryoFit. Handling of Flow Cell and Capillaries. User Guide. Version 002
 CryoFit Handling of Flow Cell and Capillaries User Guide Version 002 Copyright by Bruker BioSpin NMR GmbH. All rights reserved. No part of this publication may be reproduced, stored in a retrieval system,
INSTRUCTION MANUAL FOR: WIRELESS SECURITY STARTER KIT MODEL NO: SWSKIT
 INSTRUCTION MANUAL FOR: WIRELESS SECURITY STARTER KIT MODEL NO: SWSKIT B. Operation i. Powering up the Key Fob Remote Control ii. Enrolling the Remote Control onto the Smart Panel iii. Operating the Key
Service Instructions
 BASIC EXCELLENT PERFECT U Universal ovens I Incubators S Sterilisers Service Instructions Mo Tu We Th Fr Sa Su t3 on off h t2 t1 t4 loop 4 3 2 1 STERI DEFRO C MIN MAX C IN 1 IN 2 OUT IN 1 IN 2 OUT % rh
status AW1 Plus WiFi Alarm System User Manual
 status AW1 Plus WiFi Alarm System User Manual Foreword Congratulations on your purchase of the AW1 Plus Alarm system. Before you commence installation we recommend that you unpack the product, familiarise
- website: Vax Ltd., Kingswood Road, Hampton Lovett, Droitwich, Worcestershire WR9 0QH, UK
 V-026PT User Guide.qxd 7/9/06 15:13 Page 12 EEC STATEMENT OF COMPLIANCE Manufacturer/EEC importer: Vax Limited, hereby on our own responsibility, declare that the product V-026PT is manufactured in compliance