XG-37 ROTARY BAR GLASSWASHER. Standard Features :
|
|
|
- Jessie Ford
- 5 years ago
- Views:
Transcription

 rinse, providing clean glasses that")


1 XG-37 ROTARY BAR GLASSWASHER Standard Features : Fill and dump style cycle uses less water and energy than traditional rotary glasswashers. Unit plugs into standard 120V electrical outlet for an easy installation. Computer controlled fill cycle allows for 75 F (24 C) rinse, providing clean glasses that are cool to the touch. The sliding cover and cold water rinse prevent steam from escaping during and after the cycle. Unique drainboard top provides integrated glassware landing area. Exclusive design with side notch provides space for three one-gallon chemical containers within the 24" by 24" foot print. Conveyor advance switch rotates conveyor one-half turn for easy loading and unloading of glassware. Covers and drainboard top are easily removable for cleaning access. Pre-programmed de-liming cycle for easy removal of mineral deposits during maintenance (de-liming agent must be added). Conveyor and stationary spray box are easily removed for cleaning and visual inspection. Automatic peristaltic metering pumps accurately dispense detergent, sanitizer, and rinse aid.


.")


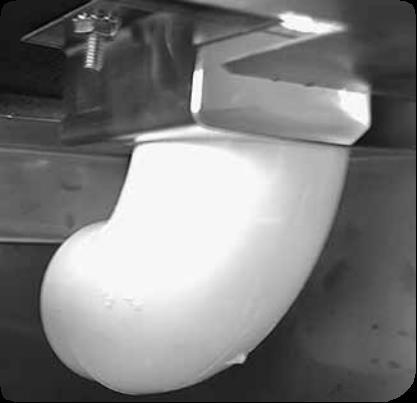
2 Unique drainboard top provides integrated glassware landing area. Covers and drainboard top are easily removable for cleaning access. The sliding cover prevents water and steam from escaping during operation and reduces operating noise. Additionally, the cold water rinse eliminates steam billowing out at the end of the cycle. 59% Easy to clean membrane switch panel includes : LESS WATER Conveyor advance switch that rotates conveyor one half turn for easy loading and unloading of glassware. Priming switches for easy priming of chemical pumps. Fill and dump style cycle results in up to 59% less water consumption than common industry rotary glasswashers. De-liming cycle for easy removal of mineral deposits during maintenance (de-liming agent must be added). No curtain and soft-start conveyor help to ensure no glasses tip over during operation. Full 10 of clearance height for washing glassware and pitchers. Can wash up to 18 glasses per minute, easily handling the output of multiple bartenders using typical glassware. (A complete cycle is 2 minutes, 15 seconds) 87% LESS ENERGY Fill and dump operation means no maintenance heater and low utility bills. Uses up to 87% less energy than common industry rotary glasswashers. Virtually no idle energy use. Durable water recirculating pump has stainless steel housing and impeller (shown with cover removed) Pumped wash and rinse ensures water line pressure variances do not affect wash results. XG-37 is equipped with a slide-out chemical bottle rack for easy access to chemical bottles.
3 The XG-37 has a fill and dump style cycle but the comparisons to traditional fill & dump style machines end there. In addition to the cold water rinse, this glasswasher is specifically designed to align with underbar equipment. It also has a sliding cover for access to glassware, which improves bartender work flow by eliminating the door extending into the aisle. Control board Delays cycle start until incoming water is at least 120 F (49 C) to ensure excellent wash results. Allows lengthened fill time without increasing overall cycle time for installations with less than normal water volume. Allows 75 F (24 C) cold water rinse temperature for clean glasses that are cool to the touch. Permits easy chemical pump adjustments. Slide-out circuit board tray allows for easy service access. Switch turns of the machine if the cover is slid open during the spray portion of the cycle to prevent over spray. The cycle resumes if the cover is closed within 30 seconds. Automatic peristaltic metering chemical pumps: Removable front and side panels for easy service access. Third chemical pump included for use with rinse aid to ensure no spotting. Front-mounted for easy visual inspection. Accurately dispense detergent, sanitizer, and rinse aid. Specifications : General Plumbing [Hot water and cold water required] Plumb with 1/2" water supply. Adapt to 3/8" FMPT Minimum water pressure is 25 PSI Maximum water pressure is 100 PSI. Install water pressureregulator if line pressure is over 100 PSI. Water valve on unit has built-in strainer and flow control to provide consistent volume between 25 and 100 PSI Install separate water shut-off valve Unit has built-in air gap - vacuum breaker is not required Consumption is 3 gallons per cycle Hot Water Supply Maximum temperature is 150ºF (66ºC) Minimum temperature is 130ºF (54ºC) Cold Water Supply No minimum temperature requirement Drain 1-1/2" tailpiece. Use open type floor drain for maximum drainage Electrical 120V, single phase, 60Hz, 6-foot grounded cord included Dedicated 15 amp circuit recommended Power requirements amps Detergent* Extra heavy duty, non-foaming, commercial liquid dishwashing detergent is required -.30% concentration Consult local chemical supplier to match detergent with local water conditions Sanitizer* Liquid chlorine bleach (sodium hypochlorite % solution) adjusted to 50 ppm Rinse Aid* Liquid Rinse Aid adjusted for proper sheeting * Detergent, Sanitizer, and Rinse Aid containers are stored externally. The side cut-out in the machine provides space for three one-gallon chemical containers within the 24 x 24" foot print of the machine. Operation / Capacity 120 F (49ºC) minimum wash temp and rinse temp adjustable down to 75 F (24ºC) 2 minute 15 second cycle 2-3/4" diameter bar glasses - 41 per cycle 2-1/2" diameter bar glasses - 49 per cycle Maximum glass height 10" Materials 20 gauge stainless steel parts include: cabinet 18 gauge stainless steel parts include: floor and tanks 16 gauge stainless steel parts include: leg mounting brackets and legs 11 gauge stainless steel parts include: drive wheel Service Access Front panel is removable for service Optional Accessory Export transformer 220V/50Hz electrical (price on request)
4 Drain stopper is controlled by a quiet and reliable gear motor with linkage cam instead of a noisy solenoid valve. Conveyor easily lifts out for cleaning access. Chemical fill is easily visible by sliding the cover open during the fill portion of the wash and rinse cycle. Special mounting bracket allows for easy service access to water recirculating pump. Incoming water line has built-in air gap so no separate vacuum breaker accessory is required. Stationary spray box simply unlatches for easy visual inspection and cleaning. Dimensions : 24" Sliding Door Open 30" 30.75" 10-3/32" 14.75" 24" PLAN VIEW 7" 6" FRONT VIEW SIDE VIEW Mechanicals : 24" NOTE: 1. In all cases, consult local plumbing, electrical and health codes for regulations which may not be consistent with the information on the front of this specification sheet 7" " 2. The utility connections are made from the floor at the bottom of the unit approximately 7" to 8" high. 3. The Jet-Tech policy of constant quality improvement means specifications are subject to change without notice " 3 5" " 1 = DRAIN 2 = HOT WATER 3 = COLD WATER 4 = ELECTRICAL 4.312" 10.5" 7.5" 4 9" MVP GROUP CORPORATION 5659 Royalmount Ave. Montreal QC, Canada H4P 2P9 Tel: / Fax: / sales@mvpgroupcorp.com

5 Operation Manual XG-37 Glasswasher Rev Jet-Tech
6 Index Topic Page Introduction...1 Utility Requirements and Connections...2 Uncrating and Assembly Instructions...2 XG-37 Parts Identification...3 Start-Up Instructions Water Level/Temperature Adjustment Procedure...4 Chemical Adjustment Procedure...5 Control Panel Operation...6 Wash Cycle Description...6 Wiring Diagram...7 Cleaning Instructions De-liming Procedure...9 Slide-Out Chemical Bottle Rack Installation...10 Useful Information About Water, Detergent and Sanitizer Important Information about Chemicals...12 Tips for Trouble-Free Operation...12 Trouble Shooting Guide...13 Warranty...14 MVP Group Corp Royalmount Ave., Montreal, QC, Canada H4P 2P9 Tel: / Fax: / sales@mvpgroupcorp.com -
7 Introduction This manual describes the operational features of the XG-37 model glasswasher. Please review this information before attempting installation and operation. Long term, troublefree operation will follow if good housekeeping and maintenance procedures are followed. Thank you for selecting Jet-Tech products. Note the Simplicity: Function Wash Rinse and Sanitize Design Hot water and a preset portion of detergent join in the tank. During operation, hot soapy water is pumped in a forceful, but gentle, spray pattern across the moving glassware. When the wash cycle is complete, all water is drained. While the drain is still open, clean water pre-rinses the holding tank to prepare for the rinse and sanitize cycle. Fresh water and a preset portion of sanitizer and rinse aid join in the tank. During operation, rinse water is pumped in a forceful, but gentle, spray pattern across the moving glassware. At the end of the cycle, all water is drained so the next load can begin with fresh, clean water. Please read on to learn more about this simple machine. MVP Group Corp Royalmount Ave., Montreal, QC, Canada H4P 2P9 Tel: / Fax: / sales@mvpgroupcorp.com - 1
8 Utility Requirements and Connections 1. General Plumbing (Hot and cold water required) a. Use 1/2" OD (or larger) copper to 3/8" FMPT adapter provided. b. Minimum water pressure - 25 PSI. c. Maximum water pressure PSI. Install water pressure regulator if line pressure is over 100 PSI. Water valve on unit has built-in strainer and flow control to provide consistent volume between 25 and 100 PSI. d. Install separate water shut-off valve for each connection. e. Unit has built-in air gaps - vacuum breakers NOT required. 2. Hot Water Wash a. Maximum temperature 150 F (66 C). Minimum supply temperature 130 F (54 C) to ensure a minimum wash temperature of 120 F (49 C). 3. Cold Water Rinse a. No minimum cold water inlet temperature. Control module automatically tempers rinse based on temperature setting (see Start-Up Instructions page 5, Step 5). 2. Drain a. 1-1/2" tailpiece provided on unit. b. Use open type floor drain for maximum drainage. 3. Electrical a. 120V, single phase, 60Hz, 6-foot grounded cord included. b. A dedicated 15 amp circuit is recommended. c. Power requirements amps. 4. Detergent a. Extra heavy-duty non-foaming commercial liquid dish detergent required. Adjust to.30% concentration. b. Consult The local chemical supplier to match detergent with local water conditions. 5. Sanitizer a. Liquid chlorine bleach (sodium hypochlorite % solution) adjusted to 50 PPM. 6. Rinse Aid a. Liquid Rinse Aid adjusted for proper sheeting. 7. Notes a. In all cases, consult local plumbing, electrical, and health codes for regulations which may not be consistent with the above. b. Utility connections are made up from the floor at the bottom of the unit approximately 6" high. c. A side notch located on the left side of the unit provides space for three one-gallon chemical containers within the 24" x 24" footprint. The glasswasher is shipped in one carton. Refer to the images on the opposite page to identify the following: 1. Main section 2. Drainboard insert 3. Drainboard pan 4. Sliding cover 5. Inner cover Uncrating and Assembly Instructions 6. Conveyor 7. Spray box 8. Spray box gasket 9. Tank screen 10. Drain stopper 11. Inlet screen 12. Scrap tray 13. Water inlets 14. Chemical inlets Assembly Procedures: 1. Remove all packaging from the main section. 2. Remove plastic protective paper from all stainless steel parts. 3. Place glasswasher in position and level by adjusting the bottom portion of the stainless legs. 4. Make plumbing connections in accordance with utility requirements listed above. 5. Install chemical bottle rack accessory if ordered with unit. See page 10 for installation instructions. 2 MVP Group Corp Royalmount Ave., Montreal, QC, Canada H4P 2P9 Tel: / Fax: / sales@mvpgroupcorp.com -


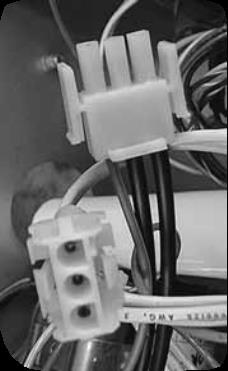
9 Digital temperature gauge Control Panel XG-37 Part Identification* 2. Drainboard insert 3. Drainboard pan 5. Inner cover 4. Sliding cover Chemical feed lines 1. Main section Chemical pumps 12. Scrap tray Slide-out holder for chemicals Top View 6. Conveyor 7. Spray box 8. Spray box gasket Drain hole for drainboard pan drain tube Front Panel Removed Water inlet lines Optional empty chemical switches 9. Tank screen 10. Drain stopper Drainstopper cam and linkage arm Circuit Board 11. Inlet screen 13. Water inlets 14. Chemical inlets * For a more comprehensive parts list, reference the XG-37 Parts Directory. MVP Group Corp Royalmount Ave., Montreal, QC, Canada H4P 2P9 Tel: / Fax: / sales@mvpgroupcorp.com - 3


10 Start-Up Instructions WARNING: The chemicals used in commercial glass washing are very harsh. Exposure to human skin can cause severe burns. Chemical containers should be stored in a manner and/or location that prevents them from spilling or splashing. Chemical containers must be secured. Please consult your chemical vendor to ensure proper storage or call the Jet-Tech factory to purchase an accessory chemical storage drawer, part number Place chemical Feed Lines into the proper chemical containers. Red - Detergent Blue - Rinse Aid Clear - Sanitizer 2. After utility connections described on page 2 are completed, plug in glasswasher. 3. Prime Chemical Pumps: Slide cover open to view chemical inlets. Depress Prime switches to fill Feed Lines (see page 6 - Control Panel Operation). Stop priming when chemicals come out of inlets. NOTE: Always run a complete cycle or dump clean water in the tank after using the prime switches. Undiluted chemicals will damage stainless steel. Chemical inlets 4. Fill Level Adjustment: Cycle the glasswasher to check water fill level (water fill level is preset at the factory but may require adjustments due to variations in water pressure/flow at installation location). With the sliding cover open, initiate cycle by pressing Cycle Start (see page 6 - Control Panel Operation). When fill is complete, verify that the water level is at the FILL mark (top of the drain screen handle - see photo below). If water level is correct, skip to Step 5. If water level is above or below the fill mark, fill adjustment is required. Unplug glasswasher and remove front panel. Adjust the Fill adjustment knob on the circuit board. Turn knob clockwise to increase fill time or counterclockwise to decrease fill time. Leaving the sliding cover open will end the cycle and drain the tank after 30 seconds and cycle can be restarted to check water level again. Once water level is correct, continue with Step 5. FILL mark - top of drain screen handle Adjust circuit board knobs as needed Circuit board slides out for easy access 4 MVP Group Corp Royalmount Ave., Montreal, QC, Canada H4P 2P9 Tel: / Fax: / sales@mvpgroupcorp.com -
11 Start-Up Instructions 5. Rinse Temperature Adjustment: With the sliding cover closed, initiate a cycle by pressing Cycle Start to check rinse water temperature (Rin Temp knob is set fully open at the factory and may require adjustment at installation location). Machine will perform wash cycle and proceed to rinse cycle. NOTE: Wash cycle water temperature must register between 120 F (49 C) and 150 F (66 C). Adjust hot water supply source if necessary. During rinse cycle (recirculating pump must be on to mix and stabilize temperature reading), observe digital temperature read out. The sliding cover can also be opened, interrupting the rinse cycle to insert thermometer into the tank water. NOTE: Minimum rinse temperature is 75 F (24 C) per FDA Ordinance and Code for Food Service Establishments, Section 5-103(e)(2). If the rinse water temperature is at desired temperature, skip to Step 6. If the rinse water temperature is not correct, temperature adjustment is required. Unplug glasswasher and remove front panel. Adjust the Rin Temp knob counterclockwise to increase rinse temperature and clockwise to decrease the rinse temperature. NOTE: The cold water inlet supply minimum temperature may exceed 75 F, resulting in the inability to lower the water temperature further. Leaving the sliding cover open will end the cycle and drain the tank after 30 seconds and cycle can be restarted to check rinse temperature again. Once rinse water temperature is correct, continue with Step Chemical Concentration Adustment: With the sliding cover closed, initiate a cycle by pressing Cycle Start to check chemical settings. The chemical strengths should be tested with a professional test kit by the chemical supplier. Water samples should be taken during both the wash cycle and the rinse cycle. Proper concentration levels: Detergent -.30% concentration Sanitizer - 50 PPM (sodium hypochlorite [bleach]) Rinse Aid - until proper sheeting is achieved If chemical adjustment is correct, skip to Step 8. Unplug glasswasher, remove front panel, and adjust chemicals on the circuit board as required. Detergent: If the factory setting does not render the proper concentration, turn the Det adjustment knob clockwise to increase or counterclockwise to decrease the dispense time. Repeat chemical testing procedure and adjust again if necessary. Sanitizer: If the factory setting does not render the proper concentration, turn the San adjustment knob clockwise to increase or counterclockwise to decrease the dispense time. Repeat chemical testing procedure and adjust again if necessary. Rinse Aid: If the factory setting does not render the proper level of sheeting, turn the Rin Aid adjustment knob clockwise to increase or counterclockwise to decrease the dispense time. Run a test cycle to check wash results and adjust again if necessary. 7. Replace panel and plug in glasswasher. Repeat Step 6 to recheck chemical settings. 8. Your glasswasher is now ready for operation. MVP Group Corp Royalmount Ave., Montreal, QC, Canada H4P 2P9 Tel: / Fax: / sales@mvpgroupcorp.com - 5
12 Control Panel - Wash Cycle Control Panel Operation Power Detergent Prime Cycle Start Conveyor Advance De-liming In Use Sanitizer/ Rinse Aid Prime Cycle Start - Push to start wash cycle Power - Green light* indicates power to unit when illuminated In Use - Red light* indicates cycle in progress when illuminated Conveyor Advance - Push to rotate conveyor 1/2 turn to aid in loading/ unloading glassware Detergent Prime - Push and hold to prime detergent Sanitizer / Rinse Aid Prime - Push and hold to prime sanitizer and rinse aid De-liming - Push to start de-liming cycle * Alternating flashing of the red and green light indicates the sliding cover interlock switch has interrupted cycle or a chemical detection switch (optional accessory) has detected a chemical outage. Wash Cycle Description: 1. Load the conveyor with glassware. To aid in loading the conveyor, rotate the conveyor 1/2 turn by pressing the Conveyor Advance button on the control panel. 2. Close the sliding cover. 3. Cycle is initiated by pressing the Cycle Start button on the control panel. Once in cycle, the red In Use light will illuminate. 4. Wash water fill is initiated and the drain will close when hot water is sensed or 15 seconds into the cycle, whichever is sooner. 5. Detergent is automatically injected into the tank during fill. The sliding cover can be opened during fill to visually verify detergent is being injected into wash water.* 6. The wash cycle will automatically start once full. Opening the sliding cover during the wash cycle will pause the cycle, turning off the recirculating pump and conveyor. Closing the sliding cover will continue the cycle.* 7. At the completion of the wash cycle, the wash water will drain. 8. The rinse water fill is initiated with the drain open to rinse detergent from the tank. The drain then closes to allow the tank to fill. 9. Sanitizer and Rinse Aid are automatically injected into the tank during fill. The sliding cover can be opened during fill to visually verify chemicals are being injected into the rinse water.* 10. The rinse cycle automatically starts once the tank if full. Opening the sliding cover during the rise cycle will pause the cycle, turning off the recirculating pump and conveyor. Closing the sliding cover will continue the cycle.* 11. At the completion of the rinse cycle, the rinse water will drain. 12. The red In Use light will turn off, indicating that the cycle is complete. 13. Open the sliding cover. 14. Unload the glassware from the conveyor. Pressing the Conveyor Advance button will rotate the conveyor 1/2 turn to aid in unloading the conveyor. * NOTE: If the sliding cover is open for more than 30 seconds, the cycle will terminate and the tank will drain. Press Cycle Start to initiate a new cycle. 6 MVP Group Corp Royalmount Ave., Montreal, QC, Canada H4P 2P9 Tel: / Fax: / sales@mvpgroupcorp.com -
13 XG-37 Wiring Diagram R/W San pump R Det pump O/W Rinse pump O P Coveyor Advance P 24Vac Transformer Br/W C Bl Cycle Start Bl NO NC De-Lime Door Switch Y Y San / Rin Prime O O Br/W C Det Prime R R NO NC Low Det. Air Switch C NO NC Low San. Air Switch C Br/W NO NC Low Rinse Air Switch Br/W Control Box MC FS Bl/W Bl P Br Bl Y O R Y + Y - W/R B/W R B BARE R/W Temp Sensor MC TS Conveyor Soft Start 5 6 B Conveyor Moptor O W HOT 120 Vac Neutral Low Chemical Option MC K2HS Power Box Bl P R/W Br Hot Water Solenoid Cold Water Solenoid R W Bl/W Green Light Red Light B P C C B NO NC NO NC Drain Br Br Recirc Pump Y 120 Vac Neutral HOT MVP Group Corp Royalmount Ave., Montreal, QC, Canada H4P 2P9 Tel: / Fax: / sales@mvpgroupcorp.com - 7


14 Cleaning Instructions Regular maintenance of your Jet-Tech glasswasher will extend its useful life and lower the service costs. The following parts are removable for daily cleaning: 1. Drainboard insert 2. Drainboard pan 3. Sliding cover 4. Inner cover 5. Conveyor 6. Spray box 7. Spray box gasket 8. Tank screen 9. Pump inlet screen 10. Drain stopper 11. Scrap tray The daily cleaning procedures consist of the following steps: 1. Remove drainboard insert, drainboard pan, sliding cover, and inner cover. Wipe down each part as necessary. Drainboard insert Drainboard pan Sliding cover Inner cover 2. Remove the conveyor wheel. Any large debris found inside the machine, like broken glass, lemon seeds, stir sticks, and so on, should be removed. Conveyor 3. Remove and scrub clean the spray box, spray box gasket, and tank screen. Remove and wipe down the drain stopper. Remove any debris from the lower wash tank. Make sure nothing is clogging the pump inlet screen. The pump inlet screen can be removed for cleaning if necessary. Spray box Spray box gasket (located under spray box - not shown) Tank Screen Pump inlet screen Drain stopper 8 MVP Group Corp Royalmount Ave., Montreal, QC, Canada H4P 2P9 Tel: / Fax: / sales@mvpgroupcorp.com -


15 Cleaning Instructions 4. Remove the scrap tray and empty out any debris that may have passed through the tank screen. 5. Use a damp cloth to wipe down the entire wash tank. For more stubborn stains, use a nylon brush or a Scotch-Brite Stainless Steel Cleaner pad. Never use steel wool to clean stainless steel. Steel wool will cause the stainless steel to rust. Scrap tray 6. Re-assemble the glasswasher. Wash tank 7. Check Detergent, Sanitizer, and Rinse Aid containers. Refill or replace if empty. 8. Visually inspect the Chemical Inlets by opening the sliding cover during the wash and rinse cycle fill. You should notice detergent intermittently dripping into the tank during the wash fill and Sanitizer and Rinse Aid intermittently dripping into the tank during the rinse fill. NOTE: After verifying the chemicals have been dispensed, close the sliding cover to allow the glasswasher to resume cycle. If the sliding cover is left open for more than 30 seconds, the water will be drained and the cycle will terminate. In the event the cycle does terminate, push the Cycle Start button to initiate a new cycle. 9. Your glasswasher is now ready for operation Detergent, Sanitizer, and Rinse Aid Containers Chemical inlets De-liming Procedure When the interior is coated with a white chalky substance, perform the following de-liming procedure. De-liming should be executed after daily cleaning has been completed. 1. With the conveyor empty, press the De-Liming button. The red In Use light will illuminate. 2. The XG-37 holds 1.25 gallons of water - measure out the appropriate amount of de-liming solution. WARNING! Most de-liming chemicals are hazardous. Follow chemical manufacturers instructions very carefully! 3. During water fill, open sliding cover and pour de-liming chemicals into tank. Close sliding cover. 4. The de-liming cycle consists of a 5 minute wash and two rinse cycles. 5. The red In Use light will turn off after the de-liming cycle is complete. MVP Group Corp Royalmount Ave., Montreal, QC, Canada H4P 2P9 Tel: / Fax: / sales@mvpgroupcorp.com - 9
16 Useful Information About Water, Detergent, & Sanitizer Water Conditions Your water supply fits one of the following descriptions. Greater detergent consumption is required with hard water. Grains Parts Description Per Gallon Per Million Soft Less than 1.0 Less than 17.1 Slightly Hard 1.0 to to 60 Moderately Hard 3.5 to to 120 Hard 7.0 to to 180 Very Hard 10.5 and over 180 and over Detergent Titrating Instructions An Alkalinity Test Kit, as recommended by your chemical supplier, is required for proper chemical adjustment. Follow kit instructions to test. Sanitizer Titrating Instructions After the water has agitated during the rinse cycle, open the sliding cover and dip a Chlorine test strip into the tank for one (1) second. Immediately compare the strip to the scale on the side of the test strip container tube. Adjust sanitizer (bleach) to 50 PPM, and iodine type sanitizer to 12.5 PPM. NOTE: Leaving the sliding cover open more than 30 seconds will end the cycle and drain the tank. Important note: Glasswashers are NOT water conditioners. Consult local water conditioning experts to determine your specific water condition. 10 MVP Group Corp Royalmount Ave., Montreal, QC, Canada H4P 2P9 Tel: / Fax: / sales@mvpgroupcorp.com -
17 Important Information About Chemicals The XG-37 glasswasher has chemical pumps that automatically dispense chemicals into the machine. The detergent and sanitizer chemicals are supplied by a chemical vendor. Since the type of chemicals and the condition of water varies by region, the chemical pumps are not pre-set at the factory. The chemical pumps must be adjusted at start-up to achieve the proper titration levels or the machine may not produce good wash results. Typically, the chemical vendor is responsible for adjusting the chemical pumps. Since detergent and sanitizer chemicals play an important role in the performance of a glasswasher, understanding how the chemical pumps work and how to maintain them is very important. Reviewing the following information will help ensure the proper operation of your glasswasher and its chemical pumps: 1. CAUTION: Always cycle the machine after using the prime switches to rinse out the wash/rinse tank. Undiluted chemicals will damage stainless steel. 2. The chemical feed lines must be properly placed inside the appropriate chemical container. Damaged chemical lines will spill chemicals on the machine and floor and create poor wash results. 3. Every glasswasher requires chemical pump adjustment and titrating by a chemical vendor. Poor wash results will occur if the chemicals are not in proper concentration (see page 5, Step 6, for proper concentration levels). 4. Glasswasher chemicals are highly caustic and will cause severe burns when they contact human skin. These same caustic chemicals will also corrode stainless steel and destroy machine components. A glasswasher should be checked regularly for chemical leaks. Any leaks should be corrected immediately. 5. All of the chemical tubing on a glasswasher should be inspected regularly and replaced at least once per year. The highly caustic chemicals cause the chemical tubing to get brittle, and since leaking chemicals destroy glasswasher components, it is good preventative maintenance to replace chemical tubing often. The various tubing includes the lower tubing assembly or main chemical feed line, the pump squeeze tube (especially susceptible to damage), and the upper tubing assembly from the pump to the glasswasher tank. 6. Chemical vendors that deliver chemicals to your establishment are typically responsible for adjusting the chemical levels in your glasswasher. They are also helpful for assisting you with chemical tubing inspection and replacement. Nothing removes your responsibility for proper maintenance, but the chemical vendor will help. Tips for Trouble-Free Operation 1. NEVER, NEVER wash ash trays in the glasswasher. Since ashes are smaller than the opening in the Pump Inlet Screens, ashes can adhere to glasses. Also, with ashes recirculating in the wash water, the cleaning effectiveness of the detergent is greatly reduced. The final result of washing ash trays is dirty glasses. 2. For best results, run glasswasher full of glassware. This keeps the water and detergent consumption to a minimum and helps prevent glassware from tipping over. 3. Water spotting can occur when glassware is placed on a flat surface after washing, thus preventing air to assist the drying process. Make sure the proper shelf liner or drying surface is used. 4. Clearance below the top cover of the glasswasher allows for a maximum glass height of ten (10) inches. Keep this in mind when ordering beer pitchers and wine carafes. 5. Glasses which have been frequently washed by hand may have deposits of invisible film. Although initially appearing clean, these glasses may show unsightly signs of dirt after passing through the glasswasher. This unsightly condition will exist until the film is removed with frequent passes through the glasswasher, or it may be necessary to use a de-liming agent to clean glassware. 6. Do not place wet glasses into glass chillers or frosters. Allow glasses to dry and sanitizer odors to dissipate first. 7. Changing detergents may require readjustment of the Detergent Pump to maintain.30% detergent concentration. A greater volume of low strength detergent is required to maintain the proper level. 8. Only Jet-Tech replacement parts should be used. Components from other suppliers may result in machine malfunctions. Please consult your Jet-Tech service agent if service or technical assistance is required. The factory is also available to answer any operational questions. 11 MVP Group Corp Royalmount Ave., Montreal, QC, Canada H4P 2P9 Tel: / Fax: / sales@mvpgroupcorp.com -
18 Trouble Shooting Guide Trouble or Situation Cause Remedy A. Unit does not run 1. Sliding cover open 1. Close sliding cover 2. Out of chemicals 2. Replace and prime empty chemicals 3. No power (Power light off ) 3. Check power source 4. Defective switch panel 4. Replace switch panel 5. Wire connections poor, loose, or broken 5. Re-crimp and/or replace wire connection B. Unit experiences a delay (up to 15 seconds) before beginning a cycle 1. Incoming water does not reach minimum operating temperature 1. Check temperature of water source C. Conveyor runs but holding tank not 1. Water off 1. Turn water on filling 2. Bad water valve 2. Test valve, replace if necessary D. Conveyor moves intermittently 1. Glassware or debris blocking rotation of 1. Clear obstruction conveyor 2. Worn drive coupling 2. Replace drive coupling E. Water recirculating, conveyor not 1. Obstruction in tank area 1. Remove obstruction moving 2. Conveyor not engaged with conveyor 2. Rotate conveyor until it engages drive shaft 3. Worn drive coupling 3. Replace drive coupling 4. Defective drive motor 4. Replace drive motor F. Water not recirculating 1. Completely plugged pump inlet screen 1. Clean pump inlet screen 2. Defective recirculating pump 2. Replace recirculating pump G. Water leaking from recirculating 1. Defective pump seal 1. Replace pump pump housing - water on floor 2. Pump housing cracked 2. Replace pump H. Glasses slimy or soapy at end of cycle 1. Sanitizer feed line in detergent container 1. Clean line and place in proper container 2. Improper Rinse Aid setting 2. Adjust chemical setting I. Recirculating water pressure low 1. Spray box not latched properly 1. Latch spray box properly 2. Partially plugged pump inlet screen 2. Clean pump inlet screen Refer to page 8 cleaning instructions 3. Missing or worn spray box gasket 3. Replace gasket J. Detergent, sanitizer, and/or rinse aid 1. Chemical container is empty 1. Refill or replace container(s) not feeding properly 2. Feed lines will not fill 2. Replace defective parts. Notes: The detergent, sanitizer, or rinse aid product advances in the line on each stroke of the pump. The product should hold position between strokes. If the product falls back toward the supply container, one or more of the following conditions may exist: a. Debris in pump b. Split feed line c. Bad pump tube Replace parts as necessary K. Poor washing results 1. Clogged spray nozzles and dirty holding 1. Clean unit -see page 8 cleaning instructions tank 2. Detergent container empty 2. Fill container 3. Poor water conditions 3. Have filter or softener installed 4. Chemicals not adjusted properly 4. Call chemical technician 5. No hot water 5. Check temperature of water source MVP Group Corp Royalmount Ave., Montreal, QC, Canada H4P 2P9 Tel: / Fax: / sales@mvpgroupcorp.com
19 Warranty Statement MANUFACTURERS LIMITED WARRANTY MVP GROUP Corporation (MVP) hereby warrants all new warewashers bearing the name JET-TECH and installed within the United States of America and Canada to be free from defects in material and workmanship, under normal and regular usage and operation, for a period of one (1) year for parts and labor. Labor shall be paid to replace any part found to be defective within this same period. NOTE: Original warranty for Model F-14 is for one (1) year for parts and ninety (90) days for labor following the date of the original installation If a defect in material(s) or workmanship is detected; or found to exist within the stated period above, MVP, at its sole discretion, shall either repair or replace any original equipment manufacturers part which has proven to fail within the machine; providing that the equipment has not been altered or tampered with in any manner, has been installed correctly as per the owners manual, and maintained and operated in complete accordance with this manual. The labor cost to repair or replace any part proven to be defective, as per above clause(s), shall be covered by MVP; provided that: the service work was performed by an authorized Jet-Tech service agency; and that this agency installed an original and genuine Jet-Tech part in the machine. Any repair work performed by a nonauthorized service depot remains the sole responsibility of the user, and MVP will not be held responsible. The installation of any generic part will not be valid; and therefore voids this warranty. All authorized labor coverage shall be limited to regular hourly rates only. Any supplemental hourly rates or charges, such as weekends or emergency premiums remain the responsibility of the user. Exceptions to above warranty are: (A) Damages resulting from shipping, handling or abuse. (B) Incorrect installation and/or connections. (C) Adjustments or calibration of any parts. (D) Faults due to lack of regular maintenance or cleaning of any internal part(s). (E) Replacement of any wearable items such as: peristaltic squeeze tubing or gaskets. (F) Excessive lime, mineral, alkali or hard water conditions (in excess 1,6-3,2 mmol/l = PPM = 9-18 odh), and (G) Poor results due to: use of an incorrect type of detergent (for non-commercial type applications), and excessive or inadequate water temperature(s) or pressure conditions or incorrect use. MVP GROUP CORPORATION STATES THAT THERE ARE NO OTHER WARRANTIES, EXPRESSED OR IMPLIED, THAT ARE NOT SET FORTH HEREIN. MVP SHALL ASSUME NO OTHER RESPONSIBILITY, EI- THER DIRECT OR NON-DIRECT, OR BE LIABLE FOR ANY OTHER OR ADDITIONAL LOSS OR DAMAGE WHETHER BEING DIRECT OR CONSEQUENTIAL, AS A RESULT OF ITS EQUIPMENT. The manufacturer reserves the rights to alter design and specifications without notice. MVP Group Corp Royalmount Ave., Montreal, QC, Canada H4P 2P9 Tel: / Fax: / sales@mvpgroupcorp.com
20 XG-37 Wiring Diagram R/W San pump R Det pump O/W Rinse pump O P Coveyor Advance P 24Vac Transformer Br/W C Bl Cycle Start Bl NO NC De-Lime Door Switch Y Y San / Rin Prime O O Br/W C Det Prime R R NO NC Low Det. Air Switch C NO NC Low San. Air Switch C Br/W NO NC Low Rinse Air Switch Br/W Control Box MC FS Bl/W Bl P Br Bl Y O R Y + Y - W/R B/W R B BARE R/W Temp Sensor MC TS Conveyor Soft Start 5 6 B Conveyor Moptor O W HOT 120 Vac Neutral Low Chemical Option MC K2HS Power Box Bl P R/W Br Hot Water Solenoid Cold Water Solenoid R W Bl/W Green Light Red Light B P C C B NO NC NO NC Drain Br Br Recirc Pump Y 120 Vac Neutral HOT MVP Group Corp Royalmount Ave., Montreal, QC, Canada H4P 2P9 Tel: / Fax: / sales@mvpgroupcorp.com - 7

21 Parts Directory XG-37 GlassWasher.
22 Index Covers and Drainboard Tops Interior and Exterior Components Electrical Components Recirculating Pump and Related Parts Peristaltic Pump, Chemical Tubing, and Related Parts Drive Assembly Components Accessories Plumbing Components Recommended Spare Parts Inventory Parts Order Form


23 Covers and drainboard tops Part no. description Sliding cover Drainboard top Insert, drainboard top Inner cover Slide, plastic, sliding cover, (2 required)


24 InterIor and exterior ComPonents

 7. 01000620 Nut, drain tank mounting, overflow channel cover mounting, 1/4\"-20, zinc. 8. 01001413 Cover, overflow channel 9. 01001435 Cover, drain tank mist 10.")
 18.")
25 InterIor and exterior ComPonents Part no. description Assembly, conveyor Spray box Gasket, spray box Drain tank Bracket, front tank mounting Bolt, drain tank mounting, 1/4"-20x5/8", hex head (4 required) Washer, flat, drain tank mounting, 1/4"-20 (8 required) Lockwasher, split, drain tank mounting, 1/4" (8 required) Nut, drain tank mounting, overflow channel cover mounting, 1/4"-20, zinc Cover, overflow channel Cover, drain tank mist Screw, phillips pan head, 10x1/2, SS (1 required) Tank, complete (includes all welded components) Floor assembly Panel, right side Panel, left, upper Front panel drain side Access panel Switch panel (does not include membrane switch panel) Screw, phillips pan head, 10x1/2, SS (11 required) Screw, x 1-1/4", phillips, round head, zinc (3 required) Screw, x 3/8", phillips, trusshead, SS (2 required)


26 electrical ComPonents
 7. 01001464 Switch panel membrane 8.")
![01000592 Light, green, 125VAC [.591 or.592?] 9. 07000171 Red In Use light 10. 01000606 Gauge, digital temperature, with probe 11.](/docs-images/90/101793221/images/27-1.jpg "01001534 Screw, phillips truss head, 4-40x1\" (2 required) 01000618 Nut, 4-40, temperature gauge mounting (2 required) 12. 01000741 Retaining plate, temperature gauge sensor probe 13.")
 18.")
27 Part no. description electrical ComPonents Soft start module Main control module Relay module Electrical panel Transformer, primary VAC, secondary - 24 VAC, 40VA Screw, transformer mounting, x 3/8" phillips TH, MS, SS (2 required) Switch panel membrane Light, green, 125VAC [.591 or.592?] Red In Use light Gauge, digital temperature, with probe Screw, phillips truss head, 4-40x1" (2 required) Nut, 4-40, temperature gauge mounting (2 required) Retaining plate, temperature gauge sensor probe Nut, retaining plate, star, # Washer, retaining plate, star, # Plug, three wire Receptacle, three wire Plug, solderless terminal Power cord, 8' with grounded plug Switch, drain motor cam (2 required) Screw, drain motor cam switch mounting 4-40 x 1", PPH, MS, SS (4 required) Switch insulator (2 required) Clamp, cable, white nylon, 5/8" (6 required) Screw, phillips pan head (6 required) Wire harness, jumper Wire harness, chemical pump Wire harness, power Wire harness, switch panel Probe, temperature sensor for main control module Actuator, magnetic Bolt, 8-32 x 1/2", hex head (2 required)


28 recirculating PumP and related Parts
 3. 00000000 Clamp, hose (8 required) 4.")
29 Part no. recirculating PumP and related Parts description Pump kit, water recirculating (including items 1-8) Mounting kit (including items 2-8) Pump, water recirculating, all stainless construction Screw, 1/4"-20x1/2" phillips truss head (4 required) Clamp, hose (8 required) Hose, 1" ID x 1-1/4" OD x 1/8" (2 ft. required) Elbow, grey plastic high pressure braid (2 required) Nut, 1/4-20, Large Flange Serrated Nut (4 required) Bracket, pump Hose, 1"ID x 1-1/4"OD x 1/8" (3 inches required) Screen, inlet pump Screen, tank Shaft seal O-ring Impeller Acorn nut


30 PerIstaltIC PumP, ChemICal tubing, and related Parts
 3. 00000153 Screw, phillips, pan head, 10x1/2\" (4 required) 4. 01000596 Motor, drive, peristaltic pump 5.")
31 PerIstaltIC PumP, ChemICal tubing, and related Parts Part no. description Pump complete, triple, beta with tubing assemblies Pump complete, triple, beta LESS tubing assemblies Pump panel Clamp, cable white nylon, 5/8" ID (2 required) Screw, phillips, pan head, 10x1/2" (4 required) Motor, drive, peristaltic pump Pump cartridge kit, detergent, sanitizer, or rinse aid, with fittings 1/8" ID Pump cartridge and motor assembly, detergent, sanitizer, or rinse aid (consists of Pump cartridge kit and Motor, drive, peristaltic pump) Pump cartridge kit, peristaltic pump (no tubing) Pump tube, detergent, sanitizer, or rinse aid, with fittings 1/8" ID Tubing, clear, 1/8" ID x 1/4" OD (per foot) Grommet, three hole, rubber (chemical inlet) Inlet, detergent, sanitizer, or rinse aid, 1/8" x 1/8" Decal, detergent Decal, sanitizer Decal, rinse aid Tubing, assembly, lower, detergent (consists of , [5' length], chemical pick up, and tubing support) Tubing, assembly, lower, sanitizer (consists of , [5' length}, chemical pick up, and tubing support) Tubing, assembly, lower, rinse aid (consists of , [5' length], chemical pick up, and tubing support) Tubing, assembly, upper (consists of (3) [4' length], (3) , and ) Switch, liquid level (up to 3, optional) Clip, plastic (up to 6, optional) Ty-wrap, 4", nylon (up to 6, optional)


32 drive assembly ComPonents
 [attaches motor to motor mount] 6. 01001473 Bracket, motor mounting 7.")
![00000041 Bolt, 1/4"-20 x 5/8", hex washer head (4 required) [attaches motor mount to tank] 8. 01000956 Hub, flexible shaft coupling, 3/8" bore, motor side 9.](/docs-images/90/101793221/images/33-2.jpg "01000957 Sleeve, flexible shaft coupling 10. 01000958 Hub, flexible shaft coupling, 1/2\" bore, drave shaft side 11. 01001468 Bearing, thrust, drive shaft (1 required) accessories Part no.")
33 drive assembly ComPonents Part no. description Drive shaft Bearing, flange (2 required) Drive motor, drive wheel, 10 RPM (same as drain stopper) Fan blade, drive motor Screw, drive motor mounting, 8-32 x 1/4" hex washer head (4 required) [attaches motor to motor mount] Bracket, motor mounting Bolt, 1/4"-20 x 5/8", hex washer head (4 required) [attaches motor mount to tank] Hub, flexible shaft coupling, 3/8" bore, motor side Sleeve, flexible shaft coupling Hub, flexible shaft coupling, 1/2" bore, drave shaft side Bearing, thrust, drive shaft (1 required) accessories Part no. description Chemical bottle rack, slide out 1 14


34 PlumbInG ComPonents
35 PlumbInG ComPonents Part no. description Valve, water inlet Bolt, water inlet valve mounting, 1/4"-20 x 5/8", HWH Hose, nylon braider, water inlet (per foot) Clamp, hose, water inlet (6 required) Water line, hot Water line, cold Clamp, cable, white nylon, 1/2" (2 required) Nut, cable clamp, 1/4", zinc Cover, water inlet Assembly, screen, drain tank PVC, drain elbow, white, 1-1/2" IPS Bracket, drain elbow Nut, 8-32, drain elbow bracket Lockwasher, star, large, drain elbow bracket, # Drain stopper stem with hanger, stainless steel Drain stopper ball, grey rubber, reversible Drain stopper assembly (consists of and ) Drive motor, drain stopper, 10 RPM (same as drive wheel) Screw, drive motor mounting, 8-32 x 1/4" (4 required) Assembly, drain linkage arm Motor linkage Locknut, motor linkage mounting, 7/16"-14, nylon insert, zinc Bearing, flange (2 required) Linkage rod Nut, linkage rod, 1/4"-28, zinc (2 required) Cam, drain motor Screw, set, cam mounting, 5/16"-18 x 1/2" Ball joint assembly Locknut, ball joint assembly mounting, 1/4"-28, hex head, nylon insert Tubing, vinyl, clear drain line, 1/2" ID x 5/8" OD per foot (2 required) accessories Part no. description Adapter, water inlet valve, 1/4" MPT to 3/8" FMPT 16
GT-18, GT-18+1, GT-18+1L, GT-18+1R, GT-18+2, GT-18+2-IC Glasswashers (Manufactured after October 1, 1994 with motor driven drain stopper)
") Parts Directory GT-18, GT-18+1, GT-18+1L, GT-18+1R, GT-18+2, GT-18+2-IC Glasswashers (Manufactured after October 1, 1994 with motor driven drain stopper) GT-18+2 GT-18 Glastender, Inc. 5400 North Michigan
Parts Directory GT-18, GT-18+1, GT-18+1L, GT-18+1R, GT-18+2, GT-18+2-IC Glasswashers (Manufactured after October 1, 1994 with motor driven drain stopper) GT-18+2 GT-18 Glastender, Inc. 5400 North Michigan
OWNER S MANUAL DISHWASHER INSTALLATION AND MAINTENANCE F14 F16 F18 F20 F For operator. Do not discard.
 OWNER S MANUAL DISHWASHER INSTALLATION AND MAINTENANCE F14 F16 F18 F20 F22 727 737 747 767 For operator. Do not discard. Welcome to JET-TECH Creating endless possibilities! We have included information
Owner s Manual. Keep with machine for reference PKC24 INSTALLATION & OPERATION REV Perlick Corporation 8300 W Good Hope Rd Milwaukee, WI 53223
 Owner s Manual Keep with machine for reference PKC24 INSTALLATION & OPERATION REV.11.09 Perlick Corporation 8300 W Good Hope Rd Milwaukee, WI 53223 800-558- 5592 FAX 414-353- 7069 perlick.com TABLE OF
GLC/GW-100 MANUAL INSTALLATION SERVICE PARTS REV.1.01
 Owner s Manual Keep with machine for reference GLC/GW-100 MANUAL INSTALLATION SERVICE PARTS REV.1.01 CMA DISHMACHINES 12700 KNOTT STREET GARDEN GROVE, CALIFORNIA 92841 800-854- 6417 FAX 714-895- 2141 www.cmadishmachines.com
Operation Manual & Parts List
 Operation Manual & Parts List A Family Company Manufacturing In The USA Since 1969 GT-2, GT-30 Glasswashers (Manufactured after June 1, 1990 with digital temperature gauges) GT-2-CW GT-30-CCW Glastender,
Owner s Manual GW-100 MANUAL INSTALLATION SERVICE PARTS REV.1.00
 Owner s Manual GW-100 MANUAL INSTALLATION SERVICE PARTS REV.1.00 C M A D I S H M A C H I N E S 1 2 7 0 0 K N O T T S T R E E T GARDEN GROVE, CALIFORNIA 92841 800-8 5 4-6 4 1 7 F A X 7 1 4-8 9 5-2141 www.cmadishmachines.com
Owner s Manual GLC MANUAL INSTALLATION SERVICE PARTS REV.1.00
 Owner s Manual GLC MANUAL INSTALLATION SERVICE PARTS REV.1.00 C M A D I S H M A C H I N E S 1 2 7 0 0 K N O T T S T R E E T GARDEN GROVE, CALIFORNIA 92841 800-8 5 4-6 4 1 7 F A X 7 1 4-8 9 5-2141 www.cmadishmachines.com
KLE-235D DOUBLE RACK IN-LINE CONFIGURATION KLE-175GTM SINGLE RACK THREE-DOOR CONFIGURATION KLE SERIES ULTRA WASH DISHMACHINE INSTRUCTION MANUAL
 KLE-235D DOUBLE RACK IN-LINE CONFIGURATION KLE-175GTM SINGLE RACK THREE-DOOR CONFIGURATION KLE SERIES ULTRA WASH DISHMACHINE INSTRUCTION MANUAL 9600475 Rev: C (06/12) Page 1 of 8 INTRODUCTION The KLE-235D
USER AND TECHNICAL MANUAL
 PASTA COOKER Model : AX-SPG & AX-DPG USER AND TECHNICAL MANUAL GAS TYPE/PRESSURE Natural gas Propane gas PRODUCTION YEAR: SERIAL NR: MVP GROUP CORPORATION 5659 ROYALMOUNT MONTREAL, QC. CANADA H4P 2P9 Tel:
Operation Manual and Parts Directory
 Operation Manual and Parts Directory ST24, ST36, ST48, ST60, ST72 and ST96 Slide Top Coolers ST36-B ST48-SF Glastender, Inc. 5400 North Michigan Road Saginaw, MI 48604-9780 800.748.0423 989.752.4275 Fax
Operation Manual and Parts Directory
 Operation Manual and Parts Directory MF, MF6, MF8 Mug Frosters and Plate Chillers MF-S MF8-B Glastender, Inc. 00 North Michigan Road Saginaw, MI 860-9780 800.78.0 989.7.7 Fax 800.88.0888 / 989.7. www.glastender.com
EFFECTIVE: MAY, American Dish Service ADS MODEL: ASQ GLASSWASHER PARTS MANUAL. 900 Blake Street Edwardsville, Kansas (913) /08
 /08") EFFECTIVE: MAY, 2014 American Dish Service ADS MODEL: ASQ GLASSWASHER PARTS MANUAL 900 Blake Street Edwardsville, Kansas 66111 (913)422-3700 05/08 The American Dish Service part numbers contained in this
EFFECTIVE: MAY, 2014 American Dish Service ADS MODEL: ASQ GLASSWASHER PARTS MANUAL 900 Blake Street Edwardsville, Kansas 66111 (913)422-3700 05/08 The American Dish Service part numbers contained in this
A910.8A Remote Water Chiller, 8 GPH A A / A A-220V TECHNICAL ASSISTANCE TOLL FREE TELEPHONE NUMBER:
 Remote Water Chiller, 8 GPH A9100080-A / A9100080-A-220V TECHNICAL ASSISTANCE TOLL FREE TELEPHONE NUMBER: 1.800.591.9360 Technical Assistance Fax: 1.626.855.4894 NOTES TO INSTALLER: 1. Please leave this
The Classeq under counter range
 Installation & Operators Manual The under counter range Part number 902.0011 Revision C Effective date January 2010 Language English Glasswashers Eco 1 Eco 2 Eco 3 Duo 2 Duo 3 Dishwasher Hydro 500 Hydro
PARTS MANUAL. American Dish Service ADS LOW-WATER DISHWASHER MODELS: L3DW / L3DWC EFFECTIVE: MAY, 2008
 EFFECTIVE: MAY, 2008 ADS LOW-WATER DISHWASHER MODELS: L3DW / L3DWC PARTS MANUAL 900 Blake Street Edwardsville, Kansas 66111 (913)422-3700 05/08 The part numbers contained in this publication are replacement
Installation & Operators Manual
 Installation & Operators Manual Eco, Hydro and Duo under counter range Part number 902.0011 Revision A Installation and Operation instructions For Classeq under counter range of glass and dishwashers.
PARTS MANUAL. American Dish Service MODEL: 5-AG-S ADS LOW TEMPERATURE DISHWASHER EFFECTIVE: JULY, 2013 C 4/08
 EFFECTIVE: JULY, 2013 ADS LOW TEMPERATURE DISHWASHER MODEL: PARTS MANUAL 900 Blake Street Edwardsville, Kansas 66111 (913)422-3700 C 4/08 The American Dish Service part numbers contained in this publication
PLEASE RETAIN THIS MANUAL FOR FUTURE REFERENCES. This equipment is design engineered for commercial use only
 OWNER S MANUAL INSTALLATION OPERATION MAINTENANCE FRYER SRF-40/50 All equipment manufactured by SIERRA CORP. is for use with the type of gas specified on the rating plate and for installation will be in
B.I.C.A Built-In Coffee Appliance
 B.I.C.A Built-In Coffee Appliance Automatic Coffee Brewer Parts & Service Models: 1033510, 1033510S & 1033511 3828 S. Main St. Los Angeles, CA 90037-1491 800-421-6860 310-787-5444 Fax 310-787-5412 e-mail:
PARTS MANUAL. American Dish Service ADS CONVEYOR DISHWASHER MODELS: ADC-44 L-R/R-L EFFECTIVE: SEPTEMBER 1, 2001
 EFFECTIVE: SEPTEMBER 1, 2001 ADS CONVEYOR DISHWASHER MODELS: ADC-44 L-R/R-L PARTS MANUAL 900 Blake Street Edwardsville, Kansas 66111 (913)422-3700 211-0044L-R / 212-0044R-L ADC-44 Conveyor Dishwasher 2
INSTALLATION and OPERATION INSTRUCTIONS
 INSTALLATION and OPERATION INSTRUCTIONS perlick batch rotary glasswashers MODEL NOS. PKBR4 PKBR4L PKBR4R PKBR4L PKBR4 IMPORTANT INFORMATION This manual has been prepared to assist you in the operation
MODELS CMA-180 VL/180 VLTall PARTS MANUAL Rev 2.02A
 MODELS CMA-180 VL/180 VLTall PARTS MANUAL Rev 2.02A C M A D I S H M A C H I N E S 1 2 7 0 0 K N O T T A V E N U E GARDEN GROVE, CALIFORNIA 92841 800-8 5 4-6 4 1 7 FAX 714-895-2141 www.cmadishmachines.com
Operation, Cleaning and Maintenance Manual
 Operation, Cleaning and Maintenance Manual PRO Series Rack Conveyor Dishwashers Models: 44 PRO 66 PRO 70FF PRO 80HD PRO 44 PRO LISTED www.championindustries.com Issue Date: 2.2.17 Manual P/N 116113 rev.
Wilbur Curtis Company, Inc. Service Manual WB-10 Water Boiler
 MODELS INCLUDED WB-10-12 WB-10-60 CAUTION: Please use this setup procedure before attempting to use this appliance. Failure to follow the instructions can result in injury or the voiding of the warranty.
Model HC-2. Crathco Whipped Hot Chocolate Dispenser. Table of Contents. Operation and Instruction Manual. for
 Crathco Whipped Hot Chocolate Dispenser Operation and Instruction Manual Table of Contents Introduction...1 Specifications...2 Installation and Start-Up Procedures...2 How to Dispense Hot Chocolate...3
A Family Company Manufacturing In The USA Since 1969
 Operation Manual A Family Company Manufacturing In The USA Since 1969 GT-24 & GT-30 Glasswasher GT-24-C GT-30-CC Glastender, Inc. 5400 North Michigan Road Saginaw, MI 48604-9780 800.748.0423 989.752.4275
Installation & Operators Manual
 Installation & Operators Manual Eco, Hydro and Duo under counter range Part number 902.0001 Revison B Installation and Operation instructions For Classeq under counter range of glass and dishwashers. Section
STERO SD1. Low Temp Dishwasher MODEL: ML
 INSTRUCTION MANUAL STERO SD1 Low Temp Dishwasher MODEL: SD1 ML-130225 STERO, a division of Illinois Tool Works, Inc. 1758 Corporate Circle Petaluma, CA 94954 Phone: 800-762-7600 Fax: 707-762-5036 Website:
MODELS CMA-180 VL/180 VLTall PARTS MANUAL Rev 2.02B
 MODELS CMA-180 VL/180 VLTall PARTS MANUAL Rev 2.02B C M A D I S H M A C H I N E S 1 2 7 0 0 K N O T T A V E N U E GARDEN GROVE, CALIFORNIA 92841 800-8 5 4-6 4 1 7 FAX 714-895-2141 www.cmadishmachines.com
Installation Manual with Service Replacement Parts
 Installation Manual with Service Replacement Parts Rotary-type Conveyor Glasswasher Models: CGM7 Clockwise Rotation (access door front) CGM7 clockwise rotation (access door front) Glasswasher serial no.
OPERATIONS MANUAL & PARTS LIST. BX2 Fastracts Extractor. IPC Eagle 3650 Dodd Rd, Eagan MN
 OPERATIONS MANUAL & PARTS LIST BX2 Fastracts Extractor IPC Eagle 3650 Dodd Rd, Eagan MN 55123 800.486.2775 www.ipceagle.com BEFORE OPERATING THE MACHINE Read the manual carefully and completely before
Xaact Spot. Xaact Hot Spot
 Xaact Spot & Xaact Hot Spot INFORMATION & OPERATING INSTRUCTIONS READ AND UNDERSTAND THESE INSTRUCTIONS BEFORE OPERATING THE MACHINE 78-00012 Rev. 101211 1 CONTENTS: Machine Specifications............
Owner s Manual. MODELS AH/B/C/Scullery/Pizza/Bowl INSTALLATION & OPERATION Rev 1.01A
 Owner s Manual MODELS AH/B/C/Scullery/Pizza/Bowl INSTALLATION & OPERATION Rev 1.01A CMADISHMACHINES 12700 KNOTT STREET GARDEN GROVE, CALIFORNIA 92841 800-854- 6417 FAX 714-895-2141 www.cmadishmachines.com
MODEL CMA-180UC PARTS MANUAL Rev 1.18
 MODEL CMA-180UC PARTS MANUAL Rev 1.18 CMA DISHMACHINES 12700 KNOTT AVENUE GARDEN GROVE, CALIFORNIA 92841 800-854-6417 FAX 714-895-2141 wwwcmadishmachines.com TABLE OF CONTENTS MODEL CMA-180UC 1. PARTS
CMA Dishmachines Knott Avenue Garden Grove, CA Undercounter High Temperature Dishwasher. Service Replacement Parts.
 CMA Dishmachines 1700 Knott Avenue Garden Grove, CA 981 Toll Free: 1- (800) 8-617 Fax: 1- (71) 89-11 Service Replacement Parts Undercounter High Temperature Dishwasher Model: UC6e M Machine Serial No.
WAREMAX SERIES. Dosing Systems for Commercial Dishmachines. Contents. WAREMAX Series Dishwasher systems. 4 Priming and Delime Mode.
 WAREMAX SERIES Dosing Systems for Commercial Dishmachines Contents 1 Getting started.... Page 2 2 Installation... Page 3 3 Set-Up. Page 9 4 Priming and Delime Mode. Page 11 5 Probeless Mode..... Page 12
Water Boilers ME10EN, ME15EN. Table of Contents
 Water Boilers ME10EN, ME15EN Operator Manual Model ME15EN Model ME10EN Safety Information...2 Rough-In Drawing...3 Installation...4 Priming...5 Cleaning...5 Table of Contents Adjustments...6 Maintenance...7
DEMA 813 PROBELESS DEMAMaster TM INSTALLATION INSTRUCTIONS
 DEMA 813 PROBELESS DEMAMaster TM INSTALLATION INSTRUCTIONS Models: DM-813-PLLL-1T DM-813-PDLL-1T DM-813-PLLL-2T DM-813-PDLL-2T I-729 Pg 1 of 15 System Overview The DEMA DEMAMaster probeless series is designed
Glass and Dishwashers 402/452/502. (original instructions) (incl. Australian /502) Starting from Serial No.:
 (incl. Australian /502) Starting from Serial No.:") Glass and Dishwashers ECOMAX 402/452/502 (incl. Australian 452-90/502) INSTALLATION AND OPERATION INSTRUCTIONS (original instructions) Starting from Serial No.: 8663 4000 REV. 05.10.2015 EN IMPORTANT NOTES
Glass and Dishwashers ECOMAX 402/452/502 (incl. Australian 452-90/502) INSTALLATION AND OPERATION INSTRUCTIONS (original instructions) Starting from Serial No.: 8663 4000 REV. 05.10.2015 EN IMPORTANT NOTES
MODEL CMA-180UC SERVICE & PARTS MANUAL Rev 1.10
 MODEL CMA-180UC SERVICE & PARTS MANUAL Rev 1.10 CMA DISHMACHINES 12700 KNOTT AVENUE GARDEN GROVE, CALIFORNIA 92841 800-854-6417 FAX 714-895-2141 www.cmadishmachines.com 0203 TABLE OF CONTENTS MODEL CMA-180UC
Owner s Manual. Keep with machine for reference CMA DISHMACHINES KNOTT AVENUE GARDEN GROVE, CALIFORNIA FAX
 Owner s Manual Keep with machine for reference MODELS CMA-180/180 TALL Including 480V MACHINES Installation and Operation Rev 2.08 CMA DISHMACHINES 12700 KNOTT AVENUE GARDEN GROVE, CALIFORNIA 92841 800-854-
Operation Manual and Parts Directory
 Operation Manual and Parts Directory Lettuce Crisper LC Glastender, Inc. 5400 North Michigan Road Saginaw, MI 48604-9780 800.748.0423 989.752.4275 Fax 800.838.0888 / 989.752.4444 www.glastender.com Rev.
PINNACLE WAREWASH CONTROL By DEMA DP-812-DL-1T DP-813-DLL-1T DP-812-LL-1T DP-813-LLL-1T Introduction
 DP-812-DL-1T DP-813-DLL-1T DP-812-LL-1T DP-813-LLL-1T Introduction The PINNACLE warewash control is a single control board design. This controls all of the system functions. The system requires a single
Glass and Dishwashers AMX / AUX Series
 Glass and Dishwashers AMX / AUX Series INSTALLATION OPERATION REV. 8.xx 04.07.2005 Installation and Operation Instructions for Models of AMX / AUX Series Content Page 1 Installation... 3 2 Connections...
PARTS MANUAL. American Dish Service ADS HIGH TEMP SINGLE RACK DISHMACHINE MODEL: HT Blake Street Edwardsville, Kansas (913)
") EFFECTIVE: MAY, 2014 ADS HIGH TEMP SINGLE RACK DISHMACHINE MODEL: PARTS MANUAL 900 Blake Street Edwardsville, Kansas 66111 (913)-422-3700 05/08 The American Dish Service part numbers contained in this
EFFECTIVE: MAY, 2014 ADS HIGH TEMP SINGLE RACK DISHMACHINE MODEL: PARTS MANUAL 900 Blake Street Edwardsville, Kansas 66111 (913)-422-3700 05/08 The American Dish Service part numbers contained in this
Glass and Dishwashers AMX / AUX Series
 Glass and Dishwashers AMX / AUX Series INSTALLATION OPERATION VERSION 24.02.04 Important Notes Use in Accordance with Regulations This machine is exclusively to be used to wash ware such as plates, cups,
Operating and installation instructions. Except as noted, this manual can be used for V500
 ALFA MODEL V500DP Manufactured by ELVIOMEX Ltd. for ULTIMO STAINLESS PRODUCTS INC. www.ultimostainless.com Operating and installation instructions Except as noted, this manual can be used for V500 CONTENTS
HOTSPOT. Two Gallon Pump Up Spotter OPERATING & MAINTENANCE
 HOTSPOT Two Gallon Pump Up Spotter INTRODUCTION OPERATING & MAINTENANCE INSTRUCTIONS This operator s book has important information for the use and safe operation of this machine. Read this book carefully
PARTS MANUAL. American Dish Service. ADS HIGH TEMP SINGLE RACK DISHMACHINE MODELS: HT-25 5 WIRE 110 Volt Control System
 EFFECTIVE: MAY 1, 2018 ADS HIGH TEMP SINGLE RACK DISHMACHINE MODELS: 5 WIRE 110 Volt Control System PARTS MANUAL 900 Blake Street Edwardsville, Kansas 66111 (913)-422-3700 C 05/2018 The American Dish Service
INSTALLATION, OPERATION AND MAINTENANCE INSTRUCTIONS
 INSTALLATION, OPERATION AND MAINTENANCE INSTRUCTIONS AquaArctic Remote Water Chiller A9100080 -A TECHNICAL ASSISTANCE TOLL FREE TELEPHONE NUMBER: 1.800.591.9360 Technical Assistance Fax: 1.626.855.4894
READ AND UNDERSTAND THESE INSTRUCTIONS BEFORE OPERATING THE MACHINE
 XAACT Xtract 500 INFORMATION & OPERATING INSTRUCTIONS READ AND UNDERSTAND THESE INSTRUCTIONS BEFORE OPERATING THE MACHINE 78-00015 Rev B 032912 1 CONTENTS: Machine Specifications............ 2 Record Important
Installation/Operation and Service Parts Manual
 Installation/Operation and Service Parts Manual Rotary-type Conveyor Glasswasher Model: DFM7.5 Clockwise Rotation Issue Date: 9.7.17 Manual P/N 0514427 rev. B For machines beginning with S/N G160520081
SOUP COOKER/WARMER 120V, 240V MODEL 6423 INSTRUCTIONS. Installation Operation Maintenance
 SOUP COOKER/WARMER 120V, 240V MODEL 6423 INSTRUCTIONS Installation Operation Maintenance WELLS MANUFACTURING COMPANY P. O. BOX 280 VERDI, NEVADA 89439 (702) 345-0444 FAX (702) 345-0569 ITEM NO. 47566 3/98
MODEL CMA-180UC PARTS MANUAL Rev 1.16
 MODEL CMA-180UC PARTS MANUAL Rev 1.16 CMA DISHMACHINES 12700 KNOTT STREET GARDEN GROVE, CALIFORNIA 92841 800-854-6417 FAX 714-895-2141 wwwcmadishmachines.com TABLE OF CONTENTS MODEL CMA-180UC 1. PARTS
UNDERCOUNTER DISHWASHER
 OWNER S MANUAL BLAKESLEE Division of Blako Inc. UNDERCOUNTER DISHWASHER UC-21 I.R.S. INTEGRATED RECIRCULATING SYSTEM DESIGN 1844 South Laramie Avenue Chicago, IL 60804 Phone (708) 656-0660 Fax (708) 656-0017
Wax Base Heater & Dispenser
 Wax Base Heater & Dispenser Service Manual Models: IDWB2/0900, IDWB2/0775, IDWB3/0900, IDWB3/0775, IDWB4/0900, IDWB4/0775 Introduction............................................................................
Installation and Operation Manual. ACF-18 Automatic Chlorinating Feeder
 Installation and Operation Manual ACF-18 Automatic Chlorinating Feeder Operating Specifications Inlet Flow: 1.0-1.5 gpm Outlet Flow: = Inlet Flow Inlet Pressure: 10-45 psi Maximum Output: 26 lbs. of Available
READ AND UNDERSTAND THESE INSTRUCTIONS BEFORE OPERATING THE MACHINE
 XAACT Xtract 200 INFORMATION & OPERATING INSTRUCTIONS READ AND UNDERSTAND THESE INSTRUCTIONS BEFORE OPERATING THE MACHINE 78-00018 Rev B 032912 1 CONTENTS: Machine Specifications............ 2 Record Important
14 Upright Vacuum with HEPA Filter & Dual Power
 E29990-00 14 Upright Vacuum with HEPA Filter & Dual Power Operator and Parts Manual 1001 Brown Avenue Toledo, Ohio 43607-0127 Customer Service: 888-GO-BETCO Fax: 800-445-5056 Technical Service: 877-856-5954
Industrial Vacuums, Inc
 Instructions/Spare Parts Manual Nilfisk Model GWD255 Drum Top Vacuum CAUTION: This Nilfisk vacuum cleaner is not to be used in explosion-hazardous areas, as serious injury could result. Under no circumstances
Cooler Mounted Bottle Fillers
 BF Series Bottle Filler, Sensor Operated TECHNICAL ASSISTANCE TOLL FREE TELEPHONE NUMBER:.800.9.960 Technical Assistance Fax:.66.8.89 NOTES TO INSTALLER:. Please leave this documentation with the owner
American Dish Service
 1 American Dish Service INSTALLATION INSTRUCTIONS Model ET AF M/ET AF 3 (Gravity Drain) Available in 90, 120, 150 second Time Cycle Undercounter, Single Rack, Chemical Sanitizer, Dump & Fill Dishmachine
BarAid 400. Installation and. Starting from Serial No.:
 Glasswasher BarAid 400 Installation and operation Instructions Starting from Serial No.: 8649 1065 REV. 19.01.2009 DE 1618-A-01-09 Content Page 1 Important Notes... 4 2 Installation... 5 2.1 Location...
American Dish Service
 1 American Dish Service INSTALLATION INSTRUCTIONS Model 5 CD (LF or RF) Available with Left Front or Right Front door Available in 90, 120, 150 second Time Cycles Door type, Double Rack, Chemical Sanitizer,
INSTALLATION & OPERATION Rev 1.00A DISTRIBUTED EXCLUSIVELY BY CMA DISHMACHINES KNOTT AVENUE GARDEN GROVE, CALIFORNIA 92841
 MODEL UC 60e INSTALLATION & OPERATION Rev 1.00A DISTRIBUTED EXCLUSIVELY BY CMA DISHMACHINES 12700 KNOTT AVENUE GARDEN GROVE, CALIFORNIA 92841 800-854- 6417 FAX 714-895-2141 www.cmadishmachines.com TABLE
Operation, Cleaning, and Maintenance Manual
 , Cleaning, and Maintenance Manual PRO Series Standard Rack Conveyor Dishwashers Models 44 PRO 70FF PRO HD 80HD PRO 66 PRO 44 PRO LISTED www.championindustries.com Issue Date: 8.1.17 Manual P/N 116113
3500 SERIES CONVECTION STEAM COOKER PARTS AND SERVICE MANUAL
 3500 SERIES CONVECTION STEAM COOKER PARTS AND SERVICE MANUAL EFFECTIVE JULY 30, 2014 Superseding All Previous Parts Lists. The Company reserves the right to make substitution in the event that items specified
Hoshizaki America, Inc.
 Hoshizaki America, Inc. Self-Contained Flaker Model F-330BAH(-C) A Superior Degree of Reliability INSTRUCTION MANUAL www.hoshizaki.com Issued: 5-4-2007 Revised: 1-15-2013 WARNING Only qualified service
Glass and Dishwashers. BarAid 500/800. Installation and. Starting from Serial No.:
 Glass and Dishwashers BarAid 500/800 Installation and operation Instructions Starting from Serial No.: 8652 0001 REV. 19.01.2009 1617-A-01-09 Content Page 1 Important Notes... 4 2 Installation... 5 2.1
Whirlpool AUTOMATIC ICE CUBE MAKER. User s Instructions & Care and Cleaning Guide MODELS CH E-5R CHS-5R CHE-7R CHS-7R. Part No.
 Whirlpool AUTOMATIC ICE CUBE MAKER User s Instructions & Care and Cleaning Guide MODELS CH E-5R CHS-5R CHE-7R CHS-7R Part No. 585102 Rev. A General Information When the desired thickness is reached, the
OPERATIONS MAINTENANCE MANUAL
 OPERATIONS MAINTENANCE MANUAL COOK & HOLD OVEN SYSTEMS WITTCO MODEL NUMBERS 1300-AD-SS 1300-AD-SS-SPLIT LIMITED WARRANTY Wittco warrants the Products that it manufactures to be free from defects in materials
HW-17 Record Cleaning Machine Setup and Instruction Manual
 HW-17 Record Cleaning Machine Setup and Instruction Manual VPI Industries, Inc., 77 Cliffwood Ave. #3B, Cliffwood, NJ 07721 Phone: 732-583-6895, Email: Sales@vpiindustries.com http://www.vpiindustries.com
HOSHIZAKI ICE DISPENSING BIN/ WATER DISPENSER MODEL DM-90A SERVICE MANUAL
 NO.: ISSUED: REVISED: 73091 DEC. 21, 1999 DEC. 17, 2003 HOSHIZAKI ICE DISPENSING BIN/ WATER DISPENSER MODEL DM-90A SERVICE MANUAL IMPORTANT Only qualified service technicians should attempt to service
Nilfisk Inc Winnetka Avenue North Minneapolis, MN REV.03( ) VF80189
 VF80189") Nilfisk Inc. 9435 Winnetka Avenue North Minneapolis, MN 55445 www.usviper.com REV.03(05-) VF8089 SAFETY PRECAUTIONS This machine is intended for commercial use. It is constructed for use in an indoor
Nilfisk Inc. 9435 Winnetka Avenue North Minneapolis, MN 55445 www.usviper.com REV.03(05-) VF8089 SAFETY PRECAUTIONS This machine is intended for commercial use. It is constructed for use in an indoor
INSTRUCTIONS. Installation, operation and care of HD SERIES HOT DELI DISPLAY CASES. MODEL HD5 Full-Service IMPORTANT READ BEFORE USING DISPLAY CASE
 INSTRUCTIONS Installation, operation and care of HD SERIES HOT DELI DISPLAY CASES MODELS Full-Service Humidified Full-Service Self-Service HD3 HD4 HD5 HD7 HD3 HD4 HD5 HD7 HD3 HD4 HD5 MODEL HD5 Full-Service
OPERATOR S MODEL HCN-5 HHC-136 HEATED HOLDING CABINET REGISTER WARRANTY ONLINE AT
 OPERATOR S M A N U A L HEATED HOLDING CABINET MODEL HCN-5 HHC-136 REGISTER WARRANTY ONLINE AT WWW.HENNYPENNY.COM TABLE OF CONTENTS Section Page Section 1. INTRODUCTION... 1-1 1-1. Heated Holding Cabinet...
EFFECTIVE: MAY, American Dish Service ADS MODEL: ASQ GLASSWASHER PARTS MANUAL. 900 Blake Street Edwardsville, Kansas (913) /08
 /08") EFFECTIVE: MAY, 2008 American Dish Service ADS MODEL: ASQ GLASSWASHER PARTS MANUAL 900 Blake Street Edwardsville, Kansas 66111 (913)422-3700 05/08 021-0061 Model: ASQ Glasswasher American Dish Service
EFFECTIVE: MAY, 2008 American Dish Service ADS MODEL: ASQ GLASSWASHER PARTS MANUAL 900 Blake Street Edwardsville, Kansas 66111 (913)422-3700 05/08 021-0061 Model: ASQ Glasswasher American Dish Service
Parts and Instruction Manual EX12 Carpet Extractor
 Parts and Instruction Manual EX12 Carpet Extractor This manual is furnished with each new MINUTEMAN EX 12. This provides the necessary operating and preventive maintenance instructions. Operators must
Installation Manual with Service Replacement Parts
 Installation Manual with Service Replacement Parts Undercounter High Temperature Dishwasher Model: 301HT M2 High temperature dishwasher with built-in electric booster Dishwasher Serial No. www.moyerdiebel.com
OPERATING & SERVICE PARTS MANUAL HDS-215 COMBINATION SHRINK SYSTEM
 OPERATING & SERVICE PARTS MANUAL HDS-215 COMBINATION SHRINK SYSTEM FOR HOT KNIFE AND IMPULSE MACHINES READ ALL INSTRUCTIONS CAREFULLY BEFORE OPERATING EQUIPMENT TABLE OF CONTENTS Electrical Requirements
INSTRUCTIONS FOR OPERATION AND CARE OF
 INSTRUCTIONS FOR OPERATION AND CARE OF LITTLE Splint Compact Splint Pan Model LS-1 Whitehall Manufacturing is a Member of Acorn Engineering s Family of Companies. 6900-191-001 July 2010 Introduction...3
MODEL CMA-180UC INSTALLATION & OPERATION Rev 1.17A
 Owner s Manual MODEL CMA-180UC INSTALLATION & OPERATION Rev 1.17A C M A D I S H M A C H I N E S 1 2 7 0 0 K N O T T S T R E E T GARDEN GROVE, CALIFORNIA 92841 800-8 5 4-6 4 1 7 FAX 714-895-2141 www.cmadishmachines.com
ECOJET EJ-10E & EJ-7E ELECTRIC CONVECTION STEAMER W/TWIN GENERATORS PARTS AND SERVICE MANUAL
 ECOJET EJ-10E & EJ-7E ELECTRIC CONVECTION STEAMER W/TWIN GENERATORS PARTS AND SERVICE MANUAL EFFECTIVE JULY 31, 2014 Superseding All Previous Parts Lists. The Company reserves the right to make substitution
Control Panel For Water Wash Hoods AM2
 Control Panel For Water Wash Hoods AM2 For further information Call: (919) 554-1025 Or Fax: (919)554-1525 Aqua-Matic 117 Franklin Park Ave. Youngsville, NC 27506 TABLE OF CONTENTS AQUA-MATIC LIMITED WARRANTY
EQUIPMENT MANUAL FOR ES25 PASS THROUGH DISHWASHER
 EQUIPMENT MANUAL FOR ES25 PASS THROUGH DISHWASHER JUNE 2011 TABLE OF CONTENTS 1. Important: Prior to Installation 3 2. General Description 4 3. Technical Specifications 5 4. Installation 6 5. Initial Start-up
A112408B/S-VR-UBL TECHNICAL ASSISTANCE TOLL FREE TELEPHONE NUMBER: Technical Assistance Fax:
 INSTALLATION, OPERATION AND MAINTENANCE INSTRUCTIONS Vandal Resistant Refrigerated Universal Bi-Level AquaAccess Barrier Free, Wall Mounted Water Cooler OR Alternate Configuration A112408B/S-VR-UBL TECHNICAL
2 Gallon Water Boiler
 USER S GUIDE 2 Gallon Water Boiler READ AND SAVE THESE INSTRUCTIONS NOTICE TO INSTALLER: Please leave this booklet with the machine. CONTENTS CL39...FS39... IS2...II20...II21...CI16............ES83.........
MODEL GL-X INSTALLATION & OPERATION
 Owner s Manual Keep with machine for reference MODEL GL-X INSTALLATION & OPERATION Rev. 1.01B CMA DISHMACHINES 12700 KNOTT AVENUE GARDEN GROVE, CALIFORNIA 92841 800-854-6417 FAX 714-8 95-2 141 www.cmadishmachines.com
Installation Manual PS-225 & PS-275
 Installation Manual PS-225 & PS-275 Table of Contents Pre-Uncrating Checklist... 1 Verifying System Requirements... 2 Verifying System Direction... 2 Verifying the Electrical Requirements... 2 Removal
SAFETY OPERATION & MAINTENANCE MANUAL X-405 CARPET EXTRACTOR This unit is intended for commercial use.
 SAFETY OPERATION & MAINTENANCE MANUAL X-405 CARPET EXTRACTOR This unit is intended for commercial use. READ AND FOLLOW ALL INSTRUCTIONS, WARNINGS AND CAUTIONS BEFORE USING THIS EXTRACTOR Address: 777 South
AGITATOR V DO NOT OPERATE THE MACHINE UNTIL YOU HAVE READ ALL SECTIONS OF THESE INSTRUCTIONS IMPROPER USE OF THE MACHINE WILL VOID THE WARRANTY
 AGITATOR 20 120V INFORMATION & OPERATING INSTRUCTIONS DO NOT OPERATE THE MACHINE UNTIL YOU HAVE READ ALL SECTIONS OF THESE INSTRUCTIONS IMPROPER USE OF THE MACHINE WILL VOID THE WARRANTY 1. Always use
VANTAGE. Installation Manual. Release Date: April 16, 2003 Publication Number: INS Revision Date: January 22, 2015 Revision: E
 VANTAGE Installation Manual Release Date: April 16, 2003 Publication Number: 3120031005INS Revision Date: January 22, 2015 Revision: E Visit the Cornelius web site at www.cornelius.com for all your Literature
SPECIFICATION, INSTALLATION AND OPERATION MANUAL UNDER BENCH GLASS WASHER EVO40ST
 SPECIFICATION, INSTALLATION AND OPERATION MANUAL READ ALL INSTRUCTIONS BEFORE USE UNDER BENCH GLASS WASHER EVO40ST A guide on the use, care and maintenance of your quality Culinaire product Rev: C - 02/11/2018
P-60 and 60 Special. Popcorn Machine Instruction Manual Model #1866, #2085, #2086 and #2656. Cincinnati, OH USA
 Part No. 49064 Revised: March 2004 P-60 and 60 Special Popcorn Machine Instruction Manual Model #1866, #2085, #2086 and #2656 Models #1866 and #2086 Models #2085 and #2656 Cincinnati, OH 45241-4807 USA
USER MANUAL. Bottled Water Dispenser SAVE FOR FUTURE USE. Model #
 Model # 900161: Page 1 USER MANUAL Bottled Water Dispenser Model # 900161 TO REDUCE THE RISK OF INJURY AND PROPERTY DAMAGE, USER MUST READ THIS MANUAL BEFORE ASSEMBLING, INSTALLING & OPERATING DISPENSER.
TURBOWASH TM... Pot and Pan Sink
 TURBOWASH TM... Pot and Pan Sink MODEL TW ML-110644 701 S. RIDGE AVENUE TROY, OHIO 45374-0001 FORM 33800 Rev. A (4-98) Installation, Operation, and Care of TurboWash TM Pot and Pan Sink SAVE THESE INSTRUCTIS
CREWMAN 20 ORB CREWMAN 28 ORB
 E88066-00 E88068-00 E88070-00 CREWMAN 20 ORB CREWMAN 28 ORB 20, 28 Orbital Strip Machines Operator and Parts Manual 400 Van Camp Road Bowling Green, Ohio 43402 Customer Service: 888-GO-BETCO Fax: 800-445-5056
Owner s Manual PS-200
 Owner s Manual PS-200 Table of Contents Product Introduction Page 1 Explanation of Warning Messages Page 2 Danger Warning Chemical Hazard Personal Injury Requirements for Detergents and Sanitizers Page
Wilbur Curtis Company, Inc. Service Manual WB5GT Water Boiler
 Wilbur Curtis Company, Inc. Service Manual WB5GT Water Boiler Important Safeguards/Symbols This equipment is designed for commercial use. Any servicing other than cleaning and routine maintenance should
Reliability is a beautiful thing TM MODULAR FLAKER F-800MAH(-C) F-800MWH(-C) INSTRUCTION MANUAL
 F-800MWH(-C) INSTRUCTION MANUAL") Reliability is a beautiful thing TM MODULAR FLAKER F-800MAH(-C) F-800MWH(-C) INSTRUCTION MANUAL ISSUED: FEB. 28, 2001 REVISED: DEC. 11, 2003 IMPORTANT Only qualified service technicians should attempt
Reliability is a beautiful thing TM MODULAR FLAKER F-800MAH(-C) F-800MWH(-C) INSTRUCTION MANUAL ISSUED: FEB. 28, 2001 REVISED: DEC. 11, 2003 IMPORTANT Only qualified service technicians should attempt