NS1000E Installation & Troubleshooting
|
|
|
- Meredith Gaines
- 6 years ago
- Views:
Transcription

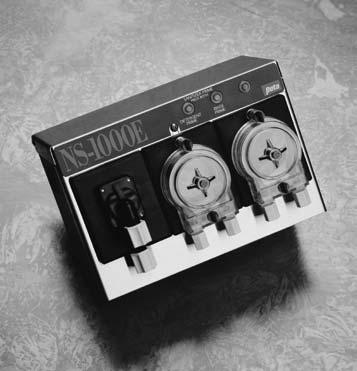
1 NS1000E Installation & Troubleshooting
2 Presentation Objectives This presentation is intended for both experienced field personnel familiar with warewashing installations, as well as new field service personnel who have only a rudimentary knowledge of accessing triggers and conductivity control. The objective is to train the installer to be able to install NS1000E on either a door or conveyor dishwashing machine, and troubleshoot any unusual conditions they may encounter. To train new installers, we recommend using this presentation in conjunction with an actual installation or at least a lab installation followed by a site visits to see typical conveyor and door machine installations. Excluded from this presentation is detailed training on electrical safety, which should always be performed prior to attempting any high voltage installations. In brief, however, power to the dishwasher and dispenser should be shut off at the source prior to opening them, and a voltmeter should be used to verify the power s off prior to doing wiring.
3 This presentation is comprised of the following sections Physical installation: mounting, tubing, solenoid water supply Wiring: power connection, trigger/signal wiring Programming Troubleshooting
4 NS1000E Mounting Location Pick a spot to the pumpbox(s) on the wall over the dish tray counter or behind the washer; the former is preferred so it s easy for the dishwashers to see and react to alarms. Hold the NS1000E up with a level on it and mark the screw holes on the wall; drill, put in screws, and then slide the unit on the screws For solid or powder detergent capsule bowls, be sure to install in a location where it s easy for the dishwashers to check and replace the capsule. NS1000E can be mounted onto the top of the washer using metal bracket kit

5 TUBING: Chemical Pickup Lance Connection Connect tubes to standpipes as shown at left. The standpipes come with nut fittings to connect to standard 1/4 ID detergent and 1/8 ID rinse polyflow transport tubing ¼ red and ¼ blue tubing is also available for customers who prefer to use color tubing (be sure to use a ¼ T rinse nut fitting if you use ¼ rinse tubing) Detergent 1/4 ID 18 long CPVC standpipe Rinse 1/8 ID 18 long CPVC standpipe
6 TUBING: Pump Connection The left side of the pump is the suction side which should be connected to the chemical supply The right side of the pump is the chemical discharge side which will be connected to injection fittings on the washer Loosen tube nuts, insert tubes, and tighten nuts as shown
7 TUBING: Injection Fittings Mount the detergent bulkhead fitting in a 7/8 hole above the water line, just above where the probe will be located. Make sure the area has plenty of water circulation, such as an area near the wash pump strainer inlet so the detergent will get circulated immediately Add rinse injector to rinse line, in a location away from large amounts of steam or moving parts which can induce thermal or physical fatigue on injector plastic over time. If using a pressure switch or a sanitizer, an injector with two connections is required, one for the rinse and one for the sanitizer or copper tubing line to the pressure switch. We recommend using a stainless steel injection fitting if installing in a remote location, since they are impervious to thermal and physical fatigue Tubes connect to the detergent bulkhead fitting and rinse injection fitting just like they do to the pump nuts. Don t use an old hole if it s in the wrong spot! Making a new hole during installation always takes less time than getting a trouble call and making a new hole on a separate trip

8 Solenoid & Bowl Connect water supply tube to water inlet on bottom of solenoid. Be sure to verify which way the arrows point on the solenoid, since standard warewash solenoids have the water inlet on the bottom whereas OPL solenoids have it on the top. Connect outlet to bowl Mount bowl in a location where it will be easy for the dishwashers to replace the detergent capsule
9 WIRING: Main Power NS1000E uses triggers as its power source, typically using a separate power/signal for detergent and rinse. Crimp a GA (4mm 2 ) ground wire to the ground connection next to the terminal block. Run power and ground wires through a strain relief such as or conduit connection on bottom of unit. Replace cover so it supports the surface around the knockouts prior to knocking them out Never run the probe wire next to the power or trigger wires; the electrical noise they emit can interfere with getting a correct probe reading PWR ON/OFF SWITCH Terminal Block Line Voltage Connector DETERGENT TRANSFORMER HOT NEUTRAL HOT NEUTRAL Detergent PWR ON/OFF SWITCH INCOMING POWER RINSE TRANSFORMER Rinse NS1EMM02
10 WIRING: Probe Connection Be sure you do not mount the probe in an old hole that s a bad location, since that can produce bad probe readings or subject the probe to too much thermal shock Concentration Probe Input (Black and White) Temperature Probe Input (Green and Red) Mount conductivity probe 3-4 inches (8-10 cm) from the bottom of the wash tank, about 3-5 /7-12 cm over the detergent injection point and as close to the wash pump intake strainer as possible. The terminals should be vertically oriented as shown. Ensure the probe location is not close to heater elements, corners, or in the path of moving mechanical components. Ensure the probe location is in an area with plenty of circulation Connect probe wires to conductivity input on the PCB. If using a temperature compensated probe, use a four wire cable and run the thermistor/temperature wires to the temp input
11 PROGRAMMING: Button Functions SANITIZER PRIME PUSH BOTH BUTTONS To enter programming mode, hold down the Program/Run button for 5 seconds. PROGRAM/RUN BUTTON DETERGENT PRIME BUTTON RINSE PRIME BUTTON LED ALARM VOLUME ADJUSTMENT The left digit on the display is the setup menu number and the two right digits are the setup menu value. Use the Program/Run button to change to the next menu and the prime buttons to change the menu values. ALPHANUMERIC DISPLAY AUDIBLE ALARM The detergent prime button increases the value and the rinse prime button decreases the value. (Feed times are set by pumping the desired amount into a graduated cylinder) The alarm volume adjustment potentiometer adjusts the alarm volume from 0 93 decibels NS1EMF03 PROBE CONNECTOR FUSE CONNECTOR SANITIZER PUMP CONNECTOR (J3) PHONE JACK EXT AL PRESSURE SWITCH CONNECTOR (J6) If you don t do any programming for 60 seconds, the NS-1000E will automatically return to the run mode. EXTERNAL ALARM (J1)
12 PROGRAMMING: Menu Guide Menu # Probe Mode Probeless Mode 1 Set to 01 for probe Set to 02 for probeless 2 Low detergent alarm delay time: seconds in 10 second increments, so "209" is a 90 second delay time 4 Detergent concentration setpoint: 0-70 Beta Units 5 Detergent overfeed stop: seconds in 10 second increments after alarm condition, so "524" has the pump stop after 240 seconds of on time after the alarm Conveyor machine rack time: 0-60 seconds (will dose detergent recharge based on this interval) Detergent Recharge: To program this setting, hold detergent prime button down to dispense correct recharge amount. Amount displayed as 0-20 second range for door machines, 0-6 second range for conveyor machines Detergent initial fill: Use the detergent prime button to set the desired amount.amount displayed as 0-24, 10 second increments of Rinse pump delay: 0-99 seconds Rinse pump delay: 0-99 seconds 7 Rinse pump speed 0-99% Rinse pump speed 0-99% 8 Rinse pump run time 0-99 seconds (set to 00 for Rinse pump run time 0-99 seconds (set to 00 for conveyor machine) conveyor machine) d Reduced detergent feed rate: 01= 1 second on, 9 seconds on, 09=9 seconds off 1 seconds off, 10 = on continuously Detergent initial fill trigger: Set to 00 to start feed once machine power's been on 20 seconds. Set to 01 if using a dedicated separate trigger for initial charge. Sanitizer trigger: Set to 00 to feed with rinse or 01 to Sanitizer trigger: Set to 00 to feed with rinse or 01 to E feed with detergent feed with detergent F Sanitizer pump speed: 0-99% Sanitizer pump speed: 0-99% NS1000E contains this chart in the manual, and in a reference card you can leave in the dispenser, so you re sure to always have this info handy!
13 PROGRAMMING: Menu 2 SETUP MENU VALUE MENU NUMBER After picking probe mode (01) or probeless mode (02) on menu #1, you d proceed to menu #2. Probe mode: As shown in the reference chart, menu #2 is alarm delay in probe mode. I.e. it s the amount of time the detergent will be on before triggering an alarm to indicate out of product or drain open. The example on the left shows a value of 15 for menu #2; in probe mode this would cause the alarm to start beeping after 150 seconds of detergent on time. Probeless mode: This menu is rack time in probeless conveyor mode. It isn t used on probeless door machines. The example on the left shows a value of 15 seconds, which in probeless mode on a conveyor would cause the recharge to come on every 15 seconds.
14 PROGRAMMING: Menu 4 Probe Mode: In probe mode, menu 4 is the setpoint. Setpoint controls detergent concentration, and varies with the chemical being used and water hardness. In the example shown on the right, a setpoint of 35 Beta Units has been programmed. Probeless Mode: In probeless mode, you ll push the detergent prime button to pump the amount of chemical required for recharge, and the screen will show the number of seconds of pump time. (Note you push once to start and again to stop)
15 PROGRAMMING: Menu 5 Probe mode: Menu 5 is the overfeed stop, or amount of time the alarm is on before the detergent is shut off. Remember total detergent alarm time before stopping is low detergent alarm delay (menu 2, beeping alarm) + overfeed stop (menu 5, steady on alarm) Probeless mode: Menu 5 is detergent initial charge time. Use the detergent prime button to dispense the requisite amount of product into a graduated cylinder, pressing the button once to start and once to stop. The rough number of seconds will be displayed on the screen in 10 second increments. Don t worry that the unit shows 02 for either 22 or 28 seconds; the dispenser keeps the precise time in memory even though it can t display it on the 3 digit screen.
16 PROGRAMMING: Menu 6 Probe Mode & Probeless Mode: Menu 6 is rinse pump delay time. For most installs it will be 0, as shown on the right.
17 PROGRAMMING: Menu 7 Probe & Probeless Modes: Menu 7 is the rinse speed
18 Probe Mode & Probeless Mode: Rinse runtime limit, set to 20 seconds in the example on the right PROGRAMMING: Menu 8
19 PROGRAMMING: Menu d Probe Mode: Menu d reduces detergent overusage by cycling the pump on and off. 01=1 second on, 9 seconds off 05=5 seconds on, 5 seconds off (as shown in the example, a rather typical setting) 09=9 seconds on, 1 second off 10=on continuously Probeless Mode: Menu d dictates what triggers initial charge. Initial charge is the dose of chemical when the tank is filling. 00=Machine power triggers initial charge once on for 20 seconds. Use this setting with all door machines, and with conveyors where a special separate signal for tank fill can t be found. When the detergent signal s received, recharge will begin immediately and then initial charge will come on after 20 seconds.) 01=Conveyor with disparate initial fill signal only (dry contact through probe or temp connection)
20 PROGRAMMING: Menu E Probe Mode & Probeless Mode: Menu E determines whether the sanitizer pump will turn on with the rinse or detergent. 00=Feed sanitizer with rinse 01=Feed sanitizer with detergent
21 PROGRAMMING: Menu F Probe Mode & Probeless Mode: Menu F determines sanitizer pump speed, 0-99% In the example shown, the speed has been set to 20%
22 TROUBLESHOOTING: Probe Diagnosis Probe Reading LO (00) Too low, overdosing Too high, not dosing enough HI (99) Solution No reading usually means the wires aren t properly connected. Check all the wire connections, and the wire itself for damage. If everything s hooked up correctly, the problem could be delamination; to check for this detach wires from probe, attach both voltmeter wires (use ohm setting) to one probe post, with one wire on the sensor side, one wire on the screw/wire attachment side to verify continuity. Repeat for the second post. Scrap probe if there's no continuity, and verify probe location meets guidelines before installing a new one Check tank for extreme scale build up. If there s a lot of scale, clean the probe. (VCP compensates for scale, and usually the account will delime the tank before the scale gets so bad that VCP can t compensate for it. ) Replace the probe. This failure should only be seen on pre-y2k temperature compensated probes. Newer temp comp probes are medical grade and shouldn t fail in this manner. (VCP will also compensate for this problem in most cases.) This failure usually indicates a short. Check the wires to ensure there s no short, and check the back of the probe for moisture. Sometimes if the probe is wet in back, replacing it and allowing it to dry will allow it to function again. In rare cases moisture may work into the body of the probe; when this occurs the probe can t be dried out and instead must be scrapped.

23 TROUBLESHOOTING: Solenoid Not Activating If the solenoid doesn t make a clicking sound when turned on/off, verify wires are attached and supplying voltage with voltmeter. If there s no voltage from the PCB, try supplying voltage by priming. If priming doesn t supply voltage to the solenoid replace the PCB; if it does, correct programming and troubleshoot probe If the dispenser is turning on voltage to the solenoid, but it isn t feeding or isn t making a click sound, it s likely clogged. If it s a metal solenoid, remove the strainer cap shown at top left, clean the cylinder filter, and reassemble If it s a plastic solenoid, disassemble and clean the round rubber diaphragm shown at left; if diaphragm is damaged replace it or the solenoid
24 TROUBLESHOOTING: Miscellaneous Problems Issue Screen dead How often do I replace tubes? How do I adjust the alarm? Answer Screen will only have power when dishmachine is on, and dispenser switch is set to on. Check switch and put a rack in the machine to get power. The Beta rinse flex tube lasts at least 6 times longer than most competing tubes. On a door machine, it should last a minimum of several years as long as it's not injecting into water pressure over 35 PSI. On a typical conveyor machine, it should last 1-3 years. Even in a flight kitchen you can expect a life of 4 months. The norprene detergent tube should last a comperable amount of time. Lift the NS1000E lid and adjust the dial to change the alarm volume.
25 NS1000E Installation & Troubleshooting
How to Install D3000
 How to Install D3000 Scope of Presentation This presentation is intended for both experienced field personnel familiar with warewashing installations, as well as new field service personnel who have only
D3000. Installation and Operating Manual SAFETY D3000 SPECIFICATIONS PRODUCT DESCRIPTION
 D3000 Installation and Operating Manual SAFETY Always wear the required Personal Protective Equipment (such as safety glasses, gloves, face shields, and aprons) when potentially exposed to any hazardous
D3000. Installation & Setup Guide
 Page 1 of 15 17483-00 Rev B s1 April 2009 Contents Description Page Safety... 3 Installation Standards 3 Specification. 3-4 Circuit Board Connection 5 Mounting Dimensions 6 Installation Procedure 6 Mechanical
D3000. The reliable, quick-to-install dispenser!
 D3000 The reliable, quick-to-install dispenser! Automatic Feed Rate Control: An embedded control algorithm that learns how to adjust the feed ON/OFF cycle in order to minimize overshoot and improve the
Sprite III Warewash Dispensing System
 Sprite III Warewash Dispensing System Reference Manual DM-700 Series Online and downloadable Product Manuals and Quick Start Guides are available at www.hydrosystemsco.com Please check online for the latest
SPRITE Warewash Dispensing System
 SPRITE Warewash Dispensing System Reference Manual DM-400 NUMERIC Series Online and downloadable Product Manuals and Quick Start Guides are available at www.hydrosystemsco.com Please check online for the
PINNACLE WAREWASH CONTROL By DEMA DP-812-DL-1T DP-813-DLL-1T DP-812-LL-1T DP-813-LLL-1T Introduction
 DP-812-DL-1T DP-813-DLL-1T DP-812-LL-1T DP-813-LLL-1T Introduction The PINNACLE warewash control is a single control board design. This controls all of the system functions. The system requires a single
DEMA TITAN EP II WAREWASH CONTROL TE.812 & TE.813 SERIES
 DEMA TITAN EP II WAREWASH CONTROL TE.812 & TE.813 SERIES Overview The Titan EP ware wash system controls all chemical delivery functions for dish machines and similar warewash applications. The system
DEMA 813 PROBELESS DEMAMaster TM INSTALLATION INSTRUCTIONS
 DEMA 813 PROBELESS DEMAMaster TM INSTALLATION INSTRUCTIONS Models: DM-813-PLLL-1T DM-813-PDLL-1T DM-813-PLLL-2T DM-813-PDLL-2T I-729 Pg 1 of 15 System Overview The DEMA DEMAMaster probeless series is designed
DEMA Nitro Ware Wash Chemical Dispensing
 DEMA Nitro Ware Wash Chemical Dispensing Overview The DEMA Nitro is a digital ware wash dispenser designed to dispense cleaning chemicals into ware wash and dish machines. The unit is triggered by a ware
DEMAMaster Nitro Express Ware Wash Chemical Dispenser
 DEMAMaster Nitro Express Ware Wash Chemical Dispenser Overview The DEMAMaster Nitro Express is an analog ware wash dispenser designed to dispense cleaning chemicals into ware wash and dish machines. The
DEMAMaster Nitro Express Ware Wash Chemical Dispenser
 DEMAMaster Nitro Express Ware Wash Chemical Dispenser Overview The DEMAMaster Nitro Express is an analog ware wash dispenser designed to dispense cleaning chemicals into ware wash and dish machines. The
Sprite III (Alpha) Warewash Dispensing System
 Warewash Dispensing System") Sprite III (Alpha) Warewash Dispensing System Reference Manual DM-700 Series Online and downloadable Product Manuals and Quick Start Guides are available at www.hydrosystemsco.com Please check online for
Sprite III (Alpha) Warewash Dispensing System Reference Manual DM-700 Series Online and downloadable Product Manuals and Quick Start Guides are available at www.hydrosystemsco.com Please check online for
WAREMAX SERIES. Dosing Systems for Commercial Dishmachines. Contents. WAREMAX Series Dishwasher systems. 4 Priming and Delime Mode.
 WAREMAX SERIES Dosing Systems for Commercial Dishmachines Contents 1 Getting started.... Page 2 2 Installation... Page 3 3 Set-Up. Page 9 4 Priming and Delime Mode. Page 11 5 Probeless Mode..... Page 12
DEMA Nitro Express Ware Wash Chemical Dispenser
 DEMA Nitro Express Ware Wash Chemical Dispenser Overview The DEMA Nitro Express is an analog ware wash dispenser designed to dispense cleaning chemicals into ware wash and dish machines. The unit is triggered
DEMA CHEMASTER WAREWASH SYSTEM INSTALLATION AND OPERATIONS MANUAL
 DEMA CHEMASTER WAREWASH SYSTEM INSTALLATION AND OPERATIONS MANUAL DM-812-LL-2T DM-812-DL-2T I-602 Pg. 1 of 16 Rev. A-0600 Deleted: 14 CONTENTS Page Number Introduction 3 Special Features 3 System Overview
KLE-235D DOUBLE RACK IN-LINE CONFIGURATION KLE-175GTM SINGLE RACK THREE-DOOR CONFIGURATION KLE SERIES ULTRA WASH DISHMACHINE INSTRUCTION MANUAL
 KLE-235D DOUBLE RACK IN-LINE CONFIGURATION KLE-175GTM SINGLE RACK THREE-DOOR CONFIGURATION KLE SERIES ULTRA WASH DISHMACHINE INSTRUCTION MANUAL 9600475 Rev: C (06/12) Page 1 of 8 INTRODUCTION The KLE-235D
DEMA TITAN II WAREWASH CONTROL T.812 & T.813 SERIES
 DEMA TITAN II WAREWASH CONTROL T.812 & T.813 SERIES Overview The Titan ware wash system controls all chemical delivery functions for dish machines and similar warewash applications. The system has an advanced
Antares Warewash Dispensing System
 Antares Warewash Dispensing System Quick Start Guide Antares Series Online and downloadable Product Manuals and Quick Start Guides are available at www. HydroSystemsCo.com Please check online for the latest
Glass and Dishwashers AMX / AUX Series
 Glass and Dishwashers AMX / AUX Series INSTALLATION OPERATION VERSION 24.02.04 Important Notes Use in Accordance with Regulations This machine is exclusively to be used to wash ware such as plates, cups,
Glass and Dishwashers AMX / AUX Series
 Glass and Dishwashers AMX / AUX Series INSTALLATION OPERATION REV. 8.xx 04.07.2005 Installation and Operation Instructions for Models of AMX / AUX Series Content Page 1 Installation... 3 2 Connections...
Antares Warewash Dispensing System
 Antares Warewash Dispensing System Reference Manual Antares Series Online and downloadable Product Manuals and Quick Start Guides are available at www.hydrosystemsco.com Please check online for the latest
DR30 MAX Warewash Chemical Dispenser Dispensing technology by Seko UK
 DR30 MAX Warewash Chemical Dispenser Dispensing technology by Seko UK 400-2003-00 A total commitment to guaranteed reliability and optimal performance has led to Seko being utilised in many types of industry.
DEMA TITAN WAREWASH CONTROL T-812 & T-813 SERIES
 DEMA Engineering Company 10020 Big Bend Blvd. St. Louis, MO 63122 (800) 325-3362 or (314) 966-3533 www.demaeng.com I-879 Pg. 1 of 26 PURPOSE: The Titan ware wash system controls all chemical delivery functions
INSTALLATION & OPERATION Rev 1.00A DISTRIBUTED EXCLUSIVELY BY CMA DISHMACHINES KNOTT AVENUE GARDEN GROVE, CALIFORNIA 92841
 MODEL UC 60e INSTALLATION & OPERATION Rev 1.00A DISTRIBUTED EXCLUSIVELY BY CMA DISHMACHINES 12700 KNOTT AVENUE GARDEN GROVE, CALIFORNIA 92841 800-854- 6417 FAX 714-895-2141 www.cmadishmachines.com TABLE
Viking Installation Guide
 Viking Installation Guide Viking Range Corporation 111 Front Street Greenwood, Mississippi 38930 USA (662) 455-1200 For product information, call 1-888-VIKING1 (845-4641) or visit the Viking Web site at
INSTRUCTION MANUAL FOR DEMA CHEMASTER TM DM-813-LLL-1T, DM-813-LLL-2T, DM-813-DLL-1T and DM-813-DLL-2T
 INSTRUCTION MANUAL FOR DEMA CHEMASTER TM DM-813-LLL-1T, DM-813-LLL-2T, DM-813-DLL-1T and DM-813-DLL-2T Introduction The Chemaster series is a comprehensive range of single and dual function units for Industrial
Warewash Systems. innovation > technology > future
 Warewash Systems Transaxle Technology provides added support and stability to the gear shaft. This equalizes roller pressure, extending the life of the motor gearbox and squeeze tube. innovation > technology
HX-30/40 and HX-30/40 S Glass and Dishwashers
 HX-30/40 and HX-30/40 S Glass and Dishwashers INSTALLATION OPERATION VERSION 18/01/00 2 Installation and Operation Instructions for Model HX-30/40 and HX-30/40 S (with built-in softener) Content Page 1
Proportional Injector
 3 Proportional Injector USER MANUAL www.demaeng.com E-mail: sales@demaeng.com User Manual The MixRite is powered by water flow, with minimal loss of pressure. The water engine powers the proportioning
GLC/GW-100 MANUAL INSTALLATION SERVICE PARTS REV.1.01
 Owner s Manual Keep with machine for reference GLC/GW-100 MANUAL INSTALLATION SERVICE PARTS REV.1.01 CMA DISHMACHINES 12700 KNOTT STREET GARDEN GROVE, CALIFORNIA 92841 800-854- 6417 FAX 714-895- 2141 www.cmadishmachines.com
Warewash systems. innovation > technology > future
 Warewash systems Transaxle Technology provides added support and stability to the gear shaft. This equalizes roller pressure, extending the life of the motor gearbox and squeeze tube. innovation > technology
Door-Type Dual-Rack High Temperature Sanitizing Dishwasher (USA Version)
") MODEL DV 200.2 Door-Type Dual-Rack High Temperature Sanitizing Dishwasher (USA Version) OWNER S INSTALLATION, OPERATION AND MAINTENANCE MANUAL MEIKO 1349 Heil Quaker Blvd. La Vergne, TN 37086 Phone: (615)
MODEL DV 200.2 Door-Type Dual-Rack High Temperature Sanitizing Dishwasher (USA Version) OWNER S INSTALLATION, OPERATION AND MAINTENANCE MANUAL MEIKO 1349 Heil Quaker Blvd. La Vergne, TN 37086 Phone: (615)
QUANTURA DISHWASH DOSING SYSTEMS. revolutionary dispensing solutions
 QUANTURA DISHWASH DOSING SYSTEMS revolutionary dispensing solutions QUANTURA BRIGHTWELL DISPENSERS NEW RANGE OF DISHWASH DOSING SYSTEMS Reliable and efficient chemical dosing systems ensure that commercial
Q: What can be done if my dishes have a cloudy, white film on them after a wash?
 TROUBLESHOOTING 45 TROUBLESHOOTING FAQs: Frequently Asked Questions Q: Does this dishwasher require a rinse aid to be used? A: Rinse aid is strongly recommended to enhance the drying performance of the
Tall Hood Door-Type Variotronic High Temperature Sanitizing Utensil Washer (USA Version)
") MODEL DV 120.2 T Tall Hood Door-Type Variotronic High Temperature Sanitizing Utensil Washer (USA Version) OWNER S INSTALLATION, OPERATION AND MAINTENANCE MANUAL MEIKO 1349 Heil Quaker Blvd. La Vergne,
MODEL DV 120.2 T Tall Hood Door-Type Variotronic High Temperature Sanitizing Utensil Washer (USA Version) OWNER S INSTALLATION, OPERATION AND MAINTENANCE MANUAL MEIKO 1349 Heil Quaker Blvd. La Vergne,
DEMA 830 Laundry Master TM Installation Instructions
 I-656 Pg. 1 of 9 SYSTEM OVERVIEW The DEMA 830 Laundry Master is designed for long reliable use with simplicity in mind for both the installer and user. The system is based on the reliable DEMA peristaltic
High Temperature Sanitizing Pot and Pan Washer (USA Version)
") MODEL FV 130.2 High Temperature Sanitizing Pot and Pan Washer (USA Version) OWNER S INSTALLATION, OPERATION AND MAINTENANCE MANUAL Meiko 917 Airpark Center Drive Nashville, TN 37217 Phone: (615) 399-6600
MODEL FV 130.2 High Temperature Sanitizing Pot and Pan Washer (USA Version) OWNER S INSTALLATION, OPERATION AND MAINTENANCE MANUAL Meiko 917 Airpark Center Drive Nashville, TN 37217 Phone: (615) 399-6600
Accu-Mix 500. Proportional Injector USER MANUAL
 Accu-Mix 500 Proportional Injector USER MANUAL Hangsterfer s Laboratories, Inc. www.hangsterfers.com 175 Ogden Road tel: +1 856-468-0216 Mantua, New Jersey 08051 fax: +1 856-468-0200 United States of America
AJ-44 Rack Conveyor Dishmachine Maintenance Instructions. Changing Conveyor Direction
 AJ-44 Rack Conveyor Dishmachine Maintenance Instructions Changing Conveyor Direction 07610-003-04-72 A March 30, 2005 The Jackson model AJ-44 series dishmachine has the ability to have its direction of
American Dish Service
 1 American Dish Service INSTALLATION INSTRUCTIONS Model HT-25, HT-34 208v/240v, Single-phase, 90amps (dual 60a/30a), Neutral High Temp Dishmachine Listed by UL #E68594, NSF/ANSI 3, ASSE 1004 #933, Mass.
DEMA SOLID PRODUCT LAUNDRY MASTER TM MODEL: 581L-1W and 581L-2W INSTALLATION INSTRUCTIONS
 Included Parts: A. 581.1 Solid Bowl B. 58.1LA Vacuum Breaker C. 58.6 Stainless Steel Supply Tube D. 58.29 90º Compression Fitting E. 58.24 Straight Compression Fitting F. 58.7 Vinyl Discharge Tube G. 66.123
Glass and Dishwashers 402/452/502. (original instructions) (incl. Australian /502) Starting from Serial No.:
 (incl. Australian /502) Starting from Serial No.:") Glass and Dishwashers ECOMAX 402/452/502 (incl. Australian 452-90/502) INSTALLATION AND OPERATION INSTRUCTIONS (original instructions) Starting from Serial No.: 8663 4000 REV. 05.10.2015 EN IMPORTANT NOTES
Glass and Dishwashers ECOMAX 402/452/502 (incl. Australian 452-90/502) INSTALLATION AND OPERATION INSTRUCTIONS (original instructions) Starting from Serial No.: 8663 4000 REV. 05.10.2015 EN IMPORTANT NOTES
Installation. 324 Series Built-In Dishwashers U L. Viking Range, LLC 111 Front Street Greenwood, Mississippi USA (662)
") Installation Viking Range, LLC Front Street Greenwood, Mississippi 890 USA (66) 455-00 For product information, call -888-845-464 or visit the Viking Website at vikingrange.com U L C U L 4 Series Built-In
Installation Viking Range, LLC Front Street Greenwood, Mississippi 890 USA (66) 455-00 For product information, call -888-845-464 or visit the Viking Website at vikingrange.com U L C U L 4 Series Built-In
CP-200 S&T. CP Warewash Pump Instruction & Operation Manual Speed & Time , Rev1.0, , Page 1 of 8
 CP-200 - Warewash Pump Instruction & Operation Manual Speed & Time 20-08606-01, Rev1.0, 20.07.2012, Page 1 of 8 Contents A) Description B) Site Survey and Installation Requirements C) Package Contents
TraceTek Sensing Module Installation, Operation and Maintenance Instructions DESCRIPTION SPECIFICATIONS APPROVALS TYPE NM
 TTC-1 TraceTek Sensing Module Installation, Operation and Maintenance Instructions DESCRIPTION The nvent RAYCHEM TraceTek TTC-1 sensing module is used with TraceTek sensing cables to detect liquid leaks.
Glass and Dishwashers. BarAid 500/800. Installation and. Starting from Serial No.:
 Glass and Dishwashers BarAid 500/800 Installation and operation Instructions Starting from Serial No.: 8652 0001 REV. 19.01.2009 1617-A-01-09 Content Page 1 Important Notes... 4 2 Installation... 5 2.1
Owner s Manual. Keep with machine for reference PKC24 INSTALLATION & OPERATION REV Perlick Corporation 8300 W Good Hope Rd Milwaukee, WI 53223
 Owner s Manual Keep with machine for reference PKC24 INSTALLATION & OPERATION REV.11.09 Perlick Corporation 8300 W Good Hope Rd Milwaukee, WI 53223 800-558- 5592 FAX 414-353- 7069 perlick.com TABLE OF
Rif Cod i220-0
 15 52 50 6 13 53 51 2 9 8 3 20 19 18 5 1 7 14 10 4 17 Rif Cod 1 0010060 2 0060287 3 0060310 4 0080003 5 0080004 6 0080051 7 0080053 8 0080410 9 0080413 10 0080430 11 0080432 12 0080434 13 0080435 14 0080436
Installation Instructions. For the 18 Built-In Dishwasher and Front Color Panels
 Installation Instructions For the 18 Built-In Dishwasher and Front Color Panels Printed in USA 154232102 Before You Begin DO NOT INSTALL DISHWASHER UNTIL YOU HAVE READ ALL INSTRUCTIONS. FOR YOUR SAFETY,
Owner s Manual GW-100 MANUAL INSTALLATION SERVICE PARTS REV.1.00
 Owner s Manual GW-100 MANUAL INSTALLATION SERVICE PARTS REV.1.00 C M A D I S H M A C H I N E S 1 2 7 0 0 K N O T T S T R E E T GARDEN GROVE, CALIFORNIA 92841 800-8 5 4-6 4 1 7 F A X 7 1 4-8 9 5-2141 www.cmadishmachines.com
UNDERCOUNTER DISHWASHER
 OWNER S MANUAL BLAKESLEE Division of Blako Inc. UNDERCOUNTER DISHWASHER UC-21 I.R.S. INTEGRATED RECIRCULATING SYSTEM DESIGN 1844 South Laramie Avenue Chicago, IL 60804 Phone (708) 656-0660 Fax (708) 656-0017
PARTS AND SERVICE MANUAL FOR MERCO HOLDING CABINET MODEL 86002
 PARTS AND SERVICE MANUAL FOR MERCO HOLDING CABINET MODEL 86002 Merco Savory, Inc. 1111 North Hadley Road Fort Wayne, Indiana 46804 United States of America Phone: (260) 459-8200 U.S. Facsimile: (888) 790-8193
P550W Series Air Dryers
 P550W Series Air Dryers User s Guide Models covered: P550W P550WH P550WLP P552W P552WH P552WLP 1. Welcome & Congratulations Congratulations on your purchase of a new PUREGAS P550W Series Air Dryer! We
CMA Dishmachines Knott Avenue Garden Grove, CA Undercounter High Temperature Dishwasher. Service Replacement Parts.
 CMA Dishmachines 1700 Knott Avenue Garden Grove, CA 981 Toll Free: 1- (800) 8-617 Fax: 1- (71) 89-11 Service Replacement Parts Undercounter High Temperature Dishwasher Model: UC6e M Machine Serial No.
Owner s Manual RD432-0 Chemical Controller
 Owner s Manual RD432-0 Chemical Controller Table of Contents I. Introduction page 2 A. Water Chemistry page 2 B. Safety page 3 C. System Components page 4 D. Specifications page 7 E. Controller Panel Descriptions
DEMA 832 LAUNDRY MASTER TM INSTALLATION INSTRUCTIONS
 System Overview DEMA 832 LAUNDRY MASTER TM INSTALLATION INSTRUCTIONS The DEMA 832 Laundry Master is designed for long reliable use with simplicity in mind for both the installer and user. The system is
Model Series Series
 PumpAgents.com - Click here for Pricing/Ordering Model 36800-Series 36900-Series ELECTRIC WATER SYSTEM PUMPS Automatic Multi-Outlet FEATURES Self-Priming Diaphragm Design Allows Dry Running Built-in Discharge
Electrical cable Water supply tube Fittings for tube Coupler Teflon tape. Hole saw min. 2½" bit
 Installation Parts and Tools Parts not Provided Electrical cable Water supply tube Fittings for tube Coupler Teflon tape Air gap Wire nuts for 6-gauge wiring Hose clamp ⅞" UL approved strain relief Electrical
MODEL CMA-180UC INSTALLATION & OPERATION Rev 1.17A
 Owner s Manual MODEL CMA-180UC INSTALLATION & OPERATION Rev 1.17A C M A D I S H M A C H I N E S 1 2 7 0 0 K N O T T S T R E E T GARDEN GROVE, CALIFORNIA 92841 800-8 5 4-6 4 1 7 FAX 714-895-2141 www.cmadishmachines.com
MODEL CMA-180UC SERVICE & PARTS MANUAL Rev 1.10
 MODEL CMA-180UC SERVICE & PARTS MANUAL Rev 1.10 CMA DISHMACHINES 12700 KNOTT AVENUE GARDEN GROVE, CALIFORNIA 92841 800-854-6417 FAX 714-895-2141 www.cmadishmachines.com 0203 TABLE OF CONTENTS MODEL CMA-180UC
INSTALLATION AND OPERATION INSTRUCTIONS LC-D SERIES COFFEE CONCENTRATE BREWER WITH DIGITAL ELECTRONIC CONTROL CENTER
 107353 1-00 INSTALLATION AND OPERATION INSTRUCTIONS LC-D SERIES COFFEE CONCENTRATE BREWER WITH DIGITAL ELECTRONIC CONTROL CENTER PLUMBER'S INSTALLATION INSTRUCTIONS CAUTION: Power to brewer must be OFF
Safety. Rinse Kit for Multi-Pro 1200 and 1250 Turf Sprayers Model No Safety and Instructional Decals. Installation Instructions
 Rinse Kit for Multi-Pro 1200 and 1250 Turf Sprayers Model No. 106-4842 Form No. 3353-529 Rev B Installation Instructions Note: Determine the left and right sides of the machine from the normal operating
Revision B Printed Fall Elston Manufacturing HC Heater Owners Manual
 Revision B Printed Fall 2007 Elston Manufacturing HC Heater Owners Manual Table of Contents Important Safety Information... ii 1) Description of Heater... 1 General information about your heater including
Installation, Operation & Maintenance Manual. Wash System
 Installation, Operation & Maintenance Manual Wash System Kleen Flo Wash System Installation, Operation & Maintenance Manual CONTENTS Introduction and Overview... 3 Pipeline Wash System Features... 5 Wash
TECHNICAL MANUAL CHEMICAL SANITIZING GLASSWASHER DISHMACHINE SERIES INSTALLATION MANUAL FOR EXPORT UNITS SERVICE MANUAL FOR DOMESTIC UNITS
 CHEMICAL SANITIZING GLASSWASHER DISHMACHINE SERIES TECHNICAL MANUAL INSTALLATION MANUAL FOR EXPORT UNITS SERVICE MANUAL FOR DOMESTIC UNITS FOR NOBLE MODELS: NOBLE CG July 23, 2015 P/N 07610-004-26-27 Noble
Standard Features. Performance/Capacities
 TSC-66 Traditional Power/Connections Approximate Total Load AMPS 208V / 60HZ / 3PH 51.8 208V / 60HZ / 1PH 88.3 230V / 60HZ / 3PH 47.8 230V / 60HZ / 1PH 81.5 460V / 60HZ / 3PH 23.9 Booster Heater Options
Instruction Manual Machine P/N: # & #
 Instruction Manual Machine P/N: 1000830# & 1000831# 1 CONTENTS 1. INFORMATION...3 1. Introduction...3 2. Safety...3 3. Warning Notes...3 4. Contact...4 5. Electrical Installation Procedure...4 6. Plumbing
P4200W2 Series Air Dryer
 P4200W2 Series Air Dryer User s Guide Models covered: P4200W2 P4200W2LP P4202W2 P4202W2LP P4202W2H 1. Welcome & Congratulations Congratulations on your purchase of a new PUREGAS P4200W2 Series Air Dryer!
541D19 SERIES. Technical Manual. A Division of Aquion Partners L.P.
 541D19 SERIES Technical Manual A Division of Aquion Partners L.P. Table of Contents Introduction... Page 1 Technical Specifications... Page 2 Flow Diagrams... Page 3 Injector & Flow Control Selection Injector...
DEMA I /23/18. detergent and. responds to. rinse triggers. of a pressure indicating. plumbing
 DEMA TITAN II WAREW WASH CONTROL T.82 & T.83 SERIESS Overview The Titan warewash system controls all chemical delivery functions for dish machines and similar warewash applications. The system has an advanced
J120 STEAM BOOSTER INSTALLATION, OPERATION, AND SERVICE MANUAL J120 STEAM BOOSTER. J120 Steam Booster Manual D
 INSTALLATION, OPERATION, AND SERVICE MANUAL J120 STEAM BOOSTER J120 STEAM BOOSTER J120 Steam Booster Manual REVISION HISTORY Revision Letter Revision Date Made by Applicable ECNs Details A 10-27-04 CBW
DEMA 844 Laundry Master Laundry Chemical Dispensing
 DEMA 844 Laundry Master Laundry Chemical Dispensing Overview The DEMA Laundry Master is a digital laundry dispenser designed to dispense chemicals when signals are received from commercial laundry machines.
Machine Serial No. Technical Manual. International Door Dishwasher. February, 1998 Manual P/N Rev.A
 This manual supersedes PIN 112426, April, 1997. Destroy previous edition. For machines beginning with serial no. 89519 and above Technical Manual International Door Dishwasher Model I-DHM3 High Temperature
INSTALLATION INSTRUCTIONS UNDERCOUNTER DISHWASHERS
 INSTALLATION INSTRUCTIONS UNDERCOUNTER DISHWASHERS VIKING 111 Front Street Greenwood, Mississippi 38930 USA (662) 455-1200 IMPORTANT - PLEASE READ AND FOLLOW Before beginning - please read these instructions
Propo tional Injector Bomba de dosificación proporcional Pompe à Dosage Proportionnel Pompa proporzionale
 Propo tional Injector Bomba de dosificación proporcional Pompe à Dosage Proportionnel Pompa proporzionale Manual del Usuario Manuel Utilisateur User Manuel Manuale d Uso User Manual The MixRite is powered
How to Use and Care for Your Sleek
 How to Use and Care for Your Sleek Table of Contents Get to know the important buttons, lights and key parts.. 3 This part should be read carefully: it s about safety!...4 First time using The Sleek? Follow
Warewashing individual and integrated systems
 Warewashing individual and integrated systems 2 Warewashing WareBasic PR 7 Detergent peristaltic pump with analog speed adjustment WareBasic WareBasic PR 1 Rinse-Aid or Sanitizer peristaltic pump with
The Danger signal indicates an immediately hazardous situation which, if not avoided, will result in death or serious injury.
 The Danger signal indicates an immediately hazardous situation which, if not avoided, will result in death or serious injury. The Warning signal alerts you to potential hazards or unsafe practices which,
Technical Manual. June, Undercounter Dishwasher. Machine Serial No. Model UH-200B UH-200 UH-100B UH-100 UL-100
 For machines beginning with Serial no. U-1352 Technical Manual Champion Undercounter Dishwasher Model UH-200B High Temperature with Built-in Booster Fresh Water Final Rinse UH-200 UH-100B High Temperature
USER S MANUAL AND INSTALLATION INSTRUCTIONS IMPORTANT
 USER S MANUAL AND INSTALLATION INSTRUCTIONS P3BD Series 13 SEER Single Package Air Conditioner IMPORTANT Read this owner information to become familiar with the capabilities and use of your appliance.
Policy # MI_WASH Department of Microbiology. Page Quality Manual TABLE OF CONTENTS APPENDIX I STERILIZATION AND GLASS WASHING TECHNICAL MANUAL...
 Quality Manual Version: 1.1 CURRENT 1 of 13 Prepared by QA Committee Issued by: Laboratory Manager Revision Date: 4/14/2018 Approved by Laboratory Director: Annual Review Date: 5/1/2019 Microbiologist-in-Chief
Installation, Operation, and Maintenance Manual RTE14S & RTE14S-2. For the Taco Bell "Rethermalizer" Model Numbers
 Installation, Operation, and Maintenance Manual For the Taco Bell "Rethermalizer" Model Numbers RTE14S & RTE14S-2 NOTICES There are three different types of notices that you should be familiar with, a
1 ESMA, Inc. P. O. BOX 734 * SOUTH HOLLAND, IL * (800) * FAX (708)
 * FAX (708)") 1 2 Instructions for Ultrasonic Washer E789 (U.L. Approved) 1. INTRODUCTION The E789 Automatic Ultrasonic Washer automatically performs a cleaning cycle, the major steps of which are: Ultrasonic cleaning
1 2 Instructions for Ultrasonic Washer E789 (U.L. Approved) 1. INTRODUCTION The E789 Automatic Ultrasonic Washer automatically performs a cleaning cycle, the major steps of which are: Ultrasonic cleaning
American Dish Service
 American Dish Service INSTALLATION INSTRUCTIONS Model JDS12 (T) or (R) Muffler Booster (T) 12kW, 240v, 3-ph, (R) 12kW, 208v, 3-ph Manufactured by Hubbell Electric Heater Company for use on American Dish
Owner s Manual GLC MANUAL INSTALLATION SERVICE PARTS REV.1.00
 Owner s Manual GLC MANUAL INSTALLATION SERVICE PARTS REV.1.00 C M A D I S H M A C H I N E S 1 2 7 0 0 K N O T T S T R E E T GARDEN GROVE, CALIFORNIA 92841 800-8 5 4-6 4 1 7 F A X 7 1 4-8 9 5-2141 www.cmadishmachines.com
RADIATION PROTECTION SYSTEMS, INC.
 60 LEONARD DRIVE GROTON CT 06340 RADIATION PROTECTION SYSTEMS, INC. OPERATING MANUAL O/M-22 RESPIRATOR WASHER MODEL RCM-501 with PLC Controller REVISION L REVISION SHEET O/M-22 Rev. C: Deleted Standard
Installation Instructions
 GE Consumer & Industrial Appliances Installation Instructions Junction Box Cover Within this user bag, you will find a junction box cover and a #10 hex head screw used to attach the junction box cover
INSTALLATION, OPERATION & MAINTENANCE MANUAL BERG TEMPERATURE CONTROL UNIT
 INSTALLATION, OPERATION & MAINTENANCE MANUAL BERG TEMPERATURE CONTROL UNIT TABLE OF CONTENTS Description Page # Introduction 3 Customer Support 3 Model Number Nomenclature 4 Control Panel 5 Display Panel
CONTROLS INSTRUCTIONS MANUAL ENGLISH
 CONTROLS INSTRUCTIONS MANUAL ENGLISH Table of Contents 1. Introduction of the Innova Controls 3 1.1 Precautions 3 2. Operating Instructions 2.1 Quick Start 4 2.2 Direction of Use 5 2.2.1 Heater on 5 2.2.2
BOHEC R CRS86A DISHWASHER STANDARD FEATURES MODEL ACCESSORIES DIRECTION OF OPERATION VOLTAGE OPTIONS AT EXTRA COST
 Item # Quantity C.S.I. Section 11400 DISHWASHER STANDARD FEATURES 244 racks per hour Opti-RinSe system Ball detent clutch conveyor drive mechanism Top mounted controls Stainless steel anti-clogging wash
STERO SD3. Door-Type Dishwasher MODEL: ML
 INSTRUCTION MANUAL STERO SD3 Door-Type Dishwasher MODEL: SD3 ML-130232 STERO, a division of Illinois Tool Works, Inc. 1758 Corporate Circle Petaluma, CA 94954 Phone: 800-762-7600 Fax: 707-762-5036 Website:
K00364 Electronic Bin Thermostat
 K00364 Electronic Bin Thermostat Installation Instructions This kit reduces overfill and condensation issues and can be used on any Manitowoc ice machine installed on an ice dispenser. Order kit number
Operation Manual NEMA 4X Controls
 Operation Manual NEMA 4X Controls Douglas Machines Corp. Page 1 of 25 Douglas Machines Corp. Page 2 of 25 PREAMBLE We congratulate you on the purchase of your new rack, pan, and utensil washer. In order
P4200PM / P5000PM Remote Air Dryer User s Guide
 P4200PM / P5000PM Remote Air Dryer User s Guide 1. Welcome & Congratulations Congratulations on your purchase of a new PUREGAS P4200PM / P5000PM Air Dryer! We here at PUREGAS are very proud of our products
Dishwasher Cycle Chart Condensation Dry System
 Models: DMR57LFB/XAA DMR57LFS/XAA DMR57LFW/XAA DMR77LHB/XAA DMR77LHS/XAA DMR77LHW/XAA DMR78AHB/XAA DMR78AHS/XAA DMR78AHW/XAA Program Drain Pre-wash 1 Fast Track Troubleshooting IMPORTANT SAFETY NOTICE
INSTALLATION, OPERATION and MAINTENANCE MANUAL for Cres Cor AQUATEMP TM HUMIDITY CONVECTION and RETHERM OVENS with MICROPROCESSOR CONTROLS
 9 Heisley Road Mentor, OH 0- Rev. (6/0) Page of INSTALLATION, OPERATION and MAINTENANCE MANUAL for Cres Cor AQUATEMP TM HUMIDITY CONVECTION and RETHERM OVENS with MICROPROCESSOR CONTROLS ROFWB-Q COFWUAB-Q
Owner s Manual. Keep with machine for reference CMA DISHMACHINES KNOTT AVENUE GARDEN GROVE, CALIFORNIA FAX
 Owner s Manual Keep with machine for reference MODELS CMA-180/180 TALL Including 480V MACHINES Installation and Operation Rev 2.08 CMA DISHMACHINES 12700 KNOTT AVENUE GARDEN GROVE, CALIFORNIA 92841 800-854-
aquaphyll TM QUAD Wall Mounted Chemical Dispensing System
 aquaphyll TM QUAD Wall Mounted Chemical Dispensing System w w w. p i o n e e r e c l i p s e. c o m aquaphyll tm QUAD wall mounted chemical dispensing system AquapHyll is the professional s choice in wall
Technical Manual. June, Undercounter Dishwasher. Machine Serial No. Model UH-200B UH-200. For machines beginning with Serial no.
 For machines beginning with Serial no. U-2239 Technical Manual Champion Undercounter Dishwasher Model UH-200B High Temperature with Built-in Booster Fresh Water Final Rinse UH-200 High Temperature Fresh