User Manual for MullToa 10 and 25
|
|
|
- Marcia Patterson
- 5 years ago
- Views:
Transcription

1 User Manual for MullToa 10 and 25
2
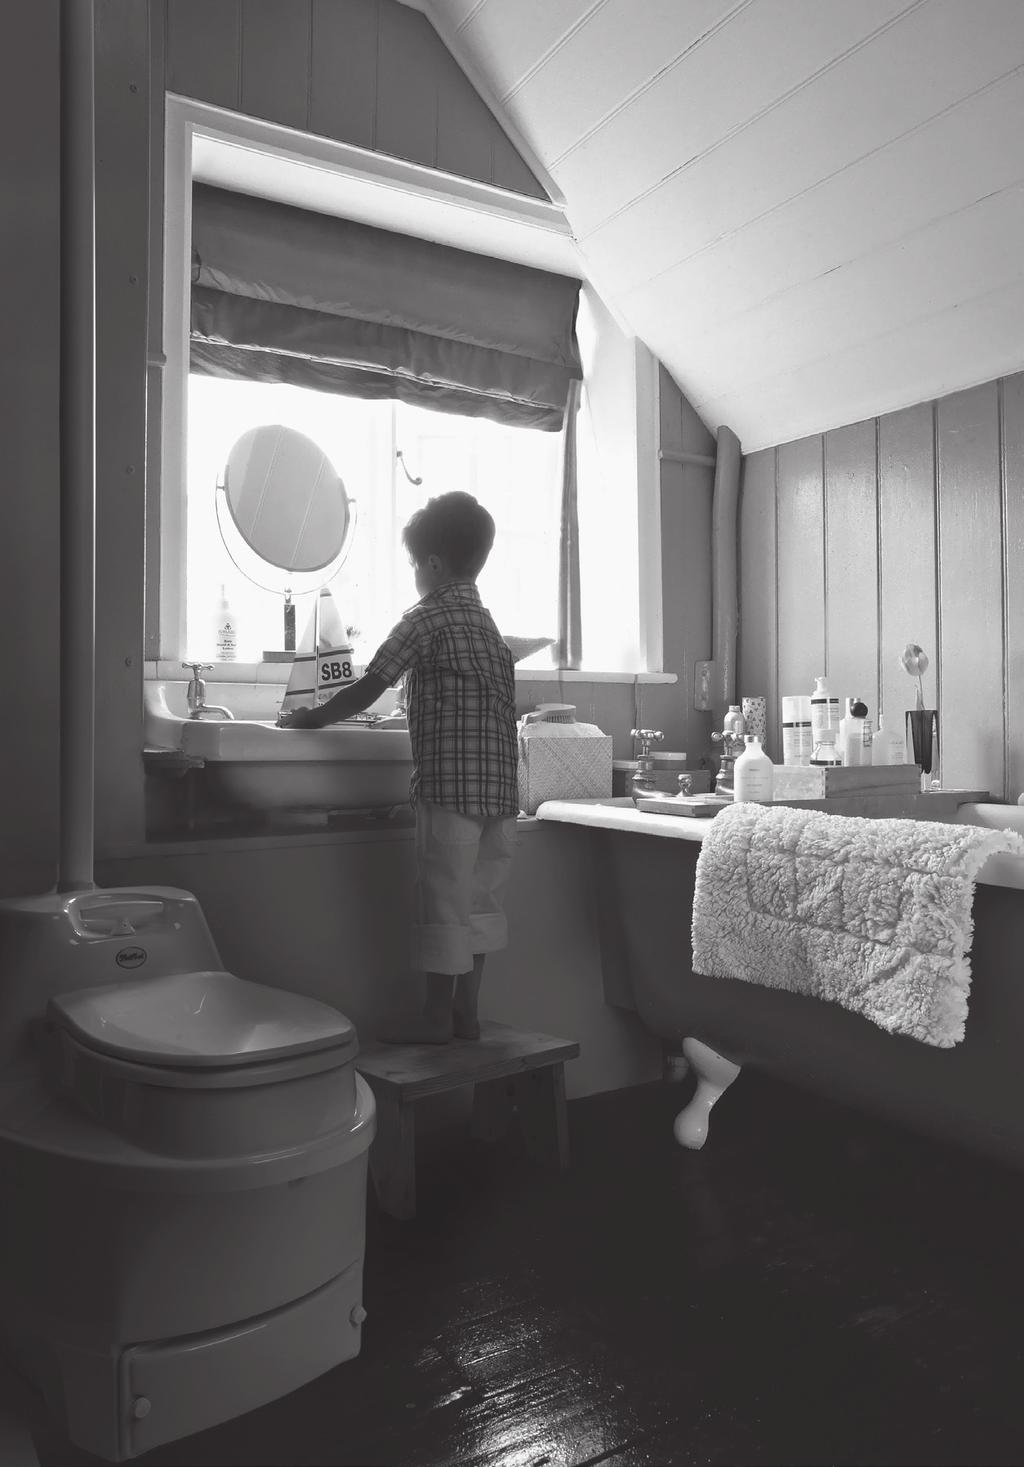
3 User Manual for MullToa 10 and 25 Congratulations on your purchase of MullToa toilet Your bio-toilet is patented and manufactured in Sweden and the brand is MullToa. MullToa means that it produces natural humus in the actual unit, without the use of water or chemicals. Our largest model has been awarded the Nordic Ecolabel (the Swan mark). 1
4 INTRODUCTION Please read all these instructions before beginning to install your MullToa toilet. Experience has shown that problems that usually occur are almost always related to installation and maintenance. To ensure hassle-free use, please take a moment to read through the manual. Three important things to always remember: When the toilet is in use the room temperature must be at least 18 C. If you are away for more than two days, you should always switch the power off, otherwise the compost will become dry. Switch the power off and place the cover over the seat opening. The moisture content is an important component of the biological process, so it is important to retain the moisture as long as possible, even when the toilet is switched off. Apart from the natural needs being taken care of during a visit to the toilet, the only thing that should go into the toilet is toilet paper. Your new MullToa experience starts here! We hope you will be completely satisfied. CONTENTS How MullToa works 3 Contacting Environmental Health 3 Your MullToa package 3 Installation package 3 Optional accessories 3 MullToa cross-section all parts 3 Installation 4 What you need 4 Pipe installation 4 Temperature 4 Air supply 4 Assembly 5 Starting the empty toilet 5 Maintenance 6 Extra humus starter 6 Mixing 6 Setting the thermostat 6 About the liquid in the level tube 6 Keeping the compost at right temperature 6 Emptying frequency 7 Emptying in spring 7 Emptying the tray 7 Prepare for a couple of days or more 7 At the end of the season 7 At the start of the season 7 FAQ 8-9 Bad odour 8 Compost too dry 8 Compost too wet 8 Replacing the break-pin 9 Spare parts and service 9 2


 The installation package contains: ventilation pipes, (4x1.")
5 How the MullToa works The MullToa is a biological toilet that composts waste and evaporates liquid, in the toilet itself. The composting process takes place using nature's own microorganisms, without the need of any chemicals. The toilet should be used as any other. Controlled air supply and heat, as well as regular mixing of the compost, accelerates the composting process and converts the waste into eco-friendly humus. This makes a nutrientrich supplement for your garden. Contacting Environmental Health Contact Environmental Health office regarding local health regulations. This always applies when installing any type of toilet. Your MullToa package The MullToa box contains: A toilet, a 50 cm humus rake and a bag of humus. The installation package (accessories) The installation package contains: ventilation pipes, (4x1.1 m ventilation pipe with 55 mm outer diameter), exterior pipes (2 x 0,5 or 1,0 m, 110 mm outer diameter), insulation (2 x 1 m), reducing coupling, roof flashing and insect netting. Optional accessories Optional accessories: pipe bends (30 and 45 ), additional insulation, straight pipes, humus starter, an extra tray and a kit for installation through the outer wall. MullToa in cross section 1. Rubber coupling 2. Adjustable thermostat 3. Fan motor 4. Terminal block with flat pin connection 5. Heating element 6. Airflow 7. External cord 8. Composting chamber 9. Tray 10. Handle 11. a. Switch for mixer motor b. Nut for switch c. Nut for compost cover 12. Mixer motor (MullToa 25) 13. Cover 14. Compost cover 15. Shear-pin 16. Shaft with mixer arms a. upper mixer arm b. lower mixer arm 17. Airflow 18. Grating 19. Front cover 20. Liquid tube, overflow (at the left hand side, seen from the front) 21. Liquid tube, tray (at the right hand side, seen from the front) 22. Lower heating element (MullToa 25) 3
6 INSTALLATION What you need For installation you need to have the following tools available: Drill Hole saw (55 mm) or Compass saw Saw Metre rule/measuring tool Asphalt sealant/adhesive Also check that the floor area where the toilet is to be positioned is large enough. The floor area required is: Width 55 cm x Length 110 cm (for the toilet and removal of the humus tray). Pipe installation All pipes going through the ceiling into cold spaces (e.g. the attic) must be insulated. This is to prevent draughts and condensation in the ventilation pipe. Insulation is essential, regardless of how much or how little the toilet is used. Do not use pipe bends over 45. Do not use a rain cap on top of the ventilation pipe - the air must be allowed to flow out freely. Only the insect netting should be on top of the pipe. Temperature The room in which the toilet is installed must be insulated. When the toilet is in use the room temperature must be at least 18 C to ensure it functions properly. The easiest thing to do is to fit a thermostaticallycontrolled radiator. If the toilet is not in use then the temperature need not be controlled, low temperatures will not damage the unit itself. Air supply In order to ensure adequate air supply, a vent should be installed in the exterior wall. The exhaust air is evacuated through the toilet. Avoid having a bathroom fan in the toilet room as it creates a back draught, which can lead to odours in the room. 4
7 Assembly 1. Set the toilet in position against the wall. The floor must be even and insulated. MIN. 0,5 m Insect netting Reducing coupling Pipe 110 mm 25 mm Insulation Eng 2. Measure and make a hole for the ventilation pipe in the ceiling, with 55 mm diameter. Install the ventilation pipe with the non-sleeved end down inside the rubber coupling on the toilet. 3. Measure and make a hole in the roof, with 55 mm diameter. MAX 45 Roof flashing 25 mm Insulation 4. Push the pipe up through the hole. Seal it well using asphalt sealant between the pipe and the roof to prevent any leaks. VENT alternative 18 C Ventilation pipe 55mm 5. Insulate the pipe from the ceiling up to the top. All pipework in cold spaces must be insulated. 6. Cut the exterior pipe to fit the angle of the roof. 7. Place the roof flashing onto the exterior pipe. (Use soapy water to make it easier). If you have a tin roof, the best thing to do is to get a lead worker to create a junction between the roof and the exterior pipe. 8. Pass the exterior pipe over the ventilation pipe's insulation. Put on the reduction coupling. 9. Adjust the roof flashing and seal firmly with asphalt sealant between the roof flasing and the roof. 10.Fit the insect netting against the stop on the reducing coupling. VENT alternative Roof flashing Nonsleeved end Sleeved end Radiator seal of asphalt Roof (brick, paper or plate/plastic) Starting the empty toilet 1. Pour 2/3 of the humus starter into the toilet. About half of the humus starter will fall down through the grating into the tray. 2. Plug into an earthed socket. Open the lid and the motor will start automatically and run for a short while. Close the lid and the motor will make one turn. Repeat this a couple of times. On model 10 you need to turn the handle clockwise at least a couple of times to distribute the humus starter. The tray fills up immediately and should stay this way until the compost level reaches the upper mixing arm. 3. Setting the thermostat. This depends on how many people are going to use the toilet. See recommended use in the separate sketch under maintenance instructions, page 6. 5

8 MAINTENANCE A properly installed and maintained MullToa is odour-free. We emphasise this to highlight the importance of reading the maintenance instructions carefully. If it is not working as it should it has usually something to do with installation or maintenance. Of course we want your MullToa to work, hassle-free, and we therefore ask that you please take the time to read through this information in its entirety. Thank you in advance and enjoy your new MullToa toilet! Extra humus starter For the best composting, the compost must be of a porous and moderately moist consistency. At low load, or 1-2 people, calculate around 1 /2 litre per person per week. At higher loads, or 3-4 people, halve the amount. If four people a day use the toilet, two litres of humus should be added into the compost every week. Use the humus rake to mix the humus in. If hard lumps form in the compost, make sure you break them up. Hard lumps can be a sign that the heat is too high. If this is the case, turn the thermostat down. Mixing When the seat cover is opened, the motor will start automatically and run for a short time. Close the lid after the toilet has been used. The motor will start again and complete a full turn. On model 10, the handle should be turned clockwise at least a couple of times to distribute the humus starter. This is so that waste and paper will be mixed into the compost and to make it more porous. This is essential for efficient composting. Setting the thermostat Before the first use the thermostat should initially be set according to how many people will be using the toilet. Number of people Recommended setting at start Emptying 10 For higher or lower loads, you can easily change the setting, as recommended below. HOW TO SET THE THERMOSTAT Adjust the thermostat according to load. Check the liquid tube ( 21) on the right hand side. On the Model 25 the thermostat works in two steps depending on settings. At level 1-7 the main heating element (5) is working At level 8-10 the main heating element (5) and the lower heating element (22) are both working. LIQUID IN THE LEVEL TUBE The level tube (on the right side, viewed from the front) shows how much liquid is in the tray. There will always be some liquid in the tray, but the whole tube should definitely not be full; this would mean the whole tray is full of liquid. One centimetre of liquid in the tube is OK. If your compost is too moist, or if you have an extra load over a longer period of time, turn up the thermostat. RIGHT TEMPERATURE At the right temperature, the compost has a porous and moderately moist consistency. If liquid stays on top of the compost and seeps down into the tray slowly, then the compost is too wet and can no longer absorb the liquid as intended. Increase the thermostat setting slowly and add a few litres of humus starter. On the other hand, if hard lumps form or toilet paper remains on top, so that it doesn't get soaked and mixed in properly during mixing, the compost is too dry. If so, turn the thermostat down. 6
9 EMPTYING FREQUENCY In vacation homes, with a four to six weeks stay per year, it is usually enough to empty the tray once. But, at more frequent use, you have to adapt the emptying frequency. The general rule is to empty the tray when the compost level reaches the upper mixing arm. You soon learn to adapt the emptying frequency according to use. The tray will be filled up again after a couple of days in use. EMPTYING IN SPRING Where you can get by with one emptying a year, leave the compost in the toilet over the winter. The tray is then emptied in the spring before the toilet starts to be used. EMPTYING THE TRAY A few days before emptying, increase the thermostat to 10 to dry up the liquid in the tray. Once it has disappeared from the level tube, do as follows: 1. Switch the power off! 2. Make sure that there is no liquid in the level tubes on the right or left. 3. If there is liquid, increase the thermostat setting and wait a few days before emptying. 4. Emptying: Remove the front cover. Remove the hose to the tray. If the tray is stuck in place, due to compost between the tray and the grating having dried out, release the tray by pulling the humus rake back and forth between the tray and the grating. 5. Empty the tray in a suitable place for post-composting, such as in the garden compost. 6 Clean the tray. Before you slide it into place, check that the area where the tray goes is clean. 7. Replace the level tube. Replace the front cover. For more frequent use, the more often the tray has to be emptied. If the toilet has not been used for the last 2 months, the contents in the tray can be used as fertilizer immediately. But, when emptying the tray in the middle of the season, the contents needs to compost further for about 2 months. Remove the full tray and replace it with an additional tray (which can be bought from us). Put the full tray in a plastic bag. Prepare for brief absences If you are away for more than two days, turn the power off and put the cover into the seat opening, otherwise the compost will quickly become hard and dry. If there is a lot of liquid, for example, after heavy use, you can leave the toilet running for a limited period (approximately one week). Leave the toilet running with the thermostat in position 1. Then only the fan will run, and the contents of the tray will dry out slowly. At the end of the season When the season is over and it is time to leave your holiday cottage, unplug the toilet and put the cover in the seat opening. You can also turn off the heat in the toilet room, as the MullToa cannot freeze and break. New season approaching When the season is approaching, and it is time to open up your cottage, it is also time for the MullToa to be used again after a long break. Check if the compost has become hard. This is especially important on MT25, otherwise the shear pin might break.if so, break it up with the rake. Then emplty the tray. If there is less than 5 cm of compost on the grate, add som more humus starter. 7
10 FAQ How do I know if the compost is too dry? Answer: The forming of hard lumps indicates that it is too dry. Another indication is that toilet paper remains on top instead of becoming wet and getting mixed in properly during mixing. What do I do if the compost becomes too dry? Answer: Use the thermostat to reduce the heat to a lower level and spray some water on the compost, at the same time it may be useful to break up the compost through the seat using the humus rake supplied. You should also use toilet paper sparingly, as this is broken down more slowly when the compost is too dry. If the compost is consistently too dry, despite the thermostat being at position 1-2, then you can install a timer that turns the toilet power off at night. How do I know if the compost is too wet? Answer: When the compost is no longer able to absorb liquid, and it sits on top of the compost. What do I do if the compost becomes too wet? Answer: First check that power is reaching the toilet, so that the fan and heat work. If the fan and heating element are working correctly then you should be able to hear it and also feel the heat from the back of the toilet with your hand. Then check: That the ventilation pipe has been installed according to the instructions and that it is well insulated. That the temperature inside the room is at least 18 C. If the toilet has been overloaded (if so, the thermostat setting needs to be adjusted). That there is plenty of air being supplied through the wall vent. Drying up the compost, do the following: 1. Mix a few litres of MullToa Special Humus into the moist compost. 2. If there is also liquid in the level tube, turn the thermostat up to a higher setting. Do not turn it down to a lower setting until the liquid regains its normal level. 3. If there is liquid in the level tube on the left side as viewed from the front, the tray has overflowed. Raise the thermostat and wait a couple of days before emptying. 4. If the compost does not become drier, the excess liquid will need to be emptied out. Loosen the level tube at the top and connect a garden hose. Note: Do not open the front cover. What can be put in the toilet? The toilet can be used like any other, including for the disposal of toilet paper. However, the disposal of items such as sanitary towels or tampons, cigarette butts, or burning or glowing objects is not allowed. What do I do if there is a bad odour in the toilet room? Answer: A properly installed and maintained MullToa is completely odour-free. If you do experience a bad smell in the toilet room, it is an indication that something is wrong. Make sure you have carefully followed the installation and maintenance instructions (using the quick-guide below) and you will probably be able to determine the cause of the malfunction. 1. Check that the Biolet is getting enough air through a vent in the outer wall. 2. Make sure the front cover is closed properly. 3. Avoid draughts by not having both windows and vents open at once. 4. Check that the pipes fit the toilet properly. 5. Check that the pipe joints are sealed completely tight. 6. Check that any pipe bends you have are not over 45, and that you do not have more than two bends. 8
11 What do I do if the mixer motor does not work (MullToa 25)? The mixer motor is protected in two different ways in order to prevent damange on mechanical parts. The motor runs normally, but the mixing arms do not move! There is a shear pin mounted in the motor shaft. When the resistance is too tough, the shear pin breaks and must be replaced. The motor starts and stops and after a while it starts again by itself, but the mixing arms are still not moving! The electrical motor has an overheating protection, which activates if the resistance is too high. It will turn itself off. But it will try again after a while and it will repeat this until the high resistance in the compost has been resolved. It usually is enough by mixing the compost using the manual rake and adding a few litres of humus starter. See What do I do if the compost becomes too dry page 8 What do I do if the shear-pin breaks (MullToa 25)? 1) Unplug the toilet. 2) Lift the toilet at the front, pull it forward and loosen the ventilation pipe. 3) Unscrew the round nut holding the switch (11b) for the mixer and press the button inside the plastic. 4) Loosen the nut for the compost cover (11c). Lift the upper section. 5) Disconnect the wires that connect the mixer motor (12) to the terminal block on the electrical panel. Memorise their positions before disconnecting them. 6) Remove the four Phillips screws holding the mixer motor in place in the lower section. 7) Lift the mixer motor straight up. (If the mixer motor is wedged in the shaft, then try lifting the motor up while you rotate the shaft with an adjustable spanner.) 8) Working on a rigid surface or by fastening the motor shaft in a vice, tap out the remains of the broken shear-pin (15) using a mandrel or the new shear-pin. 9) Tap in the new shear-pin and put the mixer motor back. 10) Reattach the wires to the terminal block. 11) Perform a test run. 12) Replace the top section, the round nut holding the switch for the mixer in place and the nut for the compost cover. 13) Put the toilet in place. 14) Switch the power back on. When do I need to call a qualified electrician? MullToa is approved for installation in bathrooms. If the main cord is damaged it must be replaced by the manufacturer or its repair business, or another qualified person, to prevent injury. This warning is placed near the toilet. Where do I get parts and service? Contact you national dealer. Always have the serial number and model at hand. This information can be found on a sticker at the upper back of the toilet. 9
12 Swedish Ecology AB Klippan 1J S Göteborg Sweden Tel: Fax:
User Manual for Separera 30
 User Manual for Separera 30 User Manual for Separera 30 Congratulations on your purchase of a Separera 30. Before installing your new Separera 30, we recommend that you read through this instruction in
MANUAL BIOLET. Model Separera 30 and 30 NE. What you have to know about the installation and the use of your Biolet. Websites :
 MANUAL BIOLET Model Separera 30 and 30 NE What you have to know about the installation and the use of your Biolet Websites : English : www.composttoilet.eu Dutch : www.composttoilet.be French : www.toilletteacompost.be
Comfort Odour free Easy handling. Waterless. Environmentally friendly. Feels like home. Comfort wherever you are.
 Comfort Odour free Easy handling Waterless Environmentally friendly Feels like home Comfort wherever you are Separett VILLA 5-year guarantee www.separett.com Separett a complete toilet system for vacation
Feels like home. Unlimited Capacity Odour free Easy handling Waterless. Comfort wherever you are. Environmentally friendly
 Unlimited Capacity Odour free Easy handling Waterless Environmentally friendly Feels like home Comfort wherever you are Separett VILLA 5-year guarantee www.separett.com 5-year guarantee Child Seat Included
GREEN LOO DRY COMPOSTING TOILET Owners Installation Operation Manual. for the. GT 120 Family and GT 330
 GREEN LOO DRY COMPOSTING TOILET Owners Installation Operation Manual for the GT 120 Family and GT 330 2 INSTALLATION PLANNING It's all in the planning! For proper operation of the toilet you should consider
6L PRESSURE COOKER. Instruction Manual. Model: PLA1424
 6L PRESSURE COOKER Instruction Manual Model: PLA1424 Due to ongoing product improvements, specifications and accessories may change without notice. Actual product may differ slightly to that depicted.
Unlimited Capacity. Odor free. Easy handling. Waterless. Environmentally friendly. Feels like home. Comfort wherever you are.
 Unlimited Capacity Odor free Easy handling Waterless Environmentally friendly Feels like home Comfort wherever you are Separett VILLA 5-year guarantee www.separett.com Separett A complete toilet system
GREEN LOO DRY COMPOSTING TOILET MANUAL. for the. GT 120 Family and GT 330
 GREEN LOO DRY COMPOSTING TOILET MANUAL for the GT 120 Family and GT 330 INSTALLATION PLANNING It's all in the planning! For proper operation of the toilet you should consider a number of issues during
Atmos EasySolar. Installation Instructions for. In-roof and flat roof installation with flat plate collectors
 Atmos EasySolar Installation Instructions for Atmos EasySolar In-roof and flat roof installation with flat plate collectors Atmos Heating Systems West March Daventry Northants, NN11 4SA Tel: 01327 871990
Comfort. Odour free Easy handling. Waterless. Environmentally friendly. Feels like home. Comfort wherever you are.
 Comfort Odour free Easy handling Waterless Environmentally friendly Separett FLAME 3-year guarantee Feels like home Comfort wherever you are Separett VILLA 5-year guarantee www.separett.com Separett a
Installation and handlinginstructions for Mullis biological toilets.
 Installation and handlinginstructions for Mullis biological toilets. Please read the instruction before starting the installation and follow the handlinginstructions. The systems best functional temperature
EFX 600. aquamanta. Instruction Manual. 4year guarantee. the experts in aquatic technology. >600 Litres
 EFX 600 aquamanta TM the experts in aquatic technology >600 Litres Coldwater Tropical Marine 4year guarantee Instruction Manual Important Safeguards This appliance is not intended for use by persons (including
SAFIRE 1600D, 1800D and 2100D Diesel / fuel oil heaters USAGE, INSTALLATION AND MAINTENANCE
 SAFIRE 1600D, 1800D and 2100D Diesel / fuel oil heaters 1 Heater kit contains : Heater, mounting bracket Fuel hose (3 meters), pump, a fuel tank connection to standard tanks (15, 22, 30 litres) Power supply
Atmos EasySolar. Installation Instructions for. Sloping roof and flat roof installation with evacuated tube collector
 Atmos EasySolar Installation Instructions for Atmos EasySolar Sloping roof and flat roof installation with evacuated tube collector Atmos Heating Systems TBS Building Supplies Ltd Hackwood Road Daventry
BOILING UNIT REDITAP. Installation and User Guide. IMPORTANT: This booklet should be left with the user after installation and demonstration
 in tap Boiling water to in tap sink Drain Valve (as high as possible) REDITAP CONNECTION SUMMARY Amp mains supply cold mains water into in tap optional filter cold water in hot water BOILING UNIT Installation
Air Conditioner PORTABLE. Instruction Manual. Your Guarantee. Portable Air Conditioner / Heater. For model WA-7500M
 Portable Air Conditioner / Heater Your Guarantee If this product is found to be faulty as a result of faulty materials or workmanship within one year from date of purchase, it will be repaired or replaced
* depending on model.
 EN EASY PRESSING * * depending on model www.tefal.com 1 2 3 4 5 7* 8 9 10 11 6 12 14* 13* 15 * * depending on model Click!! Click!! fig. 1 fig. 2 fig. 3 fig. 4 fig. 5 fig. 6 fig. 7 fig. 8 fig. 9 ¾ fig.
Double Door Over 70. Service Manual. Models: F NMTZH 821 F T F NMTZH 822 F T
 Double Door Over 70 Service Manual Models: F083975 NMTZH 821 F T F083973 NMTZH 822 F T Contents Parts Description...2 Circuit diagram...3 Cooling diagram...4 The guide for Disassembly Common parts of Refrigerator...5
Air Conditioner. Instruction Manual. For Models WA-1010E, WA-1010H, WA-1010M WA-1230E, WA-1230H P O R T A B L E
 R Instruction Manual For Models WA-1010E, WA-1010H, WA-1010M WA-1230E, WA-1230H P O R T A B L E Air Conditioner It is important that you read these instructions before using your new purchase and we strongly
BMW E36 Thermostat Removal And Coolant Flush
 BMW E36 Thermostat Removal And Coolant Flush Disclaimer: The cooling system is critical to the proper operation of your car. Failure to properly install all of the components of the cooling system could
AQUA PREMIER ELECTRONIC ELECTRIC SHOWER. Installation and User Guide
 AQUA PREMIER ELECTRONIC ELECTRIC SHOWER Installation and User Guide IMPORTANT: This booklet should be left with the user after installation and demonstration CONTENTS Section Page Section Page Introduction.......................
Hot Chocolate Dispenser
 Hot Chocolate Dispenser Instruction manual Model: CN219-A AU Telephone Helpline: 1300225960 Safety Tips Position on a flat, stable surface. A service agent/qualified technician should carry out installation
Air Conditioner PORTABLE. Instruction Manual. Your Guarantee. Portable Air Conditioner / Heater. For models WA-1010E, WA-1010H, WA-1010M
 Portable Air Conditioner / Heater Your Guarantee If this product is found to be faulty as a result of faulty materials or workmanship within one year from date of purchase, it will be repaired or replaced
FIREPLACE INSTALLATION
 CHECK GAS TYPE Use proper gas type for the fireplace unit you are installing. If you have conflicting gas types, do not install fireplace. See retailer where you purchased the fireplace for proper fireplace
INSTALLATION INSTRUCTIONS ELECTRIC DRYER
 INSTALLATION INSTRUCTIONS ELECTRIC DRYER Table of Contents... 2 IMPORTANT: Save for local electrical inspector s use. 3397627C DRYER SAFETY... 2 INSTALLATION INSTRUCTIONS... 4 Tools and Parts... 4 Location
USERS MANUAL. Desiccant Dehumidifier. Model: ECO DD322FW CLASSIC
 keeping your home safe and clean USERS MANUAL Desiccant Dehumidifier Model: ECO DD322FW CLASSIC Read This Manual Inside you will find many helpful hints on how to use and maintain your dehumidifier properly
Framtidens toaletter FLAME Användarmanual Ohjekirja User manual
 Framtidens toaletter FLAME 8000 Användarmanual Ohjekirja User manual 1 24 Congratulations to your new FLAME 8000 For 40 years we at Separett have been developing qualitative and functional toilet solutions
Cott Vending Inc. THESE GUIDES ARE FOR MACHINE MODEL: ROYAL 448 AND OTHER NON-ELECTRONIC (NE) ROYAL VENDORS ONLY. Store Level Vending Responsibilities
 ROYAL VENDORS ONLY. Store Level Vending Responsibilities") The Leader in Premium Retailer Brand Beverage Innovation THESE GUIDES ARE FOR MACHINE MODEL: ROYAL 448 AND OTHER NON-ELECTRONIC (NE) ROYAL VENDORS ONLY Store Level Vending Responsibilities Two employees
The Leader in Premium Retailer Brand Beverage Innovation THESE GUIDES ARE FOR MACHINE MODEL: ROYAL 448 AND OTHER NON-ELECTRONIC (NE) ROYAL VENDORS ONLY Store Level Vending Responsibilities Two employees
Mobile Air Conditioner Instruction Manual Model TC-N9KM
 Mobile Air Conditioner Instruction Manual Model TC-N9KM Please read and retain these instructions for future reference SPECIFICATION Model no. Cooling capacity Power/Ampere consumption for cooling* Air
Sanipack is a compact pump/macerator specially designed to take the waste from a wall hung or back to wall WC pan.
 1. escription Sanipack is a compact pump/macerator specially designed to take the waste from a wall hung or back to wall WC pan. I The Sanipack will pump away the waste from a WC, washbasin and shower.
1 GALLON / 3.78 LITER ULTRASONIC HUMIDIFIER
 Adorable Humidifiers 1 GALLON / 3.78 LITER ULTRASONIC HUMIDIFIER FOR THE FOLLOWING MODELS: EE-0865 EE-3186 EE-3189 EE-3190 EE-3191 EE-4139 EE-4140 EE-5058 EE-6369 EE-7270 EE-8189 EE-8190 If you have any
Index I. INSTALLATION DIAGRAM... WIRING DIAGRAMS...
 Index I. INSTALLATION DIAGRAM... 4 II. III. WIRING DIAGRAMS...... 1. Wiring diagram AC 3-N-400 50/60 Hz... 2. Wiring diagram AC 3-230 50/60 Hz...... 3. Wiring diagram AC 230 50/60 Hz... 4. Series 30 electrical
RCM-77. Instruction Manual. G-Series Cooler. U.S. Patent No. 8,215,125 RECHARGE COLD MERCHANDISER
 G-Series Cooler RECHARGE COLD MERCHANDISER U.S. Patent No. 8,215,125 Instruction Manual FOR YOUR FUTURE REFERENCE This easy-to-use manual will guide you in getting the best use of your cooler. Remember
Details: How it works MANUAL. Water connection If water supply is possible, use R15 1/2.
 MANUAL How it works Porcelain Porcelain is much more hygienic and easier to keep clean than other materials such as plastic or similar. And of course it lasts much longer. Urine hose A urine hose is mounted
Installation Instructions T 9822 Gas Dryer. en - US, CA. To prevent accidents
 Installation Instructions T 9822 Gas Dryer To prevent accidents en - US, CA and appliance damage read these instructions before installation or use. M.-Nr. 07 431 110 2 WARNING For your safety the information
SILENT 12 PORTABLE AIR CONDITIONER USER MANUAL
 SILENT 12 PORTABLE AIR CONDITIONER USER MANUAL Thank you for choosing ElectriQ Please read this user manual before using this innovative Air Conditioner and keep it safe for future reference. Visit our
Installation manual. Tumble dryers T4130. Compass Control
 Installation manual Tumble dryers T4130 Type N1130 Compass Control Installation manual in original language 487 05 41 61/EN 2011.09.16 Contents 3 Contents Safety precautions... 5 Technical data... 7 Setup...
π H-2268 SANITAIRE UPRIGHT VACUUM SAFETY uline.com
 π H-2268 SANITAIRE UPRIGHT VACUUM 1-800-295-5510 uline.com SAFETY PAGE 1 OF 7 NOTE: When using an electrical appliance, basic precautions should always be followed, including the following: READ ALL INSTRUCTIONS
CROWN WATER HEATERS CPU10 - CPU15 CPOS10 - CPOS15
 CROWN WATER HEATERS CPU10 - CPU15 CPOS10 - CPOS15 COMPACT PLUS 10 and 15 Litre Unvented Under and Over Sink Water Heater INSTALLATION AND USER GUIDE 1 DIMENSIONS 10L - 250mm 15L - 310mm 100mm 80mm 410mm
CLIM9000CE PORTABLE AIR CONDITIONER USER MANUAL
 CLIM9000CE PORTABLE AIR CONDITIONER USER MANUAL Please read this user manual before using this innovative Air Conditioner and keep it safe for future reference. SAFETY INSTRUCTIONS Important! Carefully
Service Documentation Market Release 7/84. Braun Kitchen machine KM 32 B 4209 with lamp
 Market Release 7/84 Braun Kitchen machine KM 32 B 4209 with lamp 4209 Exploded Drawing BAG Rev: 7/84 4209 4209-2 Service Information BAG Rev: 12/88 4209 Pos. No. Part Description Part Number 1 Male drive
INSTRUCTIONS AND WARRANTY
 INSTRUCTIONS AND WARRANTY MODEL NO. SPF40E SALTON ELITE PEDESTAL FAN 40CM Congratulations on purchasing our Salton Elite Pedestal Fan. Each unit is manufactured to ensure safety and reliability. Before
INSTRUCTIONS AND WARRANTY
 INSTRUCTIONS AND WARRANTY MODEL NO. SFP600 SALTON FOOD PROCESSOR Congratulations on purchasing our Salton Food Processor. Each unit is manufactured to ensure safety and reliability. Before using this appliance
900mm Island Canopy Manual
 900mm Island Canopy Manual MODEL ICF9BLS Installation and Operation CANOPY INSTALLATION AND OPERATION MANUAL Dear Customer, We thank you for choosing this quality appliance and hope you enjoy many years
Full Size Canister Service Manual Riccar Models 1700 / 1800 Power Nozzles RPB-100 / RPB-220 / RPB-224 / RPB-250
 Full Size Canister Service Manual Riccar Models 1700 / 1800 Power Nozzles RPB-100 / RPB-220 / RPB-224 / RPB-250 Table of Contents I. General Full Size Canister Issues...2 A. Full Bag Indicator...2 1. General
ER MANUAL FOR YOUR BAUMATIC
 BW18BL 50 litre thermoelectric beverage centre BW28BL 70 litre thermoelectric beverage centre ER MANUAL FOR YOUR BAUMATIC BW18BL 50 litre thermoelectric beverage centre BW28BL 70 litre thermoelectric beverage
GRUNDFOS INSTRUCTIONS. Sololift2 C-3. Installation and operating instructions
 GRUNDFOS INSTRUCTIONS Sololift2 C-3 Installation and operating instructions English (US) English (US) Installation and operating instructions Original installation and operating instructions. CONTENTS
WC2 & WC3 Installation & Maintenance Instructions
 WC2 & WC3 Installation & Maintenance Instructions Please leave this instruction booklet with the home owner as it contains important guarantee, maintenance and safety information WC3 shown WC2 WC3 IMPORTANT
Installation Instructions
 PAGE 1 Installation Instructions Important information about your new a/c system. Please read the following directions prior to installing this a/c system. PN: CK6772-1CHPU 1967-1972 Chevy PU A/C Kit Contact
Instruction Manual JLCHDD601/JLCHDD901 60cm/90cm Cooker hood
 Contents 3 Introduction 3 Safety is important 3 In the box 4 Safety information 4 Important safety information 4 Warnings 5 Cautions 5 Electrical information 6 Operation 6 Automatic shut-down 7 Care and
GB User manual. Washing machine ZWQ 5130
 GB User manual 2 Washing machine ZWQ 5100 ZWQ 5101 ZWQ 5130 Product description 1 1. The control panel 2. Lid handle 3. Adjustable levelling feet 2 3 The control panel 1 2 3 4 5 6 1. Programme selector
1. Take the hoses and elbow out of the holders, depending on model. max. 100 cm. min. * cm
 Safety instructions The washing machine is heavy - take care when lifting. Caution: frozen hoses may rip/burst. Do not install the washing machine in areas exposed to frost or outdoors. The washing machine
INSTRUCTIONS FOR USE PORTABLE VACUUM SYSTEM LEI Part # s / , , , IMPORTANT INFORMATION
 INSTRUCTIONS FOR USE PORTABLE VACUUM SYSTEM LEI Part # s / 27-009, 27-010, 27-015, 27-020 IMPORTANT INFORMATION UNATHORIZED CHANGES OR ALTERATIONS TO ANY LINCOLN PORTABLE VACUUM SYSTEM WILL AUTOMATICALLY
USERS MANUAL. Desiccant Dehumidifier. Model: ECO DD322FW SIMPLE. Read This Manual
 keeping your home safe and clean USERS MANUAL Desiccant Dehumidifier Model: ECO DD322FW SIMPLE Read This Manual Inside you will find many helpful hints on how to use and maintain your dehumidifier properly.
Owners Manual - Incorporating Operation, Maintenance and Troubleshooting
 B-Series Advanced Wastewater Treatment Units www.bluewateratu.ca Owners Manual - Incorporating Operation, Maintenance and Troubleshooting Tel: 1 877 702 4634 Certified to NSF/ANSI Standard 40, Class 1
Orrin. Instruction Manual. Includes our new CoolTouch TM Control System Looks permanent, but goes wherever you go! U.S.
 Includes our new CoolTouch TM Control System Looks permanent, but goes wherever you go! U.S. Patent Pending Orrin A Kichler Select ceiling fan Kichler Lighting 7711 East Pleasant Valley Road P.O. Box 318010
This site is based on a but applies to all 1971-on Saab 99 and Saab 900.
 by Mark Jeter updated: December 8, 2004 originally web-published June 27, 2001 This document shows how the original waterpump in a Saab "B" engine can be eliminated and replaced with a reliable, efficient
USER MANUAL WATER DISPENSER WITH ICE MAKER
 USER MANUAL WATER DISPENSER WITH ICE MAKER Model:048-GM-48200 Please read this owner s manual carefully before operating the unit. TABLE OF CONTENTS INTRODUCTIONS... 3 IMPORTANT SAFETY INSTRUCTIONS.. 3
Instructions for set-up, use and cleaning
 Nice job reading the instruction manual cover-to-cover! Here are a few extra tips to keep you & your Formula Pro Advanced happy. Push the drip tray firmly against the base to make sure it fits securely.
Maintenance Tips for Tenants
 Maintenance Tips for Tenants If you experience any minor maintenance issues during your tenancy, please follow these helpful tips from our Property Maintenance team. If you need further assistance, you
HEATED COUNTER. Operating Instructions
 HEATED COUNTER PROFF BAIN-MARIE BM2, BM3, BMOS, BMOS2, BMOS3 PROFF COOKER BMC2, BMC3 Operating Instructions S/N: 10960601160010 Rev.: 1.0 Dear Customer, Congratulations on deciding to choose a Metos appliance
installation & operating instructions
 installation & operating instructions RGE 410 RA/RM-2D 822706106 MO-M 0740 INTRODUCTION We are pleased that you have chosen this refrigerator and hope you will derive much satisfaction from using it.
Eccotemp L5 and L10 Comprehensive Troubleshooting Guide
 http://waterheatertimer.org/tent-city-usa-water-heater.html Eccotemp L5 and L10 Comprehensive Listed below are some common questions and troubleshooting guidelines for our various models. Always remember
GCG-10. Instruction Manual. G-Series Cooler. Manual is for the following models: GCG-10-N33EB G-10-N33EB UPRIGHT COOLER
 G-Series Cooler GCG-10 UPRIGHT COOLER Manual is for the following models: GCG-10-N33EB G-10-N33EB Instruction Manual Manual is for the following models: GCG-10-N33EB G-10-N33EB Instruction Manual GCG-10
USER MANUAL SILENT16 PORTABLE AIR CONDITIONER
 USER MANUAL SILENT16 PORTABLE AIR CONDITIONER Thank you for choosing electriq Please read this user manual before using this innovative Air Conditioner and keep it safe for future reference. Visit our
User Manual. Electric Heating Element MEG DRY MOA REG 2 REG 3
 User Manual Electric Heating Element MEG DRY MOA REG 2 REG 3 User Manual Our products have been designed and manufactured in such a way to ensure that all quality, functionality and aesthetic requirements
Portable Dehumidifier
 Portable Dehumidifier OPERATING INSTRUCTIONS HMT-D30-A Model Numbers: HMT-D30-A HMT-D45E-A HMT-D70E-A HMT-D45E-A HMT-D70E-A 3058080 V.161115 PURCHASE INFORMATION Thank you for choosing a Soleus Air Portable
Instruction Manual JLHDA cm Cooker hood
 Contents 3 Introduction 3 Safety is important 3 In the box 4 Safety information 4 Important safety information 4 Warnings 5 Cautions 5 Electrical information 6 Remote control 6 Programming the remote control
IMPORTANT WARNINGS Therefore, to avoid breaking it, do not turn it manually in order to seek the correct position.
 IMPORTANT WARNINGS Before use check that the voltage power supply corresponds to the one shown on the appliance data plate. Only connect the appliance to electrical sockets which have a minimum load of
Autofill counter top water boiler
 Autofill counter top water boiler Please read and keep these instructions For Burco counter top water boilers 76500 (SKU 444448531) and 76502 (SKU 444448533) Getting the best from your water boiler Remove
GDDEM10 DEHUMIDIFIER
 GDDEM10 DEHUMIDIFIER SOCIABLE REMARK When using this dehumidifier in the European countries, the following information must be followed: DISPOSAL: Do not dispose this product as unsorted municipal waste.
Servicemanual COFFEE QUEEN * en ma
 Servicemanual COFFEE QUEEN *320. 320504 en ma 202 07 Contents. Contents 2 Introduction 3 Functional description 4 Installation and starting 5-6 Programming: Calibration 7 Fault indications 8 Important
REDRING POWERSTREAM UNVENTED INSTANTANEOUS WATER HEATER. Installation and User Guide
 : GUARANTEE AND CONTACT DETAILS REDRING POWERSTREAM UNVENTED INSTANTANEOUS WATER HEATER Installation and User Guide APPLIED ENERGY PRODUCTS LIMITED MORLEY WAY, PETERBOROUGH PE2 JJ TEL: +44 (0) 844 372
Installation Manual PS-200 & PS-201
 Installation Manual PS-200 & PS-201 Table of Contents Pre-Uncrating Checklist... 1 Verifying System Requirements... 2 Verifying System Direction... 2 Verifying the Electrical Requirements... 2 Removal
washing machine contents
 washing machine contents WARNINGS SPECIFICATIONS INSTALLATION AND ASSEMBLY USING THE APPLIANCE. PRACTICAL TIPS MAINTENANCE AND CLEANING SAFETY AND TROUBLESHOOTING ENVIRONMENTAL WARNINGS 4 5 6 10 20 22
Index BEFORE USING THE APPLIANCE Safety Instructions... 2 Recommendations... 3 Switching On the Appliance... 4 HOW TO OPERATE THE FREEZER...
 Index BEFORE USING THE APPLIANCE... 2 Safety Instructions... 2 Recommendations... 3 Switching On the Appliance... 4 HOW TO OPERATE THE FREEZER... 5 Thermostat Setting... 5 Display Panel... 5 FOOD STORAGE
ISLAND MOUNT RANGE HOOD. This manual is made with 100 % recycled paper. Electronic version of this manual is available at:
 ISLAND MOUNT RANGE HOOD This manual is made with 100 % recycled paper. Electronic version of this manual is available at: www.cosmoappliances.com Thank You Thank you for your purchase. We know that you
ARTICA. 8000Btu. Room Air Conditioners Portable Range
 UK ARTICA 8000Btu Room Air Conditioners Portable Range INDEX Congratulations! You have purchased the very latest in room air conditioning technology. Your new EcoAir high efficiency room appliance will
WALL MOUNT RANGE HOOD. This manual is made with 100 % recycled paper. Electronic version of this manual is available at:
 WALL MOUNT RANGE HOOD This manual is made with 100 % recycled paper. Electronic version of this manual is available at: www.cosmoappliances.com Thank You Thank you for your purchase. We know that you have
Table of Contents What to Expect with Your Installation. Tools Needed. Wall Control
 Table of Contents Congratulations on purchasing your new Casablanca ceiling fan! It will provide comfort and performance in your home or office for many years. This installation and operation manual contains
Dryer. User manual DV22K6800** DV22K A-00_EN (US)_ indd :15:41
_ indd :15:41") Dryer User manual DV22K6800** DV22K6800-03650A-00_EN (US)_151211.indd 1 2015-12-11 7:15:41 Before installation Read through the following instructions before installing the dryer, and keep this manual
Dryer User manual DV22K6800** DV22K6800-03650A-00_EN (US)_151211.indd 1 2015-12-11 7:15:41 Before installation Read through the following instructions before installing the dryer, and keep this manual
Washing Machine OWNER S MANUAL TRWTL-70. Before using your washing machine, please read this manual carefully and keep it for future reference.
 Before using your washing machine, please read this manual carefully and keep it for future reference. Washing Machine OWNER S MANUAL TRWTL-70 Read This Manual Inside you will find many helpful hints on
Read the instructions and keep them safe. If you pass the iron on, pass on the instructions too. Remove all packaging, but keep it till you know the
 instructions 2 Read the instructions and keep them safe. If you pass the iron on, pass on the instructions too. Remove all packaging, but keep it till you know the iron works. important safeguards Follow
1.5 LITRE COMPACT FRYER
 INSTRUCTION BOOKLET 1.5 LITRE COMPACT FRYER Model: 18912 LAKELAND 1.5 LITRE COMPACT FRYER Thank you for choosing the Lakeland 1.5 Litre Compact Fryer. Please take a little time to read this booklet before
Installation Manual PS-225 & PS-275
 Installation Manual PS-225 & PS-275 Table of Contents Pre-Uncrating Checklist... 1 Verifying System Requirements... 2 Verifying System Direction... 2 Verifying the Electrical Requirements... 2 Removal
Francis Pegler Memento Single Sequential Exposed Thermostatic Shower
 e x p e r i e n c e d e s I g n i n n o v a t i o n You re Guide to the Installation, Care and maintenance of Francis Pegler Memento Single Sequential Exposed Thermostatic Shower For further information,
Installation and Operating Instructions
 Installation and Operating Instructions CHEOPS for Pre-Filter Module Order No. CHEOPS 0015 CHEOPS and Main Filter Module Order No. CHEOPS 0010 Before putting the filter system into operation please carefully
Zip Econoboil 1.5 litre White Zip Econoboil 3.0 litre White Zip Econoboil 5.0 litre White Zip Econoboil 7.
 Zip Econoboil Installation and Operating Instructions 301042 Zip Econoboil 1.5 litre White 303042 Zip Econoboil 3.0 litre White 305042 Zip Econoboil 5.0 litre White 307042 Zip Econoboil 7.5 litre White
JLBIHD624 60cm Cooker Hood
 JLBIHD624 60cm Cooker Hood User guide 2 Cooker hood user guide Contents Contents 3 Introduction 4 Safety is important 4 In the box 4 Safety information 5 Important safety information 5 Warnings 5 Cautions
Moisture inside the drum is due to final testing.
 Safety instructions Scope of delivery depending on model Moisture inside the drum is due to final testing. Removing the transport braces Water connection depending on model The washing machine is heavy
EVAPORATIVE AIR COOLER SERVICE MANUAL
 EVAPORATIVE AIR COOLER SERVICE MANUAL CAUTION: Before servicing the unit, read the Safety Precautions in this manual. Only for authorized service. MODEL NO.: CL30XC & CHL30XC (INDOOR USE ONLY) CONTENT
NOT EVERYTHING IN LIFE IS COMPLICATED.
 NOT EVERYTHING IN LIFE IS COMPLICATED. SCALEMASTER SOFTLINE 150 INSTALLATION & OPERATING PROCEDURES OWNERS MANUAL SCALEMASTER A Division of DAW Enterprises Ltd Emerald Way, Stone Business Park, Stone,
Spiral Dough Mixer. Instruction manual. Model: CP821
 Spiral Dough Mixer Instruction manual Model: CP821 SPARE PARTS LIST OF CP821 NO. Description QTY. NO. Description QTY. 1. Small chain wheel of main shaft 1 29. Chain 06B-1-70L 2 2. Big chain wheel 3 30.
User manual. Washing machine ZWQ 6120 ZWQ 6100
 EN User manual Washing machine ZWQ 6120 ZWQ 6100 Product description 1 1. The control panel 2. Lid handle 3. Adjustable levelling feet 2 3 The control panel 1 2 3 4 5 6 1. Programme selector 2. Pushbuttons
TECHNICAL INSTRUCTIONS USE AND MAINTENANCE
 TECHNICAL INSTRUCTIONS USE AND MAINTENANCE Cm Pelet-set For boilers CentroPlus 25/35 and CentroPlus-B 25/35 (solid fuel and wood pellets fuel firing) TUPSCP-K-11-2016-ENG CONTENTS 1.Introduction 2. Status
USING THE REFRIGERATOR COMPARTMENT
 USING THE REFRIGERATOR COMPARTMENT Switching the appliance on Starting the appliance Insert the plug. The light, located under the control panel or inside the product (depending on model) comes on when
Electric Cast Iron Radiators
 PARTS LIST Electric Cast Iron Radiators Parts arriving with the radiator: Wall brackets (consist of 2 parts: hook and clamp ) 1 x air vent For primer finishes only - If element is 600, 900 or 1200 watt
User manual. Washing Machine ZWP 581 ZWQ 5102 ZWQ 5103 ZWQ 5122
 EN User manual Washing Machine ZWP 58 ZWQ 502 ZWQ 503 ZWQ 522 Contents Safety information 2 Product description _ 3 How to run a wash cycle? 4 Daily use _ 5 Washing programmes 6 Care and cleaning 8 Safety
INSTRUCTIONS FOR USE
 INSTRUCTIONS FOR USE GB IMPORTANT PLEASE READ THESE INSTRUCTIONS THOROUGHLY BEFORE USING THIS APPLIANCE. KEEP THEM IN A SAFE PLACE FOR FUTURE REFERENCE. SECTION 1: BEFORE USE * Safety warnings * User Information
LEC L6014W/S User Manual
 LEC L6014W/S User Manual Safety Information Important Please read these instructions fully before installation Before use The installation of this appliance is best carried out by 2 people. Dispose of