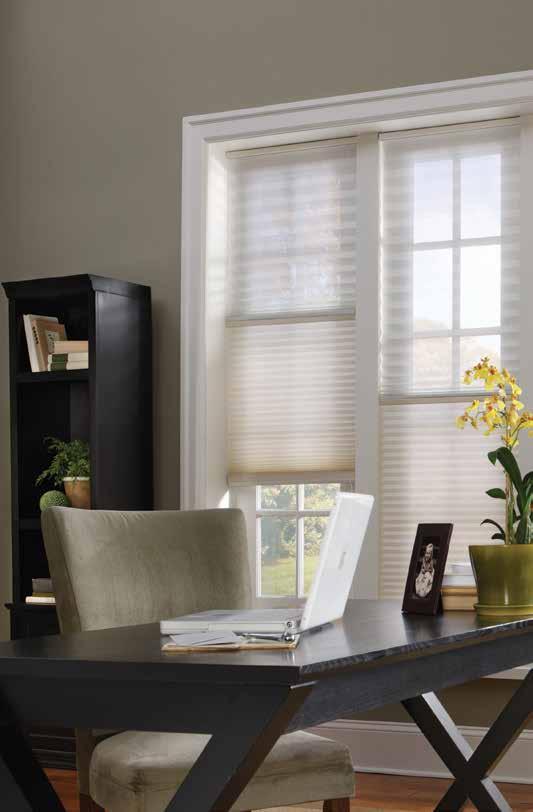
CONGRATULATIONS, YOU VE MADE A GREAT CHOICE!
|
|
|
- Moris Murphy
- 6 years ago
- Views:
Transcription

1 WELCOME GUIDE
2

3 CONGRATULATIONS, YOU VE MADE A GREAT CHOICE! And thank you for making that choice Alta. We take our customer s experience very personally. After all, we are part of your most personal space. Your home. For over four decades, we have delivered on our promise of enduring style and quality. Our pledge is to deliver that same experience for your next project. And the project after that. Because with Alta, you have a partner for life. TAKE A LOOK: l Instructions for easy care and maintenance l Directions for safely and correctly operating your new window coverings l Limited Lifetime Warranty With our appreciation, the Alta team

4 // Honeycomb Shades Alta Honeycomb Shades are 100% polyester and are treated to help resist dust, dirt, and stains. Dusting Dust your shades regularly using an ordinary soft, clean cloth, dust cloth or mitt, feather-like duster, or cylindrical dust brush specially designed for shades. Vacuuming For deeper cleaning, vacuum gently with a brush attachment. Spot Cleaning Use a soft cloth or sponge moistened with lukewarm water and mild detergent. Blot gently to avoid creasing or damaging the fabric. Bathtub Cleaning/Water Immersion This method can be used for most, but not all, honeycomb fabrics. DO NOT USE with any SoftStyle fabrics or Blackout fabrics. DO NOT immerse headrails on any operating system other than standard cordlock. Immerse entire shade in lukewarm water with a mild detergent and gently move the water around with your fingers. Rinse with clear water. Close shade before removing, and hold vertically allowing the excess water to drain off. Re-install the damp shade into the window. Lower the shade all the way down and allow to dry completely. Ultrasonic Cleaning Professional ultrasonic cleaning is recommended for most, but not all, Honeycomb fabrics. DO NOT USE with any Blackout fabrics. Injection/Extraction Cleaning This type of cleaning injects a cleaning solution into the fabric and immediately extracts the dirty solution. The service is typically performed in the home. Search online or consult your local Yellow Pages. Standard Rectangular and Top-Down/Bottom-Up Shades Raising Your Shade: Pull the cord toward the center of the shade (approximately 30 from vertical) until the lock is released. Continue pulling the cord at this angle until the shade reaches the desired position. To lock, move the cord back toward the edge of the shade and release. Lowering Your Shade: Pull the cord toward the center of the shade (approximately 30 from vertical) until the lock is released. Let the cord slip slowly through your fingers until the shade reaches the desired position. To lock, move the cord back to the edge of the shade. Continuous Cord Loop Shades Pull gently on the front or back of the cord loop to lift or lower the shade. Cordless Lift Shades Firmly grasp the handle or center of the bottomrail, then lift or lower the shade to the desired position. Cordless Lift & Lock Shades Push and hold the button on the bottomrail handle. Lift or lower the shade to the desired position, then release the button to lock the shade into place. Vertical Application Grasp the handle on the side rail and pull the shade back and forth across the window.

5 // Wood & Faux Wood Blinds Dusting Dust your blinds regularly using an ordinary soft, clean cloth, chemically-treated dust cloth or mitt, feather-like duster, or cylindrical dust brush specially designed for blinds. Vacuuming For deeper cleaning, vacuum gently with a brush attachment. Compressed Air/Hair Dryer Use a can of compressed air or a handheld hair dryer on the COOL setting to Spot Cleaning Faux Wood Blinds only. Use a soft cloth or sponge moistened with lukewarm water and mild detergent if needed. DO NOT USE to clean Wood Blinds. Bathtub Cleaning/Water Immersion Faux Wood Blinds without cloth tapes only. DO NOT USE to clean Wood Blinds. Immerse entire blind in lukewarm water with a mild detergent and gently move the water around with your fingers. Rinse with clear water. Close blind before removing, and hold vertically allowing the excess water to drain off. Re-install the damp blind into the window. Lower the blind all the way down and allow to dry completely. Standard Blinds Aligning Your Blind: After the blind is installed, tilt it open, then raise and lower it several times. This will allow the cords and slats to align themselves. Tilting The Slats: Pull down on either one of the tilt cords or twist the tilt wand until slats reach the desired position. Raising Your Blind: Ensure slats are in the open position, then pull the lift cord downward until the blind reaches the desired height. Release the cord and the blind will automatically lock into place. Lowering Your Blind: Gently pull the cord toward the center of the blind until the lock releases. Let the cord slip slowly through your fingers until the blind reaches the desired height. Move the cord toward the outside of the blind and release. The blind will automatically lock into place. Cordless Lift & Lock Push and hold the button on the bottomrail to lift or lower the blind. Release the button to lock the blind into place. Cordless Lift Blinds Firmly grasp the center of the bottomrail, then lift or lower the blind to the desired position.

6 // Window Shadings Alta Window Shadings are 100% polyester and are treated to help resist dust, dirt, and stains. Dusting Dust your shadings regularly using an ordinary soft, clean cloth, dust cloth or mitt, featherlike duster, or cylindrical dust brush specially designed for shades. DO NOT USE magnetic cleaners such as a dusting mitt on light-dimming fabrics. This will damage the light-dimming backing. Vacuuming For deeper cleaning, vacuum gently with a brush attachment. Ultrasonic Cleaning Professional ultrasonic cleaning is recommended for Window Shadings. Injection/Extraction Cleaning This type of cleaning injects a cleaning solution into the fabric and immediately extracts the dirty solution. The service is typically performed in the home. Search online or consult your local Yellow Pages. Continuous Loop Control Lower Shading/Open Vanes: Pull the rear cord of the cord loop down to lower the shading. With the shading fully lowered, continue to pull the rear cord to tilt the bottom rail and open the vanes. Close Vanes/Raise Shading: Pull the front cord of the cord loop down to close the vanes and raise the shading. NOTE: If the cord tensioner moves up the cord while operating, you have not secured it to the wall or window frame. You must do so for the shading to operate properly. Retractable Cord Control Lower Shading/Open Vanes: Pull cord down toward the center of the shading with long strokes. Allow cord to retract completely into the headrail after each downward stroke. Continue until shading is fully lowered and vanes are open. While lowering, stop shading at any point by moving the cord back toward the vertical position. NOTE: The s hading must be in the fully lowered position before the vanes can be opened. Tilt Vanes/Raise Shading: Pull cord straight down, or down and slightly out, with long strokes. With each stroke the shading partially raises. Allow cord to retract completely into headrail after each downward stroke. Use multiple strokes until shading reaches desired position. The shading can be stopped at any point while raising. Cordless (Available Summer, 2017) Lower Shading/Open Vanes: Gently pull down on handle. ( H andle will retract when released.) When shading is fully lowered, continue pulling down on the handle until the vanes open to desired position. Close Vanes/Raise Shading: Slightly p ull down on handle (about 1") and release. The v anes will close first, then shading will retract into headrail. NOTE: To reposition the shading, it must be raised several inches first to reset the mechanism and then pulled down to the new position. IMPORTANT: If the shading raises or lowers unevenly, the fabric rubs against one end of the headrail, or the bottomrail is uneven when fully raised, the bottomrail weight needs to be adjusted. To do so, release the weight clips on the bottomrail by inserting a flat blade screwdriver into the weight clip and turning clockwise. Move the weight in 1" increments toward the side where the fabric is gathering. Secure the weight clips back into position by counterclockwise after making the adjustment. Test and adjust again as necessary.


7 // Vertical Shadings // Dual Shades Alta Vertical Shadings are 100% polyester and are treated to help resist dust, dirt, and stains. Dusting Dust your shadings regularly using an ordinary soft, clean cloth, dust cloth or mitt, feather-like duster, or cylindrical dust brush designed for shades. DO NOT USE magnetic cleaners such as a dusting mitt on light-dimming fabrics, for it will damage the backing. Ultrasonic Cleaning Professional ultrasonic cleaning is recommended for Vertical Shadings. Injection/Extraction Cleaning This type of cleaning injects a cleaning solution into the fabric and immediately extracts the dirty solution. The service is typically performed in the home. Wand/Cord Combination Control Rotating the Vanes: With the shading fully traversed across the window, grasp the wand tether in one hand and the bottom handle in the other. Twist the bottom handle left or right to open or close vanes. Traversing The Vanes: Rotate the vanes to the fully open position. Then pull down on either side of the cord to draw the shading across the window. Safety Wand Operation Rotating the Vanes: With the shading fully traversed across the window, twist the wand to the left or right to open or close vanes to the desired position. Traversing The Vanes: Rotate the vanes to the fully open position. Then push or pull the wand to draw the shading across the window. Alta Dual Shades are 100% polyester and are treated to help resist dust, dirt, and stains. Dusting Dust your shades regularly using a featherlike duster, or cylindrical dust brush specially designed for shades. Ultrasonic Cleaning Professional ultrasonic cleaning is recommended for Dual Shades. Injection/Extraction Cleaning This type of cleaning injects a cleaning solution into the fabric and immediately extracts the dirty solution. The service is typically performed in the home. NOTE: Dual Shades should not be vacuumed or spotcleaned. Continuous Loop Control Lowering the Shade: Hold the back of the cord loop and pull down until shade reaches desired position. Raising the Shade: Hold the front of the cord loop and pull down until the shade reaches desired position.

8 // Shades: Roller // Panel Track // Roman Dusting Dust your shades regularly using an ordinary soft, clean cloth, dust cloth or mitt, feather-like duster, or cylindrical dust brush specially designed for shades. Vacuuming For deeper cleaning, vacuum gently with a brush attachment. Spot Cleaning (Screen shades and vinyls only) Use a soft cloth or sponge moistened with lukewarm water and mild detergent. Blot gently to avoid creasing or damaging the fabric. DO NOT USE this method on delicate woven fabrics. ROLLER SHADES Beaded Chain Control Raising and Lowering Your Shade: Pull gently on the front or back of the beaded chain to lift or lower the shade. TouchLift Cordless Control Lowering Your Shade: Grasp the handle or center of the bottomrail and gently pull the shade down to the desired position. Release the shade and it will lock into position. Raising Your Shade: Gently pull the handle or center of the bottomrail down slightly to release the locking mechanism, then guide the shade to the desired position. Then gently pull down slightly to engage the lock. PANEL TRACK Safety Wand Operation Traversing the Panels: Push or pull the wand to draw the panels across the window. ROMAN SHADES Standard Rectangular Lifting Your Shade: Pull the lift cord down and toward the left of the shade to unlock the cordlock, then continue pulling on the cord until the shade reaches the desired height. To lock the shade into position, pull the cord sharply to the right of the shade and release. Lowering Your Shade: Pull the cord down and toward the left of the shade to unlock the cordlock, then let the cord slip slowly through your fingers until the shade reaches the desired position. To lock the shade into position, pull the cord sharply to the right of the shade and release. NOTE: Do not try to raise the shade any higher than it was intended to go. If the shade binds, check the cord alignment to ensure that the cords are not jamming. Continuous Cord Loop Shades Pull gently on the front or back of the cord loop to lift or lower the shade to the desired position. Do not try to raise the shade any higher than it was intended to go. If the shade level becomes uneven, lower the shade completely to realign the shade lift cords.


9 // Natural Wovens // Aluminum Blinds Dusting Dust your shades regularly using an ordinary soft, clean cloth, dust cloth or mitt, feather-like duster, or cylindrical dust brush specially designed for shades. Vacuuming For deeper cleaning, vacuum gently with a brush attachment. Standard Rectangular And Top-Down/Bottom-Up Shades Lifting Your Shade: Pull the lift cord down and toward the left of the shade to unlock the cordlock, then continue pulling on the cord until the shade reaches the desired height. To lock the shade into position, pull the cord sharply to the right of the shade and release. Lowering Your Shade: Pull the cord down and toward the left of the shade to unlock the cordlock, then let the cord slip slowly through your fingers until the shade reaches the desired position. To lock the shade into position, pull the cord sharply to the right of the shade and release. NOTE: Do not try to raise the shade any higher than it was intended to go. If the shade binds, check the cord alignment to ensure that the cords are not jamming. Continuous Cord Loop Shades Pull gently on the front or back of the cord loop to lift or lower the shade to the desired position. Do not try to raise the shade any higher than it was intended to go. If the shade becomes uneven, lower the shade completely to realign the shade lift cords. Cordless Lift Shades Firmly grasp the center of the bottomrail, then lift or lower the shade to the desired position. Alta Aluminum Blinds are treated with an anti-static paint additive that helps inhibit dust build-up. Dusting Dust your blinds regularly using an ordinary soft, clean cloth, chemically-treated dust cloth or mitt, feather-like duster, or cylindrical dust brush specially designed for blinds. Vacuuming For deeper cleaning, vacuum gently with a brush attachment. Spot Cleaning Use a soft cloth or sponge moistened with lukewarm water and mild detergent. Bathtub Cleaning/Water Immersion This method can be used for all Aluminum Blinds except 2" Blinds with cloth tapes. Immerse entire blind in lukewarm water with a mild detergent and gently move the water around with your fingers. Rinse with clear water. Lift the blind from the water and hold vertically allowing the excess water to drain off. Lightly pat dry with a soft towel. Re-install the blind into the window. Lower the blind all the way down and allow to dry completely. Aligning Your Blind: Tilt slats open, then raise and lower blind several times to allow the cords and slats to align themselves. Tilting Slats Open and Closed: Twist the tilt wand until the slats reach the desired position. Raising Your Blind: Open slats, then pull the lift cord downward until the blind reaches the desired height. Release the cord to lock into place. Lowering Your Blind: Gently pull the cord toward the center of the blind until the lock releases. Let the cord slip slowly through your fingers until the blind reaches desired height. Move the cord toward the outside of the blind and release to lock blind into place. Cordless Lift & Lock: Push and hold the button on the bottomrail to lift or lower the blind. Release the button to lock the blind into place.


10 // Vertical Blinds Dusting Dust your blinds regularly using an ordinary soft, clean cloth, dust cloth or mitt, feather-like duster, or cylindrical dust brush specially designed for blinds. Vacuuming For deeper cleaning, vacuum gently with a brush attachment. Spot Cleaning Vinyl Blinds only. Use a soft cloth or sponge moistened with lukewarm water and mild detergent. DO NOT USE this method on Fabric Blinds. Ultrasonic Cleaning Professional ultrasonic cleaning is recommended for Fabric Blinds only. Injection/Extraction Cleaning This type of cleaning injects a cleaning solution into the fabric and immediately extracts the dirty solution. The service is typically performed in the home. Search online or consult your local Yellow Pages. Standard Cord and Chain Operation Rotating The Vanes: Pull gently on either of the beaded chains to tilt vanes open and closed. Traversing the Vanes: Ensure vanes are in the open position, then pull gently on the front or back of the cord loop to traverse the vanes across the window. Safety Wand Operation Rotating the Vanes: With the blind fully traversed across the window, twist the wand to the left or right to open or close vanes to the desired position. Traversing the Vanes: First, rotate the vanes to the fully open position. Then push or pull the wand to draw the vanes across the window. Eclipse Shutters, comprised of Polyresin 3 compound, feature a permanent finish that resists dents and scratches. Should a scratch occur, it can be removed without harming the finish. Dusting Dust your shutters regularly using an ordinary soft, clean cloth, dust cloth or mitt, featherlike duster, or cylindrical dust brush. Vacuuming For deeper cleaning, vacuum gently with a brush attachment. Spot Cleaning Use a soft cloth or sponge moistened with lukewarm water and mild detergent if needed. For difficult to remove dirt and stains, a water-based household cleaner can be used. Chlorine-based cleaners, or other cleaners containing organic solvents could affect the surface appearance and durability of the product, and therefore should not be used. Tilting Louvers Open and Closed: Grasp the tilt bar and move it up or down to the desired position. If the panel features rear tilt, grasp one louver and move it to the desired position. All other louvers in that panel will move as well. Opening Panels: Tilt the louvers to the open position, grasp the inside edge of the panel and gently pull open.
11 LIMITED LIFETIME WARRANTY Covering Our Custom Made Window Coverings Because we take pride in our workmanship and quality that goes into every one of our products, we back our products with this warranty. We extend this limited lifetime warranty to the original purchaser. This warranty applies only to manually operated Custom Products properly installed in the window, door or interior area for which they were intended. Installation of the product must be in accordance with the accompanying instructions. The product cannot be modified. It is the purchaser s responsibility to maintain and clean the product in compliance with the instructions provided. The product must be used only in the window for which it was purchased. This warranty covers our products for defects in materials, mechanisms, workmanship, or failure to operate properly. Operational cords are warranted for 5 years from the date of purchase. Any conditions caused by damage to the product resulting from misuse, abuse, direct exposure to salty air or discoloration due to sunlight or the passage of time are not covered by this warranty. THIS WARRANTY DOES NOT APPLY TO CONDITIONS CAUSED BY NORMAL WEAR AND TEAR UPON THIS PRODUCT. This Warranty Is Exclusive And In Lieu Of All Other Obligations, Liabilities Or Warranties. In no event shall Alta be liable for INCIDENTAL or CONSEQUENTIAL DAMAGES or any other direct or indirect damage, loss, cost, expense or fee. Some states do not allow the exclusion or limitation of incidental or consequential damages, so this exclusion or limitation may not apply to you. In the event of a defect under this warranty, Alta will repair or replace the product, at our option, provided it is returned to an authorized dealer. Our warranty excludes shipping charges and labor costs for removal, measuring and installation. Repairs will be made with like or similar parts. This warranty gives you specific legal rights, and you may also have other rights, which may vary from state to state. NOTES: l Specialty Shades are warranted for one year from the date of purchase. l Motorization Systems are warranted for five years from the date of purchase.
12 Ask us about our many products that are certified Best for Kids. They are best suited for use in homes with young children. #ALTWELCOME
Operating Instructions. Care & Cleaning Guidelines
 Operating Instructions Care & Cleaning Guidelines congratulations! Thank you for selecting Enlightened Style window coverings for your home. With your purchase of Enlightened Style window coverings, you
HONEYCOMB SHADES CORDLESS LIFT SYSTEM CONTINUOUS CORD LOOP SYSTEM REMOTELIFT 2.0 SYSTEM
 INSTALLATION INSTRUCTIONS HONEYCOMB SHADES CORDLESS LIFT SYSTEM CONTINUOUS CORD LOOP SYSTEM REMOTELIFT 2.0 SYSTEM Thank you for your purchase. This shade has been custom built for you from the highest
INSTALLATION INSTRUCTIONS. WOOD BLINDS 1-3/8, 2 and 2-3/8 SLAT SIZES. FAUX WOOD BLINDS 2 and 2-1/2 SLAT SIZES
 INSTALLATION INSTRUCTIONS WOOD BLINDS 1-3/8, 2 and 2-3/8 SLAT SIZES FAUX WOOD BLINDS 2 and 2-1/2 SLAT SIZES STANDARD CORDLESS LIFT Thank you for your purchase. This blind has been custom built for you
INSTALLATION INSTRUCTIONS. Vertical Blinds
 1 INSTALLATION INSTRUCTIONS Vertical Blinds Vinyl & Fabric Thank you for your purchase. This blind has been custom built for you from the highest quality materials. To avoid errors and save valuable time,
FAUX WOOD BLINDS 2 & 2-1/2 SLAT SIZES
 INSTALLATION INSTRUCTIONS FAUX WOOD BLINDS 2 & 2-1/2 SLAT SIZES STANDARD RECTANGULAR Thank you for your purchase. This blind has been custom built for you from the highest quality materials. To avoid errors
INSTALLATION INSTRUCTIONS TOOLS YOU WILL NEED GETTING STARTED
 INSTALLATION INSTRUCTIONS HONEYCOMB SHADES STANDARD RECTANGULAR Thank you for your purchase. This shade has been custom built for you from the highest quality materials. To avoid errors and save valuable
INSTALLATION INSTRUCTIONS. Aluminum Blinds - Standard - - Lift & Lock -
 1 INSTALLATION INSTRUCTIONS Aluminum Blinds - Standard - - Lift & Lock - 1 Deluxe 1 Traditional 1 Value & 1 Basic 2 Macro Thank you for your purchase. This blind has been custom built for you from the
INSTALLATION INSTRUCTIONS. WOOD BLINDS 1-3/8, 2 and 2-3/8 SLAT SIZES. COMPOSITE FAUX WOOD BLINDS 2 and 2-1/2 SLAT SIZES
 INSTALLATION INSTRUCTIONS WOOD BLINDS 1-3/8, 2 and 2-3/8 SLAT SIZES COMPOSITE FAUX WOOD BLINDS 2 and 2-1/2 SLAT SIZES POLYMER FAUX WOOD BLINDS 2 and 2-1/2 SLAT SIZES STANDARD CORDLESS LIFT Thank you for
Installation Operation Care
 Installation Operation Care Duette and Applause Honeycomb Shades Vertiglide System CONTENTS Getting Started: Product View... 1 Tools and Fasteners Needed... 2 Installation: Installation Overview... 3 Outside
Installation Operation Care
 Installation Operation Care EasyRise UltraGlide LiteRise Vignette Modern Roman Shades Traditional Style EasyRise, LiteRise, and UltraGlide Operating Systems CONTENTS Getting Started: Product View Traditional
Installation Operation Care
 Installation Operation Care Duette and Applause Honeycomb Shades Vertiglide System CONTENTS Getting Started: Product View... 1 Tools and Fasteners Needed... 2 Installation: Installation Overview... 3 Outside
Duette Shades. luxaflex.com.au
 Duette Shades The information and advice included in this brochure has been prepared with care. However, we are unable to accept responsibility for the results of or any damage caused during operation.
Installation Operation Care
 Installation Operation Care Provenance Woven Wood Shades Standard Cordlock and Clutch Operated Shades CONTENTS Getting Started: Product View... 1 Tools and Fasteners Needed... 2 Mounting Types and Window
DUETTE EXPLAINED Sales guide for dealers
 DUETTE EXPLAINED Sales guide for dealers FEATURES AND BENEFITS Duette honeycomb shades provide smart and stylish solutions when it comes to dressing your windows with window coverings that are just as
Fine Fabric Shade. Thank you for purchasing our Fine Fabric Shade.
 Fine Fabric Shade Installation Safety Care & Cleaning Warranty Thank you for purchasing our Fine Fabric Shade. With proper installation, operation, and care your new shades will provide years of beauty
Installation Operation Care
 Installation Operation Care Duette and Applause Honeycomb Shades Vertiglide Side Stack Design CONTENTS Getting Started: Product View... 1 Tools and Fasteners Needed... 2 Installation: Installation Overview...
Operating your blind is easy. Just follow these instructions.
 Vertical Blinds: Operating your blind Operating your blind is easy. Just follow these instructions. To control the angle of the louvres, pull gently on the side chain. To open and close the blind, pull
Installation Operation Care
 Installation Operation Care Roman Shades EasyRise and UltraGlide Lifting Systems CONTENTS Getting Started: Product View... 1 Tools and Fasteners Needed... 2 Mounting Types and Window Terminology... 2 Installation:
Installation Instructions Vertical Blinds
 Installation Instructions Vertical Blinds Installing Your New Vertical Blinds Thank you for your purchase of a Century Blinds Inc. Vertical Blind. Please take a moment to review the contents of your parts
Odysee Insulating Blinds
 AVAILABLE IN 800 COLORS IN LIGHT FILTERING AND ROOM DARKENING Odysee Insulating Blinds 2008 Manufacturers Price List and Reference Guide FEATURING Standard and Continuous Cord Loop Hardware Options Blind
Installation Operation Care
 Installation Operation Care Provenance Woven Wood Shades Standard Cordlock And Clutch Operated Shades CONTENTS Getting Started: Installation Components Needed... 1 Tools And Fasteners Needed... 2 Mounting
Luxaflex Silhouette. TAKE CARE not to get the headrail wet!
 Luxaflex Silhouette Luxaflex Silhouette shades look vulnerable but in fact they are very durable. Regular dusting with a feather duster is usually sufficient to keep the shade clean and attractive for
Installation Operation Care
 Installation Operation Care Horizontal Blinds Standard Hardware System LiteRise Operating System UltraGlide Operating System CONTENTS Getting Started: Product View...1 Tools and Fasteners Needed...2 Unpack
PRODUCT INFORMATION MANUAL SECTION: 3 VERI SHADES VERI SHADES
 VERI SHADES Where innovation meets style and functionality. A contemporary take on a classic window covering, Veri Shades combines the versatility of a vertical blind with the elegant appeal of a soft
Privacy Aluminum Shade
 Privacy Aluminum Shade Installation Instructions Email: customerservice@blindster.com Call us: (888) 256-8672 Mon - Fri 8am - 7pm (CT) Congratulations on purchasing an Aluminum Privacy Blind from Blindster.
Luxaflex Metal Venetian Blinds Guarantee, Installation, Safety & Care Instructions
 Luxaflex Metal Venetian Blinds Guarantee, Installation, Safety & Care Instructions ! WARNING Young children can be strangled by loops in pull cords, chains, tapes and inner cords that operate the product.
Cordless CellularFabric Shade. owner's handbook
 Cordless CellularFabric Shade owner's handbook 2 WARNING Young children can STRANGLE in cord and bead chain loops. They can also wrap cords around their necks and STRANGLE. Always keep cords and bead chains
Care and. Cleaning. Guide
 Care and Cleaning Guide Quick Guide Luxaflex Window Fashions are designed to require minimal care and maintenance. All homes are different with varying levels of care and cleaning required. To ensure your
oem OEM 1" Between the Glass Metal Blind Series P2100 Included:
 OEM 1" Between the Glass Metal Blind Series P2100 Included: Specifications ^Overview Diagram oem S H D E S INC 700 First Avenue, Ford City, PA 16226 Phone. 724-763-3600 Fax: 724-763-3601 www.oemshades.com
Installation Operation Care
 Installation Operation Care Horizontal Blinds Standard Cordlock, Operable Specialty Shapes, LiteRise, SimpleLift, and UltraGlide Operating Systems CONTENTS GETTING STARTED Product View Standard Cordlock
Product Index. Accu-Rise Standard. Assure
 Product Index Parasol Cellular Shade Fabric Information - Cordlock, Assure, Accu-Rise and Continuum Size s Cordlock Cordlock Top-Down Cordlock Top-Down/ Cordlock 2-on-1 Headrail Assure Accu-Rise Accu-Rise
Before you begin the installation process, gather the following tools and keep them handy:
 Vertical Blind Installation Instructions ucontact@udoblinds.com 1-855-205-8442 Congratulations on purchasing vertical blinds from Follow these instructions to properly install your blinds. Tools You Need
Installation Operation Care
 Installation Operation Care 2" Horizontal Aluminum Blinds MagnaView Tilt Feature 5102014000F 4/14 CONTENTS Getting Started: Product View Reveal with MagnaView... 1 Product View Natural Elements with MagnaView...
Wood. Blind owner's handbook
 Wood owner's handbook 2 WARNING Cords and bead chains can loop around a child s neck and strangle. Always keep cords and bead chains out of children s reach. Move furniture away from cords and bead chains.
SHEER MAGIC Installation Instructions
 SHEER MAGIC Installation Instructions The Vertical Blind that Looks Like A Sheer Drapery! Congratulations on the purchase of your new window covering! Sheer Magic blinds are an attractive choice for your
WHISPER CELLULAR BLINDS
 WHISPER CELLULAR BLINDS What Are WHISPER CELLULAR SHADES? Whisper Cellular Shades Collection combines style, versatility and functionality to offer an innovative and energy efficient window covering solution
wynstan.com.au Warranty & Care Guide
 wynstan.com.au 1300 667 679 Warranty & Care Guide 3 YEAR WARRANTY Wynstan is committed to high standards of manufacturing, offering high quality products which will last for years. Wynstan is pleased to
Outdoor Furniture STOP. IMPORTANT If you have any problems with this product (missing or damaged parts, assembly issues, etc.),
,") Outdoor Furniture STOP IMPORTANT If you have any problems with this product (missing or damaged parts, assembly issues, etc.), PLEASE DO NOT RETURN TO THE RETAILER/STORE from where you purchased the product.
Outdoor Furniture STOP IMPORTANT If you have any problems with this product (missing or damaged parts, assembly issues, etc.), PLEASE DO NOT RETURN TO THE RETAILER/STORE from where you purchased the product.
WHISPER CELLULAR SHADES. Stylish, Versatile & Energy Efficient.
 WHISPER CELLULAR SHADES Stylish, Versatile & Energy Efficient. WHAT ARE WHISPER CELLULAR SHADES? Whisper Cellular Shades Collection combines style, versatility and functionality to offer an innovative
Installation Instructions
 Aluminum Blinds Installation Instructions Echelon, Traditions & Integra Aluminum Blinds 2 Metro Aluminum Blinds *Click on any page to return to the Table of Contents* Echelon, Traditions & Integra Aluminum
HW-17 Record Cleaning Machine Setup and Instruction Manual
 HW-17 Record Cleaning Machine Setup and Instruction Manual VPI Industries, Inc., 77 Cliffwood Ave. #3B, Cliffwood, NJ 07721 Phone: 732-583-6895, Email: Sales@vpiindustries.com http://www.vpiindustries.com
2" and 2 1/2" Wood Horizontal Blinds 2", 2 1/4" and 2 1/2" Faux Wood Horizontal Blinds. Installation & Operating Instructions
 2" and 2 1/2" Wood Horizontal Blinds 2", 2 1/4" and 2 1/2" Faux Wood Horizontal Blinds Installation & Operating Instructions TC07-08.2011 TABLE OF CONTENTS Product View...3 GETTING STARTED...4 Tools Required:...4
POWERFORCE HELIX. Vacuum USER GUIDE 1700 & 1701 SERIES. (Model 1701 Shown)
") POWERFORCE HELIX Vacuum USER GUIDE 700 & 70 SERIES (Model 70 Shown) IMPORTANT SAFETY INSTRUCTIONS READ ALL INSTRUCTIONS BEFORE USING YOUR UPRIGHT VACUUM. Always connect to a polarized outlet (one slot
POWERFORCE HELIX Vacuum USER GUIDE 700 & 70 SERIES (Model 70 Shown) IMPORTANT SAFETY INSTRUCTIONS READ ALL INSTRUCTIONS BEFORE USING YOUR UPRIGHT VACUUM. Always connect to a polarized outlet (one slot
Installation Instructions Horizontal Blinds
 Installation Instructions Horizontal Blinds Installing Your New Horizontal Blinds Thank you for your purchase of a Century Blinds Inc. Horizontal Wood or Fauxwood blind. Please take a moment to review
POWERFORCE COMPACT USER GUIDE 2112 SERIES
 POWERFORCE COMPACT USER GUIDE 2112 SERIES More of a video person? Look for this icon and go online for an instructional how-to video at / videos IMPORTANT SAFETY INSTRUCTIONS READ ALL INSTRUCTIONS BEFORE
Aluminum Horizontal Blinds BOX BRACKET INSTALLATION
 Aluminum Horizontal Blinds BOX BRACKET INSTALLATION MOUNT THE INSTALLATION BRACKETS Mounting Options The installation brackets may be inside mounted, outside mounted or ceiling mounted. In all cases, level
General information BB0113
 General information BB0113 BB0113 General information 3 Cost guide This cost guide contains all the prices of our roller shade and butterfly blinds collection books. It will help you quote your customers
Once you ve located these components, set them aside so they ll be handy as you begin the installation process. Screw Holes
 Wood Blinds Installation Instructions with Magnet Valance Email: customerservice@blindster.com Call us: (888) 256-8672 Mon - Fri 8am - 7pm (CT) How to Install Your Wood Blinds Before you get started installing
CHOOSING WINDOW COVERINGS THE BASICS
 CHOOSING WINDOW COVERINGS THE BASICS TYPES OF WINDOW COVERINGS HORIZONTAL Wood blinds Faux wood blinds Aluminum mini blinds Textured Horizontals VERTICAL PVC ( poly vinyl chloride) Fabric free hanging
Installation and Care Instructions
 Installation and Care Instructions 2" Horizontal Aluminum Blinds MagnaView Tilt Feature CONTENTS Getting Started................................................ 1 Mount the Installation s....................................
POWERFORCE HELIX. Vacuum USER GUIDE 2110 & 2111 SERIES. (Model 2110 Shown)
") POWERFORCE HELIX Vacuum USER GUIDE 0 & SERIES (Model 0 Shown) IMPORTANT SAFETY INSTRUCTIONS READ ALL INSTRUCTIONS BEFORE USING YOUR APPLIANCE. Unplug from outlet when not in use and before conducting maintenance.
POWERFORCE HELIX Vacuum USER GUIDE 0 & SERIES (Model 0 Shown) IMPORTANT SAFETY INSTRUCTIONS READ ALL INSTRUCTIONS BEFORE USING YOUR APPLIANCE. Unplug from outlet when not in use and before conducting maintenance.
STEP BY STEP INSTALLATION INSTRUCTIONS. Wood Blinds. Standard Control
 STEP BY STEP INSTALLATION INSTRUCTIONS Wood Blinds Standard Control Everything You Need Table of Contents Step 1 - Getting Started...3 Overview - Standard Control Wood Blinds...4 Step 2 - Mounting the
Soft Sheer Vertical. Installation and Care Guide
 Soft Sheer Vertical Installation and Care Guide Soft Sheer Vertical Blinds represent a design breakthrough in style, efficiency and function. The unique fabric structure and hardware system are designed
Owner s Manual. For The Fuller Brush BARE FLOOR Maid Vacuum. Model FB-BFM
 Owner s Manual For The Fuller Brush BARE FLOOR Maid Vacuum Model FB-BFM Thank you for purchasing this Fuller Brush Broom Vacuum. To ensure the best results, please read this manual and keep it for reference.
FM740 INSTRUCTION MANUAL VACUUM CLEANER. Contents HOUSEHOLD USE ONLY
 INSTRUCTION MANUAL VACUUM CLEANER FM70 Contents IMPORTANT SAFETY INSTRUCTIONS NAMES OF EACH PART PREPARATIONS BEFORE USE USING THE VACUUM CLEANER USING THE ATTACHMENTS EMPTYING THE DUST COMPARTMENT CLEANING
Installation Operation Care. Vertical Blind Collection Paramount, PermAlign, and PermaTrak Headrail Systems
 Installation Operation Care Vertical Blind Collection Paramount, PermAlign, and PermaTrak Headrail Systems CONTENTS Getting Started: Product View... 1 Tools and Fasteners Needed... 2 Installation: Installation
POWERFORCE HELIX TURBO REWIND
 POWERFORCE HELIX TURBO REWIND Vacuum USER GUIDE 2261 SERIES IMPORTANT SAFETY INSTRUCTIONS READ ALL INSTRUCTIONS BEFORE USING YOUR APPLIANCE. Unplug from outlet when not in use and before conducting maintenance.
CLEANVIEW. Vacuum USER GUIDE 1831, 1834 SERIES
 CLEANVIEW Vacuum USER GUIDE 1831, 1834 SERIES More of a video person? Look for this icon and go online for an instructional how-to video at IMPORTANT SAFETY INSTRUCTIONS READ ALL INSTRUCTIONS BEFORE USING
Installation and Care Instructions
 Installation and Care Instructions 2" Horizontal Aluminum Blinds MagnaView Tilt Feature Thank you for your purchase. Your new blinds have been custom built for you from the highest quality materials. Properly
Canister Vacuum. OWNER S MANUAL Models CV520HB/HR/HY 120V., 60Hz., 10 Amps
 Canister Vacuum OWNER S MANUAL Models CV520HB/HR/HY 120V., 60Hz., 10 Amps EURO-PRO Operating LLC 94 Main Mill Street, Door 16 Plattsburgh, NY 12901 Tel.: 1 (800) 798-7398 Models CV520HB/HR/HY ONE (1)
Multi-Cyclonic Vacuum USER GUIDE
 Multi-Cyclonic Vacuum USER GUIDE MODEL CJTG00499B-120 Thank you for purchasing a BENNETT READ POWER UP PET vacuum. Your POWER UP PET vacuum incorporates the latest technological advances in home cleaning
USER MANUAL. PEDESTAL FAN (16 Inch)
") USER MANUAL PEDESTAL FAN (16 Inch) ACFP1016 Hydrofarm.com TABLE OF CONTENTS OVERVIEW 2 PARTS LIST - (WHAT S IN THE BOX) 3 IMPORTANT SAFEGUARDS 4 ASSEMBLY INSTRUCTIONS 4 ASSEMBLY 4 ELECTRIC SCHEMATIC DIAGRAM
USER MANUAL PEDESTAL FAN (16 Inch) ACFP1016 Hydrofarm.com TABLE OF CONTENTS OVERVIEW 2 PARTS LIST - (WHAT S IN THE BOX) 3 IMPORTANT SAFEGUARDS 4 ASSEMBLY INSTRUCTIONS 4 ASSEMBLY 4 ELECTRIC SCHEMATIC DIAGRAM
2016 Price Guide. beauty craftsmanship design
 2016 Price Guide beauty craftsmanship design The Cambrai Collection takes its name from the ancient town in France, which grew to prominence in the Middle Ages as the center of linen processing and weaving.
Hanover Outdoor Furniture IMPORTANT. If you have any problems with this product (missing or damaged parts, assembly issues, etc.),
,") Hanover Outdoor Furniture IMPORTANT If you have any problems with this product (missing or damaged parts, assembly issues, etc.), PLEASE DO NOT RETURN TO THE RETAILER/STORE from where you purchased the
Hanover Outdoor Furniture IMPORTANT If you have any problems with this product (missing or damaged parts, assembly issues, etc.), PLEASE DO NOT RETURN TO THE RETAILER/STORE from where you purchased the
MULTI REACH Stick Vacuum
 MULTI REACH Stick Vacuum USER GUIDE 2151 SERIES IMPORTANT SAFETY INSTRUCTIONS IMPORTANT: READ ALL INSTRUCTIONS BEFORE USE. RETAIN INSTRUCTIONS FOR FUTURE REFERENCE. Do not use in rain or leave outdoors
O w n e r s M a n u a l
 Owner s Manual 2 CONTENTS Getting Started Important Safety Instructions... 2 Polarization Instructions... 3 Description of the Vacuum... 4 Operation Turning the Vacuum On... 5 Hose Cleaning... 5 Cleaning
Turbo Stick Vac. OWNER S MANUAL Model EP V., 60Hz., 7.5 Amps.
 OWNER S MANUAL Model EP600 120V., 60Hz., 7.5 Amps. Turbo Stick Vac For information or assistance: EURO-PRO Operating LLC 94 Main Mill Street, Door 16 Plattsburgh, NY 12901 Tel.: 1 866 98SHARK (74275) www.sharkvac.com
User Manual. Compact Bagged Vacuum Cleaner. Dog & Cat W2000
 User Manual Compact Bagged Vacuum Cleaner 3 Features 1 2 On/off button Flexible hose 4 7 3 4 Telescopic wand Wand length adjustment 2 8 5 Cord rewind button 6 7 Variable speed control Combination floor
MULTI-FUNCTION HAND VACUUM INSTRUCTION MANUAL. For Authentic Monster Replacement Parts Call Model #: H056
 MULTI-FUNCTION HAND VACUUM INSTRUCTION MANUAL Call 888.896.8786 Model #: H056 IMPORTANT SAFE T SAVE THESE INSTRUCTIONS When using an electrical appliance, basic safety precautions should always be observed,
THE SOFTSHADES COLLECTION HONEYCOMB SHADES AND SHEER SHADINGS
 THE SOFTSHADES COLLECTION HONEYCOMB SHADES AND SHEER SHADINGS S Ef 0.31 0.45 0.42 0.52 Reduce your heating costs up to... 17%* 1 With 10mm Translucent 28%* 2 With 10mm Blockout 26%* 3 With 20mm Translucent
Install. Operate. Care.
 Install. Operate. Care. Standard Hardware System LiteRise Cordless System Wood Blinds Alternative Wood Blinds 2" Aluminum Blinds Thank you for your purchase. By selecting a horizontal blind for your window,
PORTABLE DEHUMIDIFIER
 PORTABLE DEHUMIDIFIER User s Manual For information or assistance, please contact: Soleus International 9451 Telstar Ave. El Monte, CA 91731 Tel: 1-888-876-5387 www.soleusair.com POWERED BY: KEEP THESE
V. (Versus ) Bare Floor Vacuum
 Bare Floor Vacuum") V. (Versus ) Bare Floor Vacuum USER S GUIDE 76T8 SERIES 3 Safety Instructions 4 Product View 5 Assembly 6 Operation 7-8 Maintenance and Care 9 Troubleshooting 10 Consumer Services 11 Replacement Parts
V. (Versus ) Bare Floor Vacuum USER S GUIDE 76T8 SERIES 3 Safety Instructions 4 Product View 5 Assembly 6 Operation 7-8 Maintenance and Care 9 Troubleshooting 10 Consumer Services 11 Replacement Parts
Earn BISSELL Rewards! Register your
 Earn BISSELL Rewards! Register your product today! See details on back page page 2 USER'S GUIDE 81L2 SERIES 2 Thank You 2 Product Registration 3 Safety Instructions 4 Product View 5 Assembly 5 Operations
IMPORTANT. If you have any problems with this product (missing or damaged parts, assembly issues, etc.), PLEASE DO NOT RETURN TO THE RETAILER/STORE
, PLEASE DO NOT RETURN TO THE RETAILER/STORE") Outdoor Furniture IMPORTANT If you have any problems with this product (missing or damaged parts, assembly issues, etc.), PLEASE DO NOT RETURN TO THE RETAILER/STORE from where you purchased the product.
Outdoor Furniture IMPORTANT If you have any problems with this product (missing or damaged parts, assembly issues, etc.), PLEASE DO NOT RETURN TO THE RETAILER/STORE from where you purchased the product.
Vertical Blinds. Step by Step Installation Instructions
 Vertical Blinds Step by Step Installation Instructions Everything You Need A Smooth Set-Up We want you to love your new window coverings and that includes having a smooth installation experience. We recommend
Dome Kettle. polished stainless steel body BTDK120
 Dome Kettle polished stainless steel body BTDK120 Important Safeguards When using electrical appliances, in order to reduce the risk of fire, electric shock and/or injury, these basic safety precautions
Installation and Care Instructions. Wood Blinds and Alternative Wood Blinds. LiteRise Touch System. Getting Started
 Installation and Care Instructions Wood Blinds and THANK YOU for purchasing a Hunter Douglas product. Your new blind has been custom built for you from the highest quality materials. Once in your window,
Window Care & Warranty Information
 Window Care & Warranty Information Identifying Basic Window Parts Top Sash Keeper Vent Latch Bottom Sash Lock Tilt Latches Sill About Your Windows Double-Hung Thank you for choosing the Panorama Window
True Hepa Shark Plus Canister Vacuum Model EP238 Use and Care Instructions
 True Hepa Shark Plus Canister Vacuum Model EP238 Use and Care Instructions For information or assistance, call 800-798-7398 USA: EURO-PRO Operating LLC Canada: EURO-PRO Operating LLC 21 Lawrence Paquette
Industrial Vacuums, Inc
 Instructions/Spare Parts Manual Nilfisk Model GWD255 Drum Top Vacuum CAUTION: This Nilfisk vacuum cleaner is not to be used in explosion-hazardous areas, as serious injury could result. Under no circumstances
Wax Base Heater & Dispenser
 Wax Base Heater & Dispenser Service Manual Models: IDWB2/0900, IDWB2/0775, IDWB3/0900, IDWB3/0775, IDWB4/0900, IDWB4/0775 Introduction............................................................................
CLEANVIEW BAGGED. Vacuum USER GUIDE SERIES
 CLEANVIEW BAGGED Vacuum USER GUIDE 20191 SERIES More of a video person? Look for this icon and go online for an instructional how-to video at / videos IMPORTANT SAFETY INSTRUCTIONS READ ALL INSTRUCTIONS
UV440 Owner s Guide
 WWW.SHARKCLEAN.COM UV440 Owner s Guide IMPORTANT SAFETY INSTRUCTIONS For Household Use Only WHEN USING AN ELECTRICAL APPLIANCE, BASIC SAFETY PRECAUTIONS SHOULD ALWAYS BE OBSERVED, INCLUDING THE FOLLOWING:
OWNER S MANUAL. Important: Read carefully before assembly and use. PORTABLE CANISTER U #961A00007 ID111867
 OWNER S MANUAL PORTABLE CANISTER Important: Read carefully before assembly and use. U414300 #961A00007 ID111867 THANK YOU for purchasing an Oreck product please register your product: online at oreck.com
NP320 series OWNER S GUIDE. NP320series_40_IB_ENG_120409_2.indd 1
 NP320 series OWNER S GUIDE NP320series_40_IB_ENG_120409_2.indd 1 IMPORTANT SAFETY INSTRUCTIONS For Household Use Only WHEN USING AN ELECTRICAL APPLIANCE, BASIC SAFETY PRECAUTIONS SHOULD ALWAYS BE OBSERVED,
RETRACTOR TOTAL SYSTEM VAC
 RETRACTOR TOTAL SYSTEM VAC OWNER S MANUAL Model EP187H 120V., 60Hz., 7.1 Amps USA: EURO-PRO Operating LLC Canada: EURO-PRO Operating LLC 94 Main Mill Street, Door 16 4400 Bois Franc Plattsburgh, NY 12901
Graber Lake Forest Faux Wood and Premium Faux Wood Blind
 2 3 5 6 8 7 1 2" (5.1cm) Blind shown 1. Blind (cord tilt shown) 2. Mounting Brackets 3. Center support bracket (if required). Mounting screws (2 per bracket) 5. Projection brackets (optional, one per mounting
USER'S GUIDE 6585 SERIES
 USER'S GUIDE 6585 SERIES 2 Thank You 3 Safety Instructions 4-5 Product View 6 Assembly 7-8 Operations 9-12 Maintenance and Care 13 Troubleshooting 14 Replacement Parts 15 Warranty 16 Product Registration
Owner s Guide NV26.
 Owner s Guide NV6 www.sharkclean.com Contents Thank you for purchasing the Shark Navigator Upright Vacuum. Important Safety Instructions Getting Started 4 Using the Vacuum 6 Cleaning with the Vacuum Accessories
AIR CONDITIONER ELECTRONIC CONTROL
 READ AND SAVE THESE INSTRUCTIONS AIR CONDITIONER ELECTRONIC CONTROL ROOM AIR CONDITIONER WARRANTY Your product is protected by this warranty Your appliance is warranted by Electrolux. Electrolux has authorized
NV354Q Series OWNER S GUIDE
 NV354Q Series OWNER S GUIDE IMPORTANT SAFETY INSTRUCTIONS For Household Use Only WHEN USING AN ELECTRICAL APPLIANCE, BASIC SAFETY PRECAUTIONS SHOULD ALWAYS BE OBSERVED, INCLUDING THE FOLLOWING: READ ALL
H-16.5 Record Cleaning Machine Setup and Instruction Manual
 H-16.5 Record Cleaning Machine Setup and Instruction Manual VPI INDUSTRIES, INC., 77 CLIFFWOOD AVE., #3B, CLIFFWOOD, NJ 07721 PHONE: 1-732-583-6895, FAX: 1-732-946-8578 http://www.vpiindustries.com 1 Table
USER GUIDE CLEANVIEW 1330, 1331, 1334 SERIES. *Product images may vary
 CLEANVIEW USER GUIDE 1330, 1331, 1334 SERIES *Product images may vary Important Safety Instructions Read all instructions before using your upright VACUUM. Always connect to a polarized outlet (one slot
Table of Contents Important Safeguards 2 Introduction 3 Installation 4 Operation 5 Cleaning Pattern 5 Automatic Shutoff and Removal 6 Maintenance 6
 Table of Contents Important Safeguards 2 Introduction 3 Installation 4 Operation 5 Cleaning Pattern 5 Automatic Shutoff and Removal 6 Maintenance 6 Warranty 8 WARNING: To reduce the risk of fire, electrical
COMPACT POWERFORCE USER GUIDE 1520 SERIES
 POWERFORCE COMPACT USER GUIDE 1520 SERIES IMPORTANT SAFETY INSTRUCTIONS READ ALL INSTRUCTIONS BEFORE USING YOUR UPRIGHT VACUUM. Always connect to a polarized outlet (one slot is wider than the other).
ELECTRIC STOVE HEATER Models: FS2213B
 ELECTRIC STOVE HEATER Models: FS2213B OWNER S MANUAL WARNING Read and understand this entire owner s manual, including all safety information, before plugging in or using this product. Failure to do so
OWNER S GUIDE LA400.
 OWNER S GUIDE LA400 LA400_40_IB_ENG_120910_3.indd 1 IMPORTANT SAFETY INSTRUCTIONS For Household Use Only WHEN USING AN ELECTRICAL APPLIANCE, BASIC SAFETY PRECAUTIONS SHOULD ALWAYS BE OBSERVED, INCLUDING
Install. Operate. Care.
 Install. Operate. Care. Standard HeadMaster System LiteRise Cordless System Wood Blinds Alternative Wood Blinds 2" Aluminum Blinds Thank you for your purchase. By selecting a horizontal blind for your
POWERFORCE COMPACT 1520 SERIES
 POWERFORCE COMPACT 1520 SERIES IMPORTANT SAFETY INSTRUCTIONS READ ALL INSTRUCTIONS BEFORE USING YOUR UPRIGHT VACUUM. Always connect to a polarized outlet (one slot is wider than the other). Unplug from